1
Sept 10th 2008
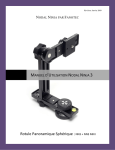
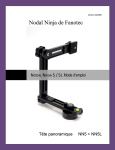
FANOTEC’S NODAL NINJA
NODAL NINJA 3 USER MANUAL
Spherical Panoramic Tripod Head
| NN3 + NN3 MKII
Nodal Ninja 3 User Manual
[Pick the date]
Table of Contents (TOC)
1.
2.
3.
4.
Cover Page…pg.1
Table of Contents…..pg.2
Introduction…..pg. 3
Nodal Ninja Features…..pg. 4
5. Nodal Ninja Parts…..pg.5
Upper Assembly Parts /Lower Assembly Parts…..pg. 6
Part Specifications…..pg.7
Lower Rail Assembly…..pg.7
Upper Rail Assembly…..pg8
Hard Shelled Cases…..pg.9-10
Nodal Ninja 3 Package Contents…..pg.11
6. Basic Assembly…..pg.12
Setting the Lower Rail…..pg.13
Setting the Upper Rail…..pg.13
Mounting using the Camera Mounting Plate…..pg.15
7. Removing and Replacing Detents…..pg.16
Available detent rings…..pg.16
Changing rings…..pg.16
8. NN3 MKII Detent Plunger Adjustment…...pg.17
9. Removing and Replacing Detent Springs…..pg.18
10.Mounting Camera in Landscape Mode…..pg.19
Using Quick Release Adapters…..pg.21
11.Cameras with Off-axis Tripod Mounts and T-adapters…..pg.22
12.About Parallax…..pg.23
13.Finding the Entrance Pupil of a Lens…..pg.24
14.Frequently Asked Questions…..pg.27
15.Warranty…..pg.29
Returns…..pg.29
16.Copyright information…..pg.30
17.Contributors…..pg.30
© 2005- 2008 CircularWorlds.com, Nodal Ninja, Fanotec,
All Rights Reserved
Page 2
Nodal Ninja 3 User Manual
[Pick the date]
1 - Introduction
Congratulations on your recent purchase and welcome to the exciting and growing world of
panoramic photography. Panoramic photography is one of the fastest growing segments in
photography. With developments in hardware and software this technology allows for the
creation of seamless stitching of multiple images. From simple two shot panoramic images or
complex 100+ shot super mega pixel mosaics, the Nodal Ninja is hardware designed to work in
conjunction with your camera and lens to eliminate parallax when shooting adjacent images.
Our panoramic tripod head is a quality piece of equipment designed to give you many years of
use.
Nodal Ninja is the lightest smallest panoramic tripod head (aka pano head) on the market
today. A specially designed Spherical Panoramic Tripod Mount allowing the photographer to
adjust a camera/lens exactly over its correct rotational axis called the entrance pupil (aka Nodal
Point). This helps to eliminate parallax error inherent when shooting multiple images side by
side. Without parallax a photographer can seamlessly stitch multiple photographs together
forming a larger higher resolution composite image.
© 2005- 2008 CircularWorlds.com, Nodal Ninja, Fanotec,
All Rights Reserved
Page 3
Nodal Ninja 3 User Manual
[Pick the date]
2 - Nodal Ninja Features
We have compiled a list of the features and benefits of Nodal Ninja. When shopping
panoramic tripod heads you need as much information as you get. We feel Nodal Ninja
offers the best performance with features against price. Here is a summary of the strong
points of Nodal Ninja
1.
2.
3.
4.
PRICE - Other panoramic heads can cost hundreds of dollars more.
FULL rotation UP (supports most wide angle lenses)
UNIVERSAL - Fits most DSLR’s - see our camera compatibility list on the website
Reversible Detent rings (click stops)
15º/18º (default), 20º/24º, 45º/60º, 72º/0º, 90º/120º, & 45º/60º.
5. SIZE - the smallest and lightest full spherical panoramic tripod head on the market
today.
6. WEIGHT - Only 475 grams
7. STURDY - made from lightweight aluminum metal, extremely durable for field use.
8. Allows your camera to mounted in landscape mode using Camera Plate (NCP-1) or tadapters (N3T20/N3T30).
9. Allows the use of many Quick Release Adapters
10. Made to higher precision tolerances than earlier models.
11. Fits all tripod heads – uses both 3/8” & 1/4” thread mount adapter.
12. Adjustable resistance for horizontal panning.
13. Easy to assembly - no tools required (if using NCP1 may need small coin or screwdriver).
14. Leveling - built-in quality bubble level for exact leveling.
15. Finish - attractive “non-glare” matt black.
16. Attractive hard shelled foam lined case available.
17. Large easy to turn knurled edge adjustments knobs (great with gloves in cold weather).
18. Numerical demarcations on horizontal and vertical rotators for easy reference.
19. Rail stops - remember your set points when re-mounting your gear.
20. Closed rail design - assures your expensive camera won’t slip off accidentally.
21. Small Rotator Base - less foot print to edit out when doing full spherical panos.
22. Customer support - top notch read our testimonials – click here
23. FULL 2 year Warranty - against manufacturer defect.
24. 30 day money back guarantee.
25. Investment – many used units sell for very close to the original selling price.
© 2005- 2008 CircularWorlds.com, Nodal Ninja, Fanotec,
All Rights Reserved
Page 4
Nodal Ninja 3 User Manual
[Pick the date]
3 - Nodal Ninja 3 Parts
Exploded images by Rosauro Ona
NN3
NN3 MKII
© 2005- 2008 CircularWorlds.com, Nodal Ninja, Fanotec,
All Rights Reserved
Page 5
Nodal Ninja 3 User Manual
[Pick the date]
Upper Assembly:
1 – Upper Rotator Tightening Knob (part#N3URTK)
2 – ¼ nut
3 - Teflon Washer
4 –Vertical Rail
5- Rubber Compression Washer
5a – Upper Rotator Ring
6 - Camera Mount Knob with plastic washer (part# N3CMK)
7 - Upper Rail with Rotator
7a- Camera Plate (part#NCP1)
7b – Rail Stops - screw types may vary (part# N3RS)
7c – Upper Rotator Ring Hex Key
8 - Square Plastic Washer
note: The Camera Mounting Plate (part# NCP1) can be substituted for the square washer.
Lower Assembly:
9 – Rubber O ring and/or Retainer Washer
10 – Vertical Rail Knob (part#N3VRK)
11 – Lower Rotator Friction Lock Screw (part#N3LRLS)
note: NN3 “MKII”does not use this lock screw system
11a – Lower Rotator Tension Knob – (part# N3LR)
12 – Lower Rotator Friction Set Knob
13 – 2 Teflon Washers note: some units may only have 1 washer
14 - Lower Rail with Bubble Level
14a – NN3 “MKII” Plastic Retainer Pins
14b- NN3 “MKII” Lower Rotator Brass Screw
15 – NN3 Reversible Brass Detent Ring
note: NN3 uses dedicated detent rings - see store for available rings
15a- NN3 “MKII”Reversible Brass Detent Ring
Available detent rings for NN3 “MKII”:
15/0 degree ring - number of stops = 24/0 (part# N3II 15/0)
18/20 degree ring - number of stops = 20/18 (part# N3II 18/20)
25.7/36 degree ring - number of stops = 14/10 (part# N3II 25/36)
45/60 degree ring - number of stops = 8/6 (part# N3II 45/60)
45/60 one side 90/120 reverse side – (part# N3II 4560/90120)
51.4/72 degree ring – number of stops = 7/5 (part# N3II 514/72)
90/120 degree ring – number of stops = 4/3 (part# N3II 90/120)
16 – NN3 Lower Rotator
16a-NN3-“MKII”Lower Rotator Base - (part# N3LR)
17 – 3/8” OD – 1/4” ID Adapter Screw (part#N3-14/38)
17a – NN3 “MKII”ball bearing detent screw (factory set – do not adjust)
18 – NN3 Detent Pin
19 – NN3 Detent Spring
20 – NN3 Detent Tension Hex Nut
© 2005- 2008 CircularWorlds.com, Nodal Ninja, Fanotec,
All Rights Reserved
Page 6
Nodal Ninja 3 User Manual
[Pick the date]
Parts Specifications:
The following specifications of dimension, weight loads, and other design information will help
to determine if NN3 is compatible with your camera. We ask you to also review our website for
an updated list of cameras that are compatible.
Max loading: approx 4 lbs (1800g) when mounting camera in portrait mode (vertical) on the
upper rail. Some heavier cameras and lenses may require extra tightening and is not
recommended.
External factors such as winds, unstable surfaces may reduce the stability of any tripod head.
We also recommend a quality tripod for better stability. Some inexpensive tripods have
“wobble” in the neck and do not maintain good level when rotating the head.
Lower Rail Assembly:
Overall dimensions of lower rail = 150mm x 35mm x 10mm (5 7/8” x 1 5/8” x 3/8”).
Adjustment distances from the lower rotator center point to the upper vertical arm mounting
point, minimum adjustment distance 25mm (1”), maximum distance 96mm (3 3/4”). Note the
N3T30 and N3T30 T-adapter will increase the adjustment maximum distance to 127mm (5”).
This would be the maximum distance from camera mount to nodal point (entrance pupil) of a
particular lens.
The lower horizontal rail is used to slide the upper vertical assembly (when attached) into 1 of 2
needed no parallax points (NPP) depending on the camera and lens being used. The rail has a
laser engraved scale marked in millimeters (1 mm intervals) denoting distance from the center
of rotation. The grooves of the scale are filled with water resistant paint to increase clarity.
The lower rail assembly incorporates the “lower rotator assembly”. A 1/4 inch non-threaded
hole in the lower rail accommodates the lower rotator base assembly. The lower rotator
assembly allows for 360 degree horizontal rotation. It is always suggested you rotate and shoot
images in a clockwise manner. The rotator base is engraved with demarcations in 5 degree
intervals, with longer tic marks at 15 degree intervals. Numerical values from 0 – 360 degrees
are engraved in 30 degree intervals.
With NN3 you may need to tighten the rotator base to adjust the
desired rotating tension. To set the tension loosen the inner screw
(shown on right) using a coin or standard screwdriver, then hand
tighten the knurled knob (with Nodal Ninja markings) to desired
tension, then tighten inner screw to lock the tension.
NN3 “MKII”does not require this adjustment.
© 2005- 2008 CircularWorlds.com, Nodal Ninja, Fanotec,
All Rights Reserved
Page 7
Nodal Ninja 3 User Manual
[Pick the date]
The bubble level is used to level the Nodal Ninja by centering the bubble in the center ring. The
bubble level is extremely sensitive - maybe too much so. It's difficult to obtain a true and
exacting level so some drift is likely. As long as the drift isn't excessive and stays within the
center target ring simply finding a happy medium with the potential drift is all that is necessary.
We discourage the use of multiple levels as getting each to match to the other is becomes very
difficult.
NOTE: If you are using multiple levels in your setup (i.e. tripod level, Quick Release Plate level
etc.) always rely on the Nodal Ninja level as the final level to sight and use.
Upper Rail Assembly:
Overall dimensions of upper rail = 146mm x 35mm x 10mm (5 3/8” x 1 5/8” x 3/8”).
Adjustment distances from the upper rotator center point to the upper rail camera mounting
point, minimum adjustment distance 37mm (1 1/2"), maximum distance 117mm (4 1/2"). Note
the N3T30 and N3T20 T-adapter will increase the adjustment maximum distance to 143mm (5
5/8”). This would be the maximum distance from camera mount to the NPP of a particular lens.
Also when using the N3T30 or N3T20 T-adapters and if adjusted to the full out position the
upper rail assembly will not rotate to the full 90 degree position up also known as the zenith.
The upper horizontal rail is used to slide the camera (when attached) into 2 of 2 needed NPP’s
depending on the camera and lens being used. The rail has a laser engraved scale marked in
millimeters (1 mm intervals). The grooves of the scale are filled with water resistant paint to
increase clarity.
The upper rail assembly incorporates the “upper rotator assembly”. The upper rotator
assembly allows for 180 degree vertical rotation. The rotator is engraved with demarcations in
5 degree intervals, with longer tic marks at 15 degree intervals. Numerical values from 0 – 90
and 90 - 0 degrees on one side and -0 - -90 and -90 - -0 degrees on the other half which are
engraved in 30 degree intervals. These are handy marks when tilting the camera to do
mulitrow panoramas and full spherical panoramas
© 2005- 2008 CircularWorlds.com, Nodal Ninja, Fanotec,
All Rights Reserved
Page 8
Nodal Ninja 3 User Manual
[Pick the date]
Hard Shelled Cases for Nodal Ninja 3
We have available very attractive hard shelled
cases
(item# N3HC).
These cases are padded with a foam lining.
Dual zippered for added opening convenience.
© 2005- 2008 CircularWorlds.com, Nodal Ninja, Fanotec,
All Rights Reserved
Page 9
Nodal Ninja 3 User Manual
[Pick the date]
Nodal Ninja 3 packed in the hard shelled case with suggested layout of parts.
© 2005- 2008 CircularWorlds.com, Nodal Ninja, Fanotec,
All Rights Reserved
Page 10
Nodal Ninja 3 User Manual
[Pick the date]
Nodal Ninja 3 MKII Package
The package generally comes with all of the above to include NN3 MKII, camera plate,
all available detent rings, rail stops, hard case, quick reference guide and a little baggie with
extra misc parts. It is important to note that package contents may vary. Resellers in various
countries may also have different parts included with their package offers. Please check at
time of purchase what is included with your package. At time of this publication the above
package on the website is selling for US$229.95.
NN3 stand alone is also available at a reduced price (US$199.95 on website) and comes with
NN3, standard 15/18 reversible detent ring, rail stops, quick reference guide and a little baggie
with extra misc parts.
© 2005- 2008 CircularWorlds.com, Nodal Ninja, Fanotec,
All Rights Reserved
Page 11
Nodal Ninja 3 User Manual
[Pick the date]
4 - Basic Assembly
Nodal Ninja 3 comes preassembled with two basic assemblies
1) Lower Rail Assembly – consisting off of lower horizontal rail and
lower horizontal rotator.
2) Upper Rail Assemby – consisting of vertical arm, upper rail, and
upper rotator.
Place vertical arm assembly (2) on
lower rail assembly and
Secure with the vertical rail friction
set knob (1).
Make sure the vertical assembly is
positioned so the upper rail is
facing so it’s on the inside. You will
see the vertical rail also has two
feet at the base – the longer is to
point inwards towards lower
rotator.
Settings things up
© 2005- 2008 CircularWorlds.com, Nodal Ninja, Fanotec,
All Rights Reserved
Page 12
Nodal Ninja 3 User Manual
[Pick the date]
There are only two adjustments needed – lower and upper unless you have an
offset tripod mount and using the t-adapter.
Setting the lower rail.
With the camera/lens mounted rotate
the “upper” rail so it is perpendicular to
the ground. Point the camera directly
down making sure the barrel of the lens
is in line with the upper rail.
Loosen the lower vertical rail knob
(shown in image as adjustment knob)
slide the vertical and upper assembly
back and forth on the lower rail unit the
camera/lens is positioned directly over
the lower rotator knob (with marking).
You can look through the camera
viewfinder to help center. Once
centered you have your first of two
settings.
Insert a rail stop as shown and tighten to lock
and remember this position.
The lower position is now set and will not change
regardless of
lens or focal
length.
Setting the upper rail.
Loosen the upper rotator knob and rotate the upper rail with
© 2005- 2008 CircularWorlds.com, Nodal Ninja, Fanotec,
All Rights Reserved
Page 13
Nodal Ninja 3 User Manual
[Pick the date]
camera/lens still attached so it
points straight out (parallel with
the ground) as shown to the
right. This position is known as 0
degrees. Next loosen the camera
mounting knob and slide the
camera on the upper rail until the
NNP of the lens is centered with
the upper rotator. In the
example we show the Nikon D70
with 10.5mm lens. The NPP point
on this lens is very near the gold
ring. So we slide the camera/lens
on the rail so the ring is centered
with the upper rotator, which is
also in line with the center of the
vertical rail.
Insert a rail stop as shown and
tighten to lock and remember
this position.The upper position
is now set unless you change camera and or lenses or vary the focal length it will
remain as is.
Using the rail stops after you learn your settings will allow you to remember
the same position when re-mounting your camera.
© 2005- 2008 CircularWorlds.com, Nodal Ninja, Fanotec,
All Rights Reserved
Page 14
Nodal Ninja 3 User Manual
[Pick the date]
Mounting using the Camera Mounting Plate (NCP1).
When mounting the camera plate make sure it is
perpendicular to the camera body to assure a snug fit.
Do NOT twist he camera plate, secure using the 1/4
screw with coin or screwdriver. Not using the screw
might damage the rubber skid plate on your camera
base. This would also apply to using the t-adapter as
well.
Completed assembly of NN3 with rail stops and camera
mounting plate.
This setup allows you mount your camera and lens in
portrait mode (sideways) onto the upper rail on Nodal
Ninja.
.
Nodal Ninja 3 folds up nicely. Folded only 7”x2”x2”
(178mm x 50mm x 50mm)
© 2005- 2008 CircularWorlds.com, Nodal Ninja, Fanotec,
All Rights Reserved
Page 15
Nodal Ninja 3 User Manual
[Pick the date]
5 - Removing and Replacing Detents
Available detent rings:
15/0 degree ring - number of stops = 24/0
note: on the 0 side there are no detents.
18/20 degree ring - number of stops = 20/18
25.7/36 degree ring - number of stops = 14/10
45/60 degree ring - number of stops = 8/6
Changing rings (pre Feb 2008 Nodal Ninja’s):
To change rings disassemble the lower rail assembly by unscrewing the lower rotator friction
set knob (1) note: the 12 degree detent ring shown in above sample has been discontinued.
Place the detent ring with desired side face up and reassemble. With NN3 you may need to
tighten the rotator base to adjust the desired rotating tension. To set the tension loosen the
inner screw (shown above) using a coin or standard screwdriver, then hand tighten the
knurled knob (with Nodal Ninja markings) to desired tension, then tighten inner screw to lock
the tension.
Newer NN3’s no longer use the inner rotator washer.
© 2005- 2008 CircularWorlds.com, Nodal Ninja, Fanotec,
All Rights Reserved
Page 16
Nodal Ninja 3 User Manual
[Pick the date]
NN3 MKII Detent Plunger Adjustment
It is important to note the detent plunger on the NN3 MKII lower
rotator is pre-set at the factory with the plunger being optimized
and fixed. If the precision of the detent system is reduced over
time minor adjustment may be necessary so please follow these
instructions carefully.
Only the height of the plunger can be adjusted. This height has
a large effect on the precision of the detent system. Incorrect
adjustment can cause damage to the brass detent rings.
Adjust the height of the plunger by tightening or loosening the
plunger screw on the underside of the rotator. Use either a screw
driver or included hex key.
Loosen the plunger so that the click ball is flush with top rotator
surface. Use the flat surface and a hole of the detent ring to adjust
the appropriate height of the detent plunger. Gradually tighten the
plunger using the hex screw. Snap the click ball to a detent hole.
Adjust the height of the plunger so that the detent ring is raised
approximately .1mm (about the same as 2 sheets of plain paper).
Align the click ball to the flat portion of the detent ring surface.
Compress the detent ring so that no gap between the detent ring
and rotator base exists (as shown). If a gap exists, loosen the
plunger slowly (while compressing the detent ring) until the gap
just disappears. Further loosening will reduce the precision of the
detent system. You could replace the detent ring with any flat
surface in this step.
We emphasize there must be no gap when the click ball is
compressed using the ring as shown or the detent ring will be
damaged.
© 2005- 2008 CircularWorlds.com, Nodal Ninja, Fanotec,
All Rights Reserved
Page 17
Nodal Ninja 3 User Manual
[Pick the date]
6 - Removing and Replacing Detent Springs on NN3 only
The click stop tension can be tightened to the desired strength giving you good precision. Use
the hex key included with your Nodal Ninja to loosen the hex screw on the underside of the
lower rotator. Replace spring and retighten. This hex screw tightens a little internal spring
causing more tension to the pin that drops into the detent plate. Do this in concert with
properly adjusting the tension on the rotator base as well. Both these adjustments together
allow for greater customization.
Screw the detent tension hex nut just below the rim to leave enough spring movement.
© 2005- 2008 CircularWorlds.com, Nodal Ninja, Fanotec,
All Rights Reserved
Page 18
Nodal Ninja 3 User Manual
[Pick the date]
7 - Mounting camera in landscape mode
N3T30 t-adapter
© 2005- 2008 CircularWorlds.com, Nodal Ninja, Fanotec,
All Rights Reserved
Page 19
Nodal Ninja 3 User Manual
[Pick the date]
The N3T30 or N3T20 T-adapter will increase the adjustment maximum distance to 127mm
(5”). This would be the maximum distance from camera mount to nodal point (entrance pupil)
of a particular lens. It is important to note that when mounting the T-adapter (or Camera
Mounting Plate shown above (NCP1) NOT to twist the t-adapter to tighten. Tighten using using
coin or screwdriver. Twisting the t-adapter or N-CP1 onto to base of a camera may cause
damage to the camera base.
The T-adapter may also be substituted for the
newer Camera Mounting Plate (NCP1) although the
CP does not add additional length to the rail its
primary purpose is to give a better gripping surface to mount your camera.
© 2005- 2008 CircularWorlds.com, Nodal Ninja, Fanotec,
All Rights Reserved
Page 20
Nodal Ninja 3 User Manual
[Pick the date]
Using Quick Release Adapters:
The use the Camera Plate (CP) or T-adapter allows for
the use of many 3rd party quick release systems
T-adapter with 3rd party quick release plate. The
camera mounting plate may also be used. When using
a 3rd party quick release plate select one that is
approximately 20mm or less in thickness. This will not
work with every camera setup but will with many.
COMING SOON:
Fanotec’s Arca Style Swiss Quick Release Clamp
– due out late 2008
© 2005- 2008 CircularWorlds.com, Nodal Ninja, Fanotec,
All Rights Reserved
Page 21
Nodal Ninja 3 User Manual
[Pick the date]
8 – Cameras with off-axis tripod mounts and T-adapters
If your camera has a tripod mount that is offset from the center of
the barrel of the lens you will need the N3T30 or N3T30 offset tadapter. First determine if the t-adapter will be needed. Look at
the base of your camera and note the position of the ¼” female
tripod mount. If this tripod mount is off center from the center
portion of the
lens you’ll need
to use the small
camera bracket. If
it is 20mm or less
you can use the
N3T20. If the offset is greater than 20mm and less than
30mm you can use the expanded N3T30 t-adapter. Using
the t-adapter allows your camera to be positioned on the
Nodal Ninja
is such a way
as to achieve
proper rotation about a camera lens NPP.
If you do not know if you camera has an offset tripod mount
we have a list of what cameras may need the t-adapter.
© 2005- 2008 CircularWorlds.com, Nodal Ninja, Fanotec,
All Rights Reserved
Page 22
Nodal Ninja 3 User Manual
[Pick the date]
9 – About Parallax
Parallax defined:
Parallax is the apparent shifting of a foreground object relative to a background object when
viewed at different angles or perspectives. With panoramic photography, multi-shot images or
images shot side by side create an issues know as parallax. This is because each image shot is
actually different from the one before it due to the minor shifting of objects in the field of view.
The foreground objects will tend to shift from the back ground objects if the camera is rotated
outside the no parallax point (NPP) of the lens. Seamless stitching of adjacently shot photos is
almost impossible with tell tale lines whenever parallax is prevalent. Things simply won’t line up
properly.
Parallax Demonstrated:
Hold your thumb out in front of you at arm’s length and view it with your right eye (left eye
closed). Move your head side to side while remaining focused on the background and you’ll see
your thumb move side to side relative to the background – this apparent change in position is
due to the effects of parallax. This is the same thing that happens when a camera is rotated on
a tripod. Tripods are NOT designed to eliminate parallax with panoramic photography.
Using a special head like the Nodal Ninja and adjusting it properly so it rotates about the
“entrance pupil” of a lens will eliminate virtually any parallax.
Parallax and Panoramic Photography:
Once parallax free images are taken, and with the use of special “stitching software”, you are
able to seamlessly stitch the images together.
© 2005- 2008 CircularWorlds.com, Nodal Ninja, Fanotec,
All Rights Reserved
Page 23
Nodal Ninja 3 User Manual
[Pick the date]
10 – Finding the Entrance Pupil of a Lens
What is the Nodal Point or Entrance Pupil and why is it important?
We would like to take moment and dispel misconceptions of the word “Nodal Point”. When
referring to this no parallax point (NPP) many still refer to it as the Nodal Point. Technically the
point at which you would rotate the camera/lens to avoid parallax is called the “entrance
pupil”. The entrance pupil is a floating point located inside the lens at the point where the light
refracts or reverses itself before continuing to the image sensor or film plane. The entrance
pupil is different on each lens and changes at different focal lengths.
The entrance pupil (incorrectly referred to by some as nodal point) of a lens is the virtual image
of the aperture formed by
the lens elements in front of
it, and is the place where
light paths cross before being
focused onto the CMOS, CCD
or film plane. For a light ray
to pass through the lens, it
must be directed towards the
entrance pupil, which is
therefore the center of
perspective. Note that the
entrance pupil can be outside
of the lens and even behind
the film plane! When taking
adjacent images you want to
rotate the camera around a
line that runs through (or
very close to) the entrance
pupil. By finding the
entrance pupil of the lens,
and rotating the camera
about this point, you will assure parallax free images. Parallax is more obvious in the viewfinder
with objects close to the camera. The more distant the objects the lesser the parallax. If using a
lens with zoom capability the entrance pupil will change in position as the zoom changes.
Because of so many variables, it is best to learn how to find the entrance pupil manually.
But if you want to see if we have your settings please look on our website.
© 2005- 2008 CircularWorlds.com, Nodal Ninja, Fanotec,
All Rights Reserved
Page 24
Nodal Ninja 3 User Manual
[Pick the date]
To locate the NNP of a lens have the camera/lens
setup on NN3 as shown to the right. You want the
camera as” far back” on the upper rail as possible
while the lens is pointing towards the horizon and
parallel with the ground.
Position in front of the camera two
objects – one nearer than the other.
For example indoors you could use
two lamps, one at about 6 feet with
the other at about 10 feet, or if outside
try using two fence posts or light poles.
Any two objects creating a vertical line
will work as long as one is positioned
behind the other. In this example we’ll
use two floor lamps.
With the camera mounted in portrait
mode (sideways on the upper rail) and
looking inside the viewfinder, or at the
LCD screen, position the camera so the
two objects are towards the left side of
the frame as shown. Note the exact
position of the two lamps. Ideally place
the lamps so they aren’t directly
behind each other causing a slight
offset.
© 2005- 2008 CircularWorlds.com, Nodal Ninja, Fanotec,
All Rights Reserved
Page 25
Nodal Ninja 3 User Manual
[Pick the date]
Now rotate the camera so the two lamps are
now in the right side of the viewfinder frame.
Go back and forth a few times and watch to see
the apparent distance between the two lamps
changes. If the apparent distance changes, like
our example, even slightly then you have
parallax.
You’ll now need to loosen the camera mounting
knob enough to allow you to move the camera
slightly forward on the upper rail – about 2mm.
The marks on the rail systems are in mm’s so
just move to tick marks forward. Repeat above
steps. Keep doing this until you reach the point
where you notice no movement between the
lamps.
if
in
The objective is to move be able to rotate the camera left to right without seeing any apparent
movement of the lamps as shown below.
Note the position on both upper and lower rails and use the rail stops to set the position. If you
change cameras or lenses you’ll need to repeat the above steps. Now you’re ready to start
shooting panoramas.
© 2005- 2008 CircularWorlds.com, Nodal Ninja, Fanotec,
All Rights Reserved
Page 26
Nodal Ninja 3 User Manual
[Pick the date]
11 – Frequently Asked Questions
The following is a partial list of the most commonly asked questions – for more FAQ’s visit
our website.
1) Q. Do I need a level on the camera’s shoe?
A. No you don’t. You really only need one level – the one with NN3. Using multiple levels
can be very complex and difficult.
2) Q. How do I know if my lens will work on NN3?
A. It’s best to simply measure it. You will get full tilt up on wide angle zoom lenses that
measure 105mm (4 1/8 inches) or less from the “entrance pupil” at the focal length used
to the camera mounting threads. With the use of the N3T20 T-Adapter you will get an
“additional” 40mm (1 ½ inches) of length however this may limit the ability to get a full 90
degree rotation up. These measurements are taken off the upper rail of NN3. Also some
larger fisheye lenses like the FC-E9 will not fit.
3) Q. What are the settings for the D70 with 10.5mm Nikkor Lens?
A. 55mm on the lower rail and 80mm (camera mount) on the upper rail.
(http://nodalninja.com/nn3_d70_10_5.html)
4) Q. Is it okay to apply a bit of grease to the detent plates on NN3 for smoother rotation?
Hmm, don’t use grease UNLESS you DON’T want to change the detent plates, the grease
could get everywhere! If you do use grease ONLY use a very minimal amount. The detents
will run smoother upon use. We enclose extra detent plunger pins with every NN3 should
these pins eventually wear in time. Replacement of the detent plunger pin is very easy.
Locate the hex screw under the horizontal turntable, use the enclosed hexagon key to
unscrew it and replace the plunger. Be careful not to lose the detent plunger spring when
replacing the pin.
5) Q. Are the click stops positive and repeatable with good precision and can I adjust the
tension?
A. The click stop tension can be tightened to the desired strength giving you good precision.
Simply use the tightening screw on the underside of the lower rotator. This screw tightens a
little internal spring causing more tension to the ball that drops into the detent plate. Do this
in concert with properly adjusting the tension on the rotator base (see FAQ #6) as well. Both
these adjustments together allow for greater customization.
© 2005- 2008 CircularWorlds.com, Nodal Ninja, Fanotec,
All Rights Reserved
Page 27
Nodal Ninja 3 User Manual
[Pick the date]
6) Q. regarding NN3 - I noticed loose tension and a slight wobble at the rotator base in my
Nodal Ninja, is this normal?
A. No - this is not normal. Occasionally a your Nodal Ninja 3 will need proper tightening. Once
properly tightened the unit should be both secure and should not unscrew if turned
counterclockwise (we recommend always turning it clockwise).
Here is the proper procedure (does not apply to NN3 “MKII”:
a) Loosen the knob with "Nodal Ninja" marking. Then loosen the silver lock screw on the
knob. Once the knob is loosened, the silver lock screw is easy to loosen. You can loosen the
screw with your finger, no tool needed.
b) Tighten knob until you achieve the desired rotation tension or friction. You can note the
amount of friction by holding the base rotator and turning the lower arm around in a
"clockwise manner", as this prevents unscrewing of the base unit until locked. It doesn't take
much tightening at all.
c) Tighten the silver lock screw with your finger. Then "lock" the tension by securely
tightening the knob. Double check the tension against the click stop feel and readjust as
needed.
d) You may need to also adjust the spring tension of the detent pin. The adjustment is
located on the underside of the lower base rotator. We’ve enclosed a hex key with each NN3.
If the unit still has a tendency to unscrew try placing an extra Teflon washer (included with
each Nodal Ninja) under the rotator knob (with Nodal Ninja markings) and repeat the above
steps. Proper tightening should enable you to find a friction point that you feel comfortable
with. This is actually a customizable option.
Q. Is there a scale (of degrees) that allows you to know how much you're tilting up/down? I
see a scale but does that translate into degrees?
A. Yes there are demarcations (little lines) in 5 degree increments.
Q. How stable is this unit in the wind (assuming a good rigid tripod)?
A. Just as stable as any other rig. Nodal Ninja being made of metal assures a sturdy
configuration. A good sturdy tripod is essential in windy environments. Some tripods have
hooks under the neck to allow you to attach backpacks or other items of weight to add to the
stability.
Q. I'm not 100% clear on how many of the white Teflon washers should be used.
A. Just keep all Teflon washers where they were originally placed. The Knurled knob that
secures the vertical arm to the lower rail uses two Teflon washers. Please refer to the above
parts image above for proper location on other washers.
© 2005- 2008 CircularWorlds.com, Nodal Ninja, Fanotec,
All Rights Reserved
Page 28
Nodal Ninja 3 User Manual
[Pick the date]
12 - Warranty
Nodal Ninja is a quality instrument. Under normal usage it will last many years. We feel so
confident our product will stand the stand of time we issue a 2 year warranty from the
date of your purchase – one of the best in the industry. In the unlikely event a part wears
or breaks simply contact us for a replacement part. We will replace any part that is deemed
to be defective at no cost to the consumer other the cost of postage to send it in.
Customer abuse or misuse (to be determined by manufacturer and/or distributor) will void
any implied warranty. This warranty is issued to the original buyer only is non-transferable.
The manufacturer (Fanotec) and/or distributors also assumes no liability for damage
caused to equipment, or downtime time caused as a consequence of not being able to use
our product, or injury caused to persons using Nodal Ninja. Please keep out of reach of
children. As with any piece of equipment, use it appropriately. We do not want to get into
a lot of expensive legalize, but we would like the buyer to understand and accept at time of
purchase ALL responsibilities that arise out of the use of our products either directly or in
directly.
Returns:
We realize Nodal Ninja might not work for everyone. If you find for any reason you are not
happy with your purchase please contact us immediately for return instructions.
We will accept items returned if “received back” NO LATER than 30 days for NN3. We will
refund the original amount paid less shipping and handling. Returns must include “all”
materials as shipped, no scratches or obvious marks. Items received as stated above will be
refunded item cost (less shipping and handling). Items missing from shipment will be
deducted from the refund at full retail price at time of receipt. Items received back in
condition noted above “after” 30 days of buyer receipt but no later than 60 days will be
offered 75% refund off purchase price (less shipping and handling paid).
Please allow up to “7 days” to process and issue your refund. For international orders we
are not responsible for exchange rate differences from the time you buy to the time money
is actually refunded.
Our return policy only applies to purchases made through this website and may differ from
those of our other online store fronts and/or authorized resellers.
eBay’r Note: Nodal Ninja’s sold on eBay from individuals are NOT covered by any warranty
nor we can offer any support - buy at your own risk. Also please report any illegal use of
images and text that may have been copied from our website.
If you wish to return your order please contact us for instructions.
Polices do change with time so please reference our current return policy on the website.
© 2005- 2008 CircularWorlds.com, Nodal Ninja, Fanotec,
All Rights Reserved
Page 29
Nodal Ninja 3 User Manual
[Pick the date]
13 - Copyright Information
The materials contained in this manual and website as well as any translations may be
downloaded or copied provided that all copies retain our copyright notice. No material
may be modified, edited or taken out of context such that its use creates false or
misleading information.
The name and trademarks of copyright holders may NOT be used in advertising or publicity
pertaining to the Web site, its content, or specifications without specific, written prior
permission. Title to copyright in these documents and website belong to
CircularWorlds.com, Nodal Ninja and Fanotec.
14 - Contributors
The following people helped to contribute to this User Guide:
Bill Bailey – www.CircularWorlds.com
Nick Fan – www.Fanotec.com (coming soon)
Rosauro Ona – www.RosauroPhotography.com
John Houghton – http://www.johnhpanos.com
Translations:
Italian: Mauro Contrafatto – www.360way.it
German - Hubert Hilgers – www.HubertHilgers.de
Français – Beeloba / Dirk Dezeure
Nederlands - Erik Van den Broeck – www.DunesDuGolf.eu
- Dirk Dezeure
Spanish - Rodrigo Alarcon-Cielock – www.360panoview.co.uk
Russian - Andrey Ilyin – www. http://pano.1drey.com
Romania – Dorin Godja – www.dxn.ro
Hebrew - Alexander Shalit - www.alexadershalit.com
Note some translations may not reflect recent revisions to this manual.
© 2008 Nodal Ninja
All Rights Reserved
© 2005- 2008 CircularWorlds.com, Nodal Ninja, Fanotec,
All Rights Reserved
Page 30