1
Page
CMO Operations & Logistics
WW Competence Transfer
Multimedia Creation & Support
(25)
Approved 2.0
MGR
29.03.2006
CONFIDENTIAL
SERVICE MANUAL
Level 1&2
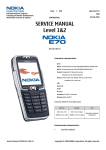
RM-49
Transceiver characteristics:
Dual Mode:
- GSM: Tri band phone for GSM 900/1800/1900MHz
- WCDMA: 2100MHz
Display: Active matrix color display with 16 Million colors,
resolution 352 x 416 pixel
Bluetooth
Vibra Alert
CARD TYPE: MMC
Connector: Pop-Port™ connector
Transceiver with BL-5c 970mAh Li-Ion battery pack
Standby time (estimated)
Up to
GSM
6.4 - 8.3 days
WCDMA
6.3 - 8.4 days
GSM/WCDMA and WLAN
4.5 - 5.4 days*
Talk time (estimated)
Up to
GSM
3.2 - 6.4 days
WCDMA
2.2 - 3.4 days
VoIP
3.8 - 6 days*
*In GSM/WCDMA network; WLAN network supporting 11-54 Mbx; 1-10
users Operation times may vary depending on radio access technology,
network and usage.
Environmental characteristics:
•
Service Manual E60 RM-49
Lead-free soldered
Copyright © 2006 NOKIA Corporation. All rights reserved.
Page
CMO Operations & Logistics
WW Competence Transfer
Multimedia Creation & Support
(25)
Approved 2.0
MGR
29.03.2006
CONFIDENTIAL
TABLE OF CONTENTS
Page
.
INTRODUCTION
3
2.
GENERAL REPAIR INFORMATION
4
3.
PATHFINDER FOR WORKSHOP STAFF
5
4.
EXPLODED VIEW AND COMPONENT DISPOSAL
6
5.
SPARE PARTS OVERVIEW
7
6.
SPARE PARTS LIST
8
7.
SERVICE TOOLS
9
8.
SW-UPDATE11
9.
DISASSEMBLY INSTRUCTION12
0.
ASSEMBLY INSTRUCTION16
.
LEGEND FOR QUICK TROUBLE SHOOTER
20
2.
QUICK TROUBLE SHOOTER PART 1
21
3.
QUICK TROUBLE SHOOTER PART 2
22
4.
QUICK TROUBLE SHOOTER PART 3
23
5.
BLUETOOTH & INFRARED TEST
24
6.
BATTERY TEST
25
CHANGE HISTORY
Status
Version No.
Date
Comments
Draft
0.1
25.11.2005
Initial draft
Approved
1.0
28.03.2006
Approval
Approved
2.0
29.03.2006
POS Flash Concept and Service Tools chapter updated
Service Manual E60 RM-49
Copyright © 2006 NOKIA Corporation. All rights reserved.
Page
CMO Operations & Logistics
WW Competence Transfer
Multimedia Creation & Support
(25)
Approved 2.0
MGR
CONFIDENTIAL
29.03.2006
. INTRODUCTION
The purpose of this document is to help NOKIA service levels 1 and 2 workshop technicians to carry out service to NOKIA
products. This Service Manual is to be used only by authorized NOKIA service suppliers, and the content of it is confidential.
Please note that NOKIA provides also other guidance documents (e.g. Service Bulletins) for service suppliers, follow these
regularly and comply with the given instructions.
While every endeavour has been made to ensure the accuracy of this document, some errors may exist.
If you find any errors or if you have further suggestions, please notify NOKIA using the address below:
mailto:[email protected]
Please keep in mind also that this documentation is continuously being updated and modified, so watch always out for
the newest version.
Warnings and Cautions
Please refer to the phone’s user guide for instructions relating to operation, care and maintenance including important
safety information. Note also the following:
Warnings:
1.
2.
3.
CARE MUST BE TAKEN ON INSTALLATION IN VEHICLES FITTED WITH ELECTRONIC ENGINE MANAGEMENT SYSTEMS AND
ANTI–SKID BRAKING SYSTEMS. UNDER CERTAIN FAULT CONDITIONS, EMITTED RF ENERGY CAN AFFECT THEIR OPERATION. IF
NECESSARY, CONSULT THE VEHICLE DEALER/MANUFACTURER TO DETERMINE
THE IMMUNITY OF VEHICLE ELECTRONIC SYSTEMS TO RF ENERGY. THE HANDPORTABLE TELEPHONE MUST NOT BE OPERATED
IN AREAS LIKELY TO CONTAIN POTENTIALLY EXPLOSIVE ATMOSPHERES EG PETROL STATIONS (SERVICE STATIONS), BLASTING
AREAS ETC.
OPERATION OF ANY RADIO TRANSMITTING EQUIPMENT, INCLUDING CELLULAR TELEPHONES, MAY INTERFERE WITH THE
FUNCTIONALITY OF INADEQUATELY PROTECTED MEDICAL DEVICES. CONSULT A PHYSICIAN OR THE MANUFACTURER OF THE
MEDICAL DEVICE IF YOU HAVE ANY QUESTIONS. OTHER ELECTRONIC EQUIPMENT MAY ALSO BE SUBJECT TO INTERFERENCE.
Cautions:
1. Servicing and alignment must be undertaken by qualified personnel only.
2. Ensure all work is carried out at an anti–static workstation and that an anti–static wrist strap is worn.
3. Use only approved components as specified in the parts list.
4. Ensure all components, modules screws and insulators are correctly re–fitted after servicing and alignment.
5. Ensure all cables and wires are repositioned correctly.
Electrostatic discharge can easily damage the sensitive components of electronic products.
Therefore every Service Supplier has to take care of all precautions, which are mentioned in the
service level related “Service Partner Requirements”, available on NOKIA Online. Also see ESD
Protection Requirements in this Service Manual.
Service Manual E60 RM-49
Copyright © 2006 NOKIA Corporation. All rights reserved.
Page
CMO Operations & Logistics
WW Competence Transfer
Multimedia Creation & Support
(25)
Approved 2.0
MGR
CONFIDENTIAL
29.03.2006
2. GENERAL REPAIR INFORMATION
In this section the technician will get some general hints how to carry out repairs:
•
•
•
•
•
•
•
•
•
•
•
•
•
•
•
•
•
•
•
•
•
To familiarize oneself with NOKIA product read the tutorials or user guide on www.nokia.com -->Support--> Phones,
by selecting the Phone Model.
Before starting the repair you must take care of ESD precautions like being in your ESD Protected Area and connecting
your wristband.
Use gloves to avoid corrosion and fingerprints.
Protect windows and displays with a film to avoid dust and scratches.
When cleaning the LCD Module any lint-free cloth can be used (e.g. Micro-Fibre cloth).
When cleaning the pads you have to use a soft cloth/ESD brush and Isopropanol. It is not allowed to use a glass fiber
pencil because it scratches the surface and will lead later on to corrosion.
Mechanical parts (except shielding lids and bent parts), which didn’t repair the failure, can be reused, if they are not
soldered.
When removing the shielding lids make sure to replace them with new ones, otherwise the high-frequency leakage
can have an influence on the device.
Always use original NOKIA spare parts.
Check the soldering joints of the parts, which are concerned regarding the indicated error (e.g. soldered connectors or
switches) and resolder them if necessary (Level 2 only).
Remove redundant soldering flux after repair.
Meet the torque requirements when assembling the unit (see also the document “torques for transceiver assembly”
on NOKIA Partner Web Site/NOKIA Online).
Always use your own equipment for testing where you are sure that it works. E.g. if the customer complains about
charger function, please test the phone with your own charger to be sure if phone or charger causes the malfunction.
A SIM card is needed for all GoNoGo tests.
When doing the fault log entries, always note the Item code, which caused the malfunction. Also, fill in the appropriate part code from the assembly, if needed.
Please be aware that some malfunctions could be software related and solved by an update.
There are several documents available on NOL, which have to be followed:
First, take care for the latest content pages of Service Bulletins, which are always available for each folder on NOKIA
Online. This is also important to recognize, if existing documents have become invalid.
The service level indicator at the bottom of each document tells the appropriate destination.
Downloads > Support Library >
1.
2.
3.
4.
5.
6.
Instructions
General Service Bulletins
Product related documents
Spare Part Service Bulletins
Service Tools Service Bulletins
Common Software Service Bulletins
etc,…
Use General SB-217 as a reference or overview.
Please also check NOKIA Online (NOL) for latest news and files on a regular basis.
Service Manual E60 RM-49
Copyright © 2006 NOKIA Corporation. All rights reserved.
Page
CMO Operations & Logistics
WW Competence Transfer
Multimedia Creation & Support
(25)
Approved 2.0
MGR
29.03.2006
CONFIDENTIAL
3. PATHFINDER FOR WORKSHOP STAFF
In addition to the information in this Service Manual, there are several instructions and information, which have to be followed. Main documentation database is NOKIA Online with the purpose of serving different multimedia content, like video
clips or interactive tutorials.
It is mandatory to watch for newest technical and organizational information on a daily basis to be updated as required
(see “Latest files in Support Library”). Every new information has to be processed and implemented as soon as possible.
When logged into NOL you can also find needed information in different folder like:
Support Library
Phones
Service Manuals
Service Bulletins
Software
Repair Information
Level 1&2 e-learning (former NOKIA CarePoint) on NOKIA Online
Former NOKIA CarePoint
content, such as
•
•
•
Online Troubleshooting
Product information
Videos – Disassembly/Assembly
can be found on
NOKIA Online
NOKIA Online
Care Services
Training
Phone Models
Level 1&2 e-learning courses offer a quick overview of the NOKIA phone and support for how to repair and use the phone:
Overview & Guides
Basic information about the phone,
features and technologies
Disassembly & Assembly
Instructions how to disassemble and
assemble the phone
Troubleshooting
Step-by-step instructions on how to
locate and repair the most common
problems with the phone
To reduce the server traffic it is recommended to download newest version of huge files like videos, Phoenix packages or
Service Manuals only once and distribute it internally for further use.
Service Manual E60 RM-49
Copyright © 2006 NOKIA Corporation. All rights reserved.
Page
CMO Operations & Logistics
WW Competence Transfer
Multimedia Creation & Support
(25)
Approved 2.0
MGR
CONFIDENTIAL
29.03.2006
4. EXPLODED VIEW AND COMPONENT DISPOSAL
Recommendation for the ecologically friendly disposal of components. Colorized components show the different categories. See corresponding ITEM/CIRCUIT REF in the Spare Parts Service Bulletins on NOL.
Service Manual E60 RM-49
Copyright © 2006 NOKIA Corporation. All rights reserved.
Page
CMO Operations & Logistics
WW Competence Transfer
Multimedia Creation & Support
(25)
Approved 2.0
MGR
CONFIDENTIAL
29.03.2006
5. SPARE PARTS OVERVIEW
Service Manual E60 RM-49
Copyright © 2006 NOKIA Corporation. All rights reserved.
Page
CMO Operations & Logistics
WW Competence Transfer
Multimedia Creation & Support
(25)
Approved 2.0
MGR
CONFIDENTIAL
29.03.2006
6. SPARE PARTS LIST
Please exchange this page (placeholder) with latest corresponding Service Bulletins
(spare parts, SWAP units and service tools) from NOL!
This will ensure, that you are using up-to-date order codes only.
Therefore Service Bulletins have to be checked from NOL on daily basis.
Service Manual E60 RM-49
Copyright © 2006 NOKIA Corporation. All rights reserved.
(25)
Page
CMO Operations & Logistics
WW Competence Transfer
Multimedia Creation & Support
Approved 2.0
MGR
CONFIDENTIAL
29.03.2006
7. SERVICE TOOLS
FLS-4s incl. ACF-8, Driver and User Guide
Dongle and flash device incorporated into one package, developed
specifically for POS use.
Alternative
FLS-5
ACF-8
Universal Power Supply is used to power FLS-4s and FLS-5 .
Travel Charger AC-4
Small and lightweight charger for fast charging of your phone battery.
Internal Battery BL-5c
Inserted under the back cover, this Li-Ion 970 mAh battery provides
power in a lightweight package.
Headset HS-23
Small and lightweight stereo headset with handsfree call handling,
volume control, push to talk support, and comfortable earpieces for
listening to the FM radio or music player.
RJ-70
Soldering Jig
Lead-free Solder Wire
Mandatory for lead-free products (Level 2 only).
Service Manual E60 RM-49
Copyright © 2006 NOKIA Corporation. All rights reserved.
Page 10 (25)
CMO Operations & Logistics
WW Competence Transfer
Multimedia Creation & Support
Approved 2.0
MGR
CONFIDENTIAL
29.03.2006
CA-53
Service Cable to connect the PC with the Pop-Port™ Connector.
0772040
•
•
•
•
•
•
•
•
•
•
•
•
•
•
•
•
•
•
•
•
•
•
Service Manual E60 RM-49
NMP Standard Toolkit
NOKIA opening tool SRT-6 NOKIA No. 0770431
Tonichi torque driver NOKIA No. 6901525
Hoya micro Fibre cloth MX304
Dastex gloves S, M, XL
Artilux goggles AH166
Wera bit T5 867/4TX 5x50
Wera 867/4 6IP; 50mm (Torx 6 PLUS®)
Wera bit T6 867/4TX 6x50
Wera 867/1 5IP; 25mm (Torx 5 PLUS®)
Wera bit T6 PLUS® 867/4TX 6IP
Facom side cutter 416E
Facom T5 driver SP.14032
Facom T6 driver SP.14033
Facom slot screwdriver AEF. 2x35.E
Wetec tweezers 7abb SA-ESD
Wetec tweezers 22 SA-ESD
Wetec tweezers 13 SA-SMD ESD
Wetec tweezers PSF SA-ESD
Wetec ESD brush E1211
Kaiser Fototechnik airbrush 6315
Wetec dental tool DEM83266/0
RS Components Scissors 323-5732
Copyright © 2006 NOKIA Corporation. All rights reserved.
Page 11 (25)
CMO Operations & Logistics
WW Competence Transfer
Multimedia Creation & Support
Approved 2.0
MGR
CONFIDENTIAL
29.03.2006
8. SW-UPDATE
Flash Concept – (Point of Sales)
To use FLS-5S Flash Dongle you have to follow the user guide inside the sales package. Please check always for the latest
version of flash software, which is available on
NOKIA Online.
Service Manual E60 RM-49
Copyright © 2006 NOKIA Corporation. All rights reserved.
Page 12 (25)
CMO Operations & Logistics
WW Competence Transfer
Multimedia Creation & Support
Approved 2.0
MGR
CONFIDENTIAL
29.03.2006
9. DISASSEMBLY INSTRUCTION
1.) You need the following tools.
2.) Remove the Battery Cover.
3.) Carefully open the A-Cover Assy with the SRT-6.
4.) Slide along both sides beginning from the bottom.
5.) Protect the LCD Shield with a plastic film.
6.) Remove the Keymat T9.
7.) Remove the Joystick Button.
8.) Unscrew the 6 Torx Plus size 6 screws in the shown
order.
Service Manual E60 RM-49
Copyright © 2006 NOKIA Corporation. All rights reserved.
Page 13 (25)
CMO Operations & Logistics
WW Competence Transfer
Multimedia Creation & Support
Approved 2.0
MGR
CONFIDENTIAL
9.) Remove the 1KE UI PWB.
10.) Remove the LCD Shield.
11.) Protect the LCD with a plastic film.
12.) Open the MMC Door before continuing.
13.) Separate the parts.
14.) Flip the LCD as shown.
15.) Gently remove the LCD Connector Shield with the
SRT-6.
16.) Always use a new shield when reassembling.
Service Manual E60 RM-49
29.03.2006
Copyright © 2006 NOKIA Corporation. All rights reserved.
Page 14 (25)
CMO Operations & Logistics
WW Competence Transfer
Multimedia Creation & Support
Approved 2.0
MGR
CONFIDENTIAL
29.03.2006
17.) Open the flex connector.
18.) First, pull the edges of the cover. Then carefully lift out
the Engine Module as shown.
19.) Lift out the Engine Module.
20.) Use a slotted screwdriver to release the
Antenna Module Assy.
21.) Unlock the clip of the Antenna Module Assy in shown
direction.
22.) Use a screwdriver to unlock the Earpiece Cover.
23.) Unlock both clips as shown to release the
Earpiece Cover.
24.) Remove the Earpiece Contact PWB.
Service Manual E60 RM-49
Copyright © 2006 NOKIA Corporation. All rights reserved.
Page 15 (25)
CMO Operations & Logistics
WW Competence Transfer
Multimedia Creation & Support
MGR
CONFIDENTIAL
25.) Push out the Earpiece.
26.) Pull out the MMC Door.
27.) Remove the Power Key.
28.) Remove the DC Jack with the DC Plug.
29.) Ease out the Microphone with a slotted screwdriver.
Always use a new microphone when reassemble.
30.) Remove it with tweezers.
Service Manual E60 RM-49
Approved 2.0
29.03.2006
Copyright © 2006 NOKIA Corporation. All rights reserved.
Page 16 (25)
CMO Operations & Logistics
WW Competence Transfer
Multimedia Creation & Support
Approved 2.0
MGR
CONFIDENTIAL
29.03.2006
0. ASSEMBLY INSTRUCTION
1.) Insert the Microphone into its compartment.
2.) Insert the DC Jack.
3.) Place the Power Key.
4.) Inset the MMC Door and fix it into its compartment.
5.) Place the Earpiece, mind the guiding. Always fit a new
Earpiece Adhesive when replacing the Earpiece.
6.) Place the Earpiece Contact PWB.
7.) Mind the correct position before placing the
Earpiece Cover.
8.) Fix the Earpiece guide at the Antenna Module Assy.
Service Manual E60 RM-49
Copyright © 2006 NOKIA Corporation. All rights reserved.
Page 17 (25)
CMO Operations & Logistics
WW Competence Transfer
Multimedia Creation & Support
Approved 2.0
MGR
CONFIDENTIAL
29.03.2006
9.) Place the Antenna Module Assy into the B-Cover.
10.) Place the Engine Module into the C-Cover. Start inserting the
Engine Module at position 1 (Note the guide pin) and press down
at 2. Remember the joystick on the back. Do not damage it.
11.) Close the flex connector.
12.) Place a new LCD Connector Shield against the cans
edge and press it down.
13.) Flip the LCD and place it into its housing.
14.) Note the correct position before continuing.
15.) Assemble the parts.
16.) Check the LCD and Display Shield before placing it to
the assembly.
Service Manual E60 RM-49
Copyright © 2006 NOKIA Corporation. All rights reserved.
Page 18 (25)
CMO Operations & Logistics
WW Competence Transfer
Multimedia Creation & Support
Approved 2.0
MGR
CONFIDENTIAL
29.03.2006
17.) Position the UI PWB Assy. Note the guiding.
18.) Insert the six Torx Plus size 6 screws.
19.) To prevent damaging the plastic theads, turn the
screws to the left first (1), then tighten them slightly (2).
20.) Apply the torque of 22 Ncm to the screws in the
shown order.
21.) Place the Joystick Button.
22.) Place the T9 Keymat.
23.) Remove the plastic film.
24.) Glue the Grounding Foam onto the Display Shield.
Service Manual E60 RM-49
Copyright © 2006 NOKIA Corporation. All rights reserved.
Page 19 (25)
CMO Operations & Logistics
WW Competence Transfer
Multimedia Creation & Support
Approved 2.0
MGR
CONFIDENTIAL
29.03.2006
25.) Place the A-Cover beginning from the top.
26.) Click all snaps into their places.
27.) Protect the window with a plastic film.
28.) Glue the MMC READER LABEL onto the MMC reader.
29.) At least place the Battery Cover.
Service Manual E60 RM-49
Copyright © 2006 NOKIA Corporation. All rights reserved.
Page 20 (25)
CMO Operations & Logistics
WW Competence Transfer
Multimedia Creation & Support
Approved 2.0
MGR
CONFIDENTIAL
29.03.2006
. LEGEND FOR QUICK TROUBLE SHOOTER
Service Manual E60 RM-49
Copyright © 2006 NOKIA Corporation. All rights reserved.
Page 21 (25)
CMO Operations & Logistics
WW Competence Transfer
Multimedia Creation & Support
Approved 2.0
MGR
CONFIDENTIAL
29.03.2006
2. QUICK TROUBLE SHOOTER PART 1
Service Manual E60 RM-49
Copyright © 2006 NOKIA Corporation. All rights reserved.
Page 22 (25)
CMO Operations & Logistics
WW Competence Transfer
Multimedia Creation & Support
Approved 2.0
MGR
CONFIDENTIAL
29.03.2006
3. QUICK TROUBLE SHOOTER PART 2
Service Manual E60 RM-49
Copyright © 2006 NOKIA Corporation. All rights reserved.
Page 23 (25)
CMO Operations & Logistics
WW Competence Transfer
Multimedia Creation & Support
Approved 2.0
MGR
CONFIDENTIAL
29.03.2006
4. QUICK TROUBLE SHOOTER PART 3
Service Manual E60 RM-49
Copyright © 2006 NOKIA Corporation. All rights reserved.
Page 24 (25)
CMO Operations & Logistics
WW Competence Transfer
Multimedia Creation & Support
Approved 2.0
MGR
29.03.2006
CONFIDENTIAL
5. BLUETOOTH & INFRARED TEST
Bluetooth test
You need another Bluetooth device (e.g. 6230) to do a GoNoGo test.
Make sure that Bluetooth is activated in the reference unit. The distance of the devices should be not more than 5m from
each other.
Infrared test
You need another infrared device (e.g. 6230) to do a GoNoGo test. The infrared windows of the devices must be directed to
each other and should have a distance of approximate 15 cm. Make sure that infrared is activated in receiver device.
Warning: Do not point the IR (infrared) beam at anyone’s eye or allow it to interfere with other IR devices. This device is a
Class 1 Laser product.
Reference unit, Bluetooth /infrared activated
Test unit
Settings on the test unit:
•
Press the red End key to reach the Home Menu
Select Contacts and choose an entry
•
If phone and SIM memory is empty, create one new entry.
•
Press Options
•
Select Send
A) - for infrared test: Select Via infrared
If sending of business card fails, make sure again that infrared windows are directed to each other and infrared is
activated in reference unit. Then try again sending.
Test was successful, if you get the message “Business card received” on the Reference unit.
You will not get a confirmation on sender device.
B) - for Bluetooth test: Select Via Bluetooth
Search window appears and shows all Bluetooth units in range.
Choose one unit and press Select
Press Accept on the Reference unit.
Test was successful, if you get the message “Business card received” on the Reference unit.
•
Press red End key of the Test unit to reach the Home Menu
Note: If the Bluetooth is activated, switch it off!
Service Manual E60 RM-49
Copyright © 2006 NOKIA Corporation. All rights reserved.
Page 25 (25)
CMO Operations & Logistics
WW Competence Transfer
Multimedia Creation & Support
Approved 2.0
MGR
29.03.2006
CONFIDENTIAL
6. BATTERY TEST
A battery tester lets you test the capacity of NOKIA batteries.
Please refer to the actual information on NOKIA Online.
http://www.astratec.co.uk/
Service Manual E60 RM-49
http://www.cadex.com/
Copyright © 2006 NOKIA Corporation. All rights reserved.