1
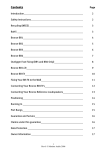
Owners Manual
Radius HD Manual ~ Greyscale Rev5,1.indd 1
01/10/2008 16:24:31
Contents Page
Important Safety Instructions
2
Safety Instructions For Fixing Your Radius
Loudspeakers to a Wall
3
Re-cycling
3
RoHS Declaration of Conformity
3
Background
3
Introduction
4
Setting up and Positioning  5
Positioning - Front Speakers
5
Positioning - Surround Speakers
5
Optimum Speaker Placement
6
Fixing to the Wall
7
Fixing the R45HD/ R90HD to a Wall
8
HD
Fixing the R180HD/ R225HD/ R250HD/ R oneHD to a Wall  9
R270HD Feet and Spikes 10
Specifications 11
Guarantee and Service
12
Claims under this Guarantee
12
Data Protection
13
Owner Information 13
EC Declaration of Conformity 14
monitoraudio.co.uk
Radius HD Manual ~ Greyscale Rev5,1.indd 2-1
1
01/10/2008 16:24:31
Safety Instructions For Fixing Your Radius HD Loudspeakers to a
Wall
Important Safety Instructions
1. Please read these instructions.
WARNING: For safety reasons do not attempt to fix these speakers to your wall
if you are unsure of your ability to provide a secure and safe fixing. You will need to
determine where to fit the bracket and the structure of the wall. If unsure, please
obtain the services of a competent qualified trades-person.
2. Please keep these instructions.
3. Heed all warnings.
4. Follow all instructions.
5. Do not use this apparatus with water.
WARNING: Ensure that there are no water pipes, or electricity cables running
behind where the wall bracket is going to be secured. Work from secure steps
and avoid trailing wires.
6. Clean only with a dry cloth. Great care and attention has gone into the materials
chosen to produce the Radius HD Series. A gentle wipe with a dry, clean cloth is all
that is required to remove any dust. Treat them as you would a fine piece of furniture
because that is how they have been designed.
Re-cycling
7. Do not install near any heat source, such as radiators, heat registers, stoves, or
other apparatus (including amplifiers) that produce heat.
Correct Disposal of Waste Electrical and Electronic Equipment (WEEE) by User in Private
Households in the EU.
8. Only use attachments/ accessories specified by Monitor Audio.
9. Use only with the cart, stand, tripod, bracket, or table specified by monitor Audio
or sold with the apparatus. When a cart is used, use caution when moving the cart/
apparatus combination to avoid injury from tip-over.
10. Refer all servicing to qualified service personnel. Servicing is required when
the apparatus has been damaged in any way, such as power supply cord or plug
is damaged, liquid has been spilled or objects have fallen onto the apparatus, the
apparatus has been exposed to rain or moisture, does not operate normally or has
been dropped.
This symbol on the product or accessories indicates that they must not be
disposed of with your household wastes throughout the EU. To prevent
possible harm to the environment or human health from uncontrolled
waste disposal, recycle it responsibly to promote the sustainable reuse of
material resources. Instead it is your responsibility to dispose of your waste
equipment by handing it over to a designated WEEE collection point for
recycling. The separate collection and recycling of your waste equipment
will help conserve natural resources and ensure that it is recycled in a
manner that protects human health and the environment.
For more specific information about where you can take your equipment for recycling please
contact your local city/council office, your local waste disposal service or the outlet where
you purchased your RadiusHD product.
11. This apparatus shall not be exposed to dripping or splashing water and that no
object filled with liquids such as vases shall be placed on the apparatus.
RoHS Declaration of Conformity
12. This exclamation point within an equilateral triangle is intended to alert the user
to the presence of important maintenance (servicing) instructions in the literature
accompanying the appliance.
Directive 2002/95/EC of the European Parliament and of the Council on
the reduction of the use of certain hazardous substances in electrical and
electronic equipment, January2003.
Background
The RoHS directive restricts the use of Lead (Pb), Cadmium (Cd), Mercury (Hg), hexavalent
Chromium (CrVI), polybrominated biphenyl (PBB) compounds, and polybrominated diphenyl
ether (PBDE) compounds in electrical and electronic equipment sold in the European
Union.
2
Radius HD Manual ~ Greyscale Rev5,1.indd 2-3
RadiusHD
monitoraudio.co.uk
3
01/10/2008 16:24:32
Introduction
Setting up and Positioning
Congratulations and thank you for your purchase of the RadiusHD loudspeakers. We are
confident they will provide years of enjoyment and pleasure as only high quality components
have been used throughout.
Although position and suitability will have been considered prior to purchasing your
RadiusHD, this section will guide you through the optimum positioning and setting up of your
loudspeakers. An illustration is provided on page 6 to assist you in ensuring your speakers
are placed in the optimum positions. For instructions on fitting your RadiusHD speakers
to a wall, please go to pages 7,8 & 9. Self adhesive rubber feet are provided to prevent
movement due to vibration when using the RadiusHD on a table/ equipment stand. The
R270HD comes supplied with rubber feet fitted into the plinth. Further details on these can
be found on page 10.
Building on the overwhelming success of the original Radius Series, RadiusHD brings
redesigned cabinet profiles, enhanced cabinet structure, improved aesthetics and improved
sonic balance and response.
The R270HD has received major performance enhancements in every area. We have
increased the cabinet volume, added an additional rear firing port and also added ballast
in the bottom of the cabinet. All of these new features combined to offer improved, tighter,
punchier bass response and extra cabinet stability.
The R45 and R90 come supplied with a wall fixing bracket. This enable upto 18 degrees
of movement in all directions.
HD
HD
We have also introduced a new product to the Radius Series, the R one . The R one
is a left, centre, right in one cabinet. Each channel is enhanced with it’s own braced
compartment and individually specified crossovers. Designed to fit below/ above your
TV where the centre channel would normally sit, additional left and right speakers are not
needed as the R oneHD houses all three in one.
HD
HD
HD
Please follow this user manual carefully as it contains important information about positioning
and set up procedures. For further advanced information on system set-up, FAQ’s and
multi-lingual support please refer to our web site at: www.monitoraudio.co.uk
The R45HD has a thermal protection device in it. This helps to protect the drive unit
and tweeter from permanent damage. If the speaker stops working after a long
period of play, turn off the source for about 10 minutes, and retry.
R oneHD
This cabinet simply needs to be placed either just below or just above your TV/ projector
screen. Ideally, it should be angled towards your listening position.
Positioning - Front Speakers
With the centre channel the tweeter is best pointed towards the listener’s ears to help direct
the sound and should be the first speaker you place in your home theatre room. The centre
channel’s job is to anchor dialogue and other on-screen sounds to the screen. Typically, As
much as 60% of a movie soundtrack comes through the centre channel .
The centre channel can be placed either above or below your TV screen, and as close as
possible. If positioned in a cabinet or sitting on top of the TV ensure that the front edge
is aligned with the front edge of the TV or shelf. Where possible, the height of the centre
channel’s tweeter should be close to the height of your front speakers’ tweeter — ideally,
within about 600mm.
When placing your RadiusHD loudspeakers on the wall, around a plasma/ LCD TV, the left
and right speakers need to be between 22 & 30° to the left and right of the seating position,
with the tweeters at approximate ear level.
Positioning - Surround Speakers
Ideally, your primary pair of surround speakers should be placed to the left and right of
your listening position — either in line with it, or just behind it (90 - 110°). If you have a 6.1
channel or 7.1 channel system with more than two surround speakers, or if side placement
isn’t available in a 5.1 channel system, consider placement behind your listening position,
facing the front of the room (135 - 150°).
Surround speakers should be placed high enough so that the drivers do not fire directly at
your ears when you’re sitting down — one rule of thumb is to place them at ear level while
standing. If your surround speakers fire directly at your ears, they can overpower your front
speakers.
If your surrounds are mounted on the side walls on brackets (R45HD & R90HD), experiment
with aiming them. You may get good results from pointing them at the ceiling or toward the
rear corners of the room.
4
Radius HD Manual ~ Greyscale Rev5,1.indd 4-5
RadiusHD
Surround speaker placement which is ideal for home theatre may not necessarily be perfect
for multichannel music listening, where a precisely focused rear soundstage is best. If both
types of listening are important to you, then you can position your surround speakers for a
compromise between the two.
monitoraudio.co.uk
5
01/10/2008 16:24:34
Optimum Speaker Placement
Fixing to the Wall
The R45HD & R90HD come with a bracket to mount it on the wall. It is fixed using the 2
button head screws on the back of the cabinet either side of the terminals.
Left
0°
WARNING: Ensure that there are no water pipes, or electricity cables running
behind where the wall bracket is going to be secured. Work from secure steps
and avoid trailing wires.
WARNING: Do not connect your speaker cable to the amplifier before connecting
it to the speaker.
Right
Centre
22°
30°
When you unpack the Radius Wall Bracket you will notice that it is packed in two parts.
Please do not put these two pieces together before fixing to the wall.
1. Remove the backing from the ‘low tack’ adhesive on the back of the template. Offer
the bracket template up to the wall, so that the fixing holes run vertically, ensuring that
it is true. If you are happy, press it against the wall to hold it in place. Mark the centres
of the two wall fixing holes with a bradawl, piercing through the template (examples
can be seen in Fig.2 and Fig. 3). If your loudspeaker cable has been/going to be run
through the wall remember to take this into consideration when fixing the bracket to
the wall. Please see the template for reference dimensions.
90°
Surround
Left
110°
Surround
Right
135°
150°
Rear
Surround
Right
Rear
Surround
Left
Figure 1.
6
Radius HD Manual ~ Greyscale Rev5,1.indd 6-7
RadiusHD
Figure 2.
Figure 3.
2. For fixing to plasterboard (sheet-rock) or a solid wall use a suitable 6.5mm (1/4”) drill bit.
Drill the two positions deep enough to accept the wall plugs provided, this should be
30mm (1 1/8”). Insert the wall plugs into the wall. If your cable has been run through
the wall, feed it through the hole in your wall bracket and then screw the bracket to the
wall using the 25mm (1”) screws provided. There are two small markers on the wall
bracket to ensure vertical/horizontal alignment.
monitoraudio.co.uk
7
01/10/2008 16:25:17
3. For fixing to a wooden wall/structure, use a 2mm drill bit to drill 2 pilot holes and use
25mm screws to secure the bracket.
4. Fully unscrew the 2 wall bracket mounting screws in the back of the speaker cabinet
using the ‘hex’ key provide (Fig. 4). Using the two screws that have just been removed,
attach the forked part of the wall bracket to the back of the speaker (Fig. 5). This
should be tightened securely.
Fixing the R180HD/ R225HD/ R250HD/ R oneHD to a Wall
Additional Points to Remember
•
•
•
•
•
Figure 4.
Figure 5.
5. Connect the speaker cables as in Fig. 6.
Alternatively, you can use bare wire. Place
the female ball part of the bracket over the
male part, ensuring the slot in the female
part lines up with the hole in the male
part.
Wall Mounting
Point
Cable Through
Hole
6. Using the 30mm cap head bolt (provided)
secure the two parts together, but leave
the bolt loose enough to allow some
adjustment if necessary (Fig. 7).
7. Adjust the speaker to the desired listening
position and fully tighten the bolt. If you realise this
is not the correct positioning, loosen the bolt slightly,
re-adjust and then tighten the bolt.
When using the wall fixing plate, the speaker will drop by 7.5mm due to the key hole fixing.
Templates are supplied with the products to aid fixing.
The grille badge can be rotated. Simply apply some pressure with your thumb/ finger
and rotate it.
Please allow no more than 200mm (8 inches) of slack cable protruding from the wall.
All unused cable can be wound around the inside of the terminal panel.
Please see the template for information on the locations of the rubber feet.
Wall Mounting
Point
Figure 6.
R225HD/ R250HD/ R oneHD
Wall Fixing Plate
Connect your speaker cable to the amplifier
R180HD Wall Fixing Plate
Figure 7.
8
Radius HD Manual ~ Greyscale Rev5,1.indd 8-9
RadiusHD
monitoraudio.co.uk
9
01/10/2008 16:25:28
10
Radius HD Manual ~ Greyscale Rev5,1.indd 10-11
RadiusHD
100 x 100 x 100
3 15/16 x
3 15/16 x
3 15/16
0.95 (2 1/8)
Drive Unit
Complement
External
Dimensions. mm
(H x W x D)
External
Dimensions. inch
(H x W x D)
Weight (each)
Kg ( Ib)
2 (4 3/8)
7 13/16 x
4 15/16 x
5 1/2
198 x 125 x 140
1x 4” MMP2
cone bass/ mid
driver.
1 x 25mm
C-CAM gold
dome tweeter
1x 3” MMP2
cone mid-bass
driver.
1 x 20mm
C-CAM gold
dome tweeter
2.8 (6 1/8)
13 3/4 x
4 15/16 x
4 1/8
350 x 125 x 105
1x 4” MMP2
cone bass/ mid
driver.
1 x 25mm
C-CAM gold
dome tweeter
Bass reflex –
front ported
Bass reflex –rear
ported
105
10-100W
100W
60W
8 Ohms
87dB
60 Hz – 35 KHz
105
Sealed Cabinet
101
Maximum SPL (dBA)
10-100 W
100W
60W
8 Ohms
87dB
80Hz – 35 KHz
Bass Alignment
5-50 W
50W
System Power
Handling (RMS)
Recommended Amp
Requirements
25W
8 Ohms
Nominal Impedance
Power Handling
Single (R.M.S)
87dB
Sensitivity (1W@1M)
120Hz – 20 KHz
Radius 180HD
The threaded inserts in the
plinth will be revealed when
the rubber feet are removed.
Take the spikes and twist
them in a clockwise direction
in to the plinths. Ensure they
are fully inserted and stand
the cabinet up and place it
in it’s final location to see
if it is stable and level. If
it is not adjust the spikes
accordingly
and
then
tighten the knurled locking
nut to hold the spikes in
that position.
Radius 90HD
4.8 (10 1/2)
24 x 4 15/16 x
4 1/8
610 x 125 x 105
2x 4” MMP2
cone bass/ mid
driver.
1 x 25mm
C-CAM gold
dome tweeter
Bass reflex –
front ported
108
20-150W
150W
100W
8 Ohms
90dB
55Hz – 35KHz
Radius 225HD
5.2 (11 1/2)
29 15/16 x
4 15/16 x 4 1/8
760 x 125 x 105
2x 4” MMP2
cone bass/ mid
driver.
1 x 25mm
C-CAM gold
dome tweeter
Bass reflex –
front ported
108
20-150W
150W
100W
8 Ohms
90dB
50Hz – 35KHz
Radius 250HD
10.2 (22 1/2)
39 3/8 x
4 15/16 x 5 ½
(Without spikes)
100 x 125 x 140
(Without spikes)
8 (17 5/8)
39 3/4 x 4 15/16 x
4 1/8
1010 x 125 x 105
4x 4” MMP2 cone
bass/ mid driver.
3 x 25mm C-CAM
gold dome tweeter
C: Bass reflex –
front ported
L/R: Bass reflex –
ported to underside
Bass Reflex Front & Rear
Ported
2x 4” MMP2
cone bass/ mid
driver.
1 x 25mm
C-CAM gold
dome tweeter
108
C: 20-150W
L/R: 10-100W
C: 150W
L/R: 100W
C: 100W L/R 60W
C: 8 Ohms
L/R: 8 Ohms
C: 90dB
L/R: 87dB
C: 55Hz – 35KHz
L/R: 85Hz – 35KHz
R oneHD
108
20 - 150W
150W
100W
8 Ohms
90dB
48Hz - 35KHz
Radius 270HD
If you wish to use spikes, you
can remove the rubber feet by
simultaneously twisting and
pulling them.
Radius 45HD
Your R270HD will come with rubber feet inserted into the plinth inserts (pictured below). This
is for use on hard floors or when spikes are inappropriate to use.
Frequency
Response
Model
R270 HD Feet and Spikes
01/10/2008 16:25:30
Guarantee and Service
Data Protection
To validate your warranty please visit www.monitoraudio.co.uk within 30 days of
purchase.
We at Monitor Audio are committed to respecting the wishes and privacy of our customers.
Any information you provide will be held in the strictest confidence and only used within the
Monitor Audio organisation for the provision of services such as warranty claims or spare
parts.
When you register here you’ll gain free entry to our monthly prize draw! What’s more you’ll
be the first to hear about the great things happening at Monitor Audio, including new
products and events!
This equipment has been fully tested prior to dispatch from the factory. Both the craftsmanship
and the performance of this product is guaranteed against manufacturing defects for the
period of three years from the date of purchase (see conditions below), provided that the
product was supplied by an authorised Monitor Audio retailer under the consumer sale
agreement. (The words ‘consumer sale’ shall be construed in accordance with section 15
of the supply of goods act 1973). Monitor Audio accepts no responsibility for defects arising
from accident, misuse, abuse, wear and tear, modification or operation outside of that
specified within this instruction manual. Neither will responsibility be accepted for damage
or loss occurring during transit to or from the parties claiming under this guarantee.
This guarantee covers both labour and parts. The liability of Monitor Audio is limited to the
cost of repair or replacement of the defective parts (at the discretion of Monitor Audio) and
under no circumstances extends to consequential losses or damage.
We may wish to contact you in the future to ensure you are happy with the products and
standards of service we provide and to keep you up-to-date with the latest products and
promotions we have to offer.
Should you wish not to be contacted by us either by post, e-mail or phone, please tick the
box on the warranty form on the web site. Alternatively you can request not to be contacted
in future by writing to Customer Service, at the address above.
Owner Information
Product Details
Model .................................................................
Product Serial No ................................................
Claims under this Guarantee
Date of Purchase ................................................
The equipment should be returned in its original packaging to the original supplier where
possible, or to any other authorised Monitor Audio dealer. If it is not possible to return the
equipment by hand, then it should be sent carriage prepaid via a reputable carrier. If the
original packing is not available replacement packaging can be purchased from Monitor
Audio.
Dealer Details
If you have any difficulties complying with these requirements please contact us at the
following address:
...........................................................................................................................................
Dealer Name .....................................................................................................................
Address .............................................................................................................................
e-mail address ...................................................................................................................
Customer Service
Tel:
44 (0) 1268 740580
Monitor Audio Ltd.
Fax:
44 (0) 1268 740589
Unit 2, 24 Brook Road
Internet: www.monitoraudio.co.uk
Rayleigh
Email: [email protected]
Essex
SS6 7XL
England
Monitor Audio reserves the right to alter specifications without notice.
This guarantee does not affect the statutory rights of the consumer under UK law.
12
Radius HD Manual ~ Greyscale Rev5,1.indd 12-13
RadiusHD
monitoraudio.co.uk
13
01/10/2008 16:25:30
EC Declaration of Conformity
We, Monitor Audio Ltd.
24 Brook Road
Rayleigh
Essex
SS6 7XL
England
08
Declare in own responsibility, that the Radius HD products described in this manual
is in compliance with Technical Standards/Council Directives:
(LVD) 2006/95/EC Low Voltage Directive
EN60065: 2002+A1: 2006 Safety requirements for mains operated electronic and
related apparatus for household and similar use.
(EMC) 89/336/EEC Electro Magnetic Compatibility
EN55013: 08.90+A12:08.94+A13:12.96 Limits and methods of measurement
of radio disturbance characteristics of broadcast receivers and associated
equipment.
EN55020: 12.94+A11:12.96 Electro magnetic immunity of broadcast receivers
and associated equipment.
EN61000-3-2: 04.95+A1:1998+A2:1998 Electro magnetic compatibility (EMC) –
Part 3: Limits – Section 2: Limits for harmonic current emissions (equipment input
current up to and including 16 Ampere per phase).
EN6100-3-3: 01.95 Electro magnetic compatibility (EMC) – Part 3: Limits – Section
3: Limits of voltage fluctuations and flicker in low-voltage supply systems for
equipment with rated current up and including
16 Ampere per phase.
Signed by:
Name: D.S. Hartley
Position: Technical Director
Company: Monitor Audio Ltd
14
Radius HD Manual ~ Greyscale Rev5,1.indd 14-15
RadiusHD
monitoraudio.co.uk
15
01/10/2008 16:25:31
Radius HD Manual ~ Greyscale Rev5,1.indd 16-17
01/10/2008 16:25:31
Monitor Audio Ltd.
Unit 2, 24 Brook Road
Rayleigh, Essex
SS6 7XL
England
Tel: 01268 740580
Fax: 01268 740589
Email: [email protected]
monitoraudio.co.uk
Designed in the United Kingdom
© 2008. Version 5
Radius HD Manual ~ Greyscale Rev5,1.indd 18
01/10/2008 16:25:32