1
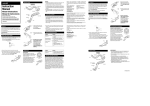
Contact Centre overview and system manual Contact Centre Manual Installation and User guide Specifications are subject to change without notice. Facilities described may or may not be supported by your network. Opera Cloud, Opera 240, Opera 20, and Operafone are the registered trademark of MDS Amiba. This documentation refers to: Opera Software Version 14.097 or later. Page 1 Contact Centre overview and system manual Contents 1. Introduction 3 2. Setting-up the Contact Centre 6 2.1. 2.2. 2.3. 2.4. 2.5. 2.6. 2.7. 2.8. 2.9. 2.10. Names for the Skill Sets ....................................................................................... 6 Assign Agents to the Skill Set ............................................................................. 7 Select the type of Call Distribution for the Skill set ............................................ 9 Fallback to Operator ........................................................................................... 10 Wall Displays ....................................................................................................... 11 Program call reports’ data collection and thresholds per skill set .................. 13 Supervisor log-in: Wall Username and Password ............................................ 16 External Number Priority .................................................................................... 16 Agent and Skillset Reports................................................................................. 17 Creating a Scheduled Report (not available on CPE) ....................................... 19 Page 2 Contact Centre 1. Introduction The Opera Cloud PBX and the Opera 240 hardware PBX have an Integrated Contact Centre which is enabled by licence key. The Contact Centre options on the system are typically used in companies which have a group of people working together, for example: Tele-Sales Service Calls Reservations An Order Desk Multiple Receptionists or in any situation where a group of employees need to operate effectively as a team handling calls of a similar nature in a Work Group. The Contact Centre offers advanced features that allow businesses to provide a professional level of service to inbound customer callers: • 240 Agents • 50 Skill sets • 200 Automated attendant announcements • Call Transfer and Overflow • Agent and Supervisor Log In/Log Out • Agent Wrap-up time • Queue Status Wallboards • Colour thresholds for key call parameters, per skill set • Agent Priority on Skill level • Skill set Mailboxes • Agent and Skill set reports Incoming calls to a skill set pool of agents may be: Routed on a dedicated inbound number destined to that skill set Transferred to another skill set or the Operator Queued on the Auto-Attendant Call Distribution Calls presented to a skill set pool may be distributed in a number of ways Ring All: The incoming call is offered to all members of the skill set simultaneously Cyclic Start: The incoming call is presented to an agent and if not answered moves around the other agents in a cycle. The starting agent in the cycle is also rotated. DM 1069 Rev 3 Page 3 Contact Centre Priority Routing: The incoming call is always offered to the first member of the skill set pool, then to the second member, then to the third and so on. Agents can be ranked in the skill set pool in ascending order of skill so that calls are offered to the lower skill sets first. Longest Idle: calls are first offered to the longest idle agent. Longest Idle Internal: calls are first offered to the agent who has been idle the longest, based on internal calls only Longest Idle External: calls are first offered to the agent who has been idle the longest, based on external calls only. Call Queuing, Auto-Attendant and Voice Mail Incoming callers can be routed to the appropriate skill set based on the number they have dialled. They are offered a menu of choices to further route the call to the appropriate agent and the system can play messages while they are queued waiting for an agent. For example a typical message could be: “Thank you for calling, an operator will answer your call shortly, alternatively dial 5 for Sales, dial 6 for Service, dial 7 for Transport or hold for the operator” The call is then routed to the relevant skill set. This significantly reduces call congestion and workload on operators. Call Overflow When a pool of agents is fully occupied with calls, new incoming calls may be overflowed to a different skill set pool or to voicemail or to an external destination. Overflow can be triggered when a call waiting threshold is exceeded. Agent Login / Logout Agents can Login and Out of Contact Centre Pools freely, typically for start/end of shift. There are many ways to do this: One touch toggle key on the system phone. Menu option on the system phone. Simple easy toggle option on the portal page. A dialling code on an analogue phone By Supervisor using web portal Handling Traffic Peaks Agents may Log-in to other skill sets during peak times to provide additional assistance in a busy skill set. This facilitates call handling during periods when particular skill sets carry a heavier load at specific times of the day. Supervisors can also login agents, using the drag & drop portal interface. Wrap-up Time At the end of a call, an agent will typically require a few minutes to complete actions such as processing orders, or writing up notes of the call. Each Agent can be assigned an individual wrap-up time by the supervisor. DM 1069 Rev 3 Page 4 Contact Centre Last Agent Log-Out While Agents can Log into and out of a skill set freely, the system must take action if all agents log out, so that the skill set pool is not left unattended. In this event the calls are forwarded to a pre-defined destination. Wallboard Supervisor Overview and Control using Web Portal The skill set Supervisor has full control over the skill set pool, and can react to levels of calls into the skill set by adding agents using a simple drag and drop interface. Live status over-view of the skill set and all its agents. Reports regarding the performance of the skill set and its agents Quickly add, remove, login, logout using drag & drop portal interface Adding a message to the wall display. Call Record (can be emailed to Agent and Supervisor as wav file) Live listen-in, (Supervisor can connect into an agent call, silently, but can un-mute if needed) Supervisor takeover of a call from an agent Several logins to the skill set web portal are possible, allowing for more than one supervisor over-seeing and controlling the skill set pool. Skill set Reporting The skill set supervisor can generate reports based on over-all skill set statistics and on a per agent basis, also allowing the option to set a date/time window for such reports as: Longest/ average wait times Longest/ average call times Max number of calls Number of call per day No of abandoned calls Agent League table These reports can be viewed on the browser screen, printed out or saved as a file. Also the raw data may be exported to allow further analysis. Wall Displays Live wall displays give real time performance for each skill set pool. Statistics are continuously updated for call queues, answered calls, abandoned calls, calls answered by voicemail, calls forwarded to other skill sets. For an individual agent, statistics such as average call length, longest call, and idle time can be displayed. DM 1069 Rev 3 Page 5 Contact Centre 2. Setting-up the Contact Centre 2.1. Names for the Skill Sets The contact centre contains 20 skill sets of agents. Each skill set has a number and name and you should change the name to describe the skill set. Examples could be ‘Sales Campaign 820’ or ‘Sales Standard 821’. You may change the names and numbers by clicking on the links “Skill Set Numbers’ and ‘Skill Set Names’, filling in the white fields and pressing ‘Save’. DM 1069 Rev 3 Page 6 Contact Centre 2.2. Assign Agents to the Skill Set The number of agents licensed in the Contact Centre is indicated on the System properties page: To assign the agents to a skill set, click on the ‘Skill set Assignment’ link, to display a list of all the pools. Click on the Edit button of the Skill set you wish to populate with agents. DM 1069 Rev 3 Page 7 Contact Centre On the Edit page for the skill set, you may add or remove agents from the skill set pool by dragging and dropping agents into the centre column as shown below. You can also select an Auto Attendant message for the skill set by clicking on the + sign underneath ‘Auto-Attendant’. This message is played to callers who are queued for the skill set. The playing of the message along with the programming of any interactive response is programmed on the Auto-Attendant programming page. Note: The Opera 240 hardware IPPBX may be networked together with other Opera 240 IPPBX systems at remote sites. In this case, an additional option to allow inclusion of remote networked users within the skill set may be shown on this page, ‘Select Networked User or Group’. DM 1069 Rev 3 Page 8 Contact Centre 2.3. Select the type of Call Distribution for the Skill set On the ‘Skill set Attributes’ page, you can choose how calls are distributed to the agents in the skill set group. Ring All: The incoming call is offered to all members of the skill set simultaneously Cyclic Start: The incoming call is presented to an agent and if not answered moves around the other agents in a cycle. The starting pointed the cycle is also rotated. Priority Routing: The incoming call is always offered to the first member of the skill set pool, then to the second member, then to the third and so on. Agents can be ranked in the skill set pool in ascending order of skill so that calls are offered to the lower skill sets first. Longest Idle: calls are first offered to the longest idle agent. Longest Idle Internal: calls are first offered to the agent who has been idle the longest, based on internal calls only Longest Idle External: calls are first offered to the agent who has been idle the longest, based on external calls only. You may also select a leader for each skill set. The leader of the skill set can access the voice mailbox of the skill set to listen to the voice messages. You may also set the PIN code for the skill set mailbox and set a limit to the number of voicemail messages. DM 1069 Rev 3 Page 9 Contact Centre 2.4. Fallback to Operator The ‘Fallback to Operator’ page is used to forward the calls destined for the skill set to the Operator in the event of No Answer or Busy from the skill set pool. DM 1069 Rev 3 Page 10 Contact Centre 2.5. Wall Displays Go to the page ‘All Wall Displays’ and click on the settings icon to select which of the 20 skillsets you wish to display on the wallboard. By clicking the skillset button, the summary live status panel for the skillset is displayed and the button becomes green. You can display a message or a title at the top of the wallboard by typing it into the white box. DM 1069 Rev 3 Page 11 Contact Centre By clicking on any skill set panel, you display the detailed performance for the skill set and for every individual agent in the skill set. Call data collection must first be activated under the Group Settings icons for the skill set. Each skill set has a supervisor wall display which gives real time statistics on the key performance indicators for that skillset. The icons at the top give easy access to Group Assignment, Messages, Forwarding and the skill set settings (e.g. message forwarding, email address, PIN code, banner url, call report data collection periods and thresholds for color highlights). DM 1069 Rev 3 Page 12 Contact Centre 2.6. Program call reports’ data collection and thresholds per skill set Click on the Group Settings icon at the top of the Skill set programming page. Voice mail forwarding may be activated and email address, PIN code and Banner URL selected for the skill set. Click on the Data Collection tab to access the following page. DM 1069 Rev 3 Page 13 Contact Centre Select the data collection (snapshot) start time. This is the time at which the system will begin to store call information on the skill set in the Skill set Reports database. The Data Granularity Interval defines the duration of each snapshot. The Call Summary Start time is the time at which the data displayed in the Call Summary for the skill set on the right hand side of this display is first reset. This is normally the same as the Data Collection Start time. The Call Summary Reset Interval is the period before which the Call Summary running totals displayed on this page are reset to zero. The Reset Interval should normally be a multiple of the Data Granularity Interval. Click the green arrow at the bottom of the page, to save the changes. Click on the red Enable Data Collection icon, so that it turns to green, to activate the call data collection. DM 1069 Rev 3 Page 14 Contact Centre Click on the Threshold values icon to set the color signals for the call summary:. Click on the green arrow to accept your changes. DM 1069 Rev 3 Page 15 Contact Centre 2.7. Supervisor log-in: Wall Username and Password Each supervisor has a username and PIN code which gives access to the supervisor privileges, including the wall display configuration. The usernames and PIN codes are defined on the page Wall Username & Password: The first user on this page ‘Master Wall’ has supervisor privileges for all skill sets. All of the other users have supervisor privileges for a single skillset. 2.8. External Number Priority The supervisor may wish to prioritize inbound calls to the Contact Centre based on the number dialed. Calls to a high priority number will be answered first. You can set the priority for each external number by clicking the link ‘External Number Priority’: DM 1069 Rev 3 Page 16 Contact Centre 2.9. Agent and Skillset Reports The system stores call data from the programmed Data Collection time for each skill set, provided the Enable Data Collection tab at the skill set Group Settings is set to display the green button. Data collection must be turned on, as described in this manual under “Program call reports’ data collection and thresholds per skill set”. You can generate reports of the key performance indicators for each agent or skillset by clicking the Skillset Report link: Select a skillset or an individual agent, from the drop-down menus at the top of the page and the time period of the report. You can click on the icons at the bottom of the page to preview the report or download it as a csv file. DM 1069 Rev 3 Page 17 Contact Centre The report for a skillset contains the following key performance indicators: Total Calls, Answered Calls, Average Call Length, Longest Call, Last Call, Average Ring Length, Longest Ring, For Abandoned Calls: Number of abandoned calls, Average ring length, Longest Ring, Last Call Voicemail Calls Answered, Voicemail Calls Abandoned Forwarded Calls, Average Calls in Queue, Maximum Calls in Queue, Average Ring length in Queue, Longest Ring in Queue. DM 1069 Rev 3 Page 18 Contact Centre 2.10. Creating a Scheduled Report (not available on CPE) This page is used to schedule regular reports or occasional reports of Key Performance Indicators. You can select the performance parameters to be included in the report, the reporting period and frequency and specify a list of email addresses the report will be sent to. The page displays a list of the currently scheduled reports and an option to “Add new Scheduled Report”. Currently scheduled reports can be enabled, disabled or edited. To schedule a new report, first give it a name which describes the contents and is different to any existing report names. Select the type of report (Skillset or Agent) and select which Skillsets or Agents are to be covered in the report (All, One or Multiple) then select the layout type (Summary data, Snapshot all raw data or both). You can select the data elements which are included in the report by drawing a box with your cursor to select items, or holding down the Ctrl key to make multiple non-adjacent selections. Selected items have a blue background as follow. DM 1069 Rev 3 Page 19 Contact Centre You can assign the Time and Date this report should be first run and a repeat period (this can be Hours, Days, weeks, Months or Years) for when it should be re-run, along with a period the report should cover. Finally, define a destination Email address (you can enter more than one email address, separated by a semicolon ;). Click the green arrow to save and return to the overview page. DM 1069 Rev 3 Page 20