Transcript
Quick User Guide to Comfort Audio FM system - Body worn TOD version
Components
Teachers
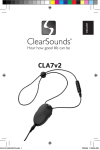
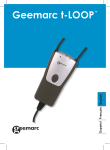
Microphone
Pupils receiver with
neckloop
STEP 3: Wearing the microphone and receiver
Clip on microphone to
clothing, the microphone
works best around 30cm.
Receiver
Microphone
STEP 1: Switch on teachers microphone
A STEP 2: Fitting and switching on pupils receiver
Press and hold the top button
and look at the screen on the
back of the unit. Press until the
GREEN bar has fully
illuminated on the screen.
Place the neckloop around
hearing aid users neck and
plug in to receiver as
shown in diagram. Switch
hearing aid to the T
Position.
As with the microphone
press and hold the top
button to switch on.
STEP 4: Increasing the volume
STEP 5: Charging
The volume of the neckloop can altered via the
+ and - switch on the side of the receiver.
A necklace is provided if
the clip is not possible to
use.
Connecting an audio source
Audio input
An audio source can be
connected e.g. White board
audio. Simply find the
OUTPUT from the device.
This will say LINE OUT or
HEADPHONE SOCKET. Use
connection lead provided and
connect to Audio input of the
microphone.
P.C. Werth Ltd | Audiology House
45 Nightingale Lane | Balham | London | SW12 8SP
Office: 020 8772 2700
Dan Roberts (West sales manager): 07880386262
Plug charger in to the mains
using the charger provided.
The indicator will be RED
when charging.
Once fully charged the
indicator will go GREEN.
Changing the channel (if required)
If there is interference the channel may require
changing. Push jog wheel (shown below)
In menu select communication
select channel. Select channel
with a green dot.
Pairing the system (if required)
After the channel has been
changed and there is still
interference the system may
require pairing.
Press and hold the receivers
button for 2 seconds. Double
click the pairing button on the
transmitter.