1
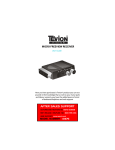
User Guide
DAB and FM Radio
With Clock, Alarm & Snooze Functions
Now you have purchased a Tevion® product you can rest
assured in the knowledge that as well as your 3 year parts
and labour warranty you have the added peace of mind
of dedicated helplines and web support
Contents
1
1.  Contents
2.  Welcome Section
3.  General Information and Safety Instructions
4.  Controls
5.  Instructions
6.  Warranty Card
Helpline No. UK/Northern Ireland 01270 508538 Rep. Ireland 1800 995 036
Web Support : www.quesh.co.uk
Model Number: 48451
2
1
Welcome Section
2
Congratulations!
You have made an excellent choice with the purchase of this quality Tevion®
product.
By doing so you now have the assurance and peace of mind which comes
from purchasing a product that has been manufactured to the highest
standards of performance and safety , supported by the high quality
standards of ALDI.
We want you to be completely satisfied with your purchase so this Tevion®
product is backed by a comprehensive manufacturer’s 3 year warranty and
an outstanding after sales service through our dedicated helpline.
We hope you enjoy using your product for many years to come.
If you require technical support or in the unlikely event that your purchase
is faulty please telephone our helpline for immediate assistance. Faulty
product claims made within the 3 year warranty period will be repaired or
replaced free of charge provided that you have a satisfactory proof of
purchase (keep your till receipt safe!). This does not affect your statutory
rights. However be aware that the warranty will become null and void if the
product is found to have been deliberately damaged, misused or
disassembled.
Helpline No. UK/Northern Ireland 01270 508538 Rep. Ireland 1800 995 036
Web Support : www.quesh.co.uk
Model Number: 48451
XXXXX
3
2
General Information and Safety Instructions
3
This DAB radio can be powered by 6 x AA batteries.
Do not dispose of batteries in your household waste.
Please contact your local authority for details on safe
disposal.
•  Never throw batteries into a fire or expose to excessive
heat sources.
•  If batteries are swallowed, please seek immediate medical
attention.
•  Always ensure correct +/- polarity when installing
batteries.
•  Do not recharge non rechargeable batteries.
Electrical and electronic equipment (EEE) contains
materials, parts and substances, which can be dangerous to
the environment and harmful to human health if waste of
electrical and electronic equipment (WEEE) is not disposed
of correctly.
Equipment, which is marked with the WEEE logo (as shown
on the left), should not be thrown away with your
household waste. Contact your Local Authority Waste
Disposal Department , as they will be able to provide details
of the recycling options available in your area.
Helpline No. UK/Northern Ireland 01270 508538 Rep. Ireland 1800 995 036
Web Support : www.quesh.co.uk
Model Number: 48451
XXXXX
3
3
Controls
4
1. Preset Keys (1-4 / 5-8)
2. Standby
3. DAB/FM Key
4. Alarm key
5. Auto Scan Key
6. Info Key
7. 4+ Key
8. Snooze Key
9. LCD Display
10. Tune/Select Dial
11. Power/Volume Dial
12. Speaker
13. Telescopic Antenna
14. 3.5mm Headphone Socket
15. DC Power Socket
16. Battery Door
(6 x AA-Size Batteries)
Helpline No. UK/Northern Ireland 01270 508538 Rep. Ireland 1800 995 036
Web Support : www.quesh.co.uk
Model Number: 48451
4
4
Instructions
5
Switching your radio on for the first time
1.  Connect the mains adaptor to the DC power socket of the radio and to
the power supply from the wall socket.
2.  Extend the aerial as far as it can go.
3.  The radio will automatically show.
4.  The radio will now sync, as you will see on the LCD display.
5.  The device will be checking the time by DAB signal, this can take up to
10 seconds.
6.  It takes around 2 minutes to search for DAB stations. if there are no
stations available it will display "SYNC FAIL". If you press the Tune/Select
button anytime during the scan, this will cancel the procedure. The
time will also show incorrectly, and "SYNC FAIL" will appear on the
screen again.
7.  If there is no DAB signal, or cancel the scan using the Tune/Select dial,
the LCD will display “NO SERV”
8.  During scan mode, the LCD will display a slide bar that indicates the
progress of scan and the amount of radio stations that have been
found so far.
Helpline No. UK/Northern Ireland 01270 508538 Rep. Ireland 1800 995 036
Web Support : www.quesh.co.uk
Model Number: 48451
5
5
7.  Once the scan has finished, the radio will select the first
alphanumerically found station.
If you cannot hear any sound, check the volume is switched on.
To explore the stations that have been found, you need to turn the “Tune/
Select” button anti-clockwise or clockwise. Every time you turn the tune
knob, you will skip to the next found station. When you find a station that
you would like to listen to, then press the ”Select ” key, after 5 Seconds, it
will auto select the current station which will be shown on the LCD .
8.  There is no DAB signal, you can find the station information
which you have previously listened to, it will display as “OFF
AIR”
Memory
When you switch on the radio, the radio will play the DAB mode with the
station that was in last operation or the FM radio that was last in operation.
DAB Mode
1.  Storing Stations - You can store up to 8 of your favourite stations to
the preset keys. This will enable you to access your favourite
station at the touch of one button. To store a preset, you must first
be listening to the station that you would like to save, then press
and hold one of the presets labeled 1-4 for 2 seconds. The LCD
will then show ”P# SAVED ”. If you want to save Radio 2 to Preset
5, you should press and the ”4 +” key to switch the Preset 1-4 to
Preset 5-8 station, then press and Hold the number 1 button at the
same time until ”P# SAVED ” appears in the display.
Helpline No. UK/Northern Ireland 01270 508538 Rep. Ireland 1800 995 036
Web Support : www.quesh.co.uk
Model Number: 48451
6
6
2.  Recalling a stored station. Once you have saved a station to one of the
presets, you can recall it by pressing and releasing the corresponding
preset key, e.g. if you saved Radio 1 to Preset 1, then just press the
number 1 preset key. If you press a preset that hasn’t been allocated a
station, then it will display ”EMPTY”. If you want to call ”preset 5 ”, you
should press and hold the ”4 + ” key, and then press number 1 button.
3.  Display mode
Helpline No. UK/Northern Ireland 01270 508538 Rep. Ireland 1800 995 036
Web Support : www.quesh.co.uk
Model Number: 48451
7
7
When you press the “Info” button, the display will cycle through
the following display modes
Helpline No. UK/Northern Ireland 01270 508538 Rep. Ireland 1800 995 036
Web Support : www.quesh.co.uk
Model Number: 48451
8
8
1.  Signal strength. The slide bar indicates how strong the
received signals are, the stronger the signal, the longer the bar
will be from left to right.
SHOWS THE SIGNAL STRENGTH
If the signal level drops below the fifth box (minimum signal level) then
you may experience problems with the quality of the audio.
Note: This signal strength is only for indicating DAB stations strength.
2.  Advanced display modes
3.  Auto scan modes
There are two types of auto scan, LOC (LOCAL) scan and the other is FULL
scan. LOC scan searches the local DAB bands III in your area and FULL scan
searches all UK band III DAB channels.
To activate the LOC scan press the ”Auto scan” button and for FULL scan
press and hold the ”Auto scan” button.
4.  Manual tune
As well as an auto tune function, you can manually tune the receiver.
This can help you when aligning your aerial or when adding stations
that were missed while auto tuning.
Press the ”Info” button and turn the ”Tune/Select” key to move the
menu, when the LCD display shows ”manual”. Then press the ”Tune/
Select” key to enter into manual tune mode. Now turn the “Tune/
Select” button to move through the DAB channels, which are
numbered from 5A to 13F.
Helpline No. UK/Northern Ireland 01270 508538 Rep. Ireland 1800 995 036
Web Support : www.quesh.co.uk
Model Number: 48451
9
9
5.  Set clock. Under DAB mode, the clock will synchronize automatically
and you do not have to adjust the clock manually. Turning the volume
button to the ’off’ position will turn the radio off and cause the clock to
reset. Please set the clock again when you turn on the radio. The
stored preset stations will not be affected. If the radio is in FM mode,
the clock needs to be set manually by pressing the ”Info” button once.
The ”SET CLOCK” menu will appear. Press the ”Tune/Select” button to
confirm.
6.  AUTO CLK. The device will check the time automatically.
7.  MANUAL CLK. Adjusting the tuning dial to set the hour and time. To
confirm the change, press the “Tune/Select” button.
8.  SLEEP. To set sleep time from 05 to 60 minutes, choose OFF to close
the “Sleep Time” setting.
9.  Time. This will display the time on-screen.
10.  CH Freq . This will display the current station frequency.
11.  Station . This displays the name of the station they are listening to.
12.  Version. This is the software version number. You may be
asked for this number if you encounter problems and need
assistance.
Helpline No. UK/Northern Ireland 01270 508538 Rep. Ireland 1800 995 036
Web Support : www.quesh.co.uk
10
Model Number: 48451
10
13.  System Reset. Press and hold the ”Info” button for 3 seconds. The
display will show “RESET”. There may be times when you need to reset
your receiver back to its original factory settings i.e. when you move
the radio to another part of the country. So that you can pick up the
local & national DAB stations in that area. If you don’t do this, then
when you select a station on the radio, it may no longer be available.
14.  Reset procedure. Press the “Tune/Select” key to confirm to start the
Reset. Please note that once the reset has taken place, you will lose all
of your stored presets both DAB and FM, and the internal DAB registry.
FM Mode
1.  Switching from DAB to FM, In order to switch the radio from DAB to FM
mode, you need to press the “ DAB/FM ” button once. The display will
show:
Helpline No. UK/Northern Ireland 01270 508538 Rep. Ireland 1800 995 036
Web Support : www.quesh.co.uk
Model Number: 48451
11
11
2.  Auto Scan. To search for FM stations, you need to press and then
release the “Autoscan” button. This will start scanning up the
frequency band. To scan up/down the frequency band, you
need to Turn the “Tune/Select” key up/down first, then press the
”Autoscan” button. Once a station has been found, the scan will
stop automatically. If no station is found, then the scan will stop
once it has cycled through the entire FM band (87.5-108MHz).
3.  When you press the “Info” button In FM mode, The display will
cycle through the following options:
4.  Clock
5.  Time
6.  Version
Helpline No. UK/Northern Ireland 01270 508538 Rep. Ireland 1800 995 036
Web Support : www.quesh.co.uk
Model Number: 48451
12
12
Alarm Mode
1.  Check Alarm Status. Under the condition of listening to the radio,
press the “alarm” button, the LCD will display the alarm mode.
Turn the “Tune/Select” button to set ALARM 1 or ALARM 2
Press down the “Tune/Select” button, and turn the dial to select “ON” or
“OFF”. Choose “OFF” to disable the alarm and return to the radio function.
Press the “Tune/Select” dial on “ON” to turn the alarm on, you will then
need to turn the dial to choose between “BUZZ”,”DAB” or “FM”. Choosing
”BUZZ” will set the alarm to a standard alarm tone, “DAB” will turn on the
DAB radio at the time of the set alarm, “FM” will turn on the FM radio at the
alarms set time.
Press down the ”Tune / Select” key to confirm the select.
For Radio Alarm, it plays the DAB or FM station that you tuned to before
you turned off the radio at the same volume level, if you don’t receive any
DAB station on DAB mode, the alarm function cannot be activated on DAB
mode.
2.  Setting Alarm Time. Select ”ON” and Press down “Tune/Select” button
to Set Alarm’s hour, turn “Tune/Select” button to change the hour.
Helpline No. UK/Northern Ireland 01270 508538 Rep. Ireland 1800 995 036
Web Support : www.quesh.co.uk
Model Number: 48451
13
13
3.  Press down ”Tune/Select” button to Set Alarm’s minute, turn ”Tune/Select”
button to change minute.
4.  Press down “Tune/Select” button to Set Alarm’s repeat mode, turn
“Tune/Select” button to change repeat mode. ”DAILY ” or ”ONCE” .
5.  Press down “Tune/Select” button to confirm the Alarm setting. The
display will return to the Radio Frequency screen. Press the “Standby”
button when you want to activate the Alarm.
When in standby mode, press the “Alarm” button to set the alarm
6.  When Alarm is Triggered. When the Alarm is set to “BUZZ”, the “BUZZ”
sound will be activated for 60 minutes when the Alarm is sounding, you
can press the “STANDBY” key to cancel the alarm.
7.  When the Alarm is set to DAB or FM, the DAB radio will switch from
standby mode to Radio mode when the alarm starts. The alarm will last
for 60 minutes. Press the ”Standby” key to cancel the alarm or return to
standby status.
Snooze Function
1.  To enable the Snooze feature, press the ”Snooze” button after the alarm
starts. The alarm will turn on every 5 minutes if the snooze function is
activated.
2.  Press “STANDBY” key to Cancel Snooze Function.
Helpline No. UK/Northern Ireland 01270 508538 Rep. Ireland 1800 995 036
Web Support : www.quesh.co.uk
Model Number: 48451
14
Standby
If you press “Standby”, the LCD display will show “Goodbye” and the clock
will appear. In standby mode, the device is dormant; pressing “Standby”
again reactivates the radio. You can also set the alarm in Standby mode by
pressing the “Alarm” key.
System Reset
Refer to page 11.
Signal Not Available
When there is no signal received after the Autoscan has been done, the
display will show “OFF AIR”. It may be due to a weak signal. Please check if
the Aerial has been pulled out and try again.
Should you experience any technical difficulties, in the first
instance please call our customer support team on the
number below as most issues can be resolved quickly over
the telephone.
Helpline No. UK/Northern Ireland 01270 508538 Rep. Ireland 1800 995 036
Web Support : www.quesh.co.uk
14
Model Number: 48451
15