1
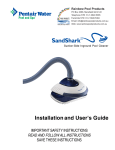
Suction-Side Inground Pool Cleaner
Installation and User's Guide
IMPORTANT SAFETY INSTRUCTIONS
READ AND FOLLOW ALL INSTRUCTIONS
SAVE THESE INSTRUCTIONS
i
Congratulations on purchasing the best pool-cleaning system in the world! Your new SandShark™ cleaner will
provide you with years of carefree pool enjoyment, as it efficiently vacuums your pool for you.
First, however, you’ll have to install SandShark™ and after installation, perhaps make some minor adjustments
and check to make sure the cleaner is operating properly. This manual also covers the steps needed to install
and adjust SandShark™.
Contents
Important Safety Precautions .............................................................................................. ii
General Installation Information ........................................................................................... iii
Warranty Information ........................................................................................................... iv
Section 1: Pool Preparation .............................................................................................. 1
SandShark™ Cleaner Assembly .............................................................................. 1
SandShark™ Hose Assembly .................................................................................. 2
Section 2: Installation ....................................................................................................... 3
Standard Installation ................................................................................................ 3
For Pools with one Skimmer, using the Vacuum Regulator ............................ 3-4
Optional Installation ................................................................................................. 5
Vac Port Installation with Vacuum Regulator in Skimmer ............................... 5-6
Section 3: Adjustments ..................................................................................................... 7
Hose Adjustments/Hose Balance ........................................................................... 7
Fine-tuning Valves and Connections ....................................................................... 8
Adjusting Flow ......................................................................................................... 8
Return Line Adjustments ......................................................................................... 9
Eyeball Diverter Positions ....................................................................................... 9
Installing the Eyeball Diverter .................................................................................. 9
In-Line Leaf Canisters ............................................................................................. 10
Section 4: Maintenance ..................................................................................................... 11
Cleaner and Hose Storage ...................................................................................... 11
Disassembly/Reassembly of the SandShark™ Cleaner .......................................... 12
Section 5: Troubleshooting .............................................................................................. 13
Section 6: Replacement Parts .......................................................................................... 14
SandShark™ Exploded View & Replacement Parts List .......................................... 14-15
Please record the serial number of your SandShark™ cleaner in the space below. This way if you need to refer to
the serial number in the future, (e.g. if you call the Customer Helpline), it will be readily available.
SandShark™ Serial Number
Activate SandShark’s Warranty
You will also need to record this serial number on the SandShark™ Warranty Registration Card. Complete and
return the card to activate the SandShark’s limited warranty. The registration card is self-addressed and postagepaid for your convenience. Please thoroughly review the warranty card and additional warranty information in
this Installation and Operation Manual so you are familiar with the terms of your warranty coverage.
SandShark™ Installation and User’s Guide
ii
IMPORTANT SAFETY PRECAUTIONS
Important Notice:
Attention Installer: This guide contains important information about the installation, operation and safe use of
this product. This information should be given to the owner and/or operator of this equipment after installation of the
pool cleaner.
Attention User: This manual contains important information that will help you in operating and maintaining this
pool cleaner. Please retain it for future reference. Consult Pentair Water with any questions regarding this equipment.
WARNING — Before installing this product, read and follow all warning notices and instructions which are
included. Failure to follow safety warnings and instructions can result in severe injury, death,
or property damage. Call (800) 831-7133 for additional free copies of these instructions.
Consumer Information and Safety
The SandShark™pool cleaners are designed and manufactured to provide many years of safe and reliable service when
installed, operated and maintained according to the information in this manual. Throughout the manual, safety warnings
and cautions are identified by the “ “ symbol. Be sure to read and comply with all of the warnings and cautions.
WARNING — Hazardous suction. Do not play with cleaner or hose or apply to body. Can trap and tear hair
or body parts. Hose can trip or entangle swimmers which could result in drowning.
WARNING — Suction entrapment, injury, and drowning hazard. If your pool has a dedicated suction port
(“vac port”) for vacuuming or for an automatic pool cleaner, it must be covered when not in
use. A spring loaded safety cover (a “vac port fitting”) is included with your cleaner. Install it on
the suction port to prevent entrapment and injury. If the cover provided does not fit, purchase one
that does from your local pool store and install it instead. The cover should conform to IAPMO
SPS4-99A.
WARNING — Stop pump before attempting to clean unit. Do not allow swimmers in pool while pool cleaner
is operating.
WARNING — To reduce the risk of injury, do not let children use or play with pool cleaner.
WARNING — Do not allow swimmers in the pool while pool cleaner is operating. Hose can trip or entangle
swimmers which could result in drowning.
CAUTION — Oscillator may injure hands or fingers. Stop pump before attempting to clean out pool cleaner
head.
SandShark™ Installation and User’s Guide
iii
GENERAL INSTALLATION INFORMATION
Pre-installation check list
Before installing your cleaner, review and understand all warnings and safety information in this guide. Failure to
follow these instructions or improper installation of the cleaner can result in damage to the pool finish or the vinyl
liner, Pentair Water Pool and Spa, Inc. disclaims any liability for repairs or replacement to any of these structures
or components of the customer’s pool.
Before installing the cleaner in a vinyl liner pool:
Check liner closely for signs of deterioration or damage from age, chemicals, pool wall damage, etc. If any
damage is found, have a qualified pool professional make all the necessary repairs. Also, if there are stones,
roots, etc., under the liner, remove them before installing the cleaner.
Before installing the cleaner in a gunite pool or a pool that is partially or completely tiled:
Repair loose tiles and tighten any loose light rings.
Before installing the cleaner, clean your filter system:
Make sure you have cleaned the filter, including backwashing, rinsing, and emptying all baskets. A clean
system is necessary for proper cleaner operation and coverage.
Before installing the cleaner, fill the hose with water:
Always make sure the cleaner head is submerged and the hose is full of water before connecting the hose to
the filtration system (whether through a skimmer or dedicated wall fitting). Air in the system can damage the
pump through dry running and overheating.
Before installing the cleaner, understand cleaner coverage:
The cleaner is designed to rid your pool of debris in approximately 4-6 hours. Less time could be needed,
depending on the pool size. The cleaner was not designed to automatically clean steps or swimouts or to
work under a solar cover. It was also not designed to do initial cleanup for a new pool or when opening your
pool for the season.
AFTER installing the cleaner, make sure the cleaner is operating correctly :
The cleaner may need some minor adjustments to make sure it is operating properly so there is no damage
to the pool finish. Certain vinyl liner patterns are particularly susceptible to surface wear, pattern removal, ink
rubbing off of, or serious scratches to the pattern caused by objects coming into contact with the vinyl surface,
including automatic pool cleaners. Pentair Water Pool and Spa, Inc. is not responsible for any pattern removal,
abrasions or markings on vinyl liners.
SandShark™ Installation and User’s Guide
iv
WARRANTY INFORMATION
Limited Warranty Terms & Conditions
Before installing your cleaner, review and understand all warnings, safety and warranty information in this guide. Failure to follow these
instructions or improper installation of the cleaner can result in damage to the pool finish or the vinyl liner, Pentair Water Pool and Spa, Inc.
disclaims any liability for repairs or replacement to any of these structures or components of the customer’s pool.
The Cleaner manufacturer, Pentair Water Pool and Spa, Inc. (“Manufacturer”), hereby provides the following limited warranty to the
purchaser (“Customer”): WHICH IS SUBJECT ONLY TO THE FOLLOWING CONDITIONS AND EXCLUSIONS:
This limited warranty does not include replacement of parts which become discolored due to exposure to sunlight or chemicals, or parts
which, even if worn, do not affect performance of the cleaner. Nicks, scratches, fading, discoloration, etc. are cosmetic conditions that
do not affect mechanical performance. Both Manufacturer and Pentair Water Pool and Spa’s dealer reserve the right to deny
any and all warranty claims made for worn parts if the wear does not negatively affect mechanical performance of the
cleaner.
The Cleaner is designed to function in a properly designed, constructed and maintained pool. This limited warranty does not extend in the
circumstances where the pool’s design, construction or maintenance is defective, substandard or inappropriate for the Cleaner’s
operation.
Deterioration, discoloration or brittleness of any pool finish can be caused over time separately by, or in combination with, age, an
imbalance in water chemistry, improper installation, and other factors. Customer hereby disclaims any and all claims, and releases
Manufacturer from any and all claims for damages to any pool plaster or vinyl liner in Customer’s pool by reason of the use and/or
operation of the Cleaner.
Under no circumstances shall Manufacturer be liable for any loss or damage, whether direct, consequential or incidental, arising out of the
use or inability to use the Cleaner or the Hose in Customer’s pool.
This limited warranty does not apply to any injury, loss, damage, defect, or malfunction of the Cleaner or failure to function resulting from
any failure to operate or maintain the Cleaner in accordance with the directions contained in the Installation and Operation Manual or
operating instructions provided by Pentair Water Pool and Spa or any injury, loss, damage, defect, or malfunction, or failure to function
resulting from any accident, acts of God, alterations in the Cleaner by anyone other than Manufacturer; or misuse, unreasonable use,
tampering, abuse, acts, omissions, failure or negligence by anyone other than Manufacturer including but not limited to such damages
or injuries to parts resulting from improper installation, or damage to pump parts resulting from running the pump dry (e.g., interruption
in or inadequate supply of water to internal pump parts due to loss of prime, or obstruction in lines or otherwise); or damage, defect or
malfunction resulting from defects in, failure or malfunction of, or negligence, abuse, or misuse with respect to equipment other than the
Cleaner; or any damage or loss of any nature whatsoever and personal injury caused due to the presence of a foreign object in or about
the pool.
Disclaimer of Liability About Your Pool and SandShark™
There are a multitude of factors that contribute to the life of your pool. The SandShark™automatic pool cleaner is a very passive product
that will have no impact on pool life.
Please be aware that over time, deterioration, discoloration and brittleness of any pool finish can be caused separately by, or in combination
with, age, an imbalance in pool water chemistry, improper installation and other factors. An automatic pool cleaner, such as SandShark™,
will not remove or cause wear on “good” pool plaster. In fact, the opposite is true–pool plaster will eventually cause wear on the cleaner.
The same situation holds true for vinyl-lined in-ground swimming pools, because vinyl liners are also affected by the environment and
factors such as pool water chemistry, sunlight and the pool’s surroundings. Therefore over time, vinyl can become brittle and weak. In
addition, vinyl-lined pools are affected by the workmanship, composition and installation of the liner and the workmanship and quality of
construction of the supporting walls and pool base. These are all factors which can contribute to liner failure. The existence of any of
these type of conditions in your pool is not caused by the use or operation of SandShark™. The manufacturer disclaims any liability for
repairs or replacement to any of these structures or components of the customer’s pool.
The pool owner must assume all responsibility for the condition and maintenance of the pool’s surface, water and deck.
SandShark™ Installation and User’s Guide
1
Section 1
Pool Preparation
The following general information describes how to set-up your new SandShark™ automatic pool cleaner.
NOTE: Before setting up this product, read and follow all warning notices and instructions starting
on page ii.
Preparation of your pool
Before you assemble and install your new SandShark™ automatic pool cleaner, you should make sure that
your pool is clean and free of algae. If necessary, make the following preparations before proceeding:
•
Chemically balance the pool water
•
Brush the pool and let the debris settle
•
Hand vacuum the pool thoroughly
•
Backwash and clean the filter and clean the pump
strainer basket, (see Figure 1)
Skimmer
Basket
Pump
Strainer
Cleaner Assembly
Check Parts
Remove the Cleaner and all of its parts from the box and
check to make sure that all components were included,
(see Figure 2).
■
Pool Cleaner
Short Leader Hose
(1 Length, 12 inches)
■
Hose (10 Lengths, 40 inches)
■
Hose Weights (2)
■
Eyeball diverters (2)
■
Reducer Cone
■
Vac Port Fitting
■
Regulator
■
■
Regulator Cap
■
Flow Gauge
Figure 1.
Hose Weights
Eyeball
Reducer
Cone
Guage
Vac Port Fitting
Regulator Regulator
Cap
Pool Cleaner
Figure 2.
SandShark™ Installation and User’s Guide
2
Assemble the Hose
Connect the Hose Sections
M l H
For best results and to maintain proper operation, use only original
hoses, or direct replacements, (see Replacement Parts page).
E d
1. A special “leader” hose section (12 inches long) is
designed to connect to the cleaner and is marked with a
red label, (see Figures 3 & 4). Failure to use this leader hose
section will hinder your cleaner’s performance.
2. Connect the hose sections by twisting and pushing the female
ends onto the male ends after wetting the ends in the pool,
(see Figure 5).
Leader Hose
with red label marked
"Connect to Cleaner"
Figure 3.
3. Make sure the connections are snug. The number of sections
that you will need depends on the size of your pool.
4. The overall length of hose needed will be the distance from:
the point at which you attach the hose to the suction
connection, to the furthest point in the pool, plus one
hose length, plus the leader hose, (see Figure 6).
Leader Hose
marked
"Connect
to Cleaner"
Figure 4.
Figure 5.
Figure 6.
Hose
must
eq
ual lo
ngest
stretc
h ——
plus o
ne len
gth leade
hose r
Add one hose weight to the third cuff from the Cleaner
SandShark™ Installation and User’s Guide
3
Section 2
Installation
This section describes how to install your new pool cleaner. The SandShark™ is designed to work in a wide
variety of swimming pools. Both the standard in-skimmer installation and optional vac port installation are
covered in these Instructions. If your pool configuration is unlike any of the examples, contact your Pentair
Water Pool and Spa dealer for assistance, or call our toll-free Customer Helpline at 1-800-831-7133.
Standard Installation
Skimmer
WARNING — Hazardous suction. Suction through the SandShark™can entrap bathers,
causing severe injuries or drowning. Do not operate the SandShark™
cleaner while people are using the swimming pool. Do not allow anyone
to play with the cleaner or its hoses.
For Pools with one Skimmer, using the Vacuum Regulator
The advantage of this installation is its use of the vacuum regulator to balance the water
flow between the pool’s skimmer, (see Figure 7), and the SandShark™. The vacuum
regulator, (see Figure 8), can be adjusted to changes in the amount of water flow to
provide the SandShark™ with the power necessary to ensure proper cleaning performance,
and we strongly recommend the use of the vacuum regulator valve for maximum
safety and performance.
Figure 7.
Vacuum
Regulator
1. Turn the pool pump off.
2. Adjust valves for vacuuming. Adjust the pump valves (if your system has valves) to
direct all suction to the skimmer. Close the main drain and all suction lines, except the
line from the skimmer to which the SandShark™ will be connected.
Figure 8.
Reducer
Cone
3. Remove the skimmer basket from the skimmer.
4. The vacuum regulator must be installed in conjunction with the reducer cone, (see
Figures 8 and 9). The reducer cone is required to make most skimmer connections.
It will keep the hose and vacuum regulator in place once the filter system is stopped.
5. To install the vacuum regulator, insert it and the reducer cone in the
skimmer. Attach the end of the hose to the regulator, (see Figure 10).
Make sure the vacuum regulator is submerged at all times. If not, the
pump will suck air and lose prime. This could damage the pump.
6. Submerge the hose so it fills with water and expels air from the hose. Attach
one end of the hose to the vacuum source as described above. Keep the
other end of the hose accessible.
Skimmer
Figure 9.
Figure 10.
Vacuum
Regulator
Reducer Cone
To Pump
Vacuum regulator installed in the skimmer with the
hose attached.
SandShark™ Installation and User’s Guide
4
Standard Installation, cont’d.
Adjust Flow
Figure 11.
1. With the main drain closed, and one end of the hose attached to the vacuum
regulator installed in the skimmer, insert the flow gauge into the other end of
the hose (the end with the “leader” hose attached).
Disc Indicator
2. Keep the hose and flow gauge underwater.
3. Turn on the pump. With the pump running, adjust the vacuum regulator
(in your skimmer) until the indicator on the flow gauge is between minimum and
maximum flow, (see Figure 11).
Flow Indicated on Flow Gauge.
4. Use the vacuum regulator in conjunction with your pool cleaner system at all
times. The vacuum regulator has an adjustment knob, (see Figure 12).
If suction is too high, the knob is turned counterclockwise to decrease the
suction. If the suction is too low, the knob is turned clockwise to increase the
suction.
NOTE: The flow gauge is calibrated for use with the “Y” shaped vacuum
regulator valve. The flow gauge will not indicate the correct flow for the cleaner
if you are not using the “Y” shaped vacuum regulator valve.
Vacuum
Regulator
Figure 12.
Adjustment
Knob
5. Remove the flow gauge from the end of the hose (the end with the “leader”
hose attached) and attach the “leader” hose to the cleaner’s swivel.
Leader Hose
marked
"Connect
to Cleaner"
Connect the Hose to the Cleaner
1. Connect the leader hose to the cleaner (correct end of hose is marked
with a red label), (see Figure 13).
2. Fill the cleaner with water and let it sink to the bottom, (see Figure 14).
3. Verify hose connections as shown in Figure 15.
Figure 13.
SandShark cleaner
The hose must equal the longest distance from the suction connection
to the furthest point in the pool, plus one hose section length,
plus the 12 in. leader hose.
Short, 12 in.
Leader hose
must be
installed
Second hose
Section
Figure 15.
SandShark™ Installation and User’s Guide
Third hose
Section
Fourth hose
Section
Figure 14.
5
Optional Installation
WARNING — Suction entrapment, injury, and drowning hazard. If your pool has a dedicated suction port
(“vac port”) for vacuuming or for an automatic pool cleaner, it must be covered when not in use.
Vac Port Installation with Vacuum Regulator in Skimmer
If your pool has a dedicated wall fitting “vac port”, (see Figure 16), you can install the SandShark™ using the
Optional Installation.
1. Turn the pool pump off.
2. Adjust valves for vacuuming. Adjust the pump valves (if your system has valves)
to direct all suction to the dedicated vacuum line and the skimmer. Close the main
drain and all remaining suction lines, except the line from the dedicated vacuum line
to which your SandShark™ cleaner will be connected, and the skimmer where the
vacuum regulator will be installed.
3. A spring loaded safety cover, (“vac port fitting”), is included with this pool cleaner
(see Figure 17). Install it on the dedicated vacuum line to prevent entrapment and
injury. For details please refer to the Vac Port Instruction sheet included with your
vac port fitting. To install the included vac port fitting:
Vac
Port
Figure 16.
a. Screw the vac port fitting into the dedicated vacuum line opening.
b. Orient the vac port fitting so the arrow on the door points up.
c. Secure the cover by tightening the Allen-screw below the door, into the dedicated
vacuum line fitting.
Figure 17.
4. Remove the skimmer basket from the skimmer, (see Figure 18).
WARNING — Hazardous suction. Can cause entrapment with severe
personal injury or drowning.
5. Insert the vacuum regulator and reducer cone in the skimmer,
(see Figure 19). To prevent water from flowing through the top of the
vacuum regulator, attach the regulator cap to the vacuum regulator.
Skimmer
Basket
Figure 18.
6. Attach the end of the hose to the vac port fitting installed in the
dedicated vacuum line, (see Figure 20).
Skimmer
Figure 19.
Hose
End
Regulator
Cap
Vac Port
Fitting
Vacuum
Regulator
Reducer Cone
To Pump
Figure 20.
SandShark™ Installation and User’s Guide
6
Optional Installation, cont’d.
Adjust Flow
Figure 21.
1. With the main drain closed, and one end of the hose attached to the vacuum
regulator installed in the skimmer, insert the flow gauge into the other end of
the hose (the end with the “leader” hose attached).
Disc Indicator
2. Keep the hose and flow gauge underwater.
3. Turn on the pump. With the pump running, adjust the vacuum regulator
(in your skimmer) until the indicator on the flow gauge is between minimum and
maximum flow (Figure 21).
Flow Indicated on Flow Gauge.
4. Use the vacuum regulator in conjunction with your pool cleaner system at all
times. The vacuum regulator has an adjustment knob, (see Figure 22). If
suction is too high, the knob is turned counterclockwise to decrease the
suction. If the suction is too low, the knob is turned clockwise to increase the
suction.
NOTE: The flow gauge is calibrated for use with the “Y” shaped vacuum
regulator valve. The flow gauge will not indicate the correct flow for the
cleaner if you are not using the “Y” shaped vacuum regulator valve.
Vacuum
Regulator
Figure 22.
Adjustment
Knob
5. Remove the flow gauge from the end of the hose (the end with the “leader”
hose attached) and attach the “leader” hose to the cleaner’s swivel.
Connect the Hose to the Cleaner
Leader Hose
marked
"Connect
to Cleaner"
1. Connect the leader hose to the cleaner (correct end of hose is marked
with a red label), (see Figure 23).
2. Fill the cleaner with water and let it sink to the bottom, (see Figure 24).
3. Verify hose connections as shown in Figure 25.
Figure 23.
SandShark cleaner
The hose must equal the longest distance from the suction connection
to the furthest point in the pool, plus one hose section length,
plus the 12 in. leader hose.
Short, 12 in.
Leader hose
must be
installed
Second hose
Section
Figure 25.
SandShark™ Installation and User’s Guide
Third hose
Section
Fourth hose
Section
Figure 24.
7
Section 3
Adjustments
After completing the installation, turn the pool pump on and allow it to run for a couple of minutes to ensure that
all air cycles out of the system. The SandShark™ should be moving about the pool at a rate of 10 to 14 feet per
minute. Check each of the following initial adjustments as described in this section to the SandShark™ at this time.
NOTICE: Each pool’s hydraulic system and vacuum connections are different. Be sure you have installed the
vacuum regulator before you “fine-tune” the system. This not only regulates vacuum, but also acts as a safety device.
WARNING — Suction entrapment, injury, and drowning hazard. If your pool has a dedicated suction port
(“vac port”) for vacuuming or for an automatic pool cleaner, it must be covered when not in use. A
spring loaded safety cover (the “Vac Port Fitting”) is included with this pool cleaner. Install it on the
vac port to prevent entrapment and injury. For details please refer to the Vac Port Fitting instruction
sheet included with your cleaner.
Hose Adjustments
Hose Length
IMPORTANT: The pump must be on when you check the hose length. The hose contracts when the pump is
operating and will be longer when the pump is off.
With the SandShark™ operating, position it at the furthest point of the pool from where it’s attached. (It is easy to
position SandShark™ in the pool by moving it about with your pool pole and brush.) SandShark’s hose should be
long enough to reach the end of the pool, plus one hose section, plus the 12 in. leader hose. If necessary, remove
extra hose sections from the center portion of the hose. Removing center hose sections avoids having to disturb
the hose weight placement. Save extra hose sections for use as needed for replacement.
NOTE: Turn pool pump off when adding or removing hose sections.
Hose Balance
It may or may not be necessary to add weight to your hose, depending on your pool’s size, shape, and depth. Try
the cleaner first without any hose weights. If the hose is too buoyant, add the weight as shown in Figure 26.
To determine correct hose balance,
turn the pump off and observe
SandShark™. Hose balance is correct
when SandShark’s rests flat on the
pool floor. SandShark™ achieves the
best cleaning coverage when the hose
neither weighs down nor pulls up on
the unit. Adjust hose weights one inch
at a time as needed, until proper hose
balance is achieved. In pools with both
shallow and deep areas, adjust hose
weights first in the deep area and then
in the shallow area.
SandShark
cleaner
Short leader
No weight on these
hose cuffs.
Second hose
Section
Attach first hose weight
1" back from the end of
the third hose section
Third hose
Section
Fourth hose
Section
Attach second hose weight 1" back from the
end of the fifth section for pools deeper than 6 feet.
Figure 26.
SandShark™ Installation and User’s Guide
8
Adjusting the Flow
1. Turn the pool pump off. Remove the Cleaner and connect the Flow Gauge to
the end of the hose, make sure you keep the hose submerged to prevent any
air to enter into it, (see Figure 27). Then turn the pump on.
2. With the pump running, turn the Adjustment Knob of the Regulator Valve
“Faster” or “Slower” until the disc indicator in the Flow Gauge settles between
“Maximum” and “Minimum” flow, (see Figure 28).
NOTE: If you have very strong pump and the flow is still over the
“Maximum” you may need to open the main drain only slightly.
Figure 27.
Flow Gauge
3. Turn the pool pump off. Remove the Flow Gauge and connect the Cleaner to
the end of the hose, make sure you keep the hose submerged to prevent any
air to enter into it. Allow the cleaner to drop to the pool floor. Then turn the
pump on.
Too much Vacuum Flow?
You have too much vacuum if the cleaner climbs up the pool wall past the water
line to the point that the cleaner sucks air and the pump loses prime. Frequent
loss of prime will damage the pump. To correct this, adjust the regulator by
turning the adjustment knob counterclockwise. This will decrease the suction. If
the cleaner still climbs out and sucks air, open the main drain valve slightly.
Adjustment
Knob
Figure 28.
Not enough Vacuum Flow?
You don’t have enough vacuum if the cleaner does not climb the pool walls, moves sluggishly, or not at all. Be
sure the filter system is clean and the regulator and all valves are adjusted to give you maximum vacuum. If the
cleaner is still not moving, your pump may not be strong enough to operate the cleaner. Please refer to the
“Troubleshooting Section” on page 13.
SandShark™ Installation and User’s Guide
9
Return Line Water Flow Adjustments
Important: The cleaner must move randomly throughout the pool. Water circulating at the surface will influence
the hose thus limiting the SandShark’s coverage. It may cause the SandShark™ to steer away from the end of
the pool where the return line is located, or it may cause the SandShark™ to remain in one section of the pool.
To correct this, use the eyeball diverter included with your SandShark™. (If the eyeball does not fit your pool,
use the wire diverter (P/N K121620) accessory available for purchase from your Pentair Water Pool and Spa
dealer.)
Eyeball Diverter Positions
BEFORE ADJUSTMENT
1. Position the diverter opening to
redirect the return line water
flow so it does not interfere with
the SandShark’s movement as
shown in Figure 29.
TOP VIEW
2. To adjust the Eyeball Diverters;
loosen the lock ring and redirect
the Eyeball Diverters slightly
downwards and also try different
directions to see what works best
in your pool.
SIDE VIEW
AFTER ADJUSTMENT
TOP VIEW
•
•
•
SIDE VIEW
Figure 29.
flow directed along the side of
pool (the tile line).
flow directed downward.
flow directed against the hose will help steer the SandShark™ away from
obstructions such as stairs and ladders.
Allow time for the body of water to settle into the new pattern.
3. If it is difficult to adjust your existing Eyeball Diverters, replace the eyeball component
with the new Eyeball Diverters (included).
To install the eyeball diverter:
1. First make sure your pool pump is off.
Remove the original eyeball from the return
line at the pool by unscrewing the lock ring.
Pool Deck
3. Replace the original eyeball with the
SandShark’s eyeball diverter, (see Figure 30).
Pool Wall
4. Replace the lock ring and tighten. Make
sure the opening of the eyeball diverter
points in the proper direction before
tightening fully. See “Eyeball Diverter
Positions” above.
Eyeball Diveter
P/N 41201-0236
5. After installing the eyeball diverter, turn
the pool pump on. The SandShark™ should
begin moving across the pool floor vacuuming
up debris in its path.
Wire Diveter (optional)
P/N K121620
Eyeball
Fitting
Return
Line
Eyeball Diverter
Lock
(Retaining)
Ring
Figure 30.
SandShark™ Installation and User’s Guide
10
In-Line Leaf Canisters
If your pool is exposed to large quantities of leaves, we suggest purchasing and installing
an in-line leaf canister, (P/N R211084 or R211086), see Figure 31. A leaf canister will
provide more debris-loading capacity and also provides a water by-pass when the canister
is full. It is very important that the pump will not starve for water!
Figure 31.
SandShark™ Installation and User’s Guide
11
Section 4
Maintenance
This section describes the service and maintenance of your SandShark™ cleaner.
WARNING — Hazardous suction. Suction through the cleaner can entrap bathers, causing severe injuries or
drowning. Do not operate the SandShark™ cleaner while people are using the swimming pool. Do
not allow anyone to play with the SandShark™ cleaner or its hoses.
Your new pool cleaner requires almost no maintenance. Manually open and close the regulator valve from time to
time to flush away accumulated dirt and debris and ensure smooth operation. Also, from time to time, visually
inspect the SandShark™ to be sure that:
• The oscillator moves freely and is not obstructed by debris.
• The vacuum pad is not excessively worn. When the traction pads on the bottom have worn down, it’s time for
replacement.
• Keep skimmer basket and pump strainer basket clean and free of debris.
• Remove the pool cleaner from the pool before super chlorinating (shocking) or chemical balancing. Wait at
least four hours after the chemical procedure before reinstalling the cleaner.
• If cleaner jams with large debris (leaves, sticks, etc.), clean the debris from bottom of unit.
• When people are using the pool, disconnect the cleaner and pull it to one side of the pool.
• We recommend that you leave the SandShark™ cleaner in your pool, except during chemical shock
treatments.
Hose Storage
NOTICE: When storing the SandShark™, do not coil the hose. Instead, lay it out straight and flat in an area
protected from direct sunlight. If hose sections are disconnected, try not to disturb the hose weight locations. Use
only a genuine SandShark™ hose. The warranty is void if the cleaner is operated with another hose other than a
genuine SandShark™ hose.
•
•
•
Remove the hose from the cleaner
when removing the cleaner from
the pool. Store the hose flat and
straight.
Don't store the cleaner with the
hose connected to the cleaner
body or with the hose coiled, see
(Figure 32). To do so will cause
the hose to take a set or kink over
a period of time. When reinstalled
in the pool, the hose will tend to
stay coiled and will cause the
cleaner to malfunction.
Figure 32.
HOSE STORAGE
Best: Hose stored correctly – laid
out straight, not connected to
cleaner.
Wrong: Storing cleaner with hose
connected will damage hose and
void the hose warranty.
If the hose has taken a set, uncoil
it as far as possible without
damaging it and lay it out in the
sun for several hours to straighten itself. Once it has relaxed and straightened out, store it laid out flat and
straight (no coiling).
SandShark™ Installation and User’s Guide
12
Disassembly
1. With a screwdriver, carefully work the rubber vacuum pad down over the
lip of the Outer Housing, (see Figure 33).
2. Lift the Outer Housing straight up off of the chassis, (see Figure 34).
3. Squeeze and pull the Sprocket Clips to release the Drive Shaft Assembly
and Center Sprocket, (see Figure 35).
Figure 33.
4. Pull the Oscillator Straight out from the bottom of the Outer Housing.
Be careful not to lose the Sliding Seals, (see Figure 36).
5. Squeeze the latching tabs and pull up on the Swivel Housing and Swivel.
The assembly will come up, releasing the Swivel Sprocket. Squeeze the
latching tabs to remove the Clutch Clip, (see Figure 37).
6. Remove the Shaft Plug with the stainless steel shaft and the Large
Steering Drive Assembly, (see Figure 38).
7. Remove the Oscillator Sleeve, releasing the Oscillator Sleeve Bushing
and the Clutch assembly, (see Figure 39).
8. If you need to replace the bumper, turn the housing/bumper assembly upside
down and remove the two flex snaps holding the bumper to the housing, (see
Figures 40 & 41). Use a piece of ½ in. (inside diameter) PVC pipe to slide
over the flex snap ends to squeeze the flex snaps together so they can be slid
out of the housing. Use a pair of pliers to
pop the flex snaps off of the bumper.
Figure 34.
Use a pair of Pliers to pull the
Flex Snaps from the Bumper
Figure 35.
Reassembly
To reassemble the SandShark™, reverse the
steps above.
NOTE: The notch on the center disk of the
Large Steering Drive Assembly must be down,
(as shown in Figure 42), for assembly.
Figure 41.
Use a piece of ½ in.
PVC pipe (inside diameter)
to push the Flex Snaps
out of the Housing
Figure 36.
Figure 42.
SandShark™ Installation and User’s Guide
Figure 40.
Figure 37.
Figure 39.
Figure 38.
13
Section 5
Troubleshooting
Use the following troubleshooting information to resolve possible problems with your SandShark™ pool cleaner.
Problem
Corrective Action
If SandShark™ moves slow or fails to climb walls:
Dirty filter –
Dirty basket in pump hair and lint strainer –
Debris blocking the bottom of the cleaner –
Leaks in the hose –
Debris in the regulator –
Low water flow through the cleaner –
Clean the filter.
Clean the basket.
Remove the Debris.
Remove the leaky section.
Clean the regulator valve.
Close the main drain.
If SandShark™ doesn’t move or pulsates slowly
or doesn’t climb pool walls properly:
Make sure that the main drain and all other suction lines are closed except the suction line
to which the SandShark™ is attached.
Check for sufficient flow through cleaner hose.
Check for debris in the filter or the pump strainer basket.
Check for debris in the SandShark’s oscillator. Debris may prevent oscillator movement
or restrict the flow through the cleaner.
Check the oscillator for: damage; lost seals (there should be 4 seals): obstructed seals
(seals should slide freely on the oscillator).
Be sure that the short, soft flexible leader hose section is the first section in the hose
assembly (next to the cleaner).
If SandShark™ climbs pool wall to water surface
and sucks air:
Reduce water flow through cleaner, see Adjust Flow on page 4, 6 or 8.
The water flow from the return line can push the
SandShark’s hose, causing the SandShark™ to steer
away from the return line or to remain in one area of
the pool. To correct this, adjust your existing return
line diverters or install the eyeball diverters supplied
with the SandShark™cleaner:
To install the eyeball diverter as follows:
A. Turn off the main circulation pump.
B. Unscrew the lock rings from the pool’s return line fittings and remove the original
eyeball diverters.
C. Replace them with the SandShark’s eyeball diverters.
D. Replace the lock rings and tighten them. Be sure that the openings of the eyeball
diverters point down (6:00 o’clock position) or to the side (3:00 or 9:00 o’clock
positions), before fully tightening the rings.
Usually, directing the return line water flow against the side of the pool
(as described above) works best. However, you may want to try pointing the
flow downward or in different positions to see which works best in the pool.
After installing the eyeball diverter, turn the circulation pump on.
The SandShark™should begin moving across the pool floor, vacuuming up
the debris in its path.
E. If the SandShark’s eyeball diverters do not fit your existing return line fittings,
adjust your existing fittings as best you can as described above.
If SandShark™ tracks in a repetitive pattern:
Check the pool return line water flow and redirect it as necessary with a return line
eyeball diverter (see above “To install the eyeball diverter”).
Check the SandShark’s hose to be sure that it has not become bent or kinked. Do not
coil the hose, as it will retain the coiled shape and reduce the cleaning coverage.
To check the hose, lay each hose section flat on the pool deck (or another flat surface)
and look down the length of the hose. It should be perfectly flat and straight. Replace any
sections which are bent or kinked.
Check the oscillator for: damage; lost seals (there should be 4 seals): obstructed seals
(seals should slide freely on the oscillator).
Be sure that the short, soft flexible leader hose section is the first section in the hose
assembly (next to the cleaner).
SandShark™ Installation and User’s Guide
14
Section 6
Replacement Parts
SandShark™ 7900 Model
23
24
1
2
3
10
22
4
21
5
6
20
7
19
18
8
9
10
17
11
12
16
13
15
12
14
14
SandShark™ Installation and User’s Guide
15
Replacement Parts List for the SandShark™ 7900 Model
Item
No.
Description
Qty.
2
3
4
22
Steering Kit (Incl. Item Nº's 2, 3, 4 & 22)
Swivel Housing
Swivel
Swivel Sprocket
Clutch Clip
5
8
21
Clutch Kit (Incl. Item Nº's 5, 8 & 21)
Oscillator Sleeve Bushing
Oscillator Sleeve
Clutch Assembly
1
1
1
6
10
11
17
19
20
Gear Kit (Incl. Item Nº's 6,10,11,17,19 & 20)
Large Steering Drive Assembly
Shaft Plug
Long Sprocket Clip
Drive Shaft Assembly
Center Sprocket
Short Sprocket Clip
1
2
1
1
1
1
12
13
14
Oscillator Kit (Incl. Item Nº's 12,13 & 14)
Small Sliding Seal
Oscillator
Large Sliding Seal
2
1
2
15
16
Seal Flap Kit (Incl. Item Nº's 15 & 16)
Right Seal Flap
Left seal Flap
1
1
1
18
23
24
Outer Housing
Chassis with Pad
Bumper with Flex Snaps
Flex Snaps Kit
7
9
GW7910
1
GW7503
GW7504
GW7912
GW7913
1
1
1
Accessory Kit (Not shown)
Regulator
Regulator Cap
Hose Weight
Flow Gage
Reducer Cone
Eyeball Diverter
Vac Port Fitting
1
1
2
1
1
2
1
Short Leader Hose
Suction Hose, 12 in. Section
1
10
Parts Not Available Separately
Support Brace
Stainless Steel Axle
P/N
GW7903
41201-0242W
GW7902
GW7904
GW7901
41201-0236
GW7911
41201-0254
1
1
SAVE THESE INSTRUCTIONS
SandShark™ Installation and User’s Guide
P/N 39503-6300
Rev. A
10/27/08