1
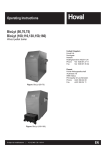
EN Operating Instructions Room station RS-T Hoval United Kingdom Hoval LTD Northgate Newark Nottinghamshire NG24 1JN Phone: +44 1636 67 27 11 Fax: +44 1636 67 35 32 Hoval Export Hovalwerk AG Austrasse 70 9490 Vaduz Principality of Liechtenstein Phone: +423 399 24 00 Fax: +423 399 26 18 4 204 764 / 00 - 11/07 Subject to modifications Table of contents 4 204 764 / 00 - 11/07 Heating system control............................................................................................................ 3-31 Operating and display elements Room station RS-T............................................................................................................................................... 3 Function of the operating elements...................................................................................................................... 4 What to do if......................................................................................................................................................... 5 Control elements of the boiler control................................................................................................................ 6-7 Adjusting the domestic hot water Adjusting the domestic hot water temperature.............................................................................................. 20-21 Manual domestic hot water reloading................................................................................................................. 21 Domestic hot water economy temperature.................................................................................................... 22-23 Further settings Setting the clock............................................................................................................................................ 24-25 Setting the date.................................................................................................................................................. 25 Changing between summer and winter time...................................................................................................... 25 Setting the language.......................................................................................................................................... 26 Reloading the standard switching times program - Deleting the own time program..................................... 27-28 Alarm messages................................................................................................................................................ 29 System information Information key for system temperatures and heating circuit information.......................................................... 30 Special symbols................................................................................................................................................. 31 Main settings Changing the room temperature....................................................................................................................... 8-9 Holiday, absent, constant reduced heating......................................................................................................... 10 Setting the operating mode (holiday, absent, party, automatic, summer, heating, reduced, standby)....... 11-13 Changing the switching times (heating times)............................................................................................... 14-16 Copying of switching times............................................................................................................................ 17-18 Heating curve (heating characteristic)........................................................................................................... 19-20 Heating system control 4 204 764 / 00 - 11/07 Room station RS-T The room station RS-T does not only serve for the remote controle your heating but also at the same time the temperature in the living room. Settings (e.g. room temperature) can be both at the room station RS-T and directly at the boiler control panel. Important addresses and telephone numbers Heating installer Plumbing installer Electrical installer Technical data (To be completed by the heating installer) Information for the plant user: Room station available x Number of heating circuits: Heating circuits 1 2 3 Adjusted heating curve value Heating circuit HC =_ ____________ ______________ Heating circuit MC1 = _____________ ______________ Heating circuit MC2 = _____________ ______________ Switching time program P2, P3 released: yes no Heating system control 4 204 764 / 00 - 11/07 Function of the operating elements The central rotary pushbutton and the labelled keys are designed for easy and straightforward operation. Function keys Function keys Rotary pushbutton: Change and store values Basic procedure for changing settings An example Select the desired function Turn the rotary pushbutton to select or change the desired parameter (flashing word or number). Press the Info key at any time to go back to the basic display without storing the values set. Press the rotary pushbutton to store the value set. It is also possible to store the value using the selected function key. Heating system control 4 204 764 / 00 - 11/07 What to do if... The following information can be used as a first level support in frequently occurring situations. Observation Remedy It is too cold Set a higher value for the room temperature with rotary pushbutton (see page 8,13). It is too warm Set a lower value for the room temperature with and the rotary pushbutton or set the operating mode to ì (page 9,13). From now on, equal day and night temperatures should be maintained continuously Set the operating mode with (page 12,13). This evening, the heating should remain on for longer Set the operating mode with desired time (page 11). A larger amount of hot water is required Press (page 21). From now on, hot water but no heating is required Set operating mode with water only) (page 12,13). Suddenly, there is no heating or hot water; it is cold. Check the control unit for alarm messages and consult a heating engineer, if necessary. The room temperature setpoint requires frequent adjustments because it is too cold or too hot Change the adjusted heating curve (page 19). Today, I will be absent for several hours during the day Set the operating mode with the return time (page 10,11). I am travelling for a short period of time (e.g. 3 days) Set the operating mode with the return time (page 19). I will be travelling for an indefinite period of time Set the operating mode with � � � to ì “RED. HEATING”. When returning, set the operating mode with � � � to “AUTOMATIC” (page 12,13). In summer, it is too cold or too warm. À indicates that the summer disconnection is active. to ��� ��� and the ë “HEATING” to è “PARTY” and set the for 3 seconds and set the additional loading time ��� to ê “SUMMER” (heating off, hot ��� ��� to ç “ABSENT TIL” and set to æ “HOLIDAY TIL” and set é If it is too cold, set the operating mode with TING” (page 12). ��� to ë “HEA- Heating system control 4 204 764 / 00 - 11/07 Control elements of the boiler control 8 7 1 6 2 5 3 4 Key 1 Designation Function Daytime room temperature Set the daytime room temperature. Reduced room temperature Set the room temperature in the reduced heating mode. page 9 DHW temperaturer Set the domestic hot water temperature. Manual DHW reloading. Rotary pushbutton Change the values by turning. Confirm the values by pressing. Function selection by pressing and turning. Information key • Show the operating data on the display. • Return to the basic display without saving the values. page 30 Heating curve set-up Set the heating curve 2 3 4 5 6 page 8 page 21 page 19 Heating system control 4 204 764 / 00 - 11/07 Key Designation Function 7 Operating mode selection key Select the operating modes 8 æ Holiday Turn off the heating system during the holidays (Frost protection page 11 ç Absence Tamporarily switch off heating page 11 è Party Extended heating page 11 é Automatic Automatic heating according to the preset heating times page 12 ê Summer Only DHW; Heating off page 12 ë Heating Continous heating mode page 12 ì Reduced heating Constant reduced heating mode page 12 í Standby System switched off Frost protection activated page 12 Display The basic display shows the day of the week, date and time of the day, as well as the current room temperature (room station). 1 2 6 3 4 5 7 Possible readouts: 1 Active heating time 24h 2 Weekday display 3 Display of the active operating mode and the clock programme 4 Time of the day 5 Selected operating mode 6 Date / Day / Month / Year 7 Room temperature (when activated) Heating system control 4 204 764 / 00 - 11/07 Main settings Changing the room temperature Setting the daytime room temperature MO. 16. AUG.'04 14:00 Basic display C 62.5 Tap the “Daytime room temperature” key ROOM DAY -20.0C The daytime room temperature setpoint flashes If “MC1” is shown on the display, you need to select the heating circuit. (Information on which heating circuit to select for your home can be found on page 3 of these instructions). Set the desired room temperature by turning the “rotary pushbutton”. - Setting range 5 - 30ºC (Factory setting 20ºC) ROOM DAY -22.0C The new “Daytime room temperature” setpoint appears on the display Tap the “Daytime room temperature” key to confirm the temperature setpoint Heating system control 4 204 764 / 00 - 11/07 Setting the reduced (night time) temperature MO. 16. AUG.'04 14:00 62.5 Basic display C Tap the “Reduced room temperature” key ROOM NIGHT -20.0C The night time room temperature setpoint flashes. If “MC1” is shown on the display, you need to select the heating circuit. (Information on which heating circuit to select for your home can be found on page 3 of these instructions). Set the desired room temperature by turning the “rotary pushbutton”. - Setting range 5 - 30ºC (Factory setting 16ºC) ROOM NIGHT -18.0C The new “Reduced room temperature” setpoint appears on the display. Tap the “Reduced room temperature” key to confirm the temperature setpoint. Heating system control 4 204 764 / 00 - 11/07 Holiday, absent, constant reduced heating Depending on the duration of your absence and what your requirements are in regard to comfort, there are different operating modes available for interrupting or reducing the heating. In any case you will be able to save a lot of energy and money if the rooms are not heated or less heated during your absence. The following table is intended as a guide for finding the best operating mode for each particular case: Application Operating mode You go on holiday for e.g. 1 System is off during holidays week and you know the return "HOLIDAY TIL" date. æ You leave home in the morning Heating interrupted temporarily and come back late in the eve"ABSENT TIL" ning. Heating temporarily interrupted until set time. Setting range: 0.5.....24h Continuous reduced heating and domestic hot water mode around the clock ì You are away for an indefinite System switched off - Frost properiod of time during spring or tection activated autumn and you don’t mind if "STANDBY" your home is cool on return - Heating system OFF / Calorifier frost protected (5ºC) - Room temperature set to minimum (10ºC) Setting range: current date + 250 days End of holiday = Return date 0:00 o’clock Early return: “Press and hold” � � � for 3 sec, to return to “AUTOMATIC” mode. ç You are travelling for an indefi- Continuous reduced heating nite period of time and want the mode living area to be at the set red"RED. HEATING" uced temperature on return. Function The entire heating system is switched off and frost protected. No domestic hot water mode! í See following pages for a detailed description on how to set the operating modes. You can return to the “AUTOMATIC” function (normal heating mode) at any time by “pressing and holding” ��� 10 for 3 sec. Heating system control 4 204 764 / 00 - 11/07 Setting the operating mode Procedure for activating the operating modes “HOLIDAY TIL”, “ABSENT TIL” or “PARTY TIL”. ��� OP. MODE AUTOMATIC Tap the “Operating mode” key The note “OP. MODE” is displayed for a short time. The currently active operating mode is then shown flashing on the display. An indicator bar at the lower part of the display points to the corresponding symbol. é Set the desired operating mode by turning the “rotary pushbutton”: "HOLIDAY TIL” or “ABSENT TIL” or “PARTY TIL". HOLIDAY TIL The selected operating mode is shown flashing on the display. Tap the “rotary pushbutton” to confirm the selected operating mode. HOLIDAY TIL 27.08 Today’s date (“HOLIDAY TIL”) or the current time (“ABSENT TIL”, “PARTY TIL”) is shown flashing on the display. Turn the “rotary pushbutton” and select - for “HOLIDAY TIL”, the date of return from holiday - for “ABSENT TIL”, the expected return time (within max. 24h). - for “PARTY TIL”, the time the party is expected to end. Tap the “rotary pushbutton” to confirm the setting. 11 Heating system control 4 204 764 / 00 - 11/07 Procedure for activating the operating modes “AUTOMATIC”, “SUMMER 1 ” , “HEATING”, “RED. HEATING” and “STANDBY” ��� OP. MODE AUTOMATIC Tap the key “Operating mode” The note “OP. MODE” is displayed for a short time. The currently active operating mode is then shown flashing on the display. Set the desired operating mode by turning the “rotary pushbutton”. RED. HEATING for example “RED. HEATING” Tap the “rotary pushbutton” to confirm the setting. 1 12 The operating mode “Summer” can not be selected when each heating circuit is set up separately. Heating system control 4 204 764 / 00 - 11/07 Operating mode Function AUTOMATIC Automatic control mode according to the heating times set in the 1. switching time program. Factory setting: Heating: 06:00 - 22:00 Reduced heating: 22:00 - 06:00 Domestic hot water: 05:00 - 22:00 é SUMMER ê Only domestic hot water mode Domestic hot water is produced at the times set in the switching time program (for showering, etc.) Factory setting for domestic hot water: 05:00 - 22:00 Frost protection is active HEATING ë RED. HEATING ì STANDBY í Info: Operating mode “Summer” can not be selected if each heating circuit is set up separately. Continuous heating mode The room temperature is not reduced during the night. DHW is produced at the times set in the time program Continuous reduced heating mode The rooms are continuously heated at the “ROOM NIGHT” temperature setting. No heating mode Heating system is switched off There is no heating and no domestic hot water is produced. Frost protection is active. 13 Heating system control 4 204 764 / 00 - 11/07 Changing the switching times (heating times) In this menu the switching time programs can be set individually for the heating and domestic hot water modes. After selecting the respective heating circuit, the factory-set standard program (P1) is loaded and can then be edited individually. The standard heating times preset by the manufacturer are, e.g.: Circuit Day Heating from All heating circuits Mo-Su (HC,MC-1,MC-2) 06.00 - 22.00 Domestic hot water circuit (DHW) 05.00 - 22.00 Mo-Su Table for recording individual switching times Switching times program for living area............... (MC1) Switching times program for living area.............. (MC2) Day Day Cycle 1 from Cycle 2 to from Cycle 3 to from to Cycle 1 from Cycle 2 to from Cycle 3 to from Mo Mo Tu Tu We We Th Th Fr Fr Sa Sa Su Su Switching times program for living area.............. (HC) Switching times program for calorifier (DHW) Day Day Cycle 1 from Cycle 2 to from Cycle 3 to from to Cycle 1 from Mo Mo Tu Tu We We Th Th Fr Fr Sa Sa Su Su Cycle 2 to from to Cycle 3 to from to Further standard programs can be - or could have been - set-up or enabled for programming by the installer (P1-P3) see page 16. A maximum of 3 heating times per day are possible, e.g.: ...per ...per ... proday Tag ... proday Tag 1 Heizzyklus! 2 Heizzyklen! 1 heating cycle 2 heating cycles 14 ...per ... pro day Tag 3 Heizzyklen! heating cycles Heating system control 4 204 764 / 00 - 11/07 MO. 16. AUG.'04 14:00 62.5 Basic display C Press the “rotary pushbutton” for at least 3 sec. TIMEPROGRAMS The note “TIMEPROGRAMS” appears flashing on the display. Tap the “rotary pushbutton” to confirm TIMEPROGRAMS The note “HC” also appears flashing on the display HC Select the heating circuit by turning the “rotary pushbutton”. (Information on which heating circuit to select for your home can be found on page 3 of these instructions). Select switching times program P1, P2 or P3, if required - page 16 e.g. TIMEPROGRAMS MC-1 Tap the “rotary pushbutton” to confirm the selected heating circuit. ÈÈÈÈÈÈÈÈÈÈÈÈÈÈÈÈÈÈÈÈ 0 2 4 6 8 10 12 14 16 18 20 22 24 06.00-22.00 MO-1- Use the “rotary pushbutton” to select the day for which the heating time has to be modified. Note: The 3rd heating cycle is omitted if the 2nd heating cycle does not contain any switching times. Change - Exit: Every flashing setting can be corrected using the rotary button, if required, and accepted by tapping. Use the key to go back one step. Use the key � � � or wait for approx. 60 sec. to go back to the basic display. 15 Heating system control 4 204 764 / 00 - 11/07 Tap the “rotary pushbutton” to confirm the day. ÈÈÈÈÈÈÈÈÈÈÈÈÈÈÈÈÈÈÈÈ 0 2 4 6 8 10 12 14 16 18 20 22 24 06.00-22.00 The currently set heating start time is shown flashing on the display MO-1- Set the desired heating start time by turning the “rotary pushbutton”. Tap the “rotary pushbutton” to confirm the set start time. Turn the “rotary pushbutton” to set the time setpoint for the end of the heating mode on the week day shown ÈÈÈÈÈÈÈÈÈÈÈÈÈÈÈÈÈÈÈÈ 0 2 4 6 8 10 12 14 16 18 20 22 24 06.00-22.00 MO-1ÈÈÈÈÈÈÈÈÈÈÈÈÈÈÈÈÈÈÈÈ 0 2 4 6 8 10 12 14 16 18 20 22 24 The week day is shown flashing on the display. You can now set a second heating time (Mo -2) for this day by turning the “rotary pushbutton” or by going directly to Tuesday to set the desired heating time. -.---.-- ....... MO-2ÈÈÈÈÈÈÈÈÈÈÈÈÈÈÈÈÈÈÈÈ 0 2 4 6 8 10 12 14 16 18 20 22 24 06.00-22.00 SU-1- Instead of introducing each day separately, you can also use the “copy” function - see page 17 This function allows you to copy the switching times from any days of the week to other days (Mo-Su) or to a whole week (1-7) or to day groups like working days (1-5) or weekends (6-7). Once you have completed all the changes, tap the operating mode key to confirm the settings and open the basic display ��� If P1 is displayed, it means that further standard heating times programs are already enabled. If not, P2 and P3 can be enabled by the heating technician.. Factory setting: Switching times program P2 Circuit All heating circuits (HC,MC-1,MC-2) Hot water circuit (DHW) 16 Day Heating from Mo-Th 06.00-08.00 16.00-22.00 Fr 06.00-08.00 13.00-22.00 Sa-Su 07.00-23.00 Mo-Th 05.00-08.00 15.30-22.00 Fr 05.00-08.00 12.30-22.00 Sa-Su 06.00-23.00 Factory setting: Switching times program P3 Circuit All heating circuits (HC,MC-1,MC-2) Hot water circuit (DHW) Day Heating from Mo-Fr 07.00-18.00 Sa-Su reduced Mo-Fr 06.00-18.00 Sa-Su reduced Heating system control 4 204 764 / 00 - 11/07 MO. 16. AUG.'04 14:00 62.5 Basic display C Press the “rotary pushbutton” for at least 3 seconds TIMEPROGRAMS The note “TIMEPROGRAMS” is shown flashing on the display. Tap the “rotary pushbutton” to confirm the selected operating mode. TIMEPROGRAMS The note “HC” is also shown flashing on the display. HC Select the heating circuit by turning the “rotary pushbutton”. (Information on which heating circuit to select for your home can be found on page 3 of these instructions) Select switching times program P1, P2 or P3, if required - page 16 e.g. TIMEPROGRAMS MC-1 Tap the “rotary pushbutton” to confirm the selected heating circuit. ÈÈÈÈÈÈÈÈÈÈÈÈÈÈÈÈÈÈÈÈ 0 2 4 6 8 10 12 14 16 18 20 22 24 06.00-22.00 The first day of the week is shown flashing on the display. MO-1- Keep turning the “rotary pushbutton” COPY until “COPY”, “DAY” appears flashing on the display. DAY 17 Heating system control 4 204 764 / 00 - 11/07 Tap the “rotary pushbutton” to confirm the settings COPY FROM MO Change - Exit: Every flashing value can be corrected using the rotary button and accepted by tapping. Use the key to go back one step. Use the key or wait for approx. 60 sec. to go back to the basic display. ��� Select the day from which the heating time setting is to be copied by turning the “rotary pushbutton”. Note: The 3rd heating cycle is omitted if the 2nd heating cycle does not contain any switching times. Tap the “rotary pushbutton” to confirm the desired day. COPY TO MO 1-5 Select the target day(s): Days of the week (MO...SU), whole week (1-7) working days only (1-5), weekend only (6-7). Tap the “rotary pushbutton” to confirm the setting. COPY DAY OK COPY MO TO 50 Confirmation for correct copying of day(s). Target range for the next copy process is shown flashing on the display. Select the next copy range by turning the “rotary pushbutton”. COPY TO MO 6-7 Target range for the copy process is shown again flashing on the display. Use the same scheme to create any additional copies. After completing all the changes, tap the operating mode key to confirm the settings and open the basic display. 18 Heating system control 4 204 764 / 00 - 11/07 Heating curve (heating characteristic) The heating curve is normally preset by the installer during the commissioning of the heating system. The heating curve should only be changed in small steps and over longer periods of time. Heating curve slope Heating flow temperature Recommended settings Floor heating: 0,3...1,0 Radiator heating: 1,2...2,0 Convector heating: 1,5...2,0 Outdoor temperature The slope of the heating characteristic curve generally describes the ratio between variations in the flow temperature and variations in the outdoor temperature. MO. 16. AUG.'04 14:00 62.5 Basic display C Tap the “Heating curve” key HEAT. CURVE HC OFF “Heating curve” display appears. “HC” flashes. In case of several heating circuits you must first select the relevant circuit by turning the “rotary pushbutton”- see page 3, Technical data. Confirm HEAT. CURVE HC OFF The slope of the heating characteristic curve is shown flashing on the display Select the desired value for the slope of the heating characteristic curve by turning the “rotary pushbutton”. HEAT. CURVE HC 1.5 The selected slope of the heating characteristic curve is shown on the display. 19 Heating system control 4 204 764 / 00 - 11/07 Tap to confirm Turn the rotary pushbutton to set up further heating circuits, if requir ed. HEAT. CURVE MC 1.00 After completing all the changes, tap the operating mode key to confirm the settings and open the basic display. Adjusting the domestic hot water temperature MO. 16. AUG.'04 14:00 62.5C Basic display Settings can be conducted at a room station, if this is available. Tap the “Domestic hot water temperature” key DHW DAY 20 C 60.0 The current domestic hot water temperature setpoint is shown flashing on the display. Heating system control 4 204 764 / 00 - 11/07 Set the desired hot water temperature by turning the “rotary pushbutton”. - Setting range 10 - 65ºC (Factory setting 60ºC) DHW DAY The selected hot water temperature is shown flashing on the display. C 63.0 Tap the “Domestic hot water temperature” key to confirm the temperature setpoint. Manual domestic hot water reloading Outside the time periods during which the domestic hot water mode is available, the calorifier can be manually reloaded within the selected setting range. The calorifier is reloaded once according to the set daytime domestic hot water temperature. Reloading is limited by the set temperature for all other settings. MO. 16. AUG.'04 14:00 Basic display C 62.5 Press and hold the “Domestic hot water temperature” key for 3 seconds. 1 TIME DHW 0.0min The domestic hot water reloading time is displayed; the minute-display flashes Set the desired additional reloading time by turning the “rotary pushbutton”. Setting range 0 - 240 min Tap to confirm 1 TIME DHW 14:16 C 63.0 The active reloading process is displayed until the reloading process has been completed. 21 Heating system control 4 204 764 / 00 - 11/07 Domestic hot water economy temperature (reduced temperature) MO. 16. AUG.'04 14:00 Basic display C 62.5 Press and hold the “rotary pushbutton” for 3 seconds TIMEPROGRAMS “TIMEPROGRAMS” is shown flashing on the display. Turn the “rotary pushbutton” DHW until “DHW” is shown flashing on the display DHW Tap to confirm DHW NIGHT 40.0° “DHW” flashes on the display. The temperature shown defines the desired domestic hot water temperature outside the time periods during which the domestic hot water mode is available. Tap to confirm DHW NIGHT 22 The night-time domestic hot water temperature flashes 40.0° 4 204 764 / 00 - 11/07 Heating system control Set the desired temperature value by turning the “rotary pushbutton” and tap to confirm the setting. After completing all the changes, tap the operating mode key to confirm the settings and open the basic display. 23 Heating system control 4 204 764 / 00 - 11/07 Further settings Setting the clock MO. 16. AUG.'04 14:00 Basic display C 62.5 Press and hold the “rotary pushbutton” for 3 seconds TIMEPROGRAMS “TIMEPROGRAMS” is shown flashing on the display. Turn the “rotary pushbutton” TIME-DATE until “Time-date” is shown flashing on the display. Tap to confirm TIME “Time” flashes 14:00 Tap to confirm TIME The “time” flashes 14:00 24 Heating system control 4 204 764 / 00 - 11/07 Turn the “rotary pushbutton” to set the desired time and tap to confirm. Turn the “rotary pushbutton” for further adjustments. Setting the date YEAR 2004 DAY.. .MONTH Mo 27.09 “Year” is shown flashing - confirm Turn to change the year setting - confirm “Day...Month” is shown flashing - confirm Turn to change the Day...Month setting - confirm Changing between summer and winter time CHANGE SU-WI ON “Change” is shown flashing - confirm Turn to change SU-WI ON or OFF - confirm After completing all the changes, tap the operating mode key to confirm the settings and open the basic display. 25 Heating system control 4 204 764 / 00 - 11/07 Setting the language You will be prompted for the desired language when switching on the control system for the first time. Changing the language is also possible during normal operation. MO. 16. AUG.'04 14:00 Basic display C 62.5 Press and hold the “rotary pushbutton” for 3 seconds. TIMEPROGRAMS “TIMEPROGRAMS” is shown flashing on the display. Turn the “rotary pushbutton” SYSTEM until “System” is shown on the display SYST Tap to confirm LANGUAGE SYST. D “Language” appears on the display. Abbreviations for the language are shown flashing D = German / GB = English F = French / I = Italian. Turn to select the desired language and tap to confirm. After completing all the changes, tap the operating mode key to confirm the settings and to open the basic display. 26 Heating system control 4 204 764 / 00 - 11/07 Reloading the standard switching time program - Deleting the own time program With this function you can reload all the factory settings. MO. 16. AUG.'04 14:00 Basic display C 62.5 Press and hold the “rotary pushbutton” for 3 seconds TIMEPROGRAMS “TIMEPROGRAMS” is shown flashing on the display. Tap to confirm TIMEPROGRAMS The note “HC” is also shown flashing on the display. HC Keep turning until “Default-time” appears DEFAULT-TIME “Default-time” is shown flashing on the display. Tap to confirm DEFAULT-TIME HC The note “HC” appears on the display Select the desired heating circuit by turning the “rotary pushbutton” 27 Heating system control 4 204 764 / 00 - 11/07 Tap to confirm RESET “Reset / HC” appears on the display HC Press and hold the “rotary pushbutton” for 3 seconds RESET “Reset” OK is displayed to confirm OK After completing all the changes, tap the operating mode key to confirm the settings and open the basic display. 28 Heating system control 4 204 764 / 00 - 11/07 Alarm messages FLOW ERROR 12-0 30-2 Example for heat generator alarm messages (switching status) Error code 30-40 50-2 Example for logical alarm messages (control functions) Error code 50-60 70-1 Example for data bus alarm messages (address errors on data bus) Error code 70 HEAT GENER. ERROR DHW ERROR BUS ERROR Example for sensor alarm messages (short circuit or interruption) Error code 10-20 The controller comprises a comprehensive alarm logic which displays the fault type by means of the corresponding error code. 29 Heating system control 4 204 764 / 00 - 11/07 System information Information key for system temperatures and heating circuit information turn to left turn to right Actual values Heat generator Starts (stage 1) Heat generator Hours of operation (stage 1) STARTS OUTSIDE Outdoor temperature 0 ST-1 OPER. HOURS HEAT GENER. Heat generator temperature DHW Domestic hot water temperature 0h ST-1 FLOW In certain cases additional information can be displayed. only for 2-stage operation: - Heat generation Hours of operation (stage 2) Flow temperature Back to the basic display: Briefly press only in conjunction with room sensor: - Room temperature direct HC - Room temperature MC 1 - Heat generation Starts (stage 2) - Room temperature MC 2 All temperature values shown represent the current values. Press and hold the “rotary pushbutton” to display the individual setpoints. 30 Heating system control 4 204 764 / 00 - 11/07 Special symbols MO. 16. AUG.'04 Á 14:00 62.5C MO. 16. AUG.'04 À 14:00 62.5C Ice crystal symbol: Frost protection activated Umbrella symbol: Summer disconnection active (heating switched off, domestic hot water according to program). 31 4 204 764 / 00 - 11/07 United Kingdom Hoval LTD Northgate Newark Nottinghamshire NG24 1JN Phone: 01636 672 711 Fax: 01636 673 532 Switzerland Hoval Herzog AG General-Wille-Strasse 201 CH-8706 Feldmeilen Telefon 044 / 925 61 11 Telefax 044 / 923 11 39 Germany Hoval (Deutschland) GmbH Karl-Hammerschmidt Strasse 45 D-85609 Aschheim-Dornach Telefon 089 / 92 20 97-0 Telefax 089 / 92 20 97-77 Austria Hoval Gesellschaft mbH A-4614 Marchtrenk Hovalstrasse 11 Telefon 07243 / 550-400 Telefax 07243 / 550-17 Italy Carival S.r.l. Via Per Azzano S. Paolo, 26/28 I-24050 Grassobbio (BG) Tel.: +39 035 525069 Fax: +39 035 525858 France Carival SA F-91743 Massy Cedex 2 route de la Bonde Tél. 01 69 30 83 00 Fax 01 69 30 22 54 Responsibility for energy and the environment 32