1
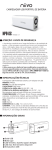
Operating Instructions for the AV NICHE Dual Deck Audio Recorder (P2B)
IT IS IMPORTANT TO READ THESE OPERATING INSTRUCTIONS BEFORE USING THE
DUAL DECK AUDIO RECORDER.
BEFORE RECORDING
1.
If using the P2B from a mains supply ensure that the mains lead is plugged into the mains lead
socket on the right hand side of the Dual Deck Audio Recorder and mains wall socket, ensuring
that power is turned on at the wall socket.
2.
Ensure that the external plug in microphone is plugged into the microphone socket on the front left
hand side of the Dual Deck Audio Recorder, (marked “MICROPHONE INPUT”). The audio
level is indicated by the five green flashing lights on the front of the Dual Deck Audio Recorder
(marked “LEVEL”). The audio level will only be indicated when the Dual Deck Audio Recorder
is powered and switched on.
3.
Switch the machine on using the Power on/off switch.
At this point the number 0 should be displayed on the Elapsed Time Indicator and the Level
Display should give an indication of the sound being made in the room.
TO START RECORDING
5.
Open the front panel door to insert audio cassettes. Insert two or three blank C90 audio cassettes
with full tape spool to the right, (cassette label facing you). The audio cassette recorder requires at
least two audio cassettes inserted before recording. Always use new, blank cassettes. Close the
front panel door.
6.
To start recording press the Red RECORD button (marked “RECORD”). The machine will beep
for 8 seconds to discourage conversation whilst the plastic leader passes over the recording head.
Whilst the machine is recording the green “Record” Indicator will be lit.
7.
Whilst recording, the Elapsed Time Indicator (marked “ELAPSED TIME”) will display the time
the cassettes have been recording, in minutes and seconds.
TO STOP RECORDING
8.
To stop recording press the Black STOP button (marked “STOP”). The Elapsed Time Indicator
will indicate that the recording is finished and give the length of the recording in minutes and
seconds. Open the two front panel doors and remove all the audio cassettes, insert three new
audio cassettes if another recording is required. The Elapsed Time indicator is reset to 0 by
removal/insertion of audio cassettes. If this process is not conducted and the red record button is
pressed again, the Elapsed Time indicator will continue from the Elapsed Time indicated when the
stop button was pressed.
PLEASE TURN OVER
ALARMS
9.
The machine has several built in alarm functions:
9.1
Record Failure
If the machine detects that sound is not recording on to the cassettes for some reason, the alarm
will sound and the Elapsed Time Indicator will Flash “Tape 1”, “Tape 2” dependent upon which
deck has detected inaudible recording threshold.
The Record Failure alarm operates under the following conditions:-
(a)
60 seconds of silence in the room during recording;
(b)
Faulty Microphone;
(c)
Poor Tape;
(d)
Dirty Tape Heads
(e)
Electronic fault inside machine.
9.2
End of Tape
If the cassettes run out during a recording the alarm sounds and the Elapsed Time Indicator flashes
END. All cassettes will stop. Press the STOP button and insert new cassettes to start recording
again.
9.3
43 Minute Warning
A C90 tape is 45 minutes in length on each side. This means that the machine will continuously
record for a maximum of 45 minutes with a C90 cassette. After 43 minutes an alarm sounds to
inform you that there are approximately 2 minutes of time left and new tapes will be needed..
Press STOP and insert fresh tapes.
10.
Spoken Elapsed Time
The dual deck audio recorder has the spoken elapsed time recorded onto the second audio track.
The spoken elapsed time is recorded every 10 seconds on the second audio track.