1
Quick Guide Operating Instructions
for the Topcon RL-H3CS Laser Level
1. The Laser Levelling Controls
•
Mount the laser on a roughly levelled
tripod.
•
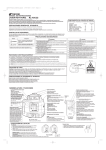
Push the green power button (see picture
A).
•
The instrument will start self levelling.
When it has levelled it will start rotating.
•
If the instrument is disturbed or jarred, the
height alert warning will switch off the
laser, and the lights will flash on the
control panel (see picture B). This feature
warns you that the height of the laser
beam may have changed. If this
happens, switch the power off and then
on to restart the instrument.
•
If you do not require the height alert
feature, push the ‘height alert off’ button
twice, and the red light will illuminate (see
picture C).
•
If you require to over-ride the instrument
self-levelling, push the ‘manual on’ button
twice (see picture D) and the red light will
illuminate.
•
To return the instrument to its original
settings, press the power button off and
then on (see picture A).
Picture A
Picture B
Picture C
Picture D
For further information call Head Office on 01635 567053
www.topcon.co.uk
Quick Guide Operating Instructions
for the Topcon RL-H3CS Laser Level
2. Using RL-H3CS as a Grade Laser
Aligning the Laser in the Direction of the Grade
•
Establish a base-line parallel to the job in
the direction of the required gradient.
•
Put a plumbed ranging pole at the far-end
of the base-line to sight on to.
•
Set the laser over the near-end of the
base-line, using a plumb bob hung from
the tripod instrument mounting screw (see
picture E).
•
Turn the instrument body on the tripod to
roughly align the instrument to the
direction of the instrument (see picture F).
•
Picture E
Picture F
Whilst viewing through the gun-sight, align
the sight precisely on to the ranging pole,
and tighten the tripod instrument mounting
screw (see picture G).
Picture G
For further information call Head Office on 01635 567053
www.topcon.co.uk
Quick Guide Operating Instructions
for the Topcon RL-H3CS Laser Level
3. Setting Slope into Laser
•
Push the green ‘on’ button (see picture A).
The instrument will start self levelling.
When it has levelled it will start rotating.
•
Have someone hold a staff with a sensor,
plumb and still at a known distance (e.g.
30m/100ft) from the laser along the base
line, and set the sensor on grade.
•
Move the sensor up or down on the staff
to the slope required (30cm/1ft to give 1%
of grade for 30m/100ft), and hold the staff
plumb and still.
•
On the laser push one of the red slope
buttons once, and the green slope light
will flash whilst the laser beam goes up or
down for the desired slope (see picture
H).
•
Once you hear the sensor start to beep,
push one of the red slope buttons; the
laser will stop sloping and the green slope
light with remain on (see picture J).
•
Now press the required slope button,
inching the beam until you hear a
continuous beep from the sensor,
indicating that the beam has reached the
desired grade (see picture H).
•
The sensor can now be moved on to the
staff to the depth of the dig or fill and the
job can commence.
•
Picture A
Picture H
Picture J
Picture K
If you wish to retain the grade setting
when you switch the instrument off, hold
down one of the slop buttons whilst
pressing the power button when restarting
the instrument (see picture K).
For further information call Head Office on 01635 567053
www.topcon.co.uk
Quick Guide Operating Instructions
for the Topcon RL-H3CS Laser Level
4. Setting Laser to Match Ground Slope
•
Push the green ‘on’ button (see picture A).
The instrument will start self levelling.
When it has levelled it will start rotating.
•
Have someone hold a staff and sensor
1m/3ft in front of the laser on the base-line
and set the sensor on to grade (see
picture L)
•
Move the staff down the base-line (do not
move the sensor), hold the staff plumb
and still.
•
On the laser push one of the red slope
buttons once, and the green slope light
will flash whilst the laser beam is going up
or down to the slope of the ground (see
picture H).
•
Picture L
Picture H
Once you hear the sensor start to beep,
push one of the red slope buttons and the
laser will stop sloping and the green slope
light will remain on.
Picture J
•
Push the required slope button, inching
the beam until you hear a continuous
beep from the sensor, indicating the laser
has reached the on grade position (see
picture H).
•
The sensor can now, if required, be
moved up or down on the staff to the
depth of dig or fill, and the job can
commence.
•
Picture K
If you wish to retain the grade setting
when you switch the instrument off, hold
down one of the slope buttons whilst
pressing the power button when restarting
the instrument (see picture K).
For further information call Head Office on 01635 567053
www.topcon.co.uk