1
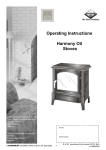
This Manual Must Always Be Available To The Stove Operator Operating Instructions Nestor Martin IT33 IN1180 Edition B April 2011 PART NUMBER SERIAL NUMBER IMPORTANT The installation of this appliance must comply with all local regulations, including those referring to national and European Standards before it can be operated. The insert is not suitable for a shared flue. Improper adjustment, alteration, maintenance or the fitting of replacement parts not recommended by the manufacturer can cause injury or property damage. Do not operate the insert with faulty seals or damaged glass. Ensure all manuals are kept safely and are available for the user at all times. Do not store or use petrol or other flammable vapours and liquids in the vicinity of this or any other heating appliance. Do not use aerosol sprays near the stove when the stove is alight. Do not burn anything but natural wood or approved coals on this appliance. Due to high operating temperatures of this appliance it should be located away from pedestrian traffic and away from furniture and draperies. Do not store paper or wood near the appliance. Any mats and rugs put in front of the insert should be fire proof and secured to prevent the possibility of tripping. Advise all persons as to the insert’s high surface temperatures, including visitors. If it is possible for children or infirm adults to come into contact with the insert, fit a suitable fire guard. Never let children “help” with the insert in any way, even when the insert is cold. It is imperative that all air passageways into, out of, and within the appliance are kept clean. All permanent ventilation into the room provided for the insert must remain clear and unobstructed at all times. Consideration must be given to the need for extra ventilation if another heating source needing air is to be operated simultaneously. If an extraction fan is proposed to be fitted to a connecting area of the house, after the insert has been installed, professional advice should sought from a qualified engineer. If a flue blockage or adverse weather conditions cause the insert to emit smoke, do not treat it as merely a nuisance, this smoke will indicate that carbon monoxide is being emitted into the room. Properly installed, operated and maintained this stove will not emit fumes into the dwelling. Occasional fumes from de-ashing and re-fuelling may occur. However persistent fume emissions are potentially dangerous and must not be tolerated. WARNING: If fume emissions persist the following immediate action should be taken: Turn the insert to its minimum firing rate, open windows to ventilate the room and leave the premises and allow the insert’s fuel to burn out before closing the windows. Do not re-light the insert without consulting a qualified engineer. Your installing engineer should have fitted a CO alarm in the same room as the stove. If the alarm sounds unexpectedly, follow the instructions in the above paragraph. In the event of a chimney fire the insert should be turned to its minimum setting and the fire brigade informed. Do not re-light the insert until the complete installation has been inspected by a qualified engineer. The appliance should be inspected regularly and the chimney cleaned at least annually. More frequent cleaning may be required and the advice of a qualified chimney sweep should be sought. Always check for any flue blockage before lighting the insert after a prolonged shut down. This insert has been carefully designed and constructed to give clean burning with optimum efficiency and safety, but as with all inserts these standards will not be achieved unless it is installed and maintained regularly by qualified engineers. It must also be operated strictly with the procedures given in this manual. If you are unsure about anything concerning your insert stove please seek professional advice. © EUROHEAT DISTRIBUTORS (H.B.S) LTD. April. 2011 2 Instructions Part Number IN1176 Ed B The Model Range Explained Thank you for purchasing your insert and helping to protect our environment. Nestor Martin and Euroheat insist on progressive development to produce products which are market leading. Our aims are to produce inserts with the latest innovations, user friendly operation and highly efficient for lower cost operation. When burning wood you will be greatly assisting with reducing Co2 to the environment when compared to coal oil or gas. This operation manual offers user information for the Nestor Martin IT33 multifuel and wood stove. Model Identification You will see on the front page of this document a label which confirms which model you have. This label also advises you of the inserts unique serial number. This information is also attached to your insert for reference. Important Please ensure the warranty registration form is returned to Euroheat. In this way the model and its history will be recorded for reference in the future. Contact Details: Euroheat Distributors (H.B.S). Ltd. Unit 2, Court Farm Business Park, Bishops Frome, Worcestershire. WR6 5AY. www.euroheat.co.uk [email protected] Whilst we are always happy to assist you, please make sure you have read this manual before contacting the technical support team. Technical support telephone number 01885 491117. E-mail [email protected] Advanced Driving Manual for the Plexus Range. Document Part Number IN1172 Please contact your Euroheat Retailer, Euroheat web site or Euroheat directly for your free copy. Useful organisations Solid Fuel Association 0845 601 4406 www.solidfuel.co.uk The National Association of Chimney Sweeps 01785 811732 www.chimneyworks.co.uk HETAS Ltd. 0845 634 5626 www.hetas.co.uk © EUROHEAT DISTRIBUTORS (H.B.S) LTD. April. 2011 3 Instructions Part Number IN1176 Ed.B Operating Items Supplied With The Insert Heat Resistant Glove Please note that the die is not colour fast and if damp may leach out and be absorbed into porous surfaces. DVD Universal User Guide for Wood and Multifuel Inserts. We strenuously recommend all users watch this DVD Operating Tool For Plexus Control operation and Ash Pan Removal Allen Key For Plexus Maintenance Poker Before Operating This Appliance The paint used on the insert is a heat resistant paint capable of withstanding 650°C, but it needs to be heated for several hours to allow it to cure`s and attain its full hardness. The lighting procedure should be followed and the insert’s first fire limited to a small fire for one hour, after which its size can be gradually increased to allow the insert to reach its operating temperature. As the temperature of the paint increases a blue hazy smoke will be apparent as the solvents in the paint are driven out. These fumes may activate a smoke detector, if fitted, and during this period the room must be ventilated by leaving the windows open and it should not be occupied by people or pets. The time taken for the paint to be fully cured will be dependant upon the temperature but you should allow at least six hours. If you re-paint or fit new parts to your insert, another period of curing will be necessary but the curing time will be very much shorter. © EUROHEAT DISTRIBUTORS (H.B.S) LTD. April. 2011 4 Instructions Part Number IN1176 Ed B Multifuel And Wood Inserts Gas and oil are consistent fuels and inserts can be designed to obtain the maximum heat from them with the user having to do no more than choose a heat setting. Solid fuels are almost infinitely variable and however well a insert has been designed, its performance will ultimately depend on the way the user operates it. Whilst we have endeavoured to make the insert as simple to operate as possible, understanding just a little about the fuels and the way your insert was designed to burn them will be rewarded by your being able to achieve the best from your insert with the least effort. As a fuel, wood is visually exciting, environmentally friendly, and a renewable source of energy but it is one of the most complex fuels to burn. Wood contains two sorts of components which burn. The fixed carbons which burn as the glowing embers, and the compounds that vaporize when heated to burn as volatile gases, giving the endlessly changing flame patterns. The fixed carbon, which is charcoal, is a virtually trouble free fuel and needs little assistance to burn cleanly, but it would be difficult to describe it as visually entertaining. When set to its wood burning position, your insert heats the incoming air to ensure it has the minimum cooling effect on any volatiles. The air is supplied as slowly as possible so as not to blow out any established flames and it comes in across the full width of the insert ensuring that all parts of the insert receive an equal air supply. Because the air enters slowly over a curved blade the air is directed towards the burning volatiles rather than the bed of the fire, this allows the tar laden volatile components to use the incoming air as a priority. By placing a log or two towards the front of the fire whenever the flames from previous logs die down, a bed of charcoal will build up. This will be virtually pure carbon and capable of burning for incredibly long periods without causing any tar deposits on the insert’s glass even when the air supply is reduced to minimal setting. Always put logs on to the fire before flames from previous logs have extinguished, this will ensure that when the new logs begin releasing gases it will ignite. Unburned gases will cause smoke and tar deposits and wastes potential heat. Putting on too much wood at one time will both restrict the air supply and cool the combustion chamber making it more difficult for the gases to burn cleanly. Never put on fresh wood whilst operating the insert with a minuscule air supply as a technique for operating for long periods without attention, it will cause both chilling and air restriction. Properly controlling the rate at which wood burns is not simply a matter of restricting the air supply, nor running the insert with a very small fire, it is maintaining the temperature and ignition flames in the insert whilst balancing the release of gases to match the chosen air supply. No two woods have the same burning characteristics but all wood contains water. It is difficult to quantify the amount of water any log might hold whilst its exterior feels dry but it would not be unreasonable to estimate a mug full from a good sized, poorly seasoned, Imagine pouring that onto your fire every time you introduce a new log and you will realize its obvious effect of cooling the fire. What is not so obvious is that the moisture mixing with the vaporized gases is cooling them, possibly below their ignition temperature. So the water within a wet log cooled the insert, it has prevented much of the potential heat from the log being realized and the unburned combustible products will be deposited as tars within the insert and flue. Advice on how to dry wood can be found on the DVD “User Guide” supplied with the insert. Coal suitable for inserts has only a very small proportion of components that vaporise and a far higher fixed carbon content and when the insert is set to its coal burning position air is supplied through the grate to the underside of the fire bed to supply the carbon directly. There will be sufficient spare air travelling through the fire bed to reach the limited gases being released and this air will have been heated as it passed the burning coals. © EUROHEAT DISTRIBUTORS (H.B.S) LTD. April. 2011 5 Instructions Part Number IN1176 Ed.B Because coals suitable for inserts have so little vaporizing content they are virtually trouble free fuels to use, but if you are using one of the manufactured smokeless coals take care to ensure the ash pan is checked regularly because some of them have a very high ash content; this is especially important if you change “brands” because the ash contents can vary dramatically. Always riddle the grate before putting on loadings of coal to give the initial release of gases sufficient air with which to burn; failure to do so may allow the insert and flue to fill with gases ready to ignite. A insert is very much safer than an open fire, but if you have children or infirm people in the house please ensure it is suitably guarded, and consideration should also be given to accidental contact with the insert if you are entertaining with a busy house full of guests. If you have a remotely operated insert please ensure you keep the remote operating handset well away from the insert, children and dogs. Choice Of Fuels Wood All wood will burn slightly differently, but the most important differences between woods is their moisture content. Until the moisture has been driven off from the wood it will remain below its combustion temperature. When the outer skin has dried and beginning to burn, much of this heat energy will be wasted having to boil off the water remaining in the core of the wood. Copious amounts of water vapour, in all but the most insulated flue, will condense, and mix with the products of combustion to form creosote and other undesirable substances which will eat away the fabric of the flue, and eventually build up to block the flue. At any time this build up of tar will be capable of causing a chimney fire. The advice to burn only "dry" wood is sometimes confusing because the atmospheric moisture will prevent wood ever becoming "dry". It is acceptable to burn wood with a moisture content of less than 20%, which can be achieved by splitting the wood, stacking it so as to allow air to circulate within the stack and storing it under cover for between 18 months and 30 months, depending on prevailing climatic conditions. The use of a wood moisture content meter will confirm the amount of water remaining in the wood easily. The practice of drying wood by the insert should be discouraged, firstly because it should be unnecessary, and secondly because stored wood will invariably become the home to many varieties of insects, many of whom enjoy eating wood. To introduce them into your house and encourage them with heat and time to make new homes in your furniture and structural timbers is not recommended. Please note that HETAS Ltd Appliances Approval only covers the use of wood logs on this appliance. HETAS Ltd Approval does not cover the use of other fuels either alone or mixed with the wood logs, nor does it cover instructions for the use of other fuels. Smokeless Coal (also known as solid mineral fuel) We recommend burning deep mined anthracite, a natural hard coal which is classified as being a smokeless fuel; specifying the sizes of “large nuts” will give most visually attractive and efficient burning. Smaller sizes than this will tend to choke the air flow too easily making long burning times without attention problematic. Various manufactured smokeless coals are available giving differing burning characteristics and the manufacturers or your coal merchant will advise you as to their suitability for inserts. The difficulties and dangers associated with burning ordinary bituminous coal (house coal) with its relatively high volatile content make it totally unsuitable and potentially dangerous for burning in any insert. Lignite (also known as solid mineral fuel) Lignite is obtainable in briquette form and is best described as young coal. It behaves very much like coal and should be burned as smokeless manufactured coal. Peat Peat burns very well, but it is bulky and its distinct aroma will pervade your home and everything in it, but otherwise peat can be burned as wood. DO NOT BURN petroleum based fuels such as petro-coke, they may seriously damage your insert. The manufacturers of other blended coal products, containing a proportion of petro-coke, should be approached to confirm the suitability of the product for use within an enclosed appliance that does not have a chrome steel grate. Instructions Part Number IN1176 Ed B © EUROHEAT DISTRIBUTORS (H.B.S) LTD. April. 2011 6 Choice Of Logs Never burn wood that is not dry or wood that has been subject to a manufacturing process, such as chipboard, as these contain resins of uncertain toxicity when burned. For the same reasons, wood that has been painted or treated with a preservative should never be burned. Natural wood is described as being either “hardwood” or “soft wood”. Typically all broad leaf trees that lose their leaves in the winter are called hard woods, and the evergreen conifers are called soft woods. Whilst the wood from the two groups have structural differences, the terms do not define the density or hardness of the wood. Balsa, one of the softest and lightest of woods is classified as being a hardwood and Hemlock, a soft wood, is extremely hard. The less density wood has, the more its structure is made up of open spaces meaning it will season faster and because of these voids it will burn faster because it will expose more surface area as it disintegrates. This makes light woods suitable for kindling or a rapidly developing fire but unless you enjoy putting wood onto a fire every few minutes it is unsuitable for burning over long periods. Although there is a difference in the speed at which woods burn, equal weights of wood will give very similar amounts of heat. Because logs are concentric tubes of cells they season faster if they are split, halving the tubes and allowing the moisture to evaporate more easily. Similarly it also allows the volatile gases given off when the wood is heated in a insert to be emitted along its full length rather than at the log’s ends. This helps the gases to be distributed more evenly within the insert and improves not only the efficiency, and emission reduction of wood burning but gives a more attractive fire. Putting logs onto the fire, bark side down and laying them, well spaced, in random orientation, rather than uniformly horizontally, will also help to increase the efficiency and attractiveness of the fire. To make this easier the ideal log length will be the length the insert’s combustion chamber can accommodate in all directions, and of proportionate cross-section, to allow you to load wood in a “higgledy-piggledy” manner. LOG SIZES. All logs should be split and ideally, quartered. Insert model IT33 Ideal Log Length Maximum Log Length 9 inches, 220mm 15 inches, 367mm DO NOT BURN Anything but dry, natural wood. Wood that has been painted, treated or has hinges, nails or any plastic attached will almost certainly emit toxic matter when burned. For similar reasons bonded wood products such a chipboard, plywood or fibre board must never be burned. DO NOT BURN Household waste. Many seemingly innocuous items like box packaging have been coated with glazes which will produce toxic matter when burned. One old video tape put on the fire will cause more pollution in a few minutes than a life time of wood burning. Not only will a fire burning rubbish pollute, the insert is not designed to contain such an assortment of sizes and weights and a flaming box falling from the insert when the door is opened will present an unacceptable fire hazard. © EUROHEAT DISTRIBUTORS (H.B.S) LTD. April. 2011 7 Instructions Part Number IN1176 Ed.B Insert Controls Ash pan door securing latch Air direction lever Riddle arm Ash pan door Air volume lever Minimum bypass lever Minimum bypass lever This lever should be set to maximum at all times unless advised otherwise by your heating engineer or the Euroheat Technical Department. © EUROHEAT DISTRIBUTORS (H.B.S) LTD. April. 2011 8 Instructions Part Number IN1176 Ed B The Plexus Air Control Your insert will has three levers on the front facia of the insert hidden behind the lower door when closed. The air direction lever, the air volume lever and the minimum bypass lever. Air Direction Lever Air Volume Lever Minimum bypass lever 1 + - 2 This lever should be set to maximum at all times unless advised otherwise by your heating engineer or the Euroheat Technical Department. This control governs the amount of air entering the insert when the air volume lever is closed. 3 Air Direction Lever When the direction lever is in its uppermost position the air enters the insert above the fire, and when set to its lower position air enters the insert from beneath the grate. Positioning the lever at its mid position will supply air both over and under the fire and this position is used when lighting a fire or burning manufactured smokeless coals. It should be set to its bottom position when burning natural smokeless coal such as anthracite and at its top position when burning wood. 1 1 1 2 2 2 3 3 3 Lighting And Manufactured Smokeless Coals 1 Anthracite Wood This Lever May Be Hot. Always Use The Insert Tool To Make Air Direction Adjustments. 2 1 3 2 3 © EUROHEAT DISTRIBUTORS (H.B.S) LTD. April. 2011 9 Instructions Part Number IN1176 Ed.B Air Volume Control The air volume should be set to maximum only when lighting and the flue is cold. Settings giving normal operating temperatures will usually be in the mid range, with slow burning being achieved when the control is set in the graduated end of the scale. Do not expect the insert’s performance to match any setting repeatedly because it will be affected by so many other factors such as fuel quality and weather conditions. Lighting and When the Flue is Cold Only Normal Operating Temperatures Slow Burning THIS CONTROL KNOB MAY BE HOT. ALWAYS USE THE Insert TOOL TO MAKE AIR VOLUME ADJUSTMENTS. © EUROHEAT DISTRIBUTORS (H.B.S) LTD. April. 2011 10 Instructions Part Number IN1176 Ed B Ash Collection The grate can be riddled to encourage ash to fall into the ash pan by locating the right angled end of the insert tool into the riddling actuating rod and using a push pull action to cause the grate to oscillate. The riddling rod is located between the Plexus facia panel and the ash pit door. If it becomes necessary to riddle the insert while it is operating, always riddle the insert before adding new fuel. As well as being used to rearrange the fire bed, the poker is designed to be used for clearing ash through the grate slots and this will be found to be the most effective way of clearing wood ash when the fire has burned out. If the fire has been running on anthracite coal, and the insert has been over filled and under riddled, the poker may have to be used to clear the grate of ash and partially burned coals. Important. Do not allow the ash pan to over fill. This will cause ash to fall behind the ash pan as it is removed and can prevent the ash pan from fitting correctly. Over filling the ash pan can prevent under grate air reaching the fire which can cause poor operation and damage to the grate. Available Accessories Euroheat offer a range of accessories which may assist with your day to day operation. These include fire tool sets for cleaner operation, log stores for storing wood and other items. Ask your euroheat retailer for the “Every Thing But The Stove Brochure” or visit the Euroheat web site. www.euroheat.co.uk © EUROHEAT DISTRIBUTORS (H.B.S) LTD. April. 2011 11 Instructions Part Number IN1176 Ed.B Ash Pan Removal Your ash pit door has a silicon sealed door which has a hexagon key slot visible. The insert tool right angle end is used to engage the ash pan socket. Care should be taken to ensure the tool is fully engaged before removing the ash pan. The glove should always be worn on the hand not operating the insert tool so that the ash pan can be securely held. Do not put the ash into, or with, anything combustible; even seemingly cold ashes may contain small glowing embers capable of igniting items they come in contact with. © EUROHEAT DISTRIBUTORS (H.B.S) LTD. April. 2011 12 Instructions Part Number IN1176 Ed B The ash pit door should be closed before lighting a fire in the insert and it should remain closed whilst the insert is operating. Opening the ash pit door when the insert is operating may cause flames to be directed fiercely at the glass and the intense heat will turn the areas of glass hit by the flames, irrevocably, opaquely white. The insert is capable of continuous operation and if it is being operated continuously it will therefore be necessary to empty the ash pan whilst the insert has a burning fire. If the ash pit door is to be opened and the ash pan removed safely the following procedure should be followed. Allow the fire to burn down as low as practicable and check that no embers will fall from the insert when the door is opened. Wearing the glove and using the operating tool partially open the main front door. This will let air into the insert above the fire and limit air being drawn in through the grate but prevent smoke from spilling into the room. ACME ACME The ash pit door can now be opened and the ash pan removed. The ash pit door must be closed immediately the ash pan is removed and the insert door must also be closed securely. When re-installing the empty ash pan the insert door must again be slightly opened before opening the ash pit door. Never open the ash pit door without the insert door being ajar and never leave either the insert door or the ash pit door open for longer than absolutely necessary. Preparation must be made for the safe handling and disposal of the burning embers in the ash pan before beginning this operation. Good practice would be to have an empty metal container brought to the insert so the ash pan can be emptied directly into it. Never leave the insert unattended without both its doors being securely closed. Always check, meticulously, that no embers have been spilled whenever any insert door has been opened. Always use gloves when carrying the ash pan, even when you think the ash is cold. Do not empty ash into a plastic waste bin or any bin containing combustible waste. There will be hot embers in the insert, long, even days, after the fire appeared to extinguish. Never clean out ashes onto paper, never use a plastic bristled brush or a vacuum cleaner to remove ash. Never let children “help” with the insert in any way, © EUROHEAT DISTRIBUTORS (H.B.S) LTD. April. 2011 13 Instructions Part Number IN1176 Ed.B Getting Started With Wood Having learned where to find the controls, you are now ready to light a wood fire in the insert, without filling the insert or neighbourhood with smoke. You will need two pieces of newspaper, a small bundle of kindling wood and several split logs. All of these should be as dry as possible. Remember that your insert needs the help of a gentle push start in the right direction until it warms. Do not expect it to be on auto pilot until it reaches its operating temperature. Ensure the ash pan is fitted and empty, then securely close the ash pit door. ACME Air Direction Lever Set to mid position Air Volume Lever Set to max position 1 2 Set the Plexus control to maximum air volume and the air direction lever to mid position, supplying air above and below the grate. 3 Lightly crumple two tabloid sized pieces of newspaper and lay them in the middle of the grate. Resist the temptation to use more paper than this, or to crumple it too tightly; doing either will prevent the rapid development of flames and will cause smoke to be produced. © EUROHEAT DISTRIBUTORS (H.B.S) LTD. April. 2011 14 Instructions Part Number IN1176 Ed B The kindling wood should be placed over the paper so as to rest against each other in a conical formation, leaving space between each piece. Light the paper using a long match or spill and close the insert door. The lightly crumpled paper will begin burning rapidly and the space between the kindling will allow the long bright flames to pass between and over the wood raising it to its ignition temperature. As the cone of kindling burns it will collapse and the inner ends of the wood will begin to char and glow. Wait until a substantial amount of the kindling is charring before moving onto the next stage. Wearing the insert glove place a log to either side of the burning kindling and larger than kindling wood over, but not smothering, the kindling. If your insert is a larger model it will be possible to put a log either side of the kindling before lighting the fire. Air direction Lever Set to top position Air Volume Lever Set to max position 1 2 Move the air direction lever to its uppermost position and do not be alarmed if the fire appears to die, or be tempted to move it back to its middle position. 3 © EUROHEAT DISTRIBUTORS (H.B.S) LTD. April. 2011 15 Instructions Part Number IN1176 Ed.B When the previous loading of wood is burning brightly add another log to bridge the fire. Always avoid putting wood directly onto wood burning with flame because the new, cold, log will tend to cool the flame giving gases below their ignition temperature. Conversely, you should try and position new logs directly onto glowing embers. Set Air Volume Lever to mid position Reduce the air volume control when the fire is established. Never leave it in its lighting position continuously. Putting new logs, bark side down, towards the front of the grate will give you both maximum efficiency and best visual effect as it begins to burn. Never put more than a layer of wood on at a time as the logs will become unstable and may roll against the glass, making it difficult to open the door. If you lit your fire in the insert cleanly and you are now feeling it becoming hot, congratulations, you have passed the lighting test and are no longer a total novice. You can throw away your “L” plates and move on to become an advanced driver. See page 18. © EUROHEAT DISTRIBUTORS (H.B.S) LTD. April. 2011 16 Instructions Part Number IN1176 Ed B Why Did You Fail? Not everyone will pass with flying colours at the first attempt, indeed even some experienced insert users will fail their test because producing smoke and tar was historically acceptable. Before checking your technique, make absolutely certain that the wood you are using is dry, not “seasoned”, “barn stored” or “ready for burning”. It must be dry if you want to burn it successfully, cleanly and efficiently. (See the Euroheat document Number IN1172 for further information.) The Fire Went Out Do not put wood onto the kindling too soon or without allowing vents for the flames. The quality of the wood will determine how much fuel can be loaded at one time but remember you are lighting the insert and wanting it to reach its operating temperature as quickly as possible; all smoke is a pollutant and wasted fuel. X X The Glass Blackened See the above. The fire may not have extinguished, but smoke and staining are unburned fuel gases from the wood. Until the flue has warmed, air supply to the insert will be limited and only allow the complete combustion of limited amounts of wood. Too much wood, too soon, will only serve to cool the gases below their ignition temperature. X 1 2 3 X THE FIRE NEVER DEVELOPED ENOUGH SIZE OR BECAME HOT ENOUGH Once the fire is well alight the air volume must be reduced from its maximum position. Leaving it at maximum will allow too much air into the insert. Air which is not needed will only serve to cool the insert, air travelling too quickly will blow some of the flames out. © EUROHEAT DISTRIBUTORS (H.B.S) LTD. April. 2011 17 Instructions Part Number IN1176 Ed.B Advanced Driving With Wood Once the insert is at its operating temperature it is capable of burning cleanly and efficiently with little or no intervention from you beyond periodic loading of wood. Two reasons for a insert failing to operate cleanly and efficiently make all other reasons virtually insignificant. One is the use of wet wood, which should never be used, and the other, which we will be discussing now, is the inappropriate intervention by an operator failing to understand a few simple principles. When to Put on More Wood When the fire in the insert has become established you will find that the insert seems, initially, to consume wood quite quickly. This is because the insert was designed to burn off the wood’s volatile matter first, leaving the charcoal to form a hot bed above the grate. The charcoal helps maintain a constant heat output from the insert between loading of wood and aids the rapid ignition of new loading, thus minimizing smoke emissions. The depth to which the charcoal should be let to accumulate will depend upon the length of time you are expecting to operate the insert for and the heat output you need. Never load more wood than can be contained safely by the log guard. Putting new wood on immediately the flames of the previous loading have almost extinguished will result in a very hot insert with a deep charcoal bed capable of being controlled to burn very slowly, without staining the glass, for many hours. If only a low heat output or limited burning time is required the charcoal will be producing much of the heat with an occasional log being loaded for interest. Letting the bed become too small, or putting on a new log when all the flames from a previous loading have extinguished will cause smoke as the new loading struggles to ignite. Always add wood to the insert before flames from a previous loading have extinguished. If there are no flames, only glowing embers, add a small amount of kindling wood and set the insert to its ignition setting. Never put logs onto a fire without flames, they will smoulder and emit smoke. X X How to Put on More Wood Wood needs not only heat but also air to burn and putting an enormous amount of logs at one time or interlocking them like bricks will both stifle the existing fire, causing it to cool; it will also limit the air available for the new wood. This will result in delayed ignition of the loading and unacceptable levels of smoke emission. Always try to keep ends of logs away from the combustion chamber walls so that gases emanating will have good access to air. If you are having to burn unsplit logs, they will release most of their initial gases only from their ends, it is important to rake embers so that the log ends are over the charcoal bed to heat the gases to promote rapid ignition. Avoid burning un-split logs if you can. If the logs are split it is better to put the log on the fire bark side down because the bark will ignite rapidly when placed on the charcoal and gases from the split surfaces will have an unrestricted air supply. © EUROHEAT DISTRIBUTORS (H.B.S) LTD. April. 2011 18 Instructions Part Number IN1176 Ed B Always try to position new logs so that they are in the path of existing flames by bridging the flames where possible. Do not over fill the insert with wood expecting it to burn for an extended time, it will produce little but smoke and tar. If the insert is running with a low air volume setting, turning up the volume for a few minutes whenever you load new logs will encourage them to ignite faster. Do not be afraid to put logs towards the front of the fire, the glass will stay clean and the visual interest will be increased. X X LOG ENDS TOO CLOSE TO Insert WALLS. NO SPACE BETWEEN THE LOGS TOO MANY LOGS TOO LITTLE SPACE BETWEEN THE LOGS. CORRECTLY LOADED Setting the Burning Rate Setting the air volume rate on the Plexus should always be done with reference to the condition of the fire. You cannot expect to turn the air to maximum and the insert increase its heat output if the fire in the insert is ash with a few glowing embers. Neither should the insert be expected to shut down a huge fire immediately the air supply was restricted, without producing copious amounts of smoke. Unlike driving a car that accelerates and brakes, wood burning should be regarded as something that gathers and losses momentum gracefully, and all adjustments to the burning rate should be made accordingly. Putting a large quantity of wood into the insert and turning the air setting to low will inevitably result in smoke as the wood is heated with insufficient air to burn with. Always wait until the wood is producing flames before turning down the air volume in stages. If the fire has become very lethargic after a long period of slow burning, or has no flames, set the air controls to their lighting position and place a few pieces of dry kindling onto the fire bed to ensure rapid ignition. Once the kindling has ignited the air direction lever should be set to its uppermost position and the volume control set to maximum before adding one or two logs. Never allow wood to smoulder, it wastes heat and pollutes the atmosphere. + If you have fitted a remotely controlled burner rate adjustment, please read Technical Guides IN1203 Thermostatic Remote Control (pictured), for advice on making the most of its facilities. © EUROHEAT DISTRIBUTORS (H.B.S) LTD. April. 2011 19 Instructions Part Number IN1176 Ed.B Slow, Overnight Burning Wood releases its volatile gases when heated, if insufficient air is available, or the temperature is below the ignition temperature of these gases, they will deposit themselves as tar and other undesirable substances on the insert body, glass and in the flue. Filling the insert with wood and restricting the air supply may be the only option available to many who want to keep the insert warm for extended periods but it is not necessary for you to adopt this anti-social practice. Your insert has been designed to burn all the gases from the wood as a priority, leaving the charcoal to burn later. Good quality charcoal, which is what the insert will produce, has the ability to burn slowly and cleanly with a restricted air supply, and by allowing the charcoal to build up in the insert it will provide many hours of clean gentle heat. The amount of charcoal needed to burn for any length of time is surprisingly small but the quantities can be increased by putting a new loading of wood to the front of the insert. Of great importance is that the insert’s air is not reduced to a very low setting if flames are still visible; reducing the air to a minimum will extinguish any flames and cause tar and smoke to be produced. Always wait until no more flames are evident before you can safely turn the air volume to a minimum setting with no fear of staining the glass. The actual setting needed will depend upon the performance of your flue setting, and by raking the ashes through the grate in the morning will reveal either no charcoal remains which means the setting was too high, or a cold insert and an abundance of charcoal indicating the setting was too low. If any charcoal remains never assume it not to be burning. If you rake any charcoal over the grate, close the insert door and set the air controls to their lighting position it will almost always begin to glow even when it gave no sign of burning. Placing wood, whose size is in proportion to the amount of charcoal remaining, over the burning charcoal will rapidly produce a good fire because the insert and flue will have retained some residual heat. This technique of using only the charcoal to burn should be used whenever the insert is to be left unattended for long periods. If you have managed to run your insert overnight, without staining the glass, you have achieved the highest achievement possible as a insert operator and you should award yourself an enormous gold star. © EUROHEAT DISTRIBUTORS (H.B.S) LTD. April. 2011 20 Instructions Part Number IN1176 Ed B Getting Started With Coal (solid mineral fuel) Having learned where to find the controls, you are now ready to light a coal fire in the insert, without filling the insert or neighbourhood with smoke. To light the fire with wood you will need two pieces of newspaper, a small bundle of kindling wood, and smokeless coal. Remember that your insert needs your help to gently push start it in the right direction until it warms. Do not expect it to be on auto pilot until it reaches its operating temperature. Ensure the ash pan is fitted and empty, then securely close the ash pit door. ACME 1 2 If the fire is to be lit using paper and wood, set the Plexus control to maximum air volume and the air direction lever to mid position, supplying air above and below the grate. 3 Lightly crumple two tabloid sized pieces of newspaper and lay them in the middle of the grate. Resist the temptation to use more paper than this, or to crumple it too tightly; doing either will prevent the rapid development of flames and will cause smoke to be produced. © EUROHEAT DISTRIBUTORS (H.B.S) LTD. April. 2011 21 Instructions Part Number IN1176 Ed.B The kindling wood should be placed over the paper so as to rest against each other in a conical formation, leaving space between each piece. Light the paper using a long match or spill and close the insert door. The lightly crumpled paper will begin burning rapidly and the space between the kindling will allow the long bright flames to pass between and over the wood raising it to its ignition temperature. Wait until the kindling fire core has lost its large flames and is glowing then, wearing the glove, lay several pieces of kindling on the top of them followed by pieces of coal. Try to leave open spaces between pieces of coal with some bridging others rather than a single layer. Putting on too much at this stage will only cause smoke and hinder the fire’s development. When the loading of coal is burning brightly, the air volume should be reduced and set to the mid position. If you are burning Anthracite, the air direction lever should now be moved to the lowest position. If you are burning one of the manufactured smokeless coals the air direction lever should always remain in the mid position. 1 1 2 2 3 3 © EUROHEAT DISTRIBUTORS (H.B.S) LTD. April. 2011 22 Instructions Part Number IN1176 Ed B New loadings of coal should be placed to cover only coals which are glowing. It will delay the ignition of coal not already burning if further layers of coal are added to them. Smoke production will be reduced if new coals are added only when the coal has stopped emitting flames but is glowing brightly. Lighting Coal With Firelighters 1 2 Fire lighters perform well only if the blocks are protected from fast air flow. Setting the air volume to a position between maximum and the mid position will provide sufficient air for the firelighters to burn without causing the flames to be blown out. The air direction lever should be set to its mid position. 3 Placing a layer of coal on the grate for the firelighters to sit on will help to defuse the air flow. Bridge the firelighters with coal trying to avoid coal actually touching the firelighters. © EUROHEAT DISTRIBUTORS (H.B.S) LTD. April. 2011 23 Instructions Part Number IN1176 Ed.B The coal should be at least glowing by the time the firelighters have extinguished and may even be producing flames. Whichever coal is being used the air volume should now be set to the mid position. 1 2 1 If the fuel is manufactured smokeless coal the air direction lever should remain in the mid position. If the fuel is Anthracite the lever should be set to its lowest position. 2 3 3 New loadings of coal should be placed to cover only coals which are glowing. It will delay the ignition of coal not already burning if further layers of coal are added to them. Smoke production will be reduced if new coals are added only when the coal has stopped emitting flames but is glowing brightly. If you lit your fire in the insert cleanly and you are now feeling it becoming hot, congratulations, you have passed the lighting test and are no longer a total novice, You can throw away your “L” plates and move on to become an advanced driver. © EUROHEAT DISTRIBUTORS (H.B.S) LTD. April. 2011 24 Instructions Part Number IN1176 Ed B Why Did You Fail? Coal is generally a simple, trouble free fuel which lights easily, but slowly. Before looking again at your lighting procedure examine the coal for evidence of moisture. Many of the manufactured coals will absorb water and this will prevent the coal from igniting or burning properly for a considerable time. The Fire Went Out If you are used to lighting a fire with “house coal” you will find smokeless coal needs heating for a considerably longer time before it begins to burn. Disturbing the fire before the coals are burning brightly will often take the parts of coal that have just ignited away from the heat, allowing them to extinguish. If you have used firelighters it must be remembered that they are petroleum based and have only flames to heat the coal. If coals are placed directly over them or the coals were piled too high the vapours will burn above and, often seemingly detached from the fire bed, rather than under the coals. Ensure that the air settings were correct because too high a draught will cause a similar effect. If the fire was lit with wood it is probable that too much coal was placed on the fire, too soon. COALS TOO HIGH OR SMOTHERING THE FIRELIGHTERS TOO MUCH AIR THROUGH THE GRATE TOO MUCH COAL OVER THE KINDLING The Glass Blackened See the above. Do not put too much coal on at one time and never turn the insert air volume down other than by gradual increments. Do not add new loadings of coal if the previous loading is still producing significant flames. THE FIRE NEVER DEVELOPED ENOUGH SIZE OR BECAME HOT ENOUGH 1 1 2 2 3 3 © EUROHEAT DISTRIBUTORS (H.B.S) LTD. April. 2011 Ensure the air settings are adjusted correctly, riddle the fire before putting on new loadings of coal. Try and avoid putting on new coal over any coals from a previous loading that have not ignited, or are still burning vigorously. 25 Instructions Part Number IN1176 Ed.B Advanced Insert Driving With Coal (also known as solid mineral fuel) Because it is the volatile gases that produce smoke, all coals defined as being “smokeless” either naturally have low volatile content or have had their volatile content reduced during their manufacturing process and so many of the problems associated with solid fuels are eliminated. Some of the manufactured coals produce more ash than might be expected, and have additives binding the coals into symmetrical shapes which tend to leave residues on the insert glass, but this can easily be avoided. When To Put On More Coal Smokeless coals will produce flames when they initially begin burning. The amount of flame will diminish at a rate depending on the specific coals being burned but all smokeless fuels give almost all their heat from being a red hot mass. While it is acceptable to add more coals when the fire bed reaches this uniform red glow, unless you are building the fire up to produce the insert’s maximum heat output the fire should be left until ash is forming on the tops of the coals before adding more coals. How To Put On Coal If ash formation makes it necessary to riddle the insert, always riddle before adding new coals. It is only necessary to riddle if ash is restricting air passing through the grate to the fire. Putting new coals onto a fire that has a restricted air flow risks gases being released from the coals with insufficient air to burn and suddenly introducing air by riddling the grate may cause the accumulated gases to ignite suddenly and startlingly. New coals should be loaded onto the fire as an even layer rather than a central mound so that it ignites rapidly and evenly. Never load more coal than is contained by the Maximum Loading Height log guard; this is especially important if rounded formed coals are being burned Setting The Burning Rate If a substantial loading of coals has been placed on the insert it is good practice to increase the air volume a little until the flames diminish to ensure the majority of volatiles have burned. Once the flames have diminished the insert’s burning rate can be adjusted to a lower setting of your choice, but doing so in several increments is the better practice. Slow, Overnight Burning The insert will burn gently for extended periods simply by reducing the air volume to a very low setting with little or no preparation. Once again it is important not to reduce the air volume until almost all the flames have disappeared and if the fire is to be kept in overnight it is advisable to give the insert a thorough riddling before leaving it to ensure the ash does not prevent the limited air supply reaching all the burning coals. Coal may be easier to manage than wood but if you have managed to run your insert overnight, without staining the glass, you will still have achieved the highest achievement possible as a coal insert operator and you should award yourself an enormous gold star. © EUROHEAT DISTRIBUTORS (H.B.S) LTD. April. 2011 26 Instructions Part Number IN1176 Ed B Cleaning The Insert Cleaning The Glass Properly operated, with the correct fuel, your glass will remain clean. Slight staining may appear when the insert is lit and below its operating temperature. This will normally clear as the insert’s temperature rises. If it becomes necessary to clean the glass by hand do not attempt to do so unless the insert is cold. Proprietary glass cleaning agents are available but they must specifically state its suitability for insert glass before being used because the glass in you insert is not ordinary glass and may be damaged with an unsuitable cleaner. Newspaper moistened with water to which a little vinegar has been added will normally remove most staining, but for really stubborn marks, gentle polishing with fine steel wool lubricated with a few drops of dish washing detergent will need to be employed. Great care must be taken not to clean the glass too vigorously as particles of grit may have adhered with the stain and these could cause scratching if dragged across the glass. However well the insert burns it will eventually become necessary to clean the glass, but if cleaning becomes necessary too often we advise you to review your operating procedures to determine whether cleaner and more efficient combustion can be achieved. The Insert Body Dusting the insert may be carried out when the insert is at its minimum heat output temperature, using light strokes of a real bristle paint brush. Thorough cleaning, or any attempt to remove marks on the insert body must only be done when the insert is cold. Inserts with a painted black finish should never be cleaned with a cloth as the texture of the paint will abrade and collect lint from the cloth which will be almost impossible to remove. Vigorous brushing with a stiff real bristle paint brush will remove all dust, but where the paint is marked, the stains are better obliterated with a spray of suitable insert paint rather than attempts made to clean them off. Suitable paint may be purchased from a insert shop or direct from Euroheat. The Flue Even if your flue is correctly lined it is advisable to run your insert at a high setting to thoroughly warm the flue periodically and ensure it is swept regularly. If the insert has not been used for some time it will be necessary to ensure the flue has not been blocked with twigs from home building birds or blocked with other obstructions before the insert is lit. Lighting a small piece of paper within the insert will determine the flue’s ability to remove any products of combustion. National Chimney Sweeps Association The Solid Fuel Association © EUROHEAT DISTRIBUTORS (H.B.S) LTD. April. 2011 01785 811732 0845 6014406 . 27 Instructions Part Number IN1176 Ed.B Simple Maintenance The insert must be cleaned of ash and any tarring as often as your use of the insert and fuel dictate. All deposits on the insert interior will insulate the insert body from the fire and will reduce the insert’s efficiency. Flue ways which become choked will not only reduce the inserts performance but can become a serious health risk if the flue is not taking away all the products of combustion. Do not use a vacuum cleaner unless it is fitted with an additional hot ash filter bin Summer Shutdown At the end of each heating season the entire installation should be thoroughly cleaned and examined for soundness; this should include having the flue examined by a registered sweep. The insert interior should be treated with a moisture repellent such as WD40 and all operating mechanisms lubricated with a suitable oil, or again with WD40. ALWAYS CHECK FOR ANY FLUE BLOCKAGE BEFORE LIGHTING THE INSERT AFTER A PROLONGED SHUTDOWN. Removing Top Chamber Baffle Periodically the insert should be thoroughly cleared of all combustion deposits which will necessitate the removal of the vermiculite baffle and cast protection plates. 1 2 3 © EUROHEAT DISTRIBUTORS (H.B.S) LTD. April. 2011 The top mica baffle is located in the top of the fire box where it sits on the L shaped baffle support lugs, which are part of the casting of the left and right side protection plates. For easier access remove the front fuel guard. To remove (1) lift the left or right hand side of the baffle board upwards as far as it will lift. (2) Slide it to that side so it moves clear of the lug on the other side and (3) then drop it down into the fire box. It can then be angled to withdraw it through the door. To refit the replacement reverse the procedure. If the new baffle plate is a very tight fit, it may be advisable to cut, using a saw, a few millimetres from either end of the board. 28 Instructions Part Number IN1176 Ed B Removing Cast Iron Internal Components 1 Removal of the Upper protection plate The upper protection plate is held in place by the two side protection plates. To remove (1) lift up the plate and then (2) draw it towards the front of the fire box. As it is drawn forward (3) pull the front edge downwards so moving it free of the side protection plates. It can then be angled within the fire box to withdraw it through the door. 2 3 To refit the replacement reverse the procedure. Removal of the Side protection plate. 2 To remove (1) lift up the plate so it is higher than the grate frame and then (2) twist the rear edge towards the front of the fire box. It can then be angled within the fire box to withdraw it through the door. 1 To refit the replacement reverse the procedure. 2 1 Removal of the Rear protection plate. To remove (1) lift up the plate so it is higher than the grate frame and then (2) draw it towards the centre of the fire box. As it is drawn towards the centre twist the edge towards the front of the fire box. It can then be angled within the fire box to withdraw it through the door. To refit the replacement reverse the procedure. © EUROHEAT DISTRIBUTORS (H.B.S) LTD. April. 2011 29 Instructions Part Number IN1176 Ed.B Faulty Operation Always seek the advice of a qualified engineer if your insert is not operating correctly. Never use the insert with any damaged or malfunctioning components. Typical Refuelling Intervals at Nominal Heat Output, Intermittent Operation Model Heat Output Nominal Wood Refuelling Interval Wood Heat Output Nominal Lignite Refuelling Interval Lignite 6.6kW 38 Minutes 9.5kW 66 Minutes IT 33 Declaration The information provided for the room heater fuelled by wood and Lignite (solid mineral fuel), has been measured as specified in EN13240:2001 and EN 13240-A2:2004. Warranty Thank you for choosing a Euroheat/Nestor Martin insert. It has been constructed with the utmost care and with the finest materials; we hope it gives you many years of pleasurable warmth. Any modification to the appliance, or the fitting of non approved parts, will cancel any warranty and may make it unsafe. Warranty Registration Please ensure this is fully completed by your installing engineer with details of your approved Euroheat supplier and returned to Euroheat within 28 days of installation. The free 10 year technical telephone help can only be authorized, if the insert is registered, fitted by an approved engineer and the registration form returned to Euroheat. Euroheat reserve the right to reject the extended support if the requirements are not met. Euroheat & Nestor Martin have a policy of continual research and development and reserve the right to modify its appliances without prior notice. We make every effort to ensure that the information provided in this document is correct and accurate at the time of printing, but continued updates occur to adapt documents to appliance changes and customer feedback. For the latest editions of all Euroheat documentation visit our web site www.euroheat.co.uk. We would welcome any comments or information which you feel is not provided in this document which would assist other users in the future. E-mail [email protected] © EUROHEAT DISTRIBUTORS (H.B.S) LTD. April. 2011 30 Instructions Part Number IN1176 Ed B © EUROHEAT DISTRIBUTORS (H.B.S) LTD. April. 2011 31 Instructions Part Number IN1176 Ed.B Need more info? with over 10,000 pages of technical information, spare parts, product shots, news and 1001 other things, - you will not find a more comprehensive solution to your queries, whatever time of the day. www.euroheat.co.uk Court Farm Business Park, Bishops Frome, Worcestershire WR6 5AY Technical: 01885 491117 Reception: 01885 491100