1
General Installation Manual
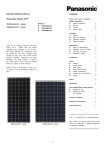
HIT Photovoltaic Module
VBHNxxxSJ25 series
Please
read
installation!
carefully
Model No.
VBHN245
VBHN245S
45SJ25
VBHN240
VBHN240S
40SJ25
before
CONTENTS
SAFETY PRECAUTIONS ..................2
General Information ................ 2
Warning ..................................... 2
Cautions ..................................... 2
General Safety .......................... 2
INSTALLATION ...............................2
General....................................... 2
Notes on Installation ............... 3
Operating Conditions .............. 3
Special Conditions .................... 3
Thank you for choosing Panasonic HIT
photovoltaic (PV) modules. Please read
this
manual
completely
before
installation or use of Panasonic HIT PV
modules. With proper operation and
maintenance,
Panasonic
HIT
PV
modules will provide you with clean,
renewable solar electricity for many
years. This manual contains important
installation, maintenance and safety
information. The word “module” as
used in this manual refers to one or
more PV modules. Retain this manual
for future reference.
SPECIFICATIONS .............................3
Notes on Specifications ........... 3
Application class of product... 3
Fire class of product ................. 3
Mechanical Loading................. 3
CERTIFICATION ..............................3
WIRING ...........................................3
General....................................... 3
Module Wiring.......................... 3
SANYO is part of the Panasonic Group
and is in charge of the manufacturing
process for Panasonic HIT PV modules.
Array Wiring ................................ 4
Earth Ground Wiring ............... 4
Module Terminations .............. 4
Junction Box and Terminals ... 4
Conduit ...................................... 4
DIODES ...........................................4
Bypass Diodes ........................... 4
MAINTENANCE ..............................4
ANTI REFLECTION GLASS SURFACE
CLEANING ......................................4
Cleaning of dirt ......................... 4
Cleaning of soiling from
handling ..................................... 5
DISCLAIMER OF LIABILITY ............5
DISPOSAL OF OLD EQUIPMENT ....5
CUSTOMER SERVICES ....................5
1
SAFETY PRECAUTIONS
General Information
•
The installation of modules requires a
great degree of skill and should only be •
performed
by
qualified
licensed
professionals,
including,
without
limitation, licensed contractors and
licensed electricians.
•
Warning
•
•
•
•
•
•
•
•
•
•
•
All instructions should be read and
understood before attempting to
install, wire, operate, and maintain
the
module.
Contact
with
electrically active parts of the
module such as terminals can result
in burns, sparks, and lethal shock
whether the module is connected
or disconnected.
The installer assumes the risk of all
injury that might occur during
installation,
including,
without
limitation, the risk of electric shock.
The modules generate DC electrical
energy when exposed to sunlight
or other light sources. Although a
single module produces only a low
voltage and current, shocks and
burns are still a potential hazard.
To avoid the hazard of electric
shock and injury, cover the entire
front surface of the module with a
dense, opaque material such as a
cardboard box, during installation
and handling of the module.
The shock hazard increases as
modules are connected in parallel,
producing higher current, and as
modules are connected in series,
producing higher voltages.
The shock hazard increases with
modules with nominal open-circuit
voltage (Voc) in excess of 50 V,
and/or
modules
rated
for
maximum system voltage in excess
of 50 V.
To avoid the hazard of electric
shock, work only in dry conditions,
with dry modules and dry tools.
Do not stand or step on a module
to avoid the hazard of injury and
damage to the module.
Do not puncture or damage the
back sheet of a module, to avoid
the hazard of electric shock and
fire.
To avoid the hazard of electric
shock and injury, children and
unauthorized persons should not
be allowed near the installation of
modules.
Do not drop a module.
•
•
•
•
•
•
•
•
•
•
•
•
•
To avoid the hazard of electric
shock and injury, be sure to
completely ground all modules.
To avoid the hazard of electric
shock, fire, and injury, do not
disassemble the module, or remove
any
part
installed
by
the
manufacturer.
Unauthorized persons—except the
qualified licensed professional—
should not open the cover of the
junction box to avoid the hazard of
electric shock.
Do not touch terminals while a
module is exposed to light. Provide
suitable guards to protect you from
direct contact with 30 VDC or
greater to avoid the hazard of
electric shock or injury.
When carrying a module, two or
more people should carry it by its
frame and wear non-slip gloves (to
avoid injury by a slipping module,
to a foot, or cuts by the edge of a
frame, and so on).
Do not carry a module by its wires
or junction box, to avoid the
hazard of electric shock, injury or
damage to the module.
Do not drop anything on the
surfaces of a module, to avoid the
hazard of electric shock, injury, and
damage.
To avoid the hazard of electric
shock and fire, be sure that all
other system components are
compatible and do not subject the
module to mechanical or electrical
hazards.
Since sparks may occur, do not
install the module near flammable
gases or vapors.
Never leave a module unsupported
or unsecured.
Do not use or install broken
modules to avoid the hazard of fire,
electric shock, and injury.
Do not artificially concentrate
sunlight on a module to avoid the
hazard of fire or damage.
Do not touch the junction box
terminals to avoid the hazard of
electric shock and injury.
Do not change the wiring of bypass
diodes to avoid the hazard of
electric shock and injury.
Do not disconnect terminals while
modules generate electricity and
connect electrical load to avoid the
hazard of electrical shock.
Do
not
touch
a
module
unnecessarily. The glass surface
and frames get hot. There is a risk
of burn.
2
Cautions
•
•
Use a module for its intended
purpose only.
Do not treat the back sheet or
front
surface
with
paint
or
adhesives, to avoid reducing its’
functionality, damage, inoperable
conditions, and other unknown
troubles.
General Safety
Follow all permissions, installation and
inspection requirements.
•
Before installing modules, contact
the appropriate authorities to
determine permissions, installation
and
inspection
requirements,
which should be followed.
•
Be sure that the construction or
structure (roof, etc.) where the
modules are being installed has
enough strength.
•
For modules mounted on roofs,
special construction or structures
may be required to help provide
proper installation support.
•
Both roof construction and module
installation design have an effect
on the fire resistance of a building.
Improper
installation
may
contribute
to
fire
hazards.
Additional devices such as ground
fault, fuses, and disconnects may
be required.
•
Do not use modules of different
specifications in the same system.
•
Follow all safety precautions of
other system components used.
INSTALLATION
General
Please read this manual carefully
before installation or use of the
modules. This section contains electrical
and mechanical specifications needed
before using your Panasonic PV
modules.
•
Modules should be firmly fixed in
place in a manner suitable to
withstand all expected loads,
including wind and snow loads.
•
Modules use anti reflection glass.
Surface of the glass is easy to be
soiled, when it is grasped by hand
or hand globes. It is recommended
to hold cardboard or frames when
carrying or installing the solar
panel. When cables and connectors
touch hardly with surface of the
glass, it may soil the surface too. It
is also recommended to avoid
contact of cable and connectors
•
•
•
•
with surface of the glass. (If the
glass surface becomes dirty, see
section on anti reflection glass
surface cleaning.)
For a non-integral module or panel,
the assembly is to be mounted over
a fire resistant roof covering rated
for the application.
Appropriate material should be
used for mounting hardware to
prevent
the
module
frame,
mounting structure, and hardware
itself from corrosion.
Install modules where they are not
shaded by obstacles like buildings
and trees. Pay special attention to
avoid partially shading the modules
by objects during the daytime.
Please contact your authorized
Panasonic
Representative
with
questions
regarding
mounting
profiles for modules if needed.
Notes on Installation
•
•
•
Clearance of “10 cm” between the
roof surface and module frame is
required to allow cooling air to
circulate around the back of the
module. This also allows any
condensation
or
moisture
to
dissipate. Install modules so that
air can circulate between the roof
and the module.
We
recommend
installation
methods shown in Figure 2. In
some areas, local electrical codes
may govern the installation and
use of modules.
To avoid the hazard of the electric
shock and fire, do not contact and
damage the back sheet of the
module with mounting bolts.
Operating Conditions
Panasonic recommends that modules
be operated within the following
Operating Conditions. An installation
location with conditions beyond the
Operating Conditions or with other
Special Conditions (see below) should
be avoided. Operating Conditions of
Panasonic HIT PV modules are as
follows:
1) The modules should be operated
only in terrestrial applications. No
space or other Special Conditions
(see below).
2) The ambient temperature should
be within –20°C (-4°F) to 40°C
(104°F).
3) The relative humidity should be
within 45% to 95%.
4)
The wind pressure load of the Fire class of product
installation site should be less than Panasonic HIT PV modules fill the fire
2,400N/m2 (50PSF).
class C that provides to IEC61730-2.
Class C roof coverings are effective
against light fire test exposures. Under
Special Conditions
1) The ambient temperature and such exposures, roof coverings of this
installation place are different from class afford a light degree of fire
the
recommended
Operating protection to the roof deck, do not slip
Conditions.
from position, and are not expected to
2) Salt damage is severe at the produce flying brands.
installation place.
3) Hail and snow damage is excessive Mechanical Loading
at the installation place.
•
The modules should be mounted
4) Sand and dust damage is excessive
basically at the four (4) quarter
at the installation place.
points by the means shown in
5) Air pollution, chemically active
Figure 1-1. However, you may
vapors, acid rain, and/or soot, etc.
choose the optional mounting
are excessive at the installation
ranges (with limitation of fixing
place.
span) by means shown in Figure 12 or Figure 1-3 for VBHNxxxSJ
series.
SPECIFICATIONS
•
This method offers a maximum
Notes on Specifications
load of 2400N/m2 (50PSF, in a
1) Rated electrical characteristics are
static state) on the module surface.
within from +10% to -5% of the
values measured at Standard Test
Conditions (STC). Irradiance of CERTIFICATION
1000W/m2, 25oC cell temperature, VBHNxxxSJ
complies
with
the
and solar spectral irradiance per requirements of IEC61215, IEC61730-1,
IEC 60904-3.
IEC61730-2 and the CE mark.
2) Under
normal
conditions,
a
photovoltaic module may produce WIRING
more current and/or voltage than General
reported at standard test condi- •
All wiring should be done in
tions. Accordingly, the values of Isc
accordance
with
applicable
and Voc should be multiplied by a
electrical codes.
factor of 1.25 when
determining •
All wiring should be done by a
voltage
ratings,
conductor
qualified, licensed professional.
capacities, fuse sizes, and size of •
Wiring should be protected to help
controls connected to the module
ensure personal safety and to
output.
prevent its damage.
3) The current output for the modules •
All modules connected in series
shown in the Specifications is
should be of the same model
measured
at
Standard
Test
number and/or type.
Conditions. These conditions may •
Do not connect modules in parallel
not be frequently observed in
without using a connection box.
actual practice.
•
Do not disconnect terminals while
PV modules generate electricity
Application class of product
and connect electrical load to avoid
Panasonic HIT PV modules are applied
the hazard of electrical shock.
to application class A. Application class •
To avoid the hazard of electric
A for PV-modules are defined as
shock and sparks, please connect
follows:
each cable after confirming the
Class A: General access, hazardous
polarity of them is correct.
voltage, hazardous power applications •
Cable conduits should be used in
Module rated for use in this application
locations where the wiring is
class may be used in systems operating
inaccessible to children or small
at greater than 50 V DC or 240 W,
animals.
where general contact access is
anticipated. Modules qualified for Module Wiring
safety through this part of IEC 61730-1 •
The
maximum
number
of
and IEC 61730-2 and within this
VBHNxxxSJ series that can be wired
application class are considered to
in series is seventeen (17).
meet the requirements for safety class
II.
3
•
•
•
Modules shall not be wired in
parallel without maximum over
current protection.
When installing a PV array, the
system design must be completed
with reference to the module
electrical specifications for proper
selection
of
inverters,
fuses,
breakers,
charging
controllers,
batteries and other storage devices.
These modules contain factory
installed bypass diodes. If these
modules are connected each other
incorrectly, the bypass diodes,
cable, or junction box may be
damaged.
24 cells / diode
24 cells / diode
24 cells / diode
Figure 4: Number of series cells per bypass diode
Array Wiring
change diodes due to system
engraved onto the body of the
The term “array” is used to
specifications.
junction
box)
(see
Figure
3).
describe the assembly of several
modules on a support structure
Conduit
MAINTENANCE
with associated wiring.
For
applications
where
wire •
Some
maintenance
is
•
Use copper wire that is sunlight •
conduits are used, follow the
recommended to maintain optimal
resistant and is insulated to
applicable codes for outdoor
output performance of the solar
withstand the maximum possible
installation of wires in conduits.
modules.
system open circuit voltage.
Minimum diameter of wire conduit •
It is also recommended to inspect
•
Check
your
local
codes
for
is 4 mm2.
the electrical and mechanical
requirements.
•
Verify that all fittings are properly
connections annually.
installed
to
protect
wires
against
•
If
you need electrical or mechanical
Earth Ground Wiring
damage
and
prevent
moisture
inspection
or maintenance, it is
•
The kind of the earth construction
recommended to have a licensed
intrusion.
shall conform to IEC61730-1.
authorized professional carry out
•
Grounding should be carried out by
the inspection or maintenance to
the attachment to the module or DIODES
avoid the hazards of electric shock
Bypass
Diodes
array frame, to avoid the hazards
or injury.
•
When
the
modules
in
series
strings
of electric shock or fire.
The return of any modules will not
are shaded partially, it may cause •
be accepted by Panasonic unless
reverse voltage across cells or
Module Terminations
prior written authorization has
modules, because the current from
•
A junction box as a terminal
been given by Panasonic.
other
cells
in
the
same
series
is
enclosure is equipped for electrical
•
As part of our policy of continuous
forced
to
flow
through
the
shaded
connections on modules.
improvement Panasonic reserves
area. This may cause undesirable
•
Modules are equipped with SMK
the right to change product
heating to occur.
plugs as a terminal enclosure. Use
specifications at any time without
The use of a diode to bypass the
these SMK plugs for electrical •
prior notice.
shaded
area
can
minimize
both
connections.
heating
and
array
current
•
If
two
or
more
separable
reduction.
ANTI
REFLECTION
GLASS
connectors are provided, they shall
All modules are equipped with SURFACE CLEANING
be configured or arranged so that •
factory installed bypass diodes. The Cleaning of dirt
the other and vice-versa will not
factory installed diodes provide •
If the module surface becomes
accept the mating connector for
proper
circuit
protection
for
the
dirty, it may reduce output power.
one, if it will result in an improper
systems within the specified system •
It is recommended to clean the
connection.
voltage, so that you do not need
surface of the module with water
•
Please contact your Panasonic
any other additional bypass diodes.
and a soft cloth or sponge.
Authorized Representative with
Specifications of bypass diode for •
To remove persistent dirt, the
questions regarding other electrical •
VBHNxxxSJ series are as follows;
module can be washed with a
connections if needed.
Number of bypass diode: 3 diodes,
micro-fiber cloth and ethanol.
Number of series cells per bypass •
Never use abrasive detergent,
Junction Box and Terminals
diode: 24 cells / diode (See Figure
strong alkaline detergent and
•
Modules
equipped
with
one
4).
strong acid detergent to clean any
junction box contain terminals for
Panasonic
Authorized
•
Contact
your
part of the module. Performance
both positive and negative polarity,
Representative
for
proper
diode
of solar panel may be reduced.
and bypass diodes.
type, if it is necessary to add or
Please be very careful since
•
One terminal is dedicated to each
•
polarity (with the polarity symbols
4
warranty will not cover the Panasonic reserves the right to make
damage from detergent.
changes to the product, specifications,
•
When cleaning with detergent, it is or manual without prior notice.
recommended
to
start
with
smallest area and from the edge of DISPOSAL OF OLD EQUIPMENT
solar panel in order to check no
This symbol on the products,
damage occurs to the glass.
and/or
accompanying
•
It is recommended to read carefully
documents means
that
the manuals of detergent and
used
electrical
and
understand notes on usage and
electronic products must
first-aid treatment.
not be mixed with general
household waste.
For proper treatment, recovery and
Cleaning of soiling from handling
•
Unlike the persistent dirt, soiling of recycling of old products, please take
surface from holding the glass will them to applicable collection points in
not affect performance of solar accordance
with
your
national
panel. Therefore cleaning is not legislation.
necessary for this soil on glass For more information about collection
surface caused by handling. In case and recycling, please contact your local
customer
prefers
cleaning, municipality.
following is the recommendation Penalties may be applicable for
incorrect disposal of this waste, in
of cleaning methods.
•
Wipe gently with clean cloth and accordance with national legislation.
neutral glass detergent or weak
alkaline glass detergent.
•
After that, clean surface of glass
with wet and clean cloth.
CUSTOMER SERVICES
•
Acid and strong alkaline detergent For further information, please visit euand the detergent which forms solar.panasonic.net
or
contact
a
protective layer on the surface of Panasonic Authorized Representative.
the glass must be avoided. Those
detergents may damage surface of © SANYO Electric Co., Ltd. 2013
the glass and affect on the All Rights Reserved Dec. 25. 2013
performance of solar panel. Please
be very careful since warranty will
not cover the damage from
detergent.
•
When cleaning with detergent, it is
recommended
to
start
with
smallest area and from the edge of
solar panel in order to check no
damage occurs to the glass.
•
It is recommended to read carefully
the manuals of detergent and
understand notes on usage and
first-aid treatment.
DISCLAIMER OF LIABILITY
Panasonic
does
not
assume
responsibility and expressly disclaims
liability for loss, damage, or expense
arising out of, or in any way connected
with installation, operation, use, or
maintenance by using this manual.
Panasonic assumes no responsibility for
any infringement of patents or other
rights of third parties, which may result
from use of modules.
No license is granted by implication or
under any patent or patent rights. The
information in this manual is believed
to be reliable, but does not constitute
an expressed and/or implied warranty.
5
SPECIFICATIONS
Sta ndard Models – V BHNxxxSJ 25
E lectrical Spe cif ica tions
Model
Ce ll Number in Serie s
Rate d Powe r, Wa tts (Pm ax)
Maxim um Powe r V oltage (Vpm)
Maxim um Powe r Curre nt (Ipm )
O pen Circuit Volta ge (V oc)
Short Circuit Curre nt (Is c)
Ce ll Type
Maxim um Syste m V oltage (Voc)
Maxim um over- curre nt prote ct ion
Fa ct ory Insta lled Bypas s Diodes
W
V
A
V
A
V
VBHN245SJ25
72
245
44. 3
5.54
53. 0
5.86
HI T*
1000
V BHN240SJ25
72
240
43. 6
5.51
52. 4
5.85
HI T*
1000
15
3
15
3
A
HIT* : He tero junction with Intr ins ic Thin-layer
Mechanical S pe cifications
Model
Le ngth
mm
VBHN245SJ25
1580
V BHN240SJ25
1580
Width
mm
798
798
He ight
mm
35
35
We ight
kg
15
15
Dimensions
(Module type: VBHNxxxSJ25 ・・・with connector and cable)
Dimension in mm
Backside
* The positions of the holes are all symmetry
against the center of the module.
Section A-A’
Front
Section B-B’
Note) a module is installed using 4 points,
symmetrical mounting within setting range
(shaded).
Side
Figure 1-1: Dimensions
6
Optional Mounting Range B
Optional Mounting Range A
Dimension in mm
Dimension in mm
Note: Fixing span must not exceed 1040mm.
Note: Fixing span must not exceed 1040mm.
Figure 1-2: Optional Mounting Range A
Figure 1-3: Optional Mounting Range B
Installation (reference)
For questions regarding mounting profiles for modules,
please contact your local dealer.
0.43”
(11mm)
1.37”
(35mm)
1.48”
(38mm)
Solar Module
1.48”
(38mm) Metal clamp B
(2 places)
Cable
Metal clamp A
(2 places)
Connector
(SMK plug)
Mounting
Structure Rail
Negative (-)
Figure 2-1 Installation A
Positive (+)
Solar Module
Figure 3: Configuration of
Junction Box
M6 Bolt
Spring washer
Flat washer
Flat washer
Spring washer
M6 Nut
Module
Mounting Structure Rail
Figure 2-2 Installation B
7