1
USER MANUAL
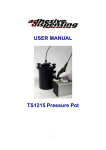
TS2250 Pressure Pot
1
Congratulations on your purchase of a quality Pressure Pot System. If you have not done
so, see the installation guide provided with your system for installation instructions.
Now that your Pressure Pot is ready to use, take a few moments to get to know the parts of
your Pressure Pot. This manual is designed to help you use your Pressure Pot as quickly as
possible.
We here at Adhesive Dispensers Ltd hope you find our product beneficial. If you ever have
any questions, please contact us at the number listed below.
Adhesive Dispensing Ltd.
Willow House, 20 Craigmore Avenue
Milton Keynes, Bucks, MK3 6HD, UK
Tel. 0845 652 0058
FreePhone. 0800 094 9058
Fax (0845 652 0059
Website: www.adhesivedispensers.co.uk
This manual is designed to provide information about the product hardware. Every effort
has been made to make this manual as complete and accurate as possible. There is no implied or
expressed warranty as to the purpose, suitability or fitness of the information. The information is
provided on an as-is basis. Adhesive Dispensing Ltd reserves the right to improve and revise its
products. This manual specifies and describes the product as it existed at the time of publication.
2
WARRANTY
Manufacturer warrants this product, the TS2250 Pressure Pot, to the original purchaser for
a period of one (1) year from date of purchase to be free from defects in material and
workmanship. This warranty, however, does not cover damages by misuse, negligence, accident,
faulty installation, abrasion, corrosion, or by not operating in accordance with factory
recommendations and instructions. Manufacturer will repair or replace (at factory’s option), free of
charge, any component of the equipment thus found to be defective, on return of the component
prepaid to the factory during the warranty period. In no event shall any liability or obligation of
Manufacturer arising from this warranty exceed the purchase price of the equipment. This
warranty is only valid if a Pressure Pot is returned as a complete assembly without physical
damage. The manufacturer’s liability, as stated herein, cannot be altered or enlarged except by a
written statement signed by an officer of the company. In no event shall manufacturer be liable for
consequential or incidental damages. A return authorization is required from Adhesive Dispensing
Ltd. prior to shipping a defective unit to the factory.
Manufacturer reserves the right to make engineering or product modifications without
notice.
Send warranty returns to:
Adhesive Dispensing Ltd.
Willow House, 20 Craigmore Avenue
Milton Keynes, Bucks, MK3 6HD, UK
3
Table of Contents
1.
1.1
1.2
1.3
1.4
2.
2.1
2.2
2.3
2.4
3.
4.
INTRODUCTION ......................................................................................................5
Receiving Inspection Procedure .........................................................................5
Features ...............................................................................................................5
Technical Specifications .....................................................................................6
Cautions And Warnings......................................................................................6
INSTALLATION AND OPERATION.....................................................................7
Connector and Tubing Installation .....................................................................7
Operation Set-Up Procedure ...............................................................................7
Operation Start-Up Procedure ............................................................................9
Operation Stop Procedure .................................................................................10
O-RING CARE ........................................................................................................12
ASSEMBLY DRAWING & PARTS LIST............................................................12
List of Figures
Figure 1
Figure 2
Figure 3
Figure 4
Figure 5
Figure 6
Figure 7
Figure 8
Connect Filtered Air Connection to Base of Pressure Pot ..........................8
Filtered Air Connection to Pressure Regulator ...........................................8
Material Feeding Tube Insertion .................................................................9
Relief Valve...............................................................................................11
Pressure Pot Assembly Drawing ...............................................................13
TS2250-375…..Accessory Kit 3/8” Fitting and Tubing………………….14
TS2250-250…..Accessory Kit 1/4" Fitting and Tubing………………….14
TS2250-4MM...Accessory Kit 4mm Fitting and Tubing…………………15
Table
Table 1
O-Rings Used with Pressure Pot ...............................................................12
4
1.
INTRODUCTION
The TS2250 Pressure Pot offers a convenient, easy to use system for dispensing
cyanoacrylates, as well as many solvents, lubricants and other low to medium viscosity materials
directly from the material container/bottle. Air pressure in the chamber forces the material from
the container/bottle through disposable polyethylene supply tubing to an optional dispensing valve.
An air pressure regulator and pressure gauge control the material flow rate with the dispense
quantity being controlled by the length of time the dispense valve is open.
No cleaning operation is required after dispensing; because there is no direct contact of
dispense material to the Pressure Pot and tube fittings. The polyethylene tubing may be discarded
after use.
To obtain maximum performance, read and follow these instructions carefully before
operating.
1.1
Receiving Inspection Procedure
For Receiving Inspection, proceed as follows:
1.
Carefully remove pressure dispenser from shipping container and examine the items
contained in the carton. These will include the following:
a.
b.
Pressure Dispenser Assembly
Accessory Pack
2.
Inspect the unit for any damage that may have occurred in transit.
3.
If damage has occurred, notify the carrier at once.
4.
Claims for damage must be made by the consignee to the carrier, and should be reported to
the manufacturer.
1.2
Features
•
•
•
•
•
•
•
•
Compatible with UV cured adhesives with O-Ring Kit # TS2250EPR.
Up to 75 psi operating pressure.
Durable stain resistant finish.
Disposable polyethylene tubing.
Integrated on/off valve and controller available.
Stainless Steel Reservoir for high pressure dispensing (75 psi).
Relief Valve with pull ring to depressurize after dispensing operation.
One continuous tube for fluid dispensing from container to valve.
5
•
•
•
•
•
Three different tubing and fitting sizes available (3/8” O.D, 1/4” O.D and 4 mm).
Easy to replace, disposable polyethylene tubing after dispense operation.
No material contact with tube fittings.
No cleaning required after dispense operation.
Two “O” Ring materials provided for different material applications (Viton, EPR/EPDM).
1.3
Technical Specifications
Specification of the TS TS2250 Pressure Pot is as follows:
Size:
188mm x 255mm High
Chamber:
180mm I.D. x 243mm High)
Stainless steel cylinder, aluminium lid
Weight:
8.5 kg
Operating Pressure:
75 psi (5 bar) max.
Tube Sizes:
Options available:
NEED TO BUY TUBE KIT
TS2250-375…..Accessory kit 3/8” fitting and tubing
TS2250-250…..Accessory kit 1/4" fitting and tubing
TS2250-4MM…Accessory kit 4mm fitting and tubing
1.4
Cautions And Warnings
75 psi (5 bar) maximum pressure
Eye protection is required.
Do NOT attempt to open cover lid until air pressure is released.
Cover knobs must be hand tightened ONLY.
Secure the pressure Pot to bench top or other stable work surface.
Model TS2250 has mounting holes in base plate.
•
Check with Factory if unsure about dispensing material chemical compatibility.
6
WARNING
Read the material safety data sheets for special precautions for the
specific material being dispensed. Wear protective safety equipment
as specified in the material safety data sheets.
2.
INSTALLATION AND OPERATION
2.1
Connector and Tubing Installation
1.
Select dispense size Tubing and Male Connector with Ferrule.
3 combination sizes are available:
i.
Tube 3/8” diameter and Male Connector 3/8” X 3/8-18NPT with 3/8” Ferrule.
ii.
Tube 1/4" diameter and Male Connector 1/4" X 3/8-18NPT with 1/4" Ferrule.
iii.
Tube 4mm diameter, Male Connector 4mm X 1/4 –18NPT with 4mm Ferrule,
and Reducer Fitting 1/4 FPT X 3/8 MPT.
2.
Install selected size Male Connector on the Lid by screwing into the 3/8-18 NPT female
threads. Note: Use Teflon tape on connector threads.
3.
Unscrew the Nut only off the Male Connector. Remove the front & back Ferrule.
4.
Insert selected size Tubing through the Nut and the back and front parts of the Ferrule.
5.
Insert the Tubing assembly end into the Male Connector body and loosely screw the
Nut back on the Connector body.
2.2
Operation SETUP Procedure
1.
Insure pressure regulator is off (set at zero). Pull locked regulator knob out to unlock and
turn counterclockwise several rotations to set to zero psi.
2.
Connect Filtered Air Connection to clip of pressure pot as shown in Figure 1.
3.
Connect air hose from filtered source to the quick male connector air inlet fitting on
regulator assembly as shown in Figure 2.
4.
Turn three locking knobs counterclockwise to remove cover. Unscrew each locking
knob until it is able to flip over its hinge to clear the cove plate.
5.
6.
Remove cover lid on TS2250 Pressure Pot and carefully set it aside.
Remove cap from material container. Cap may be saved for future resealing of
container.
7
7.
Place material container inside pressure pot chamber.
NOTE:
DO NOT pour or spill dispense material into Pressure Pot chamber.
Figure 1 Connect Filtered Air
Connection
Figure 2 Filtered Air Connection
to Pressure Regulator
8.
Insure that the ‘O-Ring stays in groove of cover.
9.
Insure the connector tubing installation is complete as described in Section 2.1
Connector and Tubing Installation. Nut on connector body should be very loose to
enable easy movement of tube through the connector body on cover.
10.
Install cover lid on Pressure Pot making sure to direct tube end into opened container
with dispense material/fluid.
11.
Align the 4 slots on cover with the 4 locking knobs.
12.
Lift the 4 locking knobs into slots on cover and tighten the 3 locking knobs uniformly
until snug. (Hand tight only)
13.
Push tubing through the connector fitting on cover further into dispense material/fluid
until it touches the bottom of container. Relying on feel only, pull the tubing to retract
about 1/4” from the bottom of container as shown in Figure 3.
14.
Hand tighten the nut securely onto the connector body. Try to pull on the tube to insure
the ferrule is holding the tube securely in the connector.
15.
Make necessary connection at the dispense end of the tube.
Note: Connect dispense end of the tube to selected dispense valve
8
CAUTION
Never pour adhesives or other material directly into
dispenser. To do so may cause severe damage to dispenser.
Use material container or similar containment vessel.
Figure 3
Material Feeding Tube Insertion
Note:
Dispense tube must be attached to Dispensing Device
(such as TS1201 Dispense Pen, TS1212 Micro Shot Valve or
equivalent).
2.3
Operation START-UP Procedure
1. Pull pressure regulator knob and turn clockwise to increase air pressure to the desired
operating pressure. Insure that the pressure gauge reading does not exceed 75 psi
maximum. Then push regulator knob in to lock and maintain set gage pressure.
CAUTION
Always start at lowest pressure and gradually increase as needed.
2. Listen for any possible air pressure leakage on the Pressure Pot.
3. Look for any signs of material/fluid leakage on tubing.
NOTE: PRESSURE POT SET-UP IS NOW COMPLETE AND READY FOR
DISPENSING OPERATION WITH THE SELECTED VALVE SYSTEM.
9
Figure 4
Relief Valve
CAUTION
Whenever replacing or removing valve(s), insure that
regulator pressure is at zero.
WARNING
Do not open lid until air pressure is at zero.
2.4
Operation STOP Procedure
1.
Pull air pressure regulator knob, turn counterclockwise and lower air pressure to zero.
2.
Pull on Relief Valve (figure 4) to insure chamber is completely depressurised.
3.
Disconnect air supply line if necessary.
4.
Disconnect fluid tubing from dispense valve.
Note: Hold the fluid tubing in vertical position to allow fluid inside tubing to flow
back inside bottle/container.
5.
Loosen the 4 lid knobs slowly and evenly. If excessive effort is required, insure air
pressure gauge reading is zero.
10
6.
Unscrew tube male connector nut completely. Move nut and ferrule along tubing about
4 inches away from the connector body on the cover.
7.
Cut off tubing in between connector body on lid and nut/ferule. Put the cut tubing with
nut/ferrule aside. Take care to accommodate drainage and spillage at the end of tubing.
8.
Wipe off any excess fluid material from the cut-ends of the tubing.
9.
Remove nut and ferrule parts from the used tube.
10.
Remove cover from Pressure Pot, while carefully pulling used tubing half from the
container, and set aside. Be careful to avoid splashing and spilling from the tube end in the
material container/bottle.
11.
Using a disposable hand glove or tongs, carefully pull the used-up tube from the connector
body on the Lid. Pull tubing from the inner side of cover plate. Dispose used tubing
appropriately.
12.
Screw the nut on the connector body. Ferrule parts may be replaced.
13.
Disconnect fitting on the dispense end of tubing, and discard used tube.
NOTE:
New tubing is required for the next dispensing operation. (Ref: section 2.1)
11
3.
ASSEMBLY DRAWINGS
The Installed O-Ring:
The standard O-Ring supplied on your Pressure Pot is made of Viton
and is intended for applications with Lubricants, Conductive and Non-Conductive Adhesives, and
various other compounds not listed below. This O-Ring may be cleaned with Tolvene and/or
Isopropyl Alcohol.
CAUTION
DO NOT soak O-Ring in Tolvene, MEK, Acetone.
Read material safety data sheet for any solvent prior to use.
Spare O-ring:
A Kit is available made of EPR and is intended for applications using fluids
containing UV Adhesives, Cyanoacrylates (CA’s), Methacrylates, and/or Acrylic Acids. If used,
this O-Ring may be cleaned as necessary with Isopropyl Alcohol, Acetone, MEK.
Please Note: Occasionally a EPR O-ring will swell or degrade when in contact with some UV
Adhesives, Cyanoacrylates (CA’s), Methacrylates, and/or Acrylic Acids. This might be due to
other components in the fluid product.
In these cases we recommend switching to the Viton
O-Ring which will then perform better with this type of fluid.
The O-Rings are listed in Table 1
Table 1
O-Rings Used with Pressure Pot
O-Ring Kit
TS2250
TS2250-EPR
TS2250-Vit
EPR
Viton
12