1
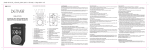
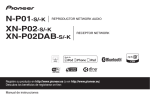
R1 - DAB/FM user manual
Contents
Introduction & Important Information
Controls
Connections
Connecting the R1 to the mains supply
Operating the R1 in DAB mode
Operating the R1 in FM mode
Using the AUX input
Setting and using the Alarm
Setting and using the Sleep Timer
System Reset
Specifications
1
2-3
3-4
4
4-7
7-9
9
9-11
11-12
12
12
Introduction
Thank you for choosing Vita Audio. Your R1 radio has been designed and engineered
to produce the finest performance available and with a little care we are confident
that it will provide you with years of great entertainment. Reading this booklet will
ensure that you understand the functions of your R1 radio and how to get the best
performance. If after reading this manual, you have any problems useful advice can
be found on our website www.vitaaudio.com or of course you are welcome to contact
us directly.
Important Information
Please read this manual carefully before operating your R1 and retain for future
reference.
Please save the carton and packing should you ever need to ship your radio, as
shipping damage is not covered by the guarantee.
Do not expose your R1 to direct sunlight, high humidity, dust, excessive vibration or
extreme temperatures all of which can affect the finish, performance and reliability of
the unit. The recommended operating temperature range for the R1 is 5oC to 40oC.
Make sure that liquids, including rain, cannot penetrate the unit.
Do not open the R1's case. There are no user serviceable parts inside. Refer all
service and repair work to your Vita Audio Dealer or a qualified technician.
In Standby mode, the R1 will still draw a small amount of power from the mains
supply. This is required to keep the clock and alarm functions operational.
To maintain your radios performance and finish
Clean with a soft lint free duster or slightly dampened cloth. Protect the RotoDial,
drive unit and contacts from wax sprays and other substances.
Contact with these substances may degrade the system's performance.
-1-
Natural wood finish cabinets will vary and lighten or darken with age particularly
when exposed to sunlight.
Controls
Unique to the R1 is the RotoDial which incorporates all the controls needed to operate
the unit.
3
2
SLEEP
rn
for
4
VOLU
M
5
A 'short press' indicates that you should press and
release the key to activate the function
E
Tu
1
Italic text includes hints, tips and additional
information.
Press for
ON-OFF
SOURCE
INFO
RM
ALA
A 'long press' indicates that you should press and
hold the key until the function is activated
OK
ON-OFF
Short press the volume knob to switch the R1 between ON and Standby. The press
action also controls functions such as SNOOZE and Sleep Timer cancel.
VOLUME
Turn the Volume knob to adjust the volume. CW to increase and CCW to decrease.
This knob also controls the volume of the headphone output
q&p
The UP & DOWN keys are used to - Set the Alarm and Sleep timer
OK
The OK key is used to - Confirm station selection in DAB mode
- Change audio mode in FM mode
- Confirm Alarm and Sleep settings
INFO
Short press the INFO key to change the type of information shown on the display
SOURCE
Short press the SOURCE key to change between DAB, FM and AUX input
1, 2, 3, 4 & 5
These keys are used to store and recall station presets in DAB and FM modes SLEEP
Short press to view the current Sleep timer settings
Long press to select the Sleep setup menu
-2-
ALARM
Short press to view the current Alarm settings
Long press to select the Alarm setup menu
AUTO TUNE (on rear of unit).
A short press starts a quick (Band III) DAB scan suitable for the UK
A long press for a full DAB scan
Connections
BBC R2
Pop music
R1 DAB FM RADIO
Vita Audio is brought to you by a team of highly respected
designers who have a wealth of expertise working within
the British Audio Industry.
Our mission is to design and build products that we
ourselves would be proud to own with superb aesthetics,
intuitive operation and class leading performance.
line out (R )
line out (L)
12V DC 1.5A
auto tune
external s peaker (R )
Designed and engineered in the UK by Vita Audio
www.vitaaudio.com
FRONT PANEL
Headphones
A 3.5mm socket for connecting a set of stereo headphones (not included).
internal loudspeaker is muted when headphones are plugged-in.
The
Avoid listening to headphones at high volume levels to prevent possible
hearing damage.
Aux line input
This 3.5mm socket is for connecting an external source such as an MP3 player, CD
player, TV or computer.
REAR PANEL
12VDC 1.5A
Connect to the R1 power adapter
-3-
If using an external 12VDC source, it must be fused at 1.5A. The connector
should be a 5mm OD x 2.1mm ID, with the centre contact wired to +12V.
A vehicle adapter power cable is available (contact your dealer or Vita Audio for
details) which must be used if the R1 is powered from a 12V vehicle supply such as a
Motor home, Caravan or Boat.
Line out (L) & Line out (R)
Stereo line level output for connecting to an external amplifier and/or recording
system. The output signal is the selected source i.e. DAB, FM or AUX.
The internal speaker remains active when using these outputs so it is necessary to
reduce the Volume to minimum if not required.
External speaker (R)
In normal operation the DAB, FM and AUX signals are combined to mono for playing
through the internal speaker. Connecting the optional R1 external loudspeaker (not
supplied) will provide stereo playback. Contact your dealer or Vita Audio for details.
Connecting the R1 to the mains supply
1.
Plug the R1 adapter lead into the socket marked '12VDC 1.5A' on the rear of the
R1.
2.
Plug the R1 adapter into a wall socket and switch on if necessary.
3.
The display on the R1 will light and display 'Welcome to Digital Radio'
4.
After 2-3s the display light dims, the message changes to 'Standby' and then
goes to the Time and Date screen.
Welcome to
Digital Radio
00:00
Date
Time and date will automatically update on-air, when the radio is operated.
Operating the R1 in DAB mode
AUTO SCAN
1. Fully extend the telescopic aerial.
2.
Short press the Volume knob to switch on the radio.
3.
The first time the radio is powered and switched on, it will automatically select
DAB mode and start a scan of the DAB channels to search for available stations.
Please leave the R1 to complete this process otherwise no DAB stations
will be stored for later selection.
During the scan the display shows the scan progress, channel number, the
multiplex name e.g. Digital 1 Network, BBC National DAB, etc. and then the total
number of stations.
-4-
Scan Services
Quick Scan
4.
47 Services
Found
When the scan is complete, the R1 will automatically tune to the first station in
the list. Stations are listed in numeric-alpha order i.e. from 0 to 9 and then A to
Z.
BBC 1Xtra
BBC National DAB
5.
Service N/A
If no stations are detected during the scan the display will show '0 services found'
and then 'Service N/A
In this case, reposition the R1 and/or the aerial and short press the Auto tune
button (on the rear of the unit) to start another scan.
Like Digital TV there are some areas where it may still be difficult to get a good DAB
signal. The broadcasters are constantly improving DAB coverage so in some cases it
may be neccesary to wait before some or all DAB services become available. You can
check coverage for your area on our website www.vitaaudio.com.
SELECTING A STATION
1. Short press either the UP or DOWN key to scroll through the available station list
and stop at the required station.
2.
Short press the OK key to tune to the selected station. The display may show
'Tuning …' while the radio selects the new station.
If OK is not pressed within 3s the display returns to the current station and no
change is made.
If after selecting a station, 'not available' is shown, try relocating the radio to
improve reception.
SECONDARY STATIONS
Some stations have one or more secondary services associated with them. When
secondary stations are available a > sign is shown after the station name.
BBC5Live>
BBC National DAB
1.
>BBC Sport Extra
BBC National DAB
A short press on the OK key will select between the primary station and the
secondary station/s.
When the secondary station goes off-air the primary station is automatically
selected.
-5-
PRESETS
TO STORE A STATION PRESET
1. Select a DAB station as described above.
2.
Press and hold one of the Preset keys until the display shows 'Preset x saved'.
BBC R2
Preset 3 saved
Chill
Tuning...
TO RECALL A PRESET STATION
1. Short press the required Preset key.
INFO
The R1 has six DAB information modes which are shown on the bottom line of the
display. Short press the INFO key to see the available types.
1.
DLS (Dynamic Link Segment)
Scrolling text which includes messages such as
Artist and track name, phone numbers, program
details, etc.
2.
Signal strength
Displays the signal strength for the station being
listened to.
BBC R2
T -----
3.
PTY (program type)
Displays the type of station content being
broadcast e.g. Classic, Pop, News, etc.
BBC Radio 2
Pop Music
4.
Data Rate and Mode
Displays the data rate in kilo Bits per second and
the audio mode e.g. Stereo.
Classic FM
Stereo
160Kbps
5.
Multiplex name
Displays the name of the multiplex to which the
current station belongs
Classic FM
Digital1 Network
6.
Time and Date
Displays current time and date, received off-air.
Classic FM
17:58 18-09-2006
BBC R2
Coming up next..
FINDING NEW STATIONS
As and when new stations are introduced it will be necessary to do an auto-scan in
order to detect and store the new stations. Short press the Auto-tune button on the
rear of the unit to start an auto-scan.
DAB services are generally localised, so if you move the R1 to a different area it will
be necessary to do an auto-scan in order to pick up stations in the new local. See also
'System Reset' on page 12.
-6-
MANUAL TUNE
Manual tuning allows you to tune directly to a DAB station.
1.
Long press the INFO button until the display shows 'Manual Tune'
Planet Rock
Manual Tune
11D 222.064 MHz
Digital1 Network
2.
Short press OK and the display shows the multiplex details for the current
station.
3.
Short press the UP or DOWN key to select a different channel number
12B 225.648 MHz
BBC National DAB
BBC Radio1
1/11
BBC National DAB
Please note: You may have to wait for the R1 to tune in to the new channel.
4.
Short press the OK key and the display will show the first station in the list and
the number of available stations. For example the BBC National DAB multiplex is
showing Radio1 as the first of 11 stations.
5.
Short press the UP or DOWN key to scroll the available stations and short press
OK to confirm the required station.
After pressing OK the R1 exits Manual tuning mode.
Operating the R1 in FM mode
1.
Fully extend the telescopic aerial.
2.
Short press the Volume knob to switch the unit on.
3.
If the R1 is in DAB mode, short press the SOURCE key to change to FM.
DAB ->
FM
87.50 MHz
Stn name N/A
The R1 remembers the selected source when switched to Standby and
automatically selects it the next time it is switched on. If the power is
disconnected the R1 will always select DAB mode when first switched on.
4.
The display shows the current tuning frequency and information line.
SELECTING A STATION
MANAUL TUNING
1. Short press the UP or DOWN key to change the tuning frequency.
-7-
Please note: Wait for a second or so between each press for the R1 to re-tune.
STATION SEEK
1. Press and hold the UP key to start an upwards (low frequency to high frequency)
or the DOWN key for a downwards scan. The search stops automatically when a
station is detected.
You can release the UP or DOWN key once the scan starts.
2.
After a few seconds the display will update and show the Station Name
88.30 MHz
Stn name N/A
88.30 MHz
BBC R2
PRESETS
TO STORE A STATION PRESET
1. Select an FM station as described above.
2.
Press and hold one of the Preset keys (for approximately 3s) until the display
shows
90.50 MHz
Preset 1 saved
90.50 MHz
Stn name N/A
TO RECALL A STATION PRESET
1. Short press the required preset key.
Please note: 5 presets are available in both DAB and FM modes.
You can overwrite any of the presets at any time by holding the preset key until
'Preset x saved' is shown.
AUDIO MODE
Normally, the R1 will automatically select Mono or Stereo mode depending on what is
being broadcast and the signal strength. However if a stereo station is being received
and the signal is weak, some hiss may be audible. To reduce the hiss it is possible to
switch the R1 from Auto to Mono mode.
1.
Short press the OK key to display the Audio Mode screen.
Audio Mode: Auto
2.
Audio Mode: Mono
Short press the OK key to switch between Auto and Mono modes. The new
setting is shown for a short time and then the display returns to the Radio
screen.
-8-
INFO
The R1 has six FM information modes which are shown on the bottom line of the
display. Short press the INFO key to see the available types.
1.
Radio Text
Scrolling text which includes messages such as
Artist and track name, phone numbers, program
details, etc.
2.
Signal strength
Displays the signal strength for the station being
listened to.
88.30 MHz
T -----
3.
PTY (program type)
Displays the type of station content being
broadcast e.g. Classic, Pop, News, etc.
88.30 MHz
Pop music
4.
Station name
Displays the name of the station being listened
to.
90.50 MHz
BBC R4
5.
Audio mode
Displays the current audio mode setting i.e.
Auto(Stereo) or Mono.
90.50 MHz
Auto(Stereo)
6.
Time and Date
Displays current time and date, received off-air.
90.50 MHz
10:32 12-09-2006
88.30 MHz
Coming up next..
Using the AUX input
1.
Short press the SOURCE key until the display shows
FM ->
2.
AUX
AUX
Line Input
Wait until the displays shows 'AUX Line Input'. The line input on the front of the
R1 is now active.
Setting and using the Alarm
VIEW ALARM SETTINGS
1. With the R1 switched on, or in Standby, short press the ALARM key. The display
shows the current ALARM settings for 3s and then returns to the previous screen.
ON
Alarm
07:30
RADIO
-9-
From Standby, the display will light, show the settings for about 3s and then go
back to Standby.
SET THE ALARM
1. With the R1 switched ON, or in Standby mode, long press the ALARM key until
the Alarm menu is shown.
Alarm
OFF 00:00 RADIO
ON
Alarm
07:30 RADIO
2.
OFF is flashing to indicate that it can be changed. Short press the UP or DOWN
key to change between OFF and ON and short press OK to confirm
3.
The hour digits are now flashing. Use the UP or DOWN key to set the required
time and short press the OK key to confirm.
Short press the UP or DOWN key to change the hour setting in one hour
increments or long press either key to scroll quickly to the required setting.
4.
The minutes can now be set, as described above and then short press OK to
confirm.
5.
RADIO is now flashing. If you wish to use RADIO as the Alarm sound, short press
OK to confirm. The display continues to show the ALARM settings for a short time
and then exits the Alarm menu.
The radio station used by the Alarm will be the last selected DAB or FM station.
6.
An ALARM symbol is shown in the top right hand corner of the display when the
unit is in Standby mode.
CHANGE THE ALARM SOUND
The Alarm sound on the R1 can be changed to an electronic beep tone if preferred.
1.
At step 5 (above) i.e. when RADIO is flashing, short press either the UP or DOWN
key to change the setting to BUZZ. Short press the OK key to confirm.
If you have selected a DAB station as the Alarm sound and for any reason the
station is not available e.g. is off-air, the BUZZ sound will be heard when the
Alarm activates.
ALARM ON-OFF
With the Alarm set to ON, it will sound each day at the set time. To turn the Alarm
OFF, for example at weekends, without altering the settings, do the following 1.
Short press the ALARM key and whilst the Alarm settings are still on screen, long
press the OK key. Release the OK key when you see the ON setting change to
OFF and vice versa.
This can be done with the R1 switched ON or in Standby mode.
- 10 -
ALARM CANCEL
To cancel the Alarm when it has activated.
1.
Press and hold the Volume knob until the sound stops. The R1 goes to Standby
mode.
The Alarm will automatically switch off after one hour unless cancelled or
switched off manually.
SNOOZE
The R1 includes a 5 minute snooze timer.
1.
When the Alarm activates, short press the Volume knob to start the Snooze timer.
The R1 goes to Standby.
The SNOOZE function can be repeated any number of times.
ALARM VOLUME
To ensure that the Alarm is always heard, even if the main Volume is set to minimum,
the Alarm volume is separately controlled. There are four preset volume settings
which start low and step up periodically, once the Alarm has activated.
Do not forget to un-plug headphones otherwise the alarm sound will not be heard
through the main speaker.
The main Volume control can be used to set the listening level after the Alarm has
activated. This does not affect the Alarm volume presets.
Setting and using the Sleep Timer
VIEW SLEEP TIMER SETTINGS
1. With the R1 switched ON, short press the SLEEP key to view the current Sleep
timer settings.
Sleep Timer
OFF
15mins
Sleep Timer
ON
60mins
SET THE SLEEP TIMER
1. With the R1 switched ON and playing any of the inputs i.e. DAB, FM or AUX, long
press the SLEEP key until the Sleep menu is shown.
2.
OFF is flashing to indicate it can be changed. Short press either the UP or DOWN
key to change it to ON. Short press the OK key to confirm.
3.
The minutes are now flashing. Short press the UP or DOWN key to change the
Sleep time.
4.
Available Sleep time is 15 to 90 minutes, in 15 minutes increments. Set the
required time and short press OK to confirm.
- 11 -
5.
The display continues to show the settings for 3s and then returns to the Radio
screen. The R1 plays for the selected time and then switches to Standby.
SLEEP TIMER ON
To turn the Sleep timer on without having to use the Sleep menu, do the following 1.
Short press the SLEEP key and whilst the Sleep settings are still on screen, long
press the OK key. Release the OK key when you see the OFF setting has changed
to ON.
CANCEL SLEEP TIMER
1. To cancel the Sleep timer and switch the R1 to Standby, short press the Volume
knob.
System Reset
System Reset can be used to clear the station list, the presets and all Alarm and
Sleep settings. This is useful if you move the R1 to a different location (when you
move house for instance) as some stations may not be available in the new area.
1.
From DAB mode, long press the INFO key until the display shows
BBC Radio 2
Manual Tune
BBC Radio 2
System Reset
2.
Short press the INFO key. The display now shows 'System Reset'. In FM mode,
'System Reset' is the first option shown.
3.
Short press the OK key to confirm. The R1 will now clear the internal memory
and automatically start a quick scan.
Specifications
R1 DAB/FM table top radio
DAB
FM
Output power
Driver
Power requirements
Dimensions
Weight
Band III DAB
88MHz to 108MHz
7W nominal
3.5" full range
12VDC 1.5A
170H x 130W x 130D
2kg
R1 power adapter
Input power
Output power
100V to 240VAC 50-60Hz 0.5A
12VDC 1.5A
- 12 -
Guarantee Information
Ruark Distribution Ltd guarantees this product to be free from defects for a period of
two years from date of purchase providing due care and attention has been paid.
Product failure through accidental damage (however caused), excessive wear and
tear, negligence or unauthorized modification will void your guarantee.
Should you experience a problem with your radio please in the first instance contact
your dealer or if this is not possible contact us directly. Where possible the product
should be returned in its original packaging. If it is not possible to return the product
by hand, then it should be sent carriage prepaid by a reputable parcel carrier. If the
original packing is not available, replacement packing can be purchased from us.
THIS GUARANTEE IN NO WAY VARIES OR REMOVES THE PURCHASERS STATUTORY
RIGHTS. E&OE
Ruark Distribution Ltd
59 Tailors Court
Temple Farm Industrial Estate
Southend-on-Sea
Essex, SS2 5TH, UK.
T: +44 (0) 1702 601 410 F: +44 (0) 1702 601 414 E: [email protected]
W: www.vitaaudio.com
Guarantee for Overseas Sales
The distributor in the country of purchase guarantees products purchased outside the
UK. For details, please contact your local Vita Audio distributor or outlet.