1
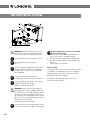
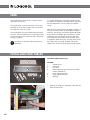
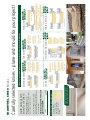
REQUIRED TOOLS
•
•
•
•
•
•
•
•
•
•
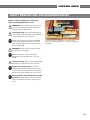
10 mm spanner
Allen key 3 mm
Allen key 4 mm
Allen key 6 mm
Ring spanner 13 mm
Ring spanner 10 mm
Adjustable spanner
Setting block for planing knives
Callipers
Guide rail 30-50 cm
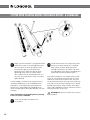
TIP! Make a tool board for the tools you need and
set it up alongside the planer, so that you can easily
see it. Look at tool board before you start the machine to check whether any tools are missing. They
could have been left in the machine!
DESCRIPTION OF MACHINE
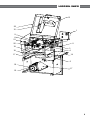
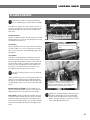
The SH410 Solo planer/moulder is a wood dimensioning machine which can process two sides of a
workpiece or, in some cases, three sides.
The machine is designed around a solid rack and a
plane table of steel plate. The table is suspended in
the rack by twin parallel stays, which allow the table
to be safely raised and lowered using a lever.
The workpiece is fed horizontally onto the plane
table and through the machine by two feeder rollers. The feeder rollers are spring mounted and fitted
to the rack. The workpiece is steered laterally by an
adjustable stop and a sprung press roller.
Pieces are processed by a cutter and a circular sawblade. The cutter and the circular sawblade counter
rotate and are driven by a powerful electric motor
which transfers drive by a poly-v-belt transmission.
The cutter and feeder rollers are covered by a retractable protective hood. A safety switch prevents
the machine from being started if the hood is not
locked.
The machine is fitted with throw-out protection on
the in-feed side.
6
Siting
Check the Solo planer/moulder on receipt. Any
transport damage is to be immediately
reported to the transport company.
Most of the planer is rust protected and therefore
can withstand being placed in cold spaces. Additional maintenance in the form of the lubrication of the
components without rust protection is however
required. Refer to the 'Maintenance' and 'lubrication
points' sections.
• There is to be an open space below the machine, so that shavings cannot collect around
the motor. Also screw the planer into place
through the holes in the rack's underside.
• Make sure that there is sufficient unrestricted
space for the longest boards which are to be
planed on the in-feed and out-feed side and
that there is space for service and wood storage.
• Hang planer electrical cables from the roof or
protect them in other ways. Never tread on the
cable. The machine should be connected via a
residual current device.
• Make sure that there is very good lighting. There
is to be good general lighting. Also set up a
powerful lamp right above the machine. Make
sure that there is no risk of being blinded by the
light.