1
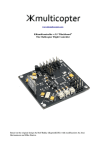
AfroESC 20A USER MANUAL
Thank you for purchasing AfroESC, with a high efficiency, all N-channel
MOSFET design, jitter-free hardware PWM input, and smooth power
response! The AfroESC series ship with SimonK software, suitable for
multi-rotor use without the need to program or adjust settings.
Caution
www.flyingtech.co.uk
With any new build or after making any changes, always test carefully in a
controlled environment. Ensure propellers rotate in the correct direction
and are tightened, that all signal connections are in the right order and
firmly connected. Motors connected in the wrong order may result in
uncontrolled flips. Never attempt to stop propellers by hand, and maintain a
safe distance at all times.
The AfroESC 20A has a lightweight BEC, capable of about 0.5A, which
should be sufficient to power most flight boards, but not servos. A
dedicated BEC is recommended where servos or other devices are used.
There is NO protection against reverse polarity, which would reduce
efficiency and add weight. Be sure that you connect RED to POSITIVE
(+V) and BLACK to GROUND when wiring or attaching bullets to avoid
damage.
Software and Updates
If desired, the firmware may be upgraded and/or customized to enable or
disable various features such as complementary PWM, brake, RC-Car
mode, or adjust default settings such as endpoints and motor timing. The
firmware can be updated using similar procedures as for the KK(2) and
other projects based on ATmega hardware. For source code, binaries, and
other information, see http://github.com/sim-/tgy/ and http://0x.ca/tgy/.
The easiest way of updating is with the Afro USB Linker from HobbyKing
attached to the regular PWM input cable. Only the signal and ground
connections are required. The boot loader speaks STK500v2 at 9600 baud
using the half duplex protocol implemented by the Afro USB Linker. Other
linkers (such as USB serial linkers) will not work at this time.
The KKmulticopter Flash Tool or any general AVR ISP software may be
used with any of the above options. See the above URLs for links and
more information.
Default Settings
Input control is available through PWM, or through I2C (MK) or UART with
additional wiring (auto- detected).
For PWM input, motor stop / arm below 1060μs, full power at 1860μs.
For
I2C input, motor stop / arm at 0, start at 1, full power at 247. BL-Ctrl V2
reverse supported. For UART input, motor stop / arm at 0, start at 1, full
www.flyingtech.co.uk
power at 200.
Low-voltage cut-off (input voltage checking) and temperature limiting are
not enabled, as reacting to such conditions on a multi-rotor will likely be
worse than ignoring them. Always use a LiPo battery alarm or telemetry to
avoid over-discharging LiPo batteries!
General Operation
Once an input signal is received that is low enough to reach the “neutral” or
power-off area, the ESC will arm (long beep), and the green LED will light.
Once the signal enters the motor start range, the ESC will attempt to start
or run the motor, and continue to do so as long as input signal is above the
neutral position. The amount of power used for starting is not fixed, just
based on the power requested, limited and ramped at first to increase the
chances of a successful start.
In general, the power handling should be as smooth as possible, but not
limited or filtered once running. The default PWM frequency is 18kHz with
800 distinct steps, but may be adjusted to any frequency. During starting,
the PWM frequency is halved both to assist starting of some difficult
motors and as an audible indication of this state.
There is no latching of stopped or start states, as doing so could make
acrobatic manoeuvres unsafe. It should not ever be required to re-arm the
ESC unless some signal, power, or hardware fault occurs. In the event that
an object (such as a tree) is struck by a moving propeller, the motor will
limit the power output until timing is regained, but not require re-arming. In
the event that the propeller is workable, this may permit a safer landing.
If a commutation time-out or long demagnetization period is detected, the
red LED will light. This should not occur in normal operation. Very brief
flashes during rapid acceleration indicate that the demagnetization period
exceeded the expected zero-crossing point and that countermeasures
have been taken to avoid loss of synchronization. The green LED will
remain off once running until the power is turned off and the motor stops.
Throttle Range Calibration
With normal PWM input, ESCs and flight boards should be configured to
match the expected working range. If unmatched, the motors may not start
until higher throttle signal is given, may start “hot” even with a low throttle,
may reach full power early, or may not reach full power. In many cases,
www.flyingtech.co.uk
end-point calibration is not required unless the flight board outputs different
ranges.
First, remove all propellers! Check to see if there are calibration steps
documented for your flight controller board. KK2 boards have a two-button
procedure that performs automatical calibration. With KK boards, the Yaw
pot must be set to the minimum position in order to enable pass-through
mode from the receiver input to the ESC output, and the ESCs are then
calibrated to the radio's throttle throw. With the Naze32, try the console
settings “set minthrottle=1064” and “set maxthrottle=1864”. The same
settings may be used for AutoQuad or other boards that allow the
endpoints to be specified.
If none of the above options are available, calibration may be performed
manually. First, remove all propellers! Disconnect the power to the ESCs.
Connect the ESC PWM input directly to the receiver's throttle channel, or
to a servo tester.
Set the radio throttle or servo tester to the highest position, then connect
power to the ESC. The motor should produce a series of initialization
beeps increasing in pitch, followed by another beep matching the pitch of
the last initialization beep. This indicates that the calibration mode has
been entered, and the pulse length has been learned.
Move the stick or knob to the lowest position. Two beeps of the same pitch
should be emitted. This indicates that the low pulse length has been
learned. If the RC Car-style reversible mode has been enabled
(RC_PULS_NEUTRAL), move the stick or knob to the center, and wait for
three beeps. This indicates that the neutral (center) pulse length has been
learned.
The ESC will then save the settings and exit calibration mode. If the input
is still at the same position, the ESC will arm (producing a higher pitched,
long beep), and function normally.
NOTE: Throttle calibration is disabled to avoid accidental calibration if the
ESC is reset by brown- out during previous operation. If the power is not
connected cleanly during the above steps, the power-up may also be
detected as a brown-out. If the rising beeps are not heard while attempting
to calibrate, disconnect the power for a few seconds, then try again.
Troubleshooting
www.flyingtech.co.uk
To aid with troubleshooting, the AfroESC sports “ready” (green) and “error”
(red) LEDs. During power-up, the MOSFETs and drive circuitry are
checked to ensure correct operation. During this test, it may be unsafe to
beep an error. If no beeps are heard from the motor, check to see if the
error LED is flashing, which should be visible through the heat-shrink. If so,
count the number of blinks between pauses and refer to the following list:
1 flash: Phase A stuck high
2 flashes: Phase B stuck high
4 flashes: Phase C stuck high
5 flashes: AIN0 (center neutral) stuck high
6 flashes: Phase A low-side drive fault
7 flashes: Phase B low-side drive fault
8 flashes: Phase C low-side drive fault
9 flashes: Phase A high-side
drive fault
• 10 flashes: Phase B high-side drive fault
• 11 flashes: Phase C high-side drive fault
•
•
•
•
•
•
•
If no wiring fault or short is visible, one or more MOSFETs may have failed.
The ESC must be repaired or replaced. Otherwise, if the hardware check
passes, the reason for reset is checked and indicated by beeping through
the motor and LED flashing. There are four main beep pitches:
Beep 1: Lowest pitch (also red LED).
Beep 2: Medium-low pitch (also green LED).
Beep 3: Medium-high pitch (no LEDs)
Beep 4: Highest pitch (also red and green LEDs together).
Beeps 1, 2, and 3: Normal power-up with no special event detected. A
longer beep 4 normally follows to indicate that an arming signal was
detected.
Beep 3, beep 1: Voltage brown-out detected (MCU voltage dropped below
4.0V). If this happens during battery connection, it can be safely ignored. If
this happens during use, the ESC may have drawn more than the power
source is able to provide, and the input voltage dropped below about 5V.
Beep 4: External reset. Should only occur after programming.
Repeating beeps 1, 1, 3, 3: Watchdog siren. Previous execution locked up
www.flyingtech.co.uk
or was not able to signal proper status, so to prevent motor or other
damage, the ESC reset itself. Check for moisture problems or strong fields
right next to the ESC. If nothing is found, the MCU may be faulty.
Once a valid input is connected and the ESC is sees an idle power
request, a long beep 4 is played and the green LED lit to indicate that the
ESC is armed. This is required for all input sources, and must be
maintained at a rate of at least 20Hz, or power will be switched off. If the
input signal stops, the ESC will disarm after 2 seconds and play beeps 3
and 2 to indicate that the input disappeared. The ESC will look again for
valid input sources, or programming input via the Turnigy USB linker.
If no input is detected for more than 8 seconds, a periodic beep 3 every 3
seconds will be emitted (beacon mode). This may aid in the location of a
crash, assuming the signal is lost.
www.flyingtech.co.uk