1
SERVICE MANUAL
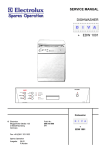
DISHWASHER
INTENSIVE
INTENSIV
70°°
70
TIME
ZEITSELECTION
VORWAHL
NORMAL
NORMAL
65°
65
°
QUICK
QUICK
50°°
50
NORMAL
NORMAL
BIO50
50°
BIO
°
VORPRE
SPÜLEN
WASH
3h
REINIGEN
CLEAN
6h
TROCKNEN
DRY
9h
ENDE
END
EIN
ON // AUS
OFF
SALZ
SALT
KLARSPÜLER
DETERGENT
50719
Dishwasher
EDW 1000
(Mini-Tronic)
© AEG Hausgeräte GmbH
Muggenhofer Straße 135
D-90429 Nürnberg
Germany
Fax +49 (0)911 323 1420
TSE - N
Edition:
10.00
Publ.-Nr.:
599 50 84 90
685
EN
Index
1.
2.
3.
4.
5.
6.
7.
8.
9.
10.
11.
12.
13.
14.
15.
16.
17.
18.
19.
20.
21.
22.
23.
24.
25.
26.
27.
Dimensions ............................................................................................................ 3
Typical features for use ......................................................................................... 4
Components .......................................................................................................... 4
Interference Filter ................................................................................................... 4
Pressure Switch ..................................................................................................... 5
Flow Heater ........................................................................................................... 5
Circulation Pump ................................................................................................... 5
Drain Pump ............................................................................................................ 5
NTC Temperature Sensor ..................................................................................... 6
Detergent / Rinse Aid Combination Dispenser Unit .............................................. 6
Electronic ............................................................................................................... 6
Water Softening ..................................................................................................... 7
Position of Components ......................................................................................... 7
Water Course Scheme ........................................................................................ 10
All-Around Water Protection ................................................................................ 11
Aqua-Control Inlet Hose ...................................................................................... 11
Safety level .......................................................................................................... 11
Leakage Protection .............................................................................................. 11
Water Inlet ........................................................................................................... 13
Water load steps .................................................................................................. 14
Static filling ........................................................................................................... 14
Dynamic filling ...................................................................................................... 15
New pulse wash with random functionality ........................................................ 15
Circulation ............................................................................................................ 16
Function of the new pulse wash with random functionality ............................... 15
Sequence draining with pressure switch level check........................................... 17
New drain with sequence draining ....................................................................... 17
Draining ............................................................................................................... 18
Installation of the Drain Hose............................................................................... 19
Regeneration ....................................................................................................... 19
Rinse out after regeneration ................................................................................ 20
Regeneration ....................................................................................................... 20
In- and Output elements ...................................................................................... 21
Position of pushbuttons, LEDs and lamps ........................................................... 21
General ................................................................................................................ 22
Input-Philosophy: Choose program- and options ................................................ 23
Input-Philosophy: Programstart till -end .............................................................. 24
Input-Philosphy - delete, change, abort ............................................................... 25
Program phase display, Status display ................................................................ 26
Adjust water hardness: ........................................................................................ 27
Service-functions for assembly line ..................................................................... 28
Assembly line test program ................................................................................. 28
Customer service functions ................................................................................. 29
Single actor activation .......................................................................................... 29
Indication of customer service failure stack ......................................................... 29
Delete the customer service failure stack and LED-test ...................................... 30
Misuse and program interrupt .............................................................................. 30
Overview of Service and After sales functions .................................................... 31
Overview of failure displays ................................................................................. 32
Programms and Options ...................................................................................... 33
Description of the options .................................................................................... 34
Rinse, resin wash, regeneration and measure .................................................... 35
TSE-N 10.00 A. B.
-2-
599 50 84 90
EN
1.
Dimensions
Build-in dimensions for Fully Integrated
Dishwashers
Build-in dimensions for Integrated
Dishwashers
ÖKO-FAVORIT
ÖKO-FAVORIT
*
Build-in dimensions for Built-Under
Dishwashers
ÖKO-FAVORIT
Appliances with height-adjustable feet
Plinth height for appliances 820 mm high
100 - 175 mm
Plinth height for appliances 870 mm high
150 - 230 mm
Dimensions for Freestanding Dishwasher
Height
Width
Depth
85 cm
60 cm
60 cm
Height with worktop removed 82 cm
Feet adjustment 1 cm
* Appliances with
height
adjustable feet
TSE-N 10.00 A. B.
-3-
599 50 84 90
EN
2.
Typical features for use
INTENSIVE
INTENSIV
70°°
70
TIME
ZEITSELECTION
VORWAHL
NORMAL
NORMAL
65°
65
°
QUICK
QUICK
50°°
50
NORMAL
NORMAL
BIO50
50°
BIO
°
VORPRE
SPÜLEN
WASH
3h
REINIGEN
CLEAN
6h
TROCKNEN
DRY
9h
ENDE
END
EIN
ON // AUS
OFF
SALZ
SALT
KLARSPÜLER
DETERGENT
50719
ÖKO-FAVORIT 50719 sensorlogic
3.
Wash programs:
Intensive 70, Normal 65, Normal Bio 50,
Quick 50, Prewash Extra
Power consumption:
10 A
Heating:
flow heater
Water consumption:
16 l
Energy Normal Bio 50 °C:
Energy Normal 65 °C:
1.05 kWh
1.35 kWh
Noise:
47 dB(A)
Components
Interference Filter
The interference filter is connected in the terminal board parallel to
the mains feed.
TSE-N 10.00 A. B.
-4-
599 50 84 90
EN
Pressure Switch
The pressure switch controls the water level.
Without water, contact 11 - 12 is closed.
fN
Switch point with level
Reset point with level
Switch point with safety level
Reset point
fS
65 mm Ws
45 mm Ws
114 mm Ws
90 mm Ws
The pressure switch is not adjustable.
fS
fN
17
16
fS
fN
12
11
14
16
17
12
11
14
65 mm
45 mm
Flow Heater
The flow heater heats the water to the required temperature. During
the wash cycle, water is contantly passing through the flow heater.
Power output
Resistor
Protector
Thermal fuse
2100 W
25 W
98 °C ± 5 K
260 °C
Circulation Pump
The circulation pump is driven by an asynchronous motor with an
auxiliary winding. The auxiliary winding ist in circuit with a 4 mF
capacitor. A tacho generator is used for speed control.
There are three speeds for rinsing.
2800 1/min, 2200 1/min, 1900 1/min, 1700 1/min, 1600 1/min, Power
output 50 W.
Drain Pump
The drain pump is driven by a synchronous motor.
Power output 26 W.
Pump rate 15 l/min.
TSE-N 10.00 A. B.
-5-
599 50 84 90
EN
NTC Temperature Sensor
NTC-Tem peraturfühler
Tem perature sensor NTC-resistor
Temperatur/Widerstand
temperature/resistor
(nur bei vollelektron.
Geschirrspüler)
(only for fully electronic dishw asher)
20 °C
25 °C
30 °C
40 °C
50 °C
55 °C
60 °C
65 °C
70 °C
/
/
/
/
/
/
/
/
/
6032
4829
3891
2573
1741
1444
1204
1009
849
Ω
Ω
Ω
Ω
Ω
Ω
Ω
Ω
Ω
Detergent / Rinse Aid Combination Dispenser Unit
Detergent dosage = 20 ml - 30 ml
Rinse Aid capacity 150 ml
Dosage settings
1-6
Quantity
1 cm3 - 6 cm3
The detergent dispenser is activated by a release coil. The first operation
adds the detergent, and the second the rinse aid. If the door is opened,
the latching bar is reset to the detergent dosage position.
Electronic
On electronic models, a micro processor controls all components, this is
done using triacs. The electronic also memorizes all programme data.
The heating is switched by a relay on the electronic board.
TSE-N 10.00 A. B.
-6-
599 50 84 90
EN
Water Softening
The components required for water softening.
1.
softener unit
2.
regeneration dosage chamber
The incoming water flows through the softener which works
according to the ion exchange principle. The ion exchanger is
filled with small epoxy resin balls. The resins exchange the
hardness constituents (calcium and magnesium), for sodium
ions.
When all the sodium ions are used up, it is necessary to
regenerate the softener. This is done by flushing a brine
solution through the softener.
2
1
Afterwards the softener is washed out with fresh water and is
now fully effective.
Depending on the water hardness, regeneration is only necessary after several wash cycles.
The softening system is designed for a water hardness of up to 50 °dH.
4.
Position of Components
Detergent dispenser (1)
Drying fan intake vent (2)
Spray arms (3)
3
3
1
2
Detergent dispenser (1)
Electronic (2)
2
1
TSE-N 10.00 A. B.
-7-
599 50 84 90
EN
Thermal sensor (1)
Drain pump (2)
Pressure switch (3)
1
2
3
Flow heater (1)
Terminal board (2)
Inlet valve (3)
1
2
3
To remove side panel :
1
Remove fixing screws
2
Pull the panel away from the rear, and gently out of the
front trim.
Removing the regeneration dosage chamber :
1
disengage locking tabs (1)
2
disconnect hoses (2)
3
holding the top of the chamber, pull upwards disengaging it
from the softener.
1
2
TSE-N 10.00 A. B.
-8-
599 50 84 90
EN
Removing the softener unit :
1
remove the securing nut located under the salt cap.
2
press softener (1) down and remove it through the front
from the base area
3
CAUTION if accessible release reed switch.
1
Removing the base :
1
remove side panels, rear panel and plinth panel
2
gently release base fixing clips with a screwdriver (figure)
3
take off base carefully and release circulation pump,
electronic and heater relay
4
disconnect the float switch
With base removed the circulation pump (1) is accessible.
1
TSE-N 10.00 A. B.
-9-
599 50 84 90
EN
5.
Water Course Scheme
22
2
3
21
7
24
23
21
4
18
1
12
15
5
6
11
8
16
9
17
10
19
20
14
1
2
3
4
5
6
7
8
9
10
11
12
Inlet valve
Air break
Regeneration water dosage
Overflow safety level
Safety overflow
Inlet to sump from regeneration dosage
chamber
Regeneration dosage chamber
Softener
Salt container
Non-return valve salt container
Regeneration valve
Safety inlet hose
TSE-N 10.00 A. B.
13
14
15
16
17
18
19
20
21
22
23
24
- 10 -
13
Base tray
Float switch
Pressure switch
Filter
Circulation pump
Flow heater
Drain pump
Non-return valve
Spray arms
Roof-mounted shower
Tub vent
Sump assembly
599 50 84 90
EN
6.
All-Around Water Protection
Aqua-Control Inlet Hose
The inlet hose has a double-wall construction. The inner hose is equipped with a flow restrictor
built into the tap connection, and has a flow rate of 4 litres per minute. The inlet valve (1) is located
in the base of the dishwasher. The safety outer hose (12) is connected to the regeneration
chamber. If the inner hose should burst, the water passes into the tub. The safety pressure switch
activates the drain pump and decreases the waterlevel down to normal level. An additional
overflow protection is a defined overflow through the regeneration chamber. The water flows into
the bottom tray and activates the float switch, which energises the drain pump. This drains the
dishwasher preventing water damage.
Safety level
If the safety level is reached by over-fillling, the safety pressure switch starts the drain pump. The
water is only drained until it has reached the normal level because the reset point of the safety
pressure switch is above the switchpoint of the normal pressure switch.
Leakage Protection
The anti-flood switch in the base tray will activate the drain pump and drain the water from the tub
in the event of an internal leakage.
If the float switch is activated, all electric components are switched off except the electronic and
the drain pump.
TSE-N 10.00 A. B.
- 11 -
599 50 84 90
EN
All-Around Water Protection
22
2
3
21
7
24
23
21
4
18
1
12
15
5
6
11
8
16
9
17
10
19
20
14
1
2
3
4
5
6
7
8
9
10
11
12
Inlet valve
Air break
Regeneration water dosage
Overflow safety level
Safety overflow
Inlet to sump from regeneration dosage
chamber
Regeneration dosage chamber
Softener
Salt container
Non-return valve salt container
Regeneration valve
Safety inlet hose
TSE-N 10.00 A. B.
13
14
15
16
17
18
19
20
21
22
23
24
- 12 -
13
Base tray
Float switch
Pressure switch with safety level
Filter
Circulation pump
Flow heater
Drain pump
Non-return valve
Spray arms
Roof-mounted shower
Tub vent
Sump assembly
599 50 84 90
EN
7.
Water Inlet
The water flows into the regeneration dosage chamber (7) via inlet valve (1), over air break (2), into
regeneration dosage chambers (3) into softener (8). At this point the water divides. 1/4 of the water
enters the tub through the vent (23). 3/4 of the water enters the sump (24) through hose (6).
The level control chamber built into the sump operates the pressure switch (15).
3
2
22
21
7
24
23
21
4
18
1
12
15
5
6
11
8
16
9
17
10
19
20
13
14
1
2
3
4
5
6
7
8
9
10
11
12
Inlet valve
Air break
Regeneration water dosage
Overflow safety level
Safety overflow
Inlet to sump from regeneration dosage
chamber
Regeneration dosage chamber
Softener
Salt container
Non-return valve salt container
Regeneration valve
Safety inlet hose
TSE-N 10.00 A. B.
13
14
15
16
17
18
19
20
21
22
23
24
- 13 -
Base tray
Float switch
Pressure switch with safety level
Filter
Circulation pump
Flow heater
Drain pump
Non-return valve
Spray arms
Roof-mounted shower
Tub vent
Sump assembly
599 50 84 90
EN
8.
water load steps
s tatic water
load
dynamic water
load
to level
max. 4
r epetitions
with level contr ol
T imeout 1
T imeout 2
speed
in U /mi n
tar gets peed
10 S ek.
5 S ek.
5 S ek.
≥20 S ek.
1600
time
in S ek.
0
water
in L
level check:
level check:
water failur e dis played
if level not r eached!
water failur e dis played
if level not r eached!
3,6 - 4
dynamic
water load
ca. 1,6
static
water load
time
in S ek.
0
valve
filing
filling is pos sible
on
time
off
in S ek.
Static filling
-
Static filling until pressure switch point.
failure code:
If this point isnt reached after max. 2 minutes (Timeout 1), a failure code is displayed and the
program is stopped. The program phase display PPD-LED LD9 is blinking.
LD9
LD10
LD11
TSE-N 10.00 A. B.
- 14 -
599 50 84 90
EN
Dynamic filling
-
10 seconds filling at reduced circulation pump speed
5 seconds pause
10 seconds filling at reduced circulation pump speed
filling with increasing circulation pump speed. As soon as the target speed has been
reached, it is filled up to the pressure switchpoint.
Failure code:
If this dynamic switchpoint isnt reached within total 4 minutes (Timeout 2), the dynamic filling
can be repeated 3 times. Only after non-successful repeating 3 times, a failure code is
displayed and the program is stopped. The PPD-LED LD9 is blinking.
LD9
LD10
LD11
*) The target speed is dependent on the subsequent pulse wash.
SXOVHZDVK
1
2
3
9.
SXOVHPLQ
0,9 sec
0,6 sec
0,3 sec
3DXVHPLQ WDUJHWVSHHGLQG\QDPLFILOOLQJ
4,5 sec
2200 1/min
3 sec
1900 1/min
1,5 sec
1700 1/min
New pulse wash with random functionality
speed
in U /min
2800
var iable*)
s peed
1600
20 S ec.
star t-r outine
T high,r
T low
T high,r
T low
T high,r
time
in s ec.
0
-function
T high,r = time (high s peed) + r andom time
water
in L
dynamic
pulse was h
level
pr es sur e s witch
point
water level
time
in s ec.
0
*) The variable speed is 1600 1/min at the moment and equal to all appliances.
TSE-N 10.00 A. B.
- 15 -
599 50 84 90
EN
T high, r
=
T high + T r
T low
=
T high, r + Ratio
Random function
Thigh,r
Thigh
Tr
Tlow
Ratio
=
=
=
=
=
time for high speed (calculated with random funktion)
time for high speed (cycle definition)
random time
time for low speed
factor for low speed (eeprom definition)
Circulation
The circulation pump (17) pumps the water simultaneously into the ceiling shower (22) and into both
spray arms (21). The water is filtered in the sieves (16) and led to the circulation pump.
Function of the new pulse wash with random functionality
After the filling steps, the circulation pump is running at two rotational speeds.
3XOVH:DVK
3XOVHWLPH PLQ
'HILQLWLYH7LPH
1
0.9 sec
5DQGRP7LPH
3D XVH PLQ
'H ILQLWLYH7LPH
0 - 0.3 sec
4.5
8VH ZLWK:DVK&\FOH V
5DQGRP7LPH
0 - 1.5 sec
prewash intensive
wash intensive
2
0.6 sec
0 - 0.3 sec
3
0 - 1.5 sec
wash and intermediate wash
prewash normal
3
0.3 sec
0 - 0.3 sec
1.5
0 - 1.5 sec
rinse
The ratio of pulse time and pause is always 1 : 5.
TSE-N 10.00 A. B.
- 16 -
599 50 84 90
EN
10. Sequence draining with pressure switch level check
dr ain pump
1 dr aining s equence
with var iable timing
level check!
on
off
T 1 (var iable)
T 2 (var iable)
'UDLQ&\FOH
T 3 (var iable)
7
7
7
First draining before every wash cycle
45 sec
15 sec
20 sec
Draining after the wash cycles
30 sec
20 sec
10 sec
New draining with sequence draining
-
The draining step contains of 3 time sequences.
In the middle sequence, during time T2 the drain pump is stopped.
-
At the end of the drain step, the water level is checked.
-
If the switch back is reached, the drain step is terminated.
If the switch back isnt reached, the drain step is repeated.
-
A failure code is displayed, if after 2 drain steps, the switch back couldnt be reached.
In this case, the program is stopped and PPD-LED LD10 is blinking.
LD9
LD10
LD11
TSE-N 10.00 A. B.
- 17 -
599 50 84 90
EN
Draining
During the wash cycle the water is pumped out at various stages. First the draining water cleans the
filters (16). The filters are open at the bottom which allows any soilage to be rinsed off sufficiently. There
is a non-return valve (20) at the inlet connection to the drain pump (19). This valve prevents the water
3
2
22
21
7
24
23
21
4
18
1
12
15
5
6
11
8
16
9
17
10
19
20
14
1
2
3
4
5
6
7
8
9
10
11
12
Inlet valve
Air break
Regeneration water dosage
Overflow safety level
Safety overflow
Inlet to sump from regeneration dosage
chamber
Regeneration dosage chamber
Softener
Salt container
Non-return valve salt container
Regeneration valve
Safety inlet hose
TSE-N 10.00 A. B.
13
14
15
16
17
18
19
20
21
22
23
24
- 18 -
13
Base tray
Float switch
Pressure switch
Filter
Circulation pump
Flow heater
Drain pump
Non-return valve
Spray arms
Roof-mounted shower
Tub vent
Sump assembly
599 50 84 90
EN
11. Installation of the Drain Hose
Drain hose connection:
Max. permissible height: 1 metre;
Min. height required 30 cm above floor level.
The drain hose can be extended horizontally to a maximum length of 3 metres, at a height of 85 cm.
12. Regeneration
The water chamber for regeneration (3) contains 350 ml water. During regeneration, the regeneration
valve (11) is energized. The 350 ml water runs into the salt container (9) and mixes with the salt to form
a brine solution.
In the top of the salt container there is an opening with a small filter, from here the brine solution passes
through a non-return valve (10) and enters the softener (8) where the resins are regenerated.
The softener has 5 settings and can be adjusted to suit the degree of water hardness.
The adjustment of the water hardness is described in the short list of service functions.
Table for water hardness adjustment
$GMXVWPHQW
WH 1
WH 2
WH 3
WH 4
WH 5
:DWHU
KDUGQHVV
4 dH
18 dH
26 dH
32 dH
50 dH
QXPEHURI
ZDWHUORDGV
60
16
8
5
0
2SHQLQJKRXUIRUUHJHQHUDWLRQ
YDOYH
180 Sek.
180 Sek.
180 Sek.
180 Sek.
180 Sek.
This table is stored in EEProm. Therefore the values are changeable
by variant configuration. The values on the left specify the actual status and shall only be seen as an
example for this documentation.
-
Column Number water loads contains the value, when the regeneration will be run.
o
With each dynamic filling step during the cycle, the counter is increased by 1.
A possible refilling is not taken into consideration.
o
If the value in the table, linked to the adjusted water hardness, is reached, the regeneration
is activated. At the water hardness WH5 regeneration is done each cycle.
o
In all DGN- and ZM45-machines, at the end of the program a 30 seconds draining of
regeneration water is run.
TSE-N 10.00 A. B.
- 19 -
599 50 84 90
EN
Rinse-out after regeneration
After a regeneration at the end of the program the directly ensuing next wash cycle performs a rinse-out.
This rinse-out replaces the first pumping step of the wash program.
Regeneration
3
2
22
21
7
24
23
21
4
18
1
12
15
5
6
11
8
16
9
17
10
19
20
14
1
2
3
4
5
6
7
8
9
10
11
12
Inlet valve
Air break
Regeneration water dosage
Overflow safety level
Safety overflow
Inlet to sump from regeneration dosage
chamber
Regeneration dosage chamber
Softener
Salt container
Non-return valve salt container
Regeneration valve
Safety inlet hose
TSE-N 10.00 A. B.
13
14
15
16
17
18
19
20
21
22
23
24
- 20 -
13
Base tray
Float switch
Pressure switch
Filter
Circulation pump
Flow heater
Drain pump
Non-return valve
Spray arms
Roof-mounted shower
Tub vent
Sump assembly
599 50 84 90
EN
13. In- and Output elements
Position of pushbuttons, LEDs and lamps
for appliances with vertical position of buttons
left side of the panel
right side of the panel
S1
S4
L D4
L D1
S2
L D8
L D9
L D7
L D10
L D6
L D11
S5
L D5
L D2
S3
S6
L D13
L D12
L D3
L D0
S0
L D14
for appliances with horizontal position of buttons
left side of the panel
L D1
L D2
right side of the panel
L D3
L D4
L D5
L D8
L D9
L D7
L D10
L D6
L D11
L D0
L D12
S1
S2
S3
S4
S5
S6
L D13
S0
L D14
TSE-N 10.00 A. B.
- 21 -
599 50 84 90
EN
14. General
Panel equipment:
-
-
Separate On/Off switch S0
6 pushbuttons S1 - S6 for choice of programs and options
All pushbutton functions can be adjusted free, without limitations, by personalisation at PNCLevel.
The pushbuttons S1 - S3 and the LEDs LD1 - LD3 are mandatory.
(Necessary for the control of the service functions)
3-step Program Phase Display (PPD) with LEDs LD9 - LD11
Actually planned indication of the LEDs Clean - Dry - End
Optional equipment for variant handling
3-step start time delay (STD), displayed with the LEDs LD6 - LD8
The delay steps can be defined free, depending on the variants on PNC-level in production.
Every start time delay must has to be between 1 and 15 hours
LED-display for salt
LED-display for rinse aid
Possible program options:
-
Superwash
Start time delay
Half load kleine Menge
Temperature increase and/or decrease
Tablets program
Additional rinse phase (Extra rinse)
Other points:
-
Regeneration depending on water consumption / Adjustment and display of water hardness
via user interface
Assembly line test program
Different after sales functions (Failure memory, Single actuator mode, LED-Test)
Device specification for max. Energylabel ABC
No active drying with fan possible!
Water safety system with different variants and safety levels
(Also depending from external components)
Type of pushbuttons:
The On/Off-pushbutton S0 is a separat power switch with toggle function
All other possible pushbuttons S1 - S6 are of push-release type and directly on the electronic
board
Acknowledges and Displays:
All pushbutton acknowledges and all other displays are realised by LEDs.
The On/Off-button is the only one connected to a glow lamp instead of a LED with separat function
directly indicate On/Off.
TSE-N 10.00 A. B.
- 22 -
599 50 84 90
EN
15. Input-Philosophy: Choose program- and options
Switch ON the device
-
Press On/Off-button S0 to switch the machine ON.
Display LD0 at the On/Off-button is highlighted.
o
The machine is in Prestart-mode.
o
All program- and option-buttons are active and can be choosen
-
Now choose of StartTimeDelay possible
The selection of the STD can be done with the predefined pushbutton.
This button hasnt an acknowledge-LED.
The activated delaytime is shown by the 3 LEDs LD6 - LD8.
Only the LED of the choosen delay time is highlighted
The choice is a scrolling function ( 3h .. 6h .. 9h .. OFF .. 3h ..)
A change or cancelling (all STD-LEDs off) of the delay time is during thecwhole delay phase
at any time possible.
As theres not yet a program choosen, the selected STD value remains unchanged till a valid
program is choosen and the LEDs are blinking.
-
Programs / Options selection
-
The user selects a program by pressing the defined pushbutton.
The LED of the choosen program is highlighted as a acknowledge.
Within 6 seconds, the user can change the program or choose one or more possible options.
During this phase PPD-LEDs LD9, LD10 or - LD11 are blinking
Activation from options or StartTimeDelay (STD) is only possible before programm start!
-
Select options possible
Press related option button.
Only predefined, permissible combinations are accepted.
If the selected option is accepted, the LEDs of program and option button are highlighted.
Within 6 seconds additional options are selectable
-
Select StartTimeDelay possible
The selection of the STD is done with the related pushbutton.
The activated delaytime is shown by the 3 LEDs LD6 - LD8.
Only the LED of the choosen delay time is highlighted
The choice is a scrolling function ( 3h .. 6h .. 9h .. OFF .. 3h ..)
6 seconds after pressing the last pushbutton, the timer for the delay time is started.
Within this 6 seconds besides LEDs for the selected program is highlighted.
Besides this, PPD-LEDs LD9, LD10 or LD11 are blinking.
During this phase PPD-LEDs LD9, LD10 or - LD11 are blinking
During the run of the delay timer, the program- and delaytime LEDs are highlighted, the
PPD-LEDs are switched off.
A change or cancelling (all STD-LEDs off) of the delay time is during the whole delay phase
at any time possible.
-
TSE-N 10.00 A. B.
- 23 -
599 50 84 90
EN
-
Countdown of StartTime
The StartTime is counted backwards, beginning with the adjusted value until 0h. Afterwards
the program starts automatically. (see description on page B 4 / subject Programstart)
The display is updated accordingly.
L D8
Display of StartTime:
L D7
9h
L D6
9h to 6h
6h to 3h
L D8
L D7
6h
3h to 0h
L D6
0h / Start
L D8
(Other values possible, due to variant programming!)
3h
L D7
L D6
-
Each activation of a pushbutton with in the 6 seconds of the program selection time, resets
the timer for the program start (where the pushbuttons are deactivated) again back to 6
seconds.
16. Input-Philosophy: Programstart till -end
Program start
-
After the end of the selected StartTimeDelay time or 6 seconds after the last program- or
optionbutton activation, the choosen program is automatically started.
From this time on, a delay time or program option can no longer be choosen.
To select a delay time, a restart of the machine is necessary.
Program run
-
During the program run, the following LED displays are highlighted:
o
Pushbutton-LED of the choosen program and options
o
Depending on the program phase, the related PPD-LED LD9 - LD11
The program cycle is described separetely in chapter Program cycles.
Program end
The End of program is displayed by PPD-LED End
The acknowledge LED of the program and, if choosen, of the option button(s) remain ON.
After reaching the program end, the actual program can be deleted by
either opening the door or switching OFF the machine by the ON/OFF button S0.
If the program was deleted by opening the door, the maschine is automatically in pre-start
mode, if the door is closed again, this means, that immediately a new program could be
choosen.
TSE-N 10.00 A. B.
- 24 -
599 50 84 90
EN
17. Input-Philosphy - delete, change, abort
Delete program
-
-
A selected and started program can be deleted at any time.
Therefore the pushbutton of the selected program has to be pressed as long (3 Sek.) until
the related LED is switched off.
o
During this time, the program and possible option LEDs are blinking.
The program is aborted and deleted.
o
Besides this the LEDs of all program and option-buttons and the PPD-LEDs LD09 LD11 are switched off.
o
Only the Power-lamp LD0 at the On/Off-switch remains highlighted.
The machine is again in Prestart-mode.
Change program (after program start)
-
A change of the program during a running cycle can only be realised by using the function
Delete program ! (see above)
Program interrupt / Pause-Function
-
-
With the help of the ON/OFF button S0 the program can be interrupted as long as one likes.
This is equal to a Pause-function. The same is valid for an interrupt by opening the door.
There is no delete function integrated in the ON/OFF button S0!
If the program is interrupted by the ON/OFF button, all displays are switched OFF.
The program cycle is continued immediately after switching the machine ON again with the
ON/OFF-switch, respectively after closing the door. No additional button activation
necessary. Special remark for steps with activate circulation pump:
The cycle continues with a reduced speed off the circulation pump for about 20 seconds.
All displays and acknowledges are shown in the same status as before the interrupt.
What happens on Opening and Closing the door?
(see description Power fail )
-
-
-
Device is switched on and timer is in Prestart-mode
o
After opening the door, all displays on the user interface remain as they are.
The power supply of the timer is guaranteed, as long as the device remains switched
ON by the On/Off-switch S0.
The door is opened during program run
o
By opening the door, the program can be interrupted for any time without loosing
information.
This is equal to a Pause function.
o
After opening the door all displays remain ON, except the PPD-LEDs LD09 bis LD11,
as long as the device isnt switched OFF by the ON/OFF switch S0.
The actual PPD-LEDs are blinking, as long as the door remains open.
o
After closing the door, the cycle continues immediately.
The door is opend after reaching the end of the program
o
If the program end is reached and the door opend, the device is again in Prestartmode.
TSE-N 10.00 A. B.
- 25 -
599 50 84 90
EN
18. Program phase display, Status display
Program Phase Display PPD
-
PPD has always 3 steps
The PPD is realised by 3 LEDs (LD09 - LD11)
The program phases are actually defined: Clean - Dry - End
The displayed phases are related to the program cycle.
During the program selection, but before the real program start all relevant program phases
are shown in parallel by blinking LEDs.
E.g. in the Quick program or in the Prewash program, only PPD-LED LD09 is blinking, in all
other programs, LEDs LD09 and LD10.
After program start, only the LED for the actual program phase is ON.
The switch from one program phase to the following in done at the step change.
The display End (PPD-LED LD11) is not shown before the real program end, when the
timer has reached the end status.
With the PPD-LEDs LD09 - LD11 also different failures are displayed.
Status resp. Indication displays:
-
-
Displays are available depending on the device variant.
The display is done mainly by theLEDs LD13 and LD14.
If necessary due to design reasons, also other positions for the display are possible.
The display is realised by a permanent activation of the relevant LED.
The LEDs are ON beginning with the machine switched ON by the ON/OFF switch S0, till the
start of the program, this means, also during a possible StartTimeDelay phase.
Besides this, also from program end (PPD-LED End) till switching OFF the device.
The display LEDs are switched OFF during the complete program cycle!
LED-display SALT
o
ON if salt level is low
o
Switched off, after adding salt.
(Due to salt dissolution it can take some hours for switch OFF)
Comment LED-Display Salt is switched OFF if waterhardness WH1 is adjusted.
(no regeneration necessary)
LED-display RINSE AID
o
ON if rinse aid level is low
o
Switched off, after adding rinse aid.
TSE-N 10.00 A. B.
- 26 -
599 50 84 90
EN
19. Adjust water hardness:
General information
The adjustment and change of the
water hardness area is valid for all
designs and button configurations.
For this function, always the buttons S0,
S1 and S2 are relevant, independent of
their varying program functionality given
by variant programming.
Button
configurations
vertically
Tastenanordnung
senkrecht
water hardness
Show with
LED LD1
WH 5
41 - 50 dH
5x blinking
WH 4
30 - 40 dH
4x blinking
WH 3
19 - 29 dH
3x blinking
WH 2
4 - 18 dH
2x blinking
WH 1
under 4 dH
1x blinking
1.
L D1
L D2
4.
L D0
L D1L D2
L D0
Tastenanordnung
waagrecht
S1 S2
S0
Button configurations
horizontally
Call function Water hardness adjustment
1.
Press at the same time button S1 and S2 and ...
2.
... Keep them pressed, as long as the device is switched ON by S0.
For acknowledge the LED LD1 ... Is switched ON ...
3.
... for about 5 seconds.
4.
The actual value of water hardness is shown by the blinking of LED
LD1.
(In the example on the left, by 3 times blinking, the pre-adjustment as
done in production is shown.)
5. / 6. Then the LED is switched OFF for 5 seconds ...
After that, this procedure is repeated continuously up to 60 seconds.
S1
L D0
S2
S0
3.
S2
Call / Change / Store the value for water hardness
S1
S2
2.
S1
L D2
S0
General:
In production line, the pre-adjustment is
WH3.
On WH1 no regeneration is carried
out. No salt is necessary. A possible
Salt-LED will not be activated.
Table for hardness areas:
adjustment
L D1
5s ek. hi ghlighted
L D0
L D1
3x blinking
L D0
L D1
(3x blinking 5sec. Pause 3x blinking 5sec. Pause aso.).
5.
per activation
5s ek. off
L D0
L D1
A.
L D1
S1
6.
Change of adjusted water hardness
A
By pressing button S1
the value is changed.
The valus is increased scrolling.
B
For acknowledge the LED LD1
is switched ON for
approx. 5 seconds
C
The new value is then shown
by the coded blinking of LED LD1.
3x blinking
L D0
L D1
B.
r epeat bl inking
water har dnes s -di s play until ...
C.
5s ek. highlighted
L D1
X+1x blinking
L D1
L D0
Each additional button S1 activation
increases the value scrolling.
(WH1 - WH5)
... OFF after 60s ek. automaticall y
L D0
Store adjusted water hardness
The updated value is stored immediately after each successful input.
S0
... OFF by manuel l activation On/Off
TSE-N 10.00 A. B.
Terminate this function
Automatically 60 sec, after the last activation of button S1
or by switching the device OFF by the ON/OFF button S0
this special program is terminated.
- 27 -
599 50 84 90
EN
20. Service-functions for assembly line
Assembly line test program:
-
Press program buttons S1 and S3 simultaneous and keep them pressed until the device is
switched ON by the ON/OFF switch S0.
For acknowledge, that the function assembly line test program is active, LED LD3 is
blinking.
This LED keeps on blinking during the whole program cycle.
The program starts automatically after 3 sec.
This specific assembly line program simulats a normal wash cycle and run analogus.
The program phase is displayed by PPD-LEDs LD9 to LD11
At least 3 seconds after power failure the full function is restarted.
The test program can be interrupted by opening the door.
During door open,the program LED LD3 is blinking and the related PPD-LED is ON.
The test program can only be terminated by an additional activation of button S3.
(See also description Delete program)
At the end of the test program, the LED LD3 is blinking and the PPD-LED End is ON.
In the assembly test program, the regeneration is run in any case, not only depending on
water consumption.
Adjust and recognise heating power:
The heating power is considered in the machine personalisation.
All machines equiped with EDW1000 will be build up with 10A heating element.
The assembly line test program takes approximately 16 minutes and proceeds as follows:
3URJUDP5XQ'LVSOD\
LED 9
LED 10
LED 11
TSE-N 10.00 A. B.
6WHS
1
2
3
)XQFWLRQ
static filling
dynamic filling
pause
4
5
dynamic filling
circulation pulse 2
heating
detergent dispenser
draining
pause
draining
regeneration
drain
End
6
7
8
9
10
11
- 28 -
7LPH
up to level
10 sec
5 sec
up to level + circulation pump with
increasing speed up to 1900 1/min
up to 50 °C
30 sec
30 sec
20 sec
10 sec
120 sec
30 sec
599 50 84 90
EN
21. Customer service functions
Single actor activation
-
Press program button S2 and S3 simultaneous and keep them pressed until switching the
machine on with the ON/OFF button S0 .
For acknowledge, that the function is active, the LEDs LD1, LD2 and LD3 are blinking.
By pressing the program button S2 the function is started.
During the whole cycle, LED LD2 is blinking.
The first component to be activated automatically is the inlet valve. All additional actors can
be started in the below mentioned sequence, by pressing button S2 repeatedly.
Each of the single actors is switched ON for the below given time. Afterwards, hes
automatically switched OFF. In the following, the machine remains in a PAUSE mode, until
the next actor is started by pressing button S2 or until the function is terminated.
The actual component is displayed by a code of the PPD-LEDs.
The sequence of activation is fixed and scrolling. It cant be changed.
The time of activation can be shorted by pressing button S2 already before the timeout of
below given value.
Sequence of activation, ON-time and PPD code:
valve
20s ek.
L D9
L D10
L D11
dis pens er cir culation pump
60s ek.
L D9
L D10
L D11
60s ek.
L D9
L D10
L D11
heating
20s ek.
L D9
L D10
L D11
60s ek.
L D9
L D10
L D11
60s ek.
L D9
L D10
L D11
60s ek.
L D9
L D10
L D11
all OF F
L D9
L D10
L D11
DGN-var iants
60s ek. br eak
continue per hand activation
-
r es et-valve r egener . dos . dr ain pump
The function remains active until terminated by pressing the ON/OFF-button S0 .
Indication of customer service failure stack
-
Press program button S2 and S3 simultaneous and keep them pressed until
switching the machine on with the ON/OFF button S0 .
For acknowledge, that the function is active, the LEDs LD1, LD2 and LD3 are blinking.
By pressing the program button S1 the function is started.
During the whole cycle, LED LD1 is blinking.
The failure code is displayed by PPD-LEDs LD9 to LD11.
(see chapter Overview of failure displays)
The failures can be displayed scrolling, by repeatedly pressing button S1 .
In maximum, the last 3 occured failures can be shown.
The function can only be terminated by switching the machine OFF with the ON/OFF button
S0 .
TSE-N 10.00 A. B.
- 29 -
599 50 84 90
EN
Delete the customer service failure stack and LED-test
-
-
Press program button S2 and S3 simultaneous and keep them pressed until
switching the machine on with the ON/OFF button S0 .
For acknowledge, that the function is active, the LEDs LD1, LD2 and LD3 are blinking.
By pressing the program button S3 the function is started.
!! Attention: By starting the function, the failure memory is cleared automatically !!
All LEDs on the panel (max. LD1 to LD14) are switched ON simultaneous for approx. 1 second.
The activation of the LEDs is repeated twice, with a pause of 2 sec inbetween.
Afterwards the function is terminated.
The function can only be terminated before, by switching the machine OFF with the ON/OFF
button S0 .
22. Misuse and program interrupt
Parallel activation of 2 or more buttons
In terms of electronic control an exactly parallel activation of 2 or more buttons is not possible
in the practical use.
Button pressed too long (with already running program)
If a program button is pressed for more than 3 seconds, this can cause the running program
to be deleted or changed.
(see description Delete program, change program )
If an option button is activated, this causes no influence on the program run.
These buttons are deactivated after program start.
Failure during program run
The failure is displayed by a blinking program LED and the blinking PPD-LEDs according to
the defined code (see table). LEDs of probably choosen options remain ON.
Removeable failure - Water tap closed, Drain pump blocked
If the recognised failure is removeable by the user the machine automatically changes in a
PAUSE mode.
As soon as the failure, e.g. water tap closed is recognised, the program is stopped in the
actual step.
The control is waiting until the failure was removed (if possible).
To continue the program, the ON/OFF button S0 has to be switched OFF and ON.
The program cycle continues from the actual program step. No program information is lost.
Its not necessary to delete the program.
Other failures
All additional failures, which are partly also visible for the customer by the PPD-LEDs, are
listed in the table on page B12 in more detail.
Power fail
If a power fail occures, the machine shows the same behaviour as if switched OFF with the
ON/OFF button.
On power return, the machine shows the same behaviour as if switched ON with the ON/
OFF button.
The program continues from the last valid step. No program information is lost.
The program continues after power fail without additional button activation.
TSE-N 10.00 A. B.
- 30 -
599 50 84 90
EN
S1
S4
L D4
L D2
S2
L D5
S5
L D3
S3
L D12
S6
L D8
L D7
L D10
L D6
L D11
L D1
L D0
L D9
- 31 -
Assembly line
test program
L D4
L D5
S1
S2
S3
S4
S5
599 50 84 90
Delete Service failure
memory
Display test
L D10
L D11
L D12
L D13
L D14
L D14
Horizontal position of buttons
Activation of base function
with button(s)
LED - display
S1 + S2
LD1
highlighted 5sek.
then afterwards
S0 (On/Off)
S1 + S3
then afterwards
S0 (On/Off)
Í
Í
Afterw ards display of
actual adjusted
hardness by blinking
LD3
blinking
Choose resp. Start of function
with button(s)
Short-description / Comment
LED - display
Í
S1
Í
Í
Start
after 3 Sek.
Automatically
Í
LD1
highlighted 5sek.
Afterw ards display of
new adjusted hardness
by blinking Code
LD3
blinking
Í
(chapter "Adjust water hardness")
The assembly line test program works automatically.
Í
("Assembly line test program")
20s ek.
Display
Service failure
memory
L D9
L D7
S6
valve
Activation of single
actuators
L D8
L D13
Vertical position of buttons
Choose
water hardness
L D3
L D6
S0
Function
L D2
S2 + S3
then afterwards
S0 (On/Off)
S2 + S3
then afterwards
S0 (On/Off)
S2 + S3
then afterwards
S0 (On/Off)
Í
LD1 + LD2 + LD3
blinking
Í
S2
Í
LD2
blinking
Í
L D9
L D10
L D11
dis pens er cir culation pump
60s ek.
L D9
L D10
L D11
60s ek.
L D9
L D10
L D11
continue per hand activation
20s ek.
L D9
L D10
L D11
r es et-valve r egener . dos . dr ain pump
60s ek.
L D9
L D10
L D11
60s ek.
L D9
L D10
L D11
60s ek.
L D9
L D10
L D11
all OF F
L D9
L D10
L D11
DGN-var iants
60s ek. br eak
(chapter "Single actor aktivation")
Í
Í
LD1 + LD2 + LD3
blinking
LD1 + LD2 + LD3
blinking
Í
Í
S1
S3
Í
LD1
blinking
Í
3 times short
activation of all
available LEDs
with 2 sec Pause
inbetween
The failure is displayed coded by the PPD-LEDs.
The stored failures can be scrolled through, by pressing button S1 .
Í
(see description "Indication of customer service failure stack"
and "Overview of failure displays)
The customer service failure stack was delete
Í
(chapter "Delete the customer ...")
$OOVHUYLFHDQGDIWHUVDOHVIXQFWLRQVFDQRQO\EHVWRSSHGE\VZLWFKLQJWKHPDFKLQHRIZLWKWKH2Q2IIVZLWFK6
Stop the function
heating
Except:
Water hardness adjust - Function is also terminated by a 60sec timeout after the last activation of button S1.
Clear failure mem
23. Overview of Service and After sales functions
TSE-N 10.00 A. B.
L D1
EN
'LVSOD \
33'/('
V
L D9
Closed water tap
L D10
Failure display Visible in failure
visible
memory
for customer
(After sales)
6KRUWGHVFULSWLRQ
:KDWKD SSHQV"
Progr.-LED blinking. Program stopped.
After removing the failure, the program can be continued
bei pressing button S0 (OFF-ON).
yes
blinking
yes
highlighted
Timeout for filling - Failure recognised if ...
1) ... after 2 min of static filling ...
2) ... after 4 min of total filling ...
3) ... after 1 min of dynamic refilling during heating phase ...
... the switch point of the pressure switch wasnt reached.
yes
blinking
yes
highlighted
Pressure switch didn’t reach the switch back after 2 drain cycles.
Progr.-LED blinking. Program stopped.
After removing the failure, the program can be continued
bei pressing button S0 (OFF-ON).
L D11
L D9
Drain pump
L D10
L D11
yes
blinking
yes
highlighted
Floating switch detects water in the bottom tray
(Debounce time 2sec.)
Program interrupted.
Inlet valve closed and drain pump activated for 1 drain cycle
(approx. 1min).
After removing the failure, the program can be continued
bei pressing button S0 (OFF-ON).
no
yes
highlighted
Target temperature not reached after a timeout of 45 min.
(Only possible in temperature controlled heating steps)
Program is terminated without activation of the heating
element!
All heating steps last 45min in general.
no
yes
highlighted
NTC short circuit or interrupt.
The NTC is controlled between the 1st filling and the start of the
drying cycle
Program is terminated without activation of the heating
element!
All heating steps last 45min in general.
yes
blinking
yes
highlighted
After activating the circulation pump, within 30 sec no signal from
the tachometer is recognised.
The program is interrupted.
By pressing the button S0 (OFF-ON), the program can be
restarted.
(Failure repeatedly occuring Service call)
L D9
Aqua-Control
L D10
L D11
- 32 -
L D9
Heating
L D10
L D11
L D9
NTC-Sensor
L D10
L D11
L D9
Tacho
L D10
L D11
yes
blinking
yes
highlighted
Signal from tachometer is recognised, although the circulation
pump isn’t activated.
The program is interrupted and water filled till the switch
oint of the pressure switch.
By pressing the button S0 (OFF-ON), the program can be
restarted.
(Failure repeatedly occuring ð Service call)
no
no
not possible
Checksum in EEProm not correct.
Only recognised after switching ON.
No program selection possible
On/Off-lamp (LD0) on
L D9
Circulation pump
Triac short circuit
599 50 84 90
Wrong variant
programming
L D10
L D11
no
display
Õ
24. Overview of failure displays
TSE-N 10.00 A. B.
)D LOXUH
EN
,QWHQVLY
1RUPDO
1RUPDO%LR
(QHUJ\VDYLQJ
(&2
(&2%,2
(DWORDG5XQ
4XLFN
4XLFN
3UHZDVK
/LQHSURJUDP
TSE-N 10.00 A. B.
WDEOHWSURJUDP
,QWHQVLY
UHGXFHLQFUHDVH
WHPSHUDWXUH
)OH[LEOHSURJUDPB
6XSHUZDVK
)OH[LEOHSURJUDPB
ULQVH
3URJUDPV
KDOIORDG
25. Programms and Options
J
J
J
J
J
J
J
----J
J
J
-----
J
J
J
J
J
J
--J
J
-----------
J
J
J
J
J
J
--J
J
-----------
J
J
J
J
J
J
--J
J
-----------
J
J
J
J
J
J
J
J
J
-----------
- 33 -
599 50 84 90
EN
26. Description of the options
Option .... half load
-
Chooseable to all programs, except Prewash
If the choosen program has a phase prewash, this phase is skipped.
The speed of the circulation pump is reduced in the filling step.
Reduction of average time are 28 minutes by intensiv programmes, 18 minutes by
programmes. The water consumption is reduced about 5 liters.
Option .... rinse +
-
Chooseable to all programs, except
Prewash, Quick-, Glass-program and Energysaving
An additional prewash phase is added to the program cycle.
Option .... superwash
-
-
-
Chooseable to all programs, except
Prewash, Quick-, Glass-program and Energysaving
Changes in the prewash phase (not available in Eco 65° and Eco Bio 50°)
o
hot prewash with higher temperature. Temperature is increased from 40°C to 55°C.
o
Two soaking phases of 5 minutes duration are added to the cycle.
Inbetween these phases the circulation pump is activated for a short time.
In this soaking phases, the soil is softened and comes off.
o
Additional prewash time of total 7 minutes is added. During this time the temperature is
kept on 55°C by enableing re-heating.
o
The duration of the program phase prewash is increased with this option by 18-20
minutes
Changes in the cleaning phase.
o
Additional 6 minutes of cleaning, with heating to max. 55°C
o
Additional 20 minutes cleaning with a controlled temperature of 70°C (resp. 65°).
o
The duration of the program phase cleaning is increased with this option by approx.
26 minutes.
This option doesnt influence the program cycle in the phases hot rinse and drying. In the
program Normal 65°C an additional 2nd intermediate rinse is run, as already available in
the Intensive program.
Option .... reduce / increase temperature
-
Chooseable to all programs, except
Prewash, Quick-, Glass-program and Energysaving
Important!
Per device, it is only possible either to increase or to decrease the temperature by an option
button. This has to be carefully watched when building variants!
This option exclusively influences the temperatures in Prewash and Cleaning.
The temperature in Hot Rinse remains unchanged.
The value for temperature in- or decrease is stored in EEProm and therefore changeable for
different variants.
Option .... tablet program
-
Chooseable to all programs, except
Prewash, Quick- and Glass-program
To better dissolve the tabs, and additional temperature step of 40°C is added in the cleaning
phase.
Due to this, the time of this phase is increased by approx. 5 minutes.
TSE-N 10.00 A. B.
- 34 -
599 50 84 90
EN
27. Rinse, resin wash, regeneration and measure
rinse
-
Always when activating the circulation pump and/or the interheater, refilling of water is
enabled.
o
But the maximum refill time is limited to 60 seconds.
o
Exceeding this limit causes a failure code display and the program cycle is
stopped.
PPD-LED LD9 is blinking.
L D9
L D10
L D11
measure to cleaner and rinse aid
-
The activation times of the dispenser were optimised with the EDW1000:
o
In program phase cleaning
30 seconds ON
o
In program phase hot rinse
30 seconds ON / 30 seconds OFF / 30 seconds ON
The dosage of rinse aid is temperature controlled at a minimum of 50°C.
TSE-N 10.00 A. B.
- 35 -
599 50 84 90
EN