Download Service Manual - TiltRotators UK
Transcript
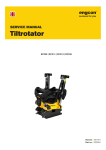
Service Manual
Tiltrotator/Rotator EC/ECR02
The noble art
of digging
Version 1.0
Service Manual Tiltrotator/Rotator EC02
Table of contents
Safety regulations
General information ............................................................. 4
Cautions ................................................................................. 4
Technical data
General information ............................................................. 6
Tightening .............................................................................. 7
Permitted play ....................................................................... 7
Tiltrotator/rotator EC02 ........................................................... 8
Tilt cylinde
Removal ................................................................................. 9
Dismantling..........................................................................10
Assembly .............................................................................11
Attachment ..........................................................................12
Directional valve/valve block, tilt cylinder
Removal ...............................................................................14
Attachment ..........................................................................16
Directional valve/valve block, frame
Removal ............................................................................... 17
Attachment .......................................................................... 17
Head
Removal ...............................................................................18
Attachment ..........................................................................18
Hydraulic motor
Removal ...............................................................................20
Attachment ..........................................................................20
Worm screw
Removal ...............................................................................21
Attachment ..........................................................................22
Worm wheel
Removal ...............................................................................23
Attachment ..........................................................................28
Checking of axial play
Axial play, worm wheel ......................................................33
Axial play, worm screw......................................................35
Page 3
Service Manual Tiltrotator/Rotator EC02
Safety regulations
Safety regulations
General information
In this service manual, the terms CAUTION, NB: and NOTE: are used as
follows:
CAUTION
The term CAUTION signifies that incorrect procedures can cause personal
injury.
NB:
The term NB: signifies that incorrect procedures can cause material damage.
NOTE:
The term NOTE: highlights important user instructions.
The service manual describes the repair and inspection operations that can be
performed on tiltrotator/rotator ec 02.
The safety regulations apply regardless of which base machine is used. Also
see the safety instructions for the base machine and other equipment used, as
well as the safety information in the instruction manual.
Make sure you have read and understood all the cautions before undertaking
any maintenance operations. The cautions explain potential risks and how to
avoid them.
If in any doubt, contact your employer or the supplier. Expert advice can
eliminate many unnecessary risks.
Cautions
CAUTION
Incorrect installation can pose a safety risk. If in any doubt, contact an engcon
dealer or engcon Nordic AB.
CAUTION
Make sure that the hydraulic system is free of pressure before starting work on
the system. Risk of personal injury.
CAUTION
Switch off the power when working with the electrical system and remove
rings, watches etc. before starting work. Risk of personal injury.
Page 4
Service Manual Tiltrotator/Rotator EC02
Safety regulations
CAUTION
Never use your hands to check for leaks in the hydraulic system. Hydraulic oil
under pressure can penetrate your skin causing serious injury.
CAUTION
Implements connected to the tiltrotator/rotator may not be used under any
circumstances unless correctly locked into place. ALWAYS make sure that the
lock bolts protrude according to the specifications for the relevant quick hitch.
CAUTION
Never attempt to upgrade the equipment’s maximum capacity by making
modifications without the supplier’s approval.
CAUTION
Short circuits in electrical cables can cause injury and burning. Insulate
electrical conductors and parts carefully when installing electrical equipment.
CAUTION
Risk of burn injuries from hot hydraulic oil.
CAUTION
The machine must never be operated with the implement lock switch turned
on, except when attaching or detaching a bucket or implement.
CAUTION
If in any doubt regarding the machinery or the safety features, contact an
engcon dealer or engcon Nordic AB.
CAUTION
Risk of catching in moving parts.
Page 5
Service Manual Tiltrotator/Rotator EC02
Technical data
Technical data
General information
Max. machine size
3 000 kg
Max. breakout
20 kNm
Max. bucket width
800 mm
Max. hydraulic pressure
22,5 MPa
Min./max. hydraulic flow
15/35 l/min
Max. rec. pressure in return line
2,5 MPa
Weight
65 kg*
Width A
180 mm*
Width B
155 mm*
Width C
160 mm*
Total length D
435 mm*
Build height E
245 mm*
Max. width
385 mm*
Swivel channel extra function, number of couplings
2
Swivel channel lock function, number of couplings
2
Rotation
Infinite
Tilt angle
2x40°
Tilt time, hydraulic flow
2s / 10 l/min
Rotation time for one rotation, hydraulic flow
4,6 s / 35 l/min
Hydraulic motor Char-Lynn, J lin
50 cm³
Standard mountings
S30, S40
*Depends on mounting
From machine
Fig. 1. Measurement table
Page 6
Service Manual Tiltrotator/Rotator EC02
Technical data
Tightening
The rotator is dimensioned to withstand heavy strain from breakout and
rotation. Tightening of certain screw joints is vital to ensure optimum durability.
Screws and thread holes must be kept very clean and the threads well
lubricated.
Screw dimension
M5
M10
M12
8.8 Type
5,7 Nm
47 Nm
81 Nm
12.9 Typ
9.7 Nm
80 Nm
140 Nm
The screws for the hitch, centre ring and yoke couplings must be replaced
during servicing.
The replacement screws should be of the same type as the previous screws.
Permitted play
Axial play, worm screw A
Max. 0.4 mm
Axial play, worm wheel B
Max. 0.3 mm
NOTE:
After shimming, the values should be between 0.1 mm and 0.2 mm.
Fig. 2. Overview, play
Axial play worm screw A.
Axial play worm wheel B.
Page 7
Service Manual Tiltrotator/Rotator EC02
Tiltrotator/rotator EC02
Tiltrotator/Rotator EC02
Tilt cylinder
Head
Valve block/swivel
Worm screw
Hydraulic motor
Worm wheel
Fig. 3. Assembly diagram, rotator EC02
Page 8
Service Manual Tiltrotator/Rotator EC02
Tilt cylinder
Tilt cylinder
Removal
CAUTION
Make sure that the hydraulic system is free of pressure before starting work.
Risk of personal injury.
NB:
All work that involves opening up connections to hydraulic parts requires a
high degree of cleanness.
1. Clean the tilt cylinder and its hydraulic connections.
2. Mark the positions of the two hydraulic tubes.
3. Disconnect the hydraulic tubes attached to connection A and connection B
on the tilt cylinder’s valve block.
4. Plug all open connections.
Fig. 4. Hydraulic connections, valve block
5.
6.
7.
8.
Remove the cable ties around the tubes.
Remove the two power plugs from the rotator’s valve block.
Remove the cylinder coupling that is turned towards the base machine.
Remove the lock screw for the cylinder shaft and remove the shaft.
Page 9
Service Manual Tiltrotator/Rotator EC02
Tilt cylinder
Fig. 5. Cylinder shaft
CAUTION
Risk of catching in moving parts.
9. Lift off the tilt cylinder with the valve package from the cylinder coupling
that is turned away from the machine.
10. Remove the protective plates covering the tilt cylinder’s valve package.
11. Remove the valve block from the tilt cylinder, making sure that O-rings
come away with it.
Dismantling
NB:
All work that involves dismantling of hydraulic parts requires a high degree of
cleanness.
1.
2.
3.
4.
Clean the outside of the cylinder.
Clamp the cylinder in a vice.
Remove the cylinder nut and empty any remaining oil from the cylinder.
Pull out the piston rod along with its seals.
NOTE:
The piston is fixed with Loctite. If necessary, heat gently to facilitate removal.
5. Remove the piston from the piston rod.
6. Remove the cylinder nut from the piston rod.
Page 10
Service Manual Tiltrotator/Rotator EC02
Tilt cylinder
Assembly
1. Check the piston rod, piston and cylinder for damage or scratches.
2. Replace all seals.
Fig. 6. Tilt cylinder, assembly diagram
3. Lubricate the seals in the cylinder nut with clean hydraulic oil and thread it
onto the piston rod.
4. Apply lock solution to the piston and mount it on the piston rod.
5. Make a punch mark on the bottom between the piston and the piston rod
to secure the piston.
6. Lubricate the new seals on the piston with clean hydraulic oil and push the
piston rod into the cylinder.
7. Screw the cylinder nut into place.
Page 11
Service Manual Tiltrotator/Rotator EC02
Tilt cylinder
Attachment
1. Attach the valve block with the directional valve.
Check that the O-rings are correctly in place.
Fig. 7. O-rings
2. Attach the protective plate without a type plate to the valve block.
Fig. 8. Protective plate without type plate
3.
4.
5.
6.
Page 12
Make sure that the cables are not rubbing against any sharp edges.
Attach the protective plate with a type plate.
Lubricate the bushes for the tilt cylinder.
Install the cylinder in the hitch that is turned away from the base
machine.
Service Manual Tiltrotator/Rotator EC02
Tilt cylinder
7. Attach the hitch that is turned towards the base machine.
Fig. 9. Tilt cylinder
8. Attach the cylinder shaft and the lock screw.
9. Connect the two hydraulic tubes to the tilt cylinder’s valve block, following
the markings made earlier.
10. Connect the two power plugs to the rotator’s valve block.
11. Fasten the power cable firmly to the hydraulic tubes using cable ties.
12. Lubricate the tiltrotator. See the lubrication schedule in the instruction
manual.
Page 13
Service Manual Tiltrotator/Rotator EC02
Directional valve/valve block, tilt cylinder
Directional valve/valve block, tilt cylinder
CAUTION
Make sure that the hydraulic system is free of pressure before starting work.
Risk of personal injury.
NB:
All work that involves opening up connections to hydraulic parts requires a
high degree of cleanness.
NB:
All work on the hydraulic system that involves dismantling of parts requires a
high degree of cleanness.
Removal
1. Mark the positions of the two hydraulic tubes so that they can be replaced
in the same position.
2. Disconnect the hydraulic tubes attached to connection A and connection B
on the tilt cylinder’s valve block.
3. Plug all open connections.
Fig. 10. Hydraulic connections, valve block
Page 14
Service Manual Tiltrotator/Rotator EC02
Directional valve/valve block, tilt cylinder
4. Undo the two screws that are screwed into the valve package (applies to
protective plate without type plate).
Fig. 11. Screws for protective plate without type plate
5. Remove the protective plate with a type plate.
6. Disconnect the three power plugs.
7. Remove the valve block from the tilt cylinder, making sure that the O-rings
come away with it.
8. Remove the directional valve from the valve block.
9. Plug all open connections.
10. Remove the plastic nuts on the electromagnets and pull the electromagnets off the directional valve.
NOTE:
Reserve the O-rings for later.
Fig. 12. Directional valve
11. Replace any damaged parts.
Page 15
Service Manual Tiltrotator/Rotator EC02
Directional valve/valve block, tilt cylinder
Attachment
1.
2.
3.
4.
5.
6.
7.
8.
9.
Page 16
Attach the electromagnets on the directional valve.
Lubricate the O-rings and thread them onto the directional valves.
Attach the plastic nuts.
Connect the directional valve to the valve block.
Attach the valve block to the tilt cylinder. Check that the O-rings are correctly in place.
Connect the three power plugs.
Make sure that the cables are positioned correctly and are not rubbing
against any edges.
Attach the protective plate and tighten the screws.
Connect the two hydraulic tubes to the valve block, following the markings
made earlier.
Service Manual Tiltrotator/Rotator EC02
Directional valve/valve block, frame
Directional valve/valve block, frame
Removal
1.
2.
3.
4.
Undo the two power plugs on the directional valves.
Remove the directional valves from the valve block.
Plug all open connections.
Remove the plastic nut for each electromagnet and pull them off the
directional valve.
NOTE:
Reserve the O-rings for later.
5. Replace any damaged parts.
Fig. 13. Directional valve
Attachment
1.
2.
3.
4.
5.
Attach the electromagnets on the directional valve.
Lubricate the O-rings and thread them onto the directional valves.
Attach the plastic nuts.
Attach the directional valves on the valve block.
Connect the power plugs to the directional valves.
Page 17
Service Manual Tiltrotator/Rotator EC02
Head
Head
CAUTION
Make sure that the hydraulic system is free of pressure before starting work.
Risk of personal injury.
NB:
All work that involves opening up connections to hydraulic parts requires a
high degree of cleanness.
Removal
1. Remove the tilt cylinder according to the instructions in the section
Tilt cylinder, Removal, steps 1-9.
2. Remove the lock screws for the tilt shafts on the head and remove
the tilt shafts.
3. Remove the head.
4. Check the head for cracks and other damage. Replace or repair if
necessary.
Attachment
1. Lubricate the bushes for the tilt shafts.
2. Lift the head into place and attach the tilt shaft that is turned away from the
base machine.
3. Attach the tilt shaft that is turned towards the machine, and push it in until it
reaches the inner edge of the shaft hole on the head.
NB:
Do not use shims on the front end. Risk of material damage.
4. Shim the head into place, positioning the shims on the inside
at the rear end.
NOTE:
There must be no perceivable play after attachment and shimming.
Page 18
Service Manual Tiltrotator/Rotator EC02
Head
Fig. 14. Shimming, head
5. Attach the lock screw for the tilt shafts.
6. Lubricate the bushes for the tilt cylinder.
7. Attach the tilt cylinder according to the instructions in the section
Tilt cylinder, Attachment, steps 5-11.
Page 19
Service Manual Tiltrotator/Rotator EC02
Hydraulic motor
Hydraulic motor
CAUTION
Make sure that the hydraulic system is free of pressure before starting work.
Risk of personal injury.
NB:
All work that involves opening up connections to hydraulic parts requires a
high degree of cleanness.
NOTE:
Dismantling instructions for each type of hydraulic motor are included with the
seal kit when spare parts are ordered.
Removal
1. Remove the motor guard.
2. Clean the motor and connections.
3. Mark the positions of the two hydraulic tubes so that they can be
replaced in the same position.
4. Disconnect the tubes from the hydraulic motor.
5. Plug all open connections.
Fig. 15. Hydraulic connections, hydraulic motor
6. Remove the screws from the hydraulic motor and remove the motor.
Attachment
1. Attach the hydraulic motor and tighten the screws.
2. Connect the tubes for the hydraulic motor, following the markings
made earlier.
3. Attach the motor guard.
Page 20
Service Manual Tiltrotator/Rotator EC02
Worm screw
Worm screw
Removal
1. Remove the hydraulic motor according to the instructions in the section
Hydraulic motor, Removal.
2. Remove the screw housing for the worm screw.
3. Remove the worm screw washer along with the corresponding shims.
A jig is required for this operation.
Fig. 16. Worm screw
4. Remove the screw bush.
5. Remove the worm screw.
6. Check all seals and wear parts for damage and wear.
Replace any damaged or worn parts.
Page 21
Service Manual Tiltrotator/Rotator EC02
Worm screw
Attachment
1. Lubricate the worm screw bushes.
2. Put together the worm screw, screw bush and screw washer with shims.
Fig. 17. Worm screw
3. Check that the screw can be turned in the screw bush, then attach the
worm screw in the frame.
4. Attach the screw housing for the worm screw.
5. Turn the lower part clockwise to make sure that the worm screw
reaches the bottom.
6. Install the dial indicator and tool 1004806 in one of the screw holes for the
hydraulic motor. Set the dial indicator to zero.
80
70
90
60
0
50
10
40
20
30
Fig. 18. Installation, dial indicator
NOTE:
When checking the play, make sure that the lower part and frame do not rotate
in relation to each other.
7. Turn the lower part anti-clockwise. Check that the play is within the
specified tolerance. If there is too much play, the worm screw must be
reshimmed.
8. Reinstall the hydraulic motor according to the instructions in the section
Hydraulic motor, Attachment.
Page 22
Service Manual Tiltrotator/Rotator EC02
Worm wheel
Worm wheel
Removal
1. Remove the tilt cylinder according to the instructions in the section
Tilt cylinder, Removal, steps 1-9.
2. Remove the lock screws from the tilt shafts on the head and remove
the tilt shafts.
3. Remove the head.
4. Remove the indicator rod on the quick hitch.
5. Use an iron bar and a spacer to hold the locking wedge in place.
6. Remove the reamed bolt for the lock cylinder.
7. Carefully allow the iron bar to slide forwards until the tool springs are free
from pressure. Remove the locking wedge and the tool springs.
Fig. 19. Jig, tool springs
8. Mark the positions of the two tubes on the lock cylinder.
9. Remove the two tubes from the lock cylinder on the swivel.
Page 23
Service Manual Tiltrotator/Rotator EC02
Worm wheel
Fig. 20. Tubes, lock cylinder
10.
11.
12.
13.
Remove the cylinder.
Plug all open connections.
Mark the positions of the tubes for extra equipment.
Remove the tubes.
Fig. 21. Tubes, extra equipment
14. Plug all open connections.
15. Mark the positions of the two hydraulic tubes connected to the hydraulic
motor, so that they can be replaced in the same position.
16. Disconnect the tubes from the hydraulic motor.
Page 24
Service Manual Tiltrotator/Rotator EC02
Worm wheel
17. Plug all open connections.
Fig. 22. Hydraulic connections, hydraulic motor
18. Remove the screws from the hydraulic motor and remove the motor.
19. Remove the directional valves, making sure that the O-rings remain
in place.
20. Undo the screws for the cover plate and remove the valve block with
the swivel.
Fig. 23. Removal of swivel
21. Remove the screw housing for the worm screw.
Page 25
Service Manual Tiltrotator/Rotator EC02
Worm wheel
22. Remove the washer for the worm screw with the shim.
A jig is required for this operation.
Fig. 24. Worm screw
23.
24.
25.
26.
27.
Remove the screw bush and the worm screw.
Remove the screws for the worm wheel/quick hitch.
Remove the quick hitch.
Remove the scraper for the quick hitch.
Undo the two hex screws for the centre ring.
Fig. 25. Hex screws, centre ring
28. Lift out the worm wheel.
Page 26
Service Manual Tiltrotator/Rotator EC02
Worm wheel
29. Remove the shims.
Fig. 26. Shims, worm wheel
30. Remove the centre ring.
31. Remove the wear washer, wear ring, guide bush and scraper for the
centre ring.
32. Check all seals and wear parts for damage and wear.
Replace if necessary.
Page 27
Service Manual Tiltrotator/Rotator EC02
Worm wheel
Attachment
1. Attach the wear washer, checking that it is
aligned with the lubrication groove.
Fig. 27. Wear washer
2. Attach the wear ring. Check that the guide pin is not protruding above the
wear washer.
3. Attach the scraper for the centre ring and the guide bush.
4. Attach the centre ring.
5. Attach the shim and lubricate the wear washer/wear ring.
6. Attach the worm wheel.
7. Tighten the worm wheel/centre ring with the two hex screws (M6).
8. Insert two screws through the holes in the worm wheel and put a flat bar
between them to keep the iron bar in place.
Page 28
Service Manual Tiltrotator/Rotator EC02
Worm wheel
9. Measure the axial play around the worm wheel,
using a dial indicator and iron bar.
Fig. 28. Measurement, play
10. Max. play: 0.3 mm. If the play exceeds the tolerance,
the rotor must be reshimmed.
NOTE:
Make sure that the groove for the scraper is clean, so that the new scraper
can be positioned correctly.
16. Put together the worm screw, screw bush and screw washer with shims.
17. Check that the screw can be turned in the screw bush, then attach
the worm screw in the frame.
18. Attach the screw housing for the worm screw.
19. Turn the lower part clockwise to make sure that the worm screw
reaches the bottom.
20. Install the dial indicator and tool 1004806 in one of the screw holes
for the hydraulic motor. Set the dial indicator to zero.
80
70
90
60
0
50
10
40
20
30
Fig. 29. Dial indicator
Page 29
Service Manual Tiltrotator/Rotator EC02
Worm wheel
NOTE:
When checking the play, make sure that the lower part and frame do not rotate
in relation to each other.
21. Turn the lower part anti-clockwise. Check that the play is within the
specified tolerance. If there is too much play, the worm screw must
be reshimmed.
22. Attach the hydraulic motor and tighten the screws.
23. Attach the valve block with the swivel. Check that the pin on the swivel
fits the notch on the hitch.
Fig. 30. Swivel pin fitted correctly in notch
24. Check that all the O-rings are correctly in place on the directional valves.
25. Attach the directional valves.
26. Attach the tubes on the hydraulic motor, following the markings
made earlier.
27. Attach the motor guard.
28. Attach the tubes for extra equipment, following the markings made earlier.
Fig. 31. Tubes, extra equipment
29. Attach the tubes to the lock cylinder, following the markings made earlier.
Page 30
Service Manual Tiltrotator/Rotator EC02
Worm wheel
Fig. 32. Tubes, lock cylinder
30. Attach the lock cylinder with spacers. Do not tighten the fastenings.
31. Attach the tool springs and the locking wedge. Use an iron bar with a
spacer to compress the springs.
32. Attach the reamed bolt for the lock cylinder.
33. Tighten the hex screws on the lock cylinder.
Fig. 33. Jig, tool springs
34. Attach the indicator rod to the quick hitch.
35. Attach the head.
36. Attach the tilt shaft that is turned away from the machine.
Page 31
Service Manual Tiltrotator/Rotator EC02
Worm wheel
37. Attach the tilt shaft that is turned towards the machine, and push it in until
it reaches the inner edge of the shaft hole on the head.
NB:
Do not use shims on the front end. Risk of material damage.
38. Shim the head into place on the inside at the rear end.
NOTE:
There must be no perceivable play after attachment and shimming.
Fig. 34. Shimming, head
39. Attach the lock screws for the tilt shafts.
40. Attach the tilt cylinder according to the instructions in the section Tilt
cylinder, Attachment, steps 5-11.
Page 32
Service Manual Tiltrotator/Rotator EC02
Checking of axial play
Checking of axial play
Axial play, worm wheel
If there is no hole for mounting the gauge:
1. Drill a hole measuring 8.5 mm in the cover plate as shown in fig. 38.
2. Probe with the tool R1/8.
NOTE:
Plug the hole after finishing the operation.
Fig. 35. Position
58 mm
25 mm
Fig. 36. Measurement table
Page 33
Service Manual Tiltrotator/Rotator EC02
Checking of axial play
Checking of play
1. Remove the directional valve for rotation.
Fig. 37. Directional valve for rotation removed
2. Attach the tool for checking the axial play.
1.
2.
3.
4.
1004707
610906
1004720
1004809
Fig. 38. Tool for checking play
3. Set the gauge to zero against one of the flat surfaces with the rotor resting
flat against the ground.
Page 34
Service Manual Tiltrotator/Rotator EC02
Checking of axial play
NOTE:
Check the play by lifting the rotor up from the ground.
4. Probe with an iron bar between the hitch and frame to make sure that there
is room for maximum play. Check that the play is within the indicated tolerance. If there is too much play, the rotator must be reshimmed.
5. Reshim according to the instructions in the section Worm wheel, Removal/
Attachment.
6. Attach the directional valve for rotation.
Axial play, worm screw
Checking of play
1. Remove the hydraulic motor according to the instructions in the section
Hydraulic motor, Removal.
2. Turn the lower part clockwise to make sure that the worm screw reaches
the bottom.
3. Attach the gauge and tool 1004806 and reset it to zero against one of the
flat surfaces.
1
2
3
4
Fig. 39. Gauge
NOTE:
When checking the play, make sure that the lower part and the frame do not
rotate in relation to each other.
4. Turn the lower part anti-clockwise and check that the play is within the
specified tolerance. If there is too much play, the worm screw must be
reshimmed.
5. Reshim according to the instructions in the section Worm screw,
Removal/Attachment.
6. Attach the hydraulic motor according to the instructions in the section
Hydraulic motor, Attachment.
Page 35
Production: Syre | Print: Berndtssons Tryckeri, 2010
engcon Nordic
engcon Finland
engcon Denmark
engcon UK
engcon Germany
engcon Poland
engcon Sweden/Nordic/Holding, PO Box 111, SE-833 22 Strömsund, Sweden
0HONEs&AX
INFO ENGCONCOMsWWWENGCONCOM


