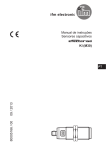
1
Operating instructions
Binary level sensor
UK
80223649 / 00
10 / 2014
LMTx0x
LMTx1x
LMTx2x
Contents
1 Preliminary note���������������������������������������������������������������������������������������������������3
1.1 Symbols used������������������������������������������������������������������������������������������������3
2 Safety instructions�����������������������������������������������������������������������������������������������3
3 Functions and features����������������������������������������������������������������������������������������4
3.1 Applications���������������������������������������������������������������������������������������������������4
3.2 Restriction of the application area�����������������������������������������������������������������6
4 Function���������������������������������������������������������������������������������������������������������������6
4.1 Measuring principle���������������������������������������������������������������������������������������6
4.2 Processing of the measured signals��������������������������������������������������������������7
4.3 Other features of the unit�������������������������������������������������������������������������������7
4.4 IO-Link�����������������������������������������������������������������������������������������������������������7
4.4.1 General information������������������������������������������������������������������������������7
4.4.2 Device-specific information�������������������������������������������������������������������8
4.4.3 Parameter setting tools�������������������������������������������������������������������������8
4.5 Application examples�������������������������������������������������������������������������������������9
4.5.1 Application examples for unit types with short probe����������������������������9
4.5.2 Application examples for unit types with longer probe������������������������10
4.5.3 Application example installation in existing tuning fork adapters ������� 11
5 Installation��������������������������������������������������������������������������������������������������������� 11
5.1 Installation location / environment��������������������������������������������������������������� 11
5.2 Installation process��������������������������������������������������������������������������������������12
5.2.1 Installation LMT1x0, LMT1x1 and LMT1x2����������������������������������������13
5.2.2 Installation LMT1x4 and LMT1x5�������������������������������������������������������13
5.2.3 Installation LMT2x2 and LMT3x2 in existing tuning fork adapters������15
5.3 Notes on the 3A compliant installation���������������������������������������������������������16
5.4 Note on the use in accordance with EHEDG�����������������������������������������������17
6 Electrical connection������������������������������������������������������������������������������������������18
7 Parameter setting����������������������������������������������������������������������������������������������19
7.1 Parameter setting via PC�����������������������������������������������������������������������������19
7.2 Parameter setting via the memory plug�������������������������������������������������������21
7.3 Parameter setting via the teach input����������������������������������������������������������22
7.3.1 Requirements�������������������������������������������������������������������������������������22
7.3.2 Set to the full vessel���������������������������������������������������������������������������22
2
7.3.3 Changing the output function��������������������������������������������������������������23
7.3.4 Fault during the setting process���������������������������������������������������������23
8 Operation�����������������������������������������������������������������������������������������������������������24
9 Maintenance, repair, disposal����������������������������������������������������������������������������25
10 Notes on the regulation (EC) 1935/2004���������������������������������������������������������25
11 Technical data and scale drawing��������������������������������������������������������������������25
12 Factory setting�������������������������������������������������������������������������������������������������26
UK
1 Preliminary note
1.1 Symbols used
►
→
Instructions
Cross-reference
Important note
Non-compliance can result in malfunction or interference.
Information
Supplementary note.
2 Safety instructions
• Please read the product description prior to setup of the unit. Ensure that the
product is suitable for your application without any restrictions.
• If the operating instructions or the technical data are not adhered to, personal
injury and/or damage to property can occur.
• Improper or non-intended use may lead to malfunctions of the unit or to
unwanted effects in your application. That is why installation, electrical
connection, set-up, operation and maintenance of the unit must only be carried
out by qualified personnel authorised by the machine operator.
• In order to guarantee the correct condition of the device for the operating time
the device must only be used in media to which the wetted parts are sufficiently
resistant (→ Technical data).
• The responsibility whether the unit are suitable for the respective application
lies with the operator. The manufacturer assumes no liability for consequences
3
of misuse by the operator. Improper installation and use of the units result in a
loss of the warranty claims.
3 Functions and features
The unit monitors the level of liquid, viscous and powdery media in tanks and
pipes. It can be used for limit detection and run-dry protection. The separate
setting of two switching thresholds enables the detection of two different media
(can be used, for example, for phase separation or differentiation of media).
3.1 Applications
• Suitable for food and hygienic areas due to food-grade materials and hygienic
installation possibilities.
• Detection of almost all media, even extremely adhering (e.g. ketchup) or nonconductive ones (e.g. vegetable oil).
• The sensitivity is preset at the factory. Easy setup possible without any
programming. The unit can be set so that it is also suitable for the applications
of other unit types (→ following table / → 12 Factory setting).
• Available process connections: G1/2, G3/4 and G1.
• Different probe lengths for various mounting positions and for temperature
decoupling (→ 4.5.2).
Type
Preset 1)
LMT100 Aqueous media
LMT110 Oils, greases, powders
LMT121 Media with low water
content
LMT102 Aqueous media
LMT104 Aqueous media
LMT105 Aqueous media
LMT202 Aqueous media
LMT302 Aqueous media
1
2
Sensitivity 1) Probe
Process
2)
length
connection
Low
11 mm
G1/2
High
11 mm
G1/2
Medium
11 mm
G1/2
Low
Low
Low
Low
Low
38 mm
G1/2
153 mm
G1/2
253 mm
G1/2
28 mm G3/4, tuning
fork contour
38 mm G1, tuning
fork contour
) Sensitivity adjustable (→ 7 Parameter setting).
) Probe length measured from conical sealing edge (→ Technical data).
4
EHEDG 3A
●
●
●
●
●
●
●
●
●
●
In the following table you can find a selection of tested media and the
corresponding recommended unit type. A complete list of media is available at
www.ifm.com (see tab "Operating instructions" in the data sheet).
Medium
Alcohol (40 % vol)
Beer
Butter (salted / unsalted)
Ice cream
Grease
Honey
Yoghurt, plain
Non-dairy creamer
Ketchup
Jam
Milk
Remoulade
Olive oil
Cream (30 %)
Chocolate (at approx. 40 °C)
Water (distilled)
Water (tap water)
Sugar (granulated sugar)
LMTx0x
●
●
○
○
○
○
●
○
●
●
●
●
○
○
○
●
●
○
LMTx1x
○
○
○
○
●
○
○
●
○
○
○
○
●
○
○
○
○
●
LMTx2x
●
●
●
●
○
●
○
○
○
○
●
○
○
●
●
●
●
○
●
The medium can be detected without the need to change the factory setting
(plug & play).
○
The medium can be detected by setting the sensitivity (with IO-Link).
UK
The above-mentioned details are non-binding reference values.
Depending on the composition of the listed media deviations may occur.
►► Always check that the device is suitable for your application without any
restrictions!
5
3.2 Restriction of the application area
• Not suitable for abrasive media (e.g. quartz sand) and heavy bulk material (e.g.
stones).
• For use in aggressive media (acids and alkali):
►► Check the compatibility of the product materials beforehand (→ Technical
data sheet).
• Media which are very inhomogeneous separate from each other thus forming
separation layers (e.g. oil layer on water):
►► Check the function by an application test.
• Air or gas bubbles in liquid media may lead to unwanted switching operations.
►► Check the function by an application test. If required, adapt the sensitivity or
set switching delays → 7 Parameter setting.
• Do not expose the probe tip to intensive sun radiation (UV radiation).
4 Function
4.1 Measuring principle
The unit operates to the impedance spectroscopy
method. It evaluates the electrical behaviour of the
media to be monitored in the frequency range between
50 and 200 MHz. An electrical field is generated by the
probe tip which is influenced by the level. The various
media show characteristic behaviour. Also deposits or
foam show significantly different behaviour.
When a suitable unit has been selected the presence of certain media
is detected, deposits or foam are suppressed. In many cases the factory
setting is sufficient. For special applications it is also possible to adapt the
sensitivity to the respective application → 7 Parameter setting.
6
4.2 Processing of the measured signals
Factory setting
Outputs OUT1 / OUT2 complement each other:
OUT1 = Hno; OUT2 = Hnc
No medium detected
OUT1 = OFF OUT2 = ON
Medium detected
OUT1 = ON
OUT2 = OFF
The readiness for operation and the switching status are indicated by LEDs
→ 8 Operation.
UK
4.3 Other features of the unit
• Food-grade materials
• Hygienic installation possibilities without dead band.
• Approvals / conformities (→ Technical data sheet)
• Indication of the switching status and readiness for operation via LEDs.
• After power on the unit is immediately ready for operation; observe the
application area of the individual unit types → 3.1 Applications.
• Defined position of the cable entry for angled sockets for use of ifm welding
adapters.
• Streamlined sensor geometry, no blockage of the pipe, no pressure loss.
• Orientation-independent installation possible.
• On delay and off delay adjustable from 0...10 s.
• IO-Link function → 4.4 IO-Link.
Some unit types do not feature all indicated characteristics
(→ Technical data sheet).
4.4 IO-Link
4.4.1 General information
This unit has an IO-Link communication interface which requires an IO-Linkcapable module (IO-Link master) for operation.
The IO-Link interface enables direct access to the process and diagnostic data
and provides the possibility to set the parameters of the unit during operation.
7
In addition communication is possible via a point-to-point connection with a USB
adapter cable.
You will find more detailed information about IO-Link at www.ifm.com/de/io-link.
4.4.2 Device-specific information
You will find the IODDs necessary for the configuration of the IO-Link unit and
detailed information about process data structure, diagnostic information and
parameter addresses at www.ifm.com/de/io-link.
4.4.3 Parameter setting tools
You will find all necessary information about the required IO-Link hardware and
software at www.ifm.com/de/io-link.
8
4.5 Application examples
4.5.1 Application examples for unit types with short probe
Example LMT121
Fig. A
Fig. B
UK
1
1
1
1: Please note the warning!
• Fig. A: Installation positions options in a tank (e.g. for point level detection or as
run-dry protection).
• Fig. B: Fill level monitoring in pipes.
In case of strongly adhering and viscous media the installation positions
(1) in fig. A and fig. B are only suited to some extent. Residues might be
detected as level.
9
4.5.2 Application examples for unit types with longer probe
Example LMT104
Fig. C
1: Maximum level
Fig. C: Installation from the top to monitor the maximum level (1) or as overfill
protection. Different probe lengths enable different response levels.
Fig. D
Fig. D: Lateral installation, the deeper position in the tank (longer distance
between the sensor tip and the tank wall) ensures the suppression of strongly
adhering and viscous deposits.
The variable clamp fitting (order no. E43322) allows variable mounting
for unit types LMT1x4 and LMT1x5. This enables e.g. high-precision
adjustment of the response point. Moreover, these types can be
thermically decoupled from the process. This also makes applications
with higher process temperature and/or with the risk of heat accumulation
possible (e.g. tank insulation).
Further information:
→ Technical data sheet E43322
→ Operating instructions E43322
10
4.5.3 Application example installation in existing tuning fork adapters
Fig. E
UK
1: Maximum level
Fig. E: Existing tuning fork welding adapters can be used in many cases with
the unit types LMT2x2 and LMT3x2 with G3/4 or G1 process connection → 3.1
Applications. Typically, the response point (1) remains in most cases.
For use of process connections from other manufacturers:
Note the remarks → 5.1 Installation location / environment!
If properly installed in the original, hygienic welding adapter, EHEDG and
also 3A conformity can be reached.
5 Installation
Before installing and removing the unit: Make sure that no pressure is
applied to the system and there is no medium in the pipe or the tank.
Also always note the potential dangers related to extreme machine and
medium temperatures.
5.1 Installation location / environment
• Installation preferably in closed metal tanks.
11
When installed in plastic tanks, there may be deterioration caused by
electromagnetic interference.
►► Check the function by an application test.
►► If disturbances occur, appropriate measures must be taken (shielding,
grounding, etc.).
A correct fit and function of the unit and ingress resistance of the
connection are only ensured using ifm adapters.
Available accessories: www.ifm.com → Data sheet search → Accessories
For use of process connections from other manufacturers:
►► Ensure mechanical compatibility.
As a rule, ifm does not assume any responsibility for ingress resistance,
hygiene and function, in particular with non-existing compatibility, incorrect
installation!
• Installation in pipes from DN25 possible (for short probes).
• When mounted in restricted spaces (e.g. pipes, tank corners) or in agitators:
15 mm
►► To avoid malfunction and damage on sensor
and plant, adhere to a distance of min. 15 mm
to neighbouring objects (e.g. pipe/tank walls,
structures, other LMT sensors) (fig. F).
►► Observe the respective installation depth of the
probe in particular with longer probes.
Fig. F
15 mm
• Do not use any additional sealing material (e.g. PTFE tape). The sensor must
be in electrical contact with the metal process connection.
• Protect the probe tip against direct sunlight (UV radiation).
5.2 Installation process
The unit is installed by means of an adapter.
►► Observe the installation instructions of the adapter used.
12
►► Ensure cleanliness of the sealing areas. Remove protective packaging only
just before mounting. In case of damaged sealing areas replace the unit or the
adapter.
►► Weld or install the adapter into the tank / pipe.
With clamp adapters etc. the order of the installation steps differs. Observe
the notes in the installation instructions of the respective adapter.
5.2.1 Installation LMT1x0, LMT1x1 and LMT1x2
►► Slide the supplied seal (black O-ring), Fig. G or the green flat seal (without
figure) across the thread onto the sensor and/or check for correct position.
It seals the gap on the back between the sensor and the adapter.
UK
Fig. G
1
►► Only use O-rings that are
supplied with the sensor.
Unsuitable O-rings can cause
problems with ingress resistance:
-- O-ring too large: Leakage on
the sensor tip (2), Fig. G.
-- O-ring too flat: Leakage on the
gap on the back between the
sensor and the adapter.
2
1: O-ring (supplied with the adapter)
2: Sealing cone / sealing PEEK on metal
►► Slightly grease the thread of the sensor using a lubricating paste which is
suitable and approved for the application.
►► Screw the sensor into the adapter and tighten.
Max. tightening torque: 20…25 Nm.
►► After installation check the tank / pipe for ingress resistance.
5.2.2 Installation LMT1x4 and LMT1x5
The seal is formed by the flush front of the metal cone (2), Fig. H.
13
As an option, a PEEK sealing ring (3) is available, Fig. I. If the welding
adapter is slightly warped or the sealing surface slightly damaged, the use
of the PEEK sealing ring is recommended. The PEEK sealing ring is not
supplied with the unit; it can be ordered separately. Order no.: E43323.
Fig. H
1: Green flat seal
2: Metal sealing cone
Fig. I
3: PEEK sealing, beige
4: Black flat seal
Installation using the metal sealing cone fig. H (2)
►► Insert the green flat seal (1) and/or check its position. It seals the gap on the
back between the sensor and the adapter.
►► Slightly grease the thread of the sensor using a lubricating paste which is
suitable and approved for the application.
►► Screw the sensor into the adapter and tighten.
Max. tightening torque: 20…25 Nm.
►► After installation check the tank / pipe for ingress resistance.
Installation using the PEEK seal E43323, fig. I
►► Replace the green flat seal (1) with the black flat seal (4). The flat seal (4) is
supplied with the article order no. E43323!
►► Slide the PEEK seal (3) onto the sensor tip until the end stop (cone).
►► Slightly grease the thread of the sensor using a lubricating paste which is
suitable and approved for the application.
14
►► Screw the sensor into the adapter and tighten.
Max. tightening torque: 20…25 Nm.
►► After installation check the tank / pipe for ingress resistance.
5.2.3 Installation LMT2x2 and LMT3x2 in existing tuning fork adapters
Installation in existing tuning fork adapters with flush seal via O-ring → 4.5.3
Application example installation in existing tuning fork adapters.
►► Observe the notes in → 5.1 Installation location / environment for use in
process connections of other manufacturers!
UK
►► Observe the mounting remarks of the manufacturer of the existing adapter!
►► Insert the green flat seal (1), Fig. J, and/or check its position. It seals the gap
on the back between the sensor and the adapter.
►► Slide a suitable, original O-ring and a possibly existing spacing ring of the
adapter over the sensor the right way round (G3/4) and/or check the position of
the adapter (G1).
►► Check the state and material of the O-ring, replace if necessary.
►► Slightly grease the thread of the sensor using a lubricating paste which is
suitable and approved for the application.
►► Screw the sensor into the adapter and tighten at the hexagonal nut (2), Fig. K,
until the sensor touches the end stop of the welding adapter (3).
Max. tightening torque for the hexagon AF 27 (1), fig. K: 35 Nm.
Max. tightening torques for the hexagon*) (2), fig. K:
LMT2x2
LMT3x2
*) AF 32
*) AF 36
75 Nm
100 Nm
►► After installation check the tank / pipe for ingress resistance.
15
Fig. J
Fig. K
1
2
3
1: Green flat seal
1: Hexagonal nut AF 27
2: Hexagonal nut LMT2x2 AF 32 / LMT3x3 AF 36
3: End stop
5.3 Notes on the 3A compliant installation
Some versions of the unit have a 3A approval → 3.1 Applications. It is only valid in
conjunction with adapters with 3A approval.
Available accessories: www.ifm.com → Data sheet search → Accessories
Cannot be used in plants that have to meet the criteria of E1.2 / 63-03 of
the 3A standard 63-03.
16
Draining must be ensured by an
appropriate installation position
(position 1...4).
The process connection must be
provided with a self-draining leakage
port. This is ensured by using the
adapter with 3A approval.
For use of process connections
from other manufacturers observe
chapter → 5.1 Installation location /
environment.
UK
5.4 Note on the use in accordance with EHEDG
Depending on the version the unit has an approval in accordance with EHEDG. It
is only valid in conjunction with adapters with EHEDG approval (www.ifm.com →
Data sheet search → Accessories).
For use of process connections from other manufacturers observe chapter → 5.1
Installation location / environment.
►► Make sure that the sensor is integrated into the system in accordance with
EHEDG.
17
6 Electrical connection
The unit must be connected by a qualified electrician.
The national and international regulations for the installation of electrical
equipment must be adhered to.
Voltage supply to EN 50178, SELV, PELV.
►► Disconnect power.
►► Connect the unit as follows:
Normal mode1)
2
1
3
4
1)
Teach operation
1
1
2
2
4
4
3
3
Factory setting
Pin
1
3
2 (OUT2)
4 (OUT1)
Connection
Ub+
Ubpnp / npn switching signal
•pnp / npn switching signal
•IO-Link
•Input for teach signal
Core colours for ifm sockets
Brown
Blue
White
Black
Factory setting OUT1 and OUT2: pnp switching signal
In the factory setting, the teach operation is deactivated.
For activation: → 7.1 Parameter setting via PC → OU1 = Tch
• Only output OUT2 is available in the teach mode.
Information about available sockets/plugs at www.ifm.com → Connection
technology → Sockets.
18
7 Parameter setting
When a suitable unit has been selected, the presence of certain media
is detected, deposits or foam are suppressed. In many cases the factory
setting is sufficient → 3.1 Applications. For special requirements it is
possible to adapt the sensitivity and other functions to the application.
Splashes, wave movements and air bubbles can be compensated by
setting a switching delay, for example.
The parameters can be set prior to installation and setup of the unit or while in
operation.
UK
If you change parameters during operation, this will influence the function
of the plant.
►► Ensure that there will be no malfunctions in your plant.
The following subchapters describe the three different parameter setting options
of the unit.
7.1 Parameter setting via PC
For parameter setting IO-Link software is necessary (e.g. "LINERECORDER
SENSOR" or "ifm Container"). To connect the sensor via the USB interface of a
computer, the USB IO-Link interfaces, order no. E30396 or E30390, are available.
The program library of the available DTM objects, the IO Device
Description (IODD) and the FDT service program "ifm Container" can be
downloaded at www.ifm.com → Service → Download.
19
The following parameters can be set:
SPx / rPx Sensitivity of the set points (SPx) and reset points (rPx) for outputs OUT1
and OUT2.
The values for SPx / rPx are set in per cent of the maximum process value.
The process value is defined as follows:
Process value in air = 0 %
Process value in tap water = 100 %
Minimum hysteresis: 2 %
Reference values:
OUx
Aqueous / water-based
media:
SPx = 62 %, rPx = 54 %
(factory setting LMTx0x)
Media with low water content:
SPx = 35 %, rPx = 29 %
(factory setting LMTx2x)
Oils, fats, powdery media:
SPx = 8 %, rPx = 5 %
(factory setting LMTx1x)
Output function for OUTx:
-- [Hno] = hysteresis function/NO
-- [Hnc] = hysteresis function/NC
-- [Fno] = window function/NO
-- [Fnc] = window function/NC
OUT1:
-- [Tch] = configure pin 4 as input for the teach signal
(→ 6 Electrical connection / → 7.3 Parameter setting via the teach input)
TSP1
Teach to medium 1
•Full adjustment to the medium 1 to be detected, automatically sets the
switching thresholds SP1 / rP1 for OUT1.
TSP2
Teach to medium 2
•Full adjustment to the medium 2 to be detected, automatically sets the
switching thresholds SP2 / rP2 for OUT2.
FOUx
Response of the outputs OUTx in case of a fault.
dFo
Delay time for switching response in case of a fault.
Setting range 0…5 s. Step increment 0.2 s
dsx*)
Switching delay for OUTx.
Setting range 0…10 s. Step increment 0.2 s
*)
Parameter ds is not available for LMT100, LMT110 and LMT121!
20
The following parameters can be set:
drx
Switch-off delay for OUTx.
Setting range 0…10 s. Step increment 0.2 s
P_n
Switching logic for the outputs (pnp or npn)
rES
Restore the factory setting
COd 0
Access code for menu level 1
Menu level 1 contains all parameters listed. After activation of this access
code the unit is completely protected against unauthorised changes.
UK
In case of loss of the valid code, parameter setting is not
possible!
Therefore store the code carefully!
COd 1
Access code for menu level 2
Menu level 2 contains the menu items FOU, ds, dr, P_n, dFo, rES and COd.
After activation of this access code only these parameters are protected
against unauthorised changes.
7.2 Parameter setting via the memory plug
Parameters can be set quickly and easily via a correctly set memory plug (order
no. E30398). To do so, a suitable parameter set must be loaded to the memory
plug (e.g. via a PC).
The memory plug can also be used to save the current parameter setting of
a unit and to transfer it to other units of the same type.
You can find more information about the memory plug in the technical
documentation (available free of charge at www.ifm.com).
21
7.3 Parameter setting via the teach input
In the teach mode the functionality is restricted, only output OUT2 is
available. During teach operation, the LEDs indicate the switching status of
output OUT2.
7.3.1 Requirements
The teach input must be activated. To do so, there are two options:
• Via the IO-Link software → 7.1 Parameter setting via PC.
• Via the memory plug → 7.2 Parameter setting via the memory plug.
Output OUT2 must be configured as hysteresis function (Hnc or Hno).
Another configuration causes an error during the teach process (→ 7.3.4
Fault during the setting process).
The teach process itself is carried out by applying Ub+ to pin 4 (→ 6 Electrical
connection).
The tool which is available for this process is the teach button (order no.
E30405).
7.3.2 Set to the full vessel
With the full adjustment the sensitivity of the unit can be set to the medium to be
detected in an optimum manner (this suppresses deposits and foam):
►► Fill the tank until the probe tip is completely covered.
►► Apply Ub+ to pin 4 for > 2 ... < 5 s (T1).
).
>> LEDs flash with 2 Hz (
>> After the teach process, the LEDs light for 2 s; then the colours change to
regular operating mode (table → 7.3.3).
22
7.3.3 Changing the output function
Output OUT2 can be changed from "NC" (Hnc) to "NO" (Hno) and vice versa. Only
the hysteresis functions (Hnc / Hno) are available, the parameters for the window
functions can only be set via IO-Link:
►► Apply Ub+ to pin 4 for > 5 ... < 10 s (T1).
), after 5 s it double flashes at 1 Hz (
).
>> LEDs flash with 2 Hz first (
>> After the change, the LEDs light for 2 s; then the colours change to regular
operating mode (table below).
>> After the change, the LEDs light depending on the level as follows:
UK
No medium detected
Medium detected
LEDs = yellow
(with Hnc)
LEDs = green
(with Hnc)
LEDs = green
(with Hno)
LEDs = yellow
(with Hno)
7.3.4 Fault during the setting process
The teach operation is cancelled in case of a fault:
>> LEDs flash green-yellow at 8 Hz.
>> The unit returns to the operating mode with unchanged settings.
Possible faults:
• Time error (teach time too long / too short).
• Internal sensor signal outside the measuring range.
• Wrong output function: No hysteresis function was selected as output function
for OUT2 → 7.3.1 Requirements.
• Process value too small (< 9 %, e.g. for powdery media),
setting SPx / rPx has to be made manually → 7.1 Parameter setting via PC.
23
8 Operation
When the supply voltage has been applied, the unit is in the operating mode. It
carries out its evaluation functions and switches the outputs.
The following table shows the factory settings. In this state OUT1 = Hno
and OUT2 = Hnc.
Operating mode
Unit ready for operation, no medium
detected
Unit ready for operation, medium
detected
No operating voltage
Short circuit output 1
Short circuit output 2
Error / failure
Teach operation
Fault during the setting process
1)
According to the level
LEDs
Green
OUT1
OFF
OUT2
ON
Yellow
ON
OFF
OFF
OFF
OFF
1)
Flashes yellow
1)
Flashes yellow
OFF
OFF
→ 7.3.2 Set to the full vessel
→ 7.3.3 Changing the output function
LEDs flash green-yellow at 8 Hz
In the factory setting, the LEDs indicate the switching status of OUT1
(exception: teach operation → 7.3).
24
9 Maintenance, repair, disposal
►► From time to time check the probe cap for deposits and damage. Clean the unit
if badly soiled. In case of damage replace the unit.
►► After removal and before reinstallation of the unit carefully clean the probe neck
and the installation slot - especially the sealing cone - with appropriate methods
to ensure that it is resistant to ingress and without dead space.
►► If the variable clamp fitting E43322 is used: Check the correct position
of the safety chain or the securing wire between the clamp fitting and
the sensor from time to time.
►► Replace if damaged!
UK
When the medium is changed, it may also be necessary to use another
type of unit or adapt the sensitivity → 3.1 Applications.
►► It is not possible to repair the unit.
►► After use dispose of the unit in an environmentally friendly way in accordance
with the applicable national regulations.
►► In case of returns ensure that the unit is free from soiling, especially of
dangerous and toxic substances. For transport only use appropriate packaging
to avoid damage of the unit.
10 Notes on the regulation (EC) 1935/2004
The following components of the product are designed for permanent
contact with food according to the regulation (EC) 1935/2004:
- Sensor tip made of PEEK
- Sealing ring made of PEEK (→ 5.2.2)
11 Technical data and scale drawing
Technical data and scale drawing at www.ifm.com → Data sheet search → Enter
the article number.
25
12 Factory setting
LMTx0x
LMTx1x
LMTx2x
SP1
62 %
8 %
35 %
rP1
54 %
5 %
29 %
OU1
Hno
Hno
Hno
SP2
62 %
8 %
35 %
rP2
54 %
5 %
29 %
OU2
Hnc
Hnc
Hnc
FOU1
OFF
OFF
OFF
FOU2
OFF
OFF
OFF
ds1 *)
0.0
0.0
0.0
ds2 *)
0.0
0.0
0.0
dr1
0.0
0.0
0.0
dr2
0.0
0.0
0.0
P_n
pnp
pnp
pnp
dFo
0.0
0.0
0.0
User setting
Percentage values refer to the final value of the process value → 7 Parameter setting
*) Parameters not provided with LMT100, LMT110 and LMT121
More information at www.ifm.com
26
UK
27