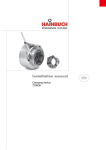
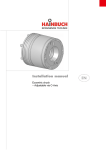
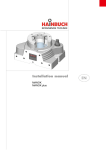
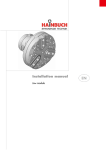
1
Installation manual SPANNTOP mini pull-back deadlength SPANNTOP mini. Table of contents 1 General.........................................................................................................................4 1.1 Information about this manual..........................................................................4 1.2 Description of variants......................................................................................4 1.3 Explanation of symbols.....................................................................................5 1.4 Limitations of liability.........................................................................................6 1.5 Max. RPM.........................................................................................................7 1.6 Copyright...........................................................................................................7 1.7 Scope of delivery..............................................................................................7 1.8 Spare parts.......................................................................................................8 1.9 Warranty terms.................................................................................................8 1.10 CFK.................................................................................................................8 2 Safety............................................................................................................................9 2.1 Responsibility of the customer..........................................................................9 2.2 Personnel requirements..................................................................................10 2.3 Intended use...................................................................................................11 2.4 Personal protective equipment.......................................................................12 2.5 Special dangers..............................................................................................14 2.6 Further warnings.............................................................................................16 2.7 Clamping force................................................................................................18 2.8 Screws............................................................................................................18 2.9 Functionality....................................................................................................19 2.10 Environmental protection..............................................................................19 3 Technical data.............................................................................................................20 3.1 General Information........................................................................................20 3.2 Operating conditions.......................................................................................22 3.3 Power specifications.......................................................................................22 3.4 Dimensional sheet..........................................................................................22 3.5 Type designation............................................................................................22 4 Structure and function.................................................................................................23 4.1 Overview and brief description of the SPANNTOP mini pull-back.................23 4.2 Overview and brief description of the SPANNTOP mini deadlength.............25 4.3 Optional Accessories......................................................................................27 4.3.1 Changing fixture..................................................................................27 4.3.2 Clamping head....................................................................................27 4.3.3 Work piece end-stop...........................................................................28 4.3.4 Grease.................................................................................................28 4.3.5 Grease gun..........................................................................................28 5 Transporting, packaging, storing................................................................................29 5.1 Safety instructions for transporting.................................................................29 5.2 Symbols on the packaging..............................................................................29 5.3 Transport inspection.......................................................................................29 5.4 Unpacking and inner-company transportation................................................30 5.5 Packaging.......................................................................................................31 5.6 Storing.............................................................................................................32 2 Order Hotline +49 7144. 907-333 SPANNTOP mini. english 6 Assembly....................................................................................................................33 6.1 Preparations....................................................................................................33 6.2 Preparing SPANNTOP mini clamping device.................................................34 6.3 Installation.......................................................................................................35 6.3.1 Installing the spindle flange.................................................................37 6.3.2 Checking and adjusting the concentricity of the spindle flange..........38 6.3.3 Special flange......................................................................................40 6.3.4 Installing the SPANNTOP mini clamping unit.....................................41 6.3.5 Checking and adjusting the face run and concentricity of the clamping unit.....................................................................................................42 6.3.6 Installing the base end-stop................................................................44 6.3.7 Disassembling the base end-stop.......................................................45 6.3.8 Assemble / disassemble the clamping head.......................................47 6.4 Work piece......................................................................................................48 6.5 Inspections......................................................................................................49 6.6 Control of the stroke position..........................................................................50 6.7 Activities after production is concluded..........................................................50 7 Disassembly, subsequent storage, disposal..............................................................51 7.1 Safety..............................................................................................................51 7.2 Disassembling the clamping device SPANNTOP mini...................................52 7.3 Disassembling the spindle flange...................................................................53 7.4 Subsequent storage of the clamping device..................................................54 7.5 Disposal..........................................................................................................54 8 Maintenance...............................................................................................................55 8.1 General...........................................................................................................55 8.2 Cleaning..........................................................................................................56 8.3 Preservation....................................................................................................58 8.4 Use of lubricant...............................................................................................59 8.5 Maintenance schedule....................................................................................60 8.6 Bolt torque.......................................................................................................61 9 Trouble shooting.........................................................................................................62 9.1 Safety..............................................................................................................62 9.2 Trouble shooting table....................................................................................63 9.3 Start-up after corrected fault...........................................................................64 10 Appendix...................................................................................................................65 10.1 Service Hotline..............................................................................................65 10.2 Representatives............................................................................................65 10.2.1 Europe...............................................................................................65 10.2.2 America.............................................................................................68 10.2.3 Asia...................................................................................................68 10.2.4 Australia............................................................................................69 10.2.5 Africa.................................................................................................69 11 Index.........................................................................................................................70 »Translation of original installation manual« Order Hotline +49 7144. 907-333 3 SPANNTOP mini. General 1 General 1.1 Information about this manual This manual enables safe and efficient handling of the clamping device. The manual is a component of the clamping device and must be kept in the immediate vicinity of the clamping device where it is accessible for personnel at all times. Personnel must have carefully read and understood this manual prior to starting all tasks. The basic prerequisite for safe work is compliance with all the safety instructions and handling instructions in this manual. Illustrations in this manual are provided for a basic understanding and may deviate from the actual model of the clamping device. It is assumed that the reader is familiar with standard procedures, such as cleaning the mounting surfaces. 1.2 Description of variants Two variants of the SPANNTOP mini clamping device are presented in this manual: SPANNTOP mini pull-back SPANNTOP mini deadlength If the variants differ in structure, installation, disassembling and maintenance or fault correction, they will be described separately. Based on the headers, sections and action steps can always be assigned to a specific variant. Starting with weight 15 kg, eye bolts must be used to transport the clamping device. Usual approaches like a cleaning of the areas for screwing are presupposed to be familiar 4 Order Hotline +49 7144. 907-333 SPANNTOP mini. General english 1.3 Explanation of symbols Safety instructions Safety instructions are indicated by symbols in this operating manual. The safety instructions are introduced by signal words that express the scope of the hazard. The safety instructions must be strictly adhered to. You must act prudently to prevent accidents, personal injury, and material damage. DANGER … indicates an imminent dangerous situation than can result in death or serious injury if it is not avoided. WARNING … indicates a possible dangerous situation that can result in death or serious injury if it is not avoided. CAUTION … indicates a possible dangerous situation that can result in minor or light injury if it es not avoided. NOTE … indicates a possible dangerous situation that can result in material damage if it is not avoided. Tips and recommendations … indicates useful tips and recommendations, as well as information for efficient and trouble-free operation. Order Hotline +49 7144. 907-333 5 SPANNTOP mini. General 1.4 Limitations of liability All information and instructions in this operating manual have been provided under due consideration of applicable standards and regulations, the current state of technology, as well as our many years of experience. The manufacturer assumes no liability for damage due to: Failure to follow the instructions in the manual Non-intended use Deployment of untrained personnel Unauthorized conversions Technical changes Use of non-approved spare parts The actual scope of delivery can vary from the explanations and graphic representations provided in this manual in the case of special versions, if supplemental order options are desired, or on the basis of the latest technical changes. The agreed obligations in the delivery contract, the general terms and conditions, as well as delivery conditions of the manufacturer, and the statutory regulations valid at the time the contract was concluded, apply. CAUTION! Our clamping devices are balanced with balance quality G = 4, in one level n = 1. The data on the rotation balance refers to rotationally symmetrical work pieces. The clamping of not rotationally symmetrical work pieces may not be clamped and/or only be clamped after consultation with the manufacturer. Balancing bolts and balancing weights at the clamping devices may not be removed / disassembled! 6 Order Hotline +49 7144. 907-333 SPANNTOP mini. General english 1.5 Max. RPM CAUTION! The maximum permissible speed is marked on the product. By the combination of a clamping device and an add on clamping element a reduction of the maximum permissible speed may be necessary. Of all RPMs of the groups specified, the lowest given RPM must always be used. Note that the clamping force is influenced by the centrifugal force of the clamping elements. If necessary, adjust the machining force! 1.6 Copyright This manual is protected by copyright and is provided exclusively for internal purposes. Delivery of the operating manual to third parties, duplication in any form – including excerpts – as well as exploitation and/or communication of the content, are not permitted [except for internal use] without written approval from the manufacturer. Actions to the contrary make damage compensation mandatory. We reserve the right to enforce additional claims. 1.7 Scope of delivery All tools and accessories that are not included in the scope of delivery are marked as optional. In scope of delivery of the clamping device: 1 spindle flange 1 clamping unit 1 base end-stop Optionally the scope of delivery of the clamping device includes: Eye bolts Threaded adapter Order Hotline +49 7144. 907-333 7 SPANNTOP mini. General 1.8 Spare parts WARNING! Safety risk if the wrong spare parts are used! Incorrect or defective spare parts can cause damage, malfunction, or total failure; they can also impair safety. Only use manufacturer's original spare parts. Only purchase spare parts from authorized dealers or direct from the manufacturer. Addresses are in the appendix. 1.9 Warranty terms The warranty terms are included in the manufacturer's terms and conditions. 1.10 CFK In case of visible damage or visible wear of the carbon parts: Further processing only after consultation with HAINBUCH. 8 Order Hotline +49 7144. 907-333 SPANNTOP mini. Safety english 2 Safety This section provides an overview o fall the important safety aspects for optimal protection of personnel, as well as for safe and trouble-free operation. 2.1 Responsibility of the customer The device is used in industrial applications. Consequently the owner of the device is subject to legal industrial safety obligations. In addition to the safety instruction in this manual, generally valid safety and accident protection guidelines, and environmental protection guidelines as well as the machines' manual must be adhered to and complied with for the area of implementation of the device. Note in particular that the status scans of the machine must be adjusted to the respective clamping device. DANGER! Risk of injury due to thrown out parts! Incorrect machine settings may lead to the throwing out of parts. The status scans the machine must be set to the respective clamping device. Regularly check the status scans of the machine, see chapter »Maintenance Schedule«. If the end position can not be reached the jaw module may no longer be used. Observe the operating instructions of the machine. Order Hotline +49 7144. 907-333 9 SPANNTOP mini. Safety WARNING! Risk of injury! An incorrect media supply [hydraulic, pneumatic], e.g. by damaged or missing seals or pipes, can cause serious personal injury. Hydraulic and / or pneumatic tubes must be secured by the machine by check valves and a permanent pressure monitoring! WARNING! Risk of injury! Declining operating force, for example by declining energy supply, may cause serious personal injury. The product may be used only on machines where it is ensured, that during use, the operating force does not drop. 2.2 Personnel requirements WARNING! Danger of injury due to insufficient qualification! Improper handling of the clamping device can cause serious injury or material damage. Only have activities performed by personnel who are qualified to perform these activities. The following qualifications are cited in the operating manual for the various activity areas. 10 Specialized personnel are personnel who due to their specialized training, skills, and experience, as well as knowledge of the applicable regulations, are capable of executing the tasks assigned to them and of recognizing and avoiding possible hazards on their own. Order Hotline +49 7144. 907-333 SPANNTOP mini. Safety english Hydraulic specialist The hydraulic specialist has been trained for the particular task area in which he is active and is familiar with the relevant standards and regulations. Due to his specialized training and experience the hydraulic specialist can perform tasks on hydraulic equipment and recognize and avoid possible dangers on his own. Electric specialist The electric specialist has been trained for the particular task area in which he is active and is familiar with the relevant standards and regulations. Due to his specialized training and experience the electric specialist can perform tasks on electric equipment and recognize and avoid possible dangers on his own. Only persons from whom it can be expected that they reliably execute their work are considered as personnel. Persons whose capability to react is impaired, for instance through drugs, alcohol, or medication, are not approved. Comply with age-specific and job-specific regulations that are applicable at the installation site when selecting personnel. 2.3 Intended use The clamping device is designed for installation in a machine tool according to CE compliant. Within the machine tool the clamping device is designed exclusively as a through-bore chuck for bar work and / or as an end-stop chuck for chuck work. The clamping device should only be mounted, operated, maintained, and cleaned by instructed, specialized personnel. Intended use also includes compliance with all the instructions in this manual. The clamping device is to be used for the case of application contractually agreed between the producer/deliverer and the user, as well as such cases of application described in the product description which are also in accordance with the technical values. Order Hotline +49 7144. 907-333 11 SPANNTOP mini. Safety The safe function of the clamping device is, as far as it can be foreseen, guaranteed when it is used for the intended purpose in accordance with the appropriate safety regulations. Any use that extends beyond the intended use, or any other use of the clamping device is considered to be misuse and can cause dangerous situations. WARNING! Danger due to misuse! Misuse of the clamping device can cause dangerous situations. Particularly refrain from the following uses of the clamping device: Use in machines other than machine tools. Use in machine tools with technical data other than that specified on the clamping device. Claims of any type due to damage arising from nonintended use are excluded. Unintended and improper use of the Power Chuck is for example If workpieces are not clamped properly If safety regulations are disregarded and persons are working at the clamping device without additional protective devices e.g. for machining. If the clamping device is used for machines or tools for which it is not intended. 2.4 Personal protective equipment Wearing of personal protective equipment is required to minimize health hazards when working with the device. Always wear the protective equipment necessary for the respective task when working with the device. Follow the instructions that have been posted in the work area. 12 Order Hotline +49 7144. 907-333 SPANNTOP mini. Safety Always wear english For all tasks always wear: Protective work clothing is tight-fitting work clothing with low resistance to tearing, with tight sleeves, and without projecting parts. It is primarily used to protect against entanglement by moving machine parts. Do not wear rings, chains, or other jewelry. Safety footwear for protection against heavy falling parts and slipping on slippery substrates. For special tasks wear Special protective equipment is required when executing special tasks. Separate reference is made to this equipment in the specific sections of this manual. This special protective equipment is explained below: Hard hat to protect against falling and flying parts and materials. Protective goggles to protect eyes from flying parts and liquid splashes. Protective gloves to protect hands from friction, abrasion, puncture wounds, or deeper injuries, as well as from contact with hot surfaces. Order Hotline +49 7144. 907-333 13 SPANNTOP mini. Safety 2.5 Special dangers In the following section residual risks are cited that occur due to installation of the clamping device in a machine tool. In each case the residual risks that have been determined based on a risk analysis of the machine must be specified by the customer. Horizontal / lying parts Follow the safety instructions listed here and the warnings in the other sections of this manual to reduce health hazards and to avoid dangerous situations. WARNING! Danger of injury due to horizontal parts! Before transporting the clamping device in horizontal condition: Put the clamping device on a non-slip pad Screw in the eye bolts Suspended loads WARNING! Life-threatening danger due to suspended loads! Some clamping devices must be lifted with a crane. When lifting the clamping device there is a life-threatening hazard due to falling parts or parts swinging out of control. Never step under suspended loads. Comply with the instructions concerning the intended attachment points. Ensure that the sling gear is securely seated! Do not attach lifting gear in projecting components. Only use approved hoists and sling gear with sufficient bearing capacity. Do not use rope and belts that are torn or frayed. 14 Order Hotline +49 7144. 907-333 SPANNTOP mini. Safety Moving parts english WARNING! Danger of injury due to moving parts! Rotating parts of the clamping device can cause serious injuries. Do not reach into moving parts or handle moving parts during operation. Note the gap dimensions of moving parts. Do not open covers when the device is in operation. Be aware of afterrun time: Prior to opening the covers ensure that all parts have come to a standstill. Wear tight-fitting protective work clothing in the danger zone. Wrong clamping of the work piece WARNING! Danger of injury due to incorrect clamping of the work piece! Incorrect work piece clamping may lead to the ejection of the work piece and result in serious injuries. Under dimensioned (tolerance) parts can lead to incorrect clamping! Check the unmachined work pieces at random on dimensional accuracy. Too low supply pressure can lead to the reduction of clamping force! Too high supply pressure can lead to damage of the components of the clamping device! Check and adjust, if necessary, the supply pressure regularly. Do random checks of the unmachined work pieces on dimensional accuracy. Order Hotline +49 7144. 907-333 15 SPANNTOP mini. Safety Missing changing parts WARNING! Danger of injury due to missing changing parts! When operating the clamping device without changing parts [segmented clamping bushing, clamping heads, work piece end-stops] there is a higher danger of crushing injuries due to the stroke of movable components of the clamping device. The clamping process may not be initiated without assembled segmented clamping bushing and/or work piece end-stop. Parts with sharp edges WARNING! Risk of injury! When screwing in individual components such as for example work piece end-stops, threaded adapters and similar devices that are equipped with an external thread or wear caused by burrs, there is risk of cutting. The operation must be done only by qualified personnel. Wearing of gloves / [PSA] is required! CAUTION! Risk of injury! A special use-dependent or job-based design can result in variations in the clamping strokes and thus the clamping force. The notes on the associated clamping situations or product drawing must always be observed 2.6 Further warnings WARNING! Risk of injury! Never reach for the clamping device while the spindle is rotating. Before starting to work on the mandrel, make sure the machine spindle cannot be put in motion. 16 Order Hotline +49 7144. 907-333 SPANNTOP mini. Safety english WARNING! Risk of injury! Falling down of the clamping device or its parts can cause severe bruises and fractures. The dead weight of the clamping device or its parts can lead to high physical stress. WARNING! Risk of injury! By repeated reworking or wear and tear of the clamping surfaces sharp edges and burrs may appear and lead to severe cutting damages. WARNING! Risk of injury! Missing o-rings or seals may cause severe injuries! Due to missing / fallen out O-rings and seals compressed air or hydraulic fluids which are under high pressure may expel! Make sure that all O-rings / seals for the hydraulic / pneumatic connections are available and undamaged! If necessary lubricate them before assembly and/or during service. WARNING! Damage of clamping device! The clamping device may be released exclusively in the standing condition! Risk of injury! Leaking [sprayed out] hydraulic oil can cause serious injury. Make sure that all O-rings / seals for the hydraulic and/or pneumatic connections are available and undamaged Order Hotline +49 7144. 907-333 17 SPANNTOP mini. Safety 2.7 Clamping force The achieved clamping force can vary due to the maintenance condition of the clamping device [state of lubrication and degree of contamination] [see chapter »Maintenance«]. The clamping force must be checked at regular intervals. This requires the use of static clamping force measuring devices. CAUTION! Damages due to excessive draw and compressive force! An excessive draw force and/or compressive force may damage the clamping device. The max. draw force and compressive force may not be exceeded. 2.8 Screws Moving parts WARNING! Danger of injury due to screws and stud screws being accelerated out of the device!! Screws and stud screws radially attached to the product can be accelerated out of the device and cause severe injuries. At the product radially mounted screws and stud screws which were loosened for assembly and maintenance must be re-tightened with the correct tightening torque! The tightening torque is given at the product itself, near the screw or threaded pin, and/or given in chapter »Bolt torque«. All screws or stud screws that are not marked with a tightening torque specification are tightened with the prescribed tightening torque and locked [medium-strength bonding] in the factory and should only be unscrewed after consultation with the manufacturer. If in doubt you must contact the manufacturer immediately do determine the subsequent procedure. 18 Order Hotline +49 7144. 907-333 SPANNTOP mini. Safety english 2.9 Functionality NOTICE! With high contamination of the clamping device the functionality is no longer guaranteed. The cleaning and maintenance intervals must be observed. 2.10 Environmental protection NOTE! Environmental hazard due to incorrect handling! Incorrect handling of environmentally hazardous substances, particularly improper disposal, can cause significant environmental damage. Always comply with the instructions cited below If environmentally harmful substances should inadvertently get into the environment, initiate suitable measures immediately. If in doubt notify the responsible municipal authority about the damage. The following environmentally harmful substances are used: Lubricants Lubricants like greases and oils can contain toxic substances. Ensure that they do not get into the environment. The device must be disposed of by a specialized disposal company. To achieve trouble-free operational performance of the clamping device only use HAINBUCH lubricants. See the appendix for reference addresses. Order Hotline +49 7144. 907-333 19 SPANNTOP mini. Technical data 3 Technical data 20 Weight spindle flange [kg] Weight clamping unit [kg] Dimensions clamping unit [ø x length in mm] 1,5 3,6 Ø 135 x 90 5,7 1,5 4,2 Ø 140 x 89 7,1 2,4 4,7 Ø 147 x 67 7,1 2,3 4,8 Ø 147 x 66 10,4 4,3 6,1 Ø 160 x 73 11 4,5 6,5 Ø 166 x 71 Teilstock force max. [kN] Weight clamping device [[kg] 5,1 Clamping force max. [kN] Variant Ø 127 x 68 pull-back pull-back deadlength 3,5 deadlength 1,4 pull-back 4,7 Speed max. [rpm] 65 Ø 129 x 68,5 Spindle flange connection [ø in mm] 52 3,5 deadlength 42 1,7 pull-back 32 5,1 deadlength Size 3.1 General Information KK4 KK5 8000 70 4 KK4, KK5, KK6, IP120, IP140 7000 80 4 KK4, KK5, KK6 IP 120, IP 140 7000 94 8 6000 105 8 KK5, KK6 KK8, IP120, IP140, IP170 KK5, KK6 KK8 IP140, IP170 Order Hotline +49 7144. 907-333 Weight clamping unit [kg] Dimensions clamping unit [ø x length in mm] 7,3 Ø 181 x 96 25,4 11,1 14,3 Ø 216 x 95 22,2 7,3 14,9 Ø 220 x 99 Teilstock force max. [kN] Weight spindle flange [kg] 2,6 Clamping force max. [kN] Weight clamping device [[kg] 9,9 Speed max. [rpm] Variant pull-back Ø 175 x 102 deadlength 6,6 Spindle flange connection [ø in mm] 100 2,8 pull-back 80 english 9,4 deadlength Size SPANNTOP mini. Technical data KK6, KK8 IP140, IP170, IP220 5500 115 8 5000 150 8 KK6, KK8, KK11 IP170, IP220 KK6, KK8 IP170, IP220 KK = short taper size, IP = inner fit dimensions, WARNING! Risk of injury! Using false technical data can lead to serious personal injury and property damage. The technical data [label on the product, assembly drawing] must be observed and may not be modified by the operator! Order Hotline +49 7144. 907-333 21 SPANNTOP mini. Technical data 3.2 Operating conditions Environment Specification Value Unit Temperature range 15 - 65 °C Mechanical actuating In each possible operating condition the maximum draw force and compressive force may not be exceeded! 3.3 Power specifications NOTE! Material damage if the power specifications do not agree! If the power specifications of clamping device, machine adapter and machine do not agree, severe damage extending to total damage can occur. Only operate clamping devices and adapters in machines with the same power specifications. Information on maximum clamping force and draw tube force is provided on the clamping device and the adapter. 3.4 Dimensional sheet Dimension sheets for the respective product can be requested from HAINBUCH. 3.5 Type designation 1 The type designation is on the product and includes the following information: 1 2 3 ID no. [marked with the # symbol] Maximum speed [rpm] Maximum clamping force [kN] Fig. 1 22 Order Hotline +49 7144. 907-333 SPANNTOP mini. Structure and function english 4 Structure and function 4.1 Overview and brief description of the SPANNTOP mini pull-back 2 1 6 5 4 3 1. x Fig. 2 1. Clamping unit 2. Cylindrical screws – clamping unit 3. Spindle flange 4. Cylindrical screws – spindle flange 5. Base end-stop 6. Clamping screws – base end-stop Order Hotline +49 7144. 907-333 23 SPANNTOP mini. Structure and function Brief description The SPANNTOP mini pull-back is a through-bore chuck for bar work and it can also be used as an endstop chuck. When used as an end-stop chuck the base end-stop included in the scope of delivery is screwed into the chuck. Due to the axial draw tube force that is produced by the draw tube component the work piece is pulled firmly onto the fixed end-stop. The rigidity of the entire clamping device thus achieved makes it possible to also provide stable clamping for work pieces with an extremely short clamping length. The spindle flange of the clamping device is mounted on the machine spindle. Then the clamping unit with the draw tube adapter, including threaded adapter [optional], is screwed onto the draw tube. After checking concentricity and face run the clamping head is inserted. The work pieces that will be machined are now clamped into the clamping head. 24 Order Hotline +49 7144. 907-333 SPANNTOP mini. Structure and function english 4.2 Overview and brief description of the SPANNTOP mini deadlength 2 6 1 5 4 3 7. x Fig. 3 1. Clamping unit 2. Cylindrical screw – clamping unit 3. Spindle flange 4. Cylindrical screw – spindle flange 5. Base end-stop 6. Clamping screws for base end-stop [3 pc.] Order Hotline +49 7144. 907-333 25 SPANNTOP mini. Structure and function Brief description The SPANNTOP mini deadlength is a through-bore chuck for bar work and it can also be used as an endstop chuck. When used as an end-stop chuck the base end-stop included in the scope of delivery is screwed into the chuck. Due to the axial fixed clamping head, shoulders that are short to clamp can be machined, and so can long work pieces that must be machined in sections and moved forward several times. With the SPANNTOP mini deadlength clamping device you can grip without axial stress on the work piece. The spindle flange of the clamping device is mounted on the machine spindle. Then the clamping unit with the draw tube adapter, including threaded adapter [optional], is screwed onto the draw tube. After checking concentricity and face run the clamping head is inserted. The work pieces that will be machined are now clamped into the clamping head. 26 Order Hotline +49 7144. 907-333 SPANNTOP mini. Structure and function english 4.3 Optional Accessories The accessories described here are not included in the scope of delivery. Specially developed segmented clamping bushings match to the respective maximum RPM are available for each clamping device. Trouble-free and precise function of HAINBUCH clamping devices is only ensured when using original HAINBUCH segmented clamping bushings. Lubricating grease and grease gun are required for cleaning and preservation of the clamping device. The lubricating grease is also specially matched for protection of the vulcanized segments of the segmented clamping bushings and increase their service life and elasticity by a significant factor. 4.3.1 Changing fixture Manual changing fixture Fig. 4 The pins of the changing fixture are inserted in the matching holes in the clamping head. The changing fixture is tensioned via hand force. The clamping head is firmly clamped in the changing fixture and can be inserted into the mounted clamping device with the aid of the changing fixture. Pneumatic changing fixture Fig. 5 The pins of the changing fixture are inserted in the matching holes in the clamping head. The changing fixture is tensioned via compressed air. The clamping head is firmly clamped in the changing fixture and can be inserted into the mounted clamping device with the aid of the changing fixture. 4.3.2 Clamping head The clamping heads are used to accommodate the work piece that will be machined. They consists of hard steel and rubber segments that are connected via a vulcanizing process. Depending on the requirements of the work piece there are clamping heads in different sizes and with different profiles and bores. Fig. 6 Order Hotline +49 7144. 907-333 27 SPANNTOP mini. Structure and function 4.3.3 Work piece end-stop The work piece end-stop is manufactured with a endstop dimension according to the customers request. In combination with the clamping head and the chuck it provides a functional unit. Fig. 7 4.3.4 Grease The universal grease for chuck and mandrel lubrication is supplied in a 1000g can. The order number for the universal grease is 2085/0003; it can be ordered from HAINBUCH. Fig. 8 4.3.5 Grease gun Fig. 9 28 The grease gun is filled with universal grease, which is pressed into the clamping device. The grease gun has a pointed mouthpiece. The order number for the grease gun is 2086/0004; it can be ordered from HAINBUCH. Order Hotline +49 7144. 907-333 SPANNTOP mini. Transporting, packaging, storing english 5 Transporting, packaging, storing 5.1 Safety instructions for transporting Unbalanced package WARNING! Danger of falling due to an unbalanced package Packed goods can have an unbalanced package. If attached incorrectly the package can tip and cause life-threatening injuries. Note the markings on the packages. Attach the crane hook in such a manner that it is located above the center of gravity. Carefully lift and see if the load tilts. If necessary change the attachment. Transport! For transport always use a suitable clamping means / crane. Make sure that a rolling / falling of the clamping device is not possible. 5.2 Symbols on the packaging Fragile Identifies packages with fragile or sensitive contents. Handle the packed goods with care; do not allow them to fall, and do not subject them to impact. Protect from moisture Keep packed goods dry and protected against moisture. 5.3 Transport inspection Check delivery immediately upon receipt to ensure that delivery is complete and to identify any transport damage. Proceed as follows it there is apparent external damage: Do not accept the delivery, or only accept it with reservation. Order Hotline +49 7144. 907-333 29 SPANNTOP mini. Transporting, packaging, storing Note the extend of transport damage on the transport documents or on the transport company's delivery ticket. Submit a complaint. Report any defect as soon as it is detected. Claims for damage compensation can only be enforced during the applicable periods for giving notice of lack of conformity. 5.4 Unpacking and inner-company transportation 7. x From about weight 15 kg there are threaded holes in the circumference of the clamping device. Lifting eye bolts can be screwed into these threaded holes. For transporting with transport trolley the clamping device must be positioned in standing condition. Make sure that a non-slip pad has been laid. To safely lift the clamping device out of the package it must be hooked into a crane depending on the weight. All tools and accessories which are not in scope of delivery are marked as optional in the operating instructions. Two people are required for this task. Special tools required: Crane from weight more than 15 kg Lifting eye bolts 1. Screw lifting eye bolt into the radial thread in the circumference of the clamping device. 2. Hook the load-handling equipment into the lifting eye bolt. 3. Use a crane to carefully lift the clamping device out of the transport packaging and put it down on a stable, level substrate. Fig. 10 30 Order Hotline +49 7144. 907-333 SPANNTOP mini. Transporting, packaging, storing english 5.5 Packaging About the packaging Individual packages are packed according to the expected transport conditions. Environmentally-friendly materials have been used exclusively for the packaging. Packaging should protect the specific components from transport damage, corrosion, and other damage until installation. Therefore do not destroy the packaging, remove it just before installation. The packed goods are sealed in foil airtight and packed in cartons. See the »Technical Data« section for the specific weight of the respective sizes. Handling packaging materials Dispose of packaging materials in accordance with the respectively valid statutory regulations and local guidelines. NOTE! Improper disposal causes environmental damage! Packaging materials are valuable raw materials and in many cases they can be reused, or they can be effectively treated and recycled. Dispose of packaging materials in an environmentally responsible manner. Comply with locally applicable disposal guidelines. If necessary commission a specialized company to dispose of packaging. Order Hotline +49 7144. 907-333 31 SPANNTOP mini. Transporting, packaging, storing 5.6 Storing Under certain circumstances instructions for storage and subsequent storage are affixed to the packages that extend beyond the requirements cited here. Comply with these instructions accordingly. Storage of packages Only store packages under the following conditions: Do not store outdoors. Store in a dry and dust-free location Do not expose to aggressive media Protect from direct sunlight Avoid mechanical vibration Storage temperature: 15 bis 35 °C Relative humidity: max. 60 % For storage periods longer than 3 months: Check the general condition of all parts and the packaging at regular intervals. Touch up or re-apply anti-corrosion agents as needed Subsequent storage of the clamping device Only re-store the clamping device under the following conditions: Thoroughly clean the clamping device prior to subsequent storage [see section »Cleaning«] Thoroughly oil and grease the clamping device. [see section »Cleaning«] Store the clamping device in airtight foil The clamping device must be stored securely in position. If this is not guaranteed, use a suitable container for the clamping device or equip the shelf with a circumferential securing edge. 32 Order Hotline +49 7144. 907-333 SPANNTOP mini. Assembly english 6 Assembly WARNING! During the initial installation of the clamping device severe injuries may occur. The initial installation must be done only by qualified personnel. All screws remaining in the clamping must be tightened firmly. All tools and keys must be removed after installation. 6.1 Preparations The total weight of the clamping device, consisting of spindle flange and clamping unit, depends on the size and can be as much as 40 kg. The individual weight of the spindle flange can be as much as 20 kg, and the clamping unit can weigh up to 23 kg [see section »Technical data«]. Depending on the weight, to safely lift the clamping device out of the package and position it in the machine it must be hooked into a crane. WARNING! Danger of injury due to falling components! When mounting components can fall and cause severe injury and material damage. Two people are always required for this task. From size 80 use a crane. WARNING! Risk of injury when screwing in the threaded adapter! When screwing in the threaded adapter by hand cuts may occur. Wearing of PSA is required! Order Hotline +49 7144. 907-333 33 SPANNTOP mini. Assembly 6.2 Preparing SPANNTOP mini clamping device 4. x Special tools required: Allen wrench Oil stone Crane and eye bolts from weight 15 kg 1. Loosen all cylindrical screws [1] in the clamping device element reception [3] with an allen wrench [2] and remove them completely. Fig. 11 2. Lift the clamping element reception [1] off of the spindle flange. 3. Wipe off the mating surfaces on the spindle flange and clamping unit with a soft, lint-free cloth and remove all oil and grease residues. 4. Hone the mating surfaces on the spindle flange with an oil stone. Fig. 12 34 Order Hotline +49 7144. 907-333 SPANNTOP mini. Assembly english 6.3 Installation WARNING! Danger of injury due to unintentional startup of the tool spindle! Unexpected start up of the tool spindle can cause severe injury. Prior to switching on automatic mode close all protective doors or hoods that are present on the machine tool. Unscrew all eye bolts from the clamping device and remove them from the interior of the machine. Only run the machine in set-up mode or jog mode. Always remove immediately all the tools and wrenches from the clamping device after use. WARNING! Risk of injury! By operating the clamping device without changing parts [clamping head, segmented clamping bushing, work piece end-stops ...] there is an increased risk of crushing injuries by the stroke of the moving components of the clamping device. By uncontrolled discharge of the clamping process [e.g. by incorrect installation of the energy supply or faulty programming] there is an increased danger. WARNING! Risk of injury! Bending in the working area of the machine can cause severe head injuries! Order Hotline +49 7144. 907-333 35 SPANNTOP mini. Assembly CAUTION! Risk of injury! Unexpected start up of the tool spindle can cause severe injury. Make sure that the system is pressure-free and that a restart of the machine can be excluded! Risk of injury! Contamination of the mechanism can influence/reduce the stroke, thus the clamping force is reduced and thus, the work piece is not properly tightened and can be thrown out. Clean the product regularly [see chapter »Maintenance and service«]. Risk of injury! If the clamping pressure is too low clamped work piece may be thrown out. If the clamping pressure is too high severe damages of the components of the clamping device may occur the throwing out of the work piece. Before operation set the operation pressure back to operation level. The operating pressure should be checked and adjusted regularly! The dimension of the work pieces should be checked regularly [clamping-ø]! Transport! 36 For transport always use a suitable clamping means / crane. Make sure that a rolling / falling of the clamping device is not possible. Order Hotline +49 7144. 907-333 SPANNTOP mini. Assembly english WARNING! Danger of injury due to vertical suspended spindle! Bending into the machine work are when assembling overhead can cause severe head injuries. Secure components prior to overhead assembly. For assembly on a vertically suspended spindle always use a suitable mounting aid. 6.3.1 Installing the spindle flange 5. x NOTE! Material damage due to the wrong tightening torque of the cylindrical screws in the spindle flange! The tightening torque of the cylindrical screws is prescribed by the spindle or machine manufacturer. Incorrect tightening torque of the cylindrical screws in the spindle flange can cause significant material damage on the clamping device and on the machine. Only tighten the cylindrical screws of the spindle with the torque prescribed by the spindle or machine manufacturer. Two people are required for this task. Special tools required: Crane from weight 15 kg Allen wrench 1. Put the machine in set up mode. 2. Wipe off the mating surfaces of the machine spindle with a soft, lint-free cloth and remove all oil and grease residues. 3. Lift the spindle flange [2] into the machine by hand or with the aid of a crane and place it on the machine spindle [1]. Fig. 13 Order Hotline +49 7144. 907-333 37 SPANNTOP mini. Assembly In this process position the spindle flange on the machine spindle with the aid of the bores [1]. Fig. 14 4. Screw all cylindrical screws [1] into the spindle flange with an allen wrench and hand tighten in a cross pattern. NOTE! Material damage is possible if the ring nuts are left in the spindle flange! Fig. 15 Eye bolts that are left in the clamping device can significantly damage or even destroy lathe, clamping device, and work piece. Always remove eye bolts immediately after mounting the clamping device in the lathe. 6.3.2 Checking and adjusting the concentricity of the spindle flange 5. x NOTE! Material damage due to insufficient concentricity! Due to insufficient concentricity work pieces can be damaged during processing. After each mounting check the face run of the clamping device. After each mounting check, and if necessary readjust, the concentricity of the clamping device. Checking concentricity Special tools required: Dial indicator Torque wrench 38 Order Hotline +49 7144. 907-333 SPANNTOP mini. Assembly english 1. Place the magnetic base of the dial indicator on the inside of the machine. 2. Place the dial indicator [2] for concentricity on the inside edge [1] of the spindle flange. 3. Adjust the spindle flange [1] in such a manner that the dial indicator shows the value »0« [2]. Fig. 16 4. Tighten all cylindrical screws [1] with a torque wrench [2] in a cross pattern [see section »Screw tightening torque«]. For exact adjustment, if necessary loosen the cylindrical screws several turns and retighten in a cross pattern. Fig. 17 5. Wipe off the mating surfaces of the spindle flange with a soft, lint-free cloth and remove all oil and grease residues. Checking face run Special tools required: Dial indicator Torque wrench 1. Place the magnetic base of the dial indicator on the inside of the machine. 2. Place the dial indicator for face run on the face of the clamping unit. 3. Use the plastic tip hammer to carefully knock the clamping unit into position. 4. Tighten the cylindrical screws with a torque wrench in a cross pattern [see section »Screw tightening torque«]. 5. Wipe off the reception of the spindle flange with a soft, lint-free cloth and remove all oil and grease residues. Order Hotline +49 7144. 907-333 39 SPANNTOP mini. Assembly 6.3.3 Special flange A C B Fig. 18 For special flanges which the customer himself produces], the distance between the clamping element reception [B] and the collar of the self-made flange [A] must be 0.5 mm*. WARNING! Risk of injury due to thrown away pins! Stud screws radially attached to the product can be accelerated out of the device and cause severe injuries. At the product radially mounted stud screws must be tightened with the correct tightening torque! The flange manufactured by the customer must absolutely cover the radial pins/screws [C]. Pay attention the distance of 0.5 mm! 40 Order Hotline +49 7144. 907-333 SPANNTOP mini. Assembly english 6.3.4 Installing the SPANNTOP mini clamping unit 6. x Two people are required for this task. Special tools required: Allen wrench Crane and eye bolts from weight 15 kg Fig. 19 1. Put the machine tool in set up mode. 2. Remove all tools from the interior of the machine. 3. Set the clamping pressure of the machine tool on the lowest setting. 4. Move the draw tube of the machine tool into the front stop position. 5. Screw the draw tube adapter into the clamping unit. 6. Lift the clamping unit with draw tube adapter by hand, or with the aid of a crane, into the machine and place it on the draw tube of the machine. 7. Screw the draw tube adapter with clamping unit onto the draw tube of the machine tool to the end. In this process ensure that the draw tube adapter does not tilt. Fig. 20 Do not tighten the draw tube adapter with clamping unit. 8. Turn back the clamping unit until the arrows of the balance marks are aligned. Fig. 21 Order Hotline +49 7144. 907-333 41 SPANNTOP mini. Assembly NOTE! Property damage caused by thrown clamping screws! Fig. 22 By faulty installation, the clamping screws of the base end-stop can be thrown off. The threaded holes for clamping screws must not be located next to the screws securing the spindle flange! If necessary turn the clamping unit up to the next match the bolt patterns to decline. Fig. 23 The through-bore of the clamping element reception and the threaded bores of the spindle flange should now be aligned as well. Fig. 24 9. Carefully move the draw tube of the machine tool back in jog mode, until the clamping unit is completely inserted in the spindle flange. 10.Screw all cylindrical screws into the clamping unit with an allen wrench and hand tighten in a cross pattern. 6.3.5 Checking and adjusting the face run and concentricity of the clamping unit 11.x NOTE! Material damage due to insufficient face run and concentricity! Due to insufficient face run and concentricity work pieces can be damaged during processing. After each mounting check, and if necessary readjust, the face run and concentricity of the clamping device. 42 Order Hotline +49 7144. 907-333 SPANNTOP mini. Assembly english Checking concentricity Special tools required: Dial indicator Plastic tip hammer Torque wrench 1. Place the magnetic base of the dial indicator on the inside of the machine. 2. Place the dial indicator [2] for concentricity on the clamping taper [1]. 3. Adjust the clamping unit in such a manner that the dial indicator shows the value »0«. Fig. 25 For exact adjustment, if necessary loosen the cylindrical screws several turns and retighten in a cross pattern. 4. Tighten the cylindrical screws [1] with a torque wrench [2] in a cross pattern [see section »Screw tightening torque«]. For exact adjustment, if necessary loosen the cylindrical screws several turns and retighten in a cross pattern. Fig. 26 5. Wipe off the taper reception in the clamping unit with a soft, lint-free cloth and remove all oil and grease residues. Checking face run Special tools required: Dial indicator Plastic tip hammer 1. Place the magnetic base of the dial indicator on the inside of the machine. 2. Place the dial indicator [1] for face run on the face [2] of the clamping unit. Fig. 27 If the measured value is >0.01mm: Disassemble and clean the clamping unit Reassemble the clamping unit 3. Wipe off the taper reception in the clamping unit with a soft, lint-free cloth and remove all oil and grease residues. Order Hotline +49 7144. 907-333 43 SPANNTOP mini. Assembly 6.3.6 Installing the base end-stop 4. x If the clamping devices will be used as endstop chuck the base end-stop must be mounted. Special tools required: Allen wrench Mounting bolt or suitable cylindrical screw 1. Take the clamping head out of the taper. 2. Unscrew the clamping screws [see section »Disassembling the base end-stop«]. 3. Screw the mounting bolt [1] clockwise into the threaded bore [2] in the center of the base endstop [3]. Fig. 28 Screw the mounting bolt into the base end-stop so that the polished side of the base end-stop is pointing up. 4. Use the mounting bolt to insert the base end-stop into the clamping device in such a manner that the lateral fixing pin [1] of the base end-stop is aligned flush with the fixing groove [1] in the centering disk. NOTE! Fig. 29 Material damage is possible if the clamping screws are tightened too forcefully! Tightening the clamping screws too forcefully can damage or destroy them. The base endstop can no longer be clamped in. Tighten the clamping screws by hand. Do not screw in beyond the resistance. Fig. 30 44 Order Hotline +49 7144. 907-333 SPANNTOP mini. Assembly english 5. Tighten all clamping screws [1] of the base endstop in the spindle flange clockwise with an allen wrench with max. 8 Nm. The base end-stop is now secured. Fig. 31 6. Unscrew the mounting bolt [1] counterclockwise. Fig. 32 6.3.7 Disassembling the base end-stop 7. x If the clamping device will be used as throughbore chuck the base end-stop must be disassembled. Special tools required: Allen wrench Mounting bolt or suitable cylindrical screw 1. Take the clamping head out of the taper of the clamping element reception. 2. Insert the mounting bolt [1] and screw it clockwise into the threaded bore in the center of the base end-stop. Fig. 33 Order Hotline +49 7144. 907-333 45 SPANNTOP mini. Assembly NOTE! Material damage if the clamping screws are loosened incorrectly! Fig. 34 Tightening the clamping screws too forcefully can damage or destroy them. The base endstop can no longer be clamped in. Loosen the clamping screws by hand. Do not unscrew beyond the resistance. 3. Carefully loosen all clamping screws [1] with an allen wrench counterclockwise until resistance is tangible. The base end-stop is now loosened. 4. Carefully pull out the base end-stop [1] straight from the front. Fig. 35 WARNING! Risk of injury! Tools and gages that are thrown out of the machine can cause injury. Remove all tools and gages from the working area of the machine before the machine is started up. Risk of injury! If the clamping pressure is too low clamped work piece may be thrown out. If the clamping pressure is too high severe damages of the components of the clamping device may occur the throwing out of the work piece. Before operation set the operation pressure back to operation level. The operating pressure should be checked and adjusted regularly! 46 Order Hotline +49 7144. 907-333 SPANNTOP mini. Assembly english 6.3.8 Assemble / disassemble the clamping head For changing in the clamping head move the coupling of the clamping device to front end position. Depending on the model of the clamping head the handling of the changing fixture is easier or more difficult. Fig. 36 WARNING! Danger of violent pressure to hands and fingers! During operation never reach into the coupling or slot area of the clamping head nor in the changing fixture. Only run the machine in set-up mode or jog mode. Before working at the installed clamping device make sure that starting of the machine is impossible. Order Hotline +49 7144. 907-333 47 SPANNTOP mini. Assembly 6.4 Work piece WARNING! Risk of injury due to thrown out parts! During clamping of the work piece and the processing parts can be thrown and cause severe injuries and property damage. Check the clamping diameter of the work piece. Tighten only work pieces that meet the dimensional requirements. For clamping very long work pieces use in addition a tailstock / a steady rest for support. Do not exceed the maximum permissible clamping force. Make sure that the applied clamping force is set correctly [neither too high nor too low]. CAUTION Risk of injury! When placing the work piece: Make sure that the hands / fingers may not be clamped between the flange and the work piece! 48 Order Hotline +49 7144. 907-333 SPANNTOP mini. Assembly english 6.5 Inspections NOTE! Material damage due to damaged clamping devices! A damaged, incomplete, or unbalanced clamping device can significantly damage or even destroy the machine tool and the work piece. Only install undamaged, complete, and precisely balanced clamping devices. If in doubt contact the manufacturer. Ensure the following points prior to each installation and start-up of the clamping device: All cylindrical screws of the clamping device must be present and tightened with the proper tightening torque. The balance screws of the clamping device must all be present and undamaged. All rubber segments must be intact; this means that they are neither torn, nor are they porous at any point. All edges and bearing surfaces are intact; this means that they are neither broken nor do they show any signs of wear. The set speed of the machine tool should not exceed the maximum permissible speed of the clamping device. The maximum draw tube force specified on the perimeter of the clamping device must not be exceeded. The clamping pressure of the machine must be sufficiently high. All mounting tools must be removed from the interior of the machine. Clamping device and work piece must be compatible –check the clamping diameter regularly. The work piece must be clamped into the clamping device with sufficient work piece tension. Do a pressure loss test and a measurement of clamping force. Order Hotline +49 7144. 907-333 49 SPANNTOP mini. Assembly 6.6 Control of the stroke position WARNING! Crushing danger from moving parts! Crushing danger from moving parts during controlling the stroke position! Gaps, caused while controlling the stroke position, can cause severe injury. Only do the controlling of the stroke position with assembled changing parts. Only run the machine in set-up mode or jog mode. Do not reach into moving parts or handle moving parts during operation. Note the gap dimensions of moving parts. Wearing of gloves / [PSA] is required! 6.7 Activities after production is concluded 5. x 50 1. Move the clamping device into unclamped position. 2. Switch off the machine tool and safeguard it from being switched on again. 3. Open the protective door or hood. 4. Clean the clamping device and a possibly mounted adaptation clamping device and adapter of chips and production residues using a soft, lint-free cloth and oil them lightly. 5. Close the protective door or hood. Order Hotline +49 7144. 907-333 SPANNTOP mini. Disassembly, subsequent storage, disposal english 7 Disassembly, subsequent storage, disposal If there is break in production that lasts longer than 3 days, the clamping device must be disassembled and properly stored in accordance with the manufacturer's specifications [see section »Transport, packaging, storage«]. Prior to disassembling: Put the machine in set-up mode. Remove fuels and auxiliary materials, as well as residual processing materials and dispose of these items in an environmentally-responsible manner. 7.1 Safety Safeguarding against restart DANGER! Life-threatening danger if restarted without authorization When disassembling there is danger of the energy supply being switched on inadvertently. This poses a life-threatening hazard for persons in the danger zone. Prior to starting the tasks switch off all energy supplies and safeguard them from being switched on again. WARNING! Danger of injury due to falling components! When mounting components can fall and cause severe injury and material damage. Two people are always required for this task. Use a crane. For assembly on a vertically suspended spindle always use a suitable mounting aid. Order Hotline +49 7144. 907-333 51 SPANNTOP mini. Disassembly, subsequent storage, disposal WARNING! Danger of injury due to vertical suspended spindle! Bending into the machine work are when assembling overhead can cause severe head injuries. Secure components prior to overhead assembly. For assembly on a vertically suspended spindle always use a suitable mounting aid. Transport! For transport always use a suitable clamping means / crane. Make sure that a rolling / falling of the clamping device is not possible. 7.2 Disassembling the clamping device SPANNTOP mini 6. x From weight 15 kg the task requires two people, or use a crane. Special tools required: Use load-handling equipment from weight 15 kg Allen wrench Fig. 37 52 1. Move the draw tube of the machine into rear end position. 2. Put the machine tool in set up mode. 3. Disassemble the base end-stop [see section »Disassembling the base end-stop«]. 4. From weight 15 kg mount the eye bolts [see section »Unpacking and inner-company transport«]. 5. Loosen all cylindrical screws [1] with an allen wrench and unscrew them from the clamping unit. Order Hotline +49 7144. 907-333 SPANNTOP mini. Disassembly, subsequent storage, disposal english 6. Move the draw tube of the machine tool into the front stop position. 7. Remove the clamping unit from the spindle flange and remove it from the machine. Fig. 38 7.3 Disassembling the spindle flange 8. x From weight 15 kg the task requires two people, or use a crane. Special tools required: Torque wrench Allen wrench Crane and eye bolts from weight 15 kg Fig. 39 1. Put the machine tool in set up mode. 2. If necessary mount the eye bolts [see section »Unpacking and inner-company transport«]. 3. Loosen all cylindrical screws [1] with a torque wrench [2] in a cross pattern [see section »Screw tightening torque«]. 4. Remove all cylindrical screws from the spindle flange. 5. Take the spindle flange [2] down from the machine spindle [1] by hand or with the aid of load-handling equipment and lift it out of the machine tool. 6. Wipe off the mating surfaces of the machine spindle with a soft, lint-free cloth and remove all oil and grease residues. 7. Remove all tools from the interior of the machine. Fig. 40 Order Hotline +49 7144. 907-333 53 SPANNTOP mini. Disassembly, subsequent storage, disposal 7.4 Subsequent storage of the clamping device The clamping device must be cleaned and treated with corrosion protection for subsequent storage [see section »Cleaning«]. NOTE! The storage conditions are specified in the section »Transport, packaging and storage«. 7.5 Disposal If a return or disposal agreement has not been concluded, then recycle disassembled components. NOTE! Improper disposal causes environmental damage! Lubricants and other auxiliary materials are subject to treatment as special waste, and should only be disposed of by approved specialist companies! Local municipal authorities or specialized disposal companies provide information on environmentally-responsible disposal. 54 Order Hotline +49 7144. 907-333 SPANNTOP mini. Maintenance english 8 Maintenance Environmental protection Comply with the following instructions for environmental protection when performing maintenance work: At all lubricating points where lubricant is applied by hand, remove escaping, used, or excess grease, and dispose of it in accordance with applicable local regulations. Collect used oil in suitable containers and dispose of it in accordance with applicable local regulations. 8.1 General Cleanliness of the appropriate end-stop as well as the guidance diameters are conditions for reaching the concentricity and perpendicularity tolerances. Clean these surfaces with an appropriate cleaner. CAUTION Danger of injury due to improper handling of cleaners! Improper handling of cleaners can cause health impairments. Always comply with the safety data sheets and guidelines provided by the manufacturer of the cleaning agent for handling/using the cleaners. CAUTION Danger of injury due to loss of clamping force! Fouling of the clamping device can cause the clamping device to lose considerable clamping force. Always comply with the maintenance and cleaning intervals specified in this manual. In conjunction with the maintenance intervals, regularly check the maintenance status of the clamping device through clamping force measurements. Order Hotline +49 7144. 907-333 55 SPANNTOP mini. Maintenance NOTE! Material damage due to use of the wrong cleaning agent/cleaner! Seals and clamping elements can be damaged due to use of the wrong seals and clamping elements. Do not use any solvents that contain ester or polar solvents for cleaning purposes. Risk of injury! Slipping while the lubricating with a grease gun can lead to severe cuts! 8.2 Cleaning 8. x NOTE! Material damage if cleaned with compressed air! Cleaning the clamping device with compressed air can force metal chips into thread and grooves. This can damage or even destroy the clamping device. Never clean the clamping device with compressed air! Auxiliary material required: Ester-free, non-polar cleaning agent Soft, lint-free cloth 1. Disassemble the clamping unit from the machine [see section »Disassembling the clamping unit«]. For cleaning the clamping element reception the centering disc must be disassembled: 2. Unscrew and remove the 3 clamping screws out of the circumference of the clamping unit. Fig. 41 56 Order Hotline +49 7144. 907-333 SPANNTOP mini. Maintenance 1 Fig. 42 6. english 3. Loosen and remove the 3 mounting screws out of the centering disc. 4. Remove the centering disc together with adapter and coupling out of the clamping element reception. 5. Clean all the components of the clamping unit listed below with cleaning agent and a cloth; remove all oil and grease residues: Spindle flange Clamping unit Taper reception and coupling area Draw tube adapter, threaded adapter Cylindrical screws NOTE! Material damage due to missing or damaged o-rings or seals! Due to missing / fallen out O-rings and seals the clamping device may be contaminated with dirt and/or chips. This can damage the clamping device! Make sure that all O-rings / seals for the hydraulic / pneumatic connections are available and undamaged! If necessary lubricate them before assembly and/or during service. To reassemble the clamping unit follow these steps: 1. Put the centering disc together with adapter and coupling by the rear side into the clamping element reception. 2. Screw in the 3 mounting screws into the centering disc and tighten them firmly. 1 Fig. 43 Order Hotline +49 7144. 907-333 57 SPANNTOP mini. Maintenance 3. Screw in the 3 clamping screws into the circumference of the clamping unit till end. The clamping unit is reassembled. Fig. 44 8.3 Preservation 4. x Special tools required: Universal grease 2085/0003 Grease gun Oil stone Soft, lint-free cloth 1. Disassembling the clamping device [see section » Disassembling the clamping unit«]. 2. Hone all the bearing surfaces of the clamping device with an oil stone. 3. Lightly grease all cylindrical screws. Remove excess grease with a cloth. 4. Remount the clamping devices. Re-insert the clamping unit in the spindle flange. 5. Screw all cylindrical screws into the clamping device again and tighten them hand tight. For subsequent storage tightening the cylindrical screws hand tight suffices. This facilitates re-commissioning and protects the cylindrical screws. 58 Order Hotline +49 7144. 907-333 SPANNTOP mini. Maintenance english 6. Lightly grease all interior and outer surfaces of the clamping device. Remove excess grease with a cloth. 7. Pack the clamping device airtight in foil. Place it on a level, impact-free storage location and safeguard it from falling. Fig. 45 8.4 Use of lubricant With the usage of lubricant you may only use grease that corresponds to the requirements concerning bond, pressure-stability and solubility in lubricating coolant. In addition no dirt particles may be in the grease; they cause run errors if they come in in-between two mating surfaces. We recommend for this the following lubricant: HAINBUCH grease see product information Alternatives: Lubricant Manufacturer Product Universal grease MicroGleit GP 355 Klüber QNB 50 Zeller & Gmelin DIVINOL SD24440 Bremer & Leguill RIVOLTA W.A.P. Klüber MICROLUBE GL 261 Special grease Order Hotline +49 7144. 907-333 59 SPANNTOP mini. Maintenance 8.5 Maintenance schedule Maintenance tasks are described in the sections above that are required for optimal and trouble-free operation. If increased wear is detected during regular inspections, then reduce the required maintenance intervals according to the actual indications of wear. Contact the manufacturer, [see the service address on the back] if you have questions concerning maintenance tasks and intervals. Interval Maintenance task Daily Visual inspection and complete cleaning in case of heavy contamination [see section »Cleaning«] Weekly Clean the clamping unit [see section »Cleaning«] Clean the taper reception and coupling area [see section »Cleaning«] Grease the clamping unit [see section »Preservation«] Every 6 months Completely disassemble and clean the clamping unit [see section »Cleaning«] For proper operation of the coolant feed a prefiltering with duplex filter (mesh size 100 μm, PI 3754] is necessary. The duplex filter is mounted on the coolant cleaning system. 60 Order Hotline +49 7144. 907-333 SPANNTOP mini. Maintenance english 8.6 Bolt torque Metric ISO thread The guide values for bolt tightening torque for achieving the highest permissible pre-tension for metric ISO thread are specified in Nm in the table. Total friction coefficient μtot = 0,12 Diameter Torque for screw quality 10.9 [Nm] [mm] [mm] M4 7 3 4 M5 8 4 7 M6 10 5 12 M8 13 6 25 M 10 17 8 50 M 12 19 10 100 M 16 24 14 220 M 20 30 17 400 M 24 36 19 600 The table shows the prescribed values. Knowledge of the applicable guidelines and configuration criteria are the prerequisites. Order Hotline +49 7144. 907-333 61 SPANNTOP mini. Trouble shooting 9 Trouble shooting Possible fault causes and the tasks to correct these faults are described in the following section. If faults occur more frequently, the maintenance intervals must be shortened to correspond to the actual system load. Contact the manufacturer if there are faults that cannot be corrected by following the instructions below; see the service address on the back of this operating instruction. 9.1 Safety Trouble shooting The following always applies: 8. xx 1. For faults that pose a direct danger for personnel and or property immediately execute the emergency-stop function of the machine. 2. Determine the cause of the fault. 3. If correction of the fault requires work in the danger zone, put the machine in set-up mode. 4. Immediately inform the responsible parties at the installation site of the fault. 5. Depending on the type of fault, either have authorized specialized personnel correct the fault, or correct it yourself. The trouble shooting table provided below lists personnel who are authorized to correct the fault. 6. If there is a fault that was not caused by the clamping device the cause of the fault may be in the machine area. See the operating manual for the machine in this regard. 62 Order Hotline +49 7144. 907-333 SPANNTOP mini. Trouble shooting english 9.2 Trouble shooting table Fault Possible cause Fault correction Corrected by Clamping head cannot be replaced Rework the work piece The change gap between the clamping end-stop head coupling and work piece end-stop is insufficient. Clamping device does not open or the release stroke is insufficient. Fouling between the draw mechanism and the clamping unit Specialist Remove the clamping head, move the draw tube back and clean the coupling area [see section »Disassembling the clamping head«]. Dimensional deviation of the draw tube adapter Check the dimensions of Specialist the draw tube adapter and correct them if necessary. Clamping force is too low Specialist Work piece is under-di- Replace with a suitable mensioned clamping head Specialist Insufficient hydraulic pressure on the clamping cylinder Check the machine-side hydraulic aggregate Hydraulic specialist Defective clamping cylinder or blocked draw tube Contact the machine manufacturer Machine manufacturer Compression springs fatigued [at permanent tension] Replace compression springs Specialist Eccentric dimensional deviation on the work piece Concentricity error of the clamping unit Check the concentricity on Specialist the clamping taper and correct it if necessary [see section »Checking and adjusting the face run and concentricity of the clamping unit«]. Dimensional deviation on Contaminated coupling Clean the coupling area of Specialist area the clamping unit [see section »Cleaning«]. Order Hotline +49 7144. 907-333 63 SPANNTOP mini. Trouble shooting Fault the work piece Possible cause Fault correction Contaminated clamping Remove the clamping taper head and clean the clamping taper [see section »Cleaning«]. Corrected by Specialist Formal defect Elastic deformation of feedstock that is subject on the work to formal defects. After piece machining, the work piece returns to its original form. Use feedstock with fewer Specialist formal defects. Use a clamping head with several sharp teeth in the clamping surface. Marks on the Point or linear work piece clamping clamping surface Replace with a clamping Specialist head that has a smoother clamping surface Wrong clamping head type Replace the clamping head Specialist Excessive dimensional difference between the work piece diameter and the clamping bore Replace with a clamping head that has a suitable clamping bore Specialist 9.3 Start-up after corrected fault After correcting the fault execute the following steps to start up again: 7. xxx 1. Reset the emergency-stop device 2. Acknowledge the fault on the machine tool controller 3. Ensure that no one is in the danger zone 4. Start the machine tool 64 Order Hotline +49 7144. 907-333 SPANNTOP mini. Appendix english 10 Appendix 10.1 Service Hotline Order Hotline Quickly ordered and delivered. A call is all it takes: +49 7144. 907-333 Schedule Hotline Current status of your order? Just call: +49 7144. 907-222 24h emergency call Has there been a crash or other technical emergency? Our experts are at your service around the clock: +49 7144. 907-444 10.2 Representatives The sales partners and service employees listed below are available for further consultation or support. 10.2.1 Europe Austria HAINBUCH in Austria GmbH SPANNENDE TECHNIK Pillweinstr. 16 5020 Salzburg Phone +43 662 825309 E-mail: [email protected] Internet: www.hainbuch.com Belgium BIS Technics bvba/sprl Zevenputtenstraat 20 3690 Zutendaal Phone +32 89518890 Fax +32 89518899 E-mail: [email protected] Internet: www.bistechnics.com Denmark Jørn B. Herringe A/S Ramsømagle Syvvejen 31 4621 Gadstrup Phone +45 46170000 Fax +45 46170001 E-mail: [email protected] Internet: www.jbh-tools.dk Austria GGW Gruber & Co. GmbH Kolingasse 6 1090 Vienna Phone +43 13107596-0 Fax +43 13107596-31 E-Mail: [email protected] Internet: www.ggwgruber.com Czech Republic, TMC CR s.r.o. Masná 27/9 60200 Brno Phone +420 533433722 Fax +420 548217219 E-mail: [email protected] Internet: www.tmccr.cz Estonia, Latvia, Lithuania DV-Tools OÜ Peterburi tee 34/4 11415 Tallinn Phone +372 6030508 Fax +372 6030508 E-mail: [email protected] Internet: www.dv-tools.ee Order Hotline +49 7144. 907-333 65 SPANNTOP mini. Appendix Finland Oy Maanterä Ab PL 70 Keinumäenkuja 2 01510 Vantaa Phone +358 29006130 Fax +358 290061130 E-mail: [email protected] Internet: www.maantera.fi France Representative for: Haute Savoie Utilis France Sarl 597, Avenue du Mont Blanc 74460 Marnaz Phone +33 450963630 Fax +33 450963793 E-mail: [email protected] Internet: www.utilis.com Greece PAPET Papadopoulos GbR Martinstrasse 68 DE-73061 Ebersbach/Fils Phone +49 71635858/530668 Fax +49 716352265 E-mail: [email protected] Ireland HAINBUCH UK Ltd. WORKHOLDING TECHNOLOGY 6 Newmarket Keys Business Village, Keys Park Road Hednesford, Staffordshire WS12 2HA Phone +44 1543 278731 Fax +44 1543 478711 Mobile +44 7980212784 E-mail: [email protected] Internet: www.hainbuch.com Netherlands BIS Specials [Brandenburg Industry Service Dongen BV] Dreef 7 6996 BA Drempt Phone +31 313482566 Fax +31 313482569 E-mail: [email protected] Internet: www.bisspecials.com 66 France HAINBUCH France SNC Equipements de machines-outils ZI Lons-Perrigny 1600, Route de la Lième 39570 Lons-le-Saunier Phone +33 384876666 Fax +33 384876677 E-mail: [email protected] Internet: www.hainbuch.com Great Britain HAINBUCH UK Ltd. WORKHOLDING TECHNOLOGY 6 Newmarket Keys Business Village, Keys Park Road Hednesford, Staffordshire WS12 2HA Phone +44 1543 278731 Fax +44 1543 478711 Mobile +44 7980212784 E-mail: [email protected] Internet: www.hainbuch.com Hungary GIMEX Hydraulik GmbH Selyem utca 1. 9025 Györ Phone +36 96525588 Fax +36 96427239 E-mail: [email protected] Internet: www.gimex.hut Italy HAINBUCH Italia srl Via Caduti di Nassiriya 5 22036 Cantu [Co] Phone +39 0313355351 Fax +39 031611570 E-mail: [email protected] Internet: www.hainbuchitalia.it Norway Onstad Maskin A/S Chr. H. Blomsgt. 13 3717 Skien Phone +47 35532373/74 Fax +47 35532375 E-mail: [email protected] Internet: www.onstadmaskin.no Order Hotline +49 7144. 907-333 SPANNTOP mini. Appendix english Poland BIM Sp. z o.o. Złotniki, ul. Kobaltowa 6 62-002 Suchy Las Phone +48 616232041 Fax +48 616232040 E-mail: [email protected] Russia ROSNA Engineering LLC Sveaborgskaya street, 12, Letter »A«, office 20N, 196105 Saint-Petersburg Phone +7 812 4016767 Fax +7 812 4016767 E-mail: [email protected] Internet: www.rosna.spb.ru Slovenia Elmetool d.o.o. Prvomajska ulica 62 5000 Nova Gorica Phone +386 53303300 Fax +386 53303304 E-mail: [email protected] Sweden HAINBUCH Svenska AB SPÄNNANDE TEKNIK Kemistvägen 17 18379 Täby Phone +46 87327550 Fax +46 87327650 E-mail: [email protected] Internet: www.hainbuch.com Turkey Hidkom Organize Sanayi Bölgesi 75. Yil CD. Demirciler Sit. B Blok No.2 16159 Nilüfer / Bursa Phone +90 2242438292 Fax +90 2242436365 E-mail: [email protected] Internet: www.hidkom.com Romania Banatech srl. – connecting technologies Ep. Miron Cristea 26 325400 Caransebes, Caras Severin Phone +40 255517175 Fax +40 355814125 Mobile +40 749220553 E-mail: [email protected] Internet: www.banatech.ro Slovakia NS s.r.o. Vácka ulica 4109/10 01841 Dubnica N/V Phone +421 424450873 Fax +421 424440406 E-mail: [email protected] Internet: www.tnssro.eu Spain, Portugal ATM S.L C/. Gran Bretanya, 16 Pol. Ind. Pla de Llerona 08520 Les Franqueses del Vallès [Barcelona] Phone +34 938700885 Fax +34 938791689 E-mail: [email protected] Switzerland Utilis Müllheim AG Präzisionswerkzeuge Kreuzlinger Strasse 22 CH-8555 Müllheim Phone +41 527626262 Fax +41 527626200 E-mail: [email protected] Internet: www.utilis.com Order Hotline +49 7144. 907-333 67 SPANNTOP mini. Appendix 10.2.2 America Argentina HAINBUCH America Corp. WORKHOLDING TECHNOLOGY W129N10980 Washington Dr. Germantown, WI 53022 U.S.A Phone +1 4143589550 Fax +1 4143589560 E-mail: [email protected] Internet: www.hainbuchamerica.com Canada HAINBUCH America Corp. WORKHOLDING TECHNOLOGY W129 N10980 Washington Dr. Germantown, WI 53022 U.S.A Phone +1 4143589550 Fax +1 4143589560 E-mail: [email protected] Internet: www.hainbuch.com Mexico HAINBUCH America Corp. WORKHOLDING TECHNOLOGY W129 N10980 Washington Dr. Germantown, WI 53022 Phone +1 4143589550 Fax +1 4143589560 E-mail: [email protected] Internet: www.hainbuch.com Brasil SSanposs Tecnologia Suprimentos e Consultoria Internacional Ltda. Rua Cândia n° 65 - Jardim do Mar CEP: 09726-220 São Bernardo do Campo - São Paulo Phone +55 11 41266711 Fax +55 11 41266710 E-mail: [email protected] Internet: www.sanposs.com.br Canada Representative for: Ontario, Québec J.Winkel & Associates Inc. 6516 Warbler Lane L5N 6E1 Mississauga, Ontario U.S.A Phone +1 4143589550 Fax + 1 4143589560 E-mail: [email protected] Internet: www.hainbuch.com USA HAINBUCH America Corp. WORKHOLDING TECHNOLOGY W129 N10980 Washington Dr. Germantown, WI 53022 Phone +1 4143589550 Fax +1 4143589560 Se habla español: Tel +1 2143268081 E-mail: [email protected] Internet: www.hainbuch.com 10.2.3 Asia China HAINBUCH Shanghai Co. Ltd. WORKHOLDING TECHNOLOGY Room 611-612 BaoHong Center No. 7755 Zhongchun Road Minhang District, Shanghai 201101 Phone +86 2120916384 Fax +86 2120916383 E-mail: [email protected] Internet: www.hainbuch.cn India A.H. Rao Technical Consultant to HAINBUCH Ground Floor, # 4157, 14th Main HAL 2nd Stage, Indiranagar Bangalore 560 008 Phone +91 8041463972 Mobile +91 9986997959 E-Mail: [email protected] 68 India M´la Sales Corporation 5, Yeshwantnagar Telco-Century Enka Road Pimpri, Pune 411018 Phone +91 20 27477405 Fax +91 20 27464249 E-mail: [email protected] Internet: www.mla-sales.com Indonesia PT. STAHL ARBEIT WTC Mangga Dua 2nd Floor A-6 JL. Mangga Dua Raya No. 8 Level 2 Blok C No. 41-45 Jakarta 14430 Phone +62 21 3777 6622 Fax. +62 21 3001 8070 E-mail: [email protected] Internet: www.stahl-arbeit.com Order Hotline +49 7144. 907-333 SPANNTOP mini. Appendix english Israel M.T.M. Machine Tools Marketing Ltd. 26 Hakishor St. Holon 58867 Phone +972 36479560 Fax +972 36479578 E-mail: [email protected] Internet: www.mtm.co.il Korea Kimi Co. B-101 98 Okgucheondongro Siheung-Si 429-925 Gyeonggi-Do Phone +82 24137911 Fax +82 24137910 E-Mail: [email protected] Taiwan GSTC Technology Co., Ltd. No. 418, Youn-Chun East 1st Rd Taichung City 40877, Taiwan' Phone +88 6423805678 Fax +88 6423805511 E-mail: [email protected] Internet: www.gstctech.com.tw Japan NK Works Co LTD 2-17-17 Iwamoto-cho, Chiyoda-ku Tokyo, 101-0032 Phone +81 338645411 Fax +81 338646752 E-mail: [email protected] Internet: www.nk-works.co.jp Malaysia, Singapore & Vietnam Jebsen & Jessen Technology [S] Pte Ltd. Process Engineering Division 18 Enterprise Road Singapore 629824 Phone +65 63053692 Fax +65 63053699 E-mail: [email protected] Internet: www.jjsea.com Thailand HAINBUCH [ Thailand ] Co. Ltd WORKHOLDING SOLUTIONS 2/25 Sukhapiban 2 Road Prawet, Prawet, Bangkok 10250 Phone +662329 0622/23 Fax +662329 0624 E-Mail: [email protected] Internet: www.hainbuch.com 10.2.4 Australia Australia Romheld Automation Pty Ltd Unit 30 115 Woodpark Road Smithfield . NSW. 2164 Phone +61 297211799 Fax +61 297211766 E-mail: [email protected] Internet: www.romheld.com.au 10.2.5 Africa South Africa South Africa Retecon [PTY] Ltd. P.O. Box 1472 1620 Kempton Park Phone +27 119768600 Fax +27 113942471 E-mail: [email protected] Internet: www.retecon.co.za Order Hotline +49 7144. 907-333 69 SPANNTOP mini. Index 11 Index A O Accessories............................................. optional............................................27 Operating conditions............................22 Assembly................................................. Clamping head................................47 Special flange..................................40 Work piece......................................48 B Bolt torque...........................................61 Brief description....................................... SPANNTOP mini deadlength..........25 SPANNTOP mini pull-back.............23 C Carbon / CFK.........................................8 Changing fixture...................................... Manual.............................................27 pneumatic........................................27 Clamping head....................................27 Cleaning...............................................56 Control of the stroke position...............50 D Description of variants...........................4 Dimensional sheet...............................22 Disassembly............................................ Clamping head................................47 Spindle flange..................................53 Overview.................................................. SPANNTOP mini deadlength..........25 SPANNTOP mini pull-back.............23 P Packaging............................................31 Personal protective equipment................ Hard hat...........................................13 Protective gloves.............................13 Protective goggles...........................13 Protective work clothing..................13 Safety footwear...............................13 Personnel requirements......................10 Power specifications............................22 Preparation.............................................. SPANNTOP mini deadlength..........34 SPANNTOP mini pull-back.............34 Preservation........................................58 R Representatives....................................... Africa...............................................69 America...........................................68 Asia..................................................68 Australia..........................................69 Europe.............................................65 S Disposal...............................................54 Scope of delivery...................................7 E Spare parts............................................8 Environmental protection.....................19 Special dangers...................................14 G Storing.................................................32 Grease.................................................28 Structure..............................................23 Grease gun..........................................28 Subsequent storage............................51 I Symbols on the packaging..................29 Installing................................................... SPANNTOP mini.............................41 Spindle flange..................................37 T Intended use........................................11 M Maintenance schedule........................60 70 Transport inspection............................29 Transport, inner company...................30 Trouble shooting..................................62 Trouble shooting table.........................63 Type designation.................................22 Order Hotline +49 7144. 907-333 SPANNTOP mini. Index english U W Unpacking............................................30 Work piece end-stop............................28 Order Hotline +49 7144. 907-333 71 SPANNENDE TECHNIK HAINBUCH GMBH SPANNENDE TECHNIK PO Box 1262 · DE-71667 Marbach Erdmannhäuser Straße 57 · DE-71672 Marbach Phone +49 7144. 907-0 Fax +49 7144. 18826 [email protected] www.hainbuch.com 24h-Emergency call +49 7144. 907-444 08.2014 Part no.: 80001/0186_en Subject to technical modifications