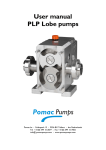
1
User manual
CP-AGF
Centrifugal pumps
CE/CP-AGF (0908) EN-01
Pomac BV - Feithspark 13 - 9356 BX Tolbert
Tel +31(0) 594 51 28 77 - Fax +31(0) 594 51 70 02
[email protected] - www.pomacpumps.com
User manual Pomac CP-AGF pumps
This user manual has been released d.d.:................................
and belongs to:
Serial number
3
capacity
m /h
pressure
bar
NPSHR
m
Drive, make
type
-1
speed
voltage
min
/
/
V
frequency
Hz
current
A
power
kW
isolation class
protection class
IP
area classification
Coupling, make
type
size
CE/CP-AGF (0908) EN-01
1
User manual Pomac CP-AGF pumps
2
CE/CP-AGF (0908) EN-01
User manual Pomac CP-AGF pumps
User manual Pomac CP-AGF pumps
This manual has been compiled with the utmost care.
However, POMAC assumes no liability for possible deficiencies
of the information in this manual. It is the responsibility of the
buyer/user of this pump to ensure this information is complete
and up-to-date.
All technical information mentioned in this user manual remains
property of Pomac bv and may only be used for the installation,
operation and maintenance of this pump. The information may
not be copied, duplicated or passed on to third parties without
our written permission.
Copyright 2009 Pomac bv
Release date: August 2009
Doc. ID. : CE/CP-AGF (0908) EN-01
CE/CP-AGF (0908) EN-01
3
User manual Pomac CP-AGF pumps
Warning!
All work regarding the pump must always be in accordance
with all the prevailing standards regarding occupational
health and safety as well as machine safety!
Never allow the pump to run without being connected to
the piping!
When performing maintenance work to the pump ensure
that the power supply to the pump is disconnected and can
not be switched on unintentionally!
When performing maintenance work to the pump always
wear protective gloves and safety goggles if the pump
conveys liquids which are a health hazard!
Ensure that the pump is depressurized, when it has to be
disassembled for overhaul!
Before performing maintenance work to the pump allow the
pump to cool down first when it is conveying hot liquids!
Never stand underneath a hoisted pump!
Never insert fingers into the pump casing or into the
connection ports. Even manually rotating the shaft can
cause injury!
If the pump is connected to the power supply: ensure the
pump is shut down and take precautions to prevent
unintentional starting up of the pump!
An electric drive may only be connected to the electric
power supply by a qualified electrician!
4
CE/CP-AGF (0908) EN-01
User manual Pomac CP-AGF pumps
Caution!
!
!
!
!
The system must ALWAYS BE FLUSHED! Not only
BEFORE INSTALLING the pump, but AFTER EACH
ACTIVITY DURING WHICH THE SYSTEM HAD TO BE
OPENED, e.g. replacement of valves or piping segments!
If the risk exists of exceeding the maximum working
pressure a safety device must be fitted to the pump, the
drive or the system!
A pump which is NOT equipped with a QUENCHED shaft
seal may NEVER be installed in a position where it possibly
could run DRY!
The maximum values given for pressure, speed or
temperature may never be exceeded!
CE/CP-AGF (0908) EN-01
5
User manual Pomac CP-AGF pumps
Table of contents
1.
Introduction ................................................................................................................................... 7
1.1. General information................................................................................................................... 7
1.2. Warranty.................................................................................................................................... 7
1.3. Transport and receipt ................................................................................................................ 8
1.4. Type code ................................................................................................................................. 8
1.5. Ordering spare parts ................................................................................................................. 9
1.6. Manufacturer ............................................................................................................................. 9
2.
Safety.......................................................................................................................................... 10
2.1. General information................................................................................................................. 10
2.2. Instructions .............................................................................................................................. 10
2.3. Staff ......................................................................................................................................... 10
2.4. Precautions ............................................................................................................................. 11
2.5. Changed application ............................................................................................................... 11
3.
Description .................................................................................................................................. 12
3.1. CP-AGF centrifugal pump ....................................................................................................... 12
3.1.1.
Pump description ............................................................................................................. 12
3.1.2.
Application area ............................................................................................................... 12
3.1.3.
Pump impeller design ...................................................................................................... 12
3.2. Connections ............................................................................................................................ 12
3.3. Materials.................................................................................................................................. 12
3.4. Constuctive variants................................................................................................................ 12
3.5. Shaft sealing ........................................................................................................................... 12
3.6. Drive ........................................................................................................................................ 12
4.
Installation................................................................................................................................... 13
4.1. General.................................................................................................................................... 13
4.2. Connecting the electric motor ................................................................................................. 13
5.
Putting into operation.................................................................................................................. 14
5.1. Preparations ............................................................................................................................ 14
5.1.1.
General ............................................................................................................................ 14
5.1.2.
Quench ............................................................................................................................ 14
5.2. Checking the rotation direction ............................................................................................... 14
5.3. Putting into operation .............................................................................................................. 15
5.4. In operation ............................................................................................................................. 15
5.4.1.
Noise ................................................................................................................................ 15
5.5. Maintenance............................................................................................................................ 15
5.5.1.
Daily maintenance ........................................................................................................... 15
5.5.2.
Periodic maintenance ...................................................................................................... 15
5.6. Malfunction .............................................................................................................................. 16
6.
Overhaul and repair .................................................................................................................... 17
6.1. Removing the pump ................................................................................................................ 17
6.2. Dismantling the pump ............................................................................................................. 18
6.2.1.
Disassembling the impeller and the mechanical seal...................................................... 18
6.2.2.
Disassembling the pump casing ...................................................................................... 19
6.2.3.
Disassembling the mechanical seal compartment .......................................................... 19
6.3. Assembling the pump.............................................................................................................. 20
6.3.1.
O-rings ............................................................................................................................. 20
6.3.2.
Assembling the mechanical seal compartment ............................................................... 20
6.3.3.
Assembling the pump casing........................................................................................... 20
6.3.4.
Assembling the impeller and the mechanical seal........................................................... 21
7.
Sectional drawings and parts lists .............................................................................................. 22
7.1. CP AGF 500 DVMF................................................................................................................. 22
7.1.1.
Sectional drawing............................................................................................................. 22
7.1.2.
Parts list ........................................................................................................................... 23
7.2. CP AGF 750 DVMF................................................................................................................. 24
7.2.1.
Sectional drawing............................................................................................................. 24
7.2.2.
Parts list ........................................................................................................................... 25
8.
Performance curves.................................................................................................................... 26
9.
Trouble shooting ......................................................................................................................... 27
6
CE/CP-AGF (0908) EN-01
User manual Pomac CP-AGF pumps
1. Introduction
1.1.
General information
This manual provides important information regarding the
correct way of installing, operating and servicing this pump.
This manual also provides information necessary to prevent the
installer/operator from injury or discomfort during installation
and operation of this pump and to ensure the correct use and
reliable performance of this pump.
This manual represents the most recent information regarding
the pump types mentioned in this manual at the time of going to
print. However, POMAC reserves the right to modify the
construction of the pump types mentioned, as well as the
contents of this manual, without prior or afterward notification.
Read this manual thoroughly before installing, operating or
servicing this pump. Ensure that operators and
maintenance staff are familiar with the symbols used.
Follow the instructions in this manual step by step.
1.2.
Warranty
Warranty is strictly limited to the conditions specified by
POMAC and will only be granted according to these conditions.
Warranty will only come into force provided that:
the pump has been installed and put into operation strictly in
accordance with the instructions given in this manual.
maintenance and repairs have been carried out according to
the instructions given in this manual.
exclusively original POMAC parts or parts provided by
POMAC have been used for replacing parts.
the pump has not been used for applications other than
those shown in the specifications according to which the
pump was sold.
no changes have been made to the construction of the pump
itself by the buyer.
the damage is not the result of work carried out by persons
not qualified or appointed.
the damage has not been caused through major force.
CE/CP-AGF (0908) EN-01
7
User manual Pomac CP-AGF pumps
1.3.
Transport and receipt
1. Check to see if the pump has not been subject to damage
during transportation. If this is the case, report it directly to
the carrier and to POMAC;
2. If the pump is delivered on a pallet, leave it on the pallet for
as long as possible. This facilitates internal transport.
3. If a suitable hoisting device is available, use this if the pump
is fitted with lifting eyes.
4. With the exception of the motors fitted with a stainless steel
shroud, the motors (pumps) from construction size 132 on
can be fitted with a screw-in lifting eye.
Motor size
1.4.
132
160
180
200
Lifting eye thread size M10
M10
M12
M16
Type code
The type code consists of the following items:
x
1
x
2
x
3
-
x
4
-
x
5
-
x
6
-
x
7
Example: CP-AGF 50088 – DVMF – 6 – 0750 – Q1
1. Type
CP-AGF
2. Pump size
500 / 750 / 1000
3. Connection sizes
88 = NW100
1212 = NW150
1616 = NW200
4. Construction
DVMF = close coupled, prolonged motor shaft, stainless steel
motor shroud, pump unit placed on Omega profiles
DVF = close coupled, prolonged motor shaft, pump unit placed
on Omega profiles
5. Electric motor poles
4 ( = 1500 rpm at 50 Hz)
6 ( = 1000 rpm at 50 Hz)
8 ( = 750 rpm at 50 Hz)
6. Power
0300 = 3 kW
0400 = 4 kW
0550 = 5,5 kW
0750 = 7,5 kW
1100 = 11 kW
1500 = 15 kW
1850 = 18,5 kW
2200 = 22 kW
3000 = 30 kW
3700 = 37 kW
4500 = 45 kW
8
CE/CP-AGF (0908) EN-01
User manual Pomac CP-AGF pumps
7. Mechanical seal
S1 = internal single mechanical seal - unbalanced
B1 = internal single mechanical seal - balanced
Q1 = internal single mechanical seal - unbalanced,
with oil-bath quench with oil seal
Q2 = internal single mechanical seal - balanced,
with oil-bath quench with oil seal
1.5.
Ordering spare parts
An order form for ordering spare part is included in the
documents accompanying this pump. You should state the
following details on this form:
your address data
the serial number and the type number (these are stated
on the type plate of the pump and on the first page of this
manual).
the item numbers and quantities of the desired parts.
See
chapter 8 for the sectional drawings of the pump, with the
corresponding parts lists with item numbers.
1.6.
Manufacturer
CP-AGF pumps are manufactured by
Pomac bv
Feithspark 13
9356 BX Tolbert
Holland
Tel +31(0) 594 5128 77
Fax +31(0) 594 5170 02
[email protected]
www.pomacpumps.com
CE/CP-AGF (0908) EN-01
9
User manual Pomac CP-AGF pumps
2. Safety
2.1.
General information
This manual provides information necessary to prevent the
installer/operator from injury or discomfort during installation
and operation of this pump and to ensure the correct use and
reliable performance of this pump.
2.2.
Read this manual thoroughly before installing, operating or
servicing this pump.
Ensure that operators and maintenance staff are familiar
with the contents of this manual and with the instructions
given.
Ensure that operators and maintenance staff are familiar
with the symbols used.
Follow the instructions in this manual step by step.
Store this manual in a place that is known and accessible to
any user.
Instructions
This manual contains instructions with regard to the safety of
the user, the continued good functioning of the pump and hints
to facilitate certain actions or procedures.
These instructions are indicated with the following symbols:
Warning! May cause injury to the user! Act strictly in
accordance with the instructions given!
!
Caution! May cause severe damage to the pump or bad
functioning! Closely follow the instructions given!
Note: Hint or instruction that can facilitate certain actions.
Issues which require extra attention are printed in bold.
2.3.
Staff
All personnel, in charge of the installation, operation or
maintenance and overhaul of the pump, should have received
the necessary training.
10
CE/CP-AGF (0908) EN-01
User manual Pomac CP-AGF pumps
2.4.
Precautions
When performing maintenance work to the pump ensure
that the drive of the pump is shut down and can not be
switched on unintentionally!
All work on and with the pump must always be in
accordance with all the prevailing standards regarding
occupational health and safety as well as machine safety!
Always wear protective gloves and safety goggles if the
pump conveys harmful liquids that may cause injuries!
See to is that the pump is depressurized, when it has to be
disassembled for overhaul!
Allow the pump to cool down first when it is used for
conveying hot liquids!
2.5.
Changed application
Contact POMAC in case the pump is going to be used for
other applications or in different circumstances than those
specified during the initial pump selection.
CE/CP-AGF (0908) EN-01
11
User manual Pomac CP-AGF pumps
3. Description
3.1.
3.1.1.
CP-AGF centrifugal pump
Pump description
The CP-AGF is a stainless steel sanitary centrifugal pump that
is used for pumping liquids containing solids. This process
requires a constant liquid flow with a pre-pressure at the suction
side.
De CP-AGF pumps are applied for pumping turnip-shaped
products, like potatoes, vegetables and fruit.
3.1.2.
Application area
3
The application area goes from a capacity of 500 m /h to a
manometric head of 2 bars.
3.1.3.
Pump impeller design
The pumps are equipped with a closed impeller.
3.2.
Connections
All pump types are provided with the following connections:
Flanges DIN 2633
3.3.
Materials
All parts that come into contact with the liquid are designed
in stainless steel 304 (Werkstoffnr. 1.4301).
All pumps are suitable for being C.I.P. cleaned.
3.4.
Constuctive variants
The CP-AGF pumps are available in the following designs:
CP-AGF DVMF
Pump and motor close coupled and placed on adjustable
stainless steel Omega profiles. The motor is provided with a
stainless steel shroud.
CP-AGF DV_F
Pump and motor close coupled and placed on adjustable
stainless steel Omega profiles.
3.5.
Shaft sealing
The shaft sealing of a standard pump assembly comprises a
mechanical seal with SiC/SiC slide rings and EPDM secondary
seal. The shaft seal is provided with an oil-bath quench, sealed
at atmospheric side with an oil seal, running to a speedy sleeve.
The applied mechanical seal types are according to EN 12756
(DIN 24960), with the exception of the build-in length.
3.6.
Drive
The pumps are fitted with B3/B5 foot/flange motors acc. to
IEC.
The electric motors are available in all possible voltages,
insulation categories, protection categories and in low-noise
design.
12
CE/CP-AGF (0908) EN-01
User manual Pomac CP-AGF pumps
4. Installation
4.1.
General
The foundation must be smooth and level.
Adjust the adjustable feet (11), by means of the nuts (37), in
such a way that the pump is resting stably on all 4 feet!
Once the pump is positioned stably, secure the adjustable
feet with the counter nuts (37).
Verify that the system pressure does not exceed the
permitted operating pressure.
Verify that the pipes do not show any leakage.
The pipes must be installed and connected stress-free.
4.2.
Connecting the electric motor
An electric motor may only be connected by a qualified
electrician!
CE/CP-AGF (0908) EN-01
13
User manual Pomac CP-AGF pumps
5. Putting into operation
5.1.
5.1.1.
Preparations
General
Check that the shaft can turn freely. To do this, rotate the
impeller a few times manually.
Check that the fuses have been fitted.
5.1.2.
Quench
First fill the oil-bath quench compartment with oil!
The recommended oil type is: Foodgrade Energol GR-FG
220 BP.
1. Remove the vent-plug (1) and place a funnel in the fill hole.
2. Pour the oil into the oil-bath compartment until the oil shows
in the centre of the oil sight glass (10).
3. Replace the vent plug.
5.2.
Checking the rotation direction
1. Fill the pump with the liquid to be pumped.
2. Switch the pump on briefly.
Be careful with any unprotected rotating parts!
3. Check that the rotation direction of the motor corresponds
with the rotation direction of the pump (which is indicated by
an arrow on the lantern piece). If the rotation direction is not
correct, swap the connection wires L1 and L2.
This must be done by a qualified electrician!
4. Fit the motor shroud (only for DVMF).
14
CE/CP-AGF (0908) EN-01
User manual Pomac CP-AGF pumps
5.3.
Putting into operation
1. Check that the oil-bath quench compartment is sufficiently
filled with oil.
2. Fully open the shut-off-valve in the suction pipe.
3. Close the delivery valve.
4. Switch the pump on and allow it to come up to pressure.
5. Subsequently open the delivery valve.
6. Set the pump to its required operating point.
5.4.
5.4.1.
In operation
Noise
The noise data stated in this manual refer to normal usage, with
an electric motor. Under these conditions the noise level is
below 85 dB(A). If after the passage of time the pump produces
excessive noise, this can be an indication that there is a fault in
the pump or elsewhere in the system (e.g. worn out bearings,
cavitation).
5.5.
5.5.1.
Maintenance
Daily maintenance
!
Regularly check the oil level of the quench compartment.
The valve in the suction pipe must always be completely
open
Regularly check that the inlet pressure is not too low to avoid
the occurrence of cavitation in the pump
Regularly check the delivery pressure
Regularly check the shaft seals for leakage.
!
5.5.2.
The pump may never run without liquid
Periodic maintenance
CP-AGF pumps basically are maintenance free. Only the
following items require periodic attention:
!
Periodically check that the quench compartment is
sufficiently filled with oil!
The electric motor bearings are greased for their entire life
and do not require any maintenance or subsequent
lubrication.
A mechanical seal may not show any visible leakage. If any
leakage is visible, replace the mechanical seal.
If a mechanical seal does not show any visible leakage
disassembly is not recommended!
CE/CP-AGF (0908) EN-01
15
User manual Pomac CP-AGF pumps
5.6.
Malfunction
If there is a malfunction in the pump, try to find the cause using
the troubleshooting list at the back of this manual or consult
your installer!
Always switch off the current first if you intend to
investigate the malfunction yourself. Remove the fuse or
lock the operating switch with a pad lock!
The pump can still be hot or under pressure. Allow the
pump to cool down first and if possible release the
pressure from the pump. Always wear the correct personal
protection devices (goggles, gloves, etc.)!
16
CE/CP-AGF (0908) EN-01
User manual Pomac CP-AGF pumps
6. Overhaul and repair
6.1.
Removing the pump
parts
The item numbers shown (...) refer to the illustrations and the
lists in chapter 7.
First ensure the electric current has been switched off.
Remove the fuses or switch the operating switch to OFF
and lock it with a pad lock!
1. Close the suction valve and the delivery valve of the suction
and delivery lines to the pump.
2. Place an appropriate drain pan under the drain opening.
Unscrew drain plug (6) and drain the pump. Replace the
drain plug.
If the pumped liquid is HOT, first allow the pump to cool
down!
3. Disconnect the electrical connections to the electric motor.
4. Loosen the connections of the pipes and remove the pump
from the piping.
CE/CP-AGF (0908) EN-01
17
User manual Pomac CP-AGF pumps
6.2.
6.2.1.
Dismantling the pump
Disassembling the impeller and the mechanical seal
1. Remove the vent plug (1) and the drain plug (2) and drain
the oil from the quench compartment. Replace the vent plug
and the drain plug with sealing ring (3).
2. Remove the front side pump cover nuts (35) and washers
(40) and remove the front pump cover (28). Remove the
pump cover O-ring (21).
3. Remove the impeller screw (16) and O-ring (20).
4. Mount the impeller extractor (4) and tighten it to loosen the
impeller. When the impeller (23) has come loose from the
motor shaft remove the impeller. Unscrew the impeller
extractor.
5. Remove the shim (5) from the shaft hole of the impeller hub.
6. Remove the rotary part of the mechanical seal (24) from the
impeller hub.
7. Remove the stationary part of the mechanical seal (24) from
its seat in the seal compartment.
8. Inspect the disassemble parts for possible wear and replace
them if they show too much wear.
9. Turn the motor shaft by hand to inspect the condition of the
motor bearings. If the bearings show excessive play have
the motor overhauled.
18
CE/CP-AGF (0908) EN-01
User manual Pomac CP-AGF pumps
6.2.2.
Disassembling the pump casing
!
Use an appropriate hoisting device to remove the pump
casing. It is too heavy to be lifted by hand!
1. Apply a crane hook to the lifting eye of the pump casing.
2. Remove the rear side pump cover nuts (35) with washers
(40).
3. Remove the pump casing, using the hoisting device.
4. Remove the pump cover O-ring (21).
6.2.3.
Disassembling the mechanical seal compartment
1. Remove the fixation screws (30) and remove the rear pump
cover (13) with the seal compartment.
2. Remove screws (29) and washers (42) and remove the seal
compartment (14). Remove the O-ring (7).
3. Remove screws (33) and remove the seal compartment
cover (15). Remove the O-ring (7).
4. Check the oil seal (38).
CE/CP-AGF (0908) EN-01
19
User manual Pomac CP-AGF pumps
6.3.
6.3.1.
Assembling the pump
O-rings
!
!
20
Prior to assembling the pump check all O-rings.
Replace them when they show any wear or cracks.
Grease all O-rings with Foodgrade grease prior to
mounting them.
6.3.2.
Assembling the mechanical seal compartment
1. Apply some Foodgrade grease to the fitting rim and mount
the oil seal (38) in the seal compartment cover (15).
2. Place an O-ring (7) and mount the seal compartment cover
to the seal compartment (14), using screws (33).
3. Apply some Foodgrade grease to the seal seat and press
the stationary part of the mechanical seal in the seal seat,
using an appropriate plastic pressure piece. Do not touch
the sliding surface with your fingers.
4. Place the other O-ring (7) and mount the seal compartment
to the rear pump cover (13), using screws (29) and washers
(42).
5. Mount the rear pump cover assembly to the intermediate
piece (22), using fixation screws (30).
6.3.3.
Assembling the pump casing
1. Place the rear pump cover O-ring (21).
2. Apply a crane hook to the lifting eye of the pump casing.
3. Position the pump casing against the rear pump cover and
centre it to the rear pump cover by means of the studs.
4. Fix the pump casing, using nuts (35) and washers (40).
CE/CP-AGF (0908) EN-01
User manual Pomac CP-AGF pumps
6.3.4.
Assembling the impeller and the mechanical seal
1. Apply some Foodgrade grease to the impeller hub and
mount the rotary part of the mechanical seal, applying a
slightly twisting movement. Do not touch the sliding
surface with your fingers.
2. Take notice of the position of the key in the motor shaft and
position the impeller (23) in such a way that the key notch in
the impeller hub is aligned with the key.
3. Centre the impeller on the motor shaft and push it backward
until the impeller hub touches the motor shaft end.
4. Keep the impeller pushed in this position and measure the
depth D between the impeller front and the front cover fitting
face on the pump casing.
The required shim thickness is 0.5*(D- X), see table
below for value of X.
CP AGF 500
4
CP AGF 750
2.6
5. Remove the impeller from the motor shaft and place a shim
of the correct thickness in the shaft hole of the impeller hub.
6. Repeat steps 2 and 3.
7. Put the O-ring (20) around the impeller screw (16), using
some Foodgrade grease and fix the impeller with the
impeller screw.
8. Place the front pump cover O-ring (21).
9. Mount the front pump cover (13) with the pump cover nuts
(35) with washers (40).
CE/CP-AGF (0908) EN-01
21
User manual Pomac CP-AGF pumps
7. Sectional drawings and parts lists
7.1.
CP AGF 500 DVMF
7.1.1.
Sectional drawing
1
43
3
41
33
28
39
26
23
19
29
5
38
18
13
40
27
32
10
34
35
17
6
42
11
12
30
38
20
OLIE NIVEAU
42
24
6
36
24
22
39
31
4
44
15
25
8
37
7
14
16
9
2
22
CE/CP-AGF (0908) EN-01
21
7
8
User manual Pomac CP-AGF pumps
7.1.2.
POS
1
2
3
4
5
6
7
8
9
10
11
12
13
14
15
16
17
18
19
20
21
22
23
24
25
26
27
28
29
30
31
32
33
34
35
36
37
38
39
40
41
42
43
44
Parts list
QTY
1
1
1
1
1
1
2
2
1
1
2
1
1
1
1
1
4
1
1
1
2
1
1
1
4
8
4
4
6
3
10
4
4
8
1
16
4
9
24
8
8
1
1
DESIGNATION
MOTOR SHROUD SIZE 160L
REAR FLANGE
INTERMEDIATE PIECE SIZE160
VENT PLUG SFV.1/2-10 MB
O-RING 19,2x3
SLEEVE ø65
INNER HEX PLUG G-1/2''
SEALING RING 1/2''
IMPELLER EXTRACTOR
BASEMENT SIZE 160
O-RING ø139,37x2,62
O-RING ø48x2
INSPECTION COVER
SEAL SEAT COVER
SEAL SEAT
OIL SIGHT GLASS G1/2''
MACHINE ADJUSTABLE FOOT TYPE H M20x70
HEXAGON PLUG FTHPP 316 1''
MODIFIED BOLT ISO4762 M16x90
O-RING 28,17x3,53
O-RING 263x4
FRONT FLANGE
PUMP CASING CP500
IMPELLER ø260x90
HEX. HEAD SCREW ISO 4014 M6x130
HEX. HEAD SCREW ISO 4017 M10x25
HEX. HEAD SCREW ISO 4017 M12x50
HEX. HEAD SCREW ISO 4017 M16x55
HEX. HEAD SCREW ISO 4017 M8x12
HEX. HEAD SCREW ISO 4017 M8x16
HEX.NUT ISO 4032 M10
HEX.NUT ISO 4032 M12
HEX.NUT ISO 4032 M16
HEX.NUT ISO 4032 M20
OIL SEAL DIN 3760-B 65x85x10
SET SCREW ISO 4766 M10x35
WASHER ISO 7089-6
WASHER ISO 7089-8
WASHER ISO 7089-10
WASHER ISO 7089-12
WASHER ISO 7089-16
MECHANICAL SEAL DY520-70/t4
MAT.
EPDM/FDA
RVS 304
PVC
EPDM
EPDM
RVS
EPDM
EPDM
A2
A2
A2
A2
A2
A2
A2
A2
A2
A2
NBR
A2
A2
A2
A2
A2
A2
PART. NR.
ALG.009-017-010
ALG.009-017-005
ALG.009-017-012
054.211-011
051.741-100155
P.000.000.508
P-000-000-331
P-000-000-482
ALG.009-017-008
ALG.009-017-009
P-000-000-495
051.741-100132
ALG.009-017-015
ALG.009-017-007
ALG.009-017-006
054.210-012
P-000-000-299
051.000.000.005
700.418-007
051.741-100142
051.741-000087
ALG.009-017-018
ALG.009-017-014
ALG.009-017-017
051.001-06-130-05
051.002-10-025-05
051.002-12-050-05
051.002-16-055-05
051.002-08-012-05
051.002-08-016-05
051.011-10-000-05
051.011-12-000-05
051.011-16-000-05
051.011-20-000-05
P-000-000-490
051.046-10-035-05
051.013-06-000-05
051.013-08-000-05
051.013-10-000-05
051.013-12-000-05
051.013-16-000-05
P-000-000-489
ELECTRIC MOTOR 11KW 1500RPM SIZE160 B35
054.530-058
SHIM 30x42x0,3
SHIM 30x42x0,5
SHIM 30x42x1,0
P-000-000-522
P-000-000-521
P-000-000-520
CE/CP-AGF (0908) EN-01
23
29
41
1
27
10
24
35
41
27
34
3
CE/CP-AGF (0908) EN-01
2
44
17
26
2
11
OLIE NIVEAU
9
24
18
42
5
19
23
21
22
40
32
39
6
31
20
30
42
12
24
13
14
38
25
28
4
7
8
16
15
7
8
7.2.1.
6
33
7.2.
33
43
User manual Pomac CP-AGF pumps
CP AGF 750 DVMF
Sectional drawing
User manual Pomac CP-AGF pumps
7.2.2.
POS
1
2
3
4
5
6
7
8
9
10
11
12
13
14
15
16
17
18
19
20
21
22
23
24
25
26
27
28
29
30
31
32
33
34
35
38
39
40
41
42
Parts list
QTY
1
1
1
1
1
1
2
2
1
1
2
1
2
1
1
1
4
2
2
2
2
1
1
1
4
8
12
2
6
2
12
24
12
8
1
12
20
24
24
1
DESIGNATION
MOTOR SHROUD CP750
REAR FLANGE
INTERMEDIATE PIECE SIZE 225 CP750
VENT PLUG SFV.1/2-10 MB
O-RING ø25,2x3
SLEEVE ø90
INNER HEX PLUG G-1/2''
SEALING RING 1/2''
IMPELLER EXTRACTOR CP750 AGF
BASEMENT CP750
O-RING ø183,74x3,53
O-RING ø115x2
LOWER INSPECTION COVER
SEAL COMPARTMENT COVER
SEAL SEAT DY520
OIL SIGHT GLASS G1/2''
MACHINE ADJUSTABLE FOOT TYPE H M20x70
HEX PLUG G11/4''
MODIFIED BOLT DIN912 M20x110
UPPER INSPECTION COVER
O-RING ø404x4
FRONT FLANGE CP750
PUMP CASING CP750
IMPELLER ø400-140 CP750
HEX.SCREW ISO 4014 M8x160
HEX. HEAD SCREW ISO 4017 M10x35
HEX. HEAD SCREW ISO 4017 M16x60
HEX. HEAD SCREW ISO 4017 M8x25
HEX. HEAD SCREW ISO 4017 M8x12
O-RING ø120x2
HEX.NUT ISO 4032 M10
HEX.NUT ISO 4032 M12
HEX.NUT ISO 4032 M16
HEX.NUT ISO 4032 M20
OIL SEAL DIN 3760-B90x110x12-NBR
WASHER ISO 7089-8
WASHER ISO 7089-10
WASHER ISO 7089-12
WASHER ISO 7089-16
MECHANICAL SEAL WITH BELLOWS DY520-95NP
MAT.
EPDM
RVS 304
PVC
EPDM
RVS
RVS 316
EPDM
A2-70
A2
A2-70
A2-70
A2
EPDM
A2
A2
A2
A2
NBR
A2
A2
A2
A2
PART. NR.
ALG.008-003-010
ALG.008-003-005
ALG.008-003-012
054.211-011
051.741-000097
P-000-000-342
P-000-000-331
P-000-000-482
ALG.008-003-008
ALG.008-003-009
051.741-000096
P-000-000-343
ALG.008-003-015
ALG.008-003-007
ALG.008-003-006
054.210-012
P-000-000-299
P-000-000-348
ALG.008-003-011
ALG.008-003-016
051.741-000087
ALG.008-003-018
ALG.008-003-014
ALG.008-003-017
051.001-08-160-05
051.002-10-035-05
051.002-16-060-05
051.002-08-025-05
051.002-08-012-05
P-000-000-344
051.011-10-000-05
051.011-12-000-05
051.011-16-000-05
051.011-20-000-05
051.763-040
051.013-08-000-05
051.013-10-000-05
051.013-12-000-05
051.013-16-000-05
052.001-100-017
43
ELECTRIC MOTOR 22KW 750RPM SIZE.225 B35
054.530-115
44
SHIM 45x55x0,3
SHIM 45x55x0,5
SHIM 45x55x1,0
P-000-000-519
P-000-000-518
P-000-000-337
CE/CP-AGF (0908) EN-01
25
User manual Pomac CP-AGF pumps
8. Performance curves
800
750
650
580
500
320
280
240
200
800
750
160
650
120
580
80
500
800
750
40
650
580
500
0
320
26
CE/CP-AGF (0908) EN-01
320
User manual Pomac CP-AGF pumps
9. Trouble shooting
A malfunction in a pump system may have various causes. The
malfunction is not always necessarily in the pump itself, but can
also be caused by a malfunction in the piping system, or in
another appendage in the system. If the operating conditions
differ too greatly from the specifications by which the pump was
purchased this can also cause malfunctioning.
Therefore always check first:
Has the pump been installed correctly?
Are the operating conditions still according to the initial
specifications?
Are the other appendages in the pipe system functioning
correctly?
In general terms, the following malfunctions in a pump can be
distinguished:
1.
2.
3.
4.
5.
6.
7.
8.
9.
pump gives no or little liquid
pump does not reach duty point
pump gives irregular liquid flow
pump leaks
pump vibrates excessively
pump makes too much noise
motor overheats
pump cuts out thermally
pomp has seized
The table on the next page gives a possible cause and solution
for the malfunctions mentioned above:
CE/CP-AGF (0908) EN-01
27
User manual Pomac CP-AGF pumps
When establishing the cause of a malfunction of the pump
ensure that the power supply to the pump is disconnected
and can not be switched on unintentionally!
Malfunction
1
2
3
4
5
♦
6
7
♦
♦
8
♦
♦
wrong rotation direction
Have qualified electrician
reverse the sense of
rotation of the electric motor
Increase the pre-pressure
or place the pump on a
lower position
pump operating at the wrong Check the motor speed
speed
♦
contaminations or objects in
the pump
Clean the pump, if
necessary disassemble
air in the piping
Inspect the piping
♦
valve in suction pipe is not
completely open
Entirely open the valve in
the suction pipe
♦
pump selected with too
small delivery head
Install another pump
suction pipe or filter blocked
Clean the suction pipe or
the filter
shaft seal defective
Disassemble the pump and
replace the shaft seal
liquid temperature is too
high
Decrease the liquid
temperature
defective O-ring
Disassemble the pump and
replace the O-ring
♦
♦
♦
♦
♦
♦
♦
♦
♦
♦
28
Have qualified electrician
check the electric
connections
insufficient pre-pressure
♦
♦
♦
electrical connection
defective
pump is not completely filled Top up the pump entirely
with liquid
with liquid
♦
♦
Action
9
♦
♦
Cause
♦
♦
impeller is jammed
Inspect the impeller through
the inspection ports
♦
♦
impeller is damaged
Disassemble the pump and
replace the impeller
♦
♦
♦
♦
♦
♦
♦
motor shaft is bent
Replace the motor
♦
♦
♦
♦
♦
bearings are damaged or
worn
Replace the motor
♦
♦
motor is overloaded
Check the viscosity of the
liquid.
Switch off the motor and
check if the impeller does
not drag. If so, disassemble
the pump and adjust the
shim thickness
CE/CP-AGF (0908) EN-01
User manual Pomac CP-AGF pumps
Index
Address data, 9
CIP, 12
Cavitation, 15
Centrifugal pump, 12
Changed application, 11
Connection sizes, 8
Connections, 17, 28
Connections, 12
Construction, 8, 12
Contaminations, 28
Drive, 1, 12
Electric motor, 13, 15, 28
Electric motor poles, 8
EN 12756 (DIN 24960), 12
General information, 7, 10
Guard, 14
Injury, 7, 10
Introduction, 7
Lifting eyes, 8
Maintenance
Daily, 3, 4, 7, 10, 11, 15
Periodic, 15
Major force, 7
Malfunction, 16, 27
Manufacturer, 9
Mechanical seal, 12
Non-return valve, 13
Note, 10
Occupational health and safety, 4, 11
Onderdelen, 8
Order form, 9
Ordering spare parts, 9
Original pomac parts, 7
Overhaul, 4, 10, 11
Overhaul, 17
Pad lock, 16, 17
Parts lists, 9, 17, 22
Performance curves, 26
Personal protection, 16
Personnel, 10
Training, 10
Piping, 4, 5, 17, 27, 28
Pomp, 17
Precautions, 11
Pre-pressure, 12, 28
Pump, 3, 4, 5, 7, 8, 9, 10, 11, 12, 13, 14, 15,
16, 17, 18, 28
Dismantling, 18
Qualified electrician, 4, 13, 14, 28
Repair, 17
Rotation direction, 14, 28
Rotorcase, 4
Safety, 10
Seal compartment
Assembling, 20
Sectional drawing, 9
Sectional drawings, 22
Serial number, 9
Shaft seal, 5
Shut-off-valve, 15
Speed, 28
Staff, 10
Stainless steel shroud, 8, 12
Standards, 4, 11
Transport, 8
Transport and receipt, 8
Trouble shooting, 27
Type, 1
Type code, 8
Type number, 9
Visible leakage, 15
Warranty, 7
CE/CP-AGF (0908) EN-01
29