1
Before Starting
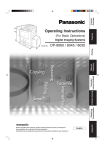
Digital Imaging System
Operating Instructions
DP-1515P
Before operating this equipment, please read these instructions completely
and keep this operating instructions for future reference.
English
Appendix
Problem Solving
Function
Model No.
Making Copies
(For Copy Function)
Before Starting
Table of Contents
Before Starting
Safety Information ........................................................................................................................... 3
Precautions ...................................................................................................................................... 6
Control Panel ................................................................................................................................... 8
Making Copies
Basic Copies
■ Copying with the Same Size Original (1:1) .................................................... 10
■ Reduction/Enlargement
Copying with Preset or Variable Zoom Ratios ................................................ 12
Creative
Features
■ Sort ................................................................................................................. 14
■ Skyshot .......................................................................................................... 16
■ Job Build and SADF ....................................................................................... 17
Other Feature
■ Energy Saver (Power Saver Mode, Sleep/Shutdown Mode) ......................... 18
Function
■
■
■
■
■
■
For Example
Using Function Modes to Change the Initial Machine Modes ........................
Procedure .......................................................................................................
General Settings ............................................................................................
General Settings (For Key Operator) .............................................................
Copier Settings ...............................................................................................
Copier Settings (For Key Operator) ...............................................................
19
19
20
20
21
21
■ Changing the Paper Size (Paper Tray) .......................................................... 22
Problem Solving
Troubleshooting ............................................................................................................................ 24
■ User Error Codes (U Code) ............................................................................ 25
■ Jam Error Codes (J Code) ............................................................................. 25
Maintenance
■ Adding Paper
● Paper Tray .................................................................................................. 26
● Sheet Bypass ............................................................................................. 27
■ Replacing Toner Bottle/Toner Waste Container ............................................. 28
■ Removing Misfed Paper (Paper Exit Area) (J46) ........................................... 30
■ Removing Misfed Paper (Paper Transport/Fusing Area)
(J01, J30, J31, J33, J45, J48, J95) ................................................................ 31
■ Removing Misfed Paper (Optional ADF: J70, J71, J79, J92, J93) ................. 32
Machine Care ................................................................................................................................. 33
Appendix
Specifications
2
■ Main Unit ........................................................................................................ 34
■ Printer Unit (Standard) ................................................................................... 35
■ ADF (Option) .................................................................................................. 35
Before Starting
Safety Information
For Your Safety
To prevent severe injury and loss of life, read this section carefully before using the Panasonic DP-1515P to ensure
proper and safe operation of your machine.
■ This section explains the Warnings and Cautions used in this Operating Instructions manual.
WARNING
Denotes a potential hazard that could result in serious injury or death.
CAUTION
Denotes hazards that could result in minor injury or damage to the machine.
■ This section also explains the graphic symbols used in this Operating Instructions manual.
These symbols are used to alert operators to a specific operating procedure that must not be
performed.
These symbols are used to alert operators to a specific operating procedure that must be
emphasized in order to operate the machine safely.
WARNING
Power and Ground Connection
Cautions
Ensure that the plug connection is free of
dust. In a damp environment, a contaminated
connector can draw a significant amount of
current that can generate heat and eventually
cause fire if left unattended over an extended
period of time.
Always use the power cord provided with your
machine. When an extension power cord is
required, always use a properly rated cord.
● 220-240 V AC / 6.5 A
If you use a cord with an unspecified current
rating, the machine or plug may emit smoke
or become hot to the touch.
Do not attempt to repair, pull, bend, chafe or
otherwise damage the power cord. Do not
place a heavy object on the cord. A damaged
cord can cause fire or electric shocks.
Never touch a power cord with wet hands.
Danger of electric shock exists.
If the power cord is damaged or insulated
wires are exposed, contact the authorized
Panasonic dealer for a replacement. Using a
damaged cord can cause fire or electric
shocks.
When disconnecting the machine, grasp the
plug instead of the cord. Pulling on a cord
forcibly can damage it and cause fire or
electric shock.
Stop operation immediately if your machine
emits smoke, excessive heat, unusual noise,
or abnormal smell, or if water is spilt onto the
machine. These conditions can cause fire.
Immediately switch Off and unplug the
machine, and contact the authorized
Panasonic dealer.
Do not disconnect or reconnect the machine
while the power switch is in the On position.
Disconnecting a live connector can cause
arcing, consequently deforming the plug and
cause fire.
When the machine is not used over an
extended period of time, switch it Off and
unplug it. If an unused machine is left
connected to a power source for a long
period, degraded insulation can cause electric
shocks, current leakage or fire.
Be sure to switch Off and unplug the machine
before accessing the interior of the machine
for cleaning, maintenance or fault clearance.
Access to a live machine’s interior can cause
electric shock.
Once a month, unplug the machine and check
the power cord for the following. If you notice
any unusual condition, contact the authorized
Panasonic dealer.
● The power cord is plugged firmly into the
receptacle.
● The plug is not excessively heated, rusted,
or bent.
● The plug and receptacle are free of dust.
● The cord is not cracked or frayed.
3
Before Starting
Safety Information
Do not touch areas where these caution labels
are attached to, the surface may be very hot
and may cause severe burns.
Never open or remove machine covers that
are secured with screws unless specifically
instructed in the “Operating Instructions”. A
high-voltage component can cause electric
shocks.
Do not place any liquid container such as a
vase or coffee cup on the machine. Spilt
water can cause fire or shock hazard.
Do not try to alter the machine configuration
or modify any parts. An unauthorized
modification can cause smoke or fire.
Operating Safeguards
Do not place any metal parts such as staples
or clips on the machine. If metal and
flammable parts get into the machine, they
can short-circuit internal components, and
cause fire or electric shocks.
If debris (metal or liquid) gets into the
machine, switch Off and unplug the machine
immediately. Contact the authorized
Panasonic dealer. Operating a debriscontaminated machine can cause fire or
electric shock.
Consumable Safeguards
Never dispose of toner, toner cartridge or a
toner waste container into an open flame.
Toner remaining in the cartridge can cause an
explosion, burns and/or injuries.
CAUTION
Installation and Relocation
Cautions
Do not place the machine near heaters or
volatile, flammable, or combustible materials
such as curtains that may catch fire.
Do not place the machine in a hot, humid,
dusty or poorly ventilated environment.
Prolonged exposure to these adverse
conditions can cause fire or electric shocks.
Place the machine on a level and sturdy
surface that can withstand a weight of
the machine. (The machine weight without
optional unit : 43.6 kg) If tilted, the machine
may tip-over and cause injuries.
When relocating the machine, contact the
authorized Panasonic dealer.
When moving the machine, be sure to unplug
the power cord from the outlet. If the machine
is moved with the power cord attached, it can
cause damage to the cord which could result
in fire or electric shock.
Operating Safeguards
Do not place a magnet near the safety switch
of the machine. A magnet can activate the
machine accidentally, resulting in injuries.
Do not use a highly flammable spray or
solvent near the machine. It can cause fire.
When copying a thick document, do not use
excessive force to press it against the platen
glass. The glass may break and cause injuries.
4
This symbol is used to alert operators to a
heated surface that may cause burns and
requires close attention.
Never touch a labelled area. You can get
burnt. If a sheet of paper is wrapped around
the heat roller, do not try to remove it yourself
to avoid injuries or burns. Switch Off the
machine immediately, and contact the
authorized Panasonic dealer.
Do not use conductive paper, ex: folding
paper, carbon paper and coated paper. When
a misfed paper occurs, they can cause a short
circuit and fire.
Do not place any heavy object on the
machine. An off-balance machine can tip-over
or the heavy object can fall, causing damage
and/or injuries.
Keep the room ventilated when using the
machine for an extended period of time to
minimize the ozone density in the air.
When copying with the ADF open, do not look
directly at the exposure lamp. Direct eye
exposure can cause eye fatigue or eye injury.
When removing misfed paper, make sure that
no pieces of torn paper are left in the
machine. A piece of paper remaining in the
machine can cause fire. If a sheet of paper is
wrapped around the heat roller or when
clearing a misfed paper that is difficult or
impossible to see, do not try to remove it by
yourself. Doing so can cause injuries or
burns. Switch Off the machine immediately,
and contact the authorized Panasonic dealer.
Be sure to use the specified type of batteries
only.
Ensure that batteries are installed with correct
polarity. Incorrectly installed batteries can
burst or leak, resulting in spillage or injuries.
Others
■ The machine has a built-in circuit for protection against
lightning-induced surge current. If lightning strikes in your
neighborhood, switch Off the machine. Disconnect the
power cord from the machine and reconnect only when
the lightning has stopped.
Before Starting
Consumable Safeguards
Others
■ If you notice flickering or distorted images or noises on
your audio-visual units, your machine may be causing
radio interference. Switch it Off and if the interference
disappears, the machine is the cause of the radio
interference. Perform the following procedure until the
interference is corrected.
● Move the machine and the TV and/or radio away from
each other.
● Reposition or reorient the machine and the TV and/or
radio.
● Unplug the machine, TV and/or radio, and replug them
into outlets operating on different circuits.
● Reorient the TV and/or radio antennas and cables
until the interference stops. For an outdoor antenna,
ask your local electrician for support.
● Use a coaxial cable antenna.
5
Before Starting
Precautions
■ Laser Safety
LASER SAFETY
This unit employs a laser. Only qualified service personnel should attempt to
service this device due to possible eye injury.
CAUTION:
USE OF CONTROLS, ADJUSTMENTS OR PERFORMANCE
PROCEDURES OTHER THAN THOSE SPECIFIED HEREIN MAY RESULT
IN HAZARDOUS RADIATION EXPOSURE.
■ Caution Label
Manufacturer’s Name and Address
Factory ID
(Rear Cover of the Machine)
6
Illegal Copies
■ The maximum power consumption is 1.3 kW.
A properly wired (grounded), dedicated, 6.5 A, 220240 V AC outlet is required. Do not use an extension
cord. The power cord on this machine must be used to
disconnect the main power.
Please ensure that the machine is installed near a wall
outlet and is easily accessible.
It is unlawful to make copies of certain documents.
Caution Note: Unplug the power cord from the wall outlet
before removing covers.
■ The machine should not be installed in areas with the
following conditions:
● Extremely high or low temperature and humidity.
Ambient conditions Temperature: 10-30 °C
Relative humidity: 30-80 %
● In areas with chemical fume concentration.
● With unstable or uneven conditions (floors, etc.).
● Direct exposure to sunlight.
● In areas of high dust concentration.
● Directly in the air conditioning flow.
● In areas of poor ventilation.
● In areas with extreme vibration.
Supplies
■ Store the toner and paper in a cool area with low
humidity.
■ Use of other than genuine Panasonic supplies can
damage the printer. This may void the warranty of the
printer and supplies. Be sure to use only genuine
Panasonic Toner designed for the machine.
■ Dispose of Toner Cartridge and OPC Drum Unit(s)
according to your local regulations.
Before Starting
Installation
Copying certain documents may be illegal in your country.
Penalties of fines and/or imprisonment may be imposed
on those found guilty. The following are examples of items
that may be illegal to copy in your country.
●
●
●
●
●
Currency
Bank notes and checks
Bank and government bonds and securities
Passports and identification cards
Copyright material or trademarks without the consent of
the owner
● Postage stamps and other negotiable instruments
This list is not inclusive and no liability is assumed
for either its completeness or accuracy.
In case of doubt, contact your legal counsel.
Notice:
Install your machine near a supervised area to prevent
illegal copies from being made.
Handling
■ Dept. (Department) Code
When the Department Counter function is set up, the
Dept. (Department) Code input screen is displayed on
the LCD. A registered Department Code (1 to 8 digits) is
required to gain access to each secured function, or the
secured Copy function cannot be used. Please consult
with the Key Operator regarding the Department Code(s)
for the desired function.
How to enter the Dept. Code :
1 Input a registered department code (1 to 8 digits).
2 Press the START key.
■ Maximum Copies Limitation
After setting the maximum allowed number of copies
for each department, consult with your Key Operator
when the total copy count reaches the designated limit
and the message appears on the LCD.
7
Before Starting
Control Panel
1 2
3
LCD Display
11
No.
Contents
1
Original Mode Select Key
Selects original mode.
(See pages 10)
2
CONTRAST Key
To adjust scanning contrast.
(See page 10)
3
4
5
8
Icon
No.
Icon
10
9
Contents
6
STOP Key
Stops the copy run, clears
copy settings, exits function
setting mode or resets all
features to the initial power-on
state.
Energy Saver Key
Saves power while the
machine is not in use.
(See page 18)
7
START Key
Starts the copy job or sets the
parameter(s) of Function
settings.
Keypad
Sets copy quantities, inputs
the parameter(s) of Function
settings or zoom ratio.
8
PAPER TRAY Key
Selects the paper tray.
9
COPY SIZE Key
To select a copy size.
10
ORIGINAL SIZE Key
To select an original size.
11
SORT Key
Selects Electric Sort mode.
(See pages 14-15)
FUNCTION Key
Use when changing the paper
size, initial function values
(default values) and key
operator settings.
5
Before Starting
4
6
Warning Indications
8
7
LCD Display
a
b
c
d
A4 ->A4
[A4
]
ZOOM:100% COPIES:001
e
f
a
b
c
d
e
f
Original Size
g
h
i
j
k
Add Paper (See pages 26-27)
Copy Size
Rotating Paper Size
Paper Size in Paper Tray
Zoom Ratio
Number of Copies
Warning Indications
g
h
i
j
Replace Toner Bottle (See pages 28-29)
Removing misfed paper (See pages 30-32)
Call Service
Jam position (ADF/Main Unit/PaperTray area)
k
9
Making Copies
Basic Copies
■ Copying with the Same Size Original (1:1)
1
3
Place the Original(s).
Select Original Mode with the
Original Mode Select key.
A
B
C
Face Up
Original Guides
Tray
Adjust to the
original’s width
(Max. 50
A4 size originals)
Original Mode
Select key
TEXT/PHOTO
● Hold the Guide by the center when
adjusting the width.
A3
B4
A4
A4-R
A5-R
A5
Face Down
2
TEXT
TEXT/PHOTO : Text and Photo combined
PHOTO
: Mainly Photo
TEXT
: Mainly Text
Original Guides
● If the original is
not positioned
properly a
portion of the
original may
not be copied.
PHOTO
4
Adjust scanning contrast.
● For originals
smaller than
A5 size,
position the
original within
the A5 area
and select A5.
Select Original Size with the
ORIGINAL SIZE key.
(From Platen only)
Press the CONTRAST
key
CONTRAST
–[
]+
Adjust the contrast with the CONTRAST key.
CONTRAST
–[
]+
ORIGINAL SIZE key
A3
10
B4
A4
A4
A5
(A4-R)
A5
(A5-R)
Making Copies
5
Enter the Number of Copies.
Keypad (Max. 999)
● When changing the number of copies,
re-enter it (3 digits) with the Keypad.
Ex: Changing from 2 to 5 copies.
Enter "005" with the Keypad.
6
Press Start key.
START key
● When canceling the copy job, press the
STOP key, then press the
key.
11
Making Copies
Basic Copies
■ Reduction/Enlargement
Copying with the Preset or Variable Zoom Ratios
1
2
Place the Original(s).
For Variable Zoom Ratio:
(See page 10)
Select Original Size with the
ORIGINAL SIZE key.
(From Platen only)
Adjust the Zoom Ratio (50 to 200 %) with
or
key of the keypad.
: To Reduce in 1 % (Down to 50 %)
: To Enlarge in 1 % (Up to 200 %)
A4 ->A4 [A4
]
ZOOM:100% COPIES:001
ORIGINAL SIZE key
A3
3
B4
A4
A4
A5
(A4-R)
A5
(A5-R)
● When changing the paper size, do not use
the COPY SIZE key. Use the PAPER TRAY
key.
Select Copy Size with the COPY
SIZE key.
For Preset Ratio:
PAPER TRAY key
COPY SIZE key
A3
B4
A4
A4
A5
(A4-R)
A5
(A5-R)
● Paper Tray will be selected according to
the copy size.
● When the suitable paper is not in the
paper tray, use the sheet bypass.
(See page 27)
12
4
Select Original Mode or adjust
scanning contrast if necessary.
(See page 10)
NOTE
Making Copies
5
Enter the Number of Copies.
● When copying with the Sort Mode from the Platen
Glass, place the next original and follow the
instructions described on the LCD display.
(See pages 14-15)
● After finishing copying, press the Stop key to return
to the initial screen of the current active mode.
Keypad (Max. 999)
● When changing the number of copies,
re-enter it (3 digits) with the Keypad.
Ex: Changing from 2 to 5 copies.
Enter "005" with the Keypad.
6
Press Start key.
START key
● When canceling the copy job, press the
STOP key, then press the
key.
13
Making Copies
Creative Features
■ Sort
Sort:
Multiple copy sets are sorted automatically.
1
2
Rotated Sort:
When loading both A4 and A4-R sized paper are stacked in
alternate direction (rotation of 90 degrees). (See page 20)
Place the Original(s).
(See page 10)
Select Original Size with the
ORIGINAL SIZE key.
(From Platen only)
4
5
Select the required settings.
(See page 10)
Enter the Number of Copies.
Keypad (Max. 999)
ORIGINAL SIZE key
A3
3
B4
A4
A4
A5
(A4-R)
● When changing the number of copies,
re-enter it (3 digits) with the Keypad.
Ex: Changing from 2 to 5 copies.
Enter "005" with the Keypad.
A5
(A5-R)
Select the Sort mode with the
SORT key.
6
Press Start key.
START key
SORT Indicator
Lights: Sort Mode
Off : Non Sort Mode
SORT key
● When copying from the ADF, Sort mode is
selected by standard setting.
● Rotate-Sort mode is only available when
copy size is A4 only and stacked both A4
and A4-R sized paper is stocked into the
paper trays/sheet bypass .
14
● When canceling the copy job, press the
STOP key, then press the
key.
From Platen Glass only:
Select "1:YES" or "2:NO".
Making Copies
7
NOTE
● After finishing copying, press the Stop key to return
to the initial screen of the current active mode.
ANOTHER ORIGINAL?
1:YES 2:NO
1: YES
2: NO
Go to step 8.
Starts making copies.
8
Place the next Original.
9
Press Start key.
(See page 10)
START key
10
Select "1:YES" or "2:NO".
ANOTHER ORIGINAL?
1:YES 2:NO
1: YES
2: NO
If copying another original,
repeat steps 8 and 9.
Starts making copies.
15
Making Copies
Creative Features
■ Skyshot
Digital Skyshot allows the copying of a manuscript without
generating dark borders even if the ADF or Platen Cover is open.
1
Opening the Platen Cover or ADF
and Place Original on the Platen
Glass.
3
Enter the Number of Copies.
Original Guides
A3
B4
A4
● If the original is
not positioned
properly a
portion of the
original may
not be copied.
A4-R
A5-R
A5
Face Down
● For originals
smaller than
A5 size,
position the
original within
the A5 area
and select A5.
● An incorrect detection of the original may
occur when a strong light shines onto the
glass during digital skyshot mode.
● Incorrect exposure may occur when there
is a black line at the edge of the original or
an image which the machine interprets as
a black pattern in the digital skyshot mode.
2
Keypad (Max. 999)
● When changing the number of copies,
re-enter it (3 digits) with the Keypad.
Ex: Changing from 2 to 5 copies.
Enter "005" with the Keypad.
4
Press Start key.
Select Original Size with the
ORIGINAL SIZE key.
START key
● When canceling the copy job, press the
STOP key, then press the
key.
● When copying with the Sort Mode, place
the next original and follow the
instructions described on the LCD
display. (See pages 14-15)
NOTE
ORIGINAL SIZE key
A3
B4
A4
A4
A5
(A4-R)
A5
(A5-R)
● The Digital Skyshot has 2 modes (NORMAL and
QUALITY). The default setting of Digital Skyshot
Mode is "NORMAL". "QUALITY" can be selectable,
refer to the Copier Settings in the Function Mode.
(See page 21)
NORMAL
Default setting (usually select this mode).
QUALITY
For better definition, select the Quality mode.
16
■ Job Build and SADF
1
Place the Original(s).
For SADF
: First one Original
Minimum 55 g/m2
For Job Build : First Originals
Maximum 50 sheets (80 g/m2)
● The default setting of Job Build and SADF is "OFF".
When using this mode, change the default setting to
"ON" in the Copier Settings. (See page 21)
4
Press Start key.
Making Copies
Special originals (like thin paper, etc.) can be fed from
the ADF Tray and copied continuously using the Job
Build and SADF Mode.
A
B
C
Face Up
START key
● When canceling the copy job, press the
STOP key, then press the
key.
Original Guides
Tray
Adjust to the
original’s width
(Max. 50
A4 size originals)
● Hold the Guide by the center when
adjusting the width.
2
3
Select the required settings.
(See page 10)
5
Place the next original(s) within
5 sec. of last ejected copy.
For SADF
Enter the Number of Copies.
: First one Original
Minimum 55 g/m2
For Job Build : First Originals
Maximum 50 sheets (80 g/m2)
Keypad (Max. 999)
● When changing the number of copies,
re-enter it (3 digits) with the Keypad.
Ex: Changing from 2 to 5 copies.
Enter "005" with the Keypad.
17
Making Copies
Other Feature
■ Energy Saver (Power Saver Mode, Sleep/Shutdown Mode)
These modes save power while the machine is not in use.
Power Saver Mode
Sleep/Shutdown Mode
To enter
To enter
Automatically enters the Sleep/Shutdown Mode
after 10 minutes* from the last job.
* To adjust the default Sleep/Shutdown Mode
timer. (See page 20)
Press the Energy Saver key.
or
Automatically enters the Power Saver Mode
after 10 minutes* from the last job.
* To adjust the default Sleep/Shutdown
Mode timer. (See page 20)
Lights:
Sleep/Shutdown Mode
To exit
Flashes:
Power Saver Mode
Press the Energy Saver key.
To exit
● The default setting of Sleep/Shutdown Mode is
"Sleep".
The Sleep or Shutdown Mode can be selected in
the General Settings. (See page 20)
Press the Energy Saver or Any key.
Modes
18
Power Consumption
Warm Up Time
Unavailable Functions
Standby
Approx. 120 W
—
————————
Power Saver
Approx. 19.5 W
Approx. 30 sec.
————————
Sleep
Approx. 9.5 W
Approx. 30 sec.
Shutdown
Approx. 1.6 W
Approx. 30 sec.
————————
• Printer Function
Function
■ Using Function Modes to Change the Initial Machine Modes
General
Settings
General Settings:
Changing the Initial Machine Modes.
Copier
Settings
Making Copies
Copier Settings:
Changing the Initial Copy Modes.
Input Key Operator Password (3-digit)
General
Settings for
Key Operator
Copier
Settings for
Key Operator
■ Procedure
3
FUNCTION key
2
Select a mode with
/
key or
the
Keypad.
Select a desired setting.
General
Settings
Copy
Settings
Press the
START key.
Select a setting with
the Keypad.
4
Select a function.
Set the desired Function
Parameter(s).
Function
1
Press the FUNCTION key.
Press the STOP key to Exit this
Function Mode.
Press the
START key.
STOP key
19
Function
■ General Settings
● When inputting above General Settings mode No., no need to input the first "0", input only the second number of
the two digit display.
No.
Modes
Function
Initial Setting
01
SORT MEMORY USAGE
Selects whether to display the amount of sort
memory used on the control panel.
1:OFF / 2:DISPLAY
1: OFF
02
DEPT. COUNTER
Displays the Total Copy usage and copy limit of Consult your authorized
the selected department.
service provider
03
SORT-ROTATE
Selects the rotate-sort mode.
1:OFF / 2:ON (Available for A4 size paper only)
07
MANUAL ADD TONER
Adds toner manually.
PRESS START
09
KEY OPERATOR MODE
Inputs the key operator password.
ENTER PASSWORD =
1:OFF
The following Parameter Settings require the input of the Key Operator Password:
■ General Settings (For Key Operator)
No.
20
Modes
Function
Initial Setting
00
GENERAL LIST
Prints the general settings list, and meter count
readings.
PRESS START
01
PAPER SIZE
Selects the Paper Tray and sets the Paper Size.
(See page 22)
→ B5 → B5
→ A5 →
A4 → A4
→ FLS1
→ FLS2
→
A5
→ LEGAL
→ LETTER →
LEDGER
LETTER
→ INVOICE
→ A3
→ B4
→
03
AUTO RESET TIME
Selects the Control Panel reset time.
3:1 min.
1:OFF / 2:30 sec / 3:1 min. / 4:2 min. / 5:3 min. /
6:4 min.
04
ENERGY SAVER MODE
Sets the Energy Saver mode and time.
1:INVALID / 2:POWER SAVER / 3:SLEEP /
4:SHUTDOWN
Power Saver mode timer: 1-240 min.
Sleep/Shutdown mode timer: 1-240 min.
06
LANGUAGE DEFAULT
Selects the default message language for the display.
1:FRENCH 2:GERMAN 3:ITALIAN 4:DUTCH
5:PORTUGUESE 6:SPANISH 7:ENGLISH
8:GREEK
09
KEY/TOUCH BEEP
Selects the default key sound level.
1:OFF / 2:SOFT / 3:LOUD
10
BYPASS SET BEEP
Selects whether to sound a Beep when paper is 1:INVALID
set on the Sheet Bypass.
1:INVALID / 2:VALID
11
ORIG.SET BEEP ADF
Selects whether to sound a Beep when paper is 2:VALID
placed on the ADF.
1:INVALID / 2:VALID
12
PAPER OUT ROTATE
Machine will automatically rotate the image to
1:OFF
accommodate the orientation of the paper in another
Tray and print when the selected Tray is empty.
1:OFF / 2:ON
13
DEPT. COUNTER MODE
Monitors the copy usage of each department.
1:TOTAL COUNTER
2:DEPT. COUNTER
3:DEPT. COUNTER LIST
3:SLEEP
10 min.
2:SOFT
Consult your
authorized
service provider
■ Copier Settings
No.
Modes
Initial
Setting
Function
07
DIGITAL SKYSHOT
Selects the default digital skyshot mode.
1:OFF / 2:NORMAL / 3:QUALITY
2:NORMAL
09
AUTO EXPOSURE
Selects whether the auto exposure is enabled.
1:INVALID / 2:VALID
2:VALID
10
SORT PRIORITY ADF
Selects the sort priority when using the ADF.
1:NON-SORT / 2:SORT
2:SORT
11
SORT PRIOR. GLASS
Selects the sort priority when using the Platen.
1:NON-SORT / 2:SORT
1:NON-SORT
19
KEY OPERATOR MODE
Inputs the key operator password.
ENTER PASSWORD =
The following Parameter Settings require the input of the Key Operator Password:
■ Copier Settings (For Key Operator)
Modes
Initial
Setting
Function
00
COPY SETTING LIST
Prints the copier settings list.
PRESS START
01
ORIGINAL (HOME)
Selects the halftone default setting.
1:TEXT / 2:TEXT/PHOTO / 3:PHOTO
02
TEXT CONTRAST
Selects the default contrast setting for the Text mode. 3
1-5
03
T/P CONTRAST
Selects the default contrast setting for the Text/Photo 3
mode.
1-5
04
PHOTO CONTRAST
Selects the default contrast setting for the Photo mode.
1-5
3
05
MAX. COPY SETTING
Select the maximum number of copies allowed per job.
1-999
999
08
MEM. FULL ACTION
Selects the action to take during memory full condition. 1:PRINT
1:PRINT / 2:CANCEL
09
TONER SAVE (TEXT)
Selects the Toner Save Level to use for the Text mode. 1:NONE
1:NONE / 2:LEVEL1 / 3:LEVEL2
10
TONER SAVE (T/P)
Selects the Toner Save Level to use for the
Text/Photo mode.
1:NONE / 2:LEVEL1 / 3:LEVEL2
1:NONE
11
TONER SAVE (PHOTO)
Selects the Toner Save Level to use for the
Photo mode.
1:NONE / 2:LEVEL1 / 3:LEVEL2
1:NONE
12
SADF DEFAULT
Selects whether the Job Build and SADF Mode
is enabled.
1:OFF / 2:ON
1:OFF
Function
No.
2:TEXT/PHOTO
21
Function
For Example
■ Changing the Paper Size (Paper Tray)
The Paper Trays are designed to accommodate A5, A4, B4 and A3 Size paper.
1
Press the FUNCTION key.
6
7
2
FUNCTION MODE (1-2)
ENTER NO. OR ∨ ^
Enter "1" with keypad.
Press START key.
3
Enter "9" with keypad to select
"09 KEY OPERATOR MODE".
4
Enter key operator password
(3-digit) with key pad.
GENERAL PARAM. (0-9)
ENTER NO. OR ∨ ^
01 PAPER SIZE
1:TRAY-1[A4
]
Select a Paper Size with
key.
TRAY-1
A4
FUNCTION key
Select "1: GENERAL SETTINGS".
Press START key.
^ ∨
A4
A5
LETTER
A4
FLS1
LETTER
B5
FLS2
INVOICE
B5
LEDGER
A3
A5
LEGAL
B4
8
Press the START key.
09 KEY OPERATOR MODE
ENTER PASSWORD=_
START key
● The default key operator password is "000".
If it is changed, consult your key operator.
5
/
Enter "01" with keypad to select
"01 PAPER SIZE".
9
Press the STOP key.
KEY OPR.MODE (00-12)
ENTER NO. OR ∨ ^
STOP key
22
● It is recommended that the paper guide B is fixed in place with a screw, consult your authorized service provider for
details on how to fasten the guide.
10
Pull out the Paper Tray.
Paper Tray
Paper Tray
Adjust the Paper Guide B to the
paper width.
Function
11
13
Reinstall the Paper Tray.
Paper Guide B
12
Adjust the Paper Guide A to the
paper length.
Paper Guide A
23
Problem Solving
Troubleshooting
Check
Action
Unit Does Not Operate
Does the display light?
Check if the Power Switch (Main Power Switch
on the Right Side of the machine) is turned ON
and if the power cord is plugged into the AC
outlet.
Does the Energy Saver key flash (or light)
and the display is turned OFF?
(See page 18)
Press Energy Saver key on the control panel.
Does any of the U## codes and messages
appear on the display?
(U01, U07, U13, U14....etc.)
Perform actions in accordance with each
message.
Does the Add Paper indicator and message
appear on the display?
Add paper. (See pages 26-27)
Does the Misfed Paper indicator, message
and J## codes appear on the display?
Remove the misfed paper. (See pages 30-32)
Does E#-## codes and messages appear on
the display?
Turn the Power Switch on the Right Side of the
machine to the OFF and ON position. If the
error code does not clear, call your Service
provider.
The machine would not accept the next job
during operation, instructed job would not be
accepted for a long time period or job would
not be completed.
Turn the Power Switch on the Right Side of the
machine to the OFF and ON position.
Light Copies
24
Does the scanning contrast indicator say
" " or " " (Lighter)?
Press the "CONTRAST" key to adjust the
scanning contrast. (See page 10)
Does the Add Toner indicator and message
appear on the display?
Replace the Toner Bottle.
(See pages 28-29)
Check
Action
Marked Copies
Is the machine’s Platen Glass or Platen Sheet
dirty?
Clean the Platen Glass or Sheet.
Is the original an OHP film or a dark original?
Cover the original with a sheet of white paper
before copying or lighten the exposure setting.
Clean the Corona Wire of the Drum Unit.
(See page 28)
Check the copies.
If a dark vertical line is remained, repeat
above step to clean the Corona Wire
became dark vertical line is erased.
If a dark vertical line of
2-3 cm in width is printed.
■ If the measures outlined above do not solve the problem, call your Service provider.
■ User Error Codes (U Code)
U01
U13
U14
U15
U16
Check Points
Front and/or Left Cover is open.
Low Toner or Out of Toner.
Toner Waste Container is full.
Toner Waste Container is incorrectly installed.
Developer Unit is incorrectly installed.
Call your Service Provider.
Code
Check Points
U20
ADF Cover is open.
U21
U25
ADF is opened while scanning from ADF.
Toner hardened inside the Toner Bottle.
Remove the Toner Bottle and shake it well.
Problem Solving
Code
■ Jam Error Codes (J Code)
Code
J00
J01
J30,
J31,
J33,
J45,
J46,
J48,
J95∗
Check Points
Remove paper from the Sheet Bypass.
Open and close the Left Cover.
(See page 30)
Pull the paper tray out and remove jammed
paper from the standard paper tray (Tray-1)
(See page 31)
Remove misfed Paper.
(See page 31)
∗J95: Check the paper size of the paper tray.
(See page 22)
Code
J70,
J71,
J79,
J92,
J93,
Check Points
Remove misfed Paper.
(See page 32)
NOTE: ● The J## Code indicates the most probable Jam location. If the jam message reappears after the jam is cleared,
paper is most likely jammed at other location(s). Check the Jam Error Codes Table above for other check
points and remove all misfed paper.
25
Problem Solving
Maintenance
■ Adding Paper
● Paper Tray
1
Pull out the Paper Tray.
2
Load paper.
Paper Tray
Paper Tray
NOTE
● When changing the paper size, refer to page 22.
Max Level
Indicator
Face Up
Paper Weight: 60 - 90 g/m2
Paper Capacity: 550 Sheets (80 g/m2)
● Make sure that the paper is set properly
and that it does not exceed the Max.
Level indicator.
26
3
Reinstall the Paper Tray.
● Sheet Bypass
Copying on Special Paper, etc.
1
Open the Sheet Bypass.
4
Load paper.
(Do not exceed limit guides)
Face Down
PUSH
Sheet Bypass
Until it stops
Upper Limit Guides
Until it stops
3
Paper Weight: 55-133 g/m2
Paper Capacity: 50 sheets / 80 g/m2
To add paper to the Sheet Bypass, remove the
leftover paper from the tray, and align it with the
additional paper and load them together onto
the tray.
Problem Solving
2
Pull the Sheet Bypass.
Adjust the Width Guides.
Width Guides
● Incorrect adjustment may cause the paper
to wrinkle, misfed or skew.
27
Problem Solving
Maintenance
■ Replacing Toner Bottle/Toner Waste Container
ATTENTION
1
● For optimum copy quality use the recommended Panasonic Toner.
Do not unseal the Toner Bottle unless you are ready to use it.
4
Open the Front Cover.
Front Cover
Turn the Empty Toner Bottle to
counter clockwise, then remove
the old Toner Bottle.
Toner Bottle (Empty)
To Release
2
Remove the old Toner Waste
Container.
5
Turn the Corona Cleaner Handle.
Corona Cleaner Handle
Toner Waste Container
3
Equip the Cap to the hole of
container.
Cap
Toner Waste Container
● Do not reuse the toner from the Toner
Waste Container.
28
6
Slide the Corona Cleaner in and
out 3 or 4 times slowly, then return
the Corona Cleaner Handle to
original position.
9
Turn the New Toner Bottle to
clockwise.
Toner Bottle (New)
Corona Cleaner
To Lock
7
Shake the New Toner Bottle well.
10
Install the New Toner Waste
Container, then close the Front
Cover.
Problem Solving
Toner Bottle (New)
● Do not reuse the toner from the Toner
Waste Container.
8
Install the New Toner Bottle.
Toner Waste
Container (New)
Toner Bottle (New)
29
Problem Solving
■ Removing Misfed Paper (Paper Exit Area) (J46)
ATTENTION
1
● Do not scratch or touch the surface of the OPC Drum (Green) with bare hands. The OPC Drum is
sensitive to light.
To prevent optical exposure problems, do not expose the OPC Drum to direct sunlight or bright light.
Open the Left Cover.
4
Close the Left Cover.
Left Cover
Left Cover
2
Turn the Jam Removal Knob.
Jam Removal
Knob
3
Remove misfed paper.
Misfed Paper
NOTE
● Make sure that the Jam Error Code and Misfed
Indicator disappears after removing the misfed paper.
● The Jam Error Code and Misfed Indicator will not
disappear if the paper is still jammed in the machine.
Check again and remove all misfed paper.
30
■ Removing Misfed Paper (Paper Transport/Fusing Area) (J01, J30, J31, J33, J45, J48, J95)
ATTENTION
1
● Do not scratch or touch the surface of the OPC Drum (Green) with bare hands. The OPC Drum is
sensitive to light.
To prevent optical exposure problems, do not expose the OPC Drum to direct sunlight or bright light.
Pull out the Paper Tray.
Paper Tray
4
Remove misfed paper.
Heat Roller Cover
Jam Removal Knob
2
Open the Left Cover.
5
Remove misfed paper.
Pull out
Left Cover
3
Remove misfed paper.
Problem Solving
Misfed Paper
6
Remove misfed paper.
Misfed Paper
Misfed Paper
7
Reinstall the Paper Tray, then
close the Left Cover.
31
Problem Solving
■ Removing Misfed Paper (Optional ADF: J70, J71, J79, J92, J93)
1
Open the ADF Cover.
4
Close the ADF Cover.
ADF Cover
2
ADF Cover
Remove misfed paper.
Misfed Paper
3
Remove misfed paper.
ADF
NOTE
Misfed Paper
Open the ADF.
Remove misfed paper.
Close the ADF.
32
● Make sure that the Jam Error Code and Misfed
Indicator disappears after removing the misfed paper.
● The Jam Error Code and Misfed Indicator will not
disappear if the paper is still jammed in the machine.
Check again and remove all misfed paper.
Machine Care
■ As a rule, clean weekly.
■ Adjusting the Double Feed Switch
(For DA-AS181) When original(s) do not
feed correctly, adjust the position of the
Double Feed Switch as follows:
Platen Sheet
Platen
(Glass)
Double Feed Switch
Platen Glass/Platen Sheet
Wipe marks off with a cloth and a neutral detergent.
Wipe again with a dry cloth.
Position of
Switch
Normal Operation
Original does not feed.
Problem Solving
Several originals are fed
at one time
33
Appendix
Specifications
■ Main Unit
34
Type:
Desktop
Platen Type:
Fixed
Acceptable Originals:
Sheets, Books (Max. A3)
Copying Method:
Laser Indirect Electro Static
Fusing Method:
Heating Roller & Pressure Roller
Imaging Method:
Dry Dual Components
Resolution:
600 dpi
Copy Size:
Paper Trays
Sheet Bypass
Void Area:
Less than 5.0 mm
Warm Up Time:
(20 °C)
Less than 30 sec
First Copy Time:
(A4 from 1st Tray)
Less than 7.0 sec
Multi-Copy Speed:
(A4 from Paper Tray)
15 cpm
Enlargement Ratios:
Preset 115 %, 122 %, 141 %, 173 %, 200 %
Variable: From 101 % to 200 % in 1 % increments
Reduction Ratios:
Preset 87 %, 82 %, 71 %, 58 %, 50 %
Variable: From 99 % to 50 % in 1 % decrements
Paper Feed:
Standard Paper Tray (550 sheets x 1) + Sheet Bypass (50 sheets)
Paper Weight:
Paper Tray
Sheet Bypass
Quantity Selector:
Max. 999 sheets
Inner Tray Output Capacity:
250 sheets (A4)
Electrical Consumption:
220 V - 240 V, 6.5 A, 50 Hz
Power Consumption:
1.3 kW
Dimensions (W) (D) (H):
Platen Glass
: 558 mm x 557 mm x 460 mm
Incl. ADF, Sheet Bypass : 844 mm x 624 mm x 623 mm
Unit Weight:
43.6 kg
Operating Environment:
Temperature: 10 - 30 °C
[Humidity should be 70 % or less at 30 °C]
Relative Humidity: 30 - 80 %
[Temperature should be 27 °C or less at 80 % RH]
: A3, B4, A4, A4R, A5, A5R, FLS
: A3, B4, A4, A4R, A5, FLS
: 60 - 90 g/m2
: 55 - 133 g/m2
■ Printer Unit (Standard)
Printing Speed:
15 sheets/minute
Resolution (dots per inch):
600 x 600, 300 x 300
Interface:
USB1.1
Applicable OS:
Windows 98, Windows Me, Windows 2000, Windows XP
■ ADF (Option)
Tray Capacity:
A4, A5
: 50 sheets (80 g/m2)
A3, B4, FLS : 30 sheets (80 g/m2)
Original Size:
A5/A4/B4/A3/FLS
Paper Weight:
50 - 110 g/m2
Electrical Requirements:
Supplied from the machine
Appendix
Specifications are subject to change without notice.
35
For Service, Call:
For Customer Support:
Panasonic Communications Co., Ltd.
Fukuoka, Japan
http://www.panasonic.co.jp/global/
Ko0605-3125
PJQMC0473ZD
December 2005
Printed in Philippines
English