1
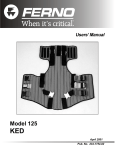
N.A.R. Extrication Vest
N.A.R. Extrication Vest
USER MANUAL
Page 19
N.A.R. Extrication Vest
1. Head piece is one slat wider, to provide better securing of a patient’s head that may be a little
more forward than normal. There is no ”hook” tape on the first slat, so it will be more comfortable
on the side of the patient’s face, if it is turned in. Adhesive tape will stick to the slat easier and
more securely.
2. The top of the head piece dips down (notch) in the center, providing better access to the back of the
patient’s head.
3. There are three center slats, providing stronger vertical stability while not adding any more total
weight to the device.
4. At the top of the two chest flaps, the first two slats on each side turn back independently to
accommodate electrode pads and to help secure larger busted patients.
5. The longer strap with the male buckle comes from the left side of the chest piece. If the device was
stored correctly, the straps will not tangle behind the patient during placement.
6. The buckles are color coded, so it will be easier to see which buckle the rescuer has in his/her hand.
7. The body of the device is wider at the bottom, to provide coverage of wider torsos, and distribute the
p.s.i. force of the lower chest strap.
8. The two long leg straps w/male white buckles are sewn closer together, so as to be in a more
anatomically correct position to pass midline from back to front. The rescuer no longer needs to
decide either to place straps “criss-cross” or “same side”
9. The two white female buckles for the leg straps are better positioned for easier location and
anatomically correct usage.
10.The sewn in static webbing is coated to prevent absorption of fluids, making cleaning of the device
easier.
11.The side flap slats/stiffeners are made of HDPE, so that they provide increased strength to place
the Extrication Vest behind the patient, yet enough flex to conform and contour to the patient’s body
shape, providing better contact and patient comfort.
12.Two additional straps (orange) are provided to be used in a standing takedown maneuver.
13.Deceleration Receptacles (blue) and a shoulder strap (yellow) are incorporated to better secure the
patient’s shoulders back. Sometimes referred to as a “deceleration” strap (13A). It may be placed
over each shoulder and buckled.
14.The carry bag is vented to help keep the device drier while stored.
15.The extra straps and the chin/forehead strap set are stored in a conveniently located and vented
pouch on the side of the carry bag.
Page 2
N.A.R. Extrication Vest
N.A.R. Extrication Vest
Product No.
Replacement Accessories
N.A.R. Extrication Vest
50-0022 (Black)
Replacement Accessories
Head and Chin Straps
Deceleration & Take down straps
Folding Pad
Carry Case
Page 3
N.A.R. Extrication Vest
1- ABOUT THE N.A.R. EXTRICATION VEST
1.1 General Specifications
Length
Width
Thickness
Opened flat
32 in
(81.28 cm)
34 in
(86.36 cm)
1 in
(2.54 cm)
Rolled, In Case
33.5 in
(85.09 cm)
9.5 in
(24.13 cm)
6 in
(15.24 cm)
Weight*
Load Limit
8 lb, 14.4 oz
(4.04 kg)
500 lb
(227 kg)
* Weight includes restraints, pad, head straps, carry case, take down straps, and deceleration straps.
1.2 Components (outside view with straps in storage configuration)
Center Lifting Handle
Head Flap (2)
Hook-and-Loop Fastening
Strips (10)
Side Lifting Handles (2)
Deceleration Strap Receptacle (2)
(Blue)
Torso Flap (2)
Top Torso Strap Receptacle
(Red)
Top Torso Strap
(Red Buckle)
Middle Torso Strap Receptacle
(Yellow)
Middle Torso Strap
(Yellow Buckle)
Bottom Torso Strap
(Green)
Bottom Torso Strap
(Green Buckle)
Leg Strap Buckle (2)
Leg Strap (2)
Folding Pad
Take Down Straps (2)
(Orange)
Head Strap (2)
Deceleration Strap
(Yellow)
Carry Case
Page 4
N.A.R. Extrication Vest
2- About the N.A.R. Extrication Vest
Features
2.1 Torso Straps
The N.A.R. Extrication Vest is constructed with three torso
straps: top, middle, and bottom. The straps are color coded
for easy matching of left and right pieces (Fig. 1).
When wrapping the N.A.R. Extrication Vest torso flaps
around the patient, fasten the middle (Yellow) strap first,
then the bottom (green) strap. Do not fasten the top (red)
strap until just before you are ready to transfer the patient
to a long spine board.
THE MIDDLE STRAP
The middle (yellow buckle) strap is the first strap to be
fastened (Fig. 2).
When fastening the strap initially, snug it until there is
space for 2 or 3 fingers laid flat between the strap and the
patient’s torso. You will tighten the strap just before transferring the patient to a spine board.
Figure 1- Torso Straps (As folded Storage)
The middle strap evenly secures the greatest possible area
of the N.A.R. Extrication Vest, providing the greatest patient
stability while you finish applying the N.A.R. Extrication Vest.
If the rescue situation or the patient’s condition requires
that you remove the patient from the vehicle sooner than
anticipated, the stability provided by the N.A.R. Extrication
Vest with only the middle strap fastened, and properly tightened, may be preferable to using no supporting equipment.
Follow your medical advisor’s protocols.
THE BOTTOM STRAP
The bottom (green buckle) strap is the second strap fastened (Fig. 2).
When fastening the strap initially, snug it until there is
space for 2 or 3 fingers laid flat between the strap and the
patient’s torso. You will tighten the strap just before transferring the patient to a spine board.
THE TOP STRAP
Do not fasten the top (red buckle) strap at this time. Leave
the top strap unfastened until you are ready to transfer
the patient to the long spineboard. This allows the patient
to breathe more freely while you finish applying the N.A.R.
Extrication Vest.
Figure 2- MIddle and Bottom straps fastened
Page 5
N.A.R. Extrication Vest
2.2 Leg Straps
2.3 Head Pad (Folding-Pad)
The leg straps secure the pelvis to the lower portion of
the N.A.R. Extrication Vest to stabilize the lower lumbar
area.
The foam-filled folding pad can be used to fill the gap
that may exist between the N.A.R. Extrication Vest and
any of these areas: head, cervical collar (or neck, if no
cervical collar is used), shoulders.
The N.A.R. Extrication Vest leg straps can be fastened
in a “criss-cross” configuration or a “same-side” configuration, depending on the patient’s condition.
The leg straps are most commonly used “criss-cross”
style (Fig. 3). For this configuration, pass the straps
under the patient’s
legs and buckle the
left strap at the
right side of the
N.A.R. Extrication
Vest and the right
strap at the left
side of the N.A.R.
Figure 3- Leg strap applied in
Extrication Vest.
“Criss-Cross” Configuration
If groin injury is suspected, you can use the straps in
the “same-side” configuration to reduce pressure on
the groin area. Pass the straps under the legs and
buckle the left strap at the left side of the N.A.R. Extrication Vest and the right strap at the right side of the
N.A.R. Extrication Vest.
Whether using the “criss-cross” or “same-side” configuration, you must position the straps as close as
possible to the body’s midline. When buckled straps are
correctly positioned, they run straight down from their
anchoring points on the back of the N.A.R. Extrication
Vest (Fig. 4) before passing beneath the buttocks.
Figure 4- Back view of leg straps when correctly
positioned close to the body’s midline
Page 6
The patient’s medical condition, body structure, and
head shape determine the need for padding. Most
patients, when properly positioned in the N.A.R. Extrication Vest, will not need padding but when you do use it,
follow your medical advisor’s protocols.
If you need to apply the folding pad:
1. Determine whether to use the pad single
thickness or folded.
2. Slide the pad between the N.A.R. Extrication
Vest and the patient (Fig. 5). Depending on the
patient’s injuries, body structure, and head
shape, the pad may be positioned behind the
head only, behind the head and neck area,
or behind head, neck area, and the tops of
shoulders.
Always take care to pad without hyperextending or flexing the patient’s neck
3. Secure the patient’s head with the head straps
(See Head Straps, Page 7).
Figure 5- Postioning the Folding Pad
N.A.R. Extrication Vest
2.4 Lifting Handles
The N.A.R. Extrication Vest is constructed with three lifting handles (Fig. 6). Use the handles when adjusting the
N.A.R. Extrication Vest’s vertical position on the patient
during extrication.
The top lift handle serves
as an extension of the leg
straps and offers a firm hold
for vertical lift or horizontal
pull to get the patient in
position to extricate.
One method for applying the lower strap when using a
rigid cervial collar is shown in Figure 10:
1. Place the strap against a rigid area beneath the “Chin” of the cervical collar.
2. Position the strap ends horizontally, or just above the horizontal, and secure them to the fastening strips on the head flaps.
A method for applying the lower strap to the patient’s
chin area, with or without a cervical collar, would be:
During extrication, the hanFigure 6- N.A.R. Extrication
dles provide a firm hold on
Vest Lifting Handles
the patient and the N.A.R.
Extrication Vest as a single
unit, minimizing chances of losing control or dropping the
patient during extrication.
1. Grasp the strap with both hands and turn the center pad fully inside-out.
2.5 Head Straps
Make sure the strap placement does not prevent the
patient from opening his/her mouth.
Two identical head straps are provided to secure the
N.A.R. Extrication Vest head flaps in place. They can also
be used to secure the N.A.R. Extrication Vest when using
it as a splint.
APPLYING THE UPPER
STRAP
Grasp the strap with both
hands (Fig. 7) and turn the
center pad fully inside-out,
exposing the inside (Fig. 8).
Center the pad at the
patient’s eyebrows. Position
the strap ends at a downward angle and secure them
to the fastening strips on
the N.A.R. Extrication Vest
head flaps (Fig. 9).
Figure 7- Exposing the
Center Pad Rubber
Figure 8- Exposing the
Center Pad Rubber
APPLYING THE
LOWER STRAP
Two methods for applying
the lower strap are provided
in the next column. There
are alternate methods.
Use and secure the strap
according to your medical
director’s protocol.
Figure 9- Head Straps in place
2. Place the strap over the patient’s chin.
3. Position the strap ends horizontally and secure them to the fastening strips on the head flaps.
2.6 Buckling the top strap and making final
strap adjustments
When the long spine board and ambulance cot are perpared and waiting, it is time to buckle the top strap and
make the final adjustments to the other straps.
The purpose of the adjustments is to make sure the
N.A.R. Extrication Vest is
firmly in place from the lower
spine to the head, and is positioned high up under the
armpits to prevent movement
during extrication.
Finish applying the N.A.R.
Extrication Vest as follows:
1. Remove the top (red) buckle strap from its holder and
buckle it. Tighten the strap to
Figure 10- The N.A.R.
the chest using the feed-andExtrication Vest Applied
pull technique.
2. Check and tighten the middle (yellow buckle) strap.
3. Check and tighten the bottom (green buckle) strap.
4. Check and tighten the leg (white buckle) straps.
the proper applied N.A.R. Extrication Vest will look as illustrated in Figure 10.
Page 7
N.A.R. Extrication Vest
3- USING THE N.A.R. Extrication Vest
3.1 General protocols for use
3.2 Applying the cervical colar
This manual illustrates use of the N.A.R. Extrication Vest
in an ideal setting. Other, and sometimes unusual, settings and circumstances will occur in the field and the
N.A.R. Extrication Vest can be adapted to many of them.
It is the responsibility of qualified Emergency Medical
Service personnel to assess the patient’s condition and
determine the proper equipment and procedures to use.
Apply the cervical colar
according to local protocols and the manufacturer’s instructions.
• Follow your medical director’s protocols when using the
N.A.R. Extrication Vest.
In situations where there are only two or three trained
operators available, one operator manually stabilizes the
head and neck while the other(s) applies the N.A.R. Extrication Vest
• Follow the standard emergency patient handling procedures when using the N.A.R. Extrication Vest.
• Maintain manual stabilization of the patient;s head and
neck until the patient is properly secured on a long spine
board.
• After applying the N.A.R. Extrication Vest and transferring the patient to the spine board, secure the patient to
the spine board with restraints.
WARNING
An unattended patient can be injured.
Stay with the patient at all times.
• Stay with the patient at all times
Maintain manual stabilization of the patient’s
head and neck until the
patient is properly secured on a spineboard.
Figure 11- Applying the Cervical Collar
In figure 11, one operator holds the patient’s head and
neck in neutral alignment while the other operator applies
the cervical collar.
3.3 Removing the N.A.R. Extrication Vest
from the carry case
The N.A.R. Extrication Vest carry case is designed for
quick removal of the N.A.R. Extrication Vest as follows:
1. Stand the carry case containing the N.A.R. Extrication
Vest on end with the open end of the case facing upward.
Where the case meets the ground, there will be a left and
right “dog ear” (Fig. 12).
2. Place your foot on one of the “dog ears” to hold the
case in place while you pull the N.A.R. Extrication Vest out
of the case (Fig. 12)
3. Unroll the N.A.R. Extrication Vest and lay the folding
pad and head
straps aside.
Figure 12- Removing the N.A.R. Extrication
Vest from its carry case
Page 8
N.A.R. Extrication Vest
3.4 Placing the N.A.R. Extrication Vest
behind the patient
The instructions below allow operators to use the N.A.R.
Extrication Vest design features to their best advantage.
1. Be aware of articles (wallet, belt, etc.) that could
interfere with sliding the N.A.R. Extrication Vest
between the patient and the vehicle seat.
2. With the buckles toward the seat, grasp the N.A.R.
Extrication Vest at the top of the head flap and the
top corner of the torso flap closest to the patient.
3. Tilt the N.A.R. Extrication Vest at about a 45
degree angle and slide it behind the patient (Fig.
13).
Figure 13- Sliding the N.A.R. Extrication Vest at an angle
Note: Use the N.A.R. Extrication Vest vertical rigidity as
an aid when sliding the N.A.R. Extrication Vest behind the
patient. Tilting the N.A.R. Extrication Vest at a 45 degree
angle provides a rigid leading edge to slip between the
patient and the seat. This prevents the N.A.R. Extrication
Vest from rolling up and allows the N.A.R. Extrication Vest
to clear the vehicle roofing.
4. The operator and assisting operator(s) work the
N.A.R. Extrication Vest down between the patient
and the seat and then into the vertical position (Fig.
14). Work the N.A.R. Extrication Vest far enough
down to clear the vehicle roofline and be positioned
behind the patient’s head when the N.A.R.
Extrication Vest is tipped to the vertical.
Note: The third operator may move the patient forward
just enough to reduce friction so the N.A.R. Extrication Vest
slides smoothly between the patient and seat. To avoid
jostling the patient’s head, coordinate this effort with the
operator stabilizing the head.
5. Use the lift handles to center the N.A.R. Extrication
Figure 14- Centering the N.A.R. Extrication Vest
Vest behind the patient.
6. If you are going to use the leg (white buckle)
straps, remove them from the fastening strips at
the top of the N.A.R. Extrication Vest (Fig. 15). Slide
them clear of the N.A.R. Extrication Vest and lay
them within reach (Fig. 16).
Figure 15
Figure 16
Releasing a leg strap
Page 9
N.A.R. Extrication Vest
3.5 Wrapping and positioning the
N.A.R. Extrication Vest
1. Wrap both torso flaps around the patient’s torso,
lifting the patient’s arms only as much as needed
to slide the flaps beneath them.
2. Use the lift handles to raise and adjust the N.A.R.
Extrication Vest until the top edges of the torso
flaps press firmly into the armpit area. You
can also use the lift handles to keep the N.A.R.
Extrication Vest in place until the straps can be
buckled (Fig. 17).
If using three operators, the two side operators lift the N.A.R. Extrication Vest with the side straps.
IMPORTANT
It is important to pull the N.A.R. Extrication Vest
up snugly under the armpits to make sure the
patient’s weight is suspended. This will reduce the
possibility of the patient slipping downward later
when he/she is lifted or maneuvered.
3. Before beginning to fasten the straps, make
sure the parient is sitting back against the N.A.R.
Extrication Vest as full as his/her body structure
and condtion allow.
To check and adjust the patient’s position, the operator behind the patient holds the patient’s head in alignment while a side operator gently presses on the patient’s chest area below the cervical collar.
Page 10
Figure 17- Wrapping the Torso Flaps around the patient
BE AWARE
Positioning the patient as fully as possible
against the N.A.R. Extrication Vest minimizes
the need for padding between the patient’s
head and the N.A.R. Extrication Vest. But be
aware that some patients may not be able to
sit fully back into the N.A.R. Extrication Vest.
N.A.R. Extrication Vest
3.6 Transferring the patient to the long spine
board
The technique described below for transferring the patient
to the long spine board involves turning patient with his/
her back toward the midline of the vehicle. In many situations, this may be the most effective technique for preventing lower spine torque.
5. Tighten leg straps if necessary. Properly applied
leg straps will loosen when the patient is placed
supine on the spine board.
6. Secure the patient on the spine board with the
spine board restraints.
7. Secure the spine board on the cot with the cot
restraints.
Alternative techniques have been developed and are in use.
Follow your medical director’s protocols when choosing a
technique.
BE AWARE
Be sure to maintain the patient’s body angle
and a straight midline as you turn the patient
to position his/her back toward the inside of
the vehicle.
TRANSFERRING THE PATIENT TO THE LONG
SPINE BOARD
1. Two operators grasp the side handles of the
N.A.R. Extrication Vest and turn/tilt/lift the
patient until his/her back is toward the inside of
the vehicle (Fig. 18).
Figure 18- patient pivoted with
back toward inside of vehicle
Figure 19- Lifting the patient to
position the long spine board
2. Grasping the side handles of the N.A.R. Extrication
Vest and holding the patient under the knees, lift
the knees enough to allow third operator to slide
the long spine board between the patient and the
seat (Fig. 19). Then lower the patient onto the
spine board.
Note: Slide the head-end of the spine board as close as
possible to the far side of the seat so that the patient will
become properly positioned on the board when you lift the
knees.
3. Lift the spine board and the patient out of the
vehicle and place them on the ambulance cot (Fig.
20).
4. Immediately loosen the top (red) torso strap to
allow the patient more chest expansion.
Note: Keeping the remaining straps tightened provides stability for the patient during the starts, stops, and corners of
the ambulance ride to the hospital.
Figure 20- placing patient and long
spine board on ambulance cot
Page 11
N.A.R. Extrication Vest
4- Special Situations
4.1 General protocols
When necessary, the N.A.R. Extrication Vest can be
adapted for use in special situations and circumstances.
Some possible adaptations are presented in this section.
Follow your medical director’s protocol for adapting the
N.A.R. Extrication Vest.
4.2 Adapting the N.A.R. Extrication Vest for a pregnant patient
When applying the N.A.R. Extrication Vest to a pregnant
patient, fold two slats inward on each torso strap to leave
the abdomen exposed.
Strap configuration will depend on the patient’s abdomen
and breast size. Generally, straps can be positioned to lay
beneath the breasts but above the abdomen. Two possible
configurations are described in this subsection.
USING TWO STRAPS
Fasten the bottom (green buckle) strap in the middle (yellow) buckle and the middle (yellow buckle) strap in the bottom (green buckle) strap (Fig. 21).
Figure 21- Two Strap Configuration
USING ALL THREE STRAPS
Fasten the middle (yellow buckle) strap in its own buckle.
Fasten the bottom (green buckle) strap in the top (red
buckle) strap in the bottom (green buckle) strap (Fig. 22).
Figure 22- Three Strap Configuration
Page 12
N.A.R. Extrication Vest
4.3 Adapting the N.A.R. Extrication Vest for
a pediatric patient
The patient’s size and condition determine how the N.A.R.
Extrication Vest can be adapted for a child.
In this example of one possible method, the child’s
legs are longer than the N.A.R. Extrication Vest so the
N.A.R. Extrication Vest and child are placed on a long
spineboard.
A folded blanket is placed on the child so the torso flaps
can be wrapped around and fastened normally (Fig. 23).
Figure 23- Applying the N.A.R. Extrication Vest to a child
4.4 Adapting the N.A.R. Extrication Vest for
angulated neck
When it is not desirable to straighten the patient’s neck,
fold the head flaps inward. Position a rolled towel as
needed, then place a head strap across the patient’s forehead and secure the strap to the N.A.R. Extrication Vest
fastening strips (Fig. 24).
Figure 24- Applying the N.A.R. Extrication
Vest to an angulated neck
4.5 Adapting the N.A.R. Extrication Vest for
use with monitoring systems.
Folding two slats of each torso flap inward provides more
chest exposure when needed. Loosening two of the three
chest straps allows defibrilation without losing immobility
(Fig. 25).
Figure 25- Adapting the N.A.R. Extrication Vest
for use with a monitoring system
Page 13
N.A.R. Extrication Vest
4.6 Adapting the N.A.R. Extrication Vest for
use as a splint
The N.A.R. Extrication Vest can be used as a splint for pelvic
stabilization and hip and/or femur stabilization. Two possible methods of adaptation are shown here.
HIP AND/OR FEMUR STABILIZATION
The N.A.R. Extrication Vest and patient are placed on a long
spine board with the head portion of the N.A.R. Extrication
Vest toward the foot end of the board.
Figure 26- Stabilizing the Hip and/or Femur
The torso portion of the N.A.R. Extrication Vest is positioned
a little above the waist and centered. The torso flaps are
secured around the patient’s pelvic area and the head flaps
are wrapped around both the patient’s leg and secured with
the N.A.R. Extrication Vest head straps (Fig. 27).
PELVIC STABILIZATION
The N.A.R. Extrication Vest and patient are placed on a long
spine board with the head portion of the N.A.R. Extrication
Vest toward the foot end of the board.
The torso portion of the N.A.R. Extrication Vest is positioned
a little above the waist and centered. the torso flaps are
secured around the patient’s pelvic area and the head flaps
are wrapped around both the patient’s legs and secured
with the N.A.R. Extrication Vest head straps (Fig. 27).
Figure 27- Stabilizing the Pelvis
4.7 Using the N.A.R. Extrication Vest with an
Anti-Shock Garment
The N.A.R. Extrication Vest will not interfere with, or limit the
use of, a pneumatic anti-shock garment (Fig. 28).
Figure 28- Using the N.A.R. Extrication Vest
with an Anti-Shock Garment
Page 14
N.A.R. Extrication Vest
5- Take down and Deceleration Straps
5.1 Take Down Straps
The orange take down straps are to be used when you encounter a patient that has already extricated themselves
from the crashed vehicle or from the accident scene and
is standing upright complaining of cervical pain or tenderness.
STANDING PATIENT BACKBOARDING
1. Maintain control of the patient, while placing a
cervical collar
2. One rescuer approaches the patient from behind
with the N.A.R. Extrication Vest and wraps it
around the patient.
3. The rescuer in front pulls the flaps under the
patient’s arms and around the front (Fig. 29).
4. The middle (yellow buckle) strap is fastened and
tightened. The other straps may be used, if the
patient warrants additional securing (Fig. 31).
5. Place a long spine board against the N.A.R.
Extrication Vest and patient.
6. Place one strap (orange with black buckles)
through each of the two side handles on the
N.A.R. Extrication Vest (Fig. 31).
7. Pass each of the straps through a high hand hold
on the long board (Fig. 31).
8. Snap the male and female buckles together (Fig.
31).
9. Tighten the straps until the N.A.R. Extrication Vest
is carrying the weight of the patient (Fig. 32).
10.One rescuer stands on each side of the long
board (Fig. 33).
11.Place one hand through the hand hold at the
patient’s arm pit area.
12.Place one hand beneath the patient’s buttocks
area (Fig. 33).
13.In one controlled motion, each rescuer takes one
step in the head direction as the board is lowered
and leveled. Note: Be mindful of your back as the
board tilts, because the patient’s full weight will be
in your hands (Fig. 34).
14.Place the patient on the ground for additional
strapping or place them directly on your cot for
securing.
Page 15
N.A.R. Extrication Vest
5.2 Deceleration Strap
This is the yellow strap that has a piece of hook and loop
sewn to it in the middle (Fig. 35). This strap is used when
the N.A.R. Extrication Vest is in place with the patient fully
immobilized. The strap is attached to the back of the N.A.R.
Extrication Vest utilizing the hook and loop on the strap and
the corresponding hook and loop on the back of the N.A.R.
Extrication Vest (Fig. 36). The strap is then draped over the
shoulders of the patient and fastened into the corresponding color coded buckles on the front (turned upward toward
the head) of the N.A.R. Extrication Vest. Once fastened,
the straps should be tightened to pull the shoulders of the
patient into the device and straightening the upper torso.
Shoulder (Deceleration) Strap
1. Place the shoulder strap around the back of the
N.A.R. Extrication Vest, even with the top of the
shoulders (Fig. 36).
2. Bring the strap forward and over the shoulders
(Fig. 37). Note: Do not cross the straps on the
front of the patient, they cross too high, and tend
to choke the patient (Fig. 38).
3. Insert the female buckle into the corresponding
male buckle (Fig. 39).
4. Tighten the straps to a “snug” fit, do not
overtighten (Fig. 40)
Front and rear view of N.A.R. Extrication Vest after application of the deceleration strap (Fig. 41 and 42).
(Note: Image subject is lightened slightly to enhance
visibility of straps)
Page 16
N.A.R. Extrication Vest
6- STORING THE N.A.R. EXTRICATION VEST
6.1 Storing the N.A.R. Extrication Vest
If you properly prepare the N.A.R. Extrication Vest before
placing it in its carry case you will be able to unpack and
use it quickly.
TORSO STRAPS
Fold each torso strap accordian fashion and secure it in
its hook-an-loop fastener as follows:
1. Lengthen the strap until only three or four
fingerwidths of webbing have not passed
backward through the buckle slide.
Figure 43- Turning the buckle under
2. Turn the buckle under, flush against the webbing
Make sure to position the folded strap so the fastening
strips wrap around it at the location of the buckle release
tabs. This will enable you to pull the strap free without
tangles, and have the buckle in your hand, in a single
motion.
LEG STRAPS
Storing the leg straps as
described here will keep them
out of the way while sliding the
N.A.R. Extrication Vest between the patient and vehicle
seat, yet readily available when
you want to use them.
Leave the leg straps in their
stored position in situations
where you choose not to use
them (Fig. 47).
Figure 47- Wrapping
the Leg Straps
(Fig. 43).
Store both leg straps as follows:
Figure 44- Making the first fold
3. Make the first fold beneath the buckle (Fig. 44)
and continue folding the strap accordian fashion
(Fig. 45)
Figure 45- Folding accordian style
4. When all the webbing is folded, secure it in the
1. Lengthen the leg straps until about six inches of
webbing have not passed backward through the
buckle slide (Fig. 49)
2. Beginning at the point where the strap is attached
to the N.A.R. Extrication Vest, fold the strap down
around the bottom edge
of the N.A.R. Extrication
Vest then up and around
the inside of the N.A.R.
Extrication Vest (Fig. 48).
3. Turn the buckle under
to rest flush against the
webbing and secure
Figure 48- Securing the folded
strap in the fastener
the strap in place by
pressing its hook-andloop fastening strip against a fastening strip on the
outside of the N.A.R. Extrication Vest (Fig. 48).
hook-and-loop fastener (Fig. 46).
Figure 46- Securing the Strap
Page 17
N.A.R. Extrication Vest
FOLDING PAD
Lay the N.A.R. Extrication Vest flat with the buckles facing upward.
Place the folding pad on the center of the N.A.R. Extrication Vest,
with one end of the pad at the bottom edge of the N.A.R. Extrication Vest (Fig. 49).
HEAD STRAPS
Press one end of each strap against the hook and loop fastening
strips on the head area of the N.A.R. Extrication Vest and lay the
straps parallel with the Folding Pad.
Figure 50- Folding the torso flap
Figure 51- Rolling the N.A.R. Extrication Vest
Figure 49- Positioning the Folding Pad and Head Straps
TORSO FLAPS
1. Fold the torso flap over the Folding pad, tucking the edge
of the flap over the edge of the pad (Fig. 50).
2. Roll the folded portion of the N.A.R. Extrication Vest over
the remaining torso flap (Fig. 51) until the center portion
of the inside of the N.A.R. Extrication Vest is upward (Fig.
52)
3. Grasp the N.A.R. Extrication Vest to keep it rolled and
slide it into the carrying case.
Page 18
Figure 52- Ready for the Carry Case
N.A.R. Extrication Vest
7- MAINTAINING the N.A.R. EXTRICATION VEST
7.1 Cleaning and disinfecting the N.A.R. Extrication Vest
1. Lay all pieces of the N.A.R. Extrication Vest on a clean surface and rinse off with warm water.
2. Lightly scrub the N.A.R. Extrication Vest and Folding Pad with a mild soap solution and medium bristle
brush. Wash the head straps with soap solution and a clean sponge.
3. Rinse all pieces with warm water.
4. To disinfect, apply a solution of 2% to 5% chlorine bleach and water.
5. Rinse all pieces with warm water.
6. Allow all pieces to dry completely before returning them to the carrying case.
7.2 Inspecting the N.A.R. Extrication Vest
❏ Are all the components present?
❏ Is all stitching secure?
❏ Are vertical battens (inside N.A.R. Extrication Vest) solid and unbroken?
❏ Are torso, leg straps, and lifting handles in good condition?
❏ Are buckles free from visible damage and do they operate properly?
❏ Are head straps free of excessive wear and is their stitching secure?
❏ Is folding pad in good condition?
❏ Are Deceleration and take down straps in good condition?
IMPORTANT
Storing a damp or wet N.A.R. Extrication Vest in its carrying case will encourage the growth of mold. Do not return
the N.A.R. Extrication Vest to its carry case until it is
thoroughly dry.
WARNING
Untrained operators can cause injury or be injured.
Permit only trained personnel to apply
the N.A.R. Extrication Vest.
Improper use of the N.A.R. Extrication Vest can
cause injury. Use the N.A.R. Extrication Vest only
for the purposes described in this manual.
Improper maintenance can cause injury.
Maintain the N.A.R. Extrication Vest
only as described in this manual.
Do not attach equipment or items of any kind to the
N.A.R. Extrication Vest as it may cause injury to
the patient.
An unrestricted patient can fall off the spineboard
or cot and be injured. Use restraints to secure
the patient on the spineboard or cot.
An unattended patient can be injured. Stay with the
patient at all times.
Page 19
Explanation of Symbols
Explanation
Symbol
Manufacturer
European Authorized
Representative
Catalogue Number
Caution, Consult
Accompanying Documents
EMERGO Europe
Molenstraat 15
2513 BH, The Hague
The Netherlands
Tel: +31 (0)70 345 8570
Fax: +31 (0)70 346 7299
Emergency Products & Research
890 West Main Street
Kent, Oh 44240-2218
+1-330-673-5003
PN:50-0022
or www.NARescue.com
CAUTION, CONSULT
ACCOMPANYING DOCUMENTS
For additional User Manuals, Please contact N.A.R. at either of
the numbers listed below, contact your N.A.R. Distributer, or
download at www.NARescue.com
35 Tedwall Court
Greer, SC 29650-4791
Phone: 864.675.9800
Fax: 864.675.9880
Page 20