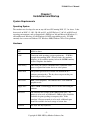
1
ISC 8001 and Intecolor 3800/8800 Terminal Emulator User’s Manual Mirador Software, Inc. 5200 Riverview Road, NW Atlanta, Georgia 30327 USA www.pc8800.com e-mail [email protected] Acknowledgments Thanks to Gene Boughey, formerly of Intecolor Corp., for creating the original manual for PC8800, and for providing a number of additions that are incorporated into this revised version. Copyright Notice This manual is copyright © 2001-2003 by Mirador Software, Inc. It may be reproduced in electronic or hardcopy form for non-commercial purposes, provided it is kept intact and the copyright notices are preserved. Excerpts may not be published in any form without written permission. In no event may reproductions or published excerpts be sold without express written permission. Copyright © 2001-2003 by Mirador Software, Inc. Table of Contents PREFACE ABOUT PC8800 ...................................................................................... 1 CHAPTER 1 INSTALLATION AND STARTUP ......................................................... 5 System Requirements ......................................................................................................................................5 Operating System ..........................................................................................................................................5 Hardware.......................................................................................................................................................5 About The Distribution Disk and License Key..............................................................................................6 Installing the Emulator ...................................................................................................................................6 Using INSTALL.BAT To Install The Emulator ..........................................................................................7 Modifying the AUTOEXEC.BAT File (DOS and Windows 3.x) .................................................................7 Modifying the CONFIG.SYS File (DOS and Windows 3.x) ........................................................................8 Configuration for Windows 95 or Windows 98 Systems ............................................................................10 Installing the APPLICATION/licensing key...............................................................................................11 Connecting to the Host................................................................................................................................12 Starting the Emulator....................................................................................................................................13 User Specified RUN-TIME Switches .........................................................................................................13 The Initialized State ....................................................................................................................................15 CHAPTER 2 USING THE KEYBOARD................................................................... 17 Modifier Keys.................................................................................................................................................17 Main Keypad..................................................................................................................................................18 Numeric Pad...................................................................................................................................................19 Auxiliary Cursor Pad ....................................................................................................................................20 8001/8800 Color Pad......................................................................................................................................20 Function keys .................................................................................................................................................20 Special Keys and Keystroke Sequences .......................................................................................................21 CHAPTER 3 USING THE SETUP MENU SYSTEM ................................................ 23 Entering Setup ...............................................................................................................................................23 Host Menu ......................................................................................................................................................24 Keyboard Menu .............................................................................................................................................25 Printer Menu..................................................................................................................................................26 Locator Device Menu ....................................................................................................................................27 Options Menu.................................................................................................................................................28 CHAPTER 4 USING PRINTERS ............................................................................. 29 Printing Using the Print Scrn Key ...............................................................................................................29 Printing by Command ...................................................................................................................................30 Copyright © 2001 by Mirador Software, Inc. CHAPTER 5 USING LOCATOR DEVICES ............................................................. 33 Overview.........................................................................................................................................................33 Absolute Devices ........................................................................................................................................33 Relative Devices..........................................................................................................................................33 Function Key Buttons on Devices ...............................................................................................................34 Operation........................................................................................................................................................34 General Considerations ...............................................................................................................................34 Enabling and Disabling the Locator Device................................................................................................35 Locator Cursor Mode ..................................................................................................................................35 Locator Cursor Display ...............................................................................................................................36 Report/Pick Modes......................................................................................................................................37 Report Formats............................................................................................................................................37 Locator Device Sensitivity ..........................................................................................................................39 Notes on Specific Devices ..............................................................................................................................39 Microsoft Mouse .........................................................................................................................................39 Itac MouseTrak Trackball ...........................................................................................................................40 Arrow Keys .................................................................................................................................................40 EloTouch IR Smart Frame ..........................................................................................................................41 CHAPTER 6 DISPLAY AND CHARACTER SETS .................................................. 43 Organization of the Display ..........................................................................................................................43 Character Sets................................................................................................................................................44 Standard Font Files .......................................................................................................................................46 Custom Font Files ..........................................................................................................................................46 Using FEDIT to Create Custom Fonts .........................................................................................................47 Character Matrix Conversion Examples......................................................................................................48 Modifying Existing Font Files.....................................................................................................................49 Running FEDIT...........................................................................................................................................50 APPENDIX A CHART OF CHARACTER CODES ................................................... 55 APPENDIX B KEYBOARD LAYOUTS .................................................................... 63 APPENDIX C STANDARD FONTS ......................................................................... 65 APPENDIX D CHARACTER WORKSHEETS ......................................................... 73 APPENDIX E COMMAND REFERENCE................................................................. 75 Copyright © 2001-2003 by Mirador Software, Inc. PC8800 User’s Manual Preface About PC8800 PC8800 is a software emulator of ISC 8001 and Intecolor 8800 and 3800 series color graphics terminals that runs on PCs. PC8800 supports all the functions found in the standard versions of the original 8001, 3800 and 8800 series terminals. Intecolor supplied a number of custom versions of these terminals to OEMs for use in their control systems. In some cases, the terminals were merely fitted with custom character sets. In other cases, the terminals were fitted with custom kernel firmware to provide special functions required by OEMs. PC8800 is designed to handle custom character sets quite easily. Several custom character sets are distributed with the emulator, and can be used as replacements for or additions to the standard character sets. Other custom character sets can be created by the user as needed with a font editing utility that is distributed with PC8800. Custom versions of PC8800 are available to replace original terminals that were fitted with certain custom kernel firmware versions. These versions are listed below. If you have a terminal with custom firmware that is not on the list, you can contact Mirador Software to discuss having Mirador create a custom version of the emulator for you. Features of PC8800 Support for host communications: • • • • Serial port is selectable (COM1 through COM4) Baud rates to 38,400 Selectable hardware (DTR/CTS) or software (^S/^Q or ^F/^G) flow control Data analysis (Line Monitor) mode Support for text and character graphics displays: • • • • • • • • 80 column x 48 line displays rendered on monitor with 640x480 resolution Each character is rendered in an 8x10 pixel matrix Four text mode display pages, stored independently of graphics pages Double height and blink attributes Block, underscore and box cursors Lower Case, Process, Forms and Custom character sets Protected Fields 8001G plot graphics (160x192 addressable pixels) Support for dot-addressable graphics displays: • • • Complete 8001R command set Fill patterns and super-pixels Terminal coordinate space (480x384 pixels) scaled to VGA resolution -1Copyright © 2001-2003 by Mirador Software, Inc. About PC8800 • Four graphics pages, stored independently of text pages Support for 8001 and 8800 V1 Fastscreen functions: • • • Text mode screens can be saved locally for fast recall INI, DEV, SAV, LOA, DEL commands Local storage devices RX0 and RX1 are implemented in RAMDISK or hard disk Support for keyboards: • • AT keyboard keys mapped to 8001 keyboard codes Multi-level programmable function keys (up to 40 characters per level per key) Support for locator devices: • • • • Follows 8800 terminal locator system conventions Arrow keys Microsoft compatible mouse or trackball at auxiliary serial port IR touch screen at auxiliary serial port Support for printers • • • • • Follows 8800 terminal print system conventions Parallel or serial printer at selectable port Print buffering is built-in (no need for an external buffer box) Support for Epson FX-86 compatible dot matrix B/W printer, landscape or portrait mode Support for Hewlett-Packard Paintjet and Deskjet color ink jet printers, landscape or portrait mode Support for 8800 style Setup Menus • • • • • Host communications menu Operator preferences menu Printer menu Keyboard menu Locator menu -2Copyright © 2001-2003 by Mirador Software, Inc. PC8800 User’s Manual Terminal Models that are Replaceable by PC8800 Basic 48 Line Termina l B08001, B84819 E08001 F08001 48 Line Terminal with Character Graphics B8001G 48 Line Terminal with Dot Addressable Graphics B8001R Package Style E8001G F8001G R08810 R08814 R08815 R08816 R08865 T03810 T03815 T03860 T03865 E8001R F8001R R08820 R08824 R08825 R08826 R08875 T03820 T03825 20” Benchtop (2nd Generation) 20” Benchtop (3rd Generation) 20” Benchtop (4th Generation) 20” Open Chassis (5th Generation) 20” Desktop (5th Generation) 20” Benchtop (5th Generation) 20” Rackmount (5th Generation) 14” Desktop (4th Generation) 14” Desktop (5th Generation) 14” Rackmount (4th Generation) 14” Rackmount (5th Generation) T03875 20” Benchtop (1st Generation) Custom Versions of PC8800 Currently Available Custom versions of PC8800 are available that provide replacement solutions for terminals equipped with the following Intecolor custom firmware releases: Firmware Version CSR 978000-228 CSR 978000-276E CSR 978000-361A CSR 978000-334B (no number) (no number) OEM MCC Powers Dow Chemical Dow Chemical Mannesman Demag Florida Power and Light Carolina Power and Light If you need one of these custom versions, or a version that does not appear on this list, please contact Mirador Software. -3Copyright © 2001-2003 by Mirador Software, Inc. PC8800 User’s Manual Chapter 1 Installation and Startup System Requirements Operating System The emulator was developed to run on any x86 based PC running DOS V3.3 or above. It has been tested on DOS 3.3, 4.01, 5.0, 6.0, and 6.2, on OS/2 Release 1.3 & 2.0, on DOS based operating environments such as Quarterdeck's DESQview 386 and Microsoft Windows 3.1, and on Microsoft Windows 95 and Windows 98 DOS compatibility modes. PC8800 currently does not run on Windows NT, Windows 2000, Windows XP or Unix platforms. Hardware CPU 80386 or above RAM Consistent with operating system requirements. 512KB is enough when running DOS. (When it loads, the emulator allocates of all available memory below the 640KB boundary as Pixel Graphics data buffers. Serial Port(s) One serial port for host communications, additional serial ports as required for locator device or serial printer Parallel Port One parallel port must be available for attachment of a software protection key. The key does not prevent the port from being used for a printer. Video Card IBM VGA compatible. The emulator uses VGA 640x480 graphics mode. Floppy drive One 1.44MB 3.5-inch floppy drive is needed for loading the software. Hard drive The emulator files occupy about 1MB of disk space. If a printer is to be used, an additional 2-5MB of space should be available for print spooling to temporary files. If the emulator’s Fastscreen mode is to be used, additional space should be available for local storage of screen data. Keyboard AT Style 101-key keyboard -5Copyright © 2001-2003 by Mirador Software, Inc. Installation and Startup About The Distribution Disk and License Key The contents of the distribution diskette are not encrypted or otherwise copy protected, and they may be copied to other media for archive purposes. However, copying for other than archive purposes, or transmission over a public network is prohibited under the license agreement. The emulator uses a hardware key for license control. The hardware key must be installed on the PC’s parallel port to enable the emulation software to function. The key does not interfere with the use of a printer or other parallel device attached to the same port. Installing the Emulator An installation script (INSTALL.BAT) is provided on the emulator distribution disk. This program copies all necessary files to a designated directory on one of the target machine’s hard disks and optionally performs configuration for a typical hardware setup. The installation script places the files that are required to run the emulator, along with certain other files, including demonstration screens and extra fonts, in their own directory tree at the place you designate. Since the installation script gives you the flexibility to locate the emulator’s directory tree where you want it, and since all the files it installs take up only about 1MB of disk space, it is recommended for use in all but the most extreme cases. Copying individual files from the distribution diskette to the target medium is, of course, possible, but this method is indicated only when the target medium is a RAM disk, flash drive, or the like, with very limited capacity. The files that must be installed include: pc8800.exe comdrvr.bin lpt1drvr.bin Configuration involves making some changes to the DOS startup files CONFIG.SYS and AUTOEXEC.BAT. Lines must be added to the CONFIG.SYS file to tell the operating system to load device drivers for the serial and parallel ports. (These drivers are included among the emulator files on the distribution diskette.) Lines must be added to the AUTOEXEC.BAT file to set certain environment variables that the emulator uses to find fonts, setup data, and the like, and to add the directory in which the emulator’s executable file resides to the system path. It is recommended that you let the installation script do the initial modification of these system files for you. You can then examine these files to determine if any changes or additions need to be made to accommodate your particular hardware setup. In most cases, the configuration performed by the installation script will provide a basic working installation. -6Copyright © 2001-2003 by Mirador Software, Inc. PC8800 User’s Manual Using INSTALL.BAT To Install The Emulator 1) Boot the target machine and place the emulator distribution diskette into the target computer’s floppy disk drive. 2) At the DOS prompt, run INSTALL.BAT by typing the following command: >source_drive:\install target_drive: <CR> where source_drive is the letter for the drive in which the installation diskette is installed, and target_drive is the hard disk drive on which the emulator is to be installed. For example: >a:\install c: <CR> 3) You will be given the option to review the license agreement. Make the desired selection. 4) You will be prompted to specify a directory on the target drive for the installation of the emulator files. If no directory is specified, the install will default to the root directory of the target driver. Make the desired selection. 5) After the emulator files have been copied to the target drive and directory, you will be prompted to specify whether the install program should modify your system configuration files CONFIG.SYS and AUTOEXEC.BAT. If you are installing on a system that is running Windows 95 or Windows 98, you can say “no” here and perform configuration for these platforms following the instructions given below. 6) If you selected “yes” in the previous step, you will be prompted to specify whether you want to review the changes made to the system configuration files. Note that when INSTALL.BAT makes changes it saves backups of the original files. You will be prompted to accept the changes or have the original files restored. If you selected “no” in the previous step, you will be prompted to specify whether you want to review the README.TXT file, which contains updates to the information in this manual. If you selected “no”, see the next sections of this chapter about modifying these files. Modifying the AUTOEXEC.BAT File (DOS and Windows 3.x) The install script can make the changes in AUTOEXEC.BAT that are necessary to add the path to the PC8800 executable to the system path and set environment variables needed by the executable to find auxiliary files, including the setup data file and font files. If the install script is not used to make these changes, or if the default settings it provides are not appropriate for your system, you can use the DOS EDIT program or any other text editor of your choosing to add the following statements to AUTOEXEC.BAT: -7Copyright © 2001-2003 by Mirador Software, Inc. Installation and Startup SET PATH=path_to_pc8800_exe;%PATH% SET PC8800=path_to_pc8800_exe The following additional statements must be added to AUTOEXEC.BAT if you are planning to use the emulator’s Fastscreen capabilities: SET RX0:=path_to_first_fastscreen_store SET RX1:=path_to_second_fastscreen_store Modifying the CONFIG.SYS File (DOS and Windows 3.x) The install script can configure your system to allow the emulator to use serial ports COM1 (at I/O address 03F8h, with IRQ4) and COM2 (at I/O address 02F8h, with IRQ3), and parallel port LPT1 (at an I/O address determined by the system BIOS). If you want the emulator to use additional serial ports or parallel ports, or if the ports on your machine are at non-standard I/O addresses, or use non-standard IRQ lines, you will have to make changes to your CONFIG.SYS file using DOS EDIT or another text editor. An instance of the emulator’s serial port device driver COMDRVR.BIN, must be loaded at boot time for each serial port that is to be accessed by the emulator. A DEVICE statement in the CONFIG.SYS file that references COMDRVR.BIN tells the system to load an instance of the driver. COMDRVR.BIN takes command line arguments that tell it how to attach itself to a given port at load time. The syntax of the DEVICE statement is: DEVICE[HIGH]=path_to_driver\COMDRVR.BIN/COM=com/ADDR=addr/IRQ =irq/RXQ=rxq_len/TXQ=txq_len/RTC=rtc_flag Where: path_to_driver A string representing the drive and directory where COMDRVR.BIN resides. com a numeric character representing the COM port number, in decimal. addr four alphanumeric characters representing the COM port base address, in hexadecimal. (Pad to four characters using leading ‘0’s when necessary.) irq one or two numeric characters representing the number of the IRQ line (hardware interrupt) associated with the COM port, in decimal. -8Copyright © 2001-2003 by Mirador Software, Inc. PC8800 User’s Manual rxq_len four numeric characters representing the desired number of bytes for the receive buffer to be associated with the COM port, in decimal. (Pad to four characters with leading ‘0’s as necessary. ‘4096’ is usually a good value.) txq_len four numeric characters representing the desired number of bytes for the transmit buffer to be associated with the COM port, in decimal. (Pad to four characters with leading ‘0’s as necessary. ‘0256’ is usually a good value.) rtc_flag (Use only with V3.0 driver.) One numeric character, either ‘1’ indicating that the driver should hook to the real time clock, or ‘0’ indicating that the driver should not hook to the real time clock. Use ‘0’ unless there is a specific requirement for paced transmit capability. When the driver is hooked to the RTC, paced transmit can be selected by setting ‘Function Key Rate’ in the Keyboard Setup Menu to ‘Slow’. An instance of the emulator’s parallel port device driver LPTxDRVR.BIN, must be loaded at boot time for each parallel port that is to be accessed by the emulator. A DEVICE statement in the CONFIG.SYS file that references LPTxDRVR.BIN tells the system to load an instance of the driver. The syntax of the DEVICE statement is: DEVICE[HIGH]=path_to_driver\LPTxDRVR.BIN where x is 1 for parallel port LPT1, 2 for LPT2, or 3 for LPT3. Some additional statements in CONFIG.SYS might have to be added or changed according to the following recommendations. STACKS should be set to 10,128 or greater. Some operating systems such as Quarterdeck's DESQview 386 ask that stacks be set to 0,0 since they allocate stack space within the operating system. We recommend setting stacks if these types of operating systems are not being used. -9Copyright © 2001-2003 by Mirador Software, Inc. Installation and Startup BUFFERS may be omitted if using the SMARTDRV.SYS device driver for caching hard disks. Buffers are only required to buffer data from the hard disk when other caching drivers are not being used. FILES should be at least 10, but most other PC applications require higher values (especially database programs). Configuration for Windows 95 or Windows 98 Systems PC8800 is a DOS program and runs best on DOS (V3.3 or later). However, if properly installed, it can be run successfully on Windows 95 or Windows 98, since these operating systems still have DOS mode support. (Currently, PC8800 will not work on Windows NT, 2000 or XP.) To install on a Windows 95/98 machine, do the following. 1. Run the install script on the PC8800 installation disk in the normal manner. This will set up a PC8800 directory tree on the target drive and copy the necessary files to the correct directories. 2. Use Windows Explorer to locate the file "pc8800.exe" (normally found in the c:\pc8800\bin directory). Using the mouse, right click on the file. You will get a menu of options. Choose "Create Shortcut". A Windows shortcut will be created in the c:\pc8800\bin directory. 3. Use Windows Explorer to move the shortcut to the c:\Windows\Desktop directory (or wherever you want it.) 4. When the shortcut has been placed in the proper directory, right click on it and select "Properties". You will get a "Properties" window that contains several dialog boxes, each with a labeled tab. 5. Click on the "Program" tab to get the Program dialog box. The top dialog line should contain "PC8800" or whatever you want to call the shortcut. The "Cmd line" should read "c:\pc8800\bin\pc8800.exe [switches]" where [switches] are any optional command line switches you want to use. (See the section of this chapter on starting the emulator.) The "Working" line should read: "c:\pc8800\bin" 6. After setting up these fields, click the "Advanced" button. You will get another dialog box. - 10 Copyright © 2001-2003 by Mirador Software, Inc. PC8800 User’s Manual 7. Click the box next to "MS-DOS mode" to select this mode for running the program. 8. Click the box next to "Specify a new MS-DOS configuration". 9. Enter the following lines in the CONFIG.SYS for MS-DOS mode box: DOS=HIGH, UMB Device=c:\windows\himem.sys Device=c:\pc8800\bin\comdrvr.bin/com=1/addr=03f8/irq=4 /rxq=8192/txq=0256 Device=c:\pc8800\bin\comdrvr.bin ...(as required) Device=c:\pc8800\bin\lpt1drvr.bin 10. Next, enter the following lines in the AUTOEXEC.BAT for MS-DOS mode box: set set set set set set tmp=c:\windows\tmp (or whatever) winbootdir=c:\windows path=c:\pc8800\bin;%path% PC8800=c:\pc8800\bin RX0:=c:\pc8800\rx0 RX1:=c:\pc8800\rx1 11. Click OK and save the configuration for the program. 12. If you wish, click the "Close on exit" box in the "Program" dialog to cause DOS mode to exit after the PC8800 exits from DOS mode. 13. Click OK again to save all the shortcut properties settings. 14. Now you are ready to test the setup by clicking on the newly configured shortcut to invoke PC8800. Note that the system will restart in DOS mode. Likewise, the system will restart after the PC8800 session, so that Windows 95/98 can be re-entered. (This is an unavoidable requirement for running a DOS program like this on Windows 95/98.) Installing the APPLICATION/licensing key Install the licensing key provided on the LPT1 parallel printer port. If a parallel printer is to be used at LPT1, install the key on the LPT1 port first, then attach the printer cable to the key. The key is a "pass-through" device and will not interfere with printing operations. Note: The male end of the licensing key (marked COMPUTER) must be connected to the LPT1 port. The key will not operate correctly if connected backwards through a gender changer. - 11 Copyright © 2001-2003 by Mirador Software, Inc. Installation and Startup Connecting to the Host To complete installation, it is necessary to connect the host computer to the PC that will be running the emulator. The connection will be made by way of a cable between one of the host’s serial ports and one of the PC’s COM ports. Normally, RS-232 signaling will be used; however, current loops are used sometimes instead of RS-232. The cable to the host will often be pre-existent and will terminate at an old style DB-25 connector. Since most PCs are nowadays equipped only with DB-9 connectors, it will be necessary in such cases either to use a DB-25 to DB-9 adapter, or to replace the existing DB25 connector with a DB-9 that will mate with the PC’s COM connector. A typical wiring arrangement for RS-232 signaling, using DTR/CTS hardware flow control, is shown in the following table. Note that if DTR/CTS flow control is not going to be used, it is not necessary to connect the DTR and CTS lines. In that case, only TXD, RXD and SG must be connected. PC COM Port DB-9 Pins (DCD) 1 (RXD) 2 (TXD) 3 (DTR) 4 (SG) 5 (DSR) 6 (RTS) 7 (CTS) 8 (RI) 9 Host Serial Port DB-25 Pins Host Serial Port DB-9 Pins ← → → 2 (TXD) 3 (RXD) 5 (CTS) 7 (SG) 3 (TXD) 2 (RXD) 8 (CTS) 5 (SG) ← 20 (DTR) 4 (DTR) If current loop signaling is being used, it will be necessary to obtain a serial port to current loop adapter for the PC. Such adapters are readily available off-the-shelf. Follow the manufacturer’s instructions for connection. On many PC/AT computers the physical spacing and orientation of I/O ports can lead to a problem when connecting data cables and software keys. Most of these systems have port connectors situated in very close proximity to each other. If a DB-9 to DB-25 adapter is used on a COM port, it can easily interfere with the installation of the software key on the LPT1 port. - 12 Copyright © 2001-2003 by Mirador Software, Inc. PC8800 User’s Manual In these cases, you may choose to use a DB-9 pin cable to your host COM port (not requiring the DB-9 to DB-25 adapter) or use a short male to female DB-25 pin cable on the LPT1 port. This cable may be up to 10 feet long but must have all wires required for parallel printer communications. These cables are available at most computer stores. When using the extender cable, connect the DB-25 male cable-end into the LPT1 port, and connect the DB-25 female-end of the cable to the male-end of the software key. This will leave the female-end of the key available to connect standard parallel printer cables. Starting the Emulator After installing the emulator, reboot the computer by pressing Ctrl + Alt + Del on the keyboard or pressing the computer’s reset button. As the computer boots, you should see messages relating to the loading of the serial and parallel port device drivers. If a message such as the one given here appears, you will need to recheck CONFIG.SYS and make any changes necessary. COMx device driver not installed -- no hardware. Assuming that the directory containing the emulator’s executable file has been added to the system PATH, you can invoke the emulator by issuing the following command at the DOS prompt: >PC8800 <CR> If the licensing key is missing when the emulator is started, an error message will appear on the display: Unable to start emulator. Missing or faulty hardware key. Note that if the key is removed while the emulator is running, the emulator will not be able to operate properly. User Specified RUN-TIME Switches The emulator may be invoked without any command line switches, as described above: >PC8800 However, several optional command line switches are available for use in special circumstances. These switches may be added to the command line in any order. They are not case sensitive. Each switch must be preceded by the DOS switch character (normally ‘/’). >PC8800 /switch ... - 13 Copyright © 2001-2003 by Mirador Software, Inc. Installation and Startup Switch /NOBLINK /INT9KEYS /STRICTG /NOBELL /65550 Usage Use the /NOBLINK switch to disable the blinking of characters and cursors. /NOBLINK may be useful with third-party screen capture programs. Use the /INT9KEYS switch to enable the installation of a special keyboard handler (INT 9) for use with the emulator in place of the standard BIOS handler. This special keyboard handler allows the PC keyboard to reproduce the functionality of the original terminal keyboard with greater precision than is possible using the standard BIOS handler. However, successful use of this switch is dependent on individual BIOSs and is not possible in all cases. Use /STRICTG to force the emulator to interpret the data stream from the host computer exactly like an ISC 8001 terminal would interpret it. When this switch is not used, the emulator behaves like an Intecolor 8800 series terminal. The difference is the way control sequences beginning with the <ESC> character are handled. The 8001 ignores the three highest order bits of the character immediately following an <ESC> in the data stream. Thus, it interprets a the string “<ESC>[“ as equivalent to the string “<ESC><ESC>“, to use an especially significant example. The 8800 series terminals behave somewhat differently. They do not ignore the high order bits of the character immediately following an <ESC>. Thus, they can distinguish the string “<ESC><ESC>“, which is used, for example to exit blind cursor mode, from the string “<ESC>[“, which, in the 8800 series units is the introducer of a command set extension in accordance with ANSI X3.64. /STRICTG should always be used when the emulator is installed in a Jagenberg system. Use /NOBELL to disable the sounding of a tone in response to the ASCII <BEL> code. This switch is useful in case the host software uses <BEL> codes instead of <NUL>s as padding characters in the data stream, and the update of the display is slowed to an unacceptable rate on that account. There is a 100 millisecond processing delay associated with the sounding of a tone in response to a single <BEL> code. If many <BEL> codes are encountered, the associated delays can become quite long. Use the /65550 switch to enable a workaround for a bug in the 65550 video controller chip. This chip has a bug in its attribute mode controller that results in the loss of color information in certain circumstances. If the emulator’s display appears to be faulty (colors missing at the left edges of characters), check your video card documentation to determine if the 65550 chip is being used on the card. If it is, use of this switch should solve the problem. - 14 Copyright © 2001-2003 by Mirador Software, Inc. PC8800 User’s Manual Switch /DEMO Usage This switch enables the emulator to respond to a command to display of a series of demonstration screens. When the emulator has been started using this switch, and the emulator is placed in Local Mode, it will respond to the command ‘<ESC>[D’, entered at the keyboard, by displaying a series of demo screens. Note the demo makes use of Fastscreen Mode and utilizes Fastscreen files stored in the directory \pc8800\rx0 following a normal install. Note also that this switch has no effect when the /STRICTG switch is used. /H This switch causes the emulator to print a command line help message and then exit. The Initialized State At start-up, the emulator checks the path associated with the PC8800 environment variable (usually the BIN directory, where the executable is located) for any font files it needs to load. (See the section of the manual for details.) The emulator also checks the path associated with the PC8800 environment variable for a file named 88SETUP.DAT. If the file exists, the emulator will use its contents to initialize itself and will then present a header message on the display. If 88SETUP.DAT does not exist, a setup menu will appear allowing the user to set operating parameters. Once setup menu parameters have been set and saved, the file 88SETUP.DAT will be created, and settings will be available for subsequent use. When the operator then exits the setup menu system, the emulator will initialize itself normally. At start-up, the emulator assumes the states specified by the operator’s setup and also the following states: • • • • • • • • • • • Visible Cursor set to Home position (top-left corner of screen). Visible Cursor foreground color set to White. Visible Cursor background color set to Black. Visible Cursor set to single height (1X) characters. Character Plot Mode set Off). Visible cursor writes left to right. Blind Cursor foreground color set to Red. Blind Cursor background color set to Black. Blind Cursor set to single-height (1X) characters. Blind Cursor Character Plot Mode set Off. Blind Cursor set to Home position (top-left corner of screen). - 15 Copyright © 2001-2003 by Mirador Software, Inc. Installation and Startup • • Character Graphics page set to 1st page. Pixel Graphics page set to 1st page. The initial display, in normal height characters, is: PC8800 EMULATOR Vx.xx PRESS ALT + ESC FOR SETUP MENU where “ Vx.xx" will vary depending on the version of the emulator software. The emulator is now ready to accept commands from the keyboard and/or from a host computer connected to a serial port (COM1, COM2, etc.). It takes input from one or both of these sources, depending on selections made in Setup, which is described in a following chapter. - 16 Copyright © 2001-2003 by Mirador Software, Inc. PC8800 User’s Manual Chapter 2 Using the Keyboard The PC/AT 101-key keyboard that is typically used with the emulator differs in physical appearance and key layout from the original terminal keyboard. (See Appendix B for layouts.) However, most of the keys on the original terminal keyboard have direct equivalents on the PC keyboard, and where direct equivalents are not available, indirect equivalents are. Thus, all the functions of the original keyboard can be reproduced using the PC keyboard. Modifier Keys The Shift, Ctrl and Alt modifier keys on the PC keyboard are set up to emulate the SHIFT, CONTROL and COMMAND keys of the 8001/8800 keyboard. When the emulator accesses the PC keyboard through the standard BIOS interface (the default situation), the BIOS controls the way the modifier keys affect other keys. For most keys, including main keypad keys, there are four possible states, depending on the use of the modifier keys with those keys. However, other keys are not allowed to have four states. The situation is different respecting the original terminal, which provides four states for every key on the keyboard. Thus, the PC BIOS imposes a something of a limitation on the emulator. To get around this limitation, the emulator is provided with a command line switch (/INT9KEYS), which tells it to load its own keyboard interface when it starts. This interface provides four levels of mapping for all keys. (See the chapter on Configuration and Startup for details.) Note: When the /INT9KEYS switch is not used with the emulator, it is still possible to generate all codes necessary from the PC keyboard. The four key states determined by the modifier keys are: NORM, SHIFT, CONTROL, and CONTROL+SHIFT or ALT, which corresponds to COMMAND on the 8001/8800 keyboard. CAPS LOCK works like ALPHA LOCK on the 8800. Shift There are two Shift keys. One of these must be held down while the selected alphanumeric key is operated to produced a shifted state. Caps Lock This key affects only the alpha keys A through Z. When invoked (LED On) operation of the alpha keys results in upper case characters. When Off, operation of the alpha keys results in special characters or in lower case ASCII characters, depending upon the character set selected. Using the Shift key with the Caps Lock key invoked negates the effect of the Caps Lock key. Operation of the Shift key does not - 17 Copyright © 2001-2003 by Mirador Software, Inc. Using the Keyboard change the status of the Caps Lock key. Ctrl This key must be held down while operating the selected alpha, symbol or numeric key to generate a desired control code. Alt This key generates codes requiring the operation of both the Ctrl key and Shift key in combination with another key. Pressing the Alt key yields the same result as pressing both the Ctrl and Shift keys at the same time. Main Keypad Note that positions differ on the PC and on the 8001/8800 keyboards for the following characters: " 2 & 6 ' 7 ( 8 ) 9 0 = - _ ^ ~ `@ ; + : * However, the codes generated by the keys are the same for corresponding legends, observing differences in modifier states. This is true for all four levels. There is no main pad DEL on the PC. The PC has a backspace key not found on the 8800. PC SHFT-BS = DEL. There is no repeat key on the PC. The PC has an auto-repeat capability which makes this key unnecessary. The following 8800 main pad keys are not represented on the PC keyboard. The codes may be generated using the PC numeric pad digit keys with ALT or with controls: 8001/8800 AUTO FG ON BG ON BLINK ON 2X / BLINK OFF 2X CHAR ON PC Numeric Pad Alt Alt Alt Alt Alt '29' '30' '31' '15' '14' PC Main Pad Esc I Ctrl ] Ctrl ^ Ctrl _ Ctrl O Ctrl N In general, where there is no PC key for an 8800 key, the numeric pad may be used with ALT to generate any code in the range 0-255. NUM LOCK must be set for this. - 18 Copyright © 2001-2003 by Mirador Software, Inc. PC8800 User’s Manual Numeric Pad The numeric keypad on the PC keyboard has three different modes of operation. Num Lock and Scroll Lock control these modes. When unmodified by Num Lock or Scroll Lock, the numeric pad keys generate codes that are strict equivalents of the codes generated by corresponding 8001/8800 numeric pad keys. Note that legends differ in two cases. The PC’s ‘*’ is equivalent to the terminal’s ‘x’, and the PC’s ‘Enter’ is equivalent to the terminal’s ‘=‘. When Num Lock is on, an Alt key, together with the number keys, may be used to generate any character code in the range 0 to 255 decimal. Otherwise strict 8001/8800 numeric pad emulation is maintained. The method for generating characters from their numeric codes is to hold down the Alt key and press, in sequence, the numeric keys that correspond to the decimal code of the character to be generated. For example, to generate a character with code 240 decimal, hold down the Alt key and press 2, 4, and 0 keys in succession, then release the Alt key. When Scroll Lock is on, the Home, Arrow, Ins, Del, PgUp and PgDn keys are operative for the generation of 8001/8800 style cursor and control sequences. Other keys are disabled. Note that Scroll Lock takes precedence over Num Lock. PC Legend 0 Ins 1 End 2↓ 3 Pg Dn 4← 5 6→ 7 Home 8↑ 9 Pg Up / * + Enter . Del Scroll Lock On Ins Char (disabled) ↓ Erase Line ← (disabled) → Home ↑ Erase Page (disabled) x (disabled) (disabled) = Del Char - 19 Copyright © 2001-2003 by Mirador Software, Inc. Using the Keyboard Auxiliary Cursor Pad When present (extended keyboards) the Auxiliary Cursor and Function keys work like corresponding 8001/8800 keys. Note the differences in legending. PC Ins Del Home UpAr DnAr RtAr LfAr End PgUp PgDn 8800 Ins Char Del Char Home UpAr DnAr RtAr LfAr (not used) Erase Page Erase Line 8001/8800 Color Pad The PC keyboard has no equivalents for the eight Color Pad keys on the 8800 117 key keyboard. The color pad codes are generated as follows: 8001/8800 BLACK RED GREEN YELLOW BLUE MAG CYAN WHITE PC Numeric Pad Alt '16' Alt '17' Alt '18' Alt '19' Alt '20' Alt '21' Alt '22' Alt '23' PC Main Pad Ctrl P Ctrl Q Ctrl R Ctrl S Ctrl T Ctrl U Ctrl V Ctrl W Function keys F1-F10, or F1-F12 (when present on extended keyboards), are mapped to emulate F1-F10 (and F11,F12) on the 8800. There are four modifier levels. Note that F0,F13-F15 are not present on the PC keyboard. The codes for these keys may be generated using ALT and the numeric pad keys, when NUM LOCK is set. - 20 Copyright © 2001-2003 by Mirador Software, Inc. PC8800 User’s Manual To support the generation of terminal function keys not present on the PC/AT keyboard, there is a simple solution that works in most instances. Since all function keys are "UserDefinable", the use of Shift along with F1 can be programmed to generate the F0 function code. The same applies to programming Shift F2 as F13, Shift F3 as F14, and Shift F4 as F15. The use of Alt or Control may be used instead of Shift, the choice is yours. Special Keys and Keystroke Sequences CTL-ALT-DEL still works to reset the PC. But note that a hard reset is performed. PC print screen key generates an interrupt 5, which is remapped to trigger the print flag. Setup mode entry is by ALT ESC. This corresponds to SHIFT SETUP on the 8800. The PC Pause/Break key generates the 8800 break code, '#'. - 21 Copyright © 2001-2003 by Mirador Software, Inc. PC8800 User’s Manual Chapter 3 Using the Setup Menu System The emulator provides a Setup Menu system to allow the operator to select and save such things as host communications settings, printer settings, locator device settings. The menus are similar in appearance and operation to those of the Intecolor 3800 and 8800 series terminals. (ISC 8000 series terminals do not have Setup Menu systems.) Entering Setup The Alt + Esc keyboard sequence gives entry to the Setup Menu system. The first menu to appear will be the HOST MENU. You can switch to other menus by holding down the Alt key and pressing the Up or Down Arrow. Note: When the terminal is switched from an on-line state to Setup mode, input from the host computer is gathered in a receive buffer associated with the host COM port for processing later. If host flow control is set, a “stop sending” code is sent to the host before the buffer can overflow. Figure 3-1. Menu System Flow Diagram. - 23 Copyright © 2001-2003 by Mirador Software, Inc. Using the Setup Menus Host Menu The Host Menu allows changes to parameters dealing with host communications. The serial port, data rate, echo mode, and related parameters may be changed to meet user preference and saved. The Host Menu presents the following display: HOST MENU Host Interface Host Port Local/Line Echo Flow Control Data Rate Bits per Char Parity Stop Bits RS-232/422 COM1 Local Off DTR/CTS 9600 8 None 1 1 2 3 4 5 To SAVE Current Setup. To RECALL saved setup. To recall FACTORY setup. To recall ‘8001G’ setup. To EXIT emulator to DOS. Cmd or Alt and Dn or Up Arrow Keys Up and Dn Arrow Keys Left and Right Arrow Keys Enter PC8800 Emulator To move from menu to menu To move from item to item To change an item’s setting To exit setup mode Copyright (c) 2001 by Mirador Software, Inc. Figure 3-2. HOST Menu Selections. - 24 Copyright © 2001-2003 by Mirador Software, Inc. PC8800 User’s Manual Keyboard Menu The Keyboard Menu allows changes to parameters dealing with keyboard communications and user-definable function keys. The I/O port, keyboard type, data rate, duplex, function key mode, and related parameters may be changed to meet user preference and saved. The Keyboard Menu presents the following display: KEYBOARD MENU External Keyboard Port Data Rate Bits per Char Parity Stop Bits Keyboard Type Keyclick Function Key Rate Function Key Mode Program Function Key 1 2 3 4 5 COM4 4800 8 None 1 PC Off Fast Default Off To SAVE Current Setup. To RECALL saved setup. To recall FACTORY setup. To recall ‘8001G’ setup. To EXIT emulator to DOS. Cmd or Alt and Dn or Up Arrow Keys Up and Dn Arrow Keys Left and Right Arrow Keys Enter PC8800 Emulator To move from menu to menu To move from item to item To change an item’s setting To exit setup mode Copyright (c) 2001 by Mirador Software, Inc. Figure 3-3. KEYBOARD Menu Selections. - 25 Copyright © 2001-2003 by Mirador Software, Inc. Using the Setup Menus Printer Menu The Printer Menu allows changes to parameters dealing with printer communications and printout preferences. The I/O port, printer type, data rate, duplex, orientation, and related parameters may be changed to meet user preference and saved. The Printer Menu presents the following display: PRINTER MENU Printer Printer Type Background Black Red Green Yellow Blue Magenta Cyan White Printer Port Data Rate Bits per Char Parity Stop Bits Enabled HP Paintjet P White BG FG FG FG FG FG FG FG LPT1 9600 8 None 1 1 2 3 4 5 To SAVE Current Setup. To RECALL saved setup. To recall FACTORY setup. To recall ‘8001G’ setup. To EXIT emulator to DOS. Cmd or Alt and Dn or Up Arrow Keys Up and Dn Arrow Keys Left and Right Arrow Keys Enter PC8800 Emulator To move from menu to menu To move from item to item To change an item’s setting To exit setup mode Copyright (c) 2001 by Mirador Software, Inc. Figure 3-4. PRINTER Menu Selections. - 26 Copyright © 2001-2003 by Mirador Software, Inc. PC8800 User’s Manual Locator Device Menu The Locator Menu allows changes to parameters dealing with locator device selection, I/O port selection, and host report parameters. The device type, I/O port, data rate, duplex, reporting mode, and related parameters may be changed to meet user preference and saved. The Locator Menu presents the following display: LOCATOR MENU Locator Device Type Locator Cursor Type Cursor Mode Audio Report/Pick Mode Report Format Locator Port Data Rate Bits per Char Parity Stop Bits Calibrate 1 2 3 4 5 Disabled Arrow Keys Block Host Only Off No Pick 8001 Style COM2 1200 8 None 1 Off To SAVE Current Setup. To RECALL saved setup. To recall FACTORY setup. To recall ‘8001G’ setup. To EXIT emulator to DOS. Cmd or Alt and Dn or Up Arrow Keys Up and Dn Arrow Keys Left and Right Arrow Keys Enter PC8800 Emulator To move from menu to menu To move from item to item To change an item’s setting To exit setup mode Copyright (c) 2001 by Mirador Software, Inc. Figure 3-5. Locator Menu Selections. - 27 Copyright © 2001-2003 by Mirador Software, Inc. Using the Setup Menus Options Menu The Options Menu allows changes to parameters dealing with pixel graphics ability, color mapping, Fastscreen, cursor style, character set selection, and CRT saver functions. The items may be changed to meet user preference and saved. The Options Menu presents the following display: OPTIONS MENU Line Monitor Backspace Code Protect Mode Fastscreen Graphics Mode Graphics Color Mapping Cursor Mode Cursor Type Character Set CRT Saver ^S^Q Hold Screen Allow Cmd/Alt X Exit 1 2 3 4 5 Off ^Z Enabled Enabled Enabled Enabled Page Underscore Lowercase Off Disabled Disabled To SAVE Current Setup. To RECALL saved setup. To recall FACTORY setup. To recall ‘8001G’ setup. To EXIT emulator to DOS. Cmd or Alt and Dn or Up Arrow Keys Up and Dn Arrow Keys Left and Right Arrow Keys Enter PC8800 Emulator To move from menu to menu To move from item to item To change an item’s setting To exit setup mode Copyright (c) 2001 by Mirador Software, Inc. Figure 3-6. OPTIONS Menu Selections. - 28 Copyright © 2001-2003 by Mirador Software, Inc. PC8800 User’s Manual Chapter 4 Using Printers The emulator supports three printers, the Epson FX-86e dot matrix printer (black and white), and the HP Paintjet and Deskjet color inkjet printers. Printouts may be in portrait or landscape orientation on 8.5 x 11 inch paper. The drivers for the printers are built into the emulator. No additional software is required. Other printers can be used, provided they use the relevant Epson or HP protocols. Print operations can be initiated by the operator using the PC keyboard’s Print Scrn key. In this case, printing is handled according to settings made from the Printer Setup Menu. Alternatively, print operations can be invoked by a command, issued either from the host or at the keyboard. In this case, a command argument specifies the printer, the print orientation, etc., overriding Setup Menu settings. Printing the screen can take up to several minutes, depending on the screen’s contents and the type of printer being used. Often, it is not acceptable to delay the processing of incoming data from the host for a long period while printing takes place. External print buffers were used with the original terminals to offload the servicing of the printer and free up the terminal to continue processing data. Such external buffers are unnecessary with the emulator, because it incorporates its own print buffering system. When a print screen operation is initiated, the emulator quickly processes the screen data to form data the printer can use and then stores the printer data in a temporary file on the system hard disk. Periodically, it reads a small amount of print data from the file and sends the data to the printer, until the data have been exhausted. This occurs as a background task, so that the processing of host data can continue. Depending on the type of printer being used and the amount of disk space available, up to ten screens can be queued for printing in this manner. (The temporary files can range in size from 100Kb to over 1MB.) Printing Using the Print Scrn Key The Print Scrn key on the PC/AT keyboard can be used to invoke a screen printout. Nothing is sent to the host computer to indicate that printing is occurring, and the emulator "multitasks" to maintain communications with the host while printing is under way. The settings for the printer type, image orientation, color mapping, etc., made previously by the operator in Printer Setup Menu are used to determine how print output is formatted and directed. If an attached Printer is enabled when the Print Scrn key is pressed, a disk file is created and then immediately sent to the printer. - 29 Copyright © 2001-2003 by Mirador Software, Inc. Using Printers If the printer is disabled (in Printer Setup), a disk file is created but not printed. The encoded VGA display is stored to the hard disk until the file is erased by the user, or later printed when the printer selection is set to enabled. This is a handy feature that will generate a properly formed print data file on the hard disk that can be printed at a later time. When using Windows 3.1, the "Print Screen" should be reserved for application use when defining a Program Information File (PIF) or Shortcut. Printing by Command The syntax of the print command is <ESC> M byte_arg When invoking a print operation by host command, the printer driver is selected with bit patters in the command argument byte, as follows: Printer Type HP Paintjet (color) HP Paintjet (color) HP Deskjet (color) HP Deskjet (color) Epson FX-86 (monochrome) Image Orientation portrait landscape portrait landscape landscape byte_arg b7 b6 b5 b4 b3 b2 b1 b0 0 x 1 1 1 1 x x 0 x 1 1 1 0 x x 0 x 1 1 0 1 x x 0 x 1 1 0 0 x x 0 x 1 0 0 0 x x The 2 low order bits (b1 and b0) in the argument byte select the black and white reverse mode, as follows: BG/FG Reverse b7 b6 b5 b4 b3 b2 b1 b0 No reverse 0 0 Selective reverse 0 1 (not supported, maps to full reverse) Full reverse 1 0 Printer SW version 1 1 (not supported, value ignored) Bit b6 in the argument byte selects form feed (1) or no form feed (0) Form Feed Form Feed No Form Feed b7 b6 b5 b4 b3 b2 b1 b0 1 0 - 30 Copyright © 2001-2003 by Mirador Software, Inc. PC8800 User’s Manual For example, to select the HP Deskjet with form feed, portrait mode, and background white, the bits of byte_arg would be 0 1 1110 01 which form the code for the ASCII character 'y'. Thus the complete command would be <ESC> M y To select the HP Deskjet with form feed, landscape mode, and background white, the bits of byte_arg would be 01 1101 01 which form the code for the ASCII character 'u'. Thus, the complete command would be <ESC> M u - 31 Copyright © 2001-2003 by Mirador Software, Inc. PC8800 User’s Manual Chapter 5 Using Locator Devices Overview The emulator has built-in support for several locator devices. These devices can be used to speed and facilitate screen cursor positioning or screen area picks by the operator. Locator devices can be selected, enabled, and configured by the operator in Locator Setup, or by host command. Note: Audible feedback to the operator when a pick or movement is made is not currently implemented. There are two broad classes of locator devices. The first is referred to as absolute devices, the second class as relative devices. Absolute Devices An absolute locator device reports the absolute screen coordinates of a cursor that the operator is moving, or of a screen area that the operator is selecting or picking by means of the device. The devices which fall into this class are light pens, digitizing pads, and touch screens. Generally, absolute locator devices allow the user to move a cursor or make a pick by simply pointing to the desired location on the screen. Picks can be generated in several ways with absolute locator devices. For example, when a touchscreen is being used, a pick can be generated when the operator’s finger first touches the screen or only when it ceases to be in contact with the screen. Some absolute devices (touchscreens, in particular) require calibration. Relative Devices Relative locator devices are so called because they present the emulator with movement requests in the form of offsets relative to the current locator position. Devices in this category include the Arrow Key cluster, trackball, and mouse. Picks are generated with buttons on these devices, usually with the leftmost button available on the device. Any other buttons on the device are programmable function keys. Relative devices do not require calibration as do absolute devices. However, the sensitivity of these devices to physical movement sometimes needs to be adjusted. - 33 Copyright © 2001-2003 by Mirador Software, Inc. Using Locator Devices Function Key Buttons on Devices When using various locator devices which have multiple buttons, one button is designated as a pick request button while the others become programmable function keys. The pick button may also be treated as a function key if the Report/Pick Mode is set to "No Pick". The function keys generate default values in the range of 0AFH through 0A0H. Typically the buttons are ordered from left to right with descending associated values. These buttons are logically attached to the keyboard and will act like keyboard buttons when pressed. The main exception is that modifier keys on the keyboard do not affect the locator device buttons. Modifier keys include Shift, Ctrl, and Alt. Programming of the buttons as function keys is done in the same fashion as programming the keyboard function keys. Logically, the buttons are treated as function keys F47 - F40 which are not available on the keyboard. The locator device whose button is to be programmed must be correctly attached, enabled, and selected before programming is attempted. The buttons can be programmed by use of the Function Key Programming facility in Keyboard Setup, or by host command. Operation General Considerations When using locator devices, it is important that they be correctly connected and configured before use. In order for the device to be correctly initialized, the emulator must be able to communicate with the device. The emulator will only attempt to initialize the locator under the following conditions: • At startup, provided the Locator Type is not set to None, and the Locator is set to Enabled (these settings must have been stored to the hard disk setup file 88SETUP.DAT). • On exit from Setup, provided the Locator Type is not set to None and Locator is Enabled. • On host command. If the device is not connected or is otherwise unable to communicate with the emulator, initialization cannot be completed successfully. The locator operates in the domain of the character display. There is no facility for the operation of locators as Graphic INput (GIN) devices within the pixel graphic mode. However, the locator device will operate to move its cursor even when submodes such as Pixel Graphics or Fastscreen are in effect. A locator device cursor position is maintained for each of the four character graphics screens, separately from the normal host cursor position. The locator device cursor on the currently - 34 Copyright © 2001-2003 by Mirador Software, Inc. PC8800 User’s Manual accessible screen (not necessarily the currently displayed screen) will always be the one moved. Movement of the cursor is restricted from wrapping at the edge of the screen boundary. For instance, if the cursor is moved all the way to the right edge of the screen by the locator device, continual attempts to move it farther to the right will have no effect. Double Height character display mode (sometimes referred to as A7 On) affects the movement of the locator cursor. When Double Height mode is on, the cursor (like the host visible cursor) is allowed only on odd numbered screen rows. If the locator device cursor is on an even row at the time Double Height mode is set, the locator device cursor will move down to the next odd row. Turning off Double Height mode will not affect the cursor location. The setting of the emulator’s Private Origin Mode (POM) also affects the movement of the locator cursor. If a scrolling region is defined and active (POM set), the cursor will be restricted to the scrolling region. Enabling and Disabling the Locator Device The Locator can be enabled or disabled from Setup or by host command. Selections: Disabled (default) Enabled Disable on Pick When Disabled is selected, the host can still issue commands to enable the Locator. When Enabled and a device is selected and configured, normal input operation is in effect until the Locator is specifically Disabled. When Disable on Pick is selected, the locator device operates normally until a pick action occurs. When the operator makes a pick, the locator device is Disabled following the issuance of the pick report. Note: If the Report/Pick Mode is set to “No Pick”, setting “Disable on Pick” will not have the desired effect. Note: When a locator device is enabled, exiting the setup mode can take up to an extra 750 milliseconds while the emulator attempts to initialize the locator device currently selected. Assuming flow control is being duly utilized, no data loss will occur should the host be transmitting during device initialization. Locator Cursor Mode The Locator can control the host cursor or a separate locator cursor as determined in Setup or by host command. - 35 Copyright © 2001-2003 by Mirador Software, Inc. Using Locator Devices Selections: Host Only (Standard Defaults) Locator Only (FACTORY Defaults) Host and Locator Normal operation of the terminal has traditionally called for the locator device to control the host `visible' cursor. This is the Host Only cursor display mode for the device when the Standard Defaults are invoked. When the locator is enabled and a device is selected, the host and the device share access to the host cursor. The locator device cursor assumes the current host cursor position and position reports reflect the host cursor position. Host Only mode permits the host cursor to be moved locally, without host notification, to any position on the screen by the operator. If this occurs during host screen updating data can be scattered haphazardly. When Host Only mode is in effect, the cursor display style chosen for the locator device has no visible effect since the locator cursor is not displayed separately. Locator Only allows the locator to move its own cursor which is separate from the host cursor. When this selection is in effect, the host visible cursor will disappear from the screen whenever the Locator is enabled. The Locator cursor will appear and track the operation of the Locator device. When the Locator is subsequently disabled, the Locator cursor will disappear and the host cursor will reappear at its correct current position. Data input to the emulator destined for screen display will be placed at the correct position on the screen and the visible cursor location will be adjusted just as in normal operation even while the host cursor is not being displayed. Host & Locator allows for the display of both the host and Locator cursors. As described in the previous paragraph, there is no interaction between the host and locator cursors. When this mode is in effect, the Locator cursor will appear only when the Locator is enabled. Locator Cursor Display The way in which the Locator Cursor is displayed can be controlled from Setup or by host command. Selections none blinking underscore blinking overscore and underscore blinking block If the choice is none, this does not mean that the locator is disabled. It merely means that the cursor is not displayed. Except for the fact that the locator device cursor is not seen, operation is the same as when a visible cursor style is selected. - 36 Copyright © 2001-2003 by Mirador Software, Inc. PC8800 User’s Manual Report/Pick Modes A `pick' is an action that can result in the generation of a report to the host computer containing information such as the locator's position. Generation of the pick action is device dependent. This action is caused by pressing a button on some devices; it can be caused by simply activating other devices. The type of actions signifying picks can be set by Setup selection or by host command. Tracking with exit pick The cursor will track the movement of the finger while it is in the active field and a pick will occur when the finger exits the active field. The point at which the finger exits the active field will be reported if that is the action the emulator is set to perform when a pick occurs. Tracking with movement pick This mode is the same as mode except picks are generated every time the cursor moves to a new location. Entry pick The cursor moves to the point on the screen nearest the entry point of the active field. A pick is generated at that point. No other action occurs until the finger is removed from the active field and then reinserted. Continuous pick The cursor tracks the finger and picks are generated continuously while the finger is in the active field. No pick The cursor will track locator device actions normally. However, no pick actions can occur. The buttons on external devices which would otherwise be pick buttons will act like function keys. Note that when ‘No pick’ mode is in effect, and the locator is set for Disable on Pick, the locator will not be disabled by any pick action. Report Formats The format of reports transmitted to the host when picks are made can be set in Setup Mode or by host command. - 37 Copyright © 2001-2003 by Mirador Software, Inc. Using Locator Devices Setting Report Syntax None Standard Style (default) <ETX> x y <ACK> cci character <CR> Standard Style (Short) <ETX> x y <CR> ANSI-Style <ESC> [ Row ; Column H <ESC> [ ? cci ; Character m ANSI-Style (Short) <ESC> [ Row ; Column H VT100-Style <ESC> [ Row ; Column R "Pick" Report <ESC> [ ? 8 d None means no report will be generated by a pick operation. Standard Style means a report has the traditional terminal format. The report is in the form of a seven byte sequence. Coordinates are encoded in binary form. The first part of the report consists of the leading <ETX> (Code 3) character followed by the x position of the locator cursor and then the y position. The second part of the report begins with <ACK> (Code 6) followed by the Composite Color Information (CCI), or status byte, assigned to the screen position of at the cursor position. The final part of the report is the character code for the character or symbol displayed at that this position. The report is terminated by a Carriage Return character. Standard Style (Short) means a report in an abbreviated version of the above: ANSI-Style is a report presenting similar information in a proprietary ANSI style format. The parameters are given as numeric strings representing decimal values. Because the parameters are strings representing values ranging from 0 through 255, the report can vary in length from 13 bytes to 19 bytes. ANSI-Style (Short) is a report consists only of the first part of the above report. VT100-Style is identical to the "ANSI-Style (Short)" report with the exception of the terminating character. "Pick" Report sends no specific information. It merely reports that a `Pick' occurred. The report is a fixed-length ANSI-format string. - 38 Copyright © 2001-2003 by Mirador Software, Inc. PC8800 User’s Manual Locator Device Sensitivity The sensitivity of some relative locator devices to physical movements can be controlled from Setup. Selections: Slow Normal (default) Fast Normal is the default and has been selected as the most comfortable "speed" for each device. For each device, the amount of movement required to move the cursor a certain distance on the screen can be increased or decreased by choosing Slow or Fast. For example, if a three inch movement of a mouse at "Normal" speed resulted in a certain amount of cursor motion on the screen, it would take more than the three inches of movement to achieve the same results when the sensitivity setting is changed to Slow. The opposite is true when Fast is chosen. With relative devices, individual speed settings are not maintained for each device. In order to save the relative device sensitivity setting, the user must save the setup menu. The selection of locator device speed does not affect the operation of the Arrow Key cluster. Notes on Specific Devices Microsoft Mouse The mouse should be held with the buttons away from the user, under the fingertips. When the mouse is moved left, the cursor will move left. When the mouse is moved away from the user, the cursor will move up the screen. Scrolling region and screen boundaries are not crossed. The Microsoft mouse utilizes its left button for pick generation and the right button as a programmable key. The default value for the right button is 0AEH as function key F46. When the Report/Pick Mode is set to No Pick, the left button becomes function key F47 and generates a default value of 0AFH. The COMDRVR.BIN device driver must be installed to handle communications at the host serial port selected for use by the device. Installation for this port is similar to installation for the host serial port. The proper Locator Menu settings for the Microsoft Mouse are: Data Rate = 1200 baud, Data Bits = 8, Stop Bits = 1, Parity = None. The serial COM port MUST be set to match the communication factors of the mouse. - 39 Copyright © 2001-2003 by Mirador Software, Inc. Using Locator Devices Itac MouseTrak Trackball The Itac MouseTrak trackball should be the RS-232 compatible version with the female DSub 9-pin connector and may be attached to any available COM port. This trackball supports all Microsoft Mouse operational modes and uses the Microsoft mouse selection in the Locator Menu. The trackball allows positioning of the locator cursor by rolling the ball on the device. The Itac trackball should be oriented so that the ball is at the end farthest from the user. Rolling the ball away will cause the cursor to move up and rolling it toward the user will cause the cursor to move down the screen. Movement left and right is accomplished in a similar fashion. The cursor will not move across screen boundaries. If the cursor is at the bottom of the screen and an attempt is made to move it down, it will remain at the bottom of the screen. If a scrolling region is in effect, the cursor will not cross region margins once inside the region. The Itac MouseTrak trackball utilizes its left button for pick generation and the right button as a programmable key. The default value for the right button is 0AEH as function key F46. When the Report/Pick Mode is set to "No Pick", the left button becomes function key F47 and generates a default value of 0AFH. The trackball is set up exactly like a Microsoft Mouse and uses the Microsoft Mouse as the selected locator device type. The trackball can be ordered from Itac configured to emulate several different protocols and baud rates. For use as a PC8800 locator device, it should be set up to emulate the Microsoft mouse. The COMDRVR.BIN device driver must be installed to handle communications at the host serial port selected for use by the device. Installation for this port is similar to installation for the host serial port. The proper Locator Menu settings for the Itac MouseTrak trackball are: Data Rate = 1200 baud, Data Bits = 8, Stop Bits = 1, Parity = None. The serial COM port must be set to match the communication factors of the trackball. Arrow Keys The Arrow Key cluster can be logically separated from the normal keyboard operation to become an locator device. When selected as the current locator device, the Arrow Keys operate locally to move the locator cursor. The HOME key becomes the pick button for this device. When the Arrow Key cluster is being used as a locator device, use of modifier keys, Shift, Ctrl, or Alt will cause the keys to act in their normal fashion as keyboard keys. Thus, only the unmodified keys are part of the locator device. - 40 Copyright © 2001-2003 by Mirador Software, Inc. PC8800 User’s Manual The locator cursor will not move across screen boundaries. If the cursor is at the bottom of the screen and an attempt is made to move it down, it will remain at the bottom of the screen. If a scrolling region is in effect, the cursor will not cross region margins once inside the region. When the Report/Pick Mode is set to "No Pick", the HOME key no longer generates picks. The key (with no modifiers pressed) will appear to be deactivated. EloTouch IR Smart Frame The Setup Mode Locator menu provides a means of selecting and configuring the built-in drivers for a serial IR touch system. (There is also some support for host control via ANSI command.) Before attempting to use the touch screen as a locator device, ensure that the touch screen is properly installed. The touch screen's serial port must be connected to a spare serial port on the host computer. Cabling is as shown. Touch Screen DB-9 (+12) 1 (TXD) 2 (RXD) 3 (DSR) 4 (SG) 5 (DTR) 6 (CTS) 7 (RTS) 8 9 NC → → ← ← → ← → Host DB-9 1 (DCD) 2 (RXD) 3 (TXD) 4 (DTR) 5 (SG) 6 (DSR) 7 (RTS) 8 (CTS) NC 9 (RI) The COMDRVR.BIN device driver must be installed to handle communications at the host serial port selected for use by the touch screen. Installation for this port is similar to installation for the host serial port. Finally, the host serial port to which the touch screen is connected must be selected as the locator device port in the Locator Setup Menu under PC8800. It is recommended that the port communications parameters be set initially for 4800 baud, 8 bits, odd parity, 1 stop bit. However, it is possible to use other settings. Most IR touchscreens support auto baud and auto parity detect, and the driver built in to the PC8800 utilizes these features. After the touch system has been installed and set up for communications, the calibration routine that is built in to the PC8800 and is accessible from the Locator Setup Menu should be run. Once calibration has been performed, calibration data are stored in a file called CTCALIB.DAT on the hard disk. The calibration file is accessed by the device driver - 41 Copyright © 2001-2003 by Mirador Software, Inc. Using Locator Devices whenever the touch screen is enabled. Therefore, recalibration should not be required at the beginning of every operating session. Once set up and calibrated, the touch system works like any locator device, subject to the pick mode and report mode settings that are selectable from the Locator Setup Menu. - 42 Copyright © 2001-2003 by Mirador Software, Inc. PC8800 User’s Manual CHAPTER 6 Display and Character Sets Organization of the Display The original terminal’s display area resolves to 480 pixels horizontally and 384 pixels vertically. When the terminal is operating in dot-addressable graphics mode, each pixel is addressable independently and may have its own attributes. In this mode, each pixel represents a point in a two-dimensional coordinate system with the origin (0, 0) at the lower left and (479, 383) at upper right. 480 Pixels are subdivided into 80 character columns. One 6x8 character cell matrix. Terminal's Display Matrix 384 Pixels are subdivided into 48 character rows. When the terminal is operating in a text or character graphics mode, the pixels are organized into character cells, and these character cells, rather than individual pixels, are addressable and have attributes. Each character cell is 6 pixels wide and 8 pixels high. Thus, the display represents an array of cells 80 columns wide and 48 rows high. Columns are numbered left to right, beginning with 0. Rows are numbered top to bottom, beginning with 0. Using this 80 x 48 array of character cells as a basis, the terminal is able to render incoming codes as elements of text or of a character graphic by using these codes to select characters or symbols from one of its character sets and then drawing them in the appropriate character cells. In addition, the terminal is able respond to certain character plot commands by rendering points and lines with an apparent resolution of 160H x 192V. It does this by using special drawing functions to select characters from a special plot character set, consisting of 256 symbols, and to position these characters on the display so that they form the commanded lines or points. The emulator faithfully represents the original terminal’s display on VGA compatible hardware, which provides a display with a native resolution of 640 pixels horizontally and - 43 Copyright © 2001-2003 by Mirador Software, Inc. Display and Character Sets 480 pixels vertically. It handles dot addressable graphics by scaling terminal pixel coordinates, so that the addressable space is the same as that of the terminal. It handles text and character graphics by scaling character cells from 6 x 8 to 8 x 10, so that the display still has 80 columns and 48 rows of cells. Since the emulator’s character cells have more resolution that those of the original terminal, text and character graphics have better definition. 640 Pixels are subdivided into 80 character columns. One 8x10 character cell matrix. Emulator's Display Matrix 480 Pixels are subdivided into 48 character rows. Character Sets The emulator, like the original terminal, can render incoming codes as displayable text or character graphics using any of three standard symbol sets: Lowercase ASCII, Process and Forms. It can also use up to four custom sets. Each of these symbol (or character) sets contains 128 symbols, designated G0 to G127. The ASCII uppercase alphabetic characters, numeric characters and punctuation marks (G32 to G95) are common to all sets. Symbol sets are normally selected by host command. They may also be selected by the operator (Options Setup Menu). When the emulator is in a text or character graphics display mode (but not a character plot mode), the mapping of incoming codes is determined by the currently selected character set and the state of the internal FLAG, as follows: - 44 Copyright © 2001-2003 by Mirador Software, Inc. PC8800 User’s Manual Code Lowercase (ASCII) Process Forms 0 to 31 (0x00 to 0x1F) FLAG on or off These codes are normally interpreted as controls and are not mapped to any character set. If Control Representation Mode is set, these codes are mapped to G0 to G31 of whatever character set is currently selected. 32 to 95 (0x20 to 0x5F ) FLAG on or off G32 to G95 (ASCII numeric, punctuation and upper case characters), common to all three standard character sets 96 to 127 (0x60 to 0x7F) FLAG off G96 to G127 of the Lowercase (ASCII) set, the lowercase ASCII characters G96 to G127 of the G96 to G127 of the Process set Forms set 96 to 127 (0x60 to 0x7F FLAG on G0 to G31 of the Lowercase (ASCII) set, the control representation characters G0 to G31 of the Process set 128 to 255 (0x80 to 0xFF ) These codes are normally interpreted as equivalent to codes 0 to 127 and are mapped to displayable characters accordingly. If Control Representation Mode is set, these codes are distinguished from codes 0 to 127 by being rendered in red, rather than green. G0 to G31 of the Forms set Note that the internal FLAG affects the rendering of codes 96 to 127 only. The state of the FLAG determines whether these 32 codes will be mapped to symbols G96 to G127 or G0 to G32 of the selected symbol set. Note also that the setting of Control Representation Mode (Options Setup Menu) affects the rendering of incoming codes independently of the state of the internal FLAG and the symbols set selected. Control Representation Mode is not a normal on-line operating mode; it is intended for trouble-shooting. It is intended to be used with the Lowercase (ASCII) symbol set, which includes the ASCII control representation characters. When the emulator is in a character plot mode, it interprets incoming codes as commands and command arguments for the display of points, vectors, bar graphs, etc. using a special symbol set consisting of 256 distinct “plot block” combinations. In these modes, there is no one to one mapping of incoming codes to the symbols in this symbol set; rather, the symbols are - 45 Copyright © 2001-2003 by Mirador Software, Inc. Display and Character Sets selected and placed on the screen at the required positions by the emulator’s internal drawing functions. Standard Font Files The emulator’s standard fonts are stored in files in the BIN directory. These files are: Font Filename Description 88ASCII.FNT 32 Lowercase and 32 Control Representation Characters 64 Process Characters 32 Line Drawing Characters 256 Character Graphics Plot Characters 64 Customer Specified Characters 64 Customer Specified Characters 64 Customer Specified Characters 64 Customer Specified Characters 88PROCES.FNT 88FORMS.FNT 88PLOT.FNT CUSTOM1.FNT CUSTOM2.FNT CUSTOM3.FNT CUSTOM4.FNT Setup Menu Name Lowercase Process Forms Custom 1 Custom 2 Custom 3 Custom 4 When the emulator starts up, it looks for these files and, if it finds them, loads them. If it does not find them, it defaults to built-in fonts. Files with these names can contain other than the standard font definitions associated with these names. If such files are present and are properly formed, they will be loaded at startup, and the font definitions they contain will replace the default definitions. Custom Font Files ISC 8001 and Intecolor 8800 and 3800 series terminals were often equipped with custom character sets. These sets were used to facilitate the construction of special graphical displays like process plant schematic diagrams, to enable the use of foreign languages, etc. Intecolor provided many of these custom character sets as options (0B03, 0B1700, 0R1700 and 0T1700). In other cases, Intecolor sold standard units to system suppliers and these suppliers provided custom sets to end users. The presence of an Intecolor generated custom character set in a terminal is signaled by the appearance of a Custom Software Release number in the terminal’s power-up header message (CSR 978000-xxx). Several Intecolor generated custom character sets have been ported to the emulator. They are made available as additional font files stored in the emulator’s FNT directory. - 46 Copyright © 2001-2003 by Mirador Software, Inc. PC8800 User’s Manual Intecolor Firmware Release CSR 978000-088 CSR 978000-137 CSR 978000-139 CSR 978000-168 CSR 978000-178 CSR 978000-213 CSR 978000-223 CSR 978000-230 CSR 978000-246 CSR 978000-275 CSR 978000-277 OEM PC8800 Font File Combustion Engineering Simcon Trane Sentinel MCC Systems Texas Instruments PPG DuPont Biles and Associates Combustion Engineering Simcon Modcomp Tano Marine CSR088PR.FNT CSR137PR.FNT CSR139PR.FNT CSR168PR.FNT CSR178C1.FNT CSR213C1.FNT and CSR213PR.FNT CSR223C1.FNT CSR230C1.FNT CSR246C1.FNT CSR275C1.FNT CSR277C1.FNT TAN8X1C1.FNT The mechanism for loading these custom fonts is to rename the files to the names of corresponding standard font files and then place them into the BIN directory (or the directory associated with the environment variable PC8800) in place of the standard files. Note: Before renaming a custom font file to give it a standard name and moving that file to the BIN directory, save the standard file with the corresponding name somewhere outside the BIN directory. Note: The names of the custom font files contain information about which standard font files they are meant to replace. For example, custom font file CSR223C1.FNT is meant to replace the file CUSTOM1.FNT in the BIN directory. Custom font file CSR139PR.FNT is meant to replace the 88PROCES.FNT file. Using FEDIT to Create Custom Fonts A font editor utility that is distributed with the emulator (FEDIT.EXE) allows users to define their own custom character and symbol sets and store them in appropriately formed .FNT files. Before attempting to use FEDIT to define a custom character or symbol set, it is important to understand how the emulator’s character sets are organized and how characters from these sets are rendered on the display. The beginning sections of this chapter provide the necessary background information. - 47 Copyright © 2001-2003 by Mirador Software, Inc. Display and Character Sets Character Matrix Conversion Examples When designing custom fonts for the emulator, it is important to take into account the difference in character cell matrix size between the terminal and the emulator. Since the emulator's character matrix has two extra columns and two extra rows, the character definition must be positioned in the matrix differently. The examples below indicate the differences and provide information should a custom character set need to be created or converted by the end user. 3 empty columns 2 empty 4 empty columns columns COLUMNS 1 2 3 4 5 3 empty columns COLUMNS 6 ROWS 1 1 1 2 2 3 3 4 4 5 5 6 6 7 7 8 8 G96 @ 2 3 4 5 6 7 COLUMNS 8 1 2 3 4 COLUMNS 5 6 1 3 empty rows ROWS ROWS 4 empty rows 1 1 2 2 3 3 4 4 5 5 6 6 7 7 8 8 G96 @ 9 10 G96 @ 2 3 4 5 6 7 8 4 empty rows ROWS 5 empty rows 9 10 G96 @ The next example illustrates the differences in defining a "graphics" character and an ASCII upper or lower case character. Graphics characters are defined using the entire matrix, so when characters are placed next to each other, a continuous graphic is displayed. The standard ASCII character set is different from the graphics definitions. On the terminal, the 1st column (1) and last row (8) are left undefined. In essence the ASCII upper and lowercase characters are a 5x7 character definition within the 6x8 matrix. column 8 is always left empty. column 1 is always left empty. COLUMNS 1 2 3 4 ROWS G98 @ 5 COLUMNS 6 1 2 3 4 5 6 COLUMNS 7 8 1 2 3 4 5 COLUMNS 6 1 1 1 1 1 2 2 2 2 3 3 3 3 4 4 4 4 5 5 5 5 6 6 6 6 7 7 7 7 8 8 8 8 ROWS ROWS 9 G64 @ row 8 is always left empty. 10 G98 @ 2 3 5 6 7 8 ROWS 9 10 row 10 is always left empty. ALL rows and columns may be used to define graphics characters so they may touch each other on the display to create a continous line without spaces between individual character cells. 4 G64 @ Only certain rows and columns may be used to define ASCII characters. A column and row is not used to allow space between character cells on the display for readability. - 48 Copyright © 2001-2003 by Mirador Software, Inc. PC8800 User’s Manual The emulator is very much the same, except the last column (8) and last row (10) are left undefined. The character is actually a 7x9 character definition within the 8x10 matrix. The following examples compare characters displayed in the two matrices in single height and double height modes. 1 2 3 4 5 6 1 1 2 3 1 4 2 5 3 6 4 7 5 8 6 2 3 4 5 6 7 8 5 6 7 8 7 8 Terminal's 6 by 8 Cell 9 10 Emulator's 8 by 10 Cell 1 2 3 4 5 6 1 2 3 4 1 5 1 6 2 7 3 8 4 9 5 10 6 11 7 12 8 13 9 14 10 15 11 16 12 2 3 4 13 14 15 Terminal's 6 by 16 Cell 16 17 18 19 20 Emulator's 8 by 20 Cell Modifying Existing Font Files. Modification of an existing character font is relatively easy. If only minor edits are required to change a few characters, the process may take only a few minutes to complete. When FEDIT is used to modify the existing font (such as PROCESS.FNT) a display like that shown on page 51 will be presented. In general, it is recommended that the user start a new project by editing one of the files CUSTOM1.FNT through CUSTOM4.FNT. These files already contain the middle 64 - 49 Copyright © 2001-2003 by Mirador Software, Inc. Display and Character Sets uppercase ASCII characters common to most fonts. The lower and upper 32 characters are left blank to be filled in as required using the editor. Running FEDIT FEDIT.EXE has a command line switches to allow custom character fonts to be created in various matrix sizes. The general syntax for FEDIT is as follows: >FEDIT [options] fontfile.fnt] <CR> where [options] begin with one or more of the following user-switches: User Switch Function /bNN set NN bytes per char (6-32, default 16) /cNNN set code of first char to NNN ADE (default 0) /fCCCCCCCC set font name to (defaults to filename) /hNN set cell height to NN pixels (6-24, default 10) /nNNN set NNN chars in set (default 128) /wN set cell width to N pixels (4-8, default 8) /? request this help message CCCCCCCC To use FEDIT for creating emulator fonts, the defaults are used. Thus, one can start the utility simply by typing: >FEDIT filename.fnt The following illustration shows what the FEDIT screen looks like when editing the file 88PROCES.FNT. - 50 Copyright © 2001-2003 by Mirador Software, Inc. PC8800 User’s Manual Notice that eight (8) columns of 16 characters each are displayed on the right-hand side of the screen display. Characters are shown in their actual screen matrix size. The arrangement of the characters is shown in the following chart. 32 Flag On G00 G16 G01 G17 G02 G18 G03 G19 G04 G20 G05 G21 G06 G22 G07 G23 G08 G24 G09 G25 G10 G26 G11 G27 G12 G28 G13 G29 G14 G30 G15 G31 64 Upper Case G32 G48 G64 G80 G33 G49 G65 G81 G34 G50 G66 G82 G35 G51 G67 G83 G36 G52 G68 G84 G37 G53 G69 G85 G38 G54 G70 G86 G39 G55 G71 G87 G40 G56 G72 G88 G41 G57 G73 G89 G42 G58 G74 G90 G43 G59 G75 G91 G44 G60 G76 G92 G45 G61 G77 G93 G46 G62 G78 G94 G47 G63 G79 G95 32 Flag Off G96 G112 G97 G113 G98 G114 G99 G115 G100 G116 G101 G117 G102 G118 G103 G119 G104 G120 G105 G121 G106 G122 G107 G123 G108 G124 G109 G125 G110 G126 G111 G127 - 51 Copyright © 2001-2003 by Mirador Software, Inc. Display and Character Sets A character graphics matrix is displayed in expanded form on the left-hand side of the FEDIT screen. It represents the character cell currently being edited. Above the matrix is the code of the character in hex to be edited. Bit Order 7 6 5 4 3 2 1 0 10 Bytes 0 1 2 3 4 5 6 7 8 9 The commands available to move the edit cursor and selection of each character are also shown at the bottom of the display. Key Sequence Arrow Key Space Bar Delete Pg Up Pg Dn Home End Enter Esc Function Moves cursor in cell Toggles pixel at cursor Clears cell Moves to previous char Moves to next char Moves to first char Moves to last char Exits with save Exits without save Use the commands above to practice editing the 88PROCES.FNT file. Any changes made to the file can be aborted by pressing the Esc key. - 52 Copyright © 2001-2003 by Mirador Software, Inc. PC8800 User’s Manual MAKE SURE TO EDIT ONLY THE FONT FILES ON YOUR HARD DISK DRIVE. Do not edit the font files on the emulator distribution disk. Since the altered character font will have the same name as the original file, be careful not to get confused which is which. It is advisable to make note of time/date stamp of the newly created filename as your desired file. This should be backed-up to a floppy for archive purposes. - 53 Copyright © 2001-2003 by Mirador Software, Inc. PC8800 User’s Manual Appendix A Chart of Character Codes Character Codes 0 to 31 Decimal Code Hex Code Octal Code Binary Code Keyboard Display Symbol 0 00 000 00000000 Ctrl @ <NUL> 1 01 001 00000001 Ctrl A <SOH> 2 02 002 00000010 Ctrl B <STX> 3 03 003 00000011 Ctrl C <ETX> 4 04 004 00000100 Ctrl D <EOT> 5 05 005 00000101 Ctrl E <ENQ> 6 06 006 00000110 Ctrl F <ACK> 7 07 007 00000111 Ctrl G <BEL> 8 08 010 00001000 Ctrl H <BS> 9 09 011 00001001 Ctrl I <HT> 10 0A 012 00001010 Ctrl J <LF> 11 0B 013 00001011 Ctrl K <VT> 12 0C 014 00001100 Ctrl L <FF> 13 0D 015 00001101 Ctrl M <CR> 14 0E 016 00001110 Ctrl N <SO> 15 0F 017 00001111 Ctrl O <SI> 16 10 020 00010000 Ctrl P <DLE> 17 11 021 00010001 Ctrl Q <DC1> 18 12 022 00010010 Ctrl R <DC2> 19 13 023 00010011 Ctrl S <DC3> 20 14 024 00010100 Ctrl T <DC4> 21 15 025 00010101 Ctrl U <NAK> 22 16 026 00010110 Ctrl V <SYN> 23 17 027 00010111 Ctrl W <ETB> 24 18 030 00011000 Ctrl X <CAN> 25 19 031 00011001 Ctrl Y <EM> 26 1A 032 00011010 Ctrl Z <SUB> 27 1B 033 00011011 Ctrl [ <ESC> 28 1C 034 00011100 Ctrl \ <FS> 29 1D 035 00011101 Ctrl ] <GS> 30 1E 036 00011110 Ctrl ^ <RS> 31 1F 037 00011111 Ctrl _ <US> - 55 Copyright © 2001-2003 by Mirador Software, Inc. ASCII Char Character Codes Character Codes 32 to 63 Decimal Code Hex Code Octal Code Binary Code Keyboard Display Symbol 32 20 040 00100000 Space G32 33 21 041 00100001 ! G33 ! 34 22 042 00100010 " G34 " 35 23 043 00100011 # G35 # 36 24 044 00100100 $ G36 $ 37 25 045 00100101 % G37 % 38 26 046 00100110 & G38 & 39 27 047 00100111 ' G39 ' 40 28 050 00101000 ( G40 ( 41 29 051 00101001 ) G41 ) 42 2A 052 00101010 * G42 * 43 2B 053 00101011 + G43 + 44 2C 054 00101100 , G44 , 45 2D 055 00101101 - G45 - 46 2E 056 00101110 . G46 . 47 2F 057 00101111 / G47 / 48 30 060 00110000 0 G48 0 49 31 061 00110001 1 G49 1 50 32 062 00110010 2 G50 2 51 33 063 00110011 3 G51 3 52 34 064 00110100 4 G52 4 53 35 065 00110101 5 G53 5 54 36 066 00110110 6 G54 6 55 37 067 00110111 7 G55 7 56 38 070 00111000 8 G56 8 57 39 071 00111001 9 G57 9 58 3A 072 00111010 : G58 : 59 3B 073 00111011 ; G59 ; 60 3C 074 00111100 < G60 < 61 3D 075 00111101 = G61 = 62 3E 076 00111110 > G62 > 63 3F 077 00111111 ? G63 ? - 56 Copyright © 2001-2003 by Mirador Software, Inc. ASCII Char PC8800 User’s Manual Character Codes 64 to 95 Decimal Code Hex Code Octal Code Binary Code Keyboard Display Symbol ASCII Char 64 40 100 01000000 @ G64 @ 65 41 101 01000001 A G65 A 66 42 102 01000010 B G66 B 67 43 103 01000011 C G67 C 68 44 104 01000100 D G68 D 69 45 105 01000101 E G69 E 70 46 106 01000110 F G70 F 71 47 107 01000111 G G71 G 72 48 110 01001000 H G72 H 73 49 111 01001001 I G73 I 74 4A 112 01001010 J G74 J 75 4B 113 01001011 K G75 K 76 4C 114 01001100 L G76 L 77 4D 115 01001101 M G77 M 78 4E 116 01001110 N G78 N 79 4F 117 01001111 O G79 O 80 50 120 01010000 P G80 P 81 51 121 01010001 Q G81 Q 82 52 122 01010010 R G82 R 83 53 123 01010011 S G83 S 84 54 124 01010100 T G84 T 85 55 125 01010101 U G85 U 86 56 126 01010110 V G86 V 87 57 127 01010111 W G87 W 88 58 130 01011000 X G88 X 89 59 131 01011001 Y G89 Y 90 5A 132 01011010 Z G90 Z 91 5B 133 01011011 [ G91 [ 92 5C 134 01011100 \ G92 \ 93 5D 135 01011101 ] G93 ] 94 5E 136 01011110 ^ G94 ^ 95 5F 137 01011111 _ G95 _ - 57 Copyright © 2001-2003 by Mirador Software, Inc. Character Codes Character Codes 96 to 127 Decimal Code Hex Code Octal Code Binary Code Keyboard Display Symbol ASCII Char 96 60 140 01100000 ` G0 or G96 ` 97 61 141 01100001 a G1 or G97 a 98 62 142 01100010 b G2 or G98 b 99 63 143 01100011 c G3 or G99 c 100 64 144 01100100 d G4 or G100 d 101 65 145 01100101 e G5 or G101 e 102 66 146 01100110 f G6 or G102 f 103 67 147 01100111 g G7 or G103 g 104 68 150 01101000 h G8 or G104 h 105 69 151 01101001 i G9 or G105 i 106 6A 152 01101010 j G10 or G106 j 107 6B 153 01101011 k G11 or G107 k 108 6C 154 01101100 l G12 or G108 l 109 6D 155 01101101 m G13 or G109 m 110 6E 156 01101110 n G14 or G110 n 111 6F 157 01101111 o G15 or G111 o 112 70 160 01110000 p G16 or G112 p 113 71 161 01110001 q G17 or G113 q 114 72 162 01110010 r G18 or G114 r 115 73 163 01110011 s G19 or G115 s 116 74 164 01110100 t G20 or G116 t 117 75 165 01110101 u G21 or G117 u 118 76 166 01110110 v G22 or G118 v 119 77 167 01110111 w G23 or G119 w 120 78 170 01111000 x G24 or G120 x 121 79 171 01111001 y G25 or G121 y 122 7A 172 01111010 z G26 or G122 z 123 7B 173 01111011 { G27 or G123 { 124 7C 174 01111100 | G28 or G124 | 125 7D 175 01111101 } G29 or G125 } 126 7E 176 01111110 ~ G30 or G126 ~ 127 7F 177 01111111 Del G31 or G127 <DEL> - 58 Copyright © 2001-2003 by Mirador Software, Inc. PC8800 User’s Manual Character Codes 128 to 159 Decimal Code Hex Code Octal Code Binary Code Keyboard 128 80 200 10000000 Alt @ 129 81 201 10000001 Alt A 130 82 202 10000010 Alt B 131 83 203 10000011 Alt C 132 84 204 10000100 Alt D 133 85 205 10000101 Alt E 134 86 206 10000110 Alt F 135 87 207 10000111 Alt G 136 88 210 10001000 Alt H 137 89 211 10001001 Alt I 138 8A 212 10001010 Alt J 139 8B 213 10001011 Alt K 140 8C 214 10001100 Alt L 141 8D 215 10001101 Alt M 142 8E 216 10001110 Alt N 143 8F 217 10001111 Alt O 144 90 220 10010000 Alt P 145 91 221 10010001 Alt Q 146 92 222 10010010 Alt R 147 93 223 10010011 Alt S 148 94 224 10010100 Alt T 149 95 225 10010101 Alt U 150 96 226 10010110 Alt V 151 97 227 10010111 Alt W 152 98 230 10011000 Alt X 153 99 231 10011001 Alt Y 154 9A 232 10011010 Alt Z 155 9B 233 10011011 Alt [ 156 9C 234 10011100 Alt \ 157 9D 235 10011101 Alt ] 158 9E 236 10011110 Alt ^ 159 9F 237 10011111 Alt _ Display Symbol - 59 Copyright © 2001-2003 by Mirador Software, Inc. ASCII Char Character Codes Character Codes 160 to 191 Decimal Code Hex Code Octal Code Binary Code Keyboard 160 A0 240 10100000 Atl 0 161 A1 241 10100001 Ctrl ! 162 A2 242 10100010 Ctrl " 163 A3 243 10100011 Ctrl # 164 A4 244 10100100 Ctrl $ 165 A5 245 10100101 Ctrl % 166 A6 246 10100110 Ctrl & 167 A7 247 10100111 Ctrl ' 168 A8 250 10101000 Ctrl ( 169 A9 251 10101001 Ctrl ) 170 AA 252 10101010 Ctrl * 171 AB 253 10101011 Ctrl + 172 AC 254 10101100 Ctrl , 173 AD 255 10101101 Ctrl - 174 AE 256 10101110 Ctrl . 175 AF 257 10101111 Ctrl / 176 B0 260 10110000 Ctrl 0 177 B1 261 10110001 Ctrl 1 178 B2 262 10110010 Ctrl 2 179 B3 263 10110011 Ctrl 3 180 B4 264 10110100 Ctrl 4 181 B5 265 10110101 Ctrl 5 182 B6 266 10110110 Ctrl 6 183 B7 267 10110111 Ctrl 7 184 B8 270 10111000 Ctrl 8 185 B9 271 10111001 Ctrl 9 186 BA 272 10111010 Ctrl : 187 BB 273 10111011 Ctrl ; 188 BC 274 10111100 Ctrl < 189 BD 275 10111101 Ctrl = 190 BE 276 10111110 Ctrl > 191 BF 277 10111111 Ctrl ? Display Symbol - 60 Copyright © 2001-2003 by Mirador Software, Inc. ASCII Char PC8800 User’s Manual Character Codes 192 to 223 Decimal Code Hex Code Octal Code Binary Code Keyboard 192 C0 300 11000000 Alt ‘192’ 193 C1 301 11000001 Ctrl F1 194 C2 302 11000010 Ctrl F2 195 C3 303 11000011 Ctrl F3 196 C4 304 11000100 Ctrl F4 197 C5 305 11000101 Ctrl F5 198 C6 306 11000110 Ctrl F6 199 C7 307 11000111 Ctrl F7 200 C8 310 11001000 Ctrl F8 201 C9 311 11001001 Ctrl F9 202 CA 312 11001010 Ctrl F10 203 CB 313 11001011 Ctrl F11 204 CC 314 11001100 Ctrl F12 205 CD 315 11001101 Alt ‘205’ 206 CE 316 11001110 Alt ‘206’ 207 CF 317 11001111 Alt ‘207’ 208 D0 320 11010000 Alt ‘208’ 209 D1 321 11010001 Shift F1 210 D2 322 11010010 Shift F2 211 D3 323 11010011 Shift F3 212 D4 324 11010100 Shift F4 213 D5 325 11010101 Shift F5 214 D6 326 11010110 Shift F6 215 D7 327 11010111 Shift F7 216 D8 330 11011000 Shift F8 217 D9 331 11011001 Shift F9 218 DA 332 11011010 Shift F10 219 DB 333 11011011 Shift F11 220 DC 334 11011100 Shift F12 221 DD 335 11011101 Alt ‘221’ 222 DE 336 11011110 Alt ‘222’ 223 DF 337 11011111 Alt ‘223’ Display Symbol - 61 Copyright © 2001-2003 by Mirador Software, Inc. ASCII Char Character Codes Character Codes 224 to 255 Decimal Code Hex Code Octal Code Binary Code Keyboard 224 E0 340 11100000 Alt ‘224’ 225 E1 341 11100001 Alt F1 226 E2 342 11100010 Alt F2 227 E3 343 11100011 Alt F3 228 E4 344 11100100 Alt F4 229 E5 345 11100101 Alt F5 230 E6 346 11100110 Alt F6 231 E7 347 11100111 Alt F7 232 E8 350 11101000 Alt F8 233 E9 351 11101001 Alt F9 234 EA 352 11101010 Alt F10 235 EB 353 11101011 Alt F11 236 EC 354 11101100 Alt F12 237 ED 355 11101101 Alt ‘237’ 238 EE 356 11101110 Alt ‘238’ 239 EF 357 11101111 Alt ‘239’ 240 F0 360 11110000 Alt ‘240’ 241 F1 361 11110001 F1 242 F2 362 11110010 F2 243 F3 363 11110011 F3 244 F4 364 11110100 F4 245 F5 365 11110101 F5 246 F6 366 11110110 F6 247 F7 367 11110111 F7 248 F8 370 11111000 F8 249 F9 371 11111001 F9 250 FA 372 11111010 F10 251 FB 373 11111011 F11 252 FC 374 11111100 F12 253 FD 375 11111101 Alt ‘253’ 254 FE 376 11111110 Alt ‘254’ 255 FF 377 11111111 Alt ‘255’ Display Symbol - 62 Copyright © 2001-2003 by Mirador Software, Inc. ASCII Char PC8800 User’s Manual Appendix B Keyboard Layouts Layout of the 8001/8800 Terminal Keyboard F0 F1 Blk Blu Red Mag Grn Cyn Yel Wht F2 F3 F4 F5 F6 AUTO FG ON BG ON BLINK ON ESC ! 1 " 2 # 3 Q TAB CONTROL W A 2X/BL OFF 2X CHAR ON $ 4 % 5 R D Z COMMAND F8 E S SHIFT F7 F10 F11 F12 { [ | \ } ] ~ ^ & 6 T F X F9 Y G C ' 7 B J N = - K L + ; < , > . R E T U R N * : ? / SHIFT REPT SPACE BAR ALPHA LOCK BREAK ` @ P SETUP INSERT DELETE DELETE INSERT CHAR CHAR LINE LINE HOME 0 O ERASE ERASE LINE PAGE F15 DEL I M F14 _ ) 9 U H V ( 8 F13 7 8 9 . . 4 5 6 X 1 2 3 - 0 . = + Layout of a PC Style 101-key Keyboard F1 Esc ~ ` ! 1 Tab Caps Lock Shift Ctrl F2 @ 2 Q F3 # 3 W A F4 $ 4 E S Z Alt % 5 R D X F5 ^ 6 T F C & 7 Y G V F6 * 8 U H B F7 ( 9 I J N Space Bar F8 ) 0 O K M F10 _ - + = { [ P : ; L < , F9 Alt F12 } ] " ' ? / > . F11 Caps Lock Screen Scroll Lock Pause Num Lock Insert Home Page Up Num Lock _. . Delete End Page Down 7 8 Home Print Enter Shift Ctrl - 63 Copyright © 2001-2003 by Mirador Software, Inc. 5 1 2 0 Ins X _ 9 PgUp 4 End Scroll Lock 6 + 3 PgDn . Del Enter Keyboard Layouts Layout of the PC 101-key Keyboard Showing Mappings to Terminal Keyboard Keys Esc F1 F2 F3 F4 F5 Sh F0 Sh F13 Sh F14 Sh F15 ~ ` ! 1 Tab Caps Lock Shift Ctrl @ 2 Q # 3 W A $ 4 E S Z Alt % 5 R D X ^ 6 T F C & 7 Y G V F6 * 8 U H B F7 ( 9 I J N Space Bar F8 ) 0 O K M F9 F10 F11 F12 _ { [ P : ; L < , + = ? / > . Insert Backspace } ] " ' Alt Print Scroll Pause Screen Lock Char Home Delete Char Ctrl Caps Lock Erase Page Num Lock _. . Erase Line 7 8 Home Enter Shift Num Lock Up 4 5 1 2 0 Left Down Right - 64 Copyright © 2001-2003 by Mirador Software, Inc. Insert Char Scroll Lock X _ 9 Erase Page 6 + 3 Erase Line . Delete Char Enter PC8800 User’s Manual Appendix C Standard Fonts STANDARD UPPERCASE CHARACTERS (G32 THROUGH G63) (Common to all font files except PLOT.) G32 G33 G34 G35 G36 G37 G38 G39 G40 G41 G42 G43 G44 G45 G46 G47 G48 G49 G50 G51 G52 G53 G54 G55 G56 G57 G58 G59 G60 G61 G62 G63 - 65 Copyright © 2001-2003 by Mirador Software, Inc. Standard Character Sets STANDARD UPPERCASE CHARACTERS (G64 THROUGH G95) (Common to all font files except PLOT.) G64 G65 G66 G67 G68 G69 G70 G71 G72 G73 G74 G75 G76 G77 G78 G79 G80 G81 G82 G83 G84 G85 G86 G87 G88 G89 G90 G91 G92 G93 G94 G95 - 66 Copyright © 2001-2003 by Mirador Software, Inc. PC8800 User’s Manual CONTROL REPRESENTATION CHARACTERS - FLAG ON (G0 through G31) (Lowercase ASCII font file only) G0 Null G8 Backspace G1 Null G9 Horizontal Tab G2 Null G10 G3 G4 Null End Transmission G11 G12 Line Feed Vertical Tab Form Feed G5 Shift Out G13 Carriage Return G6 Acknowledge G14 G7 Bell G15 Shift Out Shift In G16 G17 G18 G19 G20 G21 G22 G23 G24 G25 G26 G27 G28 G29 G30 G31 - 67 Copyright © 2001-2003 by Mirador Software, Inc. Standard Character Sets LOWERCASE CHARACTERS - FLAG OFF (G96 through G127) (Lowercase ASCII font file only) G96 G97 G98 G99 G100 G101 G102 G103 G104 G105 G106 G107 G108 G109 G110 G111 G112 G113 G114 G115 G116 G117 G118 G119 G120 G121 G122 G123 G124 G125 G126 G127 - 68 Copyright © 2001-2003 by Mirador Software, Inc. PC8800 User’s Manual PROCESS CHARACTERS - FLAG ON (G0 through G31) (PROCESS font file only) G0 G1 G2 G3 G4 G5 G6 G7 G8 G9 G10 G11 G12 G13 G14 G15 G16 G17 G18 G19 G20 G21 G22 G23 G24 G25 G26 G27 G28 G29 G30 G31 - 69 Copyright © 2001-2003 by Mirador Software, Inc. Standard Character Sets PROCESS CHARACTERS - FLAG OFF (G96 through G127) (PROCESS font file only) G96 G97 G98 G99 G100 G101 G102 G103 G104 G105 G106 G107 G108 G109 G110 G111 G112 G113 G114 G115 G116 G117 G118 G119 G120 G121 G122 G123 G124 G125 G126 G127 - 70 Copyright © 2001-2003 by Mirador Software, Inc. PC8800 User’s Manual FORMS CHARACTERS - FLAG ON (G0 through G31) (FORMS font file only) G0 G1 G2 G3 G4 G5 G6 G7 G8 G9 G10 G11 G12 G13 G14 G15 G16 G17 G18 G19 G20 G21 G22 G23 G24 G25 G26 G27 G28 G29 G30 G31 - 71 Copyright © 2001-2003 by Mirador Software, Inc. Standard Character Sets FORMS CHARACTERS - FLAG OFF (G96 through G127) (FORMS font file only) G96 G97 G98 G99 G100 G101 G102 G103 G104 G105 G106 G107 G108 G109 G110 G111 G112 G113 G114 G115 G116 G117 G118 G119 G120 G121 G122 G123 G124 G125 G126 G127 - 72 Copyright © 2001-2003 by Mirador Software, Inc. PC8800 User’s Manual Appendix D Character Worksheets CHARACTER WORKSHEET - FLAG ON (G0 through G31) (Emulator's Standard 8 x 10 Matrix) G0 G1 G2 G3 G4 G5 G6 G7 G8 G9 G10 G11 G12 G13 G14 G15 G16 G17 G18 G19 G20 G21 G22 G23 G24 G25 G26 G27 G28 G29 G30 G31 - 73 Copyright © 2001-2003 by Mirador Software, Inc. Character Set Worksheets CHARACTER WORKSHEET - FLAG OFF (G96 through G127) (Emulator's Standard 8 x 10 Matrix) G96 G97 G98 G99 G100 G101 G102 G103 G104 G105 G106 G107 G108 G109 G110 G111 G112 G113 G114 G115 G116 G117 G118 G119 G120 G121 G122 G123 G124 G125 G126 G127 - 74 Copyright © 2001-2003 by Mirador Software, Inc. PC8800 User’s Manual Appendix E Command Reference Alpha Mode Commands Variable arguments are byte values. Curly braces indicate optional arguments and are not themselves parts of commands. Command Syntax Variable Arguments Enter Protected Fields Mode <SOH> fill_char fill_char = the character that will be used to erase the contents of unprotected fields Enter Plot Mode <STX> Position Cursor <ETX> x y { bx by bcci } x (byte) = column 0 to 79 y (byte) = row 0 to 47 bx (byte) = column 0 to 79, blind cursor, when x > 80 by (byte) = row 0 to 47, blind cursor when x > 80 bcci = composite color byte for blind mode, when x > 80 Set Attributes <ACK> cci cci = a byte representing a combination of BG color, FG color and blink state. Bits 0-2 = BG color Bits 3-5 = FG color Bit 6 = Blink Sound Tone <BEL> Cursor Home <BS> Tab Cursor <HT> Cursor Next Line <LF> Erase Line <VT> Erase Page <FF> - 75 Copyright © 2001-2003 by Mirador Software, Inc. Command Reference Alpha Mode Commands, cont. Variable arguments are byte values. Curly braces indicate optional arguments and are not themselves parts of commands. Command Syntax Cursor Beginning of Line <CR> Set 2X High Characters <SO> Set 1X High Characters, Blink Off <SI> Set Color Black <DLE> Set Color Red <DC1> Set Color Green <DC2> Set Color Yellow <DC3> Set Color Blue <DC4> Set Color Magenta <NAK> Set Color Cyan <SYN> Set Color White <ETB> Block Transmit <CAN> Cursor Right <EM> Cursor Left <SUB> Cursor Up <FS> Flag Off <GS> Flag On <RS> Blink On <US> Variable Arguments - 76 Copyright © 2001-2003 by Mirador Software, Inc. PC8800 User’s Manual Alpha Mode Commands, cont. Variable arguments are byte values. Curly braces indicate optional arguments and are not themselves parts of commands. Command Syntax Variable Arguments Use Blind Cursor <ESC> A Enter Color Pad Plot Mode <ESC> B Report Cursor <ESC> C Enter Fastscreen Mode <ESC> D Set Local Echo Off <ESC> F Set Local Echo On <ESC> H Set Cursor Autoincrement Vertical Mode <ESC> J Set Cursor Scroll Mode <ESC> K Set Keyboard Local <ESC> L Dump Screen to Printer <ESC> M byte_arg Set Insert Character Mode <ESC> Q Enter Dot Addressable Graphics Mode, or Set Cursor Autoincrement Left Mode <ESC> T Insert Line <ESC> U Delete Line <ESC> V Set Cursor Autoincrement Right Mode <ESC> X Fill Screen <ESC> Y char Set Cursor Autoincrement 45 Degrees Down Mode <ESC> Z byte_arg: See discussion in the chapter on printing. char: The character to be used to fill the screen - 77 Copyright © 2001-2003 by Mirador Software, Inc. Command Reference Alpha Mode Commands, cont. Variable arguments are byte values. Curly braces indicate optional arguments and are not themselves parts of commands. Command Syntax Variable Arguments Exit Blind Cursor Mode <ESC> <ESC> Erase Dot Addressable <ESC> \ Graphics, or Set Cursor Autoincrement 45 Degrees Up Mode Block Receive <ESC> ] ANSI X3.64 Extended Alpha Mode Commands (executable when /STRICTG is not used at startup). Curly braces indicated optional arguments and are not parts of the commands. Command Syntax Variable Arguments Power Failure Indicator (PFL) (not implemented) Set Mode (SM) <ESC> [ pn { ; pn ... } h pn: 2 = Keyboard disable 29 = Default Function Keys 31 = Function Key Rate Fast Reset Mode (RM) <ESC> [ pn { ; pn ... } l pn: 2 = Keyboard enable 29 = User Defined Function Keys 31 = Function Key Rate Slow Select Character Set <ESC> ( pn (SCS) pn: B = Lowercase ASCII C = Process D = Forms E = Custom 1 F = Custom 2 G = Custom 3 H = Custom 4 Select Page (SP) pn: 1, 2, 3 or 4 = writeable page 11, 12, 13 or 14 = displayed page 10 = current displayed page <ESC> [ pn { ; pn ... } p - 78 Copyright © 2001-2003 by Mirador Software, Inc. PC8800 User’s Manual Alpha Mode Commands, cont. ANSI X3.64 Extended Alpha Mode Commands are executable when /STRICTG is not used at startup. Curly braces indicated optional arguments and are not parts of the commands. Command Syntax Variable Arguments Program Function Key (PPFK) <ESC> [ pk ; pn { ; pn ... } s pk: 0 to 63 = key identifier pn: decimal code of character to be assigned to key Set Cursor Position (CUP) <ESC> [ row ; col H row: 0 to 47 col: 0 to 79 Erase Display (ED) <ESC> [ pn J pn: 0 = from the active position 1 = to the active position 2 = full screen Horizontal and Vertical Tabulation (HVP) <ESC> [ row ; col f row: 0 to 79 col: 0 to 47 Set Margins (PMRG) <ESC> [ top ; bot r top: 0 to 47 bot: 0 to 47 Private Set Mode (PSM) <ESC> [ ? pn { ; pn ... } h 3 = Disable Setup entry 6 = Enable Private Origin Mode 29 = Default Function Keys 31 = Function Key Rate Fast Private Reset Mode (PRM) <ESC> [ ? pn { ; pn ... } l 3 = Enable Setup entry 6 = Disable Private Origin Mode 29 = User Defined Function Keys 31 = Function Key Rate Slow - 79 Copyright © 2001-2003 by Mirador Software, Inc. Command Reference Protect Mode Commands Protected Fields Mode Commands (executable when Protect Mode has been enabled in Setup and the mode has been entered with <SOH>) Command Syntax Exit Protect Mode to Alpha Mode <SOH> Variable Arguments <ESC> Move to first unprotected field <BS> Move to beginning of next unprotected field <HT> Move to beginning of first unprotected field on next line <LF> Erase from current position to end of <VT> current unprotected field Erase from current position to end of <FF> last unprotected field on page Transmit contents of unprotected fields to host <CR> Move right in unprotected fields <EM> Move left in unprotected fields <SUB> Move to end of last unprotected field <FS> on line above - 80 Copyright © 2001-2003 by Mirador Software, Inc. PC8800 User’s Manual Plot Mode Commands Plot Mode Commands are executable when the mode has been entered with <STX>. Commands make reference to a coordinate space defined by (0, 0) at the lower left of the screen and (159, 191) at the upper right of the screen. All x and y arguments refer to this coordinate space. X and y arguments are represented in binary as byte values. Curly braces indicate optional arguments and are not parts of the commands. Command Syntax Variable Arguments Exit Plot Mode to Alpha Mode <255> Enter Character Plot Submode <254> Point Plot <253> x0 y0 { ... xn yn } <252> y0 x0 { ... yn xn } x0 (byte) = 0 to 159 y0 (byte) = 0 to 191 etc. Incremental Point Plot <251> inc { ... inc } inc (byte) = a value representing two increments from a given base. bit 0 = negative dy2 bit 1 = positive dy2 bit 2 = negative dx2 bit 3 = positive dx2 bit 4 = negative dy1 bit 5 = positive dy1 bit 6 = negative dx1 bit 7 = positive dx1 Horizontal Bar Graph or Histograph <250> x_base y0 x0 { ... yn xn } x_base (byte) = 0 to 159 y0 (byte) = 0 to 191 x0 (byte) = 0 to 159 Continue Horizontal Bar Graph <249> y0 x0 { ... yn xn } <248> x0 y0 { ... xn yn } x0 (byte) = 0 to 159 y0 (byte) = 0 to 191 etc. Incremental Horizontal Bar Graph <247> inc { ... inc } inc (byte) = a value representing two increments from a given base. - 81 Copyright © 2001-2003 by Mirador Software, Inc. Command Reference Plot Mode Commands, cont. Command Syntax Variable Arguments Vertical Bar Graph or Histograph <246> y_base x0 y0 { ... xn yn } y_base (byte) = 0 to 191 x0 (byte) = 0 to 159 y0 (byte) = 0 to 191 Continue Vertical Bar Graph <245> x0 y0 { ... xn yn } <244> y0 x0 { ... yn xn } x0 (byte) = 0 to 159 y0 (byte) = 0 to 191 etc. Incremental Vertical Bar Graph <243> inc { ... inc } inc (byte) = a value representing two increments from a given base. Vector Plot <242> x0 y0 x1 y1 { ... xn yn } <241> y0 x0 y1 x1 { ... yn xn } x0 (byte) = 0 to 159 y0 (byte) = 0 to 191 etc. Incremental Vector Plot <240> inc { ... inc } inc (byte) = a value representing two increments from a given base. - 82 Copyright © 2001-2003 by Mirador Software, Inc. PC8800 User’s Manual Locator Commands Locator Commands are executable when /STRICTG is not used at startup. Locator report formats are discussed in the chapter on locator devices. Commands follow ANSI conventions. Variable arguments are strings of numeric characters representing decimal numbers. Command Syntax Variable Arguments Report Locator System <ESC> [ ? 250 ; 1 d Version Restore Saved Defaults <ESC> [ ? 251 ; 1 d Enable/Disable Device <ESC> [ ? 1 ; pn d pn: 1 = disable 2 = enable 3 = disable on pick 250 = report enable state Select Device <ESC> [ ? 2 ; pn d pn: 1 = None 2 = Arrow and Home keys 4 = IR touchscreen 6 = LX200 trackball 7 = Logitech C7 mouse 8 = Microsoft mouse 250 = report current selection Set Locator Position <ESC> [ ? 3 ; row ; col d row: col: 0 to 47, or 250 0 to 79, or 250 Note: If either parameter is 250 a position report is requested. Set Locator Cursor Mode <ESC> [ ? 4 ; pn d pn: 1 = host cursor only 2 = locator cursor only 3 = use both cursors 250 = report mode Set Locator Cursor Style <ESC> [ ? 5 ; pn d pn: 1 = underscore 2 = under/overscore 3 = block 10 = invisible 250 = report state - 83 Copyright © 2001-2003 by Mirador Software, Inc. Command Reference Locator Commands, cont. Locator Commands are executable when /STRICTG is not used at startup. Locator report formats are discussed in the chapter on locator devices. Commands follow ANSI conventions. Variable arguments are strings of numeric characters representing decimal numbers. Command Syntax Variable Arguments Set Report/Pick Mode <ESC> [ ? 7 ; pn d pn: Set Report Format <ESC> [ ? 8 ; pn d Report Locator Position <ESC> [ ? 9 d 1 = tracking w/exit pick 2 = tracking w/movement picks 3 = entry point mode 4 = continuous pick mode 10 = no pick mode 250 = report state pn: 1 = no reports 2 = pick report 3 = 8001 style 4 = 8001 style (short) 5 = ANSI style 6 = ANSI style (short) 7 = VT100 style 250 = report state Legacy Locator commands. Command Syntax Variable Arguments Enable/Disable Locator Device <ESC> [ pn d pn: 0 = Disable 1 = Enable Enable/Disable Locator Device <ESC> [ pn t pn: 0 = Disable 1 to 255 = Enable Set Pick Mode <ESC> [ pn q pn: 0 = Tracking with exit pick 1 = Tracking with movement pick 2 = Entry pick 3 = Continuous pick Initialize Locator Device <ESC> [ v - 84 Copyright © 2001-2003 by Mirador Software, Inc. PC8800 User’s Manual Graphics Mode Commands Dot Addressable Graphics Mode Commands (executable when dot-addressable graphics has been enabled in Setup and the mode has been entered with “<ESC> T”). The coordinate space referenced by the commands is defined by (0, 0) at the lower left of the screen, and (479, 383) at the upper right of the screen. All x and y arguments refer to this coordinate space and are representable as strings of ASCII numeric characters. Curly braces indicate optional arguments and are not parts of the commands. Argument delimiters are shown here as commas. Command Syntax Variable Arguments Exit to Alpha Mode ? Select Graphics Page X write_page , display_page , write_page = 1 to 4, 255 display_page = 1 to 4, 255 Note: If either value is 255 a status report is sent to the host Relative Vector % dx0 , dy0 , { ... dxn , dyn , } dx = displacement on x dy = displacement on y Circle (x,y,r, x = coord of center y = coord of center r = radius Display Superpixel * x0 , y0 , { ... xn , yn , } Concatenated Vector + x0 , y0 , { ... xn , yn , } Point . x0 , y0 , { ... xn , yn , } Vector / x0 , y0 , { ... xn , yn , } L x0 , y0 , { ... xn , yn , } Relative Point : dx0 , dy0 , { ... dxn , dyn , } Rectangle < x0 , y0 , x1 , y1 , Arc A x , y , r , start , end , dx = displacement on x dy = displacement on y x = coord of center point y = coord of center point r = radius start = angle in degrees end = angle in degrees - 85 Copyright © 2001-2003 by Mirador Software, Inc. Command Reference Graphics Mode Commands, cont. Command Syntax Variable Arguments Superpixel Bar B x , y , width , height , x = coord of lower left corner y = coord of lower left corner width = number superpixels height = number superpixels Clear Plane C pmask , pmask = 0 to 7 Note: Value is obtained by ORing values of individual planes. Red = 1, green = 2, blue = 4. Display Enable Plane D pmask , pmask = 0 to 7 Note: Value is obtained by ORing values of individual planes. Red = 1, green = 2, blue = 4. Fill Plane E pmask , pmask = 0 to 7 Note: Value is obtained by ORing values of individual planes. Red = 1, green = 2, blue = 4. Write Enable Plane W pmask , pmask = 0 to 7 Note: Value is obtained by ORing values of individual planes. Red = 1, green = 2, blue = 4. Fill Region F x , y , bound_color , pindex , x = coord of interior point y = coord of interior point bound_color = color index of bounding line pindex = fill pattern index Select Color Index H index , index = 0 to 7 - 86 Copyright © 2001-2003 by Mirador Software, Inc. PC8800 User’s Manual Graphics Mode Commands, cont. Command Syntax Variable Arguments Define Color Index J index , color , index = 0 to 7 color = 0 to 7 Enable Color Definition(s) I Define Fill Pattern P definition Read Color at Point Rx,y, Define Superpixel S hue , sat , intensity , definition: an undelimited string of 8 characters defining an 8x8 pixel matrix. The first character in the string defines the bottom row of the matrix hue = 0 to 95 sat = 0 to 16 intensity = 0 to 16 Note: for hue, 0 = red, 32 = green and 64 = blue Define Line Style T dots_on , dots_off , Begin Polygon [ End Polygon ] dots_on = number of pixels dots_off = number of pixels - 87 Copyright © 2001-2003 by Mirador Software, Inc. Command Reference Fastscreen Mode Commands Fastscreen Commands are executable when Fastscreen Mode has been enabled in Setup and the mode has been entered with <ESC> D. Arguments to commands are ASCII character strings. Curly braces indicate optional arguments. Command Syntax Exit to Alpha Mode <ESC> <ESC> Variable Arguments Initialize Storage Device INI dev <CR> dev = RX0: or RX1: Select Storage Device DEV dev <CR> dev = RX0: or RX1: Load Stored Display LOA {dev} file <CR> dev = RX0: or RX1: file = display filename Save Display SAV {dev} file {start - end } <CR> dev = RX0: or RX1: file = display filename start = address (in hex) corresponding to screen position end = address (in hex) corresponding to screen position Note: Address 8000h corresponds to row 0, column 0. Address 9DFFh corresponds to row 47, column 79. Delete Stored Display DEL {dev} file <CR> dev = RX0: or RX1: file = display filename - 88 Copyright © 2001-2003 by Mirador Software, Inc.