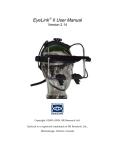
1
EyeLink® Data Viewer
User’s Manual
Document Version 1.8.402
Please report all functionality comments and bugs to:
[email protected]
Copyright ©2002-2008, SR Research Ltd.
EyeLink is a registered trademark of SR Research Ltd., Mississauga, Canada
1
2
3
4
5
Table of Contents
Introduction................................................................................................................. 1
1.1
Data Visualization............................................................................................... 1
1.2
Event Selection ................................................................................................... 2
1.3
Interest Area Definition ...................................................................................... 2
1.4
Event Filtering .................................................................................................... 2
1.5
Interest Periods and Reaction Time Definition................................................... 3
1.6
Data Output and Analysis ................................................................................... 3
1.7
Experiment Integration ....................................................................................... 4
Installation................................................................................................................... 5
2.1
System Requirements.......................................................................................... 5
2.2
Setup ................................................................................................................... 5
Working with Files ..................................................................................................... 6
3.1
Creating a Data Viewing Session (DVS)............................................................ 6
3.2
Opening an Existing Viewing Session................................................................ 6
3.3
Saving a Viewing Session................................................................................... 6
3.4
Saving an Existing Viewing Session to a Different File..................................... 7
3.5
Importing an EyeLink Data File ......................................................................... 7
Data Viewer Windows................................................................................................ 8
4.1
Inspector Window............................................................................................... 8
4.1.1
Data Tab...................................................................................................... 8
4.1.1.1 Data Tree Hierarchy.............................................................................. 10
4.1.1.2 Trial Grouping ...................................................................................... 10
4.1.1.3 Trial Summary ...................................................................................... 11
4.1.1.4 Interest Area Templates ........................................................................ 12
4.1.1.5 Custom Interest Area Set/Empty Interest Area Set............................... 13
4.1.2
Preferences Tab......................................................................................... 13
4.2
Trial View Window .......................................................................................... 13
4.2.1
Selecting Data Elements to Display.......................................................... 13
4.2.2
Cloning a Trial View ................................................................................ 14
4.2.3
Tiling/Cascading Windows....................................................................... 14
4.3
Spatial Overlay Trial View ............................................................................... 15
4.4
Temporal Graph Trial View.............................................................................. 17
4.4.1
Viewing Sample and Target Data ............................................................. 17
4.4.2
Zooming Operations ................................................................................. 19
4.5
Animation View................................................................................................ 19
Working with Events, Samples, and Interest Areas.................................................. 21
5.1
Common Operations ......................................................................................... 21
5.1.1
Selecting Events........................................................................................ 21
5.1.2
Deleting Events......................................................................................... 21
5.2
Fixations............................................................................................................ 22
5.2.1
Selecting Fixations.................................................................................... 24
5.2.2
Merging Fixations..................................................................................... 24
5.2.3
Drift Correcting Fixations......................................................................... 24
5.2.3.1 Drift-correcting a Group of Selected Fixations .................................... 25
5.2.3.2 Precise Drift Correction of a Single Fixation ....................................... 25
EyeLink Data Viewer
©2002-2008 SR Research Ltd.
ii
5.2.3.3 Cleaning Fixations ................................................................................ 26
5.3
Saccades............................................................................................................ 27
5.3.1
Merging Saccades ..................................................................................... 29
5.4
Blink Events...................................................................................................... 29
5.5
Messages ........................................................................................................... 30
5.5.1
Import Message List ................................................................................. 31
5.6
Button Events.................................................................................................... 32
5.7
Samples ............................................................................................................. 34
5.8
Interest Areas .................................................................................................... 34
5.8.1
Manually Creating Interest Areas ............................................................. 36
5.8.2
Creating Interest Area: Image Segmentation............................................ 37
5.8.3
Saving Interest Areas ................................................................................ 38
5.8.4
Importing Interest Area File (for a specific trial)...................................... 38
5.8.5
Emptying Interest Area Set (for a trial) .................................................... 38
5.8.6
Loading Interest Area Template ............................................................... 38
5.8.7
Using Interest Area Templates.................................................................. 39
5.8.8
Automatic Trial Image-Interest Area Set Association.............................. 39
5.8.9
Deleting Interest Area Templates ............................................................. 40
5.8.10
Selecting Interest Areas ............................................................................ 40
5.8.11
Moving an Interest Area ........................................................................... 41
5.8.12
Resizing Rectangular and Elliptic Interest Areas ..................................... 41
5.8.13
Resizing Freehand Interest Areas ............................................................. 42
5.8.14
Deleting Interest Areas ............................................................................. 42
5.8.15
Splitting Interest Areas ............................................................................. 42
5.8.16
Merging Interest Areas ............................................................................. 42
6
Exporting Data .......................................................................................................... 43
6.1
Managing Trial Variables ................................................................................. 43
6.1.1
Trial Variable Manager............................................................................. 43
6.1.2
Trial Variable Value Editor ...................................................................... 44
6.1.3
Trial Grouping .......................................................................................... 44
6.2
Fixation Map..................................................................................................... 46
6.3
Managing Reaction Time Definitions............................................................... 46
6.3.1
Reaction Time Manager............................................................................ 47
6.3.2
Viewing Reaction Time Information ........................................................ 50
6.4
Interest Periods.................................................................................................. 50
6.4.1
Creating Interest Periods........................................................................... 51
6.4.2
Using Interest Period................................................................................. 53
6.5
Trial Report....................................................................................................... 53
6.5.1
Obtaining a Trial Report ........................................................................... 54
6.5.2
Variables in the Trial Report..................................................................... 55
6.5.3
Using Trial Report .................................................................................... 57
6.5.4
Configuring the Trial Report .................................................................... 58
6.6
Fixation Report ................................................................................................. 59
6.6.1
Obtaining a Fixation Report...................................................................... 59
6.6.2
Variables in the Fixation Report ............................................................... 59
6.6.3
Configuring the Fixation Report............................................................... 64
EyeLink Data Viewer
©2002-2008 SR Research Ltd.
iii
6.7
Saccade Report.................................................................................................. 65
6.7.1
Obtaining a Saccade Report...................................................................... 65
6.7.2
Variables in the Saccade Report ............................................................... 65
6.8
Interest Area Report.......................................................................................... 65
6.8.1
Obtaining an Interest Area Report ............................................................ 65
6.8.2
Variables in the Interest Area Report........................................................ 66
6.8.3
Using Interest Area Report ....................................................................... 70
6.8.3.1 Fixation Sequence Analysis.................................................................. 71
6.8.3.2 Regression Analysis.............................................................................. 72
6.9
Sample Output Report....................................................................................... 73
6.9.1
Loading Samples into a Viewing Session................................................. 73
6.9.2
Obtaining a Sample Output Report........................................................... 74
6.9.3
Variables in the Sample Output Report .................................................... 74
6.10 Message Output Report..................................................................................... 77
6.10.1 Obtaining a Message Output Report......................................................... 77
6.10.2
Variables in the Message Output Report .................................................. 77
6.11 Recording Event Sequence Data....................................................................... 80
6.11.1
Obtaining a Recording Event Sequence Data........................................... 80
6.11.2
Formats of the Recording Event Sequence Data ...................................... 80
6.11.2.1
Fixation Events ................................................................................. 81
6.11.2.2
Saccade Events.................................................................................. 81
6.11.2.3
Blink Events...................................................................................... 82
6.11.2.4
Message Events................................................................................. 82
6.11.2.5
Button Events.................................................................................... 82
7
Protocol for EyeLink Data to Viewer Integration..................................................... 83
7.1
Defining the Start and End of a Trial................................................................ 83
7.1.1
Trial Start Message ................................................................................... 83
7.1.2
Trial End Message .................................................................................... 84
7.2
Pre-Trial Message Commands.......................................................................... 84
7.2.1
Trial Variable Labels ................................................................................ 84
7.2.2
Display Coordinates.................................................................................. 85
7.2.3
Trial Grouping .......................................................................................... 85
7.3
Trial Message Commands................................................................................. 86
7.3.1
Trial Variable Values................................................................................ 86
7.3.2
Single Trial Variable Message Token....................................................... 86
7.3.3
Image Commands ..................................................................................... 87
7.3.3.1 Image Loading – Fill Full Screen ......................................................... 87
7.3.3.2 Image Loading – Top Left .................................................................... 88
7.3.3.3 Image Loading – Centered.................................................................... 88
7.3.4
Simple Drawing ........................................................................................ 89
7.3.4.1 Clear Overlay View .............................................................................. 89
7.3.4.2 Line drawing ......................................................................................... 90
7.3.4.3 Drawing a Rectangle............................................................................. 90
7.3.4.4 Drawing a Filled Rectangle .................................................................. 91
7.3.4.5 Drawing a Fixation Point ...................................................................... 91
7.3.4.6 Draw List File ....................................................................................... 92
EyeLink Data Viewer
©2002-2008 SR Research Ltd.
iv
7.3.5
Interest Area Commands........................................................................... 93
7.3.5.1 Rectangular Interest Area ..................................................................... 93
7.3.5.2 Elliptic Interest Area ............................................................................. 93
7.3.5.3 Freehand Interest Area.......................................................................... 94
7.3.5.4 Interest Area Set.................................................................................... 94
7.3.6
Target Position Commands....................................................................... 95
7.4
Reaction Time Definitions................................................................................ 96
7.4.1
Button Events............................................................................................ 96
7.4.2
Fixation Events: .................................................................................... 97
7.4.3
Saccade Events: .................................................................................... 98
7.4.4
Message Events:.................................................................................... 99
7.4.5
Reaction Time Definition Set ............................................................... 99
7.5
Changes in the Sample Experiments............................................................... 100
7.5.1
“Simple” Template.................................................................................. 100
7.5.2
“Text” Template...................................................................................... 100
7.5.3
“Picture” Template.................................................................................. 101
7.5.4
“EyeData” Template ............................................................................... 101
7.5.5
“GCWindow” Template.......................................................................... 102
7.5.6
“Control” Template................................................................................. 102
7.5.7
“Dynamic” Template .............................................................................. 102
7.5.8
“Comm_simple” Template ..................................................................... 103
7.5.9
Other Templates...................................................................................... 103
8
Tutorial: Visual Search ........................................................................................... 104
8.1
Project Background Information..................................................................... 104
8.2
Programming................................................................................................... 104
8.2.1
Creating Interest Area Set Files .............................................................. 104
8.2.2
Generating Randomization Files............................................................. 105
8.2.3
Programming the Visual Search Experiment.......................................... 105
8.2.3.1 Source Files for “VisualSearch” ......................................................... 105
8.2.3.2 w32_script_main.c .............................................................................. 106
8.2.3.3 w32_script_trials.c .............................................................................. 106
8.2.4
Adding Data Viewer Functionalities ...................................................... 106
8.2.4.1 Trial Variable Labels .......................................................................... 107
8.2.4.2 Trial ID and Trial ................................................................................ 107
8.2.4.3 Trial Bitmap ........................................................................................ 108
8.2.4.4 Interest Area........................................................................................ 109
8.3
Data Analysis .................................................................................................. 109
8.3.1
Viewing session Manipulation and Data Loading .................................. 109
8.3.2
Trial Manipulation .................................................................................. 111
8.3.2.1 Loading Trial Bitmap.......................................................................... 112
8.3.2.2 Loading Trial Interest Area Set........................................................... 112
8.3.2.3 Manipulating Trial Condition Variables............................................. 113
8.3.3
Managing Reaction-time definitions....................................................... 116
8.3.4
Manipulating Events ............................................................................... 118
8.3.4.1 Hiding Events...................................................................................... 118
8.3.4.2 Merging and Drift-correcting Fixations.............................................. 119
EyeLink Data Viewer
©2002-2008 SR Research Ltd.
v
8.3.5
Analysis Output ...................................................................................... 120
8.3.5.1 Trial output report ............................................................................... 120
8.3.5.2 Fixation output report ......................................................................... 122
8.4
Reference ........................................................................................................ 125
9
Preference Settings.................................................................................................. 127
9.1
General Preferences ........................................................................................ 128
9.2
Data Loading Preferences ............................................................................... 129
9.3
Output / Analysis ............................................................................................ 131
9.4
Data Filter Preferences.................................................................................... 133
9.5
General Trial View Preferences...................................................................... 135
9.6
Spatial Overlay View Preferences .................................................................. 137
9.7
Image Segmentation Preferences.................................................................... 139
9.8
Temporal Graph Preferences .......................................................................... 140
9.9
Animation Preferences.................................................................................... 142
List of Figures
Figure 4-1. Viewer Display after Loading the Sample Picture.edf File ............................ 8
Figure 4-2. Components of the Inspector Window (Left: Data Tab; Right: Preference
Tab) ........................................................................................................................... 10
Figure 4-3. Tiling Trial View Windows. ......................................................................... 15
Figure 4-4. Sample Spatial Overlay Trial View .............................................................. 16
Figure 4-5. Sample Temporal Graph Trial View............................................................. 17
Figure 4-6. Sample Playback Animation View. ............................................................... 20
Figure 5-1.Sample Spatial Overlay View of Fixation Events........................................... 22
Figure 5-2. Diagram for Angle Calculation...................................................................... 24
Figure 5-3. Drift Correcting Fixations on One Line of Text. ........................................... 25
Figure 5-4. Options for Fixation Cleaning....................................................................... 27
Figure 5-5. Sample Spatial Overlay View of Saccade Events......................................... 28
Figure 5-6. Sample Temporal Graph View of Blink Events ........................................... 30
Figure 5-7. Sample Temporal Graph View of Message Events (Note that the default size
of the message symbol in the temporal-graph preference settings has been changed).
................................................................................................................................... 31
Figure 5-8. Sample Temporal Graph View Showing the Button Events (Note that the
default size of the button symbol in the temporal-graph preference settings has been
changed).................................................................................................................... 33
Figure 5-9. Sample Spatial Overlay View (left) and Temporal Graph View (right) of
Raw Sample Data...................................................................................................... 34
Figure 5-10. Sample Text Display Overlaid with Interest Areas..................................... 35
Figure 5-11. Creating a Freehand Interest Area............................................................... 37
Figure 6-1. Trial Variable Manager ................................................................................. 43
Figure 6-2. Trial Variable Value Editor Dialog............................................................... 44
Figure 6-3. Applying Trial Grouping by a Trial Condition Variable and Setting Interest
Area Template for a Group of Trials. ....................................................................... 45
Figure 6-4. Sample Fixation Map .................................................................................... 46
Figure 6-5. Reaction Time Definition Manager .............................................................. 47
Figure 6-6. Reaction Time Definition Editor (General Tab) ........................................... 48
EyeLink Data Viewer
©2002-2008 SR Research Ltd.
vi
Figure 6-7. Reaction Time Definition Editor (Reaction Time Tab) ................................ 48
Figure 6-8. Deleting Reaction Time Definitions ............................................................. 50
Figure 6-9. Reaction Time Graphics in Both the Spatial Overlay View and the Temporal
Graph View of the Trial View Window ................................................................... 50
Figure 6-10. Interest Period Editor (General Tab)............................................................ 52
Figure 6-11. Interest Period Editor (Details Tab). ........................................................... 52
Figure 6-12. Selecting Output Variables in a Trial Report.............................................. 55
Figure 6-13. Using Interest Period for Event Filtering .................................................... 58
Figure 6-14. Progress Dialog Box Displayed when Creating the Interest Area Report .. 71
Figure 8-1. The first Viewer Screen after Loading HD_RCN.EDF file........................ 111
Figure 8-2. Saving a Viewer Viewing session............................................................... 111
Figure 8-3. Opening a Saved Viewer Viewing session. ................................................ 111
Figure 8-4. Creating a Screen Capture of the Spatial Overlay View or the Temporal
Graph View of a Trial. ............................................................................................ 112
Figure 8-5. Using the Trial Variable Manager: Creating a New Variable..................... 113
Figure 8-6. Using the Trial Variable Value Editor: Modifying a Default Value........... 114
Figure 8-7. Modifying and Saving the Preference Setting of Data Loading. ................ 115
Figure 8-8. Using the Trial Variable Manager: Changing Variable Labels .................. 116
Figure 8-9. Creating/Editing Reaction Time Definition (General Tab) ........................ 117
Figure 8-10. Creating/Editing Reaction Time Definition (Reaction Time Tab) ........... 118
Figure 8-11. Merging Fixations ..................................................................................... 120
Figure 8-12. Obtaining a Trial Output Report ............................................................... 121
Figure 8-13. Response Time (in msec) and Number of Fixations per Trial as a function
target-presence and display size in both the single-feature (SF) and two-feature (TF)
search tasks in the high-discriminability (N = 8) and the low-discriminability
conditions (N = 8). .................................................................................................. 122
Figure 8-14. Obtaining a Fixation Output Report.......................................................... 123
Figure 8-15. Average proportion of fixations assigned to distractors sharing target color,
shape, orientation in the single-feature search task (top panels) and to distractors
sharing target color shape, color orientation, or shape orientation in the two-feature
search task (bottom panels) as a function of saccade amplitude. Note that results for
saccades smaller than 1º are not reported because of insufficient data points in some
cells. ........................................................................................................................ 124
List of Tables
Table 1. Average percent of fixations by discriminability and search task for the first
fixations following a short (below median) and long (above median) initial saccadic
latency. .................................................................................................................... 125
Table 2. Average percent of fixations by discriminability and search task for the first
fixations, second fixations, and all fixations........................................................... 125
EyeLink Data Viewer
©2002-2008 SR Research Ltd. vii
1 Introduction
The EyeLink Data Viewer is a tool that allows the display, filtering, and report output of
EyeLink I and EyeLink II EDF data files. The Data Viewer includes the following areas
of functionality.
1.1 Data Visualization
The EyeLink Data Viewer supports three trial-based viewing modes: the Spatial Overlay
View, the Temporal Graph View, and the Animation View. In the first two viewing
modes, the user can specify which event types to display, including fixations, saccades,
blinks, messages, and buttons. Sample traces can also be displayed. The animation
viewing mode plays back the gaze data of a selected trial.
The Spatial Overlay View allows a trial to be viewed superimposed on the background
image that the participant was looking at while the data was being recorded. This view is
ideal for relatively static trial presentations, like reading or visual search paradigms.
Fixations can be displayed as either circles or as a scan path. Saccades can be displayed
as lines with an arrow specifying the saccade direction. Blinks can be displayed as a line
joining the last valid sample position prior to the blink and the first valid sample
following the blink. Message and button events can be displayed as a small rectangle,
where the position of the event is determined by the position of the nearest sample
recorded at the message or button time.
The Temporal Graph View provides a two dimensional plot of trial data. The X axis
represents time, while the Y axis represents the location of the samples or events being
plotted. This view is suitable for a wide range of experimental paradigms, including those
using dynamic trial displays. The scale of the graph can be changed via zoom in and
zoom out operations. This view supports binocular display of sample position and pupil
size traces.
The color of individual events, as well as the global color of a given event type or sample
trace, can be changed as desired. There is a vast number of preferences that can be
configured by the user, saved, and then applied to future loaded data.
The Animation View plays back the subject’s gaze data in a trial, with a concurrent time
code displaying the time from the start of trial recording. If the image that was shown
during the trial recording is available, it can be loaded as the background for the playback
view. A trackbar control displays the progress of the playback and lets the user select a
specific position to start playback. The speed of playback can also be adjusted.
Multiple viewing windows can be opened at one time, displaying data from different
trials or displaying data of one single trial in the Spatial Overlay View, Temporal Graph
View, and Animation View concurrently.
EyeLink Data Viewer
©2002-2008 SR Research Ltd.
1
1.2 Event Selection
EyeLink events can be selected for either of the data views (temporal graph view or
spatial overlay view). Detailed properties of the selected event can be examined within a
Inspector Window that also provides a list view of all visible events in the selected trial.
Properties of a selected event that are editable by the user (like the events color) can be
modified directly within the inspector window.
1.3 Interest Area Definition
The Spatial Overlay View allows creation of any number of interest areas for the trial.
Rectangular, elliptic, and freehand interest area shapes can be created. The position and
shape of the Interest Area can be modified after Interest Area creation.
Users can view fixation-based statistics for a selected interest area, including the fixation
count and total dwell time for the interest area, as well as the proportion of fixations and
dwell time relative to the trial totals.
Interest area templates can be created which can then be applied to multiple trials,
speeding the process of defining interest areas for multiple trials.
1.4 Event Filtering
The EyeLink Data Viewer supports data filtering, including deleting, merging, and drift
correcting event types. Not all filtering functions are available to all event types. The
original EyeLink EDF file is never modified by the Data Viewer, so the originally
recorded data is always available.
Any event can be hidden within the Data Viewer either manually or through the
definition of some spatial or temporal filtering preferences. Hiding events allows the user
to focus on a subset of a trial’s data. Hidden events can be made visible again at a later
date if required.
Events can also be deleted from within the Data Viewer. This is useful, for example, if
the researcher inspects a specific fixation or saccade event and determines that the event
detection performed by the EyeLink on-line parser did not satisfy their needs. If a
fixation or saccade event is deleted, the surrounding saccade or fixation events are
automatically merged to keep the event structure consistent.
The position of a fixation event can also be adjusted if required. This is only suggested if
it is obvious to the user that improper system setup or calibration has resulted in a trial’s
fixation data containing significant drift that can be easily corrected manually. Any event
that is adjusted in this fashion is flagged so that it is clear what events have been
manually altered. Optionally, if the position of a fixation is adjusted, the adjoining
EyeLink Data Viewer
©2002-2008 SR Research Ltd.
2
saccade end point and start point are also adjusted so that the saccade positions are kept
consistent with fixation positions.
1.5 Interest Periods and Reaction Time Definition
For each trial, the user may selectively view and perform analysis on data within a
specific period of time within a trial (Interest Period). The EyeLink Data Viewer allows
the user to create interest periods based on messages and button events. The created
interest periods are added to the interest period list. The user can navigate between
different interest periods by selecting the desired interest period from the list. For each
interest period, only those events falling within that period are shown in the spatial
overlay, temporal graph views, and in the event list of the inspector window. In addition,
only those events and data within the selected interest period (custom-defined interest
period, or the default – “Full Trial Period”) are exported to the output file.
One important variant of the interest period is the reaction-time period. Reaction Time
Definitions (RTD) can be created and applied to all trials loaded into an EyeLink Data
Viewer session. Each RTD can have a set of trial condition variables that must be
matched for the RTD to be applied to a given trial. The message event to use as the start
time for the reaction time can be defined. Each RTD can have a fixation, saccade, button,
or message event as the ending event for the reaction time calculation. Depending on the
event type selected for the reaction time end event, a set of event properties can be
specified to determine which event should be used within each trial. A number of RTDs
can be created for a given Data Viewer session, allowing multiple reaction time
conditions to be specified. Each trial will only be matched to at most one RTD.
1.6 Data Output and Analysis
Both Spatial Overlay and Temporal Graph trial views can be saved as JPEG images for
illustrative purposes.
A series of output reports can be run for a Data Viewer session.
The Fixation Output Report generates one row for each visible fixation within the Data
Viewer. A set of output variables can be selected, with each variable output as a column
in the report. Fixation report variables include start and end time, duration, average
position, interest area identifier, etc. A set of relative variables is also available, including
the previous and next fixations position, angle, distance, and direction.
The Saccade Output Report generates one row for each visible saccade within the Data
Viewer. A set of output variables can be selected, with each variable output as a column
in the report. Saccade output report variables include start and end time, start and end
position, amplitude, angle, direction, average and peak velocity, etc. A set of relative
variables is also available, including the previous and next saccades start and end position,
etc.
EyeLink Data Viewer
©2002-2008 SR Research Ltd.
3
The Interest Area Output Report generates one row for each interest area in every trial
loaded in the Data Viewer. Variables include the interest area identifier, label, fixation
index list, number fixations, summed dwell time, and proportions of fixations and dwell
time in the interest area relative to the trial.
The Trial Output Report generates one row of data for each trial within the Data Viewer.
Variables include the count of each event type visible within the trial, the average
fixation duration and saccadic amplitude, as well as the reaction time calculated for the
trial based on the reaction time definitions created for the Data Viewer session.
The Sample Output Report provides a columnar output of eye movement data for each
eye sample in a trial. Variables include the index of the sample in a trial, time of the
sample, position (x, y), velocity, acceleration, and pupil data of the current sample. If
appropriate target position messages are read from the EDF file, the position, velocity,
and acceleration data of the targets (up to two targets) can also be provided.
The user can also save the spatial overlay and temporal graph views into image files, save
the playback of the trial into a movie file, or create a "landscape" view (i.e., fixation map)
for a trial or for a group of trials with the same background image.
1.7 Experiment Integration
The EyeLink Data Viewer allows commands to be inserted directly into the EyeLink
EDF file when an experiment is running. This allows the experiment to be significantly
integrated into the Data Viewer. These commands are interpreted by the Data Viewer
when the data file is loaded and automates several areas of the viewer functionality.
By using a set of predefined viewer commands, the programmer of an experiment can
inform the Data Viewer regarding:
a) The image(s) to load for each trial’s Spatial Overlay View.
b) The Interest Areas to load for each trial.
c) The Reaction Time Definitions to apply to the Data Viewing session.
d) The trial condition variables and values to use for each trial.
e) The position of the target in a dynamic display.
EyeLink Data Viewer
©2002-2008 SR Research Ltd.
4
2 Installation
2.1 System Requirements
Operating System: Windows 98, NT, 2000, or XP
Processor: PIII 800 MHz or better processor
RAM: minimum 256 MB RAM (512 MB recommended)
Disk Space: 50 MB free disk space for application plus space required for EyeLink data
files and saved viewing sessions.
Monitor Resolution: 1024x768 or better resolution (1600 x 1200 recommended)
Other: Free USB port required
2.2 Setup
1) Install EyeLink Data Viewer by running the installer program (EyeLinkDV*.exe). The
latest version of the installer program can be downloaded from
https://www.sr-support.com/forums/showthread.php?t=10.
2) Install the standalone HASP key driver (if this is the first time that the USB dongle
have been used on the display PC). You may install the driver by clicking "Start -> All
Programs -> SR Research -> Install HASP Driver" from your computer desktop or
double clicking on "hdd32.exe" in "C:\Program Files\SR Research\Common" folder.
3) Before starting the application, be sure to plug the license key to a USB port of the
computer.
4) From the computer desktop, click "Start -> All Programs -> SR Research -> EyeLink > Data Viewer -> DataViewer" to run the application.
Important: A USB Dongle provided by SR Research is required to run this application
and must remain connected to the PC while the application is running. If a USB Dongle
is not detected by the program, the application will run in a DEMO mode supporting
limited data loading.
EyeLink Data Viewer
©2002-2008 SR Research Ltd.
5
3 Working with Files
The EyeLink Data Viewer can import EyeLink EDF files. The viewer loads each data file
into a Data Viewing Session (DVS). A DVS can consist of many EyeLink data files.
Only one DVS can be open within the Data Viewer at a time.
Once a DVS has been created and EyeLink data files have been imported into it, the DVS
file can be saved and then reloaded at a later date for future analysis. It is much quicker
to load a DVS than to load the original EDF files of which the DVS consists.
All changes made during an viewing session only affect the DVS data; the original EDF
files are never altered.
3.1 Creating a Data Viewing Session (DVS)
From the menu, choose:
File → New
Tip: A new viewing session can also be created by clicking the Create New Viewing
Session tool
on the standard toolbar, or press Ctrl+N.
Tip: To find out the meaning of a tool on the standard toolbar, simply place the mouse
over the tool.
3.2 Opening an Existing Viewing Session
To open an existing viewing session
1) From the menus, choose:
File → Open
2) In the Open dialog box, browse to the location of the file and select it.
3) Click Open
Tip: A saved viewing session can also be opened by clicking the Open Existing Viewer
on the standard toolbar, or press Ctrl+O.
Session tool
3.3 Saving a Viewing Session
From the menus, choose:
File → Save
Tip: The viewing session can also be saved by clicking the Save Viewing Session tool
on the standard toolbar, or press Ctrl+S.
EyeLink Data Viewer
©2002-2008 SR Research Ltd.
6
3.4 Saving an Existing Viewing Session to a Different File
To save a viewing session to a file
1) From the menus, choose:
File → Save AS
2) In the Save As dialog box, browse to the directory in which you want to save the
document.
3) In the File name text box, type in the name for the document.
4) Click Save.
Tip: The viewing session can also be saved by clicking the Save Viewing Session As
tool
on the standard toolbar.
3.5 Importing an EyeLink Data File
EyeLink EDF files can be imported into an already opened Viewing session or, if no
Viewing session is open, a new one will be created for you when the data files are
imported.
To import an .EDF file,
1) From the menus, choose:
File → Import Data → EyeLink File(s)
2) In the Load dialog box, browse to the location of the EDF file that you want to
import and select it.
3) Click Load.
Tip: EyeLink data can also be imported by clicking the Import EyeLink Data File
on the standard toolbar, or press Ctrl+I.
button
Note: The time it takes to load the data files will depend on their size and heavily on
whether or not you are loading samples from the data file. A 60 minute, binocular, 500Hz
recording will take 3 – 4 minutes to initially parse the data file if loading all events and
samples. Once you have saved the viewing session, reloading the session takes a fraction
of the time because the data is in a format optimized for the Data Viewer.
Note: To load data files using the SceneLink gaze mapping, please make sure to enable
the “Enable SceneLink Gaze Mapping” and “Generate SceneLink Frame Messages” in
the “Data Loading” preferences settings before you import the data files. Make sure that
you have already created the lookup tables for the trials in SceneLink.
EyeLink Data Viewer
©2002-2008 SR Research Ltd.
7
4
Data Viewer Windows
The EyeLink Data Viewer uses a desktop framework that contains all windows of the
Viewer application. Once a Data Viewing Session (DVS) is opened and EyeLink data is
loaded, two windows will appear: the Inspector Window on the left and the Trial View
Window on the right. The Inspector Window enables the user to choose data to be
viewed, to review statistical summaries, and to configure default application settings. The
Trial View window allows a graphic examination of the data of the selected trial. Both
windows can be minimized and maximized within the Application desktop. The figure
below shows the viewer desktop after loading the sample picture.edf file.
Figure 4-1. Viewer Display after Loading the Sample Picture.edf File
4.1 Inspector Window
The Inspector Window consists of 2 tabs, the Data Tab and the Preferences Tab (see
Figure 4-2).
4.1.1 Data Tab
EyeLink Data Viewer
©2002-2008 SR Research Ltd.
8
The Data Tab consists of 3 panels (Figure 4-2, left Panel). The top panel provides a tree
view of the viewing session. The first level of the tree view contains trial-grouping nodes
( ). EyeLink Data Viewer lists trials within a viewing session by either data file or by
experimental conditions. Each trial-grouping node has a set of tree leaves representing
the trials ( ) that are contained within that node.
The middle panel represents a list of components that are within the selected node of the
analyses session tree. If a trial is selected in the viewing session tree, a list of visible
events is displayed. If an Interest Area Set is selected, a list of interest areas that make up
the set are selected.
The bottom panel is a table representing the properties of the selected tree node or
selected list component. For example, if a fixation is selected, all properties of the
fixation are listed in the properties table. Some properties, like color, are editable, by
pressing on the property value with the mouse.
EyeLink Data Viewer
©2002-2008 SR Research Ltd.
9
Figure 4-2. Components of the Inspector Window (Left: Data Tab; Right: Preference
Tab)
4.1.1.1 Data Tree Hierarchy
When a data file is loaded, the tree view panel lists the possible analysis levels in a
hierarchical order. The user can obtain information on the trial groups and individual
trials. Within each trial, statistics on all events (fixations, saccades, blinks, button presses,
and messages) and interest areas can also be retrieved.
4.1.1.2 Trial Grouping
By clicking on a trial-grouping node ( ), information on this trial group can be obtained
in the bottom panel of the data inspector. Typically, this includes the label of group
(values of the grouping variables), total number of trials, and configurable interest area
information (see section 6.1.3 on how to perform trial grouping). By default, trials in a
viewing session are grouped by the EyeLink data files loaded. The following table lists
the group properties if trials are grouped by data file. Those fields that are editable in the
viewer are marked with an asterisk.
Field
Label *
Number Trial
File
Eyelink Version
Sampling Rate
Eyes
Mode
Pupil Data Type
Gaze Data type
Display Width *,
Display Height *
EyeLink Data Viewer
Contents
The label of the trial group
The total number of trials in the trial group
The file name of the recording (with the path information)
Tracker version of the EyeLink system
250 or 500 Hz
Which eye produced the recording (the value could be Left,
Right, or Binocular)
Pupil only mode, or pupil with corneal reflection
Whether the pupil size is set by area or diameter
Raw (raw pupil-center position or pupil minus corneal if
running in pupil-CR mode as measured by the imageprocessing system), Gaze (actual gaze position on the display
screen, fully compensated for head position), or HREF (the
tangent of the rotation angle of the eye relative to the head)
Screen resolution (width and height in pixels) of the recording
displays. By default, this sets the trial view window resolution
to the value specified by display Coordinates messages. If you
want to change the screen resolution, make sure that you first
close the Trial View Window first, change the Display Width
and Display Height values, and then open another trial view
window.
©2002-2008 SR Research Ltd.
10
4.1.1.2.1 Deleting a group of trials
To remove a group of trials from the analysis, select the grouping node, click the right
mouse button and click on the “delete” menu item. If trials contained within a grouping
node are deleted from the data viewer session, they will be permanently removed from
the tree view (the EDF file has to be reloaded before information on that file can be
accessed again).
4.1.1.3 Trial Summary
By clicking on the trial node ( ) of the tree view, information on participants’
performance in individual trials can be retrieved. Once a trial is selected for analysis, the
middle panel of the Data Tab lists all of the visible events and messages in the trial and
the bottom-panel provides a general summary of performance in that trial. The following
table lists the trial-level analysis variables. Those fields that are editable in the viewer are
marked with an asterisk.
Field
Label *
Index
Recording File
Start Time
End Time
Duration
Reaction Time
RT Event Index
RT Event Type
RT Definition Label
EyeLink Data Viewer
Contents
Label of the trial
Trial sequence
File name of the recording
Timestamp when the trial recording started (in milliseconds
since EyeLink tracker was activated)
Timestamp when the trial recording ended (in milliseconds
since EyeLink tracker was activated)
Duration (in milliseconds) of the trial recording
Configurable response time determined by the Reaction Time
Definition associated with the trial. Use the value of Duration
if RT is undefined.
Index of event that triggered the end of the reaction time; -1
when NO_MATCH. The index is relative to a specific event
type; for example an index of 5 for a Saccadic RT means the
5th saccade in the trial.
The way in which the trial reaction time is ended, possible
values are TIMEOUT, BUTTON, FIXATION, SACCADE,
MESSAGE, or NO_MATCH
Label of the reaction time definition (see section 6.3.1
Managing Reaction Time Definitions). “.” if undefined;
“CUSTOM” if the RT definition is a custom one (see Section
©2002-2008 SR Research Ltd.
11
Average Fixation
duration
Average Saccadic
Amplitude
Report Hidden *
Interest Area Set *
Number Samples
Number Fixations
Number Saccades
Number Blinks
Number Button Presses
Number Messages
X Resolution,
Y Resolution
7.4 Reaction Time Definitions).
Average duration (in milliseconds) of all fixations in the trial
Average size (in degrees of visual angle) of the saccades in
the trial
Whether or not to hide the trial from output reports.
Setting of the interest areas (“Custom Interest Area Set” or
“Empty Interest Area Set”). If interest areas have been
defined, they can be removed by selecting “Empty Interest
Area Set”
Total number of samples in the trial recording
Total number of fixations in the trial recording
Total number of saccades in the trial recording
Total number of blinks in the trial recording
Total number of button presses in the trial recording
Total number of messages in the trial recording
Angular resolution at current gaze position (in screen pixels
per visual degree)
4.1.1.3.1 Hiding a Trial
To hide a trial from the output reports
1) Click the trial to hide in the top panel of the data tab.
2) In the bottom panel of the data tab (which contains properties for the trial), find
the entry “Report Hidden” and change the current setting.
4.1.1.3.2 Deleting a Trial
To delete a trial from the Data Viewer, simply place the mouse over that trial node, click
the right mouse button and select Delete. The trial is permanently removed from the data
viewing session and all other trial indexes are updated accordingly.
4.1.1.4 Interest Area Templates
An interest area template is a .IAS file that contains a set of interest areas. If the same
interest areas are used for several trials, instead of repeating the procedure of creating
interest areas for each individual trial, an interest area template can be loaded to supply
segmentation information for those trials efficiently. The property panel lists the
following summary statistics for an interest area template. Those fields that are editable
in the viewer are marked with an asterisk.
EyeLink Data Viewer
©2002-2008 SR Research Ltd.
12
Field
Name *
IA Count
IsCustom
Image Name Mapping
Contents
Label of the custom interest area set
Total number of interest areas defined in the trial
Whether the current set of interest areas is user-defined (true)
or an interest area template (false)
If the "Auto Select IAS for Trial" property in the
“Output/Analysis” preference settings is true, the value in this
field will be used to associate the IAS to trials automatically
(see section 5.8.8 “Automatic Trial Image-Interest Area Set
Association” for details).
4.1.1.5 Custom Interest Area Set/Empty Interest Area Set
For each trial, the tree view also shows whether or not a custom interest area set has been
defined for the trial. If there is no interest area set, the node
will be “Empty Interest
Area Set”. The property panel lists the same elements as the interest area templates,
except that the IsCustom field is “true” for the custom interest area set.
4.1.2 Preferences Tab
The preferences tab (Figure 4-2, right panel) provides access to all the elements of the
data viewer that can be configured by the user. These include everything from the default
colors used for displaying events, to the elements of an EDF file to load. These elements
are broken down into the following five categories: General Preferences, Data Loading
Preferences, Output/Analysis Preferences, Data Filters Preferences, General Trial View
Preferences, Spatial Overlay View Settings, Temporal Graph View Settings, and
Animation Playback Settings.
4.2 Trial View Window
The Trial View window displays the data of a selected trial in a Spatial Overlay Mode, a
Temporal Graph Mode, or an Animation Playback Mode. Selecting a trial in the Data
Inspector tree view shows the trial’s data in a Trial View Window. The user can have
several Trial View Windows open at one time by right clicking on a trial in the Inspector
window and selecting “New Window” in the popup menu.
4.2.1 Selecting Data Elements to Display
At anytime event visibility can be toggled on/off within the Trial View Window. For
button in the Application Desktop toggles the visibility of Fixation
example the
Events.
EyeLink Data Viewer
©2002-2008 SR Research Ltd.
13
Toggle Fixation Event Visibility
Toggle Saccade Event Visibility
Toggle Blink Event Visibility
Toggle Message Event Visibility
Toggle Button Event Visibility
Toggle Sample Visibility
Toggle Interest Area Visibility
4.2.2 Cloning a Trial View
From the menu, choose:
Window → Clone Window.
This allows, for example, both the temporal graph and spatial overlay views to be shown
at the same time on the desktop. You can tile the windows together. Note that event
selection in one view will automatically cause the same events to be selected in the other
view.
4.2.3 Tiling/Cascading Windows
To arrange all open trial view windows, from the menu, select:
Window → Tile
or
Window → Cascade
Figure 4-3 shows an example of tiling three open trial view (spatial overlay, temporal
graph, and animation modes) windows.
EyeLink Data Viewer
©2002-2008 SR Research Ltd.
14
Figure 4-3. Tiling Trial View Windows.
4.3 Spatial Overlay Trial View
The Spatial Overlay view (see Figure 4-4) is selected by pressing the
button in the
Trial View window. This view lets you look at events and samples by placing them
where they were detected in space. If the image that was presented during the trial is
available, it can be placed in the overlay view.
EyeLink Data Viewer
©2002-2008 SR Research Ltd.
15
Figure 4-4. Sample Spatial Overlay Trial View
The following buttons are available from the spatial overlay mode:
View Trial Data in 2D Temporal Graph Mode: Select the temporal graph
mode.
View Trial Play Back Animation: Select the playback animation mode.
Import Area of Interest File: Loads an interest area set file and sets the
interest areas for this trial. Any existing interest areas are deleted from the
trial. After loading, the Interest Area Set for the trial is set to “Custom”.
Auto Segment Image to Interest Areas: Creates interest areas
automatically for the trial bitmap.
Save the Interest Area Set File: Saves the trials interest area set to a file.
Display Image in Full. If enabled, overlay is not scaled to size of Trial
Viewer Window and is instead set to actual size (One pixel of overlay
corresponds to one pixel of trial display).
Change the Overlay Image: Select the image to use as the background of
the overlay. Any existing background graphics are deleted.
Save Trial View as Image: Creates an image of the spatial overlay view
EyeLink Data Viewer
©2002-2008 SR Research Ltd.
16
Changes from the previous versions: Note that when the background image for a trial
is manually changed with the “Change the Overlay Image” button, please also check for
the “Fit Overlay Image Change to Display” setting in the Data Views->Overlay
preference. If that setting is true, the image is scaled to fit the display dimensions for the
trial. If false, the image size is not altered and the image is centered on the trial overlay
view.
4.4 Temporal Graph Trial View
The Temporal Graph View (see Figure 4-5) allows the user to view trial data as a trace
plot, where the X axis represents time and the Y axis represents the X / Y gaze location,
pupil size (dived by a factor of 10), acceleration, and velocity data. To view trial data in
this mode, select the
button in the top left corner of the Trial View Window.
Figure 4-5. Sample Temporal Graph Trial View
4.4.1 Viewing Sample and Target Data
Time plot view will show trace plots only if the EDF file contains samples and if sample
on the Data
are activated for viewing (i.e., the “Toggle Eye Sample Visibility” button
EyeLink Data Viewer
©2002-2008 SR Research Ltd.
17
Viewer tool bar is selected). The position, velocity, and acceleration sample traces can
be selected for viewing from buttons within the Trial Viewer Window.
View Trial Spatially with Image Overlay: Select the spatial overlay mode
View Trial Play Back Animation: Select the playback animation mode
Zoom In Graph View: Zoom in to view details of a selected portion of data
Zoom Out Graph: Zoom out the graph by a scale of 2
Position Trace: Show the gaze or target position.
Acceleration Trace: Shows the gaze or target acceleration data
Velocity Trace: Show the gaze or target velocity data
X Sample Trace: Toggle X trace visibility
Y Sample Trace: Toggle Y trace Visibility
Pupil Sample Trace: Toggle Pupil Trace Visibility
Save Trial View as Image: Creates an image of the temporal graph view
Changes from the previous versions: to show the eye or target traces in this version, the
user needs to select the type of data (position, velocity, or acceleration) and data source
(x, y, pupil of left eye and/or right eye, x, y of target1 and/or target2) to be shown. To
show the position, velocity, and acceleration traces of target(s) in this view, messages on
the current position of the target(s) must be recorded in the EDF file. These messages
should contain a target position keyword (“!V TARGET_POS” by default and can be
configured in the “target position string” of Data Loading preference settings), followed
by parameters of the individual targets.
The scale in which the vertical data is displayed can be changed by clicking the right
mouse button when the mouse cursor is placed on the Y-axis and choose one of the
following options: ascending (large values on the Y-axis appear on the top of the screen),
descending (large values on the Y-axis appear at the bottom of the screen), or split (0
appear in the middle of the screen, positive values on the top and negative values at the
bottom).
The X, Y, and pupil traces can be highlighted. Press the 'x' key to highlight the X trace,
press the 'y' key to highlight the Y trace, and press the 'p' key to highlight the Pupil trace.
If pressing one of these keys does not highlight the intended sample traces, please make
sure that the trial view window is currently in focus (double clicking anywhere the
sample traces are plotted to set the keyboard focus to the trial view window).
Various aspects of the time plot view can be configured in the preference settings
(Preferences -> Data Views -> Time Plot). For example, the user may change the colors
of the sample traces, the scaling factor for plotting the acceleration, velocity, and pupil
size data, total number of initially visible samples in the temporal graph view window,
etc.
EyeLink Data Viewer
©2002-2008 SR Research Ltd.
18
4.4.2 Zooming Operations
The temporal graph can be zoomed in and out. To zoom into an area of the temporal
graph:
button.
1) Hold the Shift key down or press the
2) Position the mouse on the temporal graph at the location of the upper left hand
corner of the area you wish to zoom into.
3) Press the mouse button and drag the mouse to the lower right hand corner of the
area you wish to zoom into.
4) Release the mouse button
5) Release the Shift key.
The graph will be magnified so that the area you selected fills the Trial View Window.
Tip: Holding the CTRL key while defining the zoom in region will change to time period
to be magnified only; the spatial range displayed is not altered.
To zoom out the graph, press the
factor of 2.
button. The temporal graph will be zoomed out by a
4.5 Animation View
The Animation View (see Figure 4-6) is selected by pressing the
button in the Trial
View window. This view plays back the gaze position (superimposed on the background
image that the participant was looking at while the data was being recorded), with a
concurrent time code displaying the time from the start of trial recording.
Several controls are available for the animation view. The user can start, stop, or pause
the playback by clicking the appropriate button. The speed of playback can also be
adjusted (the user modifies the speed value and then press the “Enter” key to register the
change). A trackbar control displays the progress of the playback and lets the user select
a position to start playback.
View Trial Spatially with Image Overlay: Select the spatial overlay
mode
View Trial Data in 2D Temporal Graph Mode: Select the temporal
graph mode
Playback Trial: Starts playing back the trial data
Stop Trial Playback: Stops the playback and resets the time code and
gaze cursors.
Pause Trial Playback: Pauses the playback
EyeLink Data Viewer
©2002-2008 SR Research Ltd.
19
Forward Step: Each click on this button advances the playback by one
video frame.
Save Trial to Movie File: Save the playback of the trial into a movie file
Figure 4-6. Sample Playback Animation View.
To save the playback of trial data into a movie file, click on the "save To Movie" button
( ) on the trial view window toolbar. In the following "Movie Save Options" dialog
box, enter the movie file name, file type (.AVI or .MOV), frame rate, and compression
method. Click "Start" to begin moving saving. Depending on the size of recording file,
this may take a long time to finish. At any point, user can press "ESC" key to stop the
saving process.
Playing back video clips in the animation view is also supported if the EDF file is created
from an SR Research Experiment Builder recording. The video clip must be encoded in
XVID format and a computer with P4 CPU is required for playback in Data Viewer.
EyeLink Data Viewer
©2002-2008 SR Research Ltd.
20
5 Working with Events, Samples, and Interest Areas
In addition to providing a file-based and a trial-based summary of performance, the
EyeLink Data Viewer allows a detailed examination of event data such as fixations,
saccades, blinks, buttons, messages, as well as raw sample data.
5.1 Common Operations
The EyeLink Data Viewer allows the user to carry out various manipulations over the
events, such as selecting a portion of data for further scrutiny, excluding or deleting a
subset of events from analysis, performing drift correction on fixations, merging
neighboring fixations and saccades, etc. Selecting, hiding, and deleting operations are
common to all event types (fixations, saccades, buttons, blink events, and messages)
whereas merging and drift correction is available to fixation and saccade events only.
The common operations are discussed in this section whereas the unique operations
pertaining to certain types of events are documented in the relevant event section.
5.1.1 Selecting Events
To select an event (fixation, saccade, blink, button, or message), place the mouse cursor
over the event either in the spatial overlay/temporal graph view or in the event list of the
inspector window and click the left mouse button.
To select more than one event, hold the CTRL key down and select the target event, until
all desired events are selected. If all events in a trial are to be selected, simply click the
Select All Visible Item button
on the toolbar (or click the right mouse button and
select “Select All”).
To select a group of events within a square region, place the mouse cursor at the top-left
corner of the region. Click and hold down the left mouse button, drag the mouse cursor
to the bottom-right corner of the square region, and then release the left mouse button.
Tip: Holding the CTRL key while selecting an event leaves previously selected events
selected. If the CTRL key is not pressed, previously selected events are unselected.
5.1.2 Deleting Events
Select the events and click the Delete Selected Items button
on the toolbar (or click
the right mouse button and select “delete”). If an event is deleted, it will be permanently
removed from the temporal graph view, spatial overlay view, as well as the output
reports, and cannot be “undeleted”. In addition, deleting a fixation or saccade event will
EyeLink Data Viewer
©2002-2008 SR Research Ltd.
21
have an impact on other temporally contiguous events. For example, deleting a fixation
will merge the saccades on either side of the fixation into one saccade. Similarly,
deleting one saccade will merge the fixations on either side of the saccade into one big
fixation.
5.2 Fixations
To examine the fixation information in the data file, first make sure that the fixation
events are visible. This is done by ensuring that the Toggle Fixation Event Visibility
button
in the application desktop toolbar is selected.
Figure 5-1.Sample Spatial Overlay View of Fixation Events
The trial-view window (Figure 5-1, right panel) shows either a spatial overlay view or a
temporal graph view of the fixation events. In the former view, fixations are represented
as a hollow circle in the corresponding x, y coordinates on the trial bitmap, with fixation
duration displayed near the top-left corner of the circle. In the temporal graph view,
fixations are represented as a filled block. All fixation events in a selected trial are listed
sequentially in the middle panel of the inspector window. Properties of a selected
fixation are shown in the bottom panel of the inspector window. Each field of the
fixation event property is described in the following table. Those fields that are editable
in the viewer are marked with an asterisk.
EyeLink Data Viewer
©2002-2008 SR Research Ltd.
22
Field
Label *
Eye
Start Time
End Time
Duration
Avg. X Position *,
Avg. Y Position *
Angle
Distance
Direction
RT End Event *
Hidden
Manually Adjusted
Color *
Contents
Label of the fixation
The eye to which the current fixation event is associated.
Trial time 1 when the fixation starts. Please note that if an
interest period filter is applied, the duration, start time, and
end time of the fixations that overlap with the start or end of
the interest period will be adjusted accordingly.
Trial time 1 when the fixation ends.
Duration (in milliseconds) of the fixation
Average camera X, Y of pupil center
Angle between the horizontal plane and the line connecting
the current fixation and the previous/next fixation
Distance (in degrees of visual angle) between the current
fixation and the previous/next fixation
Direction (“LEFT”, “RIGHT”, “UP”, or “DOWN”) 3 relative
to the current fixation in which the previous/next fixation is
located
Whether the current fixation is the reaction time end event
(see section 6.3.1 for reaction time definition)
Whether the current fixation is hidden from viewing and
output analysis
Whether the fixation has been shifted manually
To achieve better visibility, the color of the currently selected
fixation can be changed by clicking on the color toolbox
Note 1 : System time refers to the timestamp (in milliseconds) since the EyeLink tracker
was activated whereas the trial time refers to the time since the trial started. The
default trial start time is the start of the trial recording (i.e., “START” message).
If reaction-time definitions are applied, the trial-start time is reset at the start event
of the RT definition (e.g., “SYNCTIME” message). A negative trial time means
that the event or message occurred before the trial start time.
Note 2 : The calculation of the angle between the previous/next fixation and the current
fixation is directional, with the arrow pointing towards the previous/next fixation
(see Figure 5-2 for an illustration of angle calculation).
EyeLink Data Viewer
©2002-2008 SR Research Ltd.
23
Figure 5-2. Diagram for Angle Calculation
Note 3: The direction of the previous/next fixation relative to the current fixation is
determined as “LEFT” if the angle is greater than 135º or less than -135º, “UP” if
the angle is between 45º and 135º, “RIGHT” if the angle is between -45º and 45º,
and “DOWN” if the angle is between -135º and -45º.
5.2.1 Selecting Fixations
In addition to the common method of event selection by mouse, fixations may also be
selected by using the cursor keys (up, down, left, and right cursor keys). To select a
group of temporally contiguous fixations, select the first fixation by mouse and press the
up cursor key to select the next fixation, until all target fixations are selected. Use the
down cursor key to unselect the recently selected fixations. The left or right cursor key
can be used to choose a group of fixations earlier or later in the temporal sequence.
5.2.2 Merging Fixations
In some cases, two or more temporally contiguous fixations can be merged and
represented as a “larger” fixation. To merge fixations, select the fixations and click the
on the toolbar (or click the right mouse button and
Merge Selected Items button
select “merge”).
Note: Only two or more temporally contiguous fixations can be merged. If fixations are
selected that are not temporally contiguous, only the neighboring fixations will be
merged.
5.2.3 Drift Correcting Fixations
Sometimes, a drift in the gaze position may occur due to poor system setup, headband
slippage, or excessive head/body movement. Normally, the eye tracker operator would
notice this problem and perform a recalibration or drift correction. If however, the issue
was not addressed during recording, it may be possible to manually adjust the fixation
events so that some degree of data analysis can still be performed.
EyeLink Data Viewer
©2002-2008 SR Research Ltd.
24
5.2.3.1 Drift-correcting a Group of Selected Fixations
To perform drift correction:
1) Select the fixations to be drift corrected
2) Hold the ALT key down
3) Move the selected fixations with the cursor keys to the desired locations
Tip: In case several fixations on one single line (such as in reading research) are to be
drift-corrected, another method is to select all of the desired fixations and press CTRL+D
to align them to the same Y position (see Figure 5-3). This operation will fail if one or
more fixations deviate more than 30 pixels in the Y dimension from the mean of the
group of fixations to be drift-corrected in a batch (for example when fixations from
different lines are selected). The tolerable deviation threshold and the X/Y dimension of
alignment is set to 30 as a default and can be modified in the general trial view preference
settings.
Figure 5-3. Drift Correcting Fixations on One Line of Text.
5.2.3.2 Precise Drift Correction of a Single Fixation
To carry out more precise drift correction of one fixation,
1) Select the fixation to be drift corrected
2) In the property panel of the Inspector window, select the entry for “Avg. X
Position” and type in the desired X position
3) Select the entry for “Avg. Y Position” and enter the desired Y position
EyeLink Data Viewer
©2002-2008 SR Research Ltd.
25
Note: Drift correcting one fixation or a group of fixations changes the properties of some
relevant events, such as the start/end point of a preceding or following saccade and its
amplitude.
Tip: Before moving the fixations, it is desirable to turn off the interest area set by
in the application desktop toolbar.
pressing Toggle Interest Area Visibility button
Otherwise, the interest area(s) within which the fixations appear will also be moved
along.
5.2.3.3 Cleaning Fixations
For some studies, researcher may want to clean up fixations based on certain rules. Data
Viewer provides two options for fixation cleaning.
1) Fixation Filter preferences
The user can filter out small fixations with "Merge Nearby Fixations", "Fixation Merging
Amplitude Threshold", and "Fixation Duration Threshold" settings from the Data Filter
preference. If the "Merge Nearby Fixations" option is checked, a fixation with a duration
shorter than the value set in the "Fixation Duration Threshold" will be merged with a
neighboring fixation, if the latter is within the distance set by the "Fixation Merging
Amplitude Threshold".
2) Four-stage Fixation Cleaning (Important: This option was not intended for all
users!)
For some reading studies, the users may want to apply a more refined fixation cleaning
algorithm. This can be done by select the intended Trial node or Recording session node,
click on the right mouse button, and select the "Clean" option.
EyeLink Data Viewer
©2002-2008 SR Research Ltd.
26
Figure 5-4. Options for Fixation Cleaning.
i)
ii)
iii)
iv)
v)
STAGE 1 For each interest area, Data Viewer checks for each fixation whether its
time duration is shorter or equal to the duration threshold. If not, the current
fixation will not be cleaned; otherwise, Data Viewer further checks the duration
and distance of the fixation immediately before and after the current fixation. The
fixation will be merged to the neighboring fixation if its duration is longer than
the threshold value and its distance along the x-axis (in degrees) from the current
fixation is shorter or equal to the distance threshold. If both the previous and next
fixations meet the above criterion, the current fixation will be merged to the
longer one of the two.
STAGE 2 This stage is similar to STAGE 1 except for a different fixation
duration and a distance value. For this stage to be effective, a shorter duration and
a longer distance threshold should be used compared to Stage 1.
STAGE 3. Data Viewer goes over the entire data and checks for interest areas
which include at least three fixations smaller than the threshold duration and no
fixations larger than the threshold duration. In such cases the shorter fixations are
merged into the larger ones.
STAGE 4 Data Viewer goes over the entire data and deletes every fixation which
is shorter than Minimum duration or larger than the maximum duration threshold.
If "Delete Fixations Outside Interest Area" box is checked, this will remove those
fixations falling out side of any interest area. Important: If no interest area is
defined, all fixations will be removed!
5.3 Saccades
EyeLink Data Viewer
©2002-2008 SR Research Ltd.
27
Figure 5-5. Sample Spatial Overlay View of Saccade Events
Saccade events (see Figure 5-4) can be toggled on/off in both the spatial overlay and
temporal graph views by clicking the Toggle Saccade Event Visibility button . A
saccade is represented as an arrow in the spatial overlay view (pointing towards the
endpoint) and as a colored solid line in the temporal graph view. The following table
lists the properties of a saccade event. Those fields that are editable in the viewer are
marked with an asterisk.
Field
Label *
Eye
Start Time
End Time
Duration
Start X *, Start Y *
End X *, End Y *
Amplitude
Peak Velocity,
Average Velocity
RT End Event *
Hidden
EyeLink Data Viewer
Contents
Label of the saccade
The eye to which the current saccade event is associated.
Trial time when the saccade starts
Trial time when the saccade ends
Duration (in milliseconds) of the saccade
X, Y coordinates of the start position
X, Y coordinates of the end position
Size (in degrees of visual angle) of the saccade
The average and peak values of gaze velocity in visual
degrees per second
Whether the current saccade is the reaction time end event
(see section 6.3.1 for reaction time definition)
Whether the current saccade is hidden from viewing and
©2002-2008 SR Research Ltd.
28
Manually Adjusted
Color*
output analysis.
Whether the saccade has been adjusted manually
To achieve better visibility, the color of the currently selected
saccade can be changed by clicking on the color toolbox.
5.3.1 Merging Saccades
Sometimes, a large saccade is followed by a small corrective saccade or vice versa.
Thus, two or more temporally contiguous saccades could be merged. This can be done
by selecting the saccades and clicking the Merge Selected Items button
on the
toolbar (or clicking the right mouse button and selecting “merge”). Once the saccades
are merged, information on the ordinal sequence for the current and subsequent saccades
is updated and the fixation between the two merged saccades is deleted.
Note: Only two or more temporally contiguous saccades can be merged. If saccades are
selected that are not temporally contiguous, only the neighboring saccades will be
merged.
5.4 Blink Events
Blink events (see Figure 5-5) can be toggled on/off by clicking the Toggle Blink Event
Visibility button . Blink is represented as a colored solid line in both the spatial
overlay view and the temporal graph view. Each field of the blink event properties is
listed in the following table. Those fields that are editable in the viewer are marked with
an asterisk.
Field
Label *
Eye
Start Time
End Time
Duration
Hidden
Color *
EyeLink Data Viewer
Contents
Label of the blink
The eye to which the current blink event is associated.
Trial time when the blink starts
Trial time when the blink ends
Duration of the blink
Whether the current blink is hidden from viewing
To achieve better visibility, the color of the currently selected
blink can be changed by clicking on the color toolbox.
©2002-2008 SR Research Ltd.
29
Figure 5-6. Sample Temporal Graph View of Blink Events
5.5 Messages
Messages, including message for built in EyeLink commands, can be placed in the EDF
file to mark the start and end of a trial or important events such as display changes.
Message events (see Figure 5-6) can be toggled on/off by clicking the Toggle Message
Event Visibility button
in the application desktop toolbar. A message is represented
as a colored triangle in the temporal graph view and a colored square in the spatial
overlay view, centering on the current gaze position. Each field of the message event
property is listed in the following table. Those fields that are editable in the viewer are
marked with an asterisk.
Field
Label *
Time
Command
Text
X, Y
EyeLink Data Viewer
Contents
Label of the message
Trial time when the message was presented. Note that if the
message is presented before the trial starts, a negative time
value will be displayed.
If the message is a command message, this lists the actual
command used. The commands include simple drawing, built
in audio messages, interest area commands, etc.
Message text
Concurrent gaze coordinates when the message is recorded (-
©2002-2008 SR Research Ltd.
30
RT End Event *
Hidden
Color *
100 if no gaze information was available for the time of the
message event).
Whether the current message is the reaction time end event
(see reaction time definitions)
Whether the current message is hidden from viewing.
To achieve better visibility, the color of the currently selected
message can be changed by clicking on the color toolbox.
Figure 5-7. Sample Temporal Graph View of Message Events (Note that the default size
of the message symbol in the temporal-graph preference settings has been changed).
5.5.1 Import Message List
Experiments should place certain messages into the EDF file to enable Data Viewer to
process the files more efficiently. Examples of these commands include defining the
image to overlay, specifying trial variables, defining a start time of RT definition, etc.
These messages will be timestamped with an accuracy of 1 millisecond from the time
sent, and can be used to mark important events such as display changes. If the user
forgot to write these messages when the experiment was created, these messages can still
be imported from a text file.
The loaded message list file must be an ASCII file and each line must be a valid EyeLink
MSG line in the format of:
MSG EDF_time [Offset] Message_text
EyeLink Data Viewer
©2002-2008 SR Research Ltd.
31
where:
• EDF_time must be an integer. If this field is positive, it is assumed to be the
absolute EDF timestamp to be used for the message (e.g., a value of 62798072 for
EDF_time field will place the message in a trial which started after 62798072 and
ended before 62798072). If EDF_time is negative, the -EDF_time = trial index of
the message in the EDF file. A value of -1 would mean the first trial in the file
and -4 would mean the 4th trial in the file. In this case, the message EDF time is
set to the start of the trial time in this case.
• Offset is optional, and must be an integer if specified. Offset is subtracted from
EDF_time to generate the real message time. For example, a message line of
“MSG 2435806 -14 !V APLAYSTART 0 1 waves/1.wav” suggests that the event
the message was referring to (APLAYSTART) actual happened at time 2435820.
• Message_text can be any string up to 100 characters in size that starts with a nonnumeric character.
• Lines that do not follow these rules are ignored.
e.g.,
MSG 2435806 -14 !V APLAYSTART 0 1 waves/1.wav
MSG 2436376 -14 !V APLAYSTOP 12578 1 waves/1.wav
MSG 62798072 0 POSN 174 384
MSG 62798072 0 POSN 185 384
To load the message list file:
1) Select the EDF file label in the treeview panel of the Inspector Window.
2) Click on the right mouse button and select “Import Message List”.
3) In the following “Open” dialog box, go to the directory where the message list file
is stored and choose the file.
After the message list file is imported into the session, a dialog box will be presented to
show the number of valid messages imported.
5.6 Button Events
Button events (see Figure 5-7) can be toggled on/off by clicking the Toggle Button
Event Visibility button . A button event is represented as a colored triangle in the
EyeLink Data Viewer
©2002-2008 SR Research Ltd.
32
temporal graph view and a colored square in the spatial overlay view, centering on the
current gaze position. The following table lists the properties of a button event. Those
fields that are editable in the viewer are marked with an asterisk.
Figure 5-8. Sample Temporal Graph View Showing the Button Events (Note that the
default size of the button symbol in the temporal-graph preference settings has been
changed).
Field
Label *
Time
Button
State
X, Y
RT End Event *
Hidden
EyeLink Data Viewer
Contents
Label of the button event
Trial time when the button was pressed/released. Note that if
the button event occurs before the trial starts, a negative time
value will be displayed
Button ID
Button pressed or released
Concurrent gaze coordinates when the button is
pressed/released (-100 if no gaze information was available
for the time of the button event).
Whether the current button event is the reaction time end
event (see reaction time definitions).
Whether the current button event is hidden from viewing and
output report.
©2002-2008 SR Research Ltd.
33
Color *
To achieve better visibility, the color of the currently selected
button event can be changed by clicking on the color toolbox.
5.7 Samples
Samples can be toggled on/off by clicking the Toggle Eye Sample Visibility button
in the desktop toolbar. In the spatial overlay view (Figure 5-8, left panel), the samples
are overlaid on the trial bitmap, forming the sample path of the viewing process. In the
temporal graph view (Figure 5-8, right panel), the xy coordinates of the samples as well as
the concurrent pupil size are plotted as a function of trial time.
Figure 5-9. Sample Spatial Overlay View (left) and Temporal Graph View (right) of
Raw Sample Data
Note: By default, samples are not loaded into the viewer when a data file is imported. To
load samples into the data viewer, change the Load Samples property in the Preferences
→ Data Loading tab.
Tip: In the Spatial Overlay trial view, if samples are visible at the same time as events,
when an event is selected, all samples used to generate that event are also selected.
5.8 Interest Areas
To access information on interest areas in a trial, first click on the interest area button
( ) of that trial in the tree view panel of the inspector window (see Figure 5-9). The
node will read as “Custom Interest Area Set” if custom interest areas are loaded or
created but as “Empty Interest Area Set” if no interest areas are defined. The middle
panel of the inspector window lists all available interest areas in that trial. The following
EyeLink Data Viewer
©2002-2008 SR Research Ltd.
34
table lists the properties of an interest area. Those fields that are editable in the viewer
are marked with an asterisk.
Figure 5-10. Sample Text Display Overlaid with Interest Areas
Field
Name *
ID
Group
Type
Left *
Top *
Right *
Bottom *
Pixel Area
Color *
Time
EyeLink Data Viewer
Contents
Text of the interest area
Ordinal ID of the interest area
Label of the group to which the current interest area belongs.
Type of interest area (rectangular, elliptic, or freehand)
X-coordinate of the upper-left corner of the interest area
Y-coordinate of the upper-left corner of the interest area
X-coordinate of the lower-right corner of the interest area
Y-coordinate of the lower-right corner of the interest area
Area of the interest area in pixels.
To achieve better visibility, the color of the currently selected
area interest can be changed by clicking on the color toolbox
EDF file Time when the interest area was created with the '!V
IAREA' command during recording. If the interest area was
created during the viewing session (manually or from interest
area template file), the time value will be -1 and this attribute
will not be visible from the property table. The interest area
time was useful only when interest periods are created and
used (i.e., to filter interest areas based on the current selected
©2002-2008 SR Research Ltd.
35
interest period).
Number Fixations
Total number of fixations within the interest area
Fixation %
Percentage of total fixations in a trial falling within the current
interest area
Dwell Time
Total time (in milliseconds) spent on the current interest area
Dwell Time %
Percentage of trial dwell time spent on the current interest
area
Sequence (Run)
Count Number of times the interest area was entered and left
(i.e., run).
Note: The coordinate information (Left, Top, Right, and Bottom) is available for the
rectangular and elliptic interest areas only.
5.8.1 Manually Creating Interest Areas
The visibility of interest areas can be toggled on/off by clicking the Toggle Interest
Area Visibility button . To create an interest area:
1) Select the Interest Area shape that you want to create from the Application
Desktop toolbar:
Rectangular Interest Area Shape is active
Ellipse Interest Area Shape is active
FreeHand Interest Area Shape is active
For rectangle and elliptic interest area shapes (see Figure 5-10):
2) Hold down the left mouse button in the top-left corner of where you want the
interest area to be created.
3) Drag the mouse down to the right until the selection region covers the area that
you want to select.
4) Release the mouse button.
5) Enter the name of the Interest Area and press Enter.
6) Repeat steps 2-6 to create more interest areas of the same type. Press the
Selection mode icon ( ) from the Application Desktop toolbar to end creating
interest areas.
For FreeHand interest area shapes:
2) Double click the left mouse button on the first point of the shape to create.
3) Move the mouse to the second point and double click the mouse again. A line
joining the points should be displayed.
4) Repeat step 3 for each point of the freehand shape.
EyeLink Data Viewer
©2002-2008 SR Research Ltd.
36
5) Press the ENTER key when you have specified all points you wish to create. The
first and last points of the interest area will be joined by the program. Note that
you can cancel the creation of a freehand interest area by pressing the ESC key.
6) Enter the name of the Interest Area and press Enter.
7) Repeat steps 2-6 to create more interest areas of the same type. Press the
Selection mode icon ( ) from the Application Desktop toolbar to end creating
interest areas.
Figure 5-11. Creating a Freehand Interest Area
Several Interest Areas of the same type can be created in a sequence by following the
above steps.
5.8.2 Creating Interest Area: Image Segmentation
If a trial bitmap has already been loaded, the Data Viewer can create interest areas for the
trial by auto-segmentation. This is done by clicking the “Auto Segment Image to Interest
Area” button ( ) in the toolbar of the spatial overlay view window.
Note: Using the auto-segmentation feature will remove all of the pre-existing interest
areas for the trial. Auto segmentation is more feasible for those displays in which the
EyeLink Data Viewer
©2002-2008 SR Research Ltd.
37
individual items can be easily isolated, such as in reading and visual search studies where
a background of a single color is present, but not good for some visual scenes in which
the boundaries between individual elements are not clearly defined (see Section 9.7 on
preference settings for image segmentation).
5.8.3 Saving Interest Areas
To save interest areas of a trial (to be used as an interest area template or to be imported
into another trial):
1) Click the Save the Interest Area Set to Disk
button on the spatial overlay
window toolbar
2) In the Save dialog box, browse to the directory in which you want to save the
interest area.
3) In the File name text box, type in the name for the file.
4) Press Save button.
5.8.4 Importing Interest Area File (for a specific trial)
For each individual trial, interest area can be imported:
4) Click the Import Interest Area File button
on the spatial overlay window
toolbar
5) In the Load dialog box, browse to the location of the interest area file that you
want to import and select it.
6) Click Load.
Note: This operation will delete any existing interest areas in the trial.
5.8.5 Emptying Interest Area Set (for a trial)
To empty the current interest area set for a trial
1) Click the trial whose interest areas are to be emptied in the tree view
2) In the property panel of the trial, find the entry “Interest Area Set” and choose the
value of “Empty Interest Area”.
5.8.6 Loading Interest Area Template
If the same interest areas are used for several trials, instead of repeating the procedure of
creating interest areas for each individual trial, an interest area template can be loaded to
supply the segmentation information for those trials.
To load an interest area template or multiple interest area set files:
1) From the menus, choose:
File → Import Data → Interest Area Template
EyeLink Data Viewer
©2002-2008 SR Research Ltd.
38
2) In the Load dialog box, browse to the location of the interest area file (.ias) that
you want to import and select it.
3) Click Load and the tree view panel will be updated.
5.8.7 Using Interest Area Templates
If several trials use the same set of interest areas, an interest area template, if already
loaded, can be used (see section 6.1.3 on applying an interest area template to a group of
trials). To apply an interest area template,
1) Click on the viewing session icon ( ) and perform trial grouping if necessary.
2) In the tree view panel of the data tab, select the trial/group onto which the interest
area template is loaded.
3) In the property panel of a selected trial or trial group, find the entry “Interest Area
Set” and select the target interest area template.
5.8.8 Automatic Trial Image-Interest Area Set Association
If "Auto Select IAS for Trial" property in the “Output/Analysis” preference settings is
true, any value in the “Image Name Mapping” field of the interest area set will be used to
automatically associate the interest area set to trials. If the last Data Viewer image load
command entered in a trial contains an image name that contains the "Image Name
mapping" text of the interest area template, then the interest area set is associated with the
trial. Please note that the matching is case sensitive, although the "Image Name
mapping" text does not need to be the full image path in the trial. If no matching "Image
Name Mapping" text was found for the trial in any IAS template, then the default empty
interest area set template will be used for the trial.
To illustrate the use of automatic trial image-interest area set association, create a Data
Viewer session and load in the sample picture.EDF file (File → Import Data … →
EyeLink File(s) …) and segment files test1.ias, test2.ias, test3.ias, and test4.ias (File →
Import Data … → Interest Area Template). The second trial of the EDF contains the
following image loading command message:
MSG
62817663 !V IMGLOAD FILL images\Sac_blur.jpg
If the user wants to associate the “test2.ias” to Trial 2, first make sure that the “Auto
Select IAS for Trial" property in the “Output/Analysis” preference settings is checked.
Click on the test2.ias in the treeview and enter “Sac_blur.jpg” (case sensitive, without
quotes) in the “Image Name Mapping” field. Now the interest areas contained in
“test2.ias” will be drawn on the Trial View Window for Trial 2.
EyeLink Data Viewer
©2002-2008 SR Research Ltd.
39
5.8.9 Deleting Interest Area Templates
Interest area templates can be deleted from IA template list. In the Treeview panel of the
Inspector window, locate the "Interest Area Templates" folder where all of the interest
area templates are loaded. Select the target interest area template from the list, click the
right mouse button, and select "Delete". If the deleted interest area template is being used
by a trial, the "Interest Area Set" property of that trial will be set to "Empty Interest Area
Set".
5.8.10
Selecting Interest Areas
To select an interest area, place the mouse cursor over the interest area and click the left
mouse button. The interest area is highlighted after selection. To select more than one
EyeLink Data Viewer
©2002-2008 SR Research Ltd.
40
interest area, hold the CTRL key down and select the target area, until all desired interest
areas are selected. If all interest areas in the trial are to be selected, simply click the
on the toolbar (or click the right mouse button and
Select All Visible Item button
select “Select All”).
Note: If there are eye movement events within the interest area to be selected, clicking
on the interest area will likely select the eye movement events instead. To make a more
precise IA selection, click on the “Custom Interest Area Set” node of the trial in the tree
view and select the interest areas from the list panel. Alternatively, you can toggle off the
eye movement events first, make the interest area selection, and then toggle the eye
movement events back on.
5.8.11
Moving an Interest Area
An interest area can be moved by following these steps:
1)
2)
3)
4)
5)
Put the mouse cursor over the Interest Area
Hold the ALT key down.
Press the left mouse button
Drag the IA to the desired location
Release the mouse button.
5.8.12
Resizing Rectangular and Elliptic Interest Areas
A rectangular or elliptic interest area can be resized by following these steps:
1) Hold the ALT key down.
2) Place the mouse over the border to be dragged (the arrow cursor changes into a
sizing cursor)
3) Press the left mouse button and drag the border to the desired location
4) Release the mouse button.
To carry out a more precise adjustment for a rectangular or elliptic interest area:
1) Select the interest area to move or adjust
2) In the property panel of the interest area, select the entry for “Left” and type in the
desired x-coordinate of upper-left corner
3) Select the entry for “Top” and type in the desired y-coordinate of upper-left
corner
4) Select the entry for “Right” and type in the desired x-coordinate of bottom-right
corner
5) Select the entry for “Bottom” and type in the desired y-coordinate of bottom-right
corner.
EyeLink Data Viewer
©2002-2008 SR Research Ltd.
41
5.8.13
Resizing Freehand Interest Areas
A freehand interest area can be resized by following these steps:
1) Select the interest area
2) Hold the ALT key down.
3) Place the mouse over the vertex to be dragged (the arrow cursor changes into a
hand cursor)
4) Press the left mouse button and drag the vertex to the desired location
5) Release the mouse button.
5.8.14
Deleting Interest Areas
To delete interest areas:
1) To delete interest areas without removing any events falling within, first toggle
off all event visibility.
2) Select the interest areas
3) Press the right mouse button
4) Select the Delete option from the popup menu.
5) Confirm that the IAs should be deleted.
Tip: Interest areas can also be deleted by clicking the Delete Selected Items button
or the Cut Selected Item button
on the desktop toolbar.
5.8.15
Splitting Interest Areas
Rectangular and elliptic interest areas can be split either horizontally or vertically. You
can split many interest areas at one time by selecting multiple IAs. To split all selected
IAs:
1) Select the IA(s) to split.
2) Press the right mouse button
3) Select “Split” from the popup menu
5.8.16
Merging Interest Areas
Neighboring rectangular interest areas can also be merged. To do that:
1) Click "Toggle Fixation Event Visibility" button on the trial view window toolbar
so that the fixation events will not be merged.
2) Press CTRL key to select the intended interest areas;
3) Click right mouse button to bring up a popup menu, select "Merge" from the list.
EyeLink Data Viewer
©2002-2008 SR Research Ltd.
42
6 Exporting Data
One of the ultimate goals of the EyeLink Data Viewer is to extract useful eye-movement
information and export the data to a text file that can be processed by most statistical
analysis software. Currently, the Data Viewer supports five kinds of outputs: trial
reports, fixation reports, saccade reports, interest area reports, sample output reports, and
recording event sequence data.
6.1 Managing Trial Variables
The Trial Variable Manager (Figure 6-1) and the Trial Variable Value Editor (Figure 6-2)
allow the user to review the currently available variables, to assign a default value for the
variables, to create or remove variables, and to change the variable values on a trial-bytrial basis.
6.1.1 Trial Variable Manager
Figure 6-1. Trial Variable Manager
The Trial Variable Manager Dialog, activated by pressing Analysis → Trial Variable
Manager from the menus, lists the filename (DATA_FILE) and other variables imported
from the EDF file, if the TRIAL_VAR_LABELS command is used (PAGE in this case;
see Section 7.2.1 on how to define new trial variable labels).
To assign a default value to one variable, click on the variable and type in the default
value in the Default Value edit box (Be sure to press Enter to register the change you
made). To create a new variable, click the
button on the left. A new variable (“label”)
EyeLink Data Viewer
©2002-2008 SR Research Ltd.
43
with a default value (“default value”) will appear. Select the variable and change its label
and default value in the two edit boxes (DO NOT include quotes for text strings). To
remove one variable, select it in the list and click the delete button .
Sometimes, the order in which the variables are listed is important. This is especially
true when you want to match the variables created with the Trial Variable Manager and
the values read from the command messages in EDF file (e.g., TRIAL_VAR_DATA,
TRIALID; see the preference settings on data loading). To do that, simply select the
variable and use the
or
button to move it to the desired position.
6.1.2 Trial Variable Value Editor
The variables and their values can be viewed and edited in the Trial Variable Value
Editor dialog box.
Figure 6-2. Trial Variable Value Editor Dialog
To activate the dialog box, from the menus, choose:
Analysis → Trial Variable Value Editor
The top-row of the dialog box lists the filename, variables imported from the EDF file, as
well as variables created by the Trial Variable Manager. The following rows list the
corresponding values for the variables in each individual trial. To change the value for a
particular cell, double click on the current value, type in the new value (DO NOT include
quotes for text strings), and press Enter to register the change. (Note, presumably, the
user would load EDF files of the same experiment with the same condition labels, into
one viewing session. Loading EDF files containing different condition labels from each
other may result in some unexpected findings.)
6.1.3 Trial Grouping
Trial condition variables are important for identifying one specific trial or grouping trials
tested under the same experimental condition. Thus, instead of going through each of the
individual trials, a trial grouping mechanism can be applied to manipulate those trials
collectively. For example, practice trials can be removed from the viewing session in a
batch, interest area templates can be applied to those trials using the same search display,
EyeLink Data Viewer
©2002-2008 SR Research Ltd.
44
and potentially, a “landscape” view can be created for the same display image with data
collected from several subjects to identify the informative parts of the display.
By default, the Data Viewer group all of the trial by data file. To regroup trials within a
viewing session, select the viewing session icon ( ), click the right mouse button, and
choose the “Trial Grouping” option. In the following “Edit Trial Grouping” dialog,
choose the variable with which the grouping should be performed and press the
“Regroup” button (see the left panel of Figure 6-3). Multiple grouping variables can be
selected or de-selected by using the control key; if no grouping variable is chosen,
grouping will be performed based on the data file each trial belongs to. Once grouping is
performed, the trials will be listed by the conditions of the grouping variables selected
(see the right panel of Figure 6-3). The property panel of each group lists the label
(values of the grouping variables), total number of trials, and configurable interest area
information for the group. Thus, the user can potentially apply an interest area template
to all trials in the group (see section 5.8.7 Using Interest Area Templates).
Figure 6-3. Applying Trial Grouping by a Trial Condition Variable and Setting Interest
Area Template for a Group of Trials.
EyeLink Data Viewer
©2002-2008 SR Research Ltd.
45
6.2 Fixation Map
The EyeLink Data Viewer also allows the user to create a "landscape" view for a trial or
for a group of trials with the same background image to visually identify the informative
parts of the display. To create a Fixation map for a single trial, select the trial node ( )
in the top-panel of the inspector window, click the right mouse button and select “Create
Fixation Map” option. To create a Fixation map for a group of trials, select the group
node ( ). Click the right mouse button and select “Create Fixation Map” option (if no
common image has been applied to the trials yet, select “Select Trial Background Image”
option before creating a Fixation map). Section 9.3 lists all of the preference settings
related to creating Fixation map.
Figure 6-4. Sample Fixation Map
6.3 Managing Reaction Time Definitions
Another important application of the trial condition variables is for managing reactiontime definitions for all the trials in the same experimental condition. A typical trial
recording could be ended in several ways, such as a button response, a saccade event, a
fixation event, or a special message. To obtain an accurate reaction time (RT) measure,
the EyeLink Data Viewer relies on a set of reaction time definitions to parse the start and
EyeLink Data Viewer
©2002-2008 SR Research Ltd.
46
end events for RT calculation. The reaction time manager allows the user to configure
the way in which the trial starts and ends for each condition of the experimental design.
Once a set of RT definitions has been created and initialized, the RT start and end event
information is available in both the trial view window and the inspector window.
6.3.1 Reaction Time Manager
The Reaction Time Manager is used to create, edit, or delete reaction time definitions for
different experimental conditions. The user can set parameters of a trial end event and
specify condition values that must be matched for the RT definition to be applied to a
given trial.
To configure reaction time definition,
1) From the menus, choose:
Analysis → Reaction Time Manager
Figure 6-5. Reaction Time Definition Manager
In the reaction time manager dialog (see Figure 6-5), the user can create a new
reaction time (RT) definition by clicking the new
button on the left, edit an
existing RT definition by clicking on the
button, and remove an RT definition
button.
by clicking on the
Users who have already had custom reaction time messages defined in the EDF
file need to decide whether the customer RT messages or the RT definitions
created here should take precedence when both of them are applicable for a
particular trial. If "Override Custom Reaction time definitions" box is checked,
the new RT definitions created through the Reaction Time Manager will take
precedence; otherwise, the custom RT messages written in the EDF file will be
used.
EyeLink Data Viewer
©2002-2008 SR Research Ltd.
47
2) Click on the
button. In the Reaction Time Definition Editor dialog (General
Tab; see Figure 6-6)
a. Enter a label for the current RT definition in the Label edit box;
b. Select the type of RT end event from the Type combo box;
c. In the Trial Condition Qualifiers group box, select the trial condition
variables and enter the intended values for the current RT definition (DO
NOT include quotes for text strings).
Figure 6-6. Reaction Time Definition Editor (General Tab)
3) Select the Reaction Time tab (see Figure 6-7).
Figure 6-7. Reaction Time Definition Editor (Reaction Time Tab)
The layout of the Reaction Time tab depends on the type of end event you
selected in the General tab. One common feature though, is the configuration of
the start time message. In the Start Time Message Text edit box, type in the
intended message string (the default is “SYNCTIME”);
Button Event:
EyeLink Data Viewer
©2002-2008 SR Research Ltd.
48
This will treat a particular button press/release as the reaction time end event.
Select the intended button ID from the Button Number combo box and choose the
button state (button press or release).
Message Event:
This will treat the first occurrence of a matching message as the end event for
reaction time calculation. In the “Message Text” edit box, type in the message
string (DO NOT include quotes for text strings).
Fixation Event:
This will end the trial by the appearance of a specific fixation. In the edit boxes,
fill in the minimum fixation duration (in millisecond) required, as well as the xy
coordinates of the center of the fixation region and the diameter of the region.
Saccade Event:
This will end the trial by the occurrence of a specific saccade. Fill in the
minimum saccadic amplitude (in degrees of visual angle) required, as well as
the xy coordinates of the region center and the diameter of the saccade region.
4) Once all the desired RT definitions have been set, arrange the order of the
and
buttons in the Reaction Time Definition
definitions by using the
Manager dialog. This operation is important only when more than one RT
definition can be met for a single trial. Always put specific definitions before
general ones.
5) Close the Reaction Time Manager dialog. This will apply the reaction definitions
to all trials. If there are lots of trials in a viewing session, this may take some time
to finish.
6) If the user thinks that the current RT definitions are not appropriate, she/he can
remove them by clicking on the “Delete” button on the Reaction Time Definition
Manager dialog box.
EyeLink Data Viewer
©2002-2008 SR Research Ltd.
49
Figure 6-8. Deleting Reaction Time Definitions
6.3.2 Viewing Reaction Time Information
If the reaction time events are initialized, such information is available for viewing in
trial view window (see Figure 6-9). In the spatial overlay view, a red symbol is
displayed near the end event. In the temporal graph view, a green line is drawn at the
time when the start time message is presented and a red line is drawn at the time when the
end event occurs (to see these graphics, make sure that the Display RT Graphics field in
the General Trial View Preferences is checked; see section 9.5).
In the event list of the Inspector window, select the end event that meets the reaction time
definition for the selected trial. The RT End Event field of that event is automatically
checked. This field will be unchecked and reaction time calculation will be updated if the
user decides to choose another event as the RT end event by checking the same field of
the newly selected event.
Figure 6-9. Reaction Time Graphics in Both the Spatial Overlay View and the Temporal
Graph View of the Trial View Window
6.4 Interest Periods
EyeLink Data Viewer
©2002-2008 SR Research Ltd.
50
Besides the above-mentioned reaction-time definitions, the user may also selectively
view and perform analysis on data within a specific period of time within a trial (Interest
Period). For example, the user may want to examine the eye data between two important
markup messages; for a trial with multi-page manipulation, analysis may be performed
separately for the period of each page presentation. The EyeLink Data viewer allows the
user to create interest periods based on messages, button events, or duration. To do that,
when programming an experiment, the user should mark up possible interest periods with
messages or other important events such as button presses. If different images were
shown within different interest period, the user should also make sure that messages used
to load images, text, or draw simple graphics be recorded with the scope of the intended
interest period.
6.4.1 Creating Interest Periods
To create an interest period,
1) Click the “Interest Period List” combo box at the far-right hand of the application
menu bar and select the “Edit …”.
2) Similar to the reaction time manager dialog (see Figure 6-10), the user can create
a new interest period by clicking the new
button on the left, edit an existing
interest period by clicking on the
button, and remove an interest period by
clicking on the
button.
Click on the new
button. In the Interest Period Editor dialog (General Tab, see
Figure 6-10), enter a label for the current interest period in the label edit box and
select the type of interest period end event (Button, Message, or Duration-based) from
the Type combo box.
EyeLink Data Viewer
©2002-2008 SR Research Ltd.
51
Figure 6-10. Interest Period Editor (General Tab)
3) Select the Details Tab (see Figure 6-11).
Figure 6-11. Interest Period Editor (Details Tab).
Similar to the reaction time definition, the layout of the Details tab depends on the
type of the end event the user selected in the General Tab.
EyeLink Data Viewer
©2002-2008 SR Research Ltd.
52
Button Event:
This will treat a particular button press/release as the interest period end event. In the
Start Time Message Text edit box, enter the message string (case-sensitive; DO NOT
include quotes for text strings). Select the intended button ID from the Button
Number combo box and choose the desired button state (button pressed or released).
The user can also specify a time offset (0 or a positive number in milliseconds) for the
start time and end time so that the interest period does not start or end right on the
time of message and/or button event.
Message Event:
This will treat the first occurrence of a matching message as the end event for the
interest period. Enter the desire message strings for both the Start Time and End
Time Message Text edit boxes (case sensitive, with no quotes for text strings). The
user can also set a time offset (0 or a positive number, in milliseconds) for the start
time and end time. Please note that when using this option, the interest period end
message must be different from the start message; otherwise, the user should use a
duration-based interest period instead (see below).
Duration Based:
The interest period can also be based on a duration following the detection of the start
message (e.g., 10 seconds following the “SYNCTIME” message). The user needs to
specify a message string (case-sensitive; DO NOT include quotes for text strings) in
the Start Time Message Text edit box. The user can also specify an optional offset
time value so that the interest period does not start right on the message time. In the
“Duration” edit box, enter the desired duration (a positive number in milliseconds) of
the interest period.
4) Close the Interest Period Editor dialog. This will initialize the interest period for
all trials.
6.4.2 Using Interest Period
The newly-created interest periods are added to the interest period list, along with the
default interest periods – “Full Trial Period” and “Reaction Time Period”. The user can
navigate between different interest periods by selecting the desired interest period from
the list. For each interest period, only those events falling within that period are shown in
the spatial overlay, temporal graph views, and in the event list of the inspector window.
In addition, for all of the following output analyses (trial, fixation, saccade, interest and
recording sequence outputs), only those events and data within the selected interest
period (custom-defined interest period, or the default – “Full Trial Period” or “Reaction
Time Period”) are exported.
6.5 Trial Report
EyeLink Data Viewer
©2002-2008 SR Research Ltd.
53
Trial report summarizes the performance of individual trials. Before trying to obtain a
trial report, make sure that you have completed the reaction time definition and initialized
the reaction time events.
6.5.1 Obtaining a Trial Report
To obtain a trial report (Figure 6-12),
1) From the menus, choose:
Analysis → Report → Trial Report
1) Select the variables in the list of available output variables (left panel) and press
“>>” to enter the variables into the list of selected output variables.
2) To remove one variable from the output list, simply select that variable and press
“<<”.
3) To change the order in which the variables are listed, simply select one variable
or
button to move it to the desired position. Repeat this step
and use the
until all variables are in the right position.
4) Once all the desired variables have been entered into the output list, press NEXT
button.
5) In the Export dialog box, browse to the directory in which you want to save the
output report.
6) In the File name text box, type in the name for the document. Note, if the output
report name does not contain an extension (i.e., “.***”, where *** are any 3
characters), the file name is appended with a “.txt” by default.
7) Press Export button.
EyeLink Data Viewer
©2002-2008 SR Research Ltd.
54
Figure 6-12. Selecting Output Variables in a Trial Report
6.5.2 Variables in the Trial Report
The following variables are listed in the trial report:
Field
Contents
RECORDING_SESSION_LABEL Label of the data file
* AVERAGE_FIXATION
Average duration (in milliseconds) of all selected
_DURATION
fixations in the trial
* AVERAGE_SACCADE
Average size (in degrees of visual angle) of all
_AMPLITUDE
selected saccades in the trial
AVERAGE_X/Y_RESOLUTION Average horizontal/vertical angular resolution (in
screen pixels per degree) for the trial
* BLINK_COUNT
Total number of blinks in the trial
* BUTTON_PRESS_COUNT
Total number of button presses in the trial
DATA_FILE
File name of the data
DURATION
Duration of the trial recording between the
“START” message and the “END” message
END_TIME
Timestamp when the trial recording ends (in
milliseconds since EyeLink tracker was activated)
EyeLink Data Viewer
©2002-2008 SR Research Ltd.
55
EYE_USED
* FIXATION_COUNT
INDEX
INTEREST_AREA_SET
* IP_DURATION
* IP_END_TIME
* IP_START_TIME
* MESSAGE_COUNT
* PUPIL_SIZE_MAX
* PUPIL_SIZE_MEAN
* PUPIL_SIZE_MIN
*PUPIL_SIZE_MAX_TIME
*PUPIL_SIZE_MAX_X
*PUPIL_SIZE_MAX_Y
¶ REACTION_TIME
¶ RT_DEFINITION_LABEL
¶RT_EVENT_BUTTON_ID
¶ RT_EVENT_END_TIME
¶ RT_EVENT_INDEX
EyeLink Data Viewer
Which eye's data (LEFT or RIGHT) is used to
create this report?
Total number of fixations in the trial
Sequential order of the trial in the recording
Setting of the interest area (“Custom Interest Area
Set” if interest areas are loaded/created and “Empty
Interest Area Set” if not)
Duration of the interest period in milliseconds.
End time (in milliseconds since EyeLink tracker
was activated) of the interest period.
Start time (in milliseconds since EyeLink tracker
was activated) of the interest period.
Total number of messages in the trial
Maximum pupil size in arbitrary units (Typical
pupil area is 800 to 2000 units while pupil diameter
is in the range of 1800-3000 units). Note that
PUPIL_SIZE_MAX, PUPIL_SIZE_MEAN, and
PUPIL_SIZE_MIN fields will output a missing
value if samples are not loaded into a viewing
session (see Data Loading Preferences).
Average pupil size in arbitrary units.
Minimum pupil size in arbitrary units.
EDF Time of the sample with maximum pupil size.
Note that this field will output a missing value if
samples are not loaded into a viewing session (see
Data Loading Preferences).
X position at PUPIL_SIZE_MAX_TIME.
Y position at PUPIL_SIZE_MAX_TIME.
Configurable response time determined by the
Reaction Time Definition associated with the trial.
This variable returns a '.' if the trial does not have an
RT end event.
Label of the RT definition (“.” if undefined).
“CUSTOM_RT” if the RT definition is a custom
one (see Section 7.4 on reaction-time definitions).
If the RT end event is the press/release of a button,
records the button ID; otherwise, records “.”
End time (in milliseconds since EyeLink tracker
was activated) of the end event. If end event is not
an eye event (fixation or saccade event), this
variable is equal to RT_EVENT_START_TIME.
Sequential order of the end event; -1 when
©2002-2008 SR Research Ltd.
56
¶ RT_EVENT_MESSAGE_TEXT
¶ RT_EVENT_POSITION_X/Y
¶ RT_EVENT_START_TIME
¶ RT_EVENT_TYPE
¶ RT_START_TIME
* RUN_COUNT
* SACCADE_COUNT
* SAMPLE_COUNT
START_TIME
TRIAL_LABEL
NO_MATCH. Index is relative to a given event
type.
Records the message text of the end event. If the
end event is not a message event, records “.”
Records the X/Y coordinates of the fixation or
saccade end event and sets “.” for a button or
message end event.
Start time (in milliseconds since EyeLink tracker
was activated) of the end event.
The way in which the trial is ended (BUTTON,
FIXATION, SACCADE, MESSAGE, or
NO_MATCH)
Start time (in milliseconds since EyeLink tracker
was activated) of RT definition for a trial.
Total runs of fixations in the trial (two consecutive
fixations in the same interest area belong to the
same run).
Total number of saccades in the trial
Total number of samples in the trial
Timestamp when the trial recording starts (in
milliseconds since EyeLink tracker was activated)
Label of the trial
Besides these default variables, additional trial variables will be listed if they have been
defined in the EDF file (see section 7.2.1 on trial variable labels) or created during the
viewing session (see section 6.1.1 on trial variable manager).
6.5.3 Using Trial Report
Please note that in the above table, outputs for all of the variables marked with an “*”will
change as different interest period filters are used. For example, the output for a trial
filtered by a reaction time period may be different from a full-trial output, as the former
only include a subset of the full-trial data in the report. Therefore, please make sure that
you have the right setting for the interest period filter when creating you own reports (see
figure below; see also 6.4.2). In those trials with no reaction time defined, missing
values (“.”) will be recorded for those variables marked with a “¶” sign. Please also note
that event counts only factor in visible events. If an event is hidden and not visible, it
will not contribute to event counts. If hidden events are visible, then they will apply to
event counts.
EyeLink Data Viewer
©2002-2008 SR Research Ltd.
57
Figure 6-13. Using Interest Period for Event Filtering
Three time periods have been used in a trial output report: 1) recording period, 2)
reaction-time period, and 3) interest period. The recording period (START_TIME,
END_TIME, and DURATION) of a trial starts from the “START” message in the EDF
file and ends on the “END” message. This is fixed for a recording trial, regardless how
the user set the interest period filters.
If a valid reaction time definition is found for one trial, the RT_START_TIME is the time
of the RT start message (e.g., time of “SYNCTIME” message),
RT_EVENT_END_TIME, and RT_EVENT_START_TIME are the start and end time of
the RT event (fixation, saccade, button, or message). Reaction time (REACTION_TIME)
is calculated as the difference between RT_START_TIME and
RT_EVENT_START_TIME. Please note that the RT_EVENT_END_TIME and
RT_EVENT_START_TIME will be the same when a button or message is used as the
RT end event but will be different when a fixation or saccade is defined as the end event.
If the user does not create a reaction time definition or no valid reaction time definition is
found for one trial, REACTION_TIME, RT_EVENT_END_TIME, and
RT_EVENT_START_TIME, and other variables related to reaction-time definition will
have missing values (“.”) whereas RT_START_TIME will be the same as the trial
recording start time (START_TIME).
The interest period variables will have different values depending on the settings used in
the interest period filter (see Figure 6-13). If the interest period filter is set to “Full Trial
Period”, the start (IP_START_TIME), end (IP_END_TIME), and duration
(IP_DURATION) of the interest period will be same as those for the recording period
(i.e., START_TIME, END_TIME, and DURATION). If the interest period filter is set to
“Reaction Time Period”, the start, end, and duration of the interest period will be same as
those for the reaction time period. If the user has created her/his own interest period (see
section 6.4.1) and that interest period is used to filter events, the output report will only
do summary statistics (variables marked with “*” in the above table) for those events
falling within that period.
6.5.4 Configuring the Trial Report
EyeLink Data Viewer
©2002-2008 SR Research Ltd.
58
The Data Viewer also allows the user to configure the trial report (similarly the fixation
report, saccade report, and the interest area report). The user can exclude some trials by
entering a string in the “Exclude Trial String” edit box. This string should be one
message or part of a message within the scope of the trial recording (see section 7.1 on
defining the start and end of a trial) that uniquely defines that subset of trials to be
excluded. In addition, to enable correct loading of string/text variables in some statistics
software, the Viewer also has an option of adding a pair of quotation marks for such
variables.
6.6 Fixation Report
Fixation report creates a columnar output of fixation events. Each row of the report
represents a fixation event. Depending on the variables selected for output, each row can
contain information on the previous fixation and/or saccade, as well as the next fixation
and/or saccade.
6.6.1 Obtaining a Fixation Report
To obtain a fixation report, follow the same procedure as in obtaining the trial report,
except from the menus, choose:
Analysis → Report → Fixation Report
6.6.2 Variables in the Fixation Report
Currently, the fixation report includes the following variables:
Field
RECORDING_SESSION_LABEL
CURRENT_FIX_ADJUSTED
CURRENT_FIX_BLINK
_AROUND
CURRENT_FIX_BUTTON_0_PR
ESS
…
CURRENT_FIX_BUTTON_8_PR
ESS
CURRENT_FIX_DURATION
EyeLink Data Viewer
Contents
Label of the data file
Whether the current fixation has been adjusted
manually
Whether there is a blink preceding or following the
current fixation. Possible values are “AFTER” (a
blink follows the current fixation), “BEFORE” (a
blink precedes the current fixation), “BOTH” (the
current fixation is flanked by a preceding and a
following blink), or “NONE” (no blink appears
around the current fixation).
Time from trial start if a specific button (0 - 8) has
been pressed during or after fixation. If no button
press is made from the start of the current fixation
to the start of next fixation, missing value “.” is
assigned.
Duration of the current fixation
©2002-2008 SR Research Ltd.
59
* CURRENT_FIX_END
* CURRENT_FIX_END_OTHER
Trial time when the current fixation ends
Trial time when the current fixation ends (on the
other eye in a binocular recording).
Ordinal sequence of the current fixation in the trial
Interest area in which the current fixation falls.
CURRENT_FIX_INDEX
CURRENT_FIX_INTEREST
_AREAS
CURRENT_FIX_INTEREST_ARE Total amount of fixation dwell time (in msec) on
A_DWELL_TIME
the interest area to which the current fixation
belongs.
CURRENT_FIX_INTEREST_ARE Total number of fixations on the interest area to
A_FIX_COUNT
which the current fixation belongs.
CURRENT_FIX_INTERESTARE Group label for the interest area to which the
A_GROUP
current fixation is assigned.
CURRENT_FIX_INTEREST
The index of the interest area in which the current
AREA_INDEX
fixation falls.
CURRENT_FIX_INTEREST_ARE Label for the interest area to which the current
A_LABEL
fixation is assigned.
CURRENT_FIX_INTEREST_ARE The ordinal sequence of the current run 2 of
A_RUN_ID
fixation(s) made towards the current interest area.
If the current interest area does not have a previous
run of fixation(s) on it, this variable will have a
value of 1.
CURRENT_FIX_INTEREST_ARE Horizontal offset of the current fixation relative to
A_X_OFFSET
the center of the interest area. If the fixation falls
into multiple interest areas, returns the offset value
relative to the first relevant interest area only.
Returns a missing value (.) for freehand interest
areas.
CURRENT_FIX_INTEREST_ARE Vertical offset of the current fixation relative to the
A_Y_OFFSET
center of the interest area.
CURRENT_FIX_IS_RT_END
Whether the current fixation is the end event of RT
definition
CURRENT_FIX_LABEL
Label of the current fixation.
CURRENT_FIX_MSG_COUNT
Number of visible messages associated with the
current fixation event¹. This number will not
exceed the “Maximum Message Variables for Eye
Event” set in the Output/Analysis Preference
Settings.
CURRENT_FIX_MSG_TEXT_?
Text string for messages associated with the
current fixation¹.
CURRENT_FIX_MSG_TIME_?
Trial time of the message¹.
CURRENT_FIX_NEAREST
Nearest interest area the current fixation is
EyeLink Data Viewer
©2002-2008 SR Research Ltd.
60
_INTEREST_AREA
CURRENT_FIX_NEAREST
_INTEREST_AREA_DISTANCE
assigned to
Distance between the current fixation point and the
center of the nearest interest area the current
fixation is associated with
CURRENT_FIX_NEAREST
Label for the nearest interest area the current
_INTEREST_AREA_LABEL
fixation is associated with
CURRENT_FIX_PUPIL
Pupil size of the current fixation
CURRENT_FIX_REFIX_INTERE Whether this trial has a previous fixation in a
ST_AREA
different run2 that had the same interest area as the
current fixation. If so, the
CURRENT_FIX_INDEX value of the very first
fixation in that interest area is given.
CURRENT_FIX_REFIX_PREV_I Whether this trial has a previous fixation in an IA
NTEREST_AREA
with higher IA ID than current fix IA ID (see run2
definition).
CURRENT_FIX_RUN_DWELL_T Total amount of dwell time (in msec) in the current
IME
run2 of fixations.
CURRENT_FIX_RUN_INDEX
Ordinal sequence of the current fixation in the
current run2 of fixations. The first fixation in this
run has a RUN_INDEX of 1 and the second one
has RUN_INDEX value of 2, and so on.
CURRENT_FIX_RUN_SIZE
Number of fixations within the current run2.
* CURRENT_FIX_START
Trial time when the current fixation starts
* CURRENT_FIX_START
Trial time when the current fixation starts (on the
other eye in a binocular recording).
CURRENT_FIX_TRIAL_SPAN
Whether the fixation starts before the trial starts
and ends after the trial starts, or starts before the
trial ends and ends after the trial ends
CURRENT_FIX_X
X coordinate of the current fixation
CURRENT_FIX_X_OTHER
X coordinate of the current fixation (on the other
eye in a binocular recording)
CURRENT_FIX_Y
Y coordinate of the current fixation
CURRENT_FIX_Y_OTHER
Y coordinate of the current fixation (on the other
eye in a binocular recording).
Note: Similar analyses are done for the previous
fixation (variables beginning with
PREVIOUS_FIX) and for the next fixation
(variables beginning with NEXT_FIX).
DATA_FILE
File name of the recording;
EYE_USED
Which eye's data (LEFT or RIGHT) is used to
create this report?
IP_END_TIME
End time (in milliseconds since EyeLink tracker
EyeLink Data Viewer
©2002-2008 SR Research Ltd.
61
IP_LABEL
IP_START_TIME
LAST_BUTTON_PRESSED
LAST_BUTTON_TIME
NEXT_FIX_ANGLE,
PREVIOUS_FIX_ANGLE
NEXT_FIX_DIRECTION,
PREVIOUS_FIX_DIRECTION
NEXT_FIX_DISTANCE,
PREVIOUS_FIX_DISTANCE
NEXT_SAC_AMPLITUDE
NEXT_SAC_ANGLE
NEXT_SAC_AVG_VELOCITY
NEXT_SAC_DIRECTION
NEXT_SAC_DURATION
NEXT_SAC_END_INTEREST
_AREAS
* NEXT_SAC_END_TIME
NEXT_SAC_END_X,
NEXT_SAC_END_Y
NEXT_SAC_INDEX
NEXT_SAC_IS_RT_END
NEXT_SAC_LABEL
NEXT_SAC_MSG_COUNT
NEXT_SAC_MSG_TEXT
NEXT_SAC_MSG_TIME
NEXT_SAC_NEAREST_END
_INTEREST_AREA
EyeLink Data Viewer
was activated) of the interest period.
Label of the current interest period selected in the
viewing session.
Start time (in milliseconds since EyeLink tracker
was activated) of the interest period.
ID of the pressed button
Trial time when the last button is pressed
Angle between the horizontal plane and the line
connecting the current fixation and the
previous/next fixation (see 5-2)
Direction (Left, Right, Top, Bottom), relative to
the current fixation, in which the next/previous
fixation is located
Distance between the current fixation and the
next/previous fixation in visual degrees
Amplitude of the following saccade in degrees of
visual angle
Angle between the horizontal plane and the
direction of the next saccade (see 5-2)
Average velocity of the next saccade
Direction (Left, Right, Top, Bottom), relative to
the current fixation, in which the next saccade is
aiming
Duration of the next saccade in milliseconds
Interest area in which the end point of the next
saccade falls
Trial time when the next saccade ends
X, Y coordinates of the end point for the next
saccade
Ordinal index of the next saccade
Whether the next saccade is the end event of the
RT definition
Label of the next saccade.
Number of visible messages associated with the
next saccade event¹. This number will not exceed
the "Maximum Message Variables for Eye Event"
set in the Output/Analysis Preference Settings.
Text string of the messages associated with the
next saccade¹.
Trial time1 of the message¹.
Nearest interest area to which the end point of the
next saccade is assigned
©2002-2008 SR Research Ltd.
62
NEXT_SAC_NEAREST_END
_INTEREST_AREA_LABEL
NEXT_SAC_NEAREST_START
_INTEREST_AREA
NEXT_SAC_NEAREST_START
_INTEREST_AREA_LABEL
NEXT_SAC_PEAK_VELOCITY
NEXT_SAC_START_INTEREST
_AREAS
* NEXT_SAC_START_TIME
NEXT_SAC_START_X,
NEXT_SAC_START_Y
TRIAL_FIXATION_TOTAL
TRIAL_LABEL
* TRIAL_START_TIME
VIDEO_FRAME_INDEX_START
VIDEO_FRAME_INDEX_END
VIDEO_NAME_START
VIDEO_NAME_END
Label for the nearest interest area to which the end
point of the next saccade is assigned
Nearest interest area to which the start point of the
next saccade is assigned
Label for the nearest interest area to which the start
point of the next saccade is assigned
Peak values of gaze velocity (in visual degrees per
second) of the next saccade
Interest area in which the start point of the next
saccade falls
Trial time when the next saccade ends
X, Y coordinates of the start point for the next
saccade
Note: Similar analyses are done for the previous
saccade (variables beginning with
PREVIOUS_SAC)
Total number of fixations in a trial
Label of the trial
The start time (in milliseconds since EyeLink
tracker was activated) of the trial.
Index of the video frame that was visible at the
start of the eye event. Note that all “VIDEO_”
variables are applicable to SceneLink recordings or
some Experiment Builder recordings only. For
SceneLink recordings, please check out the “Data
Loading” Preference Settings.
Index of the video frame that was visible at the end
of the eye event.
Name of the video frame that was visible at the
start of the eye event.
Name of the video frame that was visible at the
end of the eye event.
In addition to these default variables, other user-defined variables are also listed if they
have been defined in the EDF file (see section 7.2.1 on creating trial variable labels) or
created during the viewing session (see section 6.1.1 on trial variable manager).
Please note that the data output in the fixation report depends on the setting of interest
period filter (see section 6.4.2 or Figure 6-13) – only those fixation and saccade events
falling within the active interest period will be reported. If the "Trimmed Spanned
Fixation Duration" setting of the "Data Filter" preference is enabled, the duration, start
time, and end time of the fixations that overlap with the start or end of the interest period
EyeLink Data Viewer
©2002-2008 SR Research Ltd.
63
will be adjusted accordingly. If a valid reaction time definition is found in a trial, the
TRIAL_START_TIME will be set as the start as the reaction time definition; otherwise
this will be set as the start of trial recording (see section 6.5.3 on discussion of three time
periods used in Data Viewer). As a result, the values of CURRENT_FIX_END and
CURRENT_FIX_START, which are calculated relative to TRIAL_START_TIME, will
be different depending on whether a valid reaction time definition is found for the trial.
Note 1: Messages written in the EDF file will be associated with an event closest in time.
So, for a fixation report, the message could appear during a preceding saccade
(PREVIOUS_SAC_MSG_*) or a following saccade (NEXT_SAC_MSG_*). In very
rare cases, the message can be written to both saccade and fixation events if the message
was written out after the last sample of a fixation (or saccade) but before the first sample
of the following saccade (or fixation).
Note ²: A run of fixations refers to a group of consecutive fixations that are directed
towards the same interest area. Thus, for example, the interest areas of 10 fixations
are: A A B A A A C A E D. The run count will be 7. The
following table summarizes the values for some relevant variables.
Variables
Run (not listed in the variable list)
CURRENT_FIX_INDEX
CURRENT_FIX_INTEREST_A
REA_INDEX
CURRENT_FIX_INTEREST_A
REA_FIX_COUNT
CURRENT_FIX_INTEREST_A
REA_RUN_ID
CURRENT_FIX_REFIX_INTER
EST_AREA
CURRENT_FIX_REFIX_PREV_
INTEREST_AREA
CURRENT_FIX_RUN_INDEX
CURRENT_FIX_RUN_SIZE
A
1
1
1
A
1
2
1
B
2
3
2
A
3
4
1
A
3
5
1
A
3
6
1
C
4
7
3
A
5
8
1
E
6
9
5
D
7
10
4
6
6
1
6
6
6
1
6
1
1
1
1
1
2
2
2
1
3
1
1
0
0
0
1
1
1
0
1
0
0
0
0
0
1
1
1
0
1
0
1
1
2
2
2
1
1
1
3
2
3
3
3
1
1
1
1
1
1
1
1
6.6.3 Configuring the Fixation Report
In addition to excluding some trials by entering a string in the “Exclude Trial String” edit
box, the fixation report (similarly the saccade report and the interest area report) also
allows the inclusion of hidden events in the relative event variables [PREVIOUS_ and
EyeLink Data Viewer
©2002-2008 SR Research Ltd.
64
NEXT_]. This can be done by clicking the “Include Hidden Events in Relative
Variables” check box. If the hidden events are included in the analysis, the user can
further decide whether or not to treat these events as missing data.
6.7 Saccade Report
Saccade report creates a columnar output of saccade events in the data file. Each row of
the report represents a saccade event. Depending on the variables selected for output,
each row can contain information on the previous fixation and/or saccade, as well as the
next fixation and/or saccade.
6.7.1 Obtaining a Saccade Report
To obtain a saccade report, adopt the same procedure as in obtaining the trial report,
except from the menus, choose:
Analysis → Report → Saccade Report
6.7.2 Variables in the Saccade Report
Currently, the saccade report includes the following saccade-related information: index,
start time, end time, start xy coordinates, end xy coordinates, duration, amplitude, angle,
direction, average velocity, peak velocity, interest areas of the current, previous, and next
saccades, and whether these saccades have been selected for analysis. It also contains the
following information on the previous fixation and the next fixation: angle, blink around,
direction, distance, duration, start time, end time, pupil size, trial span, the interest area in
which the fixation is located, the nearest interest area, and whether the fixation has been
selected for analysis. In addition, the report contains labels of the data file, data file, and
individual trials, as well as other user-defined variables (see section 6.6.2 Variables in the
Fixation Report for the complete list of variables and their meanings).
6.8 Interest Area Report
Interest area report provides a columnar output of eye movement data for each interest
area in a trial. Each row of the report represents an interest area, arranged in an
ascending order of the interest area ID.
6.8.1 Obtaining an Interest Area Report
To obtain an interest area report, adopt the same procedure as in obtaining the trial report,
except from the menus, choose:
Analysis → Report → Interest Area Report
EyeLink Data Viewer
©2002-2008 SR Research Ltd.
65
6.8.2 Variables in the Interest Area Report
Currently, the interest area report provides information for the following variables:
Field
RECORDING_SESSION_LABEL
DATA_FILE
EYE_USED
Contents
Label of the data file
File name of the recording
Which eye's data (LEFT or RIGHT) is used to
create this report?
IA_AREA
Pixel area for the current interest area
IA_AVERAGE_FIX_PUPIL_SIZE Average pupil size across all fixations in the
interest area.
IA_BOTTOM
Bottom side pixel position of non-freehand IA.
IA_DWELL_TIME
Dwell time (i.e., summation of the duration across
all fixations) on the current interest area
IA_DWELL_TIME_%
Percentage of trial time spent on the current
interest area
IA_FIRST_FIXATION_DURATIO Duration of the first fixation event that was within
N
the current interest area.
* IA_FIRST_FIXATION_TIME
Start time of the first fixation to enter the current
interest area.
IA_FIRST_FIX_PROGRESSIVE
Checks whether later interest areas have been
visited before the first fixation enters the current
interest area. 1 if NO higher IA ID in earlier
fixations before the first fixation in the current
interest area; 0 otherwise.
IA_FIRST_RUN_DWELL_TIME
Dwell time (i.e., summation of the duration across
all fixations) of the first run within the current
interest area.
* IA_FIRST_RUN_END_TIME
End time of the first run of fixations in the current
interest area.
IA_FIRST_RUN_FIXATION_%
Percentage of all fixations in a trial falling in the
first run of the current interest area.
IA_FIRST_RUN_FIXATION_CO Number of all fixations in a trial falling in the first
UNT
run of the current interest area.
* IA_FIRST_RUN_START_TIME Start time of the first run of fixations in the current
interest area.
*IA_FIRST_SACCADE_END_TI
End time of the saccade that first landed within the
ME
current interest area.
*IA_FIRST_SACCADE_START_ Start time of the saccade that first landed within
TIME
the current interest area.
IA_FIXATION_%
Percentage of all fixations in a trial falling in the
current interest area
EyeLink Data Viewer
©2002-2008 SR Research Ltd.
66
IA_FIXATION_COUNT
IA_FSA_COUNT
Total fixations falling in the interest area
The number of fixations (fixation N) which started
in the current row of interest area, with fixation N
+ fixation_skip_count ending in the current
column of interest area.
IA_FSA_DURATION
The summed duration for all fixations (fixation N)
which started in the current row of interest area,
with fixation N + fixation_skip_count ending in
the current column of interest area.
IA_GROUP
Group label for the current interest area.
IA_ID
Ordinal ID of the current interest area
IA_LABEL
Label for the current interest area
IA_LAST_FIXATION_DURATIO Duration of the last fixation event that was within
N
the current interest area.
* IA_LAST_FIXATION_TIME
Start time of the last fixation to enter the current
interest area.
*IA_LAST_SACCADE_END_TI
End time of the saccade that last landed within the
ME
current interest area.
*IA_LAST_SACCADE_START_T Start time of the saccade that last landed within the
IME
current interest area.
IA_LEFT
Left side pixel position of non-freehand IA.
IA_LEGAL
A trial is considered legal (i.e., IA_LEGAL = 1)
only if the first fixation in 'interest area N' was
preceded by a fixation in interest area (N-1). This
variable is relevant for experiments that run in a
contingent display paradigm, as it ensures that
readers could see the target area before actually
lending in it.
IA_MAX_FIX_PUPIL_SIZE
Maximum pupil size among all fixations in the
interest area. Note this measure does not represent
the maximum pupil size within a fixation.
IA_MIN_FIX_PUPIL_SIZE
Minimum pupil size among all fixations in the
interest area. Note this measure does not represent
the minimum pupil size within a fixation.
IA_POINTS
List of x,y points for freehand Interest Areas.
IA_REGRESSION_IN
Whether the current interest area received at least
one regression from later interest areas (e.g., later
parts of the sentence). 1 if interest area was
entered from a higher IA_ID (from the right in
English); 0 if not.
IA_REGRESSION_IN_COUNT
Number of times interest area was entered from a
higher IA_ID (from the right in English).
EyeLink Data Viewer
©2002-2008 SR Research Ltd.
67
IA_REGRESSION_OUT
Whether regression(s) was made from the current
interest area to earlier interest areas (e.g., previous
parts of the sentence) prior to leaving that interest
area in a forward direction. 1 if a saccade exits the
current interest area to a lower IA_ID (to the left in
English) before a later interest area was fixated; 0
if not.
IA_REGRESSION_OUT_FULL
Whether regression(s) was made from the current
interest area to earlier interest areas (e.g., previous
parts of the sentence). 1 if a saccade exits the
current interest area to a lower IA_ID (to the left in
English); 0 if not. Note that
IA_REGRESSION_OUT only considers first-pass
regressions whereas
IA_REGRESSION_OUT_FULL considers all
regressions, regardless whether later interest areas
have been visited or not.
IA_REGRESSION_OUT_FULL_C Number of times interest area was exited to a
OUNT
lower IA_ID (to the left in English).
IA_REGRESSION_OUT_COUNT Number of times interest area was exited to a
lower IA_ID (to the left in English) before a higher
IA_ID was fixated in the trial.
IA_REGRESSION_PATH_DURA The summed fixation duration from when the
TION
current interest area is first fixated until the eyes
enter an interest area with a higher IA_ID.
IA_RIGHT
Right side pixel position of non-freehand IA.
IA_REGRESSION_PATH_DURA The summed fixation duration from when the
TION
current interest area is first fixated until the eyes
enter an interest area with a higher IA_ID.
IA_RUN_COUNT
Number of times the Interest Area was entered and
left (runs)
IA_SECOND_FIXATION_DURA Duration of the second fixation in IA, regardless of
TION
run.
IA_SECOND_FIXATION_RUN
Index of run that the second fixation is in.
* IA_SECOND_FIXATION_TIME Time of the second fixation in IA, regardless of
run.
IA_SECOND_RUN_DWELL_TIM Dwell time (i.e., summation of the duration across
E
all fixations) of the second run of fixations within
the current interest area.
* IA_SECOND_RUN_END_TIME End time of the second run of fixations in the
current interest area.
IA_SECOND_RUN_FIXATION_
Percentage of all fixations in a trial falling in the
EyeLink Data Viewer
©2002-2008 SR Research Ltd.
68
%
IA_SECOND_RUN_FIXATION_
COUNT
*IA_SECOND_RUN_START_TI
ME
IA_SELECTIVE_REGRESSION_
PATH_DURATION
IA_SKIP
IA_SPILLOVER
IA_THIRD_FIXATION_DURATI
ON
IA_THIRD_FIXATION_RUN
*IA_THIRD_FIXATION_TIME
IA_THIRD_RUN_DWELL_TIME
*IA_THIRD_RUN_END_TIME
IA_THIRD_RUN_FIXATION_%
*IA_THIRD_RUN_START_TIME
IA_TYPE
IA_TOP
IP_END_TIME
IP_LABEL
IP_START_TIME
TRIAL_DWELL_TIME
TRIAL_FIXATION_COUNT
TRIAL_LABEL
EyeLink Data Viewer
second run of the current interest area.
Number of all fixations in a trial falling in the
second run in the current interest area.
Start time of the second run of fixations in the
current interest area.
Duration of fixations and refixations of the current
interest area before the eyes enter an interest area
with a higher ID.
An interest area is considered skipped (i.e.,
IA_SKIP = 1) if no fixation occurred in first-pass
reading.
The duration of the first fixation made on 'interest
area (N+1)' after leaving 'interest area N' in first
pass.
Duration of the third fixation in IA, regardless of
run.
Index of run that the third fixation is in.
Time of the third fixation in IA, regardless of run.
Dwell time (i.e., summation of the duration across
all fixations) of the third run of fixations within the
current interest area.
End time of the third run of fixations in the current
interest area.
Percentage of all fixations in a trial falling in the
third run of the current interest area.
Start time of the third run of fixations in the
current interest area.
Type of interest area (rectangular, elliptic, or
freehand)
Top side pixel position of non-freehand IA
End time (in milliseconds since EyeLink tracker
was activated) of the interest period.
Label of the current interest period selected in the
viewing session.
Start time (in milliseconds since EyeLink tracker
was activated) of the interest period.
Dwell time (i.e., summation of all fixation
durations) for the whole trial
Total number of fixations in the trial
Label of the trial
©2002-2008 SR Research Ltd.
69
* TRIAL_START_TIME
The start time (in milliseconds since EyeLink
tracker was activated) of the trial.
In addition, other user-defined trial variable labels will also be listed. Note: since
version 1.3 of Data Viewer, all eye event start and end times in the interest area report are
made relative to trial start instead. The absolute time of eye events can be obtained by
adding “TRIAL_START_TIME”.
6.8.3 Using Interest Area Report
The data output in the interest area report depends on the setting of the interest period
filter (see section 6.4.2 or Figure 6-13) – only those fixation and saccade events falling
within the active interest period will be reported. If a valid reaction time definition is
found in a trial, the TRIAL_START_TIME will be set as the start as the reaction time
definition; otherwise this will be set as the start of trial recording (see section 6.5.3 on
discussion of three time periods used in Data Viewer). As a result, the values of all of
variables marked with a “*” symbol, which are calculated relative to
TRIAL_START_TIME, will be different depending on whether a valid reaction time is
found in the trial. If the "Trimmed Spanned Fixation Duration" setting of the "Data
Filter" preference is enabled, the duration, start time, and end time of the fixations that
overlap with the start or end of the interest period will be adjusted accordingly.
Some variables in the interest area report may be influenced by the outlier fixations that
do not belong to any interest area. For example, the presence of an outlier fixation may
break the run of fixations on a particular interest area and therefore shortens the measure
of IA_FIRST_RUN_DWELL_TIME and increases the IA_RUN_COUNT value.
Therefore, users should ensure that all fixations are assigned to a particular interest area
before creating an interest area report, if "run"-related measures are important. Users can
either manually move the position of those outlier fixations or, more conveniently, enable
the "Use Nearest Interest Area for Outlier Fixations" option of the Output/Analysis
preference settings.
Interest area report was designed to support analysis of data from different research
paradigms and, therefore, the user only needs to use a small portion of variables in one
output. If you have lots of interest areas in a trial, including IA_FSA_COUNT and
IA_FSA_DURATION in the output report may take a very long time for the Viewer
to generate the report. A progress dialog (see Figure 6-14) will be displayed while
creating the report. The user may abort the process by pressing the “Cancel” button.
EyeLink Data Viewer
©2002-2008 SR Research Ltd.
70
Figure 6-14. Progress Dialog Box Displayed when Creating the Interest Area Report
6.8.3.1 Fixation Sequence Analysis
Variables IA_FSA_COUNT and IA_FSA_DURATION are used primarily for fixation
sequence analysis (i. e., examination of the frequency of saccades directed from the
current interest area to all interest areas). If there are N interest areas in a trial, this will
generate N columns in the output report, with column labels being IA_FSA_COUNT_1
to IA_FSA_COUNT_N for counts and IA_FSA_DURATION_1 to
IA_FSA_DURATION_N for duration outputs. Each column in the output file reports
number of fixations coming to one particular interest area from each of all possible
interest areas. Each row reports number of fixations starting from the current interest
area and ending at each of the interest areas (when “Fixation Skip Count” in the
Output/Analysis preference settings is set to 1).
IA
_
ID
IA_LABEL
1
2
3
4
5
6
7
He
said:
‘Truth
is
a
pathless
land?.
IA_FSA_
COUNT_
1
IA_FSA_
COUNT_
2
IA_FSA_
COUNT_
3
IA_FSA_
COUNT_
4
IA_FSA_
COUNT_
5
IA_FSA_
COUNT_
6
IA_FSA_
COUNT_
7
He
0
0
0
0
0
0
0
said:
1
0
0
0
0
0
0
“Truth
0
1
0
0
0
1
0
is
0
0
1
0
0
0
0
a
0
0
0
0
0
0
0
pathless
0
0
1
1
0
1
1
Land”.
0
0
0
0
0
1
0
EyeLink Data Viewer
©2002-2008 SR Research Ltd.
71
The above example illustrates the use of fixation sequence analysis. Take interest area #6
(“pathless”) for example. It received four fixations in total. These fixations came from
interest area #3 (Fixation 4), #6 (Fixation 5), #4 (Fixation 8), and #7 (Fixation 10). This
is reported in the column “IA_FSA_COUNT_6”. There are three fixations starting from
interest area #6: Fixation 5 (to IA #6), Fixation 6 (to IA #3), and Fixation 9 (to IA #7).
This is reported in the row with IA_ID being 6 (“pathless”).
Please note that the user should also check the setting for “Fixation Skip Count” in the
Output/Analysis preference settings. The fixation skip count defines the number (should
be an integer no less than 1) of fixations to skip when looking for the next interest area to
use in the fixation sequence analysis variables of the Interest Area report. The default
setting is 1 and uses the next available fixation for the sequence analysis (from the
current interest area to all interest area). A value of 2 uses the fixation following the next
one for the analysis, and so on.
6.8.3.2 Regression Analysis
A lot of the variables in the interest area report are intended for the regression analysis,
especially in the reading research. The following example illustrates the use the interest
area report in the regression analysis.
IA_ID
IA_LABEL
IA_DWELL_TIME
1
He
F1
2
said:
F2
3
“Truth
F3 + F6
4 5
is a
F7 0
IA_FIXATION
_COUNT
IA_RUN_COUNT
IA_FIRST_FIX
_PROGRESSIVE
IA_FIRST_FIXATION
_DURATION
IA_FIRST_RUN
_DWELL_TIME
IA_SECOND_FIXATION
_DURATION
IA_SECOND_FIXATION
_RUN
IA_SECOND_RUN
_DWELL_TIME
IA_REGRESSION_IN
IA_REGRESSION_IN
_COUNT
IA_REGRESSION
_OUT
IA_REGRESSION
_OUT_COUNT
1
1
2
1
1
1
1
1
2
1
1
0
F1
F2
F3
F1
F2
.
EyeLink Data Viewer
7
Land”.
F9
0
6
pathless
F4 + F5 + F8
+ F10
4
.
.
3
1
1
1
F7 .
F4
F9
F3
F7 .
F4 + F5
F9
.
F6
.
.
F5
.
.
.
2
.
.
1
.
.
.
F6
.
.
F8
.
0
0
0
0
1
1
0
0
.
.
1
1
0
0
0
0
0
0
.
1
0
0
0
0
0
.
1
0
1
©2002-2008 SR Research Ltd.
72
IA_REGRESSION
F1
_PATH_DURATION
IA_SELECTIVE
F1
_REGRESSION_PATH
_DURATION
F2
F3
F7
F2
F3
F7 .
F4 + F5 + F6
+ F7 + F8
F4 + F5 + F8
F9
F9
Take interest area #6 (“pathless”) for example. IA_REGRESSION_PATH_DURATION
includes the first pass fixations on the interest area (F4 + F5), time spent in previous parts
of the sentence following regressive eye movements (F6 + F7), and time due to
refixations coming from the left before the eyes move past the interest area (F8). The
calculation of IA_SELECTIVE_REGRESSION_PATH_DURATION only includes the
first run fixation on the interest area (F4+F5) and the refixations on the interest area (F8)
before the eyes enter next interest area with a higher IA_ID (“land”).
IA_FIRST_FIX_PROGRESSIVE checks whether later interest areas have been visited
before the first fixation enters the current interest area. Therefore, this variable would be
0 for the interest area “is” because it was fixated on Fixation 7 while Fixations 4 and 5
were on later part of the sentence (“pathless”). IA_REGRESSION_OUT checks whether
at least one regression was made from the current interest area to previous parts of the
sentence prior to leaving that interest area in a forward direction. Therefore, the
transition from F5 → F6 makes this flag true for the interest area #6 (labeled as
“pathless”). IA_REGRESSION_IN checks whether a given interest area received at
least one regression from later parts of the sentence. Therefore, this is true for both
interest areas #3 “truth” (F5 → F6) and #6 “pathless” (F9 → F10).
6.9 Sample Output Report
Sample output report provides a columnar output of eye movement data for each eye
sample in a trial. The sample report option will not be available if the samples are not
loaded into a viewing session. As in the other reports, sample output report only outputs
samples that fall within the active interest period for the trial.
6.9.1 Loading Samples into a Viewing Session
Version 1.7 of Data Viewer introduced a change to optimize the viewer performance by
not loading the samples by default (see revision history ). To make sample data available
to a viewing session, you will need to first change the data loading preferences and then
reload the EDf file.
1) Before loading any EDF files, please go to "Start -> Programs -> SR Research ->
EyeLink -> Data Viewer" to start the software.
2) Once the application starts up, click "Preferences" tab and go to "Data Loading"
preferences. Check the "Load Samples" option. If you want this changes to be
persistent over future viewing sessions, you may consider saving this as default
setting. This can be done by selecting the topmost preference tree node, clicking
the right mouse buttons and selecting "Save Properties as Defaults".
EyeLink Data Viewer
©2002-2008 SR Research Ltd.
73
3) Once you have done step 2), this will make the properties persist over future data
viewing sessions. Now, start loading in the EDF files.
6.9.2 Obtaining a Sample Output Report
To obtain a sample report, adopt the same procedure as in obtaining the trial report,
except from the menus, choose:
Analysis → Report → Sample Report
6.9.3 Variables in the Sample Output Report
Currently, the sample output report provides output for the following variables:
Field
RECORDING_SESSION_LABEL
AVERAGE_ACCELLERATION_X
AVERAGE_ACCELLERATION_Y
AVERAGE_GAZE_X
AVERAGE_GAZE_Y
AVERAGE_INTEREST_AREA_ID
AVERAGE_INTEREST_AREA_LA
BEL
AVERAGE_PUPIL_SIZE
AVERAGE_VELOCITY_X
AVERAGE_VELOCITY_Y
DATA_FILE
HTARGET_DISTANCE
HTARGET_X
EyeLink Data Viewer
Contents
Label of the data file
Acceleration value (in degree/second/second)
along the x axis across two eyes¹.
Acceleration value (in degree/second/second)
along the y axis across two eyes¹.
Gaze coordinate along the x axis across two
eyes¹.
Gaze coordinate along the y axis across two
eyes¹.
Index of the interest area in which the current
sample (average across two eyes ¹) falls.
Label of the interest area in which the current
sample (average across two eyes ¹) falls.
Pupil size of the current sample across two eyes.
Velocity value (in degree/second) along the x
axis across two eyes¹.
Velocity value (in degree/second) along the y
axis across two eyes¹.
File name of the recording;
Distance between the head target and eye camera
(in millimeters) for an EyeLink Remote
recording. Returns a missing value if the head
target was missing or if the data was recorded
with a non-Remote eye tracker.
X position of the head target in camera
coordinate for an EyeLink Remote recording.
Returns a missing value if the head target was
missing or if the data was recorded with non-
©2002-2008 SR Research Ltd.
74
HTARGET_Y
HTARGET_FLAGS
IP_DURATION
IP_END_TIME
IP_LABEL
IP_START_TIME
LEFT_ACCELLERATION_X
LE FT_ACCELLERATION_Y
LEFT_GAZE_X
LEFT_GAZE_Y
LEFT_INTEREST_AREA_ID
LEFT_INTEREST_AREA_LABEL
LEFT_IN_BLINK
LEFT_IN_SACCADE
LEFT_PUPIL_SIZE
LEFT_VELOCITY_X
LEFT_VELOCITY_Y
RESOLUTION_X
RESOLUTION_Y
RIGHT_ACCELLERATION_X
EyeLink Data Viewer
Remote eye tracker.
Y position of the head target in camera
coordinate for an EyeLink Remote recording.
Returns a missing value if the head target was
missing or if the data was recorded with nonRemote eye tracker.
Flags used to indicate the head target tracking
status ('.............' if target tracking is ok;
otherwise error code) for an EyeLink Remote
recording. Returns a missing value if the data
was recorded with non-Remote eye tracker.
Duration of the interest period in milliseconds.
End time (in milliseconds since EyeLink tracker
was activated) of the interest period.
Label of the current interest period selected in
the viewing session.
Start time (in milliseconds since EyeLink tracker
was activated) of the interest period.
TRIAL_LABEL Label of the trial
Acceleration value (in degree/second/second) of
the left eye along the x axis.
Acceleration value (in degree/second/second) of
the left eye along the y axis.
Left eye gaze coordinate along the x axis.
Left eye gaze coordinate along the y axis.
Index of the interest area in which the left-eye
sample falls.
Label of the interest area in which the left-eye
sample falls.
Whether the left eye is in a blink.
Whether the left eye is in a saccade.
Left eye pupil size of the current sample.
Velocity value (in degree/second) of the left eye
along the x axis.
Velocity value (in degree/second) of the left eye
along the y axis.
Horizontal angular resolution (in screen pixels
per degree) for the sample.
Vertical angular resolution (in screen pixels per
degree) for the sample.
Acceleration value (in degree/second/second) of
the right eye along the x axis.
©2002-2008 SR Research Ltd.
75
RIGHT_ACCELLERATION_Y
Acceleration value (in degree/second/second) of
the right eye along the y axis.
RIGHT_GAZE_X
Right eye gaze coordinate along the x axis.
RIGHT_GAZE_Y
Right eye gaze coordinate along the y axis.
RIGHT_INTEREST_AREA_ID
Index of the interest area in which the right-eye
sample falls.
RIGHT_INTEREST_AREA_LABEL Label of the interest area in which the right-eye
sample falls.
RIGHT_IN_BLINK
Whether the right eye is in a blink.
RIGHT_IN_SACCADE
Whether the right eye is in a saccade.
RIGHT_PUPIL_SIZE
Right eye pupil size of the current sample.
RIGHT_VELOCITY_X
Velocity value (in degree/second) of the right
eye along the x axis.
RIGHT_VELOCITY_Y
Velocity value (in degree/second) of the right
eye along the y axis.
SAMPLE_BUTTON
If the EyeLink button box is pressed, this records
the ID of the EyeLink button number.
SAMPLE_INDEX
The index of the sample in the trial.
SAMPLE_MESSAGE
Message text printed out during the current
sample.
TARGET_ACCELLERATION_X
Acceleration value (in degree/second/second) of
the target along the x axis.
TARGET_ACCELLERATION_Y
Acceleration value (in degree/second/second) of
the target along the y axis.
TARGET_VELOCITY_X
Velocity value (in degree/second) of the target
along the x axis.
TARGET_VELOCITY_Y
Velocity value (in degree/second) of the target
along the y axis.
TARGET_VISIBLE
Whether the target is visible during the current
sample. To support the retrieval of target
position from a sample report, the target position
data must be written according to some format
(see section "Protocol for EyeLink Data to
Viewer Integration -> Target Position
Commands").
TARGET_X
Target gaze position on x axis.
TARGET_Y
Target gaze position on y axis.
TIMESTAMP
The time stamp of the sample (in milliseconds
since EyeLink tracker was activated).
TRIAL_LABEL
Label of the trial
* TRIAL_START_TIME
The start time (in milliseconds since EyeLink
tracker was activated) of the trial.
EyeLink Data Viewer
©2002-2008 SR Research Ltd.
76
VIDEO_FRAME_INDEX
VIDEO_NAME
Index of the video frame that was visible at the
sample time. Note that all “VIDEO_” variables
are applicable to SceneLink recordings or some
Experiment Builder recordings only. For
SceneLink recordings, please check out the
“Data Loading” Preference Settings.
Name of the video frame that was visible at the
sample time.
Note ¹: All "AVERAGE_*" measures will have a missing value if both eye samples are
not available (if pupils are missing or recording is done with left-eye or right-eye only).
In addition, other user-defined trial variable labels will also be listed. Please note that the
data output in the sample report depends on the setting of the interest period filter (see
section 6.4.2 or Figure 6-13) – only those fixation and saccade events falling within the
active interest period will be reported. If a valid reaction time definition is found in a
trial, the TRIAL_START_TIME will be set as the start as the reaction time definition;
otherwise this will be set as the start of trial recording (see section 6.5.3 on discussion of
three time periods used in Data Viewer).
6.10 Message Output Report
Message output report provides a columnar output of messages written in each trial as
well as the eye movement events to which the message is associated. As with the other
reports, message report only outputs messages that fall within the active interest period
for the trial.
6.10.1
Obtaining a Message Output Report
To obtain an output report for messages, from the application menus, choose:
Analysis → Report → Message Report
6.10.2
Variables in the Message Output Report
Currently, the following variables are included in the message output report:
Field
RECORDING_SESSION_LABEL
CURRENT_MSG_BLINK_DURATI
ON
Contents
Label of the data file
Duration of the blink to which the message is
associated.
CURRENT_MSG_BLINK_END
End time (relative to the start of the interest
period) of the blink to which the message is
EyeLink Data Viewer
©2002-2008 SR Research Ltd.
77
CURRENT_MSG_BLINK_INDEX
CURRENT_MSG_BLINK_START
CURRENT_MSG_FIX_DURATION
CURRENT_MSG_FIX_END
CURRENT_MSG_FIX_INDEX
CURRENT_MSG_FIX_START
CURRENT_MSG_FIX_X
CURRENT_MSG_FIX_Y
CURRENT_MSG_INDEX
CURRENT_MSG_IS_RT_END
CURRENT_MSG_IS_RT_START
CURRENT_MSG_LABEL
CURRENT_MSG_SAC_AMPLITU
DE
CURRENT_MSG_SAC_AVG_VEL
OCITY
CURRENT_MSG_SAC_DURATIO
N
CURRENT_MSG_SAC_END_TIME
CURRENT_MSG_SAC_END_X
CURRENT_MSG_SAC_END_Y
CURRENT_MSG_SAC_INDEX
EyeLink Data Viewer
associated.
Index of the blink to which the message is
associated.
Start time (relative to the start of the interest
period) of the blink during which the message
was written.
Duration of the fixation to which the message is
associated.
End time (relative to the start of the interest
period) of the fixation to which the message is
associated.
Index of the fixation to which the message is
associated.
Start time (relative to the start of the interest
period) of the fixation to which the message is
associated.
X position of the fixation to which the message
is associated.
Y position of the fixation to which the message
is associated.
Index of the current message.
Whether the current message is the end event of
a reaction-time definition.
Whether the current message is the start event of
a reaction-time definition.
Label of the current message event.
Amplitude (in degrees of visual angle) of the
saccade to which the message is associated.
Average velocity (in degrees/second) of the
saccade to which the message is associated.
Duration of the saccade to which the message is
associated.
End time (relative to the start of the interest
period) of the saccade to which the message is
associated.
X coordinate of the end point for the saccade to
which the message is associated.
Y coordinate of the end point for the saccade to
which the message is associated.
Index of the saccade to which the message is
associated.
©2002-2008 SR Research Ltd.
78
CURRENT_MSG_SAC_PEAK_VE
LOCITY
CURRENT_MSG_SAC_START_TI
ME
CURRENT_MSG_SAC_START_X
CURRENT_MSG_SAC_START_Y
CURRENT_MSG_TEXT
CURRENT_MSG_TIME
CURRENT_MSG_X_POSITION
CURRENT_MSG_Y_POSITION
DATA_FILE
EYE_USED
IP_DURATION
IP_END_TIME
IP_LABEL
IP_START_TIME
* TRIAL_START_TIME
Peak velocity (in degrees/second) of the saccade
to which the message is associated.
Start time (relative to the start of the interest
period) of the saccade to which the message is
associated.
X coordinate of the start point for the saccade to
which the message is associated.
Y coordinate of the start point for the saccade to
which the message is associated.
Text string of the current message.
Trial time (relative to the start of the interest
period) of the message.
X position of the current message text. It may be
a missing value if samples are not loaded in the
viewing session.
Y position of the current message text. It may be
a missing value if samples are not loaded in the
viewing session.
File name of the recording;
Which eye's data (LEFT or RIGHT) is used to
create this report?
Duration of the interest period in milliseconds.
End time (in milliseconds since EyeLink tracker
was activated) of the interest period.
Label of the current interest period selected in
the viewing session.
Start time (in milliseconds since EyeLink tracker
was activated) of the interest period.
TRIAL_LABEL Label of the trial
The start time (in milliseconds since EyeLink
tracker was activated) of the trial.
Note: Messages written in the EDF file will be associated with an event closest in time.
In very rare cases, the message can be written to both saccade and fixation events if the
message was written out after the last sample of a fixation (or saccade) but before the first
sample of the following saccade (or fixation).
In addition, other user-defined trial variable labels will also be listed. Please note that the
data output in the message report depends on the setting of the interest period filter (see
section 6.4.2 or Figure 6-13) – only those events falling within the active interest period
will be reported. If a valid reaction time definition is found in a trial, the
EyeLink Data Viewer
©2002-2008 SR Research Ltd.
79
TRIAL_START_TIME will be set as the start as the reaction time definition; otherwise
this will be set as the start of trial recording (see section 6.5.3 on discussion of three time
periods used in Data Viewer).
6.11 Recording Event Sequence Data
Recording Event Sequence Data is a trimmed version of the EyeLink ASC file. For each
trial, it outputs the selected events only and excludes the hidden events.
6.11.1
Obtaining a Recording Event Sequence Data
To obtain a recording event sequence data report:
1) From the menus, choose:
Analysis → Report → Recording Event Sequence Data.
2) In the Export dialog box, browse to the directory in which you want to save the
data.
3) In the File name text box, type in the name for the data.
4) Press Export button.
6.11.2
Formats of the Recording Event Sequence Data
The following output is a trimmed version of a sample recording event sequence report.
MSG
5520005 DISPLAY_COORDS 0 0 1023 767
MSG
5520005 FRAMERATE 85.05 Hz.
MSG
5520009 TRIAL_VAR_LABELS PAGE
MSG
5684435 TRIALID PAGE1
START 5686598
BUTTON 5686573 5 true
MSG
5686595 DRIFTCORRECT R RIGHT at 320,40
OFFSET 0.09 deg.
MSG
5686597 RECCFG P 500 2 1
MSG
5686597 GAZE_COORDS 0.00 0.00 1023.00 767.00
EFIX
R 5686602 5686852 252 514.2 388.9 49.0
4.1,1.4 pix.
50.95
45.0
false
[72: dogs, ]
BUTTON 5686716 5 false
MSG
5686723 DISPLAY ON
MSG
5686726 SYNCTIME 3
ESACC
R 5686854 5686900 48 514.1 385.7
342.1
84.5
7.58
229.0
50.55
EFIX
R 5686902 5686980 80 340.2 80.6
47.0
50.2
43.9
false
[5: the ]
ESACC
R 5686982 5687012 32 339.6 84.4
192.6
46.9
3.05
162.0
50.25
EFIX
R 5687014 5687176 164 195.0 44.4 46.0
50.3
43.8
false
[3: not ]
ESACC
R 5687178 5687192 16 189.7 41.5
38.1
0.69
62.0
50.35
EFIX
R 5687194 5687364 172 153.8 45.2 44.0
50.4
43.8
false
[2: did ]
EyeLink Data Viewer
155.1
44.45
43.85
43.8
©2002-2008 SR Research Ltd.
80
ESACC
R 5687366 5687384 20 157.9 47.8
EFIX
232.8
51.9
1.49
116.0
50.3
R 5687386 5687588 204 233.9 54.8 45.0
50.25
43.8
false
[3: not ]
ESACC
R 5718822 5718836 16 621.3 723.4
677.1
712.5
1.09
96.0
52.35
EFIX
R 5718838 5718968 132 684.3 710.4 46.0
52.45
46.7
false
[142: sides.]
ESACC
R 5718970 5719032 64 685.0 706.9
106.4
14.87
371.0
51.3
EFIX
R 5719034 5719336 304 356.5 131.3 43.0
50.25
43.5
false
[16: not ]
347.0
43.8
46.7
45.05
BUTTON 5719243 5 true
MSG
5719244 ENDBUTTON 5
END 5719345
MSG
5719360 TRIAL OK
In this output file, the display coordinates and frame rate were reported first, followed by
information from individual trials. This includes the selected fixations, saccades, blinks,
messages, and button events and excludes any hidden events. For a Data Viewing
session that loads in several recording sessions, only the first recording session will be
exported in the recording event sequence output file.
6.11.2.1
Fixation Events
Fixation events are recorded in the format of:
• EFIX <eye> <stime> <etime> <dur> <axp> <ayp> <aps> <xr> <yr> <ma>
<ia>
This reports the eye used in the recording, the time of the first and last sample in the
fixation, and computes the duration of the fixation in milliseconds. The average X and Y
eye position (the type of position data is determined when the event was generated) and
the average pupil size (area or diameter) are reported. The horizontal and vertical eyeposition angular resolutions (in pixels per visual degree) are reported next. In addition,
the output contains information on whether the fixation has been manually adjusted
<ma> and the ID and name of the interest area in which the current fixation falls <ia>.
6.11.2.2
Saccade Events
Saccade events are recorded in the format of:
•
ESACC <eye> <stime> <etime> <dur> <sxp> <syp> <exp> <eyp> <ampl>
<pv> <xr> <yr>
This reports the time of the first and last sample in the saccade, and computes its duration
in milliseconds. The X and Y eye position at the start and end of the saccade (<sxp>,
<syp>, <exp>, <eyp>) are listed. The total visual angle covered in the saccade is
reported by <ampl>, which can be divided by (<dur>/1000) to obtain the average
velocity. Peak velocity is given by <pv>. The horizontal and vertical eye-position
angular resolutions (in pixels per visual degree) are given as well.
EyeLink Data Viewer
©2002-2008 SR Research Ltd.
81
6.11.2.3
Blink Events
Blink events are recorded in the format of:
• EBLINK <eye> <stime> <etime> <dur>
This reports the eye used in the recording, the time of the first and last sample in the
blink, and computes the duration of the blink in milliseconds.
6.11.2.4
Message Events
Messages are recorded in the format of:
• MSG <time> <message>
A message line contains the text of a time stamped message. The <message> text fills
the entire line after the timestamp <time> and any blank space following it.
6.11.2.5
Button Events
Button events are recorded in the format of:
•
BUTTON <time > <button #> <button_pressed>
Button lines report a change in state of tracker buttons. The <button #> reports which
button has changed state. The <button_pressed> value will be true if the button has been
pressed, false if it has been released.
EyeLink Data Viewer
©2002-2008 SR Research Ltd.
82
7 Protocol for EyeLink Data to Viewer Integration
The EyeLink Data Viewer can interpret a set of message commands from an EyeLink
data file that allow the viewer to automate some of the viewer configuration for a given
data file or trial. Examples of these commands include defining the image to overlay and
specifying trial variables. These messages can be written by the display experiment to the
EDF file using the API function that allows the writing of a custom message to the EDF
file.
Messages that make up the EyeLink data file protocol for the viewer are not added to the
Message list that is created for viewing within the viewer tool. Message commands are
therefore invisible to the viewing windows, and are only interpreted by the Viewer during
application loading.
Important: Do not use space characters in any component of a viewer message
command; the space character is used to tokenize and interpret all viewer messages.
Instead of using a space character within a message token, use the _ character.
7.1 Defining the Start and End of a Trial
The viewer uses two special message commands to define what should be considered the
start and end of a trial for the purpose of parsing the EyeLink data files.
7.1.1 Trial Start Message
Identifier (Default): TRIALID
Description:
This message defines the start of a trial for the viewer. This is different than the start of
recording message START that is logged when the trial recording begins. The viewer
will not parse any messages, events, or samples, that exist in the data file prior to this
message. The command identifier can be changed in the data loading preference settings.
Format:
TRIALID
<Trial ID value list>
Example:
MSG
3362269 TRIALID PIX1 images\sacrmeto.jpg
EyeLink Data Viewer
©2002-2008 SR Research Ltd.
83
Note: If the trial start message is not found, or if no trial start message is defined for the
viewing session, the START message is used to indicate the start of a trial for the Viewer.
7.1.2 Trial End Message
Identifier (Default): TRIAL_RESULT
Description:
This message defines the end of a trial for the viewer. This is different than the end of
recording message END that is logged when the trial recording ends. The viewer will not
parse any messages, events, or samples that exist in the data file after this message. The
command identifier can be changed in the data loading preference settings.
Format:
TRIAL_RESULT
<possible trial result values>
Example:
MSG 3383842 TRIAL_RESULT 0
Note: If the trial end message is not found, or if no trial end message is defined for the
viewing session, the END message is used to indicate the end of a trial for the Viewer.
7.2 Pre-Trial Message Commands
The following message commands, if defined, MUST be sent to the EyeLink data file
prior to the Trial Start message defined above (i.e., outside the scope of a trial as defined
for the viewer). If they are sent during trial recording, these messages will not be
interpreted.
7.2.1 Trial Variable Labels
Identifier (Default): TRIAL_VAR_LABELS
Description:
This message allows the definition of the labels to be used for trial variables within the
viewer. The command identifier can be changed in the data loading preference settings.
Format:
TRIAL_VAR_LABELS
EyeLink Data Viewer
<trial variable list>
©2002-2008 SR Research Ltd.
84
Example:
MSG
3363553 TRIAL_VAR_LABELS TRIAL_VAR_1 TRIAL_VAR_2 TRIAL_VAR_3
7.2.2 Display Coordinates
Identifier: DISPLAY_COORDS or GAZE_COORDS
Description:
This message specifies the display coordinates to be used within the viewer. This
message MUST be present for the viewer to function correctly.
Format:
DISPLAY_COORDS
<left>
<top>
<right>
<bottom>
Left, top, right, and bottom refer to the x-y coordinates of the top-left and bottom-right
corners of display.
Example:
MSG
3325521 DISPLAY_COORDS 0 0 1279 1023
7.2.3 Trial Grouping
Identifier: V_TRIAL_GROUPING
Description:
Trial grouping message is used to group those trials in the same experimental condition
together so that they can be manipulated (e.g., selecting, hiding, deleting, applying
interest area templates) collectively. This message must be sent after
TRIAL_VAR_LABELS message but before first trial start message in EDF file.
Format:
V_TRIAL_GROUPING
<trial variable list>
The trial grouping variable(s) must be a member of the variables listed in the
TRIAL_VAR_LABELS; otherwise, this variable is simply ignored.
Example:
MSG
3363553 V_TRIAL_GROUPING
EyeLink Data Viewer
TYPE
DIRECTION
©2002-2008 SR Research Ltd.
85
Note: Trial variables are space delimited. Trial variables that do not exist in variable list
for trial are ignored.
7.3 Trial Message Commands
The following message commands MUST be specified within the scope of a trial, or the
message commands will not be interpreted by the viewer.
IMPORTANT: All message commands within the trial scope must start with a !V
directive, or the command will not be interpreted and will instead appear as a regular
message in the visible message list of the viewer.
Tip: In almost all instances, each of the following commands will be repeated for every
trial of an EyeLink data file.
7.3.1 Trial Variable Values
Identifier (Default): TRIAL_VAR_DATA
Description:
This message specifies the list of trial variable values for the trial. The list of trial
variable values must be in the same order as was specified in the TRIAL_VAR_LABELS
command for the viewer to properly match the variable label with the variable value. The
command identifier can be changed in the data loading preference settings.
Note: If this command is the same as the Trial Start Command (TRIALID), the values
will still be extracted from the Trial Start Line; however a !V is not needed in the
message.
Format:
!V
TRIAL_VAR_DATA
<trial_variable_list>
Example:
MSG
3363553 !V TRIAL_VAR_DATA value1 value2 value3
7.3.2 Single Trial Variable Message Token
EyeLink Data Viewer
©2002-2008 SR Research Ltd.
86
Identifier (Default): TRIAL_VAR
Description:
This command lets the user specify a trial variable and value for the given trial. Send one
message for each pair of trial condition variable and its corresponding value. This means
that there is really no need to use TRIAL_VAR_LABELS command when using this
command. The default command identifier can be changed in the data loading preference
settings. Please note that the eye tracker can handle about 20 messages every 10
milliseconds. So be careful not to send messages too quickly when you have many trial
condition messages to send. Add one millisecond delay between message lines if this is
the case.
Format:
!V
TRIAL_VAR <trial_var_label> <trial_var_value>
<trial_var_label> is the label for the variable being set. If the current Data Viewer session
does not have this variable yet, it is created. <trial_var_value> defines the value to set
for the variable for the given trial.
Example:
MSG
MSG
MSG
MSG
MSG
MSG
9350338
9350339
9350340
9350341
9350342
9350343
!V
!V
!V
!V
!V
!V
TRIAL_VAR
TRIAL_VAR
TRIAL_VAR
TRIAL_VAR
TRIAL_VAR
TRIAL_VAR
trial 1
condition gap
direction Left
gap_duration 200
t_x 212
t_y 384
7.3.3 Image Commands
The viewer supports a set of commands that display a default image on the overlay mode
of the trial viewer screen. All image commands use the IMGLOAD token, followed by a
sub command.
7.3.3.1 Image Loading – Fill Full Screen
Identifier: FILL
Description:
EyeLink Data Viewer
©2002-2008 SR Research Ltd.
87
This message specifies the image to be used as the background for the spatial overlay
view of a trial within the viewer. The image is sized to fit the dimensions specified in the
DISPLAY_COORDS command message. The image should be represented as a relative
path. The viewer will look for the image in the following order:
1) In the default image directory specified in the general preference settings.
2) In the directory the EyeLink data file is loaded from.
3) In the directory the viewer application is running from.
Format:
!V
IMGLOAD
FILL
<relative_image_path>
Example:
MSG
3388468 !V IMGLOAD FILL Sac_blur.jpg
7.3.3.2 Image Loading – Top Left
Identifier: TOP_LEFT
Description:
This message specifies an image to be used as a segment of the spatial overlay view of a
trial within the viewer. The image size is not changed (unless width and height
parameters are also specified) and will be positioned by using the x and y positions
specified as the top left corner of the image. The image should be represented as a
relative path. The viewer will look for the image in the following order:
1) In the default image directory specified in the general preference settings.
2) In the directory the EyeLink data file is loaded from.
3) In the directory the viewer application is running from.
Format:
!V
IMGLOAD TOP_LEFT <relative_image_path>
<y_position> [width] [height]
<x_position>
Note: width and height are optional parameters
Example:
MSG 2740540 !V IMGLOAD TOP_LEFT fixations.gif 200 200
7.3.3.3 Image Loading – Centered
EyeLink Data Viewer
©2002-2008 SR Research Ltd.
88
Identifier: CENTER
Description:
This message specifies an image to be used as a segment of the spatial overlay view of a
trial within the viewer. The image size is not changed (unless width and height
parameters are specified) and will be positioned centering on the x-y coordinate
specified. The image should be represented as a relative path. The viewer will look for
the image in the following order:
1) In the default image directory specified in the general preference settings.
2) In the directory the EyeLink data file is loaded from.
3) In the directory the viewer application is running from.
Format:
!V
IMGLOAD CENTER <relative_image_path>
[width] [height]
<x_position>
<y_position>
Example:
MSG 2740540 !V IMGLOAD CENTER
fixations.gif 200 200
7.3.4 Simple Drawing
Besides the image loading, the viewer also supports a set of commands that draws simple
graphics, such as lines, framed box, filled box, as well as display clearing.
7.3.4.1 Clear Overlay View
Identifier: CLEAR
Description:
This command clears the overlay view to the color specified by the red, blue, green
integer values specified in the command. Each RGB value should be an integer between
0 and 255.
Format:
!V
CLEAR
<red>
EyeLink Data Viewer
<blue>
<green>
©2002-2008 SR Research Ltd.
89
Example:
MSG 2740540 !V CLEAR 255 255 255
This clears the display to white color.
7.3.4.2 Line drawing
Identifier: DRAWLINE
Description:
This command draws a line with the color specified by the red, blue, green integer values
specified in the command. Each RGB value should be an integer between 0 and 255.
Format:
!V
DRAWLINE <red>
<y_end>
<blue>
<green> <x_start>
<y_start>
<x_end>
Note: <x_start>: x-coordinate of the starting point; <y_start>: y-coordinate of the starting
point; <x_end>: x-coordinate of the end position; <y_end>: y-coordinate of the ending
position.
Example:
MSG
9441901 !V DRAWLINE 255 0 0 100 100 300 400
This draws a red line, connecting (100, 100) and (300, 400).
7.3.4.3 Drawing a Rectangle
Identifier: DRAWBOX
Description:
This command draws a framed rectangle with the color specified by the red, blue, green
integer values specified in the command. Each RGB value should be an integer between
0 and 255.
Format:
EyeLink Data Viewer
©2002-2008 SR Research Ltd.
90
!V
DRAWBOX
<red>
<blue>
<green> <top>
<left>
<right>
<bottom>
Note: Left, top, right, and bottom refer to the x-y coordinates of the top-left and bottomright corners of rectangle.
Example:
MSG
9441901 !V DRAWBOX 0 255 0 200 300 400 500
This draws a green rectangle (frame), with the top-left corner at (200, 300) and the
bottom-right corner at (400, 500).
7.3.4.4 Drawing a Filled Rectangle
Identifier: FILLBOX
Description:
This command draws a filled rectangle with the color specified by the red, blue, green
integer values specified in the command. Each RGB value should be an integer between
0 and 255.
Format:
!V
FILLBOX
<red>
<blue>
<green> <top>
<left>
<right>
<bottom>
Note: Left, top, right, and bottom refer to the x-y coordinates of the top-left and bottomright corners of rectangle.
Example:
MSG
9441901 !V FILLBOX 0 0 255 400 500 500 600
This draws a rectangle, with the top-left corner at (400, 500) and the bottom-right corner
at (500, 600). The rectangle is filled with the blue color.
7.3.4.5 Drawing a Fixation Point
Identifier: FIXPOINT
Description:
This command draws a fixation point at a specified position.
Format:
EyeLink Data Viewer
©2002-2008 SR Research Ltd.
91
!V
FIXPOINT <target_red> <target_blue> <target_green>
<erase_red>
<erase_green> <erase_blue> <x> <y> <outer_diameter>
<inner_diameter>
Note: The RGB values for the fixation point drawing color is specified by the
<target_red> <target_blue> <target_green> whereas the color of the fixation center is
specified by <erase_red> <erase_green> <erase_blue>. The <outer_diameter> and
<inner_diameter> specified the diameters of the drawing circles.
Example:
MSG
9441901 !V FIXPOINT 0 0 0 255 255 255 511 383 18 4
This draws a fixation point at (511, 383), with a diameter of 18 pixels for the outer ring
and 4 pixels for the inner ring. The fixation point is drawn in black and its center is
erased with white.
7.3.4.6 Draw List File
Identifier: DRAW_LIST
Description:
When a large number of simple drawings have to be made, it is easier to first record all of
the simple drawings in a draw list file. During the viewing session, the viewer reads in
the drawing commands from the pre-recorded file and re-creates the display drawing. In
a draw list file (.dlf), each line represents one simple drawing or an image loading
command written in the same format as mentioned above except that "!V" directive is not
necessary.
Format:
!V DRAW_LIST <relative path>
Example:
Example: MSG 262495 !V DRAW_LIST BER\s1106.dlf
The content of the file being:
CLEAR 255 255 255
IMGLOAD TOP_LEFT BER\color.bmp 772 644 33 33
IMGLOAD TOP_LEFT BER\shape.bmp 772 314 33 33
IMGLOAD TOP_LEFT BER\orient.bmp 222 424 33 33
IMGLOAD TOP_LEFT BER\color.bmp 552 94 33 33
This first clears the display and then loads four small bitmap images.
EyeLink Data Viewer
©2002-2008 SR Research Ltd.
92
7.3.5 Interest Area Commands
The viewer supports a set of interest area commands that inform the viewer what interest
areas to create by default for a given trial. Trials that have interest area commands
specified in the data file have a custom interest area set created when the data is loaded
containing the specified interest areas.
All interest area commands start with the IAREA token and are followed by a one word
sub command.
7.3.5.1 Rectangular Interest Area
Identifier (Default): RECTANGLE
Description:
This message specifies the attributes of a rectangular interest area for the trial. Each trial
can have a set of such rectangular interest areas.
Format:
!V
IAREA RECTANGLE
string]
<id>
<left>
<top>
<right>
<bottom> [label
Note: The label string parameter is optional.
Example:
MSG 2740540 !V IAREA RECTANGLE 154
547
410
585
449
7.3.5.2 Elliptic Interest Area
Identifier (Default): ELLIPSE
Description:
This message specifies the attributes of an elliptic interest area for the trial. Each trial can
have a set of such elliptic interest areas.
Format:
!V IAREA
string]
ELLIPSE
EyeLink Data Viewer
<id>
<left>
<top>
<right>
<bottom>
[label
©2002-2008 SR Research Ltd.
93
Note: The label string parameter is optional. Left, top, right, and bottom refer to the x-y
coordinates of the top-left and bottom-right corners of the bounding rectangle.
Example:
MSG 2740540 !V
IAREA ELLIPSE 154
547
410
585
449
7.3.5.3 Freehand Interest Area
Identifier (Default): FREEHAND
Description:
This message specifies the attributes of a freehand interest area for the trial. Each trial can
have a set of such freehand interest areas.
Format:
!V
IAREA
FREEHAND
<id>
< x 1 , y1 >
< x 2 , y 2 > ... < x n , y n >
[label string]
Note: The label string parameter is optional. x n , y n refers to the x , y coordinates of a
point. The x, y coordinates of each point are separated by a comma.
Example:
MSG 2740540 !V IAREA FREEHAND 100,200 300,400 500,600 200,300 label
text
7.3.5.4 Interest Area Set
Identifier (Default): FILE
Description:
When a large number of interest areas have to be specified (such as in reading research),
it is easier to first write all the interest area information in a text file and later on the
Viewer can locate and import the interest-area file. The !V IAREA FILE serves this
purpose. In an interest-area file, each line represents one interest area, recorded in the
format of “RECTANGLE
id
left
top
right bottom [label]” for a
rectangular interest area, “ELLIPSE id
left
top
right bottom [label]” for
an elliptic interest area, and “FREEHAND id x1 , y1 x 2 , y 2 ... x n , y n [label]” for a
freehand interest area.
EyeLink Data Viewer
©2002-2008 SR Research Ltd.
94
Format:
!V
IAREA
FILE
<relative_file_path>
Example:
MSG 2740540 !V
IAREA FILE
segments\example.ias
7.3.6 Target Position Commands
For experiments in which a moving resource is used, the user may need to keep track of
the position of the resource. The Data Viewer allows the user to calculate the position,
velocity, and acceleration data for each individual samples in the sample output report.
With such messages, position, velocity, and acceleration traces can be displayed in the
time plot view.
Identifier (Default): TARGET_POS
Description:
This message specifies the position and visibility of the targets at the specific message
time. The command identifier can be changed in the data loading preference settings.
Format:
!V TARGET_POS <Target1 Key> <(target1 x, target1 y)> <target 1
visibility> <target 1 step> <Target2 Key> <(target2 x, target2
y)> <target 2 visibility> <target 2 step>
Where <Target1 Key> and <Target2 Key>: the tokens to extract the
position(s) of target(s);
<(target1 x, target1 y)> and <(target2 x, target2 y)>: the
position(s) of the targets. The coordinates must be enclosed in
a pair of brackets;
<target 1 visibility> and <target 2 visibility>: if 1, the
targets are visible; if 0, the targets are hidden;
<target 1 step> and <target 2 step>: if 1, the position of the
target will be in steps; if 0, the position of the target is
interpolated across samples.
Example:
EyeLink Data Viewer
©2002-2008 SR Research Ltd.
95
MSG
1 0
9071000 -15 !V TARGET_POS TARG1 (351, 278) 1 0; TARG2 (590, 134)
Note: The user can use any token word to indicate the target ID. The "key" property of
the temporal graph preference settings is set to blank by default so that various token
words can be used. If two targets are involved and if the order of the two targets is
important, set that field to the token strings used in the target position command string.
7.4 Reaction Time Definitions
To obtain an accurate reaction time (RT) measure, the EyeLink Data Viewer relies on a
set of reaction time definitions to parse the start and end events for RT calculation. The
reaction time definition command messages inform the Viewer of the RT start message,
the type of RT end events (fixation, saccade, message, or button), the parameters of the
end event, as well as the conditions to which the RT definition is applied. Reaction time
definition commands can be provided in two ways. The user can employ a pre-trial
(condition-based) command messages to specify a RT definition for each of the
experimental condition. All pre-trial reaction time commands start with the V_RT token
and are followed by a one word subcommand, indicating the type of RT end event
(BUTTON, MESSAGE, FIXATION, or SACCADE). Alternatively, the user can supply
a custom reaction time definition specifically for each trial. All custom trial-specific
reaction time commands start with the !V V_CRT token and are followed by a one word
subcommand.
Important: When an EyeLink Data File is loaded into the Viewer, any existing Reaction
Time Definitions for the Data Viewing Session are removed and reloaded from the data
file being imported. Therefore, it is important that each data file contain all the pre-trial
(condition-based) command messages required for the full analysis, not just for the given
data file. Any previously set custom, trial specific, reaction time definitions are not
affected when a new data file is loaded.
7.4.1 Button Events
Identifier: BUTTON
Description:
This will treat a particular button press/release as the reaction time end event.
Pre-Trial Message Command Format:
EyeLink Data Viewer
©2002-2008 SR Research Ltd.
96
V_RT
BUTTON <rt_start_msg> <button_id> <state> [CONDITION LABEL 1]
[condition value 1] [CONDITION LABEL 2] [condition value 2] …
Trial-specific Message Command Format:
!V
V_CRT
BUTTON
<rt_start_msg>
<button_id>
<state>
Note: Button_id refers to the intended button ID (from 1 to 8, use 0 for any button event).
Button state could be 0 (button release) or 1 (button press). Condition labels and their
values are not required for the trial-specific message command and optional for the pretrial message command (if not specified, the RT definition is applied to all conditions).
In case both a condition-based pre-trial message command and a custom trial specific
message command are applicable for one trial, the trial-specific command will override
the more general one.
Example:
MSG 329381 V_RT BUTTON SYNCTIME 5 1 TYPE normal
In this example, the end event for RT calculation is pressing button 5 serves. This RT
definition is applicable to the condition in which the value of the variable TYPE is
“normal”.
7.4.2 Fixation Events:
Identifier: FIXATION
Description:
This will end the trial by the appearance of a specific fixation. The user can specify the
parameters of the fixation end event: the minimum fixation duration (in milliseconds)
required, the xy coordinates for the region center, as well as the diameter of the fixation
region.
Pre-Trial Message Command Format:
V_RT
FIXATION <rt_start_msg> <fixation_duration> <x> <y>
<diameter> [CONDITION LABEL 1] [condition value 1] [CONDITION
LABEL 2] [condition value 2] …
Trial-specific Message Command Format:
EyeLink Data Viewer
©2002-2008 SR Research Ltd.
97
!V
V_CRT FIXATION
<diameter>
<rt_start_msg>
<fixation_duration>
<x>
<y>
Note: If the location information of the target fixation is not important, set the values of
x, y, and diameter as -1. Condition labels and their values are not required for the trialspecific message command and optional for the pre-trial message command (if not
specified, the RT definition is applied to all conditions).
Example:
MSG 329381 V_RT FIXATION SYNCTIME 500 -1 -1 -1
In this example, the RT end event is the occurrence of the first fixation with a minimum
duration of 500 milliseconds whereas the location information of the fixation is not
important.
7.4.3 Saccade Events:
Identifier: SACCADE
Description:
This will end the trial by the appearance of a specific saccade. The user can specify the
parameters of the saccade end event: the minimum saccadic amplitude (in degrees of
visual angle) required, the xy coordinates for the region center, as well as the diameter of
the fixation region.
Pre-Trial Message Command Format:
V_RT SACCADE <rt_start_msg> <saccadic_amplitude> <x> <y> <diameter>
[CONDITION LABEL 1] [condition value 1] [CONDITION LABEL 2]
[condition value 2] …
Trial-specific Message Command Format:
!V
V_CRT SACCADE
<diameter>
<rt_start_msg>
<saccadic_amplitude>
<x>
<y>
Note: If the location information of the saccade is not important, set the values of x, y,
and diameter as -1. Condition labels and their values are not required for the trialspecific message command and optional for the pre-trial message command (if not
specified, the RT definition is applied to all conditions).
EyeLink Data Viewer
©2002-2008 SR Research Ltd.
98
Example:
MSG 329381 V_RT SACCADE SYNCTIME 5.0 300 400 100 TYPE Normal
In this example, the RT end event is the occurrence of the first saccade with a minimum
amplitude of 5.0 degrees of visual angle. The saccade must fall within 50 pixels from the
region center (300, 400).
7.4.4 Message Events:
Identifier: MESSAGE
Description:
This will treat the first occurrence of a matching message as the end event for reaction
time calculation.
Pre-Trial Message Command Format:
V_RT
MESSAGE <rt_start_msg> <rt_end_msg> [CONDITION LABEL 1]
[condition value 1] [CONDITION LABEL 2] [condition value 2] …
Trial-specific Message Command Format:
!V
V_CRT
MESSAGE
<rt_start_msg>
<rt_end_msg>
Note: Condition labels and their values are not required for the trial-specific message
command and optional for the pre-trial message command (if not specified, the RT
definition is applied to all conditions).
Example:
MSG 329381 V_RT MESSAGE SYNCTIME END_RT
7.4.5 Reaction Time Definition Set
Identifier: FILE
Description:
EyeLink Data Viewer
©2002-2008 SR Research Ltd.
99
When a large number of RT definitions have to be specified, it is easier to first record all
RT definitions in a file and later on the viewer can read the RT definition file with the
V_RT FILE command. In a reaction-time definition file, each line represents one RT
definition, which is written in the same format as the pre-trial message command for each
respective type of RT end event, except that in this case V_RT token is not necessary.
Pre-Trial Message Command Format:
V_RT
FILE
<relative path>
Example:
MSG 329381 V_RT FILE rt\default.rts
7.5 Changes in the Sample Experiments
The preceding sections list the special messages and commands that can be sent to the
EDF file to enable the EyeLink Data Viewer to extract information in a more efficient
way. The current section provides an overview of the changes made in the sample
experiment templates. Please refer to the “Programming EyeLink Experiments in
Windows Version 2.0” manual for the description of individual templates.
7.5.1 “Simple” Template
Two EyeLink Data Viewer commands have been introduced in the “Simple” template:
“TRIAL_VAR_LABELS” for the definition of the labels to be used for trial condition
variables within the viewer and “TRIAL_VAR_DATA” for the assignment of condition
values for each trial. All these changes, listed in the following table, were made in the
w32_simple_trials.c file of the template.
Data Viewer Functionality
Trial Variable Labels
Trial Variable Values
Message Commands
eyemsg_printf("TRIAL_VAR_LABELS
TRIAL_WORD");
eyemsg_printf(“!V TRIAL_VAR_DATA %s”,
trial_word[num-1]);
7.5.2 “Text” Template
Along with the “TRIAL_VAR_LABELS” and “TRIAL_VAR_DATA” commands, the
“Text” template also uses “IMGLOAD FILL” to load a single image and “IAREA FILE”
to import a file containing interest areas for the trial. All of these changes, listed in the
following table, were made in the w32_text_trials.c file of the template.
Data Viewer Functionality
Message Commands
EyeLink Data Viewer
©2002-2008 SR Research Ltd.
100
Trial Variable Labels
Trial Variable Values
Images
Interest Areas
eyemsg_printf("TRIAL_VAR_LABELS PAGE");
eyemsg_printf("!V TRIAL_VAR_DATA %d", num);
eyemsg_printf("!V IMGLOAD FILL Images/%s",
image_fn);
eyemsg_printf("!V IAREA FILE Segments/%s", seg_fn);
7.5.3 “Picture” Template
One new feature of the “Picture” template is the demonstration of another approach to
load images and to specify interest areas for the trial. The third trial of the template loads
individual images (IMGLOAD TOP_LEFT) to create a composite image in the Viewer
and reads individual rectangular interest areas directly (“IAREA RECTANGLE”). All
these changes, listed in the following table, were made in the w32_picture_trials.c file of
the template.
Data Viewer Functionality
Trial Variable Labels
Trial Variable Values
Message Commands
eyemsg_printf("TRIAL_VAR_LABELS TYPE");
eyemsg_printf("!V TRIAL_VAR_DATA %s",
imgname[num-1]);
Images
“Normal” image
“Blurred” image
“Composite” image
Interest Areas
“Composite” image
eyemsg_printf("!V IMGLOAD FILL
images/sacrmeto.jpg");
eyemsg_printf("!V IMGLOAD FILL
images/sac_blur.jpg");
eyemsg_printf("!V IMGLOAD TOP_LEFT %s %d %d
%d %d", small_images[i], points[i].x, points[i].y,
SCRWIDTH/2, SCRHEIGHT/2);
eyemsg_printf("!V IAREA RECTANGLE %d %d %d %d
%d %s", i+1, points[i].x, points[i].y, points[i].x +
SCRWIDTH/2, points[i].y + SCRHEIGHT/2,
small_images[i]);
7.5.4 “EyeData” Template
The following table lists all of the changes made to the w32_data_trials.c file of the
“EyeData” template.
Data Viewer Functionality
Trial Variable Labels
Trial Variable Values
Images
Interest Areas
EyeLink Data Viewer
Message Commands
eyemsg_printf("TRIAL_VAR_LABELS CONDITION");
eyemsg_printf("!V TRIAL_VAR_DATA Playback");
eyemsg_printf("!V IMGLOAD FILL images/grid.png");
eyemsg_printf("!V IAREA FILE segments/grid.ias");
©2002-2008 SR Research Ltd.
101
7.5.5 “GCWindow” Template
The following table lists all of the changes made to the w32_gcwindow_trials.c file of the
“GCWindow” template.
Data Viewer Functionality
Trial Variable Labels
Trial Variable Values
Trial 1
Trial 2
Trial 3
Trial 4
Trial 5
Message Commands
eyemsg_printf("TRIAL_VAR_LABELS TYPE
CENTRAL PERIPHERAL");
eyemsg_printf("!V TRIAL_VAR_DATA TEXT TEXT
MASK");
eyemsg_printf("!V TRIAL_VAR_DATA TEXT MASK
TEXT");
eyemsg_printf("!V TRIAL_VAR_DATA IMAGE
IMAGE MASK");
eyemsg_printf("!V TRIAL_VAR_DATA IMAGE MASK
IMAGE");
eyemsg_printf("!V TRIAL_VAR_DATA IMAGE
IMAGE BLURRED");
Images
Trials 1 & 2
Trials 3, 4, & 5
Interest Areas
Trials 1 & 2
eyemsg_printf("!V IMGLOAD FILL images/text.png");
eyemsg_printf("!V IMGLOAD FILL
images/sacrmeto.jpg");
eyemsg_printf("!V IAREA FILE segments/text.ias");
7.5.6 “Control” Template
The following messages and commands have been added to the w32_control_trials.c file
of the “Control” template.
Data Viewer Functionality
Trial Variable Labels
Message Commands
eyemsg_printf(“TRIAL_VAR_LABELS CONDITION”);
The following messages and commands have been added to the w32_control_trial.c file
of the “Control” template.
Data Viewer Functionality
Trial Variable Values
Images
Interest Areas
Message Commands
eyemsg_printf("!V TRIAL_VAR_DATA GAZECTRL");
eyemsg_printf("!V IMGLOAD FILL images/grid.png");
eyemsg_printf("!V IAREA FILE segments/grid.ias");
7.5.7 “Dynamic” Template
EyeLink Data Viewer
©2002-2008 SR Research Ltd.
102
One important feature introduced in the “Dynamic” template is the addition of custom
reaction time definition (!V V_CRT”) for the saccade trials. Reaction time is defined as
the interval between the onset of the target (“SYNCTIME” message) and the occurrence
of the first saccade, with a minimum amplitude of 2.0°, that falls within 50 pixels from
the saccade target (goal_x, goal_y). The following table lists all of the messages and
commands that have been added in the w32_data_trials.c file of the “Dynamic” template.
Data Viewer Functionality
Trial Variable Labels
Trial Variable Values
Reaction Time Definitions
Trials 3-8
Message Commands
eyemsg_printf("TRIAL_VAR_LABELS TRIAL TYPE
DIRECTION");
eyemsg_printf("!V TRIAL_VAR_DATA %d %s %s",
num, trial_labels[0][num-1], trial_labels[1][num-1]);
eyemsg_printf("!V V_CRT SACCADE SYNCTIME 2.0
%d
%d
50", goal_x, goal_y);
7.5.8 “Comm_simple” Template
Similar to the “Simple” template, “TRIAL_VAR_LABELS” and “TRIAL_VAR_DATA”
commands were added to the w32_simple_trials.c file of the template (see the Table).
Data Viewer Functionality
Trial Variable Labels
Trial Variable Values
Message Commands
eyemsg_printf("TRIAL_VAR_LABELS
TRIAL_WORD");
eyemsg_printf(“!V TRIAL_VAR_DATA %s”,
trial_word[num-1]);
7.5.9 Other Templates
Since the “Broadcast” and “Comm_listener” templates do not produce EyeLink data
recording, no change has been made in those templates to support Data Viewer analysis.
EyeLink Data Viewer
©2002-2008 SR Research Ltd.
103
8 Tutorial: Visual Search
The current tutorial aimed to create an experiment following Williams and Reingold
(2001) and perform similar analyses with the EyeLink Data Viewer.
8.1 Project Background Information
In a recent study by Williams and Reingold (2001), eye movements were monitored
during the performance of a visual search task. Display items were created by combining
features from three stimulus dimensions: color (red vs. blue), shape (“C” vs. “T” or “E”
vs. “F”), and orientation (normal vs. rotated). Across trials, the target, counterbalanced
across subjects, was either present or absent. Each displays consisted of 6, 12, or 24
items. Stimulus discriminability was manipulated for the shape dimension, with half of
the participants seeing displays of "E”s and “F”s (low-discriminability condition)
whereas the other half of the participants seeing displays of “C”s and “T”s (highdiscriminability condition). Participants in both conditions performed two search tasks.
In a “single-feature” (SF) task, the target stimulus shared one feature with each of the
distractors, whereas in a “two-feature” (TF) task, it shared two features with each
distractor.
Williams and Reingold (2001) investigated whether the conjunction search tasks are
guided by certain feature(s) shared between the target and distractors. By examining the
spatial distributions of the fixations, they found that participants were more likely to
fixate on those distractors sharing color (SF task) or color and shape (TF task) with the
target. This was a robust finding, being observed across participants, across saccades of
different amplitudes and sequential position, and following short and long latencies to
move. These investigators also found that the extent to which participants made use of
shape information increased with discriminability.
8.2 Programming
The current experiment includes three individual projects: Gen_IAS for creating interest
area set files, Gen_Rnd for generating randomization script files, and VisualSearch for
running the actual experiment and integrating the Data Viewer functionalities.
8.2.1 Creating Interest Area Set Files
The Gen_IAS project creates interest area set files for the current visual search displays.
The main()function in the Gen_IAS.c file marks the beginning of program execution.
It is used to create 48 replicas of test trials (3 for practice trials) for each possible
combination of target presence (target present vs. target absent), set size (6, 12, or 24
items in a display), feature (number of features shared between the search target and
distractors: one feature vs. two features) by calling the create_display() function.
The save_display_info() function is used to save the interest area information into
EyeLink Data Viewer
©2002-2008 SR Research Ltd.
104
a .ias file. Note that the eyelink_exptkit20.lib file must be included in the project to
ensure the program running appropriately.
8.2.2 Generating Randomization Files
The Gen_Rnd project is used to generate randomization script files for individual
subjects. The main() function takes two arguments, passing the subject id and
discriminability information to the create_rnd_file() function. The latter function
translates a sequence of random numbers generated by sequence() into trial condition
information (target presence, set size, and stimulus number) and records it into a text
(.rnd) file.
8.2.3 Programming the Visual Search Experiment
The current experiment is modified after the Picture template. Therefore, reading the
description of the first three templates (Simple, Text, and Picture) of the
“Programming EyeLink Experiments in Windows Version 2.0” manual will be helpful in
understanding the source code of the current experiment.
8.2.3.1 Source Files for “VisualSearch”
The following table lists all of the files that are used to build VisualSearch. Those that
are the same as for the Picture template are marked with an asterisk. Those files that
have been modified are discussed in the following sections.
w32_demo.h *
w32_script_main.c
(after w32_demo_main.c)
w32_demo_window.c *
w32_script_trials.c
(after w32_picture_trials.c)
w32_bitmap_trial.c*
w32_text_support.c*
EyeLink Data Viewer
Declarations to link together the template experiment files.
Most of the declarations in this file can be used in your
experiments.
WinMain() function, setup and shutdown link and
graphics, open EDF file, open a script file containing the
trial randomization information.
Implements the full-screen window used for calibration,
validation and presentation. This file is unchanged for all
templates, and can be used without changes in your
experiments.
Performs system setup at the start of each block, and then
runs the trials with information read from the script file.
Handles standard return codes from trials to allow trial
skip, repeat, and experiment abort.
Implements a trial with simple graphics that can be drawn
in one screen refresh, and therefore doesn’t need display
blanking. You should be able to use this by replacing the
drawing code, message code, and handling any subject
responses.
Implements a simple interface for font creation and
©2002-2008 SR Research Ltd.
105
printing. This is a support module that you can link into
your experiments.
w32_freeimage_bitmap.c*
Loads any of a number of image file formats using the
“freeimage” library, creating a device-dependent bitmap
from it. The picture can be loaded to a bitmap matched in
size, or a full-screen bitmap can be created and the image
resized to fill it.
freeimage.h*
The “freeimage” library (www.6ixsoft.com). This is a
freeware graphics file library.
freeimage.dll*
freeimage.lib*
8.2.3.2 w32_script_main.c
The w32_script_main.c file is modified after w32_demon_main.c. An explorer-style
dialog is used to open the randomization script file for processing. To support this, the
OPENFILENAME structure, which contains information that is used to initialize an
Open/Save dialog box, is used. After the user closes the dialog, information about the
user's selection is returned.
// Get the name of the script file
i = get_script_filename (full_screen_window, szFileName, szTitleName);
Once the script file name is retrieved, instead of calling the run_trials() function as
in the w32_demon_main.c file, the current experiment calls the
run_script_trials() function to run the experiment, with trial information read
from the script file.
8.2.3.3 w32_script_trials.c
The w32_script_trials.c file is modified after the w32_picture_trials.c file of the
Picture template. Essentially, this file calls the process_script_file() function to
process the script file and extract the useful information for each trial (such as the title to
be displayed at the bottom of the eyetracker display, trial conditions and bitmap, etc).
The do_script_trial()function is used to execute each individual trial. The next
section highlights all of the important messages and commands to be included in the EDF
file to support the Viewer analysis.
8.2.4 Adding Data Viewer Functionalities
The current section lists all of the commands and messages that are important for the
EyeLink Data Viewer analysis. All of these messages and commands are added in the
EyeLink Data Viewer
©2002-2008 SR Research Ltd.
106
w32_script_trials.c file of the VisualSearch template. Reading the previous chapter of
the current manual (section 7: Protocol for EyeLink Data to Viewer Integration) will be
very helpful.
8.2.4.1 Trial Variable Labels
The TRIAL_VAR_LABELS message, included in the run_script_trials()
function, allows the definition of the labels to be used for trial variables within the
Viewer program. This message must be sent to the EyeLink data file prior to the first
trial start message (such as “TRIALID”, “TRIAL_VAR_DATA”, etc.).
//
//
//
//
TRIAL_VAR_LABELS message is recorded for EyeLink Data Viewer analysis
It specifies the list of trial variables for the trial.
This should be written once only and put before the recording of individual
trials.
eyemsg_printf("TRIAL_VAR_LABELS TRIAL_FILENAME PRACTICE DISCRIMINABILITY
FEATURES PRESENCE SETSIZE");
8.2.4.2 Trial ID and Trial
In the current example, the TRIALID message, included in the do_script_trial()
function, defines the start of a trial for the Viewer. The Viewer will not parse any
messages, events, or samples that exist in the data file prior to this message. The
TRIAL_VAR_DATA message specifies the list of trial variable values for the trial (see
section 7.3.1). Note that the list of trial variable values must be in the same order as was
specified in the TRIAL_VAR_LABELS command for the viewer to properly match the
variable label with the variable value.
// Given trial file name, execute trials
// Returns trial result code
// <filename_inf>: name of the trial ias filename
int do_script_trial(char *filename_inf)
{
int
i=0;
int
presence;
// target presence: 0 for absent and 1 for present
int
setsize;
// number of items in a display
int
features;
// number of features shared between the target and
// distractors: 0 for single-feature, 1 for two-feature;
int
practice;
// Whether the trial is a practice trial;
char
text[200], *token;
char
image_fn[200], image_path[200];
// string to store the file and path names of the image
// Always send a TRIALID message before starting to record.
eyemsg_printf("TRIALID %s", filename_inf);
// Find the useful trial filename information from the string, removing the
// directory name
strcpy(text, filename_inf);
token = strtok( text, "\\");
token = strtok( NULL, "\\");
EyeLink Data Viewer
©2002-2008 SR Research Ltd.
107
// Get the useful trial filename information from the string,
// removing the file extension
strcpy(text, token);
token = strtok( text, ".");
// From the
// setsize,
presence =
setsize
=
features =
practice =
filename, we get the information regarding the target presence,
features, as well as whether it is a practice trial
token[1]-'0';
token[2]-'0';
token[3]-'0';
token[4]-'0';
// TRIAL_VAR_DATA message is recorded for EyeLink Data Viewer analysis
// It specifies the list of trial variables value for the trial
// This must be specified within the scope of an individual trial (i.e., after
// "TRIALID" and before "TRIAL_RESULT")
eyemsg_printf("!V TRIAL_VAR_DATA %s %s %s %s %s %d",
token,
practice?"Practice":"TestTrial",
discriminability?"High_discriminability":"Low_discriminability",
features?"Two_feature":"Single_feature",
presence?"Present":"Absent",
items[setsize]);
8.2.4.3 Trial Bitmap
The spatial overlay view allows a trial to be viewed superimposed on the background
image that the participant was looking at while the data was being recorded. The Data
Viewer loads the background image with the IMGLOAD token, followed by a FILL,
TOP_LEFT, or CENTER subcommand. The trial image file name and its default path
can be written to the EDF file.
// With such information, we now can create our image file name
// here we set the image file as .jpg file
sprintf(image_fn, "%s.jpg", token);
// Create image file directory for writing
if (discriminability)
sprintf(image_path, "Images\\HD_%c%c%c\\", target_color?'B':'R',
target_shape?'T':'C', target_orientation?'R':'N');
else
sprintf(image_path, "Images\\LD_%c%c%c\\", target_color?'B':'R',
target_shape?'F':'E', target_orientation?'R':'N');
// IMGLOAD command is recorded
// It displays a default image
// Writes the image filename +
eyemsg_printf("!V IMGLOAD FILL
for EyeLink Data Viewer analysis
on the overlay mode of the trial viewer screen.
path info
%s%s", image_path, image_fn);
The current experiment uses the bitmap_save_and_backdrop()function to transfer
the trial bitmap to the tracker PC as backdrop for gaze cursors. This function also saves
the bitmap as a JPEG file in the specified path (“images\\”). Please note that the file
EyeLink Data Viewer
©2002-2008 SR Research Ltd.
108
saving option can be manipulated so that the existing files can be either overwritten (set
the sv_options as 0) or not overwritten (SV_NOREPLACE).
// Save bitmap and transfer to the tracker pc.
// Since it takes a long to save the bitmap to the file, the
// value of sv_options should be set as SV_NOREPLACE
bitmap_save_and_backdrop(bitmap, 0, 0, 0, 0, image_fn, image_path,
SV_NOREPLACE, 0, 0, BX_MAXCONTRAST|(is_eyelink2?0:BX_GRAYSCALE));
8.2.4.4 Interest Area
Similarly, interest areas can be created for each trial, specifying the x, y coordinates for
each individual display item as well as its label. In the current example, we recorded the
item type (i.e., features shared with the search target) as the interest area label. Since the
interest area set file has already been created in the Gen_IAS project (see section 8.2.1),
we only need to add a command IAREA FILE to inform the Viewer to load the interest
areas from the specified file during the viewing session.
// IAREA command is recorded for EyeLink Data Viewer analysis
// It creates a set of interest areas by reading the segment files
// Writes segmentation filename + path info
eyemsg_printf("!V IAREA FILE %s", seg_file_name);
// Must be offline to draw to EyeLink screen
set_offline_mode();
// Now we want to create the bitmap for the trial and save
// the segmentation information
// To avoid overwriting the file, we set the saving option as "SV_NOREPLACE"
if (create_image_bitmaps(filename_inf, seg_fn, SV_NOREPLACE))
{
eyemsg_printf("ERROR: could not create bitmap");
return SKIP_TRIAL;
// Skip the trial
}
8.3 Data Analysis
After the experiment is tested on a few subjects and data are collected, EyeLink Data
Viewer can be used to perform analysis. To illustrate the functionality of the Viewer
program, the current tutorial examined the data from one subject in detail.
8.3.1 Viewing session Manipulation and Data Loading
To create a Data Viewing Session (DVS), click on the EyeLinkDV.exe file. Once the
program starts, click File → New from the menu bar or the
button on the standard
toolbar.
EyeLink Data Viewer
©2002-2008 SR Research Ltd.
109
Once an viewing session is created, data files can be loaded by choosing:
File → Import Data → EyeLink File(s)
button on the standard toolbar). In the
from the application menu bar (or clicking the
Load dialog, go to the directory of the EDF files that you want to import and select the
file(s). Multiple data files (i.e., EDF files) can be loaded into one viewing session. By
default, the top-panel of the inspector window lists all of the data files ( ) loaded into
the current viewing session (i.e., the trials in the viewing session were grouped by data
file; see section 4.1.1.2 on Trial grouping). A trial group can be removed from the
viewing session by selecting the node, clicking the right mouse, and choosing the
“Delete” option.
Important: Whether or not to load multiple EDF files into a viewing session depends on
the user’s choice of analysis outputs. Some statistical packages may not be able to handle
the analysis output from all the EDF files recorded for one experiment, if each EDF file
contains lots of trials and a large number of events/variables are extracted from the
analysis. In this case, it is advised that the user load one or few EDF files into each
viewing session. The current tutorial illustrated the case of loading one EDF file to one
viewing session.
Figure 8-1. The first Viewer Screen after Loading HD_RCN.EDF file.
EyeLink Data Viewer
©2002-2008 SR Research Ltd.
110
For the current tutorial, load the HD_RCN.EDF file from the VisualSearch directory (the
search target for that subject was an upright red C). The first screen following the data
loading should look like the one below (see Figure 8-2).
At any time, the viewing session can be saved by clicking File → Save from the
application menu bar (or File → Save As for a different viewing session name). In the
Save dialog box, enter the desired viewing session name (see Figure 8-3).
Figure 8-2. Saving a Viewer Viewing session.
A saved viewing session can be reloaded by clicking File → Open from the menu bar
button on the toolbar) and selecting the desired .evs file from the open
(or clicking the
dialog box.
Figure 8-3. Opening a Saved Viewer Viewing session.
8.3.2 Trial Manipulation
By clicking on the trial nodes ( ) contained within a data file, information on
participant’s performance in individual trials can be examined (see section 4.1.1.3). As
explained in chapter 4, the trial view window consists of two viewing modes (i.e., spatial
overlay view and temporal graph view) whereas the inspector window provides the list of
visible events in the trial (middle panel) and a summary of the trial performance (bottom
panel). A selected trial can be deleted by clicking the right mouse button and selecting
EyeLink Data Viewer
©2002-2008 SR Research Ltd.
111
the “Delete” option on the popup menu. Once the trial is deleted, it is removed from the
viewing session and from all of the analysis outputs.
8.3.2.1 Loading Trial Bitmap
In the current example, the !V IMGLOAD FILL command loads the specified image to
be used as the background for the spatial overlay view of a trial. When working with old
EyeLink data recordings, the user can load a desired trial bitmap by clicking the “change
the overlay image”
button from the menu bar of the trial spatial overlay view window.
The Data Viewer also allows the user to create a screen capture of the spatial overlay
view or the temporal graph view of a given trial by clicking on the “Save Trial View as
Image” button
(see Figure 8-4).
Figure 8-4. Creating a Screen Capture of the Spatial Overlay View or the Temporal
Graph View of a Trial.
8.3.2.2 Loading Trial Interest Area Set
Similarly, the !V IAREA FILE command loads a specified interest area set file and
segments the display according to the interest areas listed in the file. If the IAREA
command was not initially recorded in the data file, the trial interest areas can be created
in three ways. The first one is to load an interest area file or interest area template file by
clicking the “Import Area of Interest File”
button. In the Load dialog, select the
desired interest area set file. The second approach is to allow the viewer to create interest
areas, if a trial bitmap has already been loaded into the Viewer, by clicking the “Auto
EyeLink Data Viewer
©2002-2008 SR Research Ltd.
112
Segment Image to Interest Area” button ( ). This approach is applicable for those
displays in which the individual items can be easily isolated (such as in reading and
visual search studies) but probably not good for some visual scenes in which the
boundaries between individual elements are not easily defined. A third approach is to
create interest areas manually by following the procedure outlined in section 5.8.1
“Creating Interest Areas”. The created interested areas (by auto-segmentation or
manually) can be saved by clicking the “Save the Interest Area Set File”
button from
the menu bar of the trial spatial overlay view window.
8.3.2.3 Manipulating Trial Condition Variables
The EyeLink Data Viewer allows the user to manage a list of trial condition variables and
assign values for these variables in a given trial (see section 6.1). In the current example,
the TRIAL_VAR_LABEL command imports a list of trial condition variables and the
TRIAL_VAR_DATA command extracts the values for these variables (these two default
messages can be changed in the data loading preference settings; see section 9.2). To
review and manage the list of variables and assign default values for these variables, click
Analysis → Trial Variable Manager from the application menu bar. To examine or
change the values of the variables for a given trial, click Analysis → Trial Variable
Value Editor.
Figure 8-5. Using the Trial Variable Manager: Creating a New Variable
To demonstrate the functionality of the Trial Variable Manager, here we remove the
“PRACTICE” variable and create a similar variable called “PracticeTrial”. To remove a
variable, simply select it and click the “Delete Selected Variable” button . To create a
new variable, click the “New Variable” button . A new row titled “label: default value”
is added to the variable list. To edit the label of the new variable, select it and type in
EyeLink Data Viewer
©2002-2008 SR Research Ltd.
113
PracticeTrial in Label edit box and press the enter key. To assign a default value for that
variable, type in Test and press the enter key (see Figure 8-6).
Now in the Trial Variable Value Editor dialog, we will see that for all trials, the values
for the new variable “PracticeTrial” are set as “Test” (see Figure 8-6). We know that
Trial 1-18 and Trial 115-132 were practice trials. To change the values for those trials,
double click on the current cell value, type in Practice and press the Enter key to register
the change.
Figure 8-6. Using the Trial Variable Value Editor: Modifying a Default Value
In case an analysis is being conducted on an old EyeLink data file in which the trial
conditions were recorded following the “TRIALID” or other message whereas the trial
variable labels were not recorded, to enable the correct loading of trial condition values,
the user has to change the preference settings of data loading (see Figure 8-7). Click the
preference tab of the Inspector window and select the Data Loading node. The default
value for the Trial Variable Values Message field is “TRIAL_VAR_DATA”. Replace it
with “TRIALID” (or other message following which the condition values for a trial were
recorded) and press the enter key to register the change. Now select the Data Loading
preference node again, click the right mouse button and select “Save Properties as
Defaults”. To enable this change to take effect, the user has to reload the data file again.
EyeLink Data Viewer
©2002-2008 SR Research Ltd.
114
Figure 8-7. Modifying and Saving the Preference Setting of Data Loading.
Once the above changes have been applied and the data is reloaded into the viewing
session, the user will notice that, in the Trial Variable Value Editor dialog, each column
lists the values extract from the data file for a trial condition variable whereas the first
row of the dialog box reads as “File, Trial, Variable 0, Variable 1, …”. To assign more
meaningful labels for the trial variables, start the Trial Variable Manager dialog, select
the variables and edit their labels while keeping the default values unchanged (see Figure
8-8).
EyeLink Data Viewer
©2002-2008 SR Research Ltd.
115
Figure 8-8. Using the Trial Variable Manager: Changing Variable Labels
8.3.3 Managing Reaction-time definitions
One of the important features of the EyeLink Data Viewer is the capability of creating
condition-based or trial-based reaction-time definitions. For example, for the current
example, we may want to calculate reaction times for target-absent trials (terminated by
pressing button 3) and target-present trials (terminated by pressing button 4) separately.
Such functionality can be achieved in several ways. In the first approach, simple
messages can be added in the EDF file to automate a set of condition-based reaction-time
definitions (see section 7.4.1). The C code to record such messages could be
eyemsg_printf("V_RT BUTTON SYNCTIME 3 1 PRESENCE Absent”);
eyemsg_printf("V_RT BUTTON SYNCTIME 4 1 PRESENCE Present”);
To enable the correct loading of these condition-based reaction time definitions, the
above messages must be sent to the EDF file prior to the first trial start message (e.g.,
TRIALID) but adter the TRIAL_VAR_LABEL message.
Alternatively, a trial-specific RT message can be recorded for each individual trial. Thus,
for all target-absent trials, a message like eyemsg_printf("!V V_CRT BUTTON
SYNCTIME 3 1”) can be added to the experiment source code whereas for all targetpresent trials, a message like eyemsg_printf("!V V_CRT BUTTON SYNCTIME 4
1”)can be added. To enable the proper functioning of the trial-based reaction time
definitions, the above messages must be recorded within the scope of trial as defined for
the Viewer (see section 7.1).
A third approach, as illustrated in the current tutorial, is to create a set of condition-based
reaction time definitions manually (see section 6.3). To manually create new RT
definitions or to review\edit existing RT definitions, click Analysis → Reaction Time
manager from the application menu (see Figure 8-9). In the following reaction time
EyeLink Data Viewer
©2002-2008 SR Research Ltd.
116
manager dialog, click on the “New RT Definition” button ( ). In the Reaction Time
Definition Editor dialog (General Tab), enter the label RT_Absent. In the trial condition
qualifiers list, select the variable “PRESENCE” and type in Absent (case-sensitive,
without quotation marks) in the value edit box and press the Enter key. Since participants
pressed a specific button to end a trial, keep the default “Button Event” as the reaction
time end event.
Figure 8-9. Creating/Editing Reaction Time Definition (General Tab)
Click the Reaction Time Tab (see Figure 8-10). Because the start event of reaction time
calculation is the onset of the search display, keep the start time message text as
“SYNCTIME”. From the button number combo box, select button 3 (this number
depends on the actual button designated as the response button) and set the button state as
“Pressed”.
EyeLink Data Viewer
©2002-2008 SR Research Ltd.
117
Figure 8-10. Creating/Editing Reaction Time Definition (Reaction Time Tab)
Once this has been done, close the Reaction Time Definition Editor dialog. From the
Reaction Time Definition Manager dialog, repeat the process of RT definition for targetpresent trials (Label: “RT_Present”; Type: Button Event; Trial Condition Variable
“PRESENCE”: Present; Start Time Message Text: “SYNCTIME”; Button Number: 4;
Button State: selected). A selected RT definition can be edited by clicking on
button
and removed by clicking the button. Once all of the RT definitions have been
finalized, close the Reaction Time Definition Manager dialog. In the following
“Initialize All RT Events” dialog, click the “Yes” button to apply the RT definitions.
For each trial if a matching reaction time definition is found, a red symbol is displayed
near the end event in the spatial overlay view of the trial view window. In the temporal
graph view, a green line is drawn at the time when the start message is recorded and a red
line is drawn at the time when the end event occurred. In the event list of the Inspector
window, the RT End Event field is automatically checked for the end event that matches
the reaction time definition.
8.3.4 Manipulating Events
The EyeLink Data Viewer supports several forms of event manipulation, including
hiding, deleting, merging, and drift correction. The current tutorial focused on hiding
events, merging and drift correcting fixations (see Section 5 “Working with Events,
samples, and Interest Areas” for detailed documentation of all event manipulations).
8.3.4.1 Hiding Events
Within each trial, some events may be hidden from analysis so that the user can focus on
a subset of data in each trial. Event hiding can be done either manually (see section 5.1.2)
or through the definition of some data filters. For example, the user may be interested in
the fixations and saccades within the reaction-time definition of a trial only (i.e., between
the onset of the search display and the press of the response button). As a result, those
events prior to and following the RT definitions may be hidden from viewing and
analysis output. This can be achieved by applying a set of data filter in the preference
EyeLink Data Viewer
©2002-2008 SR Research Ltd.
118
settings. In the Inspector Window, click the Preferences Tab and select the Data Filters
node. For the current example, check the “Hide Events outside RT definition” and “Hide
Spanned Events” check boxes. If only fixations, saccades, and blinks are to be hidden,
check the “Hide Eye Events Only” (otherwise, all events falling outside the filter will be
hidden).
Note: By default, if an event is hidden, it will be removed from the temporal graph view,
spatial overlay view, as well as the output report. However, if the field of “Include
Hidden Events” in the General Preference Settings (see section 9.1) is checked, hidden
events can also be shown in the trial view windows. Those events will be drawn in
dashed lines.
8.3.4.2 Merging and Drift-correcting Fixations
Temporally contiguous fixations can be merged (see section 5.2.2). For example, for the
second trial of the current example, the user may decide to merge the last two fixations
on the search target (see Figure 8-11). This can be done by selecting the two fixations
(click on the first fixation, press the CTRL key and then click on the second fixation),
clicking the right mouse button and selecting the “Merge” operation. Once such an
operation is performed, information on fixations is updated in both the Inspector window
and the trial-view window.
EyeLink Data Viewer
©2002-2008 SR Research Ltd.
119
Figure 8-11. Merging Fixations
Drift correcting fixations can also be performed. This is only suggested if it is obvious to
the user that improper system setup or calibration has resulted in a trial’s fixation data
containing significant drift that can be easily corrected manually. To illustrate the usage
of this functionality, for any trial, select the set of fixations to be adjusted, press the Alt
key, and then use the cursor keys to move the selected fixations to the desired locations
(see section 5.2.3 Drift Correcting Fixations for more information).
8.3.5 Analysis Output
In a typical viewing session, the final step is to extract useful eye-movement information
and export the data to statistical software. The EyeLink Data Viewer supports the output
of several types of analysis reports (see chapter 6 “Exporting Data”). The current tutorial
focuses mainly on two of them, namely, the trial output report and the fixation output
report.
8.3.5.1 Trial output report
The trial output report provides a summary of some important measures for individual
trials (see section 6.5.2 for a complete list of the variables). The user may be interested in
only a subset of the variables provided by the Viewer. For the current example, we
record trial condition values, response time, number of fixations, as well as information
on number of saccades, average fixation duration, and average saccadic amplitude in a
given trial.
To obtain a trial output report, select Analysis → Report → Trial Report from the
application menu. Select all of the desired variables and enter them to the list of selected
output variables (see Figure 8-12). Click the “Next” button and in the Filename edit box,
enter the desired file name with an appropriate extension (the common file extensions
that the Viewer supports are .txt or .xls).
EyeLink Data Viewer
©2002-2008 SR Research Ltd.
120
Figure 8-12. Obtaining a Trial Output Report
Once a trial output file is obtained, the data can be imported into a statistical package and
analyses can be performed on the variables in question (RT and number of fixations in
the current example). Note that for some statistical software, the user may have to
modify the default variable labels so that the data can be successfully loaded. Also note
that Tab is the delimiter used by the Viewer to separate neighboring variables. For some
statistical packages, it may be desirable to check “Use Quotes around String/Text
Variables” to make sure that any space within a string will not be treated as a delimiter.
The following graphs show the results for reaction time and the number of fixations per
trial in each search condition following the removal of practice trials and those trials with
no matching reaction-time definitions.
EyeLink Data Viewer
©2002-2008 SR Research Ltd.
121
3500
3500
Low Discriminability
High Discriminability
3000
3000
2500
2500
2000
2000
1500
1500
1000
1000
500
500
6
12
Display Size
24
12
6
12
Display Size
24
12
Low Discriminability
High Discriminability
10
10
8
8
6
6
4
4
2
2
0
6
12
Display Size
0
24
6
SF, Absent
TF, Absent
SF, Present
TF, Present
12
Display Size
24
Figure 8-13. Response Time (in msec) and Number of Fixations per Trial as a function
target-presence and display size in both the single-feature (SF) and two-feature (TF)
search tasks in the high-discriminability (N = 8) and the low-discriminability conditions
(N = 8).
8.3.5.2 Fixation output report
Similarly, a fixation output report can be obtained. The fixation output report generates
one row for each visible fixation within the Viewer, including several variables
EyeLink Data Viewer
©2002-2008 SR Research Ltd.
122
describing the current fixation, as well as a set of relative variables describing the
previous and next fixations and saccades (see section 6.6.2 for a complete list of variables
in the fixation report). For the current example, since we are interested in whether the
distribution of fixations differed across different types of display items, we need to select
variables such as fixation index, the closest interest area to which the current fixation is
assigned and the label of that interest area. In addition, we also planned to examine
whether such a distribution is influenced by the amplitude of the previous saccade
(PREVIOUS_SAC_AMPLITUDE) and whether, for the first fixations, the distribution
was influenced by the initial saccadic latency of the trial (in the current example, the
initial saccadic latency of the trial can be calculated as the
PREVIOUS_SAC_START_TIME for the first valid fixation in the trial).
Figure 8-14. Obtaining a Fixation Output Report.
To obtain a fixation output report, select Analysis → Report → Fixation Report from
the application menu. Select all of the desired variables and enter them to the list of
selected output variables (see Figure 8-14). Click the “Next” button and in the Filename
edit box, enter the desired file name with an appropriate extension (.xls or .txt). The
following Figure 8-15, Tables 1 and 2 present the analysis output for the distribution of
fixations as a function of distractor type.
EyeLink Data Viewer
©2002-2008 SR Research Ltd.
123
90
90
High-Discriminability
Low Discriminability
80
80
70
70
60
60
50
50
40
40
30
30
20
20
10
10
0
0
1-2
2-3
3-4
4-5
Saccade Size
5-6
1-2
>6
Color
Shape
2-3
3-4
4-5
Saccade Size
5-6
>6
2-3
3-4
4-5
5-6
Saccade Size (in degrees)
>6
Orientation
90
90
High-Discriminability
Low Discriminability
80
80
70
70
60
60
50
50
40
40
30
30
20
20
10
10
0
0
1-2
2-3
3-4
4-5
Saccade Size
5-6
Color-Shape
>6
1-2
Color-Orientation
Shape-Orientation
Figure 8-15. Average proportion of fixations assigned to distractors sharing target color,
shape, orientation in the single-feature search task (top panels) and to distractors sharing
target color shape, color orientation, or shape orientation in the two-feature search task
(bottom panels) as a function of saccade amplitude. Note that results for saccades
smaller than 1º are not reported because of insufficient data points in some cells.
EyeLink Data Viewer
©2002-2008 SR Research Ltd.
124
Table 1. Average percent of fixations by discriminability and search task for the first
fixations following a short (below median) and long (above median) initial saccadic
latency.
Condition
LD
(N=8)
Task
SF
TF
HD
(N=8)
SF
TF
C
S
O
CS
CO
SO
Short Latency
%
SEM
64.504
3.728
19.378
1.705
16.119
2.715
34.059
2.362
41.993
1.797
23.948
2.849
Long Latency
%
SEM
70.765
3.619
15.419
2.587
13.816
2.665
45.268
3.849
40.349
2.145
14.383
2.186
C
S
O
CS
CO
SO
50.863
27.082
22.055
39.978
33.914
26.109
55.972
26.924
17.104
54.176
29.265
16.558
6.898
3.290
4.678
2.569
1.825
3.187
6.167
4.935
1.976
5.044
3.852
2.434
Table 2. Average percent of fixations by discriminability and search task for the first
fixations, second fixations, and all fixations.
Condition Task
LD
SF C
(N=8)
S
O
TF CS
CO
SO
HD
(N=8)
SF
TF
C
S
O
CS
CO
SO
First Fixations
%
SEM
67.467
3.204
17.761
2.008
14.772
2.216
39.742
2.299
40.948
1.135
19.309
2.146
Second Fixations
%
SEM
70.893
2.692
16.377
1.641
12.729
1.765
54.386
3.792
35.393
3.240
10.222
1.614
All Fixations
%
SEM
68.307
2.416
17.527
1.256
14.166
1.378
45.840
0.934
40.088
1.146
14.073
1.058
53.446
27.060
19.493
47.103
31.606
21.290
56.509
29.872
13.619
79.496
13.146
7.357
56.209
26.342
17.449
63.855
20.733
15.412
6.096
3.668
3.104
3.555
2.141
2.476
4.394
3.564
1.804
3.296
2.378
1.324
4.789
3.245
2.007
3.515
20.64
1.694
Note ⎯ C, color; S, shape; O, orientation; CS, color shape; CO, color orientation; SO,
shape orientation; LD, low-discriminability condition; HD, high discriminability
condition; SF, single-feature search task; TF, two-feature search task.
8.4 Reference
EyeLink Data Viewer
©2002-2008 SR Research Ltd.
125
Williams, D. E., & Reingold, E. M. (2001). Preattentive guidance of eye movements
during triple conjunction search tasks: The effects of feature discriminability and
saccadic amplitude. Psychonomic Bulletin & Review, 8, 476-488.
EyeLink Data Viewer
©2002-2008 SR Research Ltd.
126
9 Preference Settings
All the elements of the EyeLink Data Viewer can be configured by the user from the
Preference tab of the Inspector Window. These include everything from the default
colors used, to the elements of how an EDF file is loaded. All the changes can be saved,
allowing the changed preference settings to be loaded in subsequent viewing sessions.
Any preferences setting can be edited by clicking on the value cell and changing the
value. For string and number values, be sure to press Enter after making the change to
register your input with the application.
Tip: The changed preference settings can be saved by clicking the right mouse buttons
and clicking on “Save Properties as Defaults”.
EyeLink Data Viewer
©2002-2008 SR Research Ltd.
127
9.1 General Preferences
The general preference setting covers the following elements:
Use Right Eye if Binocular: For a binocular
recording, which eye’s data is to be
displayed (right eye if checked; left eye if
unchecked);
Include Hidden Events: Whether or not to
include hidden events in Trial Views and
Output Reports;
Display Samples, Display Fixations,
Display Saccades, Display Blinks,
Display Messages, Display Buttons,
and Display IAs: Whether or not to
display samples, fixations, saccades,
blinks, messages, buttons, and interest
areas when the data file is first loaded (by
default, only fixations and interest areas
are displayed);
Default Viewing Session File Directory,
Default Data File Directory, Default IA
File Directory, Default Image Directory,
and Default Report Directory: Set
default directories for accessing viewing
session files, data file loading, interest
area, images loading/saving, and data
output. These settings can be changed by
clicking on the current values and
choosing a default directory from a Set
window. Note, changes to these
preference settings only take effect on
files loaded after the change.
Default Display Width and Default Display Height: Set display width and height to
enable the Data Viewer to run properly if DISPLAY_COORDS/GAZE_COORDS
message is not found in the EDF file; otherwise, these preferences are ignored;
EyeLink Data Viewer
©2002-2008 SR Research Ltd.
128
9.2 Data Loading Preferences
Data loading preference settings consist of the following parameters:
Load Samples, Load Fixations, Load
Saccades, Load Blinks, Load
Messages, Load Buttons: Allow the
loading of samples, fixations, saccades,
blinks, messages, and buttons from the
EDF files. By default all of the events
are loaded whereas samples are not.
Note: Versions before 1.7.1 loads
samples as well by default.
Trial Load Start Message and Trial Load
End Message: Define the start and end
messages of data loading. For each trial,
all events/samples before the start
message or after the end message will
not be loaded. By default, the Viewer
treats the “TRIALID” as the start
message for data loading and
“TRIAL_RESULT” as the end message.
(Note: the Trial Load Start Message
must be one message before START
recording, otherwise the Viewer will
internally re-set the loading position at
the start of trial recording to keep trial
data integrity.)
All Trial Variable Labels Message and All Trial Variable Values Message: The former
allows the definition of labels to be used for trial variables within the viewer and the
latter specifies the list of trial variable values for the trial. By default, the trial
variable labels message is set as “TRIAL_VAR_LABELS” and the trial variable
values message is set as “TRIAL_VAR_DATA”.
Single Trial Variable Message: This command lets the user specify a trial variable and
value for the given trial. Send one message for each pair of trial condition variable
EyeLink Data Viewer
©2002-2008 SR Research Ltd.
129
and its corresponding value. This means that there is really no need to use
TRIAL_VAR_LABELS command when using TRIAL_VAR command. Default
command token is "TRIAL_VAR".
Target Position String: String used to specify the position of the targets at the specific
message time.
Exclude Message String: Any messages (within the scope of a trial as defined by the
Trial Load Start Message and Trial Load End Message) containing the string will be
ignored by the Viewer. Add a “;” to separate multiple message strings.
Enable SceneLink Gaze Mapping: If checked, allows the user to load EDF file with
mapped gaze data to scene video coordinates.
Generate SceneLink Frame Message: If checked, allows the user to generate frame
number messages when loading file. The frame number message will only be written
if a lookup table has been created for synchronized playback of eye movement data
over the scene video (see section 5.1 of the "EyeLink II Scene Camera User
Manual").
Note: The user has to save the preferences and reload the data file before the changes in
the above preference settings take effect.
EyeLink Data Viewer
©2002-2008 SR Research Ltd.
130
9.3 Output / Analysis
The output / analysis preference settings consist of the following elements:
Output Reports
Variable Delimiter (\t for Tab): Specifies the
delimiter string for separating columns in
the output file.
Missing Value: Replaces variables with
missing value with a string specified here.
Decimal Places: Specifies the number of
digits to appear after the decimal point.
Include Hidden Events in Relative
Variables: Allows the inclusion of hidden
events in the relative event variables [i.e.,
those variables beginning with
PREVIOUS_FIX_, NEXT_FIX_,
PREVIOUS_SAC_, or NEXT_SAC_].
Treat Hidden Events as Missing Values: If
hidden events in the relative variables are
included in the analysis, the user can
further decide whether or not to treat these
events as missing data.
Bracket Strings with Quotes: Adds a pair of
quotation marks for string variables.
Exclude Trials with Message String:
Excludes trials containing the specified
message string. This string should be one
message or part of a message within the
scope of a trial that uniquely defines that
subset of trials to be excluded.
Auto Select IAS for Trial: If true, trial interest area set association is done automatically
by using "Image Name mapping" attribute of interest area set templates in the Data
Viewer session (see section 5.8.8 “Automatic Trial Image-Interest Area Set
EyeLink Data Viewer
©2002-2008 SR Research Ltd.
131
Association” for details). The default is false.
Use Nearest Interest Area for Outlier Fixations: If the current fixation is not in any
defined interest areas, assigns the nearest interest area as the current interest area.
Fixation/Saccade Report
Maximum Message Variables for Eye Event: Maximum number of messages
associated with a given fixation or saccade that will be shown in the output report.
Eye Event Msg. Variable String Match Token: If left blank, all messages associated
with an eye event will be reported; otherwise, only those messages containing the
"token" will be reported.
Fixation Map
Heat Map Mode: If enabled, the fixation map will be drawn in colored heat map; if
unchecked, a grayscaled version will be created.
Sigma (in degrees): Sets standard deviation of the Gaussian distribution for each
fixation point when creating a Fixation map.
Minimum Contrast Multiplier (0.0- 1.0): Sets the contrast between the fixation hotspots
and the background (0: with maximum contrast and 1: with minimum contrast).
Sigma Multiplier for Update Range: Number of standard deviations extended for each
fixation point when creating the Fixation map. For most users, keep this setting
unchanged.
Fixation Stream Analysis
Fixation Skip Count: Defines the number of fixations to skip when looking for the next
interest area to use in the fixation sequence analysis variables of the Interest Area
report. Default is 1. Can not be less than 1.
EyeLink Data Viewer
©2002-2008 SR Research Ltd.
132
9.4 Data Filter Preferences
The data filter preference settings consist of the following elements:
Merge Nearby Fixations: If checked, merge
the neighboring brief fixations. A fixation
to be merged must have a duration of less
than that specified by Fixation Duration
Threshold and be within 1° of the target
fixation. These default thresholds are set in
the “Amplitude Threshold” and “Fixation
Duration Threshold” fields.
Fixation Merging Amplitude Threshold: Sets
the amplitude threshold for fixation
merging. The default value is 1.0º.
Fixation Duration Threshold: Sets the
fixation duration threshold for fixation
merging. A fixation will be merged if
“Merge Nearby Fixations” is on and its
duration is less than the specified duration
threshold.
Saccade Amplitude Threshold: Sets the
minimum size of a saccade to be displayed
in the viewing session. All saccades will
be displayed with an amplitude threshold
set to 0.0.
Display Blink Saccades: Shows flanking
saccades of a blink.
Hide Fixations Beyond Display Bounds:
Whether or not to hide the fixations falling
beyond the display boundaries;
Show Interest Areas Pre Interest Period: If interest periods are defined, whether or not
to display interest area timed before the start of a selected interest period. If no
interest periods are defined, the interest areas are displayed anyway.
Show Interest Areas Post Interest Period: If interest periods are defined, whether or
EyeLink Data Viewer
©2002-2008 SR Research Ltd.
133
not to display interest area timed after the end of a selected interest period. If no
interest periods are defined, the interest areas are displayed anyway.
Hide Eye Events Only: If checked, filters out eye events (fixations, saccades, and blinks)
falling outside of the RT definition. If unchecked, filter out all events, including
buttons events and messages.
Hide Spanned Events: For the RT filter, whether or not to hide an event (e.g., fixation
or saccade) that overlaps with the start event or end event of the RT definition.
Trimmed Spanned Fixation Duration: If an interest period/reaction time filter is
applied, the duration of the fixation that overlaps the start or end of the interest
period will be trimmed so that only the portion of fixation within the interest period
will be reported.
Include Display Command Messages: Whether display command messages (i.e.,
command message starts with “!V” listed in sections 7.3.2 image loading and 7.3.3
simple graphics) should be visible.
Include Audio Command Messages: Whether audio command messages should be
visible. The following built in audio messages are supported: "!V ARECSTART",
"!V ARECSTOP", "!V VOICEKEY", "!V APLAYSTART", and "!V
APLAYSTOP".
EyeLink Data Viewer
©2002-2008 SR Research Ltd.
134
9.5 General Trial View Preferences
The parameters related to the general trial view preference settings are covered below:
Fixation Color, Saccade Color, Blink
Color, IA color, Button Color,
Message Color, Reaction Time Start
Color, Reaction Time End Color, and
Selection Square Color: Set the colors
to be used to show fixations, saccades,
blinks, interest areas, button events,
messages, the start/end of reaction time
calculation, and the event selection
square. These settings can be changed
by clicking the corresponding cell and
choosing a color from the palette dialog
or entering the value in RGB or HSB
scales.
Unselected Stroke Width and Selected
Stroke Width: Pixel width for the
selected and unselected events;
Adjust Saccades with Fixations: Whether
or not to adjust saccade parameters when
the fixations are shifted or merged;
Batch Drift Correction Error Threshold:
The maximum tolerable deviation in the
Y dimension (or the X dimension if the
next field is unchecked) for a fixation
from the mean of the group of fixations
to be drift-corrected in a batch. If any
fixations within the group exceeds this
threshold, batch drift correction cannot
be performed.
Batch Drift Correction Y (X=false): If checked, chooses the Y dimension for batch drift
correction. If unchecked, X dimension is checked;
Include Fixation in Single IA: In case of overlapping interest areas, whether or not to
limit the assignment of a fixation to one interest area (the interest area with a smaller
EyeLink Data Viewer
©2002-2008 SR Research Ltd.
135
ID) only;
Auto Select Fixation in Selected IA: When an interest area is selected, whether or not
to select fixations inside the IA as well;
Initial Data View (1 = TP; 2 = OL; 3 = AV): Selects the mode (1= temporal graph mode;
2 = spatial overlay mode; 3 = animation playback mode) of the trial view window
when the data is first loaded;
Display RT Graphics: If reaction time definitions are initialized, whether or not to show
the “RT” symbol in the spatial overlay view and to draw the Reaction Time
Start/End lines in the temporal graph view of the trial data.
Include Graphics Commands Sent Prior to IP: If no graphics commands are found
within the current interest period, uses those sent prior to the current interest period.
EyeLink Data Viewer
©2002-2008 SR Research Ltd.
136
9.6 Spatial Overlay View Preferences
The spatial overlay view preference settings cover the following parameters:
Sample Trace Color: Sets the color to be
used to show the sample trace;
Display Fixation Index, Display Fixation
Duration, and Display Saccade
Index: Whether or not to show the
fixation index/fixation
duration/saccade index in the spatial
overlay view;
Display Fixations as Scan Path: If
checked, two temporally contiguous
fixations are connected by an arrow,
pointing towards the more recent
fixation;
Joint Concurrent Selected Fixations:
For the selected fixations, connects
temporally contiguous fixations;
Sample Trace Granularity: If the sample
visibility is toggled on, shows every
nth sample (by default, n = 5);
Sample Tick Period: Draws a circular tick
for every nth sample (by default, n =
20). Widely spread ticks indicate high
saccade velocity;
Sample Tick Width: Diameter (in pixels)
of the sample ticks;
Minimum IA Size: Minimum width of an interest area;
Display IA%: If selected, shows percentage of trial dwell time spent on the selected
interest area
EyeLink Data Viewer
©2002-2008 SR Research Ltd.
137
Use SQRT of Fixation Duration for Circle Size: Uses the square root of fixation
duration to calculate the width of the fixation circle if checked.
Fixation Circle Scalar, Maximum Fixation Circle Width, and Minimum Fixation
Circle Width: If the above Use SQRT of Fixation Duration for Circle Size option
is not used, use Fixation Circle Scalar to define a scalar for fixation circle width
calculation. The maximum and minimum circle widths are set with the Maximum
Fixation Circle Width/Minimum Fixation Circle Width elements;
Background Color: Background color for the spatial overlay view (used only if the trial
bitmap is not loaded).
Maximum Graphics Commands to Process: Sets the maximum number of graphics
commands to process in each trial. This command is useful for those trials in which
there are many viewer graphics commands while the user may just need to see a few
of them. If it is set to -1, the viewer will process all graphics commands. For all
other entries of integer numbers, the viewer will process the number of graphics
commands specified when creating background image for overlay view.
Fit Overlay Image Change to Display: If True, when the background image for a trial
is manually changed, the image is scaled to fit the display dimensions for the trial. If
false, the image size is not altered and the image is centered on the trial overlay view.
EyeLink Data Viewer
©2002-2008 SR Research Ltd.
138
9.7 Image Segmentation Preferences
The parameters related to the auto image segmentation preference settings are covered
below:
Segmentation Spacing Threshold: Number of
consecutive pixels below threshold before
segment end is identified.
Left IA Buffer Size, Right IA Buffer Size, Top IA
Buffer Size, Bottom IA Buffer Size: Number
of pixels added to the left, top, right, and
bottom of the interest area. Note that the Top
IA Buffer Size, Bottom IA Buffer Size fields
will not have an effect if Fill Gaps Between
IA is checked.
Fill Gaps Between IA: If checked, gaps between
consecutive Interest Areas will be filled by
expanding the size of each Interest Area.
Background Threshold (0-765): Combined RGB
(R+G+B) to be used as the threshold limit for
segmentation.
Background Threshold Less Than: If checked, pixels with a RGB value less than the
threshold color are considered ‘background’ pixels. This setting is good for displays with a
lighter background. If this field is unchecked, pixels with an RGB value greater than the
threshold are considered background pixels (good for displays with a darker background).
Note: Auto segmentation may not work for a display with vertical stripes along its border(s)
that have the ‘foreground’ color. If such stripes are not part of the original image, try to
reload the background image or to change the background color for the spatial overlay
view to match with the background color of the original image.
EyeLink Data Viewer
©2002-2008 SR Research Ltd.
139
9.8 Temporal Graph Preferences
The parameters related to the temporal graph view preference settings are covered below:
Left Eye/Right Eye
X Sample Trace Color, Y Sample Trace
Color, X Velocity Trace Color, Y
Velocity Trace Color, X Acceleration
Trace Color, Y Acceleration Trace
Color, and Pupil Sample Trace Color:
Set the colors to be used to show the
horizontal and vertical position, velocity,
and acceleration traces of the eye
samples. The pupil sample traces of both
eyes are also displayed. The default
settings can be changed by clicking the
corresponding cell and choosing a color
from the palette or entering the value in
RGB or HSB scales;
Target 1/Target 2
Key: Token word to indicate the target ID.
This field is set to blank by default so
that various token words can be used. If
two targets are involved and if the order
of the two targets is important, set this
field to the token string used in the EDF
file.
X Position Trace Color, Y Position Trace
Color, X Velocity Trace Color, Y
Velocity Trace Color, X Acceleration
Trace Color, Y Acceleration Trace
Color, and Pupil Sample Trace Color:
Set the colors to be used to show the
horizontal and vertical position, velocity,
and acceleration traces of the targets.
The default settings can be changed by
clicking the corresponding cell and
choosing a color from the palette or
entering the value in RGB or HSB
scales;
EyeLink Data Viewer
©2002-2008 SR Research Ltd.
140
Acceleration Trace Scaling Factor and Velocity Trace Scaling Factor: Set the
scaling factor for the acceleration and velocity data so that these two traces can be
displayed appropriately in this view;
Message Triangle Width, Message Triangle Height, Button Triangle Width, and
Button Triangle Height: Set the width and height of the symbols for message and
button events;
Background Color and Ruler color: Set the colors for background and ruler of the
temporal graph view.
Split Y axis: If true, 0 appear in the middle of the screen, positive values on the top and
negative values at the bottom; otherwise, a descending scale is used, with large
values on the Y-axis appearing at the bottom of the screen. Note, this setting will
only be effective when the data are loaded in a new viewing session.
X Trace Highlighted, Y Trace Highlighted, and Pupil Trace Highlighted: Whether or
not by default the X trace, y trace, and pupil trace are highlighted;
Initial Visible Sample Count: Total number of initially visible samples in the temporal
graph view window (the default is 5000).
Use X Position for Fixation Location: If checked, use the X position to indicate the
position of a fixation event in the temporal graph view; otherwise, use the Y
position.
EyeLink Data Viewer
©2002-2008 SR Research Ltd.
141
9.9 Animation Preferences
The parameters related to the animation playback preference settings are covered below:
Enable Cyclopean Cursor: For a binocular
recording, enabling this option will display a
cyclopean gaze cursor (instead of two separate
gaze cursors) in the animation view.
Right Gaze Cursor Color, Left Gaze Cursor Color,
Cyclopean Gaze Cursor: Set the colors to be
used to show the right, left, and cyclopean gaze
cursor. The default settings can be changed by
clicking the corresponding cell and choosing a
color from the palette or entering the value in RGB
or HSB scales;
Gaze Cursor Diameter: Sets the diameter of the gaze
cursor (in pixels);
Trial Time Color: Sets the color of the trial time code.
Trial Time X Position (%), Trial Time Y Position (%):
Sets the x (percent of screen width) and y (percent
of screen height) coordinates of the trial time code.
Trial Time Font Size: Sets the font size of the trial
time code.
Display Frame Number: If checked, displays the
frame number of the video being played.
EyeLink Data Viewer
©2002-2008 SR Research Ltd.
142