1
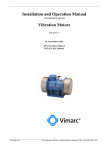
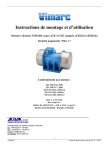
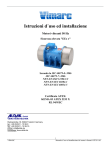
Installation and Operation Manual (Translated original) Vibration Motors Status 08.15 In accordance with: DIN-EN-ISO 12100-1/2 DIN-EN 60204-1 FRIEDRICH Schwingtechnik GmbH 1 TK Operation Manual, Vibration Motors Standard –R9-150810DA-EN Copyright by FRIEDRICH Schwingtechnik GmbH This Operation Manual is copyright protected. Any duplication and public reproduction, also in extracts, requires expressed written consent. Rights reserved to make changes without prior notification. FRIEDRICH Schwingtechnik GmbH Postfach 10 16 44 D-42760 Haan Sales: Telephone National Overseas 02129 3790-0 +49 2129 3790-0 Fax: Fax National Overseas 02129 3790-37 +49 2129 3790-37 E-Mail: E-Mail [email protected] Internet: Home page http://www.friedrich-schwingtechnik.de FRIEDRICH Schwingtechnik GmbH 2 TK Operation Manual, Vibration Motors Standard –R9-150810DA-EN CONTENTS 1. Instructions for the use of this Technical Documentation ..............................................................4 1.1 Who must be Acquainted with the Technical Documentation ................................................................................. 4 1.2 What should be Specially Observed ............................................................................................................................ 4 1.3 Explanation of the Pictograms used............................................................................................................................ 5 2. General .................................................................................................................................................6 2.1 Fields of Application for Vibration Motors................................................................................................................ 6 2.1.1 Motor arrangement and direction of rotation ........................................................................................................ 7 2.2. Intended Use................................................................................................................................................................. 7 3. Safety Instructions ..............................................................................................................................7 4. Transportation ....................................................................................................................................8 5. Storage .................................................................................................................................................9 6. Brief Description of the Motor Design ............................................................................................10 6.1 Deviating Motor Design FRIEDRICH sizes 1.3, 1.4, 1.5 ......................................................................................... 10 7. Installation .........................................................................................................................................11 7.1 Unpacking and Checking the Scope of Delivery ...................................................................................................... 11 7.2 Installation Guidelines ............................................................................................................................................... 12 7.3 Installation On Site ..................................................................................................................................................... 12 7.4 Replacement of Vibration Motors............................................................................................................................. 13 8. Adjusting the Centrifugal Force ......................................................................................................13 9. Electrical Connection........................................................................................................................14 9.1 Connection................................................................................................................................................................... 15 9.2 Installation of the Connection Cable ........................................................................................................................ 16 10. Commissioning ................................................................................................................................17 10.1 10.2 10.3 10.4 Operation at 50 Hz ................................................................................................................................................ 18 Operation at 60 Hz ................................................................................................................................................ 19 Operation with a Frequency Converter .............................................................................................................. 19 Synchronization ..................................................................................................................................................... 19 11. Replace the Bearing ........................................................................................................................20 11.1 Remove the Roller Bearing ........................................................................................................................................ 20 11.1.1 For FRIEDRICH sizes 1.2, 1.3, 1.4, 1.5, 2.2 and 2.4 ........................................................................................... 20 11.1.2 For FRIEDRICH sizes 2.1, 2.3, 3.1, 3.4, 4.0, 4.1, 4.2, 4.7, 7.0, 7.1, 7.8, ............................................................. 21 8.0, 8.9, 9.0, 10.0 and VIMARC sizes AX - KX .............................................................................................................. 21 11.1.3 For sizes with ball bearing ....................................................................................................................................... 22 11.2 Install the Roller Bearing ............................................................................................................................................ 23 11.2.1 For FRIEDRICH sizes 1.2, 1.3, 1.4, 1.5, 2.2 and 2.4 ........................................................................................... 23 11.2.2 For FRIEDRICH sizes 2.1, 2.3, 3.1, 3.4, 4.0, 4.1, 0.4, 4.7, 7.0, 7.1, 7.8, ............................................................. 24 8.0, 8.9, 9.0, 10.0 and VIMARC sizes AX - KX .............................................................................................................. 24 11.2.3 For sizes with ball bearing ....................................................................................................................................... 25 11.3 Grease ........................................................................................................................................................................ 26 11.4 Lubrication ................................................................................................................................................................ 26 12. Spare Parts and Repairs .................................................................................................................26 12.1 Spare Parts ................................................................................................................................................................ 26 12.2 Repairs ....................................................................................................................................................................... 27 13. Warranty .........................................................................................................................................27 14. Circuit Diagrams .............................................................................................................................28 Appendix, Cable Connection 1 ............................................................................................................30 Appendix, Cable Connection 2 ............................................................................................................32 15. Technical Data .................................................................................................................................33 16. Declaration of incorporation ..........................................................................................................36 FRIEDRICH Schwingtechnik GmbH 3 TK Operation Manual, Vibration Motors Standard –R9-150810DA-EN 1. Instructions for the use of this Technical Documentation In order to improve the understanding of this technical documentation and, thus, to improve the use, please read the following pages. Please always observe the following rule: Before use, installation or commissioning, it is imperative to observe this technical documentation. Furthermore, adhere to the general and local accident prevention regulations (UVV). 1.1 Who must be Acquainted with the Technical Documentation All persons working in the operation area of the vibrating machine with the vibration motor must read this technical documentation through and completely understand it, especially the safety regulations. All tasks on the vibration motor must only be carried out by qualified specialists. The electricians must be acquainted with the instructions for the electric connections. The service personnel must be acquainted with the maintenance and repair instructions. In general: Every person who works on the vibration motor must be acquainted with the contents of this technical documentation. These personnel must be qualified and instructed. The operating company of this machine is obliged to instruct their staff accordingly. This technical documentation is a part the scope of delivery of the vibration motor and must always be available to the qualified persons. The qualified persons must be trained in accordance with the safety regulations and must be familiar with the safety instructions. 1.2 What should be Specially Observed Please note that this technical documentation ... in general must not be separated or amended. Only FRIEDRICH Schwingtechnik GmbH is permitted to amend the technical documentation. must be kept complete and near the vibrating machine. Missing pages, or complete technical documentation, can be ordered at any time from FRIEDRICH Schwingtechnik. must be accessible to the operating personnel of the vibration motor / vibrating machine at all times. must be read and fully understood by the service personnel before they start maintenance and repair tasks on the vibration motor. conforms to the latest technology at the time of delivery of the vibration motor. Subsequent modifications must be adequately documented and added to the technical documentation. This is also applicable to all other technical documentation delivered FRIEDRICH Schwingtechnik GmbH 4 TK Operation Manual, Vibration Motors Standard –R9-150810DA-EN together with this vibration motor. is not part of any previous or existing covenant, agreement or legal relationship, or should amend this. All obligations of FRIEDRICH Schwingtechnik towards the customer result from the purchase order, in which the full and sole valid warranty regulations are included. These contractual warranty provisions are neither extended nor limited by the technical documentation. 1.3 Explanation of the Pictograms used The following pictograms are used to simplify using this technical documentation and to quickly find information. Fundamentally, impart all warning instructions to other users of the vibrating device. i Information General information and recommendations from FRIEDRICH Schwingtechnik. The adjacent paragraph promotes understanding, or simplifies your work. It is not necessary to read this paragraph. Non-observance will not result in an immediate risk or impairment. Testing and checking Information for the necessity of regular checks relating to the connection cable and bolted connections. Non-observance of this symbol can cause a hazard or damage can occur. Prevent material damage Reference to the increased risk of damage to the vibration motor, e.g. by using the incorrect tools, incorrect grease, penetration of debris into the drive units, incorrect assembly sequence, inappropriate transportation. The adjacent paragraph must be read and understood. Non-observance of this symbol can cause a hazard or damage can occur. Special tools Reference to the necessity of using a special tool. Please read Reference to standards and documents which should be read and understood. General warning This pictogram depicts a general warning. This indicates hazards, possible malfunctions, non-intended use or other things that concern occupational safety. It is imperative to read and understand the adjacent paragraph. Non-observance of this symbol can cause a hazard or damage can occur. Warning of risk of injury This pictogram warns of a possible risk of injury. This indicates hazards, non-intended use or other things that concern occupational safety Special attention should be paid to this topic and the appropriate precautionary measures taken. It is imperative to read and understand the adjacent paragraph. Non-observance of this symbol can cause a hazard or damage can occur. Warning of voltage FRIEDRICH Schwingtechnik GmbH 5 TK Operation Manual, Vibration Motors Standard –R9-150810DA-EN This pictogram warns of electrical voltage and the resulting dangers. Take suitable precautionary measures against these. It is imperative to read and understand the adjacent paragraph. Non-observance of this symbol can cause a hazard or damage can occur. Warning during transportation This pictogram warns of the increased hazards that could occur during transportation of the vibration motor. It is imperative to read and understand the adjacent paragraph. Nonobservance of this symbol can cause a hazard or damage can occur. Important recommendation This pictogram indicates an important recommendation or explanation. The adjacent paragraph should be read and understood. Non-observance will not result in an immediate risk, but it can impair the function of the machine. 2. General 2.1 Fields of Application for Vibration Motors Vibration motors are provided and are suitable for driving vibrating systems, such as e.g.: vibrating conveyor chutes, vibrating pipes, screen conveyors, screening machines, spiral conveyors, automatic sorting machines, knock-out grates, vibrating trestles, resonance conveyors, vibrating mills and fluidbed dryers, bin vibrating machines, etc. Any other use, or a use above and beyond, is deemed to be non-intended. FRIEDRICH Schwingtechnik will accept no claim for damages resulting from this. Intended use also includes observance of the Operation Manual, especially the inspection and maintenance instructions. For the technical information of our motors, such as type, speed, operating torque, as well as centrifugal force and the electrical values, refer to the vibration motors leaflet or motor datasheet. FRIEDRICH Schwingtechnik GmbH 6 TK Operation Manual, Vibration Motors Standard –R9-150810DA-EN 2.1.1 Motor arrangement and direction of rotation 1 motor = circular vibration 2 motors counterrotating = linear vibration 2 motors synchronous = torsional vibration 2.2. Intended Use The vibration motor is not an autonomous functioning machine, it is designed to operate only with another machine. Commissioning is prohibited until it is determined that the functional machine conforms to the provisions of the machine directive. The vibration motors are designed exclusively to drive a vibrating device. The vibrating device must be designed for the demands generated by the vibration motor. Vibration motors must not be operated without flyweights. The intended use also includes observation of the Operation Manual. 3. Safety Instructions The vibration motor must only be started when it has been assembled to the relevant machine, with all safety devices Attention: When operating, or working on the vibration motor, the flyweights of the vibration motor may rotate unexpectedly. Risk of impact or crushing. FRIEDRICH Schwingtechnik GmbH 7 TK Operation Manual, Vibration Motors Standard –R9-150810DA-EN Comprehensive personal protection can only be ensured when the vibration motors are fully enclosed. The vibration motor must not be operated without protective covers over the flyweights. The electrical connection of the vibration motor must be appropriately fused. There is a risk to life by electric shock if there is damaged insulation of the connection cable and missing cover on the terminal box! Immediately rectify such defects. Only explosion-proof vibration motors may be used in areas subject to explosion hazard. Here, use our Atex motors. Only carry out maintenance and adjustment tasks on the vibration motor when it is not in operation. Before commencing these tasks, make sure that the vibration motor cannot be switched on inadvertently, or by unauthorized persons. 4. Transportation In order to prevent risks to persons and damage to the vibration motor, transportation of the vibration motor must be carried out with the appropriate care! In addition to the following instructions, also observe the general and valid local safety and accident prevention regulations (UVV). In particular, observe the following: For deliveries overseas, or under special delivery conditions, e.g. transportation on poor or unmade roads, , or transport by ship or rail, in order to prevent damage to the bearing, secure or remove the flyweights for transportation. In this case, the flyweights will be set to "nil" by FRIEDRICH Schwingtechnik. If the flyweights are secured, reference to the security is by an appropriate sticker on the motor. Make sure that the correct transportation and lifting devices are used. When transporting the vibration motors on pallets, secure them against tilting. Use the integrally cast eyebolts to lift the vibration motor. Only attach ropes, shackles, etc. to these eyebolts. The lifting devices must be approved, undamaged and suitable for the transportation. No additional weight must be attached to the motor, because the lifting lugs are only designed for the tare weight of the motor. There are no eyebolts on the smallest vibration motors. Place a rope around the housing to transport these. For safety reasons, the lifting devices used to lift the vibration motor must have a permitted load-carrying capacity of twice the weight of the vibration motor. Only place the vibration motor on its feet. Report all transport damage to the manufacturer. Particularly make sure that there is no FRIEDRICH Schwingtechnik GmbH 8 TK Operation Manual, Vibration Motors Standard –R9-150810DA-EN damage to the contact surfaces and protective cover. Do not suspend the vibration motor by the hoods or flyweights. Strong impacts, or dropping the motor, will result in damage to the bearing and reduce the service life of the motor. Do not use motors that are damaged. 5. Storage The vibration motors should be stored until final installation, in accordance with the following specification. In closed dry rooms. At a maximum ambient temperature of 40°C. Free from vibration, to prevent damage to the bearing. The motor and, particularly the terminal box, must be closed. If the vibration motor is stored in the open, cover it with an awning, open at the bottom, to protect it from moisture. The cover must be placed so that any condensation can run off. To prevent the influence of ground moisture, place the vibration motor on a suitable support or on a shelf. If packed for transport by sea, the packaging of the vibration motor must not be damaged, or opened, during transportation and storage. Attention: Only place the vibration motor on its feet! FRIEDRICH Schwingtechnik GmbH 9 TK Operation Manual, Vibration Motors Standard –R9-150810DA-EN 6. Brief Description of the Motor Design Fully enclosed, vibration-resistant housing, with wide feet and integrally cast ribs to transfer the centrifugal forces. For easy and safe installation, integrally cast eyebolts are arranged in the centre of gravity of the vibration motors, in order to install the motor in any arbitrary position. The stator, with winding, is shrunk into the housing. The robust roller bearings are pressed into the solid bearing plates arranged at both sides. They have continuous lubrication and operate fully maintenance-free*. The sturdy dimensioned shaft, with the rotor shrunk on, runs in the roller bearings. The shaft gland is sealed by grease grooves and V-rings. To generate the centrifugal force, flyweights are arranged on both sides at the ends of the shaft. The vibration motor is hermetically sealed using two protective hoods and toroidal rings. Ingress of dust and moisture is impossible. The ∞ terminal box is located on the housing and is hermetically sealed by a terminal-box cover. *Not motors with lubrication, refer to Chapter 11.4 6.1 Deviating Motor Design FRIEDRICH sizes 1.3, 1.4, 1.5 The vibration motors of the size 1.3, 1.4 and 1.5 are equipped with an aluminium body and contain two pedestal bearing plates. FRIEDRICH Schwingtechnik GmbH 10 TK Operation Manual, Vibration Motors Standard –R9-150810DA-EN 7. Installation The vibration motors are supplied ready for installation. During installation observe the following procedure. Check delivery for completeness, in accordance with Chapter 7.1 - Unpacking and Checking the Scope of Delivery. Transport the vibration motor to the installation site, in accordance with Chapter 4 - Transportation. Make sure of the dimensional accuracy and suitability of the installation site, in accordance with Chapter 7.2 - Installation Guidelines. Attachment to the vibrating machine, in accordance with Chapter 7.3 - Installation On Site. Adjusting the centrifugal force and operating torque, in accordance with Chapter 8. Electrical connection, in accordance with Chapter 9. For operation with two vibration motors on one machine, observe the additional instructions for the electrical installation. Important: Before assembly of the contact surfaces of the vibration motor and the attachment surfaces of the vibrating machine, thoroughly remove all paint, corrosion, grease and oil. Fundamentally, when installing the vibration motor, observe the local and national accident prevention regulations (UVV). Attention: When setting the operating torque, the flyweights can suddenly rotate. Risk of impact or crushing. 7.1 Unpacking and Checking the Scope of Delivery Unpack the vibration motor and check the scope of delivery according to the shipping document. Dispose of the packaging materials in accordance with the valid local regulations for waste disposal. FRIEDRICH Schwingtechnik GmbH 11 TK Operation Manual, Vibration Motors Standard –R9-150810DA-EN 7.2 Installation Guidelines Requirements of the installation site. The connection part, to which the vibration motor is attached, must be: level vibration-resistant free from paint, corrosion, grease and oil and machined flat 7.3 Installation On Site Install the vibration motor as follows: It is imperative to observe the installation guidelines, in accordance with Chapter 7.2. To install the vibration motors, a level vibration-resistant drive seat is required. In order to obtain a correct contact surface, this base must be machined. As standard, the vibration motors are attached using hexagon-headed bolts, DIN 931- 8.8 or DIN 933-8.8 and self-locking hexagon nuts, in accordance with DIN 982-8 or DIN 985-8. No circlips, Schnorr washers or similar must be used. If washers are used, then only use high-strength washers, e.g. HV washers, in accordance with DIN 6916. All the attachment parts can only be used once. In order to attain a permanent pretension, the attachment screws require a certain minimum grip length. The minimum grip length should be 3 times the nominal diameter. The grip length is the distance between the underside of the bolt head and the nut. The required bolt protrusion is calculated according to DIN 13. Bolt protrusion v = Height of nut + 3 x thread pitch P As applicable, before installation, remove the transportation safety devices or, if the flyweights were removed, install the flyweights and protective covers. Install in the following sequence: Use the integrally cast eyebolts to align the vibration motor. Use the specified number and size of bolts to attach the vibration motor, in accordance with the leaflet or motor datasheet. Put the vibration motor in position and loosely tighten the bolts. Use a torque wrench and tighten the bolts to the following torque, refer to Chapter 15, Table 15.1. After 15 to 20 minutes after starting, switch off the motor and, using a torque wrench, re-tighten all of the motor attachment bolts. Repeat this procedure after 2 to 3 hours and after one day. We recommend checking the attachment bolts every 8 weeks. FRIEDRICH Schwingtechnik GmbH 12 TK Operation Manual, Vibration Motors Standard –R9-150810DA-EN Attention: If inappropriate bolts and nuts are used, the vibration motor can become loose and cause serious damage. Attention: Please note that most of the malfunctions and failures are caused by incorrect or loose connections! 7.4 Replacement of Vibration Motors When using the vibration motors in pairs at one machine, use two identical vibration motors only. The same centrifugal forces must be set in both the motors. 8. Adjusting the Centrifugal Force As standard, the vibration motors are delivered ex works with the centrifugal force set at 100%. At the customer's request, delivery ex works can be made with another centrifugal force setting. To adjust the centrifugal force for changing the performance, proceed as follows: 1) Remove the protective hoods (1) from both sides. 2) Release the terminal screws (14) of the inner flyweights (3) and turn the disks in the same direction as 100 % (refer to warning) to the required position. FRIEDRICH Schwingtechnik GmbH 13 TK Operation Manual, Vibration Motors Standard –R9-150810DA-EN The outer flyweights (2) are held in position by two fitting keys. There is a mark on the outer flyweights. On the inner flyweights, graduation marks are engraved on a scale, with the corresponding percentages. Each graduation mark corresponds to a certain percentage of the maximum centrifugal force and operating torque. 3) Tighten the terminal screws (14) of the inner flyweights. When tightening the flyweights, apply the torques in accordance with Chapter 15, Table 15.2. 4) Attach both the protective hoods (1) and tighten them cross-wise. Make sure that the two cord gaskets (9) for the protective hoods contact properly, do not jam and have not been damaged when demounting. Please note carefully, that the inner flyweight must be set to the same value and/or graduation mark at both sides of the vibration motors. When using the vibration motors in pairs, the same centrifugal forces must be set in both the motors. Unequal setting of the flyweights will generate excessive uncontrolled transverse forces which may result in destruction of the motor and the vibration machine. In addition, persons standing nearby may be injured or damaged otherwise. 9. Electrical Connection The motor must only be connected by an authorized electrician. Observe the relevant Electricity Board regulations for connecting and operating the motor. Ensure IP 66 protection by thoroughly sealing the cable connections, blanking plugs and terminal box cover. FRIEDRICH Schwingtechnik GmbH 14 TK Operation Manual, Vibration Motors Standard –R9-150810DA-EN 9.1 Connection In the terminal box, connect the terminal board as a star or delta connection as follows. Example for 230/400 Volts: Delta connection Star connection Before connecting, observe the following points: The vibration motor is installed ready-to-connect, star connection. With the appropriate mains voltage, the vibration motor can also be operated as a delta connection. Connect each vibration motor individually through a motor circuit breaker. During the motor run-up time (approx. 3-5 s), a starting current flows that is approx. 9- fold the rated current. Exact values are indicated in the leaflet or in the data sheet. Select the contactors and switches accordingly. If the vibration motor is exposed to high thermal loads, by frequent switching on and off or because of the ambient conditions, a PTC resistor cutout should be installed on the motor to protect it. When connecting 2 vibration motors, check them for contra-directional sense of rotation. Use appropriate measures to make sure that the maximum speed is never exceeded. Otherwise there is a risk to the machine and persons. e voltage and frequency of the plant mains must agree with the data on the motor rating plate. Connect the conductor to the terminal board. Make sure that the motor is connected correctly, star or delta connection. The three-phase connection of the motor must be earthed. Close the terminal box dust and moisture tight. The sealing surfaces of the terminal box and the cover must be clean. Connect the vibration motor through a circuit breaker and thermal relay. Adjust the circuit breaker for continuous operation, in accordance with the rated current data on the motor rating plate. FRIEDRICH Schwingtechnik GmbH 15 TK Operation Manual, Vibration Motors Standard –R9-150810DA-EN 9.2 Installation of the Connection Cable Refer to the Operation Manual for the cable connection supplied, in the Appendix, Cable Connection. Select the corresponding Operation Manual for the cable connection used for your motor. The type designation is given on the cable connection. Appendix - Cable Connection 1: Appendix - Cable Connection 2: Make WISKA Make Lapp After the cable is connected, no debris must remain in the terminal box. Damage to the motor could occur, caused by a possible short-circuit and could result in total destruction. Take particular care when laying the cables and, to prevent the cable chafing when vibrating in operation, provide sufficient reserve (cable loop). For severe mechanical demands, only use rubber cables in accordance with VDE0282, Part 4 Type H07RN – F or A07RN - F. Connect the motor through a safety switch and thermal protection. It is important to connect the thermal protection (PTC resistor) separately. Connection must be through a certified switch (not through a voltage regulator). During continuous operation, the current must not exceed the value given on the nameplate. Earthing The motor connection at the mains must be earthed. The earth can be connected inside the terminal box or, through an earthing terminal, on the foot of the motor. After connection, the terminal box cover must be carefully closed. FRIEDRICH Schwingtechnik GmbH 16 TK Operation Manual, Vibration Motors Standard –R9-150810DA-EN 10. Commissioning The vibration motors are identified by a serial number quoted on the nameplate. Nameplate FRIEDRICH vibration motors FRIEDRICH FRIEDRICH Schwingtechnik GmbH Postfach 10 16 44 D-42760 Haan www.friedrich-schwingtechnik.de D-Mot. Typ: N Fliehkraft: Nr. V KW /min Hz cosf A ISO-Kl. IP Lagertyp: Elektrischer Anschluß: Kabel H07RN-F oder A07RN-F 4x mm , Aussendurchmesser mm MADE IN GERMANY Nameplate VIMARC vibration motors FRIEDRICH Vimarc i i GmbH The vibration motors conform to the following technical requirements: Protection Class IP 66 / IP 65 (AX-KX), in accordance with EN 60529 Insulation Class F (155°C), in accordance with DIN EN 60034-1 Insulation for tropics, standard Ambient temperatures for use, from -30°C to +40°C Volume or noise level <70dB(A), in accordance with IEC Before commissioning the motors (especially following an extended period of storage/shutdown) it is recommended that insulating resistance be measured before starting the motors. Here it must be additionally noted that after an extended period of operation, also the FRIEDRICH Schwingtechnik GmbH 17 TK Operation Manual, Vibration Motors Standard –R9-150810DA-EN minimum insulating resistance of the winding can drop to the critical minimum insulating level. The insulating resistance is measured to ground at a voltage of 500V DC. Here the measuring voltage is applied continuously until the read levels do not fluctuate anymore. At a local/winding temperature of 25 °C, with windings as good as new, the level should reach > 10MOhm. The critical insulating level is 1MOhm (EN60204-1) The motor can continue to be operated as long as it does not fall short of the critical insulating resistance. If the value drops below the critical level, the motor must be shut down; if necessary the winding must be properly dried or the motor repaired. The test measurements may only be carried out by authorized persons. After carrying out the measurements, the winding is to be discharged to ground, to rule out a voltage surge. After being stored away/shut down for 2 years, the motor grease must be replaced before beginning to use the motor. The only greases which may be used are those indicated on the motor’s nameplate. See also Chapter 11.3 During continuous operation of the motor, the operating temperature on the surface of the stator housing must not be higher than 80°C. This is a design requirement, in order to maintain grease lubrication in the bearing and to attain the full service life. It is not permitted to use the motor as an independently functioning unit. A vibration motor is always a firmly attached part of a machine. This machine is designed as vibration-resistant and detached from the surrounding area using vibration insulation (e.g. springs, rubber buffers). 10.1 Operation at 50 Hz The mains frequency determines the speed of the motor. The vibration motors, designed for operation at 50 Hz, must not be operated at a frequency 60 Hz or, using a frequency converter, at a frequency of more than 50 Hz. Operation of the motor at a frequency of more than 50 Hz will result in a substantial reduction in the service life of the bearings. Premature failure of the bearings and motor could occur. Furthermore, damage to, or destruction of, the vibrating machine can occur. The centrifugal force increases by 44% for a motor operated at 60 Hz, compared to a motor operated at 50 Hz and unchanged flyweight setting. For operation at 60 Hz – Use our motors appropriate for 60 Hz. FRIEDRICH Schwingtechnik GmbH 18 TK Operation Manual, Vibration Motors Standard –R9-150810DA-EN 10.2 Operation at 60 Hz The mains frequency determines the speed of the motor. Vibration motors designed for operation at 60 Hz must not be operated using a frequency converter of more than 60 Hz. Operation of the motor at a frequency of more than 60 Hz will result in a substantial reduction in the service life of the bearings. Premature failure of the bearings and motor could occur. Furthermore, damage to, or destruction of, the vibrating machine can occur. 10.3 Operation with a Frequency Converter An appropriate frequency converter must be used for operation of the vibration motors. During the start-up phase, the full starting current must be available. Operation of the motors using the mains frequencies of 50Hz or 60 Hz will result in a substantial reduction in the service life of the bearings. This can lead to premature failure of the bearings. Furthermore, damage to, or destruction of, the vibrating machine can occur. By operating the motors at a frequency that is too low, the motors could stray into the eigenfrequency of the machine. Then the motors cannot attain the nominal speed and/or do not synchronize. Fundamentally, we recommend never to operate the motors at less than 60% of the mains frequency. However, the minimum frequency that a machine can be operated at is always dependent on the eigenfrequency of the machine, on which the motors have no influence. To make sure that the frequency converter can operated correctly, calculate the eigenfrequency of the machine, because even 60% can mean a frequency that is too low. Starting the motor should always be carried out using the full mains frequency, i.e. at 100% frequency converter setting. Only this way will an optimum synchronization of the motors be ensured. 10.4 Synchronization One of the most common applications for vibration motors is operation of two vibration motors rotating in opposite directions and generating linear vibrations. Because the motors are not coupled mechanically, the free synchronization is ensured only by means of frequencies of the motors. After start-up, the motors are not synchronized at first. Full synchronization is achieved during operation at equal frequencies. During this procedure, the driving frequency must not be disturbed in any way, otherwise the motors are not able to achieve full synchronization. Disturbances of the frequency, which do not enable the motors to achieve full synchronization, can be caused by: - too high natural frequency of the machine (springs too stiff) - too plastic, not enough stiff traverse - insufficient braced components on the machine - defective machine (broken springs, cracks in the body or in the traverse) - the machine does not vibrate freely or it is blocked by firm mounting parts (sealing rubbers, etc.) If synchronization of two motors is not achieved, it is not possible to achieve nominal FRIEDRICH Schwingtechnik GmbH 19 TK Operation Manual, Vibration Motors Standard –R9-150810DA-EN rotation speed. The motor will require higher current and this will lead to a premature failure of the motor. Furthermore the vibration machine can be damaged or destroyed. 11. Replace the Bearing When replacing a bearing, we recommend to replace both bearings of a motor, even if only one bearing should be defective. A defective bearing will also always cause damage to the other bearing. The second bearing will fail after a short time. T The bearing housings must also be replaced every 2nd time that the bearings are replaced. 11.1 Remove the Roller Bearing i For the size of the bearing, refer to the rating plate on the vibration motor. You can purchase the special bearing, including the special grease from FRIEDRICH Schwingtechnik. Attention, we do not use commercially available standard bearings. 11.1.1 For FRIEDRICH sizes 1.2, 1.3, 1.4, 1.5, 2.2 and 2.4 1. Remove both protective hoods (1). Mark or record the position of the rotating inner flyweights (3). Release the flyweight attachment screws (14). 2. Remove the outer flyweights (2). If there is a problem: Insert a chisel or strong screwdriver into the clamping slot to widen it. 3. Remove the key (13). 4. Remove the inner flyweights (3). 5. Unscrew the attaching screws (11) of the bearing plate (6). Use a rubber hammer to gently hit out the bearing plate (6) from the housing (7). Make sure not to wedge the bearing plate. 6. Press out the cylindrical roller bearing (5) from the bearing plate (6). 7. Withdraw the grease disk (16) and supporting disks (15), together with the inner FRIEDRICH Schwingtechnik GmbH 20 TK Operation Manual, Vibration Motors Standard –R9-150810DA-EN race of the cylindrical roller bearing (5), from the shaft. 8. All components to be used again must be cleaned and degreased. 9. It is not permitted to reuse bolts and locking washers. 11.1.2 For FRIEDRICH sizes 2.1, 2.3, 3.1, 3.4, 4.0, 4.1, 4.2, 4.7, 7.0, 7.1, 7.8, 8.0, 8.9, 9.0, 10.0 and VIMARC sizes AX - KX 1. Remove both protective hoods (1). Mark or record the position of the rotating inner flyweights (3). Release the flyweight attachment screws (14). 1. Remove the outer flyweights (2). If there is a problem: Insert a chisel or strong screwdriver into the clamping slot to widen it. 2. Remove the key (13). 3. Remove the inner flyweights (3). 4. Remove the V-ring (12). 5. Remove the attachment bolts (10) for the bearing plate (6) and install them into the threaded holes in the bearing plate. Use these to press out the bearing plate (6), together with the cylindrical roller bearing (5). Make sure not to wedge the bearing plate. 6. Remove the bolts (11) and bearing cover (4). 7. Press out the cylindrical roller bearing (5) from the bearing plate (6). 8. Remove the spacer (8) from the shaft, together with the inner race of the cylindrical roller bearing (5). 9. All components to be used again must be cleaned and degreased. 10. It is not permitted to reuse bolts and locking washers. FRIEDRICH Schwingtechnik GmbH 21 TK Operation Manual, Vibration Motors Standard –R9-150810DA-EN 11.1.3 For sizes with ball bearing 1. Remove both protective hoods (1). Mark or record the position of the rotating inner flyweights (3). Release the flyweight attachment screws (14). 2. Remove the outer flyweights (2). If there is a problem: Insert a chisel or strong screwdriver into the clamping slot to widen it. 3. Remove the key (13). 4. Remove the inner flyweights (3). 5. Remove the V-ring. 6. Remove the attachment bolts (10) of the bearing plate (6) and install them into the threaded holes in the bearing plate. Use these to press out the bearing plate, together with the ball bearing (5). Make sure not to wedge the bearing plate. 7. Remove the bolts (11) and bearing cover (4). 8. Press out the ball bearing (5) from the bearing plate (6). 9. As necessary, remove the spacers from the shaft. 10. All components to be used again must be cleaned and degreased. 11. It is not permitted to reuse bolts and locking washers. FRIEDRICH Schwingtechnik GmbH 22 TK Operation Manual, Vibration Motors Standard –R9-150810DA-EN 11.2 Install the Roller Bearing i The replacement bearings from FRIEDRICH Schwingtechnik are supplied with the appropriate grease. 11.2.1 For FRIEDRICH sizes 1.2, 1.3, 1.4, 1.5, 2.2 and 2.4 i 1. Push the grease disk (16) and then the supporting disks (15) onto the shaft as far as they go. 2. Heat up the inner race of the new cylindrical roller bearing (5) to approx. 80°C to 100°C (oil bath or heating plate) and push them onto the shaft as far as they go (grease ring). 3. Let the inner race cool down so that it is firmly positioned on the shaft. 4. Clean the bore of the bearing plate (6) and apply a thin layer of LOCTITE 270. Press the outer race of the cylindrical roller bearing (5) into the bore of the bearing plate (6). Make sure that the outer race does not wedge. 5. Fill the specified grease into the roller of the cylindrical roller bearing. Use the specified grease and fill two thirds of the grease space of the bearing plate (6). 6. Pull out the shaft approx. 30 mm and then push the bearing plate (6), with the installed cylindrical roller bearing (5), onto the inner race of the bearing, so that it is centred. 7. Subsequently, push the bearing plate, together with the shaft, to the chamfer on the housing. 8. Install all of the attachment bolts (11) and uniformly tighten. 9. During installation, in order to prevent the rollers of the cylindrical roller bearing wedging on the inner race, continually rotate the stub shaft in both directions by hand. Otherwise, premature damage to the bearing can occur. 10. Uniformly tighten the bearing plate as far as it will go. 11. Install the inner flyweights (3), the scale must be in the correct position. 12. Install the key (13). 13. Install the outer flyweights (2) in the correct position and install the attachment screws immediately. 14. Set the inner flyweights according to the position marked or recorded previously, install and fully tighten the bolts. Use the torque wrench and torque tighten the attachment bolts, in accordance with Chapter 15, Table 15.2 The terminal slots of all 4 flyweights must show in the same direction: i 15. Place the toroidal rings (9) around the flange of the bearing plate (6) and, if necessary, glue it at some points. 16. Mount the protective hoods (1). If several motors are repaired simultaneously, make sure that the components of the individual motors are not exchanged. FRIEDRICH Schwingtechnik GmbH 23 TK Operation Manual, Vibration Motors Standard –R9-150810DA-EN 11.2.2 For FRIEDRICH sizes 2.1, 2.3, 3.1, 3.4, 4.0, 4.1, 0.4, 4.7, 7.0, 7.1, 7.8, 8.0, 8.9, 9.0, 10.0 and VIMARC sizes AX - KX i 1. Heat the inner race of the new cylindrical roller bearing (5) and spacer (8) to approx. 80°C to 100°C (oil bath or hotplate) and push them onto the shaft up to the stop. 2. Allow the inner race and spacer to cool down so that they sit firmly on the shaft. 3. Clean the bore of the bearing plate (6) and apply a thin layer of LOCTITE 270. Press the outer race of the cylindrical roller bearing (5) into the bore of the bearing plate (6). Make sure that the outer race does not wedge. 4. Fill the specified grease into the rollers of the cylindrical roller bearing. Use the specified grease and fill two thirds of the space in the bearing plate (6) and bearing cover (4). 5. Use the attachment bolts (11) to attach the bearing cover (4) to the bearing plate. 6. Pull out the shaft approx. 30 mm and then push the bearing plate (6), with the installed cylindrical roller bearing (5), onto the inner race of the bearing, so that it is centred. 7. Subsequently, push the bearing plate, together with the shaft, to the chamfer on the housing. 8. Install all of the attachment bolts (10) and uniformly tighten. 9. During installation, in order to prevent the rollers of the cylindrical roller bearing wedging on the inner race, continually rotate the stub shaft in both directions by hand. Otherwise, premature damage to the bearing can occur. 10. Uniformly tighten the bearing plate as far as it will go. 11. If possible, install a new V-ring (12). Apply grease also to the sealing lips of the V-ring. 12. Install the inner flyweights (3), the scale must be in the correct position. 13. Install the key (13). 14. Install the outer flyweights (2) in the correct position and tighten the attachment bolts (14). 15. Set the inner flyweights according to the position marked or recorded previously, install and fully tighten the bolts. 16. Use the torque wrench and torque tighten the attachment bolts, in accordance with Chapter 15, Table 15.2. The terminal slots of all 4 flyweights must show in the same direction: i 17. Place the toroidal rings (9) around the flange of the bearing plate (6) and, if necessary, glue it at some points. 18. Mount the protective hoods (1). If several motors are repaired simultaneously, make sure that the components of the individual motors are not exchanged. FRIEDRICH Schwingtechnik GmbH 24 TK Operation Manual, Vibration Motors Standard –R9-150810DA-EN 11.2.3 For sizes with ball bearing 1. Use the specified grease and fill the spaces between the ball bearings (5). Clean the bore of the bearing plate (6) and press the ball bearing (5) into the bore in the bearing plate. Make sure that the ball bearing does not wedge. 2. Use the specified grease and fill two thirds of the spaces in the bearing plate (6) and the bearing cover (4). 3. Use the attachment bolts (11) to attach the bearing cover (4) to the bearing plate. 4. As necessary, push the spacer (8) a part way onto the shaft. At the location at which the spacer is positioned on the shaft, apply a thin layer of LOCTITE 270 and push the spacer to the final position. When the spacer is fixed, pull out the shaft approx. 30 mm and then push on the bearing plate (6), with the installed cylindrical roller bearing (5), onto the inner race of the bearing, so that it is centred. 5. Subsequently, push the bearing plate, together with the shaft, to the chamfer on the housing. 6. Install all of the attachment bolts (10) and uniformly tighten. 7. Uniformly tighten the bearing plate as far as it will go. 8. Install a new V-ring (12). Apply grease also to the sealing lip of the V-ring. 9. Install the inner flyweights (3), the scale must be in the correct position. 10. Install the key (13). 11. Install the outer flyweights (2) in the correct position and tighten the attachment bolts (14). 12. Set the inner flyweights according to the position marked or recorded previously, install and fully tighten the bolts. 13. Use the torque wrench and torque tighten the attachment bolts, in accordance with Chapter 15, Table 15.2. The terminal slots of all 4 flyweights must show in the same direction: FRIEDRICH Schwingtechnik GmbH 25 TK Operation Manual, Vibration Motors Standard –R9-150810DA-EN i 14. Place the toroidal rings (9) around the flange of the bearing plate (6) and, if necessary, glue it at some points. 15. Mount the protective hoods (1). If several motors are repaired simultaneously, make sure that the components of the individual motors are not exchanged. 11.3 Grease i It is preferred to use the following greases: A) FAG Arcanol VIB3 for ambient temperatures from -30°C to +40°C B) Special cold grease is used where special vibration motors are in continuous operation in refrigeration plants at ambient temperatures of down to –50°C. 11.4 Lubrication i The 2-pole motors AX(Z) up to the FX(Z), as well as all motors from size GX(Z) are supplied with lubrication as standard. Upon request, other types can also be equipped with lubrication. These motors must only be lubricated using the grease that is indicated on the rating plate, in accordance with Chapter 15, Table 15.3: 12. Spare Parts and Repairs 12.1 Spare Parts Only use original spare parts or spare parts that conform to the appropriate standards. Spare parts ordering In order to make sure that the correct spare part is delivered, before ordering, this must be correctly identified using the Operation Manual. Thus, unnecessary delays, incorrect deliveries and enquiries from FRIEDRICH can be prevented. FRIEDRICH Schwingtechnik GmbH 26 TK Operation Manual, Vibration Motors Standard –R9-150810DA-EN Contact: Telephone: +49 (0)2129 3790-0 Fax: +49 (0)2129 3790-37 E-Mail: [email protected] When ordering, include the following: The type and serial number of the vibration motor. For this information, refer to the nameplate. The name of the part in the spare parts list Important! Please do not forget to indicate the number or quantity of spare parts required. 12.2 Repairs i Have your motor repaired by the manufacturer, FRIEDRICH-Schwingtechnik. Make sure that original spare parts are used if a third party carries out repairs. In this case, no warranty or liability of the motor function for the intended use will be accepted by FRIEDRICH-Schwingtechnik 13. Warranty From the date of delivery of all new vibration motors, FRIEDRICH provides a warranty period of 1 year. The warranty becomes invalid if: The motor is used for purposes other than the intended use. The motor is operated on a defective machine. The motor is incorrectly connected, or connected to the incorrect voltage. Damage to the motor occurs because of incorrect, or missing, electrical protection. The motor was operated on the frequency converter and protection was not observed in accordance with Section 9.1. Modifications have been made to the motor that could influence the efficiency of the motor. The motor was operated without flyweights. Damage occurred during transportation. The motor has not been installed in accordance with the instructions in Section 7. The motor is operated with the terminal box cover open, unsealed protective covers, an incorrect cable or the cable connection is not sealed. Therefore, if in doubt, have your motor repaired by the manufacturer, FRIEDRICHSchwingtechnik. FRIEDRICH Schwingtechnik GmbH 27 TK Operation Manual, Vibration Motors Standard –R9-150810DA-EN 14. Circuit Diagrams FRIEDRICH Schwingtechnik GmbH 28 TK Operation Manual, Vibration Motors Standard –R9-150810DA-EN FRIEDRICH Schwingtechnik GmbH 29 TK Operation Manual, Vibration Motors Standard –R9-150810DA-EN Appendix, Cable Connection 1 You can choose a correct cable gland according to the cable diameter in the column 3. The mentioned sealing range corresponds to clamping range ensured by the cable gland for cables with diameters from .... mm to .... mm. FRIEDRICH Schwingtechnik GmbH 30 TK Operation Manual, Vibration Motors Standard –R9-150810DA-EN Assembly: Prior to assembly check the product for possible damages. Appropriate tools should be used for the assembly. You can find them in our Industrial catalogue or on the website www.wiska.de. Mount the cable gland. Tighten the socket properly. Remove the outer insulation of the cable. Put the cover nut and the clamping adapter on the cable. Lead the cable with the mounted parts through the prepared cable gland. Tighten the cover nut with a torque corresponding to the size of the cover nut. The cable gland does not require any maintenance. FRIEDRICH Schwingtechnik GmbH 31 TK Operation Manual, Vibration Motors Standard –R9-150810DA-EN Appendix, Cable Connection 2 Operation Manual for the Lapp Cable Connection To connect the cable, carry out the procedure as follows: 1) Attach the pipe nozzle adapter (7) to the terminal box. Make sure that the rubber Oring (6) seals correctly. 2) Guide the cable through the removed cable gland (1), together with the anti-kink grommet (4) and thrust pad (5). 3) Firmly connect the cable gland (1) with the adapter (7). Hereby, the anti-kink grommet is compressed and, thus, the cable gland is sealed. 4) To release the tension, use the slotted screws (3) to fully tighten the clamp (2). This cable connection can be used for cable diameters 12.5 – 15 mm FRIEDRICH Schwingtechnik GmbH 32 TK Operation Manual, Vibration Motors Standard –R9-150810DA-EN 15. Technical Data 1. Torques for bolts, grade 8.8 (base of motor) (Bolts must be grease and oil-free !!) M12 [Nm] M16 [ft-lb] 80 64 Table 15.1 M20 M24 M30 M36 [Nm] [ft-lb] [Nm] [ft-lb] [Nm] [ft-lb] [Nm] [ft-lb] [Nm] [ft-lb] 210 168 410 328 710 568 1350 1080 2530 2024 2. Torques for bolts, grade 8.8 (flyweights, bearing plates, bearing cover) (Bolts must be grease and oil-free !!) Bolt Grade 8.8 Grade 8.8 M 8 20 Nm 15 ft-lb M 10 40 Nm 30 ft-lb M 12 50 Nm 37 ft-lb M 16 140 Nm 103 ft-lb M 20 280 Nm 206 ft-lb M 24 Table 15.2 560 Nm 412 ft-lb 3. Lubrication. First lubrication due after 500 operating hours, subsequently, every 1000 operating hours. 50/60 Hz 50 Hz Vimarc Motor FRIEDRICH Installation size 50/60Hz 50/60 Hz Exe Exd Grease per bearing (for new bearing) Grease per bearing (lubrication) AX(Z) - - ADP(V) 5 gr 2 gr BX(Z) - - BDP(V) 5 gr 2 gr CX(Z) - - CDP(V) 8 gr 3 gr DX(Z) - - DDP(V) 15 gr 5 gr EX(Z) - - EDP(V) 29 gr 9 gr FX(Z) 7.0 - FDP(V) 29 gr 9 gr GX(Z) 7.1 - GDP(V) 37 gr 12 gr 7.8 - - 57 gr 19 gr 8.9 - - 67 gr 20 gr KX(Z) - KXE(Z) - 67 gr 20 gr HX(Z) - HXE(Z) - 96 gr 30 gr 73 gr 25 gr 9.0 Table 15.3 FRIEDRICH Schwingtechnik GmbH 33 TK Operation Manual, Vibration Motors Standard –R9-150810DA-EN Special features of size 10.0: Relubrication every 40 hours during the first 500 hours 50/60 Hz 50 Hz Vimarc Motor FRIEDRICH Installation size 10.0 Grease per bearing (for new bearing) 167 gr Grease per bearing (lubrication) 167 gr 30 gr 12 gr Every 500 hours after the first 500 hours 10.0 Table 15.3 * Lubrication upon request FRIEDRICH Schwingtechnik GmbH 34 TK Operation Manual, Vibration Motors Standard –R9-150810DA-EN 16. Declaration of incorporation FRIEDRICH Schwingtechnik GmbH 35 TK Operation Manual, Vibration Motors Standard –R9-150810DA-EN FRIEDRICH Schwingtechnik GmbH 36 TK Operation Manual, Vibration Motors Standard –R9-150810DA-EN FRIEDRICH Schwingtechnik GmbH 37 TK Operation Manual, Vibration Motors Standard –R9-150810DA-EN