1
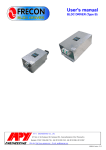
Original installation, operation and
maintenance manual
for electrode humidifiers, series :
Star line
D& T
INDUSTRIES LIMITED
D&T industries ltd., Ringstrasse 9, CH-4123 Allschwil, Switzerland
www.dt-industries.de
[email protected]
No. 1399 03 60 / 09.03.2011
Important notices :
This product must be installed by qualified HVAC and electrical contractors and in compliance with local and state codes and standards.
Improper installation may cause property damage, severe personal injury, or death as a result of electric shock, burns, and/or fire.
Read carefully this manual before you proceed to installation, operation and maintenance.
Do not change anything in the unit. Failure to comply with this instructions can damage component and void the D&T warranty.
Content :
Page
0. Introduction
0.1
0.2
0.3
0.4
Principle of operation
Notices for use
Notices for maintenance
Description of the components
2
2
2
2
1. Installation
1.0
1.1
1.2
1.3
1.4
1.5
1.6
1.7
1.8
1.9
Dimensions of the units
Recommendation for installation
Choosing a location
Connections to water supply
Quality of the supply water
Drain piping
Steam pipes
Steam distributors
Condensate pipes
Electrical connections
3
3
3
4
4
4
4
5
5
6
2. Start-up and operation
2.0 External operating elements and display
2.01 Manually energize the drain valve
2.1 Internal operating elements
2.2 Program overview
2.3 Preparation for start up
2.4 Conditions to enable the steam generation
2.5 First check after start
2.6 System messages
7
7
8
9
12
12
13
13
3.0
3.1
3.2
3.3
3.4
3.5
13
13
13
14
14
14
3. Maintenance
4. Doc´s help
5. Accessories
Regular inspection
Steam cylinder service life
Clean the steam cylinder
Clean the drain valve
Replace the steam cylinder
Starting the humidifier after a long time
4.0 Steam production
14
14
1
0. Introduction:
0.1. Principle of operation
Electrode humidifiers are units producing water steam. The heating system ( steam cylinder) uses the water as electric conductor. Electrode
humidifiers can be supplied with tap water. The water fills the steam cylinder through an inlet valve and a special filling system. As soon as water
rises to touch the electrodes, electric current flows through the conductive water from one electrode to another. The conductive water provides
resistance to current flow, producing heat and causing water in the steam cylinder to boil and produce steam. As the amount of water covering the
electrodes increases or as water conductivity increases, current flow increases. The fill valve remains open until the current increase to the
amperage corresponding to the demand steam capacity. When this capacity is met, the fill valve closes and water continues to boil off into steam. As
the water level decreases, current flow decreases. When current flow becomes less than a defined level, the fill valve opens and fill the steam
cylinder again. Steam created in the steam cylinder flows through the steam outlet via steam hose or piping to the steam distributor, where it is
discharged into the airstream to humidify.
To stabilize the water conductivity in the steam cylinder, drain operations are automatically made. The drain quantity is automatically adapted to the
hardness of the supply water.
Fill system
current
Electrode humidifiers generate steam at very low
pressure. In consequence, the resistance of the steam
pipes connected to the steam cylinder must also be very
low. The max. pressure at the outlet of the steam
cylinder should not exceed 100 mm water column.
Electrodes
Steam cylinder
Fill
valve
Drain valve
Drain system
Electrode humidifiers generate steam at very low pressure. In consequence, the resistance of the steam pipes connected to the steam cylinder must
be very low. The max. pressure at the outlet of the steam cylinder should not exceed 100 mm water column.
0.2. Notices for use
Star Line humidifiers are units for a fixed installation. Star Line humidifiers are used to humidify the air. Do not use a Star Line humidifier for another
use. Do not change anything inside the humidifier. Do not change the original wiring. Do not built parts inside. Use the humidifier only when correctly
installed and with closed door.
0.3. Notices for maintenance
A regular maintenance and cleaning of the humidifier is necessary. Check regularly all parts, valves, contactor and particularly inspect the steam
cylinder. A check of unit and components should be made every 500 hours of operation. Verify proper operation of the control system, humidistat,
humidity probe, high limit humidistat and air flow proving switch. Also check the complete installation, steam pipes, distributors, condensate pipes.
Check that there is no water leakage.
0.4. Description of the components
18
1
17
16
2
15
14
3
13
4
18
1
17
12
11
6
10
7
5
8
9
16
2
15
3
14
13
4
12
5
11
6
10
7
9
8
8A
Note : The general feature can be subject to changes without prior information.
1
2
3
4
5
6
7
8
8A
9
10
11
12
13
14
15
16
17
18
Casing
Steam cylinder plug
Max Level sensor plug
steam cylinder
Fill valve with filter
Drain valve
Drain cup
Door of the water section
Door of the electric box
knock outs for cable glands
Electric terminals
fuse
Contactor
Terminals for control
Main switch
MODE button
SELECT and SET buttons
Current transformer
Fill system
Fig. 0
2
1. Installation
1.0 Dimensions of the units
D
F
H
E
D7
G
B
D45
3/4"
C
A
B
3/4"
Figure 3
D
E
F
3/4"
A
H
C
Figure 5
G
B
442
D7
3/4"
A
C
Figure 4
Figure
Size
kg/h
A
B
C
D
weight
mm
Steam outlet
mm
E
F
G
H
empty
in operation
4, 5, 8
3
310
531
195
22/29
129
117
452
83
9
14
14, 16, 25
4
415
605
282
32/45
50
180
415
133
11
35
32, 35, 50
4
464
663
332
32/45
70, 100
5
922
663
332
2 32/45
1.1 Recommendations for installation
Max. ambient temperature :
40 degree C ( 104 F)
Min. ambient temperature :
5 Degree C ( 41 F )
Max. ambient relative humidity : 80% rh not condensing.
Supply voltage :
-8 + 10 % of the nominal voltage
Maximal pressure at the outlet of the steam cylinder :
100 mm water column
Conductivity of the supply water : 125 to 1250 MicroSiemens/cm
The humidifier should be use for air humidification only.
The Star line humidifiers cannot be installed outdoor. The humidifier must be fixed on the wall by screws. Do not install other components inside of
the humidifier. The humidifier is for use in industrial installations only. Do not use the humidifier in an explosion-proof environment or if ignitable air
mixtures can flow back into the steam cylinder.
min. 500
min. 1000
1.2 Choosing a location for the Star line humidifiers
min. 2500
Install the Star line humidifiers near the air duct system where the
steam distribution pipe will be located. Install the humidifier
horizontally on a wall. The wall must have a structurally stable
surface. Avoid any deformation of the casing. The temperature of
the wall where the humidifier is fixed should not produce
condensation inside of the humidifier. The humidifier should be
installed in a technical room only. Do not install the humidifier
outdoor. Take care for enough space for maintenance.
min.
150
min. 500
Note : The installation must be done by competent staff only.
Use only the original accessories of D&T Industries Ltd. Refer to
the spare parts lists.
The units are connected to the water supply system. At any time
water may flow outside the humidifier. If sensitive parts are
place under or close to the humidifier an efficient and safe
protection against water must be provided.
3
1.3
Connections to water supply
Important recommendations :
Water supply piping connection is made at the bottom of the unit.
Water connections must be installed by qualified personal according to EN
1717 ( National and local regulations must be observed ).
Star line humidifiers are fitted with a male water connection thread ¾“. Use a
flexible pipe to connect the fill valve to the supply piping. Install a water shut-off
valve. Refer to fig. 6.
A water particle filter is recommended.
1"
3/4"
Use only copper or iron for supply water piping. Do not use rubber or plastic
pipes. These materials may produce foam in the steam cylinder and affect the
proper function of the unit.
min. 5%
The water pressure of the supply should not exceed 10 bar. A minimum
pressure of 1 bar is required. If the pressure is lower than 1 bar, the fill valve
will not open.
If the water pressure of the supply system is higher than 10 bar, reduce the
pressure to a level between 4 and 6 bar.
Before starting the humidifier thoroughly flush the supply water piping to
remove residue and stagnant water. Check the filter of the fill valve. Clean it if
necessary. Check that there is no water leakage.
Figure 6
1.4 Quality of the supply water
Water quality – The Star line steam humidifiers can be supplied with tap water in a wide range of hardness without any treatment. The electronic
controller adapts automatically to the supply water quality. Demineralised water cannot be used because electrically not conductive.
Conductivity:
Must be in the range between 125 - 1250 microsiemens/cm.
Hardness: Is measured by international unit millimol calcium- and magnesium ions per liter (former degree of German hardness):
Soft water:
Medium hard water:
Hard water:
Very hard water:
< 1,3 mmol/l
1,3 – 2,5 mmol/l
2,5 – 3,8 mmol/l
> 3,8 mmol/l
-
<
7° 14° >
1° DH equalizes:
1,05° American hardness
1,25° English hardness
1,79° French hardness
10,0 mg/l CaO
17,9 mg/l CaCO3 (ppm)
7° DH
14° DH
21° DH
21° DH
1.5 Drain piping
The drain cup must be connected to a piece of rubber hose DN20 by a D29 hose clamp ( refer to figure 6 ). The drain pipe system must be installed
according to EN1717 ( EC regulation). The rubber hose is to connect to an open drain with a minimum air gap of 25 mm. Do not connect the drain
pipe without air gap. The pipes must have a pitch of 5% at least.
Note: for double-units it is essential to use a separate drainage siphon for each cylinder.
WARNING
Drain piping must be rated for 100 degrees C minimum ( 212 F). Electrically conductible drain piping must be properly
grounded to minimize personal injury if an electrical fault should occur.
1.6 Steam pipes
Note: The steam hose should be as short as possible. Always insure that the radius of rubber hose bents is min. 12D. The steam must pass the
hoses without any interferences: no blocking, no slack hose, dents, siphons, squeezing or other obstacles. The loss of pressure of the steam pipes
should not exceed 100mm water column. Higher counter-pressure can disturb the steam generation.
Steam pipes must be installed with an inclination so that the condensate water can flow in the same direction as the steam. The steam cylinder
outlet should be connected with a vertical piece of rubber hose of min. length 300 mm.
Always use the original steam hose of D&T according to the parts list. Do not use other hose quality (chemical residues are often the cause of foam
build-up in the water) and in case of any damage thereof responsibility cannot be considered. Always use the original D&T hose clamps to fix the
hoses. If longer steam lines are necessary, use copper-pipes with increased section. 20mm insulation is recommended. Use long bends, at least 5D.
Best installation is made if steam and condensate are flowing in the same direction.
IMPORTANT NOTICE : the pressure at the steam outlet of the steam cylinder should not exceed 100mm water column.
4
Correct installations
Incorrect installations
min 20
min 300
min 5
Be careful when laying steam lines in or near cable ducts, pipes, insulations etc.: surrounding materials must resist a temperature of minimum
100°C.
1.7
Steam distributors
D&T supply high quality steam distributors with condensate back flow pipe, in several dimensions. Back flow pipe is important to drain all the
condensate out of the steam distributor. In that way, the condensate doesn’t have to flow back in the steam pipe. A condensate flow against the
steam can disturb the well steam dispersion or produce noise. Please consult the list of accessories to choose the right distributor size.
-
An horizontal or vertical installation of steam distribution pipes is possible.
-
Steam outlets should always be directed vertical to the airflow!
-
If horizontally installed the steam outlets have to be directed upwards!
-
The steam pipe has a declination of 3% which allows the condensate water to
flow out through a special fitted pipe under the steam pipe.
-
Dimensions and proposals for various installations are in every product packages.
To avoid condensation water in the duct, a min. distance to filters, fans etc. must be maintained (check the humidification distance carefully) when
steam is generated.
D
2/3
1/3
Fig.11
1.8
Condensate pipes
siphon
To avoid a steam flow through the condensate pipe,
a siphon must be made. The size of the siphon must be
adapted to the pressure in the duct.
The condensate pipe should be end free in the air.
Check the correct flow of condensate during the first
operation hours. Condensate water should slowly but
regularly drop out.
Check regularly that there is no water leakage.
Figure 12
min. 5%
5
1.9 Electrical connections
WARNING
Only qualified electrical personnel should perform field wiring installation procedures. Improper wiring or contact with energized circuits may
cause property damage, severe personal injury or cause death as a result of electric shock and/ or fire.
Disconnect all electrical supply systems before making any electrical connections. External wirings must be in accordance with wiring the correct
wiring diagram, national and local electrical codes and by laws. Read carefully the following recommendations :
All phases, neutral point and ground must be connected to the electric power supply terminals through an interruption device with a contact air gap
of minimum 3 mm. External fuses must be installed to protect the supply lines.
The Star line humidifiers belong to the protection class 1 for electrical equipment and must be properly grounded. For correct connections consult the
wiring diagrams supplied with each unit.
Knock outs to insert cable glands are fitted at the bottom of the electric section. Break out the knock out corresponding to the size of the cable gland
you want to insert. Always use cable glands to insure a proper mechanical fixation of the electric wires.
All SL humidifiers ( with 1 steam cylinder ) have place for the following cable glands :
3 pieces M16 or M20 or M25 or PG 16
1 piece
M25 or M32 or PG16 or PG 21
An internal transformer provides the 24V ac supply control voltage for electronic and electrical components, valves and contactor. The 24 V ac circuit
is protected by a thermal fuse placed onto the transformer. The fuse is reset able. Check it if there is no 24V voltage.
1.9.2
Heating voltage
The wirings for the heating voltage must be properly connected according the wiring diagram which is supplied with each unit. Use copper wires
only. The section ( mm2) of the supply wires must be designed in accordance with the local valid electrical standards. A tree phases supply with
neutral point is required for 3 phases units. The electric wires must be tied a second time a few days after the first installation. Also check that all
wires are properly connected.
Notice : double unit are fitted with two terminal sections, one for the left side cylinder, the other for the right side cylinder. Connect electrically both
sides separately. Do not make bridges between the left and right terminals. Use separate field fuses for each side.
1.9.3 Recommended external fuses
Heatin
g-
Type
Type
Type
Type
Type
Type
Type
Type
Type
Type
Type
Type
Type
Type
Type
Type
Type
voltag
e
422
524
534
532
822
934
932
1462
1634
2564
2562
3564
3262
5064
6462
7064
10064
230V
20
16
35
25
35
20
35
63
70
2x100
2x50
2x70
400V
16
10
16
35
100
50
1.9.5 Connections for control signals
Star line humidifiers can be controlled in 3 ways :
- on-off
- continuously (modulating control) using an external humidity controller and an external humidity transmitter.
- continuously, using the internal PI humidity controller and an external humidity transmitter.
On off control is set as standard ex work. For modulating control the humidifiers must be programmed as indicated in chapter 2.2 of this manual.
Terminals marking
The twenty connection screw terminals of the pc-board are marked by a number placed onto the pc-board.
Terminal number one begins at the left side of the pc board.
Connections for on/off control
Connect the external humidistat to the terminals 14 and 15 of the electronic pcb. The contact of the external humidistat must be free of potential and
rated for minimum 24 V ac. In on-off mode, the internal humidity controller CtrL must be disabled (set to off ).
Connections for modulating control with an external humidity controller
The output signal of the used external humidity controller must be adjusted in the menu “ AdJ” ( adjustments).
The following control signals can be adjusted :
6
Voltages
0 - 20 V ;
Current
0 - 20 mA
0 - 16 V ; 0 - 10 V
;
4 - 20 mA
+ to terminal 11
ground to terminal 13 of the pcb
+ to terminal 12
ground to terminal 13 of the pcb
Important notice :
to enable the steam generation, terminals 14 and 15 must be connected together. ( connection terminals for high limit
humidistat.
Important notice :
Supply the external humidity controller or/ and the external humidity sensor by a separate voltage source.
Connections for modulating control using the internal PI humidity controller
Using the internal PI humidity controller, just an external humidity transmitter is required. The output signal ( volts or mA) of the external humidity
transmitter must be adjusted in the menu “ AdJ” (adjustments).
In addition, the integrated humidity controller must be activated ( setting “on “ ) in the menu “ CtrL “ ( controller ).
and the following control parameters must be adjusted in the menu “ CtrL“ (controller) :
- proportional range
- integral time
- humidity set point
Important notice : Good knowledge and experience is required to adjust the parameters of a PI controller. Improper setting
of the integral time can produce oscillations of the controlled humidity. Be carefull adjusting Int.
Important notice :
to enable the steam generation, terminals 14 and 15 must be connected together. ( terminals for high limit humidistat )
1.9.6 Connection of the high limit humidistat
A high limit humidistat is strongly recommended. This device prevent the humidifier from making steam when there is no air flow in the duct
or when the level of the relative humidity is too high. Failure to install this device can result in excessive moisture which can cause damage.
Refer to the wiring diagram to connect the high limit humidistat.
The contact of the humidistat must be free of potential and rated for at least 24 V ac.
1.9.7 Connection of the relay for system messages
The contact of the relay is connected to the terminals 9 and 10 of the electronic pcb. Refer to the wiring diagram supplied with each Star Line
humidifiers. The relay contact is free of potential and rated for max. 24 V, 1A ac1.
Important notice : Do not connect the terminals 9 and/or 10 to any external high voltage source. Use max. 24 V ac.
2. Start up and operation
mode button
display
2.0. External operating elements and display
MODE
On- off main switch :
ANZ1
The Star line humidifiers are fitted with an on-off main switch (See figure 0,
position 14). The main switch switches on or off the internal control voltage
24 V ac.
ANZ2
0
ANZ3
ANZ4
I
MODE button :
The MODE button can be used to activate two functions :
main switch
1) to manually open and close the drain valve
2) to call the menus
2.0.1.
Figure 13
Manually energize the drain valve
To manually open the drain valve : press and hold down the MODE button until the drain valve opens. The display shows a moving pictogram like
flowing out drain water.
To close the drain valve :
shortly press the MODE button.
7
2.0.2. Call the menus
To call the menus, just press the MODE button. The name of the menus will be shown on the digital display. There are 8 different menus :
DISP
Ser
AdJ
CtrL
drA
Coun
rSt
Info
display
to select the display mode
service
as servicing help
adjustments to adjust parameters
controller
to enable the internal humidity controller and set their parameters
drain
to set special drain functions
count
to read the operation time
reset
to reset reset able functions
to be informed about the built in software
Each menu contains several functions which can be selected by the SELECT button. The values of these functions can be programmed by the SET
button. SELECT and SET buttons are located onto the electronic pcb. ( see figure 14 ).
Note :
To reach the SELECT and SET buttons, the door of the electric box must be open. ( see : internal operating elements)
2.03 Display :
Basic function ex works is :
- If there is a steam demand, the digital display shows the steam capacity in kg/hr.
- If there is no steam demand, the display shows -- --
( 4 horizontal bars )
If another display mode is called by the MODE button, the display will automatically return to the basic function after one minute.
Note :
The display function can be programmed to remain switched off. Refer to the
menu “ dISP” ( display).
2.1 Internal operating elements
Two internal buttons are fitted to program the Star Line humidifier. To reach the buttons : open the door of the electric box.
SET
button
SELECT
button
SELECT
DIP switches
SET
ANZ1
ANZ2
ANZ3
on
on
1 2 3 4
1 2 3 4 5 6
Pressing the MODE button, several menus can be
called. Inside of each menu, several functions can be
selected by the SELECT button.
ANZ4
MODE
0
SELECT button
SET button
The SET button is used to change the parameters
Of the functions.
I
DIP switches
1
2
3
4
5
6
7
8
9
10 11 12 13 14 15 16 17 18 19 20
The DIP switches are set ex work. Never change
their positions.
pcb terminals
Figure 14
8
2.1.1
DIP switches
CAUTION
The coding switches onto the pcb are set ex work to define the steam capacity, the heating voltage and the number of
phases of the electric supply system. Do not change the position of these coding switches.
Failure to follow these instructions can result in property damage and severe personal injury
2.2 Program overview
Menu “ Display “
Ex works, the digital display constantly shows the steam capacity in kg/h.
If there is no steam demand, the digital display shows :
( dISP function is “ on “ )
----
This display function can be switched off.
If there is no steam demand, the display will show : .. .. ( four dots ).
The steam capacity can be shown at any time pressing shortly the MODE button. After a minute, the display will automatically return to the .. ..
Programming of the display function
Press the MODE button to call
The display shows :
or
means : The display shows the steam capacity in kg/h
If there is no steam demand, the display will show :
means :
The display is switched off.
If there is no steam demand, the display will show :
Set the required display function
with the button " SET "
Menu “ Service “
The service menu can be used to display :
- the max. water level
- the humidity demand ( hu )
- the actual heating current in amps.
( on or off )
and to manually check ( energize) the humidifiers components :
- drain valve, fill valve, contactor, message relay.
9
The display shows :
Press the MODE button to call :
Press " SELECT " to read the information
If he maximum water level is reached :
If the maximum water level is not reached :
Press " SELECT " to read the information
If there is a demand for steam :
If there is no demand for steam :
Press " SELECT" to read the heating current.
Do you want to
Press " SELECT" :
the components ?
yes
no
Press "SELECT"
the humidifier switches of
the display shows :
Press " SET "
( power )
Press "SET" to switch on or off the humidifier.
Press " SELECT " to check the inlet valve
Press "SET" to manually energize the inlet valve.
Press " SELECT " to check the drain valve
Press "SET" to manually energize the drain valve.
Press " SELECT" to check the contactor
Press "SET" to manually energize the contactor.
Press " SELECT" to check the
message relay
Press " SET " to manually energize the message relay.
Press "SELECT" to start again the service menu.
Press "MODE" to leave the service menu.
Menu “ adjustments “
The menu " adjustments" is used to set :
- the limitation of the steam capacity
- the control signal
Press the button "MODE" to call :
Press " SELECT " to show the capacity limitation :
( output limitation)
Press "SET" if you want to program the capacity limitation.
the steam capacity can be limited from 100 to 20 % of the nominal capacity
setting ex work : 100
( no limitation)
Press "SET" to program the control signal :
on - off
0 to 20 V
0 to 16 V
0 to 10 V
0 to 20 mA
4 to 20 mA
setting ex work :
on - off
Press " SELECT " to start the again the " Adj" menu.
Press " MODE " to leave the menu.
10
Menu “ controller”
The controller menu is used to :
- enable the internal humidity controller
- set the parametersof the controller
- to set the humidity set point
The display shows :
Press the button "MODE" to call :
Press " SET " to enable or disable the humidity controller.
If the humidity controller is enabled :
If the humidity controller is disabled :
Press " SELECT " to show the humidity set point
Press " SET " if you want to program the humidity set point
programmable set point :
setting ex work :
Press " SELECT " to show the proportional range
10 to 99 % rh
10
Press " SET " if you want to program the proportional range
programmable range :
setting ex work : 10
Press " SELECT " to show the integral time
alternates with the
programmed value
Press " SET " if you want to program the integration time
programmable range :
10 to 1000
setting ex work :
( no function of the integral
transfer )
0
alternates with the
programmed value
5 to 15
alternates with the
programmed value
Press " SELECT " to start again the menu.
Press " MODE " to leave the menu.
Menu “ Drain”
The menu " drain " is used to set special drain functions like :
- drain plus
- drain with energized contactor
- additional drain
The display shows :
Press the button "MODE" to call :
( settings ex work )
Press " SELECT " to call the function "drain plus"
Press " SET " to program an additional drain time
programmable drain time : 0 to 99 sec.
Setting ex work : 0
Press " SELECT " to call the function
Press " SET " to enable drain operations
with energized contactor.
Press " SELECT " to show the function d.Add
Press " SET " to enable or disable the function
If the function dAdd is " on " , the steam cylinder will be completely drained
each hour.
Setting ex work : oF
Menu
" counter "
In the menu " counter " you can read the number of operation hours ( steam generation )
Menu
" reset "
The menu " reset" is used to reset reset able functions can
Menu " inFo
In the menu " info " you can read the actual software.
11
2.3
Preparation for start up
- The unit must be correctly installed as instructed in this manual.
- Check that electric wirings and adjustments/programming for the required operation mode are made correctly.
- Check that the capacity limitation is adjusted as required. ( menu “ adjustments” )
- Check that the parameter for the control system are adjusted as required. ( menu “ adjustments” )
- Check that the water supply system is open.
- Check that all components are right in place.
- Switch on the main switch in position I .
2.4 Conditions to enable or disable the steam production by the control system
On-off control
To start the steam production : close the contact of the humidistat ( terminal 14 and 15 are connected together)
To stop the steam production : open the humidistat contact.
Modulating control using an external humidity controller
To start the steam production, the following conditions must be fulfilled :
-
the terminals 14 and 15 must be connected together.
the electronic pcb must be correctly programmed for the used modulating input signal ( menu “adjustments” ).
the internal humidity controller must be deactivated ( ex work setting ).
the modulating input signal must be higher than 25 % of the full signal range.
To stop the steam production one of the following condition must be fulfilled :
- Remove the connection between terminals 14 and 15.
- Set the modulating input signal under 20% of the full signal range.
Modulating control using the internal PI humidity controller
To start the steam production, the following conditions must be fulfilled :
- the terminals 14 and 15 must be connected together.
- the electronic pcb must be correctly programmed for the used modulating input signal.
- the internal controller must be enabled ( also take care that the controller parameters are correctly adjusted )
- the required humidity set point must be adjusted.
- Steam will be generated when the humidity set point is higher than the actual humidity.
Actions after start
As soon as steam is requested by a control signal, the contactor switches on and energize the electrodes. If there is no water or not enough water in
the steam cylinder, the fill valve opens after a delay time and water flows into the cylinder. When the water reaches the electrodes an electric current
flows, heats up the water and steam will be produced. The nominal steam capacity will be obtained after a “starting time” dependent of the supply
water conductivity. During the starting time, the humidifier built up the service water conductivity in the steam cylinder. After the starting time, the
units works independently of the supply water conductivity.
Drain operations are made automatically to stabilise the water conductivity in the steam cylinder.
2.5 First check after start
Check humidifier and installation a short time after the first steam production. Check that the steam is properly dispersed by the steam distributor in
the duct and that the condensate water flows out regularly.
Check that the unit doesn' t switch on an off inside of a short time resp. that the control signal only slowly change. Short operation frequency can be
generated when the humidity sensor is to close to the steam output or if the humidifier is oversized. In that case, reduce the capacity. ( see menu
"adjustment" ).
For humidifiers with built in steam blower on the top :
check that the condensate water flows properly back to the fill cup of the humidifier.
12
2.6
System messages
The electronic control of the star Line humidifiers generates system messages in the following cases :
E1
E2
E3
E4
=
=
=
=
Check the proper function of the steam cylinder. Clean it if necessary
Over current
Water supply is interrupted
PCB is not coded
After the messages E2, E3, E4 the humidifier switched off automatically. To reset, switch off the main switch.
3.
Maintenance
WARNING
When performing maintenance of the Star line humidifiers, disconnect all electrical supply systems. Wait until the temperature of the steam
cylinder drops to the ambient temperature. Close the field installed supply shut-off valve.
Failure to follow these instructions can result in property damage, severe personal injury or death as a result of electric shock, burns and/or fire.
3.0
Regular inspection
Check at regular interval ( at least each 500 hours of operation) valves, water fill system, drain system. Clean it if necessary. Inspect steam cylinder,
steam cylinder plugs and steam piping. Also inspect the general condition of the humidifier and the installation.
3.1 Steam cylinder service life
Steam cylinder service life depends of operating hours, water hardness and water quality. Replace the steam cylinder when the amount of mineral
deposits becomes so high that output demand can no longer be achieved. Using soft supply water, the service life of the steam cylinder can be
limited by a premature corrosion of the electrodes. In that case the steam cylinder must be changed even the amount of mineral deposit is low.
3.2 Clean the steam cylinder
The steam cylinder service life can be extended if the steam cylinder is regularly inspected and cleaned.
To remove the steam cylinder :
1)
close the field installed supply water shut-off valve.
2)
Open manually the drain valve holding down the MODE button more than 2 seconds. Drain the steam cylinder completely.
When the steam cylinder is empty, close the drain valve pressing shortly the MODE button.
3)
Disconnect all electric supply systems. Refer to the warning above.
4)
Open the door of the water section.
CAUTION
The steam cylinder and any undrained water may be hot. Wait until the steam cylinder have cooled at ambient temperature.
5)
Disconnect the steam hose ( clamp).
Disconnect the electrode plugs and high water sensor connector.
Remove the steam cylinder from the drain valve body.
6)
Remove the steam cylinder strainer from the steam cylinder and clean it with a brush and clear water. Flush the steam cylinder with fresh water to
eliminate the mineral deposits inside. Do not use acid, soap, detergents or any other cleaning products because they can cause foaming and disturb
the steam operation. Do not try to clean the mineral deposit on the electrodes. These incrustations cannot be removed without damage of the
electrodes.
7)
Ensure strainer is in place.
Check that the O-ring of the drain valve body is well and correctly placed.
Dampen the O-ring seals with water before replacing the steam cylinder. Do not use lubricant or other substance.
13
8) Insert the steam cylinder in the drain valve body.
Connect the electrode plugs to the cylinder electrode pins at the right place. ( see figure 13 )
Connect the high water sensor wire.
Connect the steam hose with the clamp.
Start up the humidifier according to the instructions 2.4 in this manual.
After a short steam production time, check the sealing of the steam cylinder and the well function of the humidifier and installation.
types: 3264 ; 4564 ; 6464 ; 9064
types: 2564 ; 2562 ; 1562
black
red
white
red
white
level
black
white
black
level
red
white
black
red
types: 534, 934,
red
white
level
black
Figure 13
connexions of the electrode plugs
3.3 Clean the drain valve
Always check the drain valve for need to clean before installing a new steam cylinder.
3.4 Replace the steam cylinder
1)
Execute the operations 1 to 5 as instructed in chapter 3.2
2)
Remove the used steam cylinder from the humidifier. Check that the type of the new steam cylinder is correct for the type of humidifier.
Check that the O-ring of the drain valve body is correctly placed. Dampen the O-ring seals with water before placing the new steam cylinder. Do not
use lubricant or other substance.
3)
Follow the procedure according to the instructions 8 as instructed in chapter 3.2
3.5 Starting the humidifier after a long Period of time
When the humidifier is not used a long time, check all the installation before a new start.
Also check all parts of the humidifier and apply the procedure 2 : start up and operation ( page 7 of this manual).
4. DOC’S HELP
4.0 Steam production
Poor operation can have different causes. At first check the installation carefully. Good knowledge of electrode humidifiers, air-conditioning and
control technology is essential to establish a valid diagnostic.
We recommend the following procedure:
1. Observe
2. Think it over
3. Take action
5. Accessories
D&T supply high quality accessories for the humidifiers. Consult the list of spare parts and accessories. Specifically for the Star Line type
humidifiers, the following options are available :
- Steam distributors
- steam hoses condensate hoses, drain hoses.
- Humidity transmitter
14