1
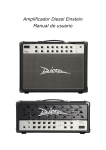
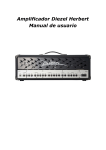
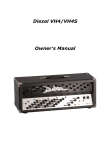
User Manual for the Einstein 100W
Guitar Amplifier
Diezel USA
Salwender International
1147 W. Collins Ave.
Orange, CA 92867
714-538-1285
http://www.salwender.com
Table of Contents
Chapter One: Safety and Warranty
1.1
1.2
Safety Warnings
Warranty information
Chapter Two: Using your Einstein
2.1
2.1.1
2.1.2
2.1.3
2.1.4
2.1.5
Mains Connections, power and Standby
Mains/connect to power outlet
Power up, Warm up, Standby off
Power tube caution
Operating Temperature
Power Tube Information
Chapter Three: Peripheral Connections
3.1
3.1.1
3.1.2
3.1.3
3.2
3.2.1
3.2.2
3.2.3
3.2.4
3.2.5
Front Panel Connections
Signal In
Connection Information
Cable Selection
Rear Panel Connections
Send/Return Loop
Parallel and Serial Return
Reasons for Dynamic Losses in the Effects Loop
Compensated Out
Speaker Connections
Chapter Four: The Two Pre-Amplifiers
4.1
4.1.1
4.1.2
4.2
4.2.1
Pre-Amplifier Duties
Channel One
Channel Two
Pre-Amplifier Tubes
Noise and Microphonics
Chapter Five: Power Amplifier
5.1
5.1.1
5.1.2
5.1.3
5.2
5.2.1
Tone and Volume of the Power Amplifier
Master Volume
Presence
Deep
Power Amplifier Tubes
Function
5.2.2
5.2.3
Selection
Life Span
Chapter Six: Functions and Switches
6.1
6.2
6.3
Channel Selection
Master 2 on/off
Channels
Chapter Seven:
7.1
7.2
7.3
Cleaning
Care
Tube Change
Maintenance and Cleaning
Chapter One: Safety and Warranty
1.1
Safety warnings
We would like to stress the importance of the following points, for reasons of
your personal safety, product longevity and product liability.
• Do not use the Amplifier in or near wet locations
• Do not store the Amplifier in damp or wet locations
• Do not operate the Amplifier on voltages other than those designated on
the rear panel of the amplifier.
• Do not open the panels of the amplifier. No user serviceable parts inside.
Your Einstein operates on very high internal voltages, which may still be
present after the Amplifier has been turned off and disconnected for a
while.
• Do not use the Amplifier for anything other than its designed purpose: To
Amplify Electric Guitar Signals
• Do not use fuses other than those intended and specified for the Amplifier
• Do not use 2-conductor extension cords or anything other than 3-pole
grounded outlets for this appliance. Your life may depend on it!
Please observe the following points when transporting your Einstein:
Einstein is a tube-powered amplifier; therefore it is sensitive to shock especially
after playing the amplifier for a while. Please store and transport your amplifier
gently and try to avoid extreme temperatures, which might produce condensation,
resulting in moisture on internal components. Usually a 60 Minute acclimatization
period is sufficient to ensure safe operation.
The amplifier should be stored in a controlled environment, and it should be
transported in a suitable flight case. Make sure the amplifier gets transported in its
normal operating position, not upside down or on its side.
The Einstein’s design incorporates a very potent power amplifier. It is configured
to deliver satisfying guitar tones at most volume levels. In its normal operational
volume level (75-80dB) it will provide beautiful tones with very little coloration.
For reasons of your own safety, please do not run the amplifier above these levels
for extended periods of time without wearing a hearing protection. Hearing Loss
is a long-term ailment, and is not normally curable.
1.2
Warranty
Diezel G.m.b.H. of Munich, Germany offers a 1-year transferable warranty on the
Einstein 100W Guitar Amplifier. The product must be registered and a dated sales
receipt must accompany the registration.
Excluded from this warranty are all vacuum tubes and any abuse done to the
amplifier. Also excluded from this warranty are damages resulting from failing to
follow the Safety Warnings mentioned in the section 1.1.
Diezel USA is the local executor of this warranty. Customer is responsible for
shipping charges to Diezel USA in Orange, California, unless other arrangements
were made in advance.
Chapter Two: Using Your Einstein
2.1
Mains Connections, Power and Standby
2.1.1
Mains/Connection to Power Outlet
Please make sure that both switches (Power and Standby) are in the off position
before connecting to the mains circuit. Verify line voltage before connecting the
power cord. Never start Einstein without connecting speakers to the proper
terminals. (See 3.2.5)
2.1.2
Power up, Warm up, Standby off
First, turn the Power switch to on (facing up). The indicator light will turn on.
This starts the tube heating process. After about 40 seconds, the tubes should be
sufficiently heated for normal operation. Your Einstein is then ready for operation
and the standby switch can be turned to “run” (also facing up). Premature
activation of the standby switch will lead to unnecessary tube stress and
subsequent reduction of the power tube’s life span.
2.1.3
Power Tube Caution
Tubes are electronic components that function only with vacuum intact and under
very high operating temperatures. Each tube has one or more heating filaments,
much like a light bulb. These filaments heat up the anode of the tube. If you
switch the standby switch to the “run” position before these anodes have reached
their operating temperature (when the anode surfaces are not heated evenly), this
causes undue stress to the tubes and their related components inside the amp.
Always give the amp its much needed warm-up time, even if musical inspiration
hits you with a full force.
2.1.4
Operating Temperature
It will take a little more time after warm-up until everything inside the amp is
working in sync and to its fullest potential. A trained ear will notice a slightly
warmer tone and better complexity in tone after playing the amp for a short while.
It’s like stretching before exercising.
2.1.5
Power Tube Life
The power tubes of your amplifier are subjected to a certain aging process. Once
signs of aging, such as unreliability or unusual noise, are detected, we suggest that
you replace all power tubes at once. Matched tube sets age relatively evenly, so
our experience suggests. This means that if one goes, the others are not far from
meeting the same fate.
The aging process manifests itself by a depletion of a thin layer of wolfram on the
anodes. This can take anywhere from 6 month to 3 years, depending on the
amount of use of the amplifier.
Chapter Three: Peripheral Connections
3.1
Front Panel Connections
3.1.1
The input jack (“IN”) receives your Electric Guitar signal by means of a shielded
guitar cord with 1/4” mono style plug.
Your guitar cord is an important part of your signal chain and its quality and
construction type clearly affect the overall tone of your rig. Try and buy the best
quality guitar cord that you can or want to afford. Call us if you have doubts and
need recommendations. This is where the smart “weak link” comment comes in.
3.1.2
Cable ABC
Some cords and cables sound very neutral; others color the sound spectrum and/or
attenuate high frequencies due to capacitance inside the wire and the shield. What
are we talking about? OK. A capacitor is used in electronic crossovers, amongst
other things, to divide low and high frequencies. Capacitance in a cable cuts your
guitar’s high end to a certain degree. Generally, the longer of a cord you use, the
more of the cord’s inherent characteristics will be audible.
3.1.3
Cable Selection
In certain circumstances, it is desirable to match a guitar cord to a specific
instrument. One may use the otherwise undesirable qualities of a cord to one’s
advantage, if one has the time and patience to experiment with different cords and
guitars. This should be done while playing with your band, or while recording.
Sometimes it is difficult to tell a component’s true advantages until it is used in
the right context.
A guitar that has very piercing highs could theoretically be tamed down somewhat
by using a long guitar cord that offers some high-end attenuation.
The loops of your Einstein send signals at higher levels and impedances, which
makes this section of wiring less sensitive. You should still use reliable and good
quality wiring for all loops.
3.2
Rear Panel Connections
3.2.1
Send/Return Loop
The system consists of 2 separate Loops. It allows creation of effects path in
either serial or parallel configurations. The individual channel volume controls
determine the signal strength at the send jacks. The range is ... to +10dB. The
output impedance is 4.7 kΩ. To use the Send/Return Loops, connect the “Send” to
the “return” or “input” or “in” of the effects unit. Be sure to adjust the input level
of the effects unit to the amplifiers level. Most effects units have led bar or other
level control devices. The Output of the effects unit must be connected to one of
the return jacks, parallel,, or serial. If you use the parallel return, then the signal
can be mixed to the original signal via the rear panel mounted “Volume” control.
3.2.2
Parallel or Serial
Which is better for you? Read on.
There are 2 ways to handle effects signals. The serial loop interrupts the signal
path of the Einstein and the signal is sent to the processor, becomes processed,
then sent back to the serial return into the power amp. Digital effects units often
digitize this signal once received, then process the signal, convert it back to
analog, then send it to the amp. This is called ADA (analog digital analog)
conversion. It is necessary for digital effects units digitize your guitar signal so
that the processor can read and understand signal. Your tubes, however, need an
analog signal to operate, so the processor converts the signal back to analog
before it goes back to the amp. Generally, even in highest quality effects
processors, this causes a change in the original signal, typically a loss of tonality
and warmth, also noticeable as a “harder” sound. When you use the serial loop for
an effects unit like this, then your signal will have been ADA converted at least
once. Tone junkies and vintage freaks alike will more than likely have hives
developing by now. But - as always, there is a better way. Use the Parallel loop
and the Volume control in the rear determines how much effect signal is being
added to the original signal, which now still flows through the amplifier. There is
always an analog connection between the send and return jacks; a parallel loop!
Important: You must set the mix control on the effects unit to 100% wet when
using the parallel loop. Otherwise there will be nasty phasing problems resulting
in unsatisfactory tone. The signal portion that is unaffected by the mix control in
the effects unit would reach the amplifier at a different time due to the cabling,
and cause phasing cancellations.
3.2.3
Top 5 Reasons for dynamic losses in the effects loop
Many different factors can be responsible for loss of dynamics, aside from those
mentioned in 3.2.2 (ADA conversion). A vital point that often leads to frustration
is a maladjusted output level of an effects unit. If the output level is too high, then
it will cause unwanted distortion in the power amp. If it is too low, then the rig
will not sound punchy and might get lost in the band sound. When used in the
serial loop, the output of the effects unit determines the ultimate drive signal
strength of the power amp. The output level should be matched to give the best
possible sound with all channels without over driving the power amp section.
(Unless this is desired for power amp distortion)
Headroom adjustments of 10% are usually sufficient.
3.2.4
Compensated Out
A frequency corrected signal will leave this jack if you connect it to a mixer or
recording device. Use it to quietly compose or send an auxiliary signal to a
console etc. For quiet sessions, just turn the master volumes to “0”.
Recording a loudspeaker through a microphone is the preferred choice of
recording engineers. The compensated out was designed as an alternative for
those that don’t have a studio at your fingertips.
3.2.5
Speaker Connections
Einstein has 5 speaker jacks. 1 for a 16Ohm load, 2 for 2 16Ohm loads or 1 8
Ohm load, and 2 for 2 8 Ohm loads or 1 4 Ohm load. Confusing? Oh yes!
Just do what it says on the jacks, and you’ll be fine
Chapter Four: Two Pre-Amplifiers
4.1
Pre-Amplifiers and their Jobs
The Diezel Einstein comes equipped with 2 different and totally independent
preamps. This allows the artist to play through nearly all musical-styles without
having to make major changes to his/her amplifier. The preamps are voiced to
deliver the most wanted guitar tone flavors: Clean, Crunch, Heavy, Lead. This
design concept delivers stellar guitar sounds with excellent playability, warm
dynamics and razor sharp equalization possibilities. The tone controls work in an
unusually wide range, so a little adjustment does quite a lot. As with so many
things, less is often more.
We suggest you start exploring the channels with all controls set to 12:00 o’clock,
and the master volume just slightly cracked open. (To avoid hearing damage)
4.1.1
Channel One (low to medium gain)
Clean Tone is a very sensitive subject, because there are so many different ideas
on how a clean amp should sound like. Clean tonal textures require much higher
dynamic range than distorted sounds. From hard and percussive sounds to soft,
warm, and blossoming tone. Einstein was designed to offer as many of the clean
varieties as possible. Your choice of guitars and pickups will have a large part in
this equation.
Channel one has three modes, selectable by a toggle switch near the channel one
gain knob. The modes pre-select different gain stages in the pre-amp, allowing
this channel to span the range from extreme clean to a heavy crunch. A player that
does not require a clean channel can use these modes for alternate distortion
sounds.
4.1.2
Channel Two (high gain)
This channel is voiced for single notes, or for very heavy and massive rhythm
guitar. Due to its slight midrange accent and very high gain, it possesses a good
punch, will play with ease, and gain authority to rule any stage, or studio. The
“less is often more” rule applies here also.
4.2
Pre-amplifier Tubes
The pre-amps are equipped with 12AX7 tubes in all positions. The pre-amp tubes
are not designed to produce high power output. Therefore, their life expectancy is
much higher than that of the power amplifier tubes.
This is not to undermine their utter importance in overall sound and response of
the amplifier. Also, annoying defects like crackling noises and low dynamics are
directly related to defective pre-amp tubes. Like all other tubes, 12AX7 tubes
come in many different gain stages, and offer a wide variety of tonal behavior.
Our choice for production was made to ensure a wide variety of tones, with low
noise and good reliability.
4.2.1
Microphonics and Bad Noises
The overall performance of pre-amp tubes is easily influenced by external
mechanical factors. Malfunction in these external components will manifest
themselves by a sudden, high-pitched feedback sound. The input stage is
especially suspect to these phenomena. If one encounters microphonic tube
behavior, then the first tube should be checked as a rule. Pre-Amplifier tubes can
also cause a hum or other bad noises, like crackling or ticking.
Chapter Five: Power Amplifier
5.1
Tone and Volume of the Power Amplifier
5.1.1
Master Volume
As the name suggests, this controls the overall, volume of the amplifier.
There is also a second, selectable master volume control, which allows volume
adjustments via remote control device while playing.
5.1.2
Presence
The presence knob controls frequencies over 3kHz. Treble is produced and
dispersed in a very small beam from the speaker, so be sure to position yourself in
the projection area of the speaker when making adjustments.
5.1.3
Deep
The Deep Control is an active bass control contrary to conventional bass controls.
It controls the frequencies around 120Hz without influencing the overall dynamic
range of the power amplifier. Diezel Co. is not responsible for disintegrating
speaker cabinets.
5.2
Power Amplifier Tubes
5.2.1
Function
As the name suggests, the power amp section is the part of the amplifier that
produces output power, measured in watts. Preamp signals are sent to the power
amp(s), which amplifies this signal to a level that is acceptable for loudspeakers.
Guitar amplifiers utilize several different types of power amps, which differ in
output power and tone. We chose the tube type power amplifier for its tried and
true performance and familiar tonal behavior.
5.2.2
Selection
Diezel Co. installs the most reliable and best sounding tubes that are currently
available in sufficient quantities. So it is possible that tube brand and tube type
will change during production. You can fine-tune your Einstein by having
different type and brands of tubes installed, however, it is imperative that the amp
is biased properly. Einstein utilizes 4 power tubes, organized in 2 pairs with dual
bias possibility. This allows use of 2 different pairs of power tubes, either the
same or the different types. Yes, this means that in a 4- tube Einstein, you can mix
6550’s with EL34’s, or 6L6’s with KT88’s etc. Cool!
A quick and a general overview of the most common tube types for the Einstein:
EL34/6CA7:
5881/6L6:
6550:
KT88/KT100:
aggressive, slender low end, higher total harmonic
distortion
Recommended bias: 30-35mA
great tube for clean sounds, good blues tone, also strong
bass and excellent clarity. Recommended bias: 25-35mA
very loud, very good dynamics, strong low end, amazingly
percussive. Recommended bias: 40-60mA
similar to 6550, but very punchy with great clarity and
warmth. Expensive. Recommended bias: 35-50m
5.2.3
Life Span
Power tubes last 1 to 3 years, depending on care, volume and frequency of use of
the amplifier. If you use your amp only once a month, then the tubes will last
much longer. Really. We have heard tubes that are over 10 years old, but it was
not a good thing. Tubes age very slowly; slow enough for the artist to get used to
the changing tone. To keep things fresh, and to keep your tube dealer in business,
we recommend re-tubing, cleaning and biasing once a year if the amp is used
frequently.
Chapter Six: Layout of Controls
6.1
Manual Channel Selection
The 2 channels of the Einstein can be selected manually by activating the select
switch for either channel. Alternatively, a foot switch can be connected to
remotely control the channel selection.
6.2
Master 2 On/Off
Master 2 can be used for all channels, and can also be remotely controlled via the
included foot switch. This allows instant volume boost, or cut, without fiddling
with the amp. Once adjusted to suit your needs for the gig, it’s a thing of pure
beauty. You can select the Master 2 function via the Diezel 2-button foot switch.
Actually, you can also use a readily available single button foot switch with a 1/4”
connector.
6.3
Channels
•
Channel One
Control perimeters include Gain, Volume, Treble, Mid, and Bass. A 3-position
toggle switch selects preset gain modes.
•
Channel Two
Control perimeters include Gain, Volume, Treble, Mid, and Bass. This channel
can be selected via the toggle switch, or via the Diezel 2-button foot switch.
6.4
Effects Mix control Rear panel
This control determines the amount of effect signal in the parallel loop
Chapter Seven: Maintenance and Cleaning
7.1
Cleaning
Never use anything wet to clean the amplifier, any amplifier. Usually, it is
sufficient to wipe down the outside of the amp with a slightly moist cleaning rag.
Do not use abrasive cleaning chemicals. Sometimes a vacuum cleaner can be used
to remove dust and dirt from nooks and crevices. Do not remove the chassis from
the housing to clean the amp; the inside of your amp carries dangerous Voltages.
7.2
Care
Be gentle with this Amplifier. Any mechanical shocks, extreme temperature
changes, damp environments, and other extreme conditions (dust, wind) can
substantially shorten tube life. In some cases, even the amplifier life.
Do not block the air circulation grilles in the front and in the back of the amp. Do
not push the amp right up against objects that would interfere with its normal
airflow. The top of the amplifier might get warm after a prolonged use; this is
normal, but will melt your ice cream and definitely ruin your beer. Never put
beverages on top of the amp where they could spill and flow inside the amplifier.
Will you rue the loss of your beverage first or the loss of your amplifier?
7.3
Tube Change
Tube changes are only to be performed by authorized service personnel. If power
tubes with different values than the stock tubes are to be installed, then the
amplifier must be re-biased before operation can be resumed. The amplifier uses a
two circuit bias system. It is quick and easy to accomplish biasing but we
recommend that you refer to trained professionals to attempt this procedure.
Salwender International and the Diezel Company wish to express their gratitude
and congratulate you on your decision to purchase the Diezel Einstein Amplifier.