1
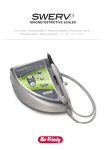
SWERV3
®
MAGNETOSTRICTIVE SCALER
USER MANUAL
Benutzerhandbuch • Manuel de l’utilisateur • Manuale per l’utente
Manual del Usuario • Manual do Usuário •
TECHNICAL DATA (SPECIFICATION)
Model
UM3000
Classification EN 60601-1
Class I device
Classification 93/42 EEC
Class IIa
Mode of Operation
Continuous operation
Power Source
AC100-240V 50/60Hz
Power Consumption
90VA
Water Pressure
0.1–0.5Mpa (15–73 psi)
Ultrasonic Specifications
Maximum output
Frequency
30 Watts
25kHz, 30kHz
Dimensions in inches (WxDxH)
6.8 x 8.9 x 3.8
Weight
3 lbs (control unit)
Fuses
5x20mm 1.6A / 250V FA
Operating Conditions
15˚–40˚ C (59˚–104˚ F)
10-85% relative humidity
500-1060hPa (7–15 psi)
<2000m altitude
Storage and Transport Conditions
-10˚– +60˚ C (14˚–140˚ F)
10-85% relative humidity
500–1060hPa (7–15 psi)
SWERV3
INTRODUCTION
Thank you for purchasing the Hu-Friedy SWERV 3 Magnetostrictive Scaler. Caution: Federal law restricts this
device to sale by or on the order of a licensed dental professional. This device generates ultrasonic vibrations
intended for ultrasonic procedures: 1.) General Supra and Subgingival scaling applications; 2.) Periodontal
debridement for non-surgical treatment of Periodontal diseases. Read this operation manual carefully before
use and retain for reference.
CONTRAINDICATIONS
The Hu-Friedy SWERV 3 Magnetostrictive Scaler should not be used in surgical, endodontic procedures or
for restorative dental procedures involving the condensation of amalgam.
PRODUCT FEATURES AND BENEFITS
• Compact, lightweight device.
• Two color-coded selectable and adjustable pre-defined power modes for a variety of scaling procedures.
• Easy to read digital display for trouble-free operation.
• Lightweight handpiece with soft, textured silicone grip for clinical comfort.
• Durable, lightweight handpiece cord to minimize hand fatigue.
• Easy to clean design to minimize the risk of cross-contamination.
COMPONENT PARTS
1.
2.
3.
4.
5.
6. 7. 8. 9. 10.
Control Unit
Handpiece
Foot Control
AC Power Cord
Water Supply Set
Tip Wear Guide
Additional Water Filter
Literature
Handpiece Barrier Sleeves
Swivel™ Ultrasonic Insert
1
2
SWERV
3
6
4
2
MIN
8
MAX
SYMBOLS AND GENERAL SAFETY
Attention, consult
accompanying documents
CE marking: Refers to
directive 93/42 EEC,
including EN 60601-1
and EN 60601-1-2
POWER
Risk of damage or harm
Follow instructions for use
Foot Control
Optional Variable
Power Foot Control
Water Connection
Purge
Dispose of this device and its accessories via
methods approved for electronic devices and
in compliance with the Directive 2002/96/CE
Keep Dry
41MY
Medical equipment with respect to electrical shock,
fire and mechanical hazards only in accordance with
UL 60601-1, CAN/CSA C22.2 NO 601.1
Handle With Care
This Way Up
Type B applied part
SAFETY INSTRUCTIONS FOR HANDLING AND OPERATION
Read these instructions carefully and use only as intended or instructed. Safety instructions are intended to
avoid potential hazards that could result in personal injury or damage to the device.
DEGREE OF RISK
WARNING
A hazard that could result in bodily injury or damage to the device if safety
instructions are not followed.
CAUTION
A hazard that could result in light or moderate bodily injury or damage to the
device if the safety instructions are not followed.
NOTICE
General information needed to operate the device safely.
WARNING
• To avoid electrical shock, do not plug or unplug the power cord with wet hands.
• To avoid risk of electric shock, this equipment must be connected to a supply mains with protective earth.
• To minimize risk of short circuit and electric shock; prevent water from contacting the control unit.
• Subjecting handpiece to a strong impact or drop onto a hard surface could result in electric shock.
• Do not disassemble or alter the handpiece.
• Keep away from explosive substances and flammable materials.
• Do not use this product in the presence of inflammable anesthetics or gases.
• Contraindication: Ultrasonics may interfere with proper function of cardiac pacemakers. This device is
not recommended for use on patients with cardiac pacemakers. There are a range of pacemakers on
the market. Clinicians should contact the pacemaker manufacturer or the patient’s physician for detailed
information about the pacemaker.
• Do not use for surgical procedures.
• Patients should rinse with an antimicrobial such as Chlorhexidine Gluconate 0.12% prior to beginning
treatment. Rinsing with an antimicrobial reduces the number of microorganisms released in the form
of aerosols during treatment, as well as the chance of infection.
• Use recommended fuse: 5x20mm 1.6A/250V FA.
• Confirm water is flowing adequately from the insert tip. Insufficient water flow to the insert tip could
result in excess heat to the insert tip, leading to hard and soft tissue damage or overheating and potential
damage to the handpiece and unit. Static contact with hard and soft tissue areas should not exceed one
second duration.
SWERV3
CAUTION
• The handpiece is designed for clinical dental use only.
• Always consider the safety of the patient when operating the handpiece.
• Check insert vibration outside the oral cavity before use. If any irregularities are found,
discontinue use immediately and contact your dealer.
• Do not force or pull on the power cord and/or handpiece cord. It could cause disconnection.
• Do not exceed recommended power ranges for the inserts. Excess power may damage
tooth structure and/or result in damage to or excess wear of the insert.
• Check the insert before every use. Inserts that have been bent, altered, worn or compromised
in any way should be removed from service.
• Do not use inserts on metal or ceramic restorations, unless inserts are intended specifically
for this purpose.
• Do not bend, alter or modify inserts. Damage may occur to the inserts affecting ultrasonic vibration.
• To eliminate risk of damage to the soft and hard tissues keep the insert tip moving at all times
when in contact with the tooth, gingiva, mucosa and intra-oral tissues.
• Attach the handpiece before turning on the power.
• Do not drop or otherwise expose the control unit to excess trauma.
• For best performance, use Hu-Friedy ® ultrasonic inserts.
• Do not autoclave any parts unless indicated so in the User Manual.
• The system functions normally when the temperature is at 15˚–40˚C (59˚–104˚F), relative humidity at
10-85% RH, atmospheric pressure at 500–1060hPa (7–15psi) and no moisture condensation occurs
in the unit. Use outside of these conditions may cause malfunction. During normal use at the ambient
conditions outlined, the maximum temperature of the hand piece will not exceed 48°C (118°F).
• Retract lips, cheeks and tongue to prevent contact with the working end of the insert.
• Close manual shut-off valve on the dental office water supply every night before leaving the office.
NOTICE
• During vibration, the handpiece and the handpiece cord may affect computer and LAN cable.
Noise may be heard during operation near a radio receiver.
• Turn off the power switch after use.
• Users are responsible for operation control, maintenance and inspection.
• Store at -10˚– +60˚C (14˚–140˚F), relative humidity at 10–85%RH, atmospheric pressure at
500-1060hPa (7–15psi). Do not subject system to dust, sulfur or salinity.
• Contact dealer or Hu-Friedy Mfg. Co., LLC if problems occur.
3
4
SWERV3
SYSTEM CONTROLS
Power Range Setting Indicator
Operation Mode
Selection (High)
Power On/Off Switch
Operation Mode
Selection (Low)
Power Range
Setting Buttons
Water
Adjustment
Knob
Auto-Purge Button
Handpiece Cradle
SWERV3
5
INSTALLATION AND ASSEMBLY
1. UNPACKING THE DEVICE
Upon receipt please check device for any damage caused in transit. If necessary, contact your dealer.
2. GENERAL RECOMMENDATIONS
Connect the SWERV 3 Magnetostrictive Scaler control unit to electric
supply in accordance with current standards.
1
3. WATER SYSTEM SETUP
The water supply system should be of adequate quality for the practice
of dental treatment. Additionally, the water supply should be equipped
with a cut-off system. See MAINTENANCE OF THE CONTROL
UNIT: Water Line Maintenance section of this User Manual.
Connect the filter side of the water tube by inserting deep into the
water connector on the back of the SWERV 3 Magnetostrictive Scaler
control unit. (Fig. 1)
13
Connect the provided water tube to the water outlet on the dental unit.
To remove the water tube from the control unit, disconnect the water
tube from the water source, then push in the grey ring of the water
connector, and gently remove the tube. (Fig. 2)
CAUTION: Be sure to insert the water tube deep into the
connector on the control unit. If water has not been used recently
at the water outlet of the dental unit, discolored water may come
out. Wait until the water coming out of the dental unit is clean
before connecting to the control unit.
14
4. FOOT CONTROL CONNECTION
Connect the foot control plug to the foot control
connector at the back of the control unit. (Fig. 3)
Take care to properly align all the pins. Push the plug gently
into the connector.
15
5. POWER CORD CONNECTION
Insert the power cord into the inlet at the back of the control unit.
(Fig. 4) Plug the power cord into the power receptacle.
6. HANDPIECE CORD CONNECTION
Align the marks on the control unit and the handpiece cord plug. Firmly
push the plug into the connector at the front of the control unit. (Fig. 5)
CAUTION:
1.Do not disconnect the handpiece cord when power to
device is switched on and the footswitch is depressed.
2.Detach insert before removing handpiece cord.
3.Grip the plug of the handpiece cord when removing.
5
6
SWERV3
7.START-UP
The following procedures are recommended before using your SWERV 3 Magnetostrictive Scaler for the
first time:
• Clean and sterilize ultrasonic inserts. (See CLEANING AND STERILIZATION section of this User Manual.)
• Always use the proper insert frequency for your SWERV 3 Magnetostrictive Scaler.
(See table below for compatibility and see HF-464 for a complete list of Hu-Friedy inserts.)
PART CODE
30 Kilohertz
UM3-30
X
UM3-30EU
X
UM3-30UK
X
UM3-30AU
X
25 Kilohertz
UM3-25
X
UM3-25EU
X
UM3-25UK
X
UM3-25AU
X
• After installation operate the device at the lowest power setting while applying pressure to the foot
control. This procedure will confirm adequate water flow and rinse the internal water lines.
• Purge unit water lines (See Maintenance of the Control Unit).
OPERATING PROCEDURES
1. WATER SYSTEM SETUP
Carefully check all water supply connections prior to start-up. Open the dental unit’s water valve.
Set water pressure between 0.1-0.5MPa (15-73psi). The CDC recommends monitoring dental unit water
regularly. Test water prior to connection to the SWERV 3 Magnetostrictive Scaler to confirm that input water
quality conforms to all applicable standards. See MAINTENANCE OF THE CONTROL UNIT: Water Line
Maintenance section of this User Manual.
2. POWER ON
Connect the power cord to the wall outlet. Turn on the power switch
on the control unit. (Fig. 6) Front panel will light up.
NOTICE: Each time the control unit is turned on, the system will
return to the default power setting.
CAUTION: Use of any wall outlets other than those of
AC120V +/- 10% or AC230V +/- 10% may result in damage
to the power cord and control unit.
6
SWERV3
3. OPERATION MODE SELECTION
Select the appropriate mode for the procedure with the mode selection keys
on the front panel. The light adjacent to the selected mode will illuminate.
BLUE
(HIGH)
Pre-select the appropriate power setting prior to patient treatment.
Please adjust (if necessary) prior to treatment.
2
MIN
4. POWER RANGE SETTING
WARNING: Do not exceed power range as indicated on the insert packaging.
Higher than recommended power may damage tooth structure and/or insert.
Set the recommended power mode with the power
key on the front panel. The light adjacent to the
selected mode will illuminate. Confirm that power is
set in the appropriate mode for the selected insert.
2
MIN
MODE
4
6
18
2MAX 3
7
6
4
GREEN
(LOW)
MAX
8
POWER
4
5
6
7
8
9
10
2
MIN
BLUE
(HIGH)
4
GREEN
(LOW)
8
6
MAX
POWER
Adjust power level within selected mode by pressing the
or
buttons to increase or decrease power.
POWER
NOTICE: To ensure patient comfort and to extend the life of your inserts always use the lowest effective
power setting.
5. ULTRASONIC INSERT CONNECTION
Select appropriate kHz insert (25 or 30) for the generator. Fill handpiece with water. While holding the
handpiece in an upright position, activate the purge function or the foot control to remove any air bubbles
that may be trapped inside the handpiece. Lubricate the rubber o-ring on the sterilized insert with water
prior to placing it into the handpiece. Fully seat the insert with a gentle push-twist motion. Do not force the
insert into the handpiece.
WARNING: Always use water when operating the unit to keep the handpiece and insert cool. Minimum
recommended setting >10 ml/min. Maximum recommended setting < 50 ml/min.
6. FOR OPERATION
• Verify that the water supply is adequate and clean prior
to beginning each procedure.
• Purge handpiece (See Maintenance for the Control Unit.)
• Use a Hu-Friedy disposable barrier sleeve (UMBS) on the handpiece.
Replace the barrier between patients. Properly dispose of the barrier
in accordance with guidelines for contaminated waste materials.
• Place insert in handpiece.
• Adjust the power level to the recommended mode.
• Depress the foot control to start insert vibration.
• Turn the water adjustment knob counterclockwise gradually
to increase the water flow. (Fig. 7)
7. WHEN TREATMENT IS COMPLETED
1.Release the foot control and place the handpiece in
the handpiece holder. (Fig. 8)
2. Turn off the power switch.
3.Hold handpiece in upright position. Gently pull the insert
out of the handpiece opening. Ultrasonic inserts are easily
interchangeable for various applications and procedures.
4. Close the dental unit’s water valve.
7
8
8
SWERV3
SAFETY FEATURES
1. When the operation mode is set to BLUE Mode and the power setting is set to Max the unit will
automatically reduce power if operated at these settings for more than 10 minutes. (The output display
reduces from Maximum to Minimum power.) If the safety feature is activated release foot control.
2. The control unit will beep to alert user if the power switch is turned on while the foot control is depressed.
3. When foot control is continuously depressed for 20 minutes or longer, the unit will beep in a continuous
tone and power down. Release the footswitch control. Turn the power switch off then back on again.
CLEANING AND STERILIZATION
Contents of this package are not provided sterile. The following cleaning and/or sterilization procedures are
recommended for your Hu-Friedy magnetostrictive scaler.
PROCEDURES FOR CLEANING CONTROL UNIT AND COMPONENTS
1. Turn off the power switch.
2. Remove the insert from the handpiece.
3. Carefully wipe all surfaces of the control unit, handpiece and handpiece cord, power cord, water tube,
foot control and cord which are contaminated by touch, contact with instruments or other inanimate
objects during dental treatment with a soft cloth using only approved hospital grade surface disinfectants
(EPA-registered, VAH / DGHM, RKI approval or CE marked).
4. Always follow the manufacturer’s directions for disinfectant use.
5. The use of an abrasive wipe or cleaning solution will damage the surface finish of the control unit.
6. Phenols, iodophors, hypochlorite/household bleach and citric acid based disinfectants are not recommended.
NOTICE: The following websites provide additional information on safety and asepsis procedures:
http://www.osap.org/indec.cfm and http://www.cdc.gov/OralHealth/infectioncontrol/index.htm
CAUTION: Do not sterilize the control unit, power cord, foot control, water tube, irrigation connector,
handpiece, or handpiece cable.
PROCEDURES FOR HU-FRIEDY ULTRASONIC INSERTS (sold separately)
1. Clean, inspect and steam sterilize before each use.
2. For complete instructions refer to cleaning and sterilization instructions provided with the ultrasonic insert.
SWERV3
9
MAINTENANCE OF THE CONTROL UNIT
CHANGING THE WATER FILTER
When the clear plastic water filter becomes discolored, it should be
replaced to prevent reduced water flow to the SWERV 3 Magnetostrictive
Scaler. Our general recommendation is to change the filter once per month.
1.Disconnect the water supply hose from water source. If a
quick-disconnect connector is attached to the end of the hose,
relieve the water pressure by pressing the tip of the connector
and drain the water.
2.Hold the fittings on both sides of the filter disk and twist
counterclockwise. (Fig. 9) Remove the filter section from
both sides of the water hose. (Fig. 10)
3.Install the replacement filter (part number: UMWF) onto the
water hose fittings. The filter should be positioned to align with
the correct hose fitting.
4.Tighten the two hose fittings with your hands. Reconnect the water
supply hose, then activate the auto-purge function to remove air
from lines. Be sure to test for leaks.
WATER LINE MAINTENANCE
Recommendations for dental unit water quality have been published by the Centers for Disease Control
(CDC) not to exceed 500 cfu/mL*. European Union Drinking Water Standards specify a maximum of
100 cfu/ml. Refer to your national regulatory authorities for recommendations specific to your local area.
The CDC recommends monitoring dental unit water regularly. Hu-Friedy recommends as a conservative
approach to start by testing the quality of the water flowing into and out of the SWERV 3 device prior to
placement of a sterilized ultrasonic insert, then monitoring weekly. The monitoring interval may be lengthened
based on established results. If results do not meet your water quality goals, repeat steps outlined for preparing
your waterlines. Monitoring can be accomplished using in-office monitoring kits or use of a commercial water
testing service. (*ref.: “Guidelines for Infection Control in Dental Health-Care Settings 2003,” CDC)
It is strongly recommended that this system is regularly cleaned and maintained by a waterline treatment
product such as Hu-Friedy’s Team Vista™ Dental Unit Waterline Cleaner (or other approved waterline cleaning
product). This can be accomplished by connecting the SWERV 3 device to the closed water system on your
dental unit or a number of devices available from your local distributor. Please follow the directions for use for
Team Vista or selected waterline cleaning product.
During the periodic antimicrobial cleaning process using Team Vista, flush as least 500 ml of potable water
through the dental unit waterlines to remove any residual chemical.
PURGING UNIT WATER LINES
1.Verify that the unit is ON using Power ON/OFF switch.
2.Set the water control knob to maximum.
3.Hold handpiece (without insert) upright over a drain.
4.Press and hold Auto-Purge Button (Fig. 11) for 2 seconds or until
unit beeps. Auto-Purge light will flash, and unit will automatically
purge the water line for 45 seconds. To interrupt the purge function
press the Auto-Purge button again anytime during the 45 seconds. It is
recommended that the water lines be purged for at least 45 seconds
between patients and for at least 2 minutes at the start of each day.
9
10
SWERV3
REPLACING THE FUSE
1. Disconnect power to the unit.
2.Pry open fuse drawer using flat head screw driver or similar tool.
(Fig 12)
3.Remove drawer to change the fuses. (Fig 13)
WARNING: Always use Replacement Fuse: 5 x 20mm
1.6A/250V FA (part number: UMFUSE)
13
SERVICE
Please send your SWERV 3 Magnetostrictive Scaler or handpiece with a copy of the invoice to your dealer
or an authorized Hu-Friedy repair center. Shipping your product in its original packaging will offer the best
protection against damage during shipping. If sending directly to an authorized Hu-Friedy repair center, please
include your name and address, and the name of your dealer. Before shipment all items must be cleaned and
sterilized as described in the CLEANING AND STERILIZATION section of this User Manual.
DISPOSAL AND RECYCLING
Dispose of this device and its accessories via methods approved for electronic devices and in compliance
with the Directive 2002/96/CE. At the end of their life, ultrasonic inserts should be discarded in safety
containers designed for this purpose.
HELPFUL INFORMATION
The use of higher than recommended power settings may cause
excessive wear or tip breakage. (See Caution pg. 5)
Always remember to properly seat the insert to the handpiece.
Scaling efficiency can diminish significantly with worn inserts (Fig. 14).
Inferior performance and poor water delivery can result from worn,
damaged, bent or altered stacks or working ends. For optimal scaling
efficiency, we recommend checking inserts regularly for signs of wear.
CHECKING ULTRASONIC INSERTS FOR WEAR:
1. Locate the diagram of the insert to be measured on the wear guide
(HF-466).
2. Rotate the insert until it is flat against the card.
3. Evaluate working end condition, comparing length to red/blue lines.
1mm loss can
result in 25%
efficiency loss
2mm loss can
result in 50%
efficiency loss
14
SWERV3
TROUBLESHOOTING
PROBLEM
The display panel does
not illuminate when the
unit is switched on.
No liquid flowing to the
handpiece when the
footswitch is activated.
CAUSE
The power cord is disconnected.
SOLUTION
Check all the connections of the control unit.
Check the power supply to the dental office.
The internal fuse has burned out.
Contact your dealer or Hu-Friedy.
Water flow is set too low.
Adjust the liquid flow water knob.
Connections are not secure.
Check the connection between the handpiece cord
and control unit.
Check the connection between the water tube and
the control unit.
Check the connection between the foot control and
the control unit.
No water flow to insert tip
No/poor ultrasonic
vibration
Water filter is blocked.
Check the water filter for blockage.
Water adjustment knob is not
properly set.
Properly set water adjustment knob.
Insert is clogged.
Contact your dealer or Hu-Friedy.
Dental office water supply valves
are closed.
Open dental office water supply valves.
Waterline filter is clogged.
Replace waterline filter.
The insert is not seated securely
in the handpiece.
Check the insert to ensure proper insertion
into handpiece.
Incorrect kHz insert.
Replace with proper kHz insert.
The insert is worn.
Replace the insert.
Power has not been properly
adjusted for the particular insert.
Adjust the power setting to the recommended power
range indicated on the package insert.
The foot control is disconnected.
Connect the foot control correctly.
Handpiece failure.
Contact your dealer or Hu-Friedy.
Foot control failure.
Contact your dealer or Hu-Friedy.
11
12
SWERV3
TROUBLESHOOTING CONTINUED
PROBLEM
Handpiece is overheating
CAUSE
SOLUTION
Inadequate water flow.
Increase water flow. Minimum setting (ccw) >10 ml/min.
Output has not been properly
adjusted for the insert.
Lower the power setting to the recommended power
mode indicated on the package insert.
The insert is not seated securely
in the handpiece.
Check the insert to ensure proper insertion into
handpiece.
Air in the waterline or handpiece
cord.
Purge water line.
Vibration failure in the handpiece
or the control unit.
Contact your dealer or Hu-Friedy.
No/poor water flow
No water is flowing to the
control unit.
Check the water line and supply to the control unit.
Water pressure should be set to: 0.1-0.5MPa
(15–73 PSI)
Water leakage
Water is leaking at the junction
of control unit and the
handpiece cord.
Firmly insert the handpiece cord into control unit.
Water is leaking at junction of
insert and handpiece.
Replace the o-ring with Hu-Friedy Part Number
UBLKORING and UGRNORING.
Water appears to be leaking from
base of unit.
Confirm water tube and handpiece cord are firmly
inserted into control unit.
Water continues to run out
of insert after foot control
is released.
Purge water line to remove air.
Water is leaking from the
water tube.
Contact your dealer or Hu-Friedy.
Loss of power output
without operation.
Safety feature is activated.
Release foot control.
Unit is beeping while
power is on.
Depressed foot control.
Release foot control.
Unit is beeping. Insert not
vibrating.
Abnormal heating of the control
unit.
Stop operation until control unit is cool. If problem
persists, contact your dealer or Hu-Friedy.
Inserts are bending or
breaking.
Excess power to the insert.
Operate the insert only in the recommended power
mode indicated on the package insert.
Insert was dropped or mishandled
during cleaning and sterilization.
Always process the insert as indicated in
insert packaging.
Internal o-ring is damaged. Contact your dealer or
Hu-Friedy.
Discard bent or broken inserts.
The insert deploys from
the handpiece
The insert O-ring is damaged
or worn.
Replace the o-ring with Hu-Friedy Part Number
UBLKORING or UGRNORING.
SWERV3
13
HELPFUL INFORMATION
MODEL
UM3000
INPUT
100-240V 50/60Hz
90 VA
FUSES RATING
5X20mm 1.6A /250V FA
OUTPUT
25㹳30kHz
WATER INLET PRESSURE 15㹳73 psi
SERIAL No.
The serial number of the SWERV 3 Magnetostrictive Scaler is located
on the back of the control unit (Fig. 15). The first five digits of the serial
number indicate the type of equipment, its revision, and the month and
year it was manufactured.
41MY
MEDICAL EQUIPMENT
UL 60601-1
CAN/CSA C22.2 NO 601.1
15
MADE IN USA
MODEL
INPUT
UM3000
100-240V 50/60Hz
90 VA
FUSES RATING
5X20mm 1.6A /250V FA
OUTPUT
25㹳30kHz
WATER INLET PRESSURE 15㹳73 psi
SERIAL No.
41MY
TYPE
REVISION
MONTH
YEAR
MEDICAL EQUIPMENT
UL 60601-1
CAN/CSA C22.2 NO 601.1
MADE IN USA
UNIT NUMBER
• Type:
control
• Type:11 =
= control
unit unit
2 = handpiece
• Revision
2 =record:
handpiece
Shows by alphabet (A~)
• Revision
Shows year.
by alphabet
(A~)
• Year: last 2record:
digits of production
(00~99)
TYPE
• Production month:
A~L =A~L
(January
December)
• Production
month:
= thru
(January
thru December)
• Year: last 2 digits of production year. (00~99)
• Unit Numbers: Running Numbers (00001~99999)
REVISION
MONTH
YEAR
UNIT NUMBER
• Type: 1 = control unit
2 = handpiece
• Revision record: Shows by alphabet (A~)
• Year: SCALER
last 2 digits of production year. (00~99)
WARRANTY — SWERV3 MAGNETOSTRICTIVE
• Production month: A~L = (January thru December)
Hu-Friedy, at its sole option, will repair or replace for a period of two years following the date of the first
purchase as new item, any SWERV 3 Magnetostrictive Scaler (“Unit”) (excluding the handpiece) that fails as
a result of a defect in materials or workmanship. Purchaser must return the defective Unit (postage prepaid)
and must provide Hu-Friedy with the warranty registration form or proof of purchase.
Excluded from this warranty are damages in cases of:
• the Unit having been used outside of normal operating conditions;
• the Unit being damaged in transit;
• the Unit having been modified;
• non-compliance with the manufacturer’s installation instructions (water pressure, mains voltage);
• use with an electrical system that does not comply with regulations in force;
• uses other than those specified in this manual;
• non-compliance with instructions contained in this manual;
• service to the Unit being provided by non-authorized persons;
• components exhibiting normal wear from usage;
• damages/defects being caused by force majeure or any other condition that is beyond
the control of Hu-Friedy.
Repair service or replacement provided under the warranty neither extends the warranty period nor
begins a new warranty period. THE EXPRESS WARRANTIES DESCRIBED HEREIN ARE THE EXCLUSIVE
WARRANTIES AND ARE PROVIDED INSTEAD OF ANY WARRANTY OF MERCHANTABILITY,
FITNESS FOR A PARTICULAR PURPOSE, OR ANY OTHER WARRANTY, EXPRESS OR IMPLIED, EXCEPT
WARRANTIES OF TITLE AND INFRINGEMENT. EXCEPT AS SET FORTH HEREIN, DAMAGES FROM
BREACH OF SUCH WARRANTIES ARE LIMITED TO THE COST OF REPAIR OR REPLACEMENT OF
THE PRODUCT, AT HU-FRIEDY’S SOLE OPTION. CONSEQUENTIAL OR INCIDENTAL DAMAGES
RESULTING FROM BREACH OF ANY APPLICABLE EXPRESS OR IMPLIED WARRANTIES ARE HEREBY
EXCLUDED.
Please contact Hu-Friedy for instructions on obtaining warranty service.
14
SWERV3
WARRANTY — SWERV3 HANDPIECE ASSEMBLY
Hu-Friedy, at its sole option, will repair or replace for a period of one year following the date
of the first purchase as new item, any SWERV 3 Handpiece Assembly (“Handpiece”) that
fails as a result of a defect in materials or workmanship. Purchaser must return the defective
Handpiece (postage prepaid) and must provide Hu-Friedy with the warranty registration form
or proof of purchase.
Excluded from this guarantee are damages in cases of:
• the Handpiece having been used outside of normal operating conditions;
• the Handpiece being damaged in transit;
• the Handpiece having been modified;
• non-compliance with the manufacturer’s installation instructions (water pressure,
mains voltage);
• use with an electrical system that does not comply with regulations in force;
• uses other than those specified in this manual;
• non-compliance with instructions contained in this manual;
• service to the Handpiece being provided by non-authorized persons;
• components exhibiting normal wear from usage;
• damages/defects being caused by force majeure or any other condition that is beyond
the control of Hu-Friedy.
Repair service or replacement provided under the guarantee neither extends the guarantee
period nor begins new guarantee period. THE EXPRESS WARRANTIES DESCRIBED
HEREIN ARE THE EXCLUSIVE WARRANTIES AND ARE PROVIDED INSTEAD OF ANY
WARRANTY OF MERCHANTABILITY, FITNESS FOR A PARTICULAR PURPOSE, OR
ANY OTHER WARRANTY, EXPRESS OR IMPLIED, EXCEPT WARRANTIES OF TITLE
AND INFRINGEMENT. EXCEPT AS SET FORTH HEREIN, DAMAGES FROM BREACH OF
SUCH WARRANTIES ARE LIMITED TO THE COST OF REPAIR OR REPLACEMENT OF
THE PRODUCT, AT HU-FRIEDY’S SOLE OPTION. CONSEQUENTIAL OR INCIDENTAL
DAMAGES RESULTING FROM BREACH OF ANY APPLICABLE EXPRESS OR IMPLIED
WARRANTIES ARE HEREBY EXCLUDED.
Please contact Hu-Friedy for instructions on obtaining warranty service.
SWERV3 MAGNETOSTRICTIVE SCALER
REGISTRATION FORM
PLEASE COMPLETE AND MAIL THIS FORM TO REGISTER YOUR UNIT:
Purchaser’s Name: Serial Number: (Located on plate) Date of Purchase: Telephone: Fax: E-mail: Address: City: State/Province: Zip/Postal Code: Country: Number of Practitioners In Practice:
Dentists Hygienists Assistants Dental Specialty: Dealer Name: U.S. and Canada:
Hu-Friedy Magneto Scaler Registration
Hu-Friedy Mfg. Co., LLC
3232 N. Rockwell St.
Chicago, IL 60618 USA Europe:
Hu-Friedy Magneto Scaler Registration
Hu-Friedy Mfg. B.V.
European Headquarters & Customer Care Dept.
P.O. Box 29025
NL-3001GA Rotterdam