1
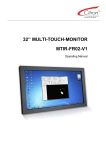
User Manual PD-BE26AU-OKAVU
Industrial Monitor
26” open frame
Code No.: CL2683AT
Part Number: PD-BE26AU-OKAVU
REV:A0
0622683705
TABLE OF CONTENTS
1.
SAFETY SYMBOLS & PRECAUTIONS ................................................................................ 3
1.1. SAFETY SYMBOLS............................................................................................................... 3
1.2. PRECAUTIONS ...................................................................................................................... 3
2. INTRODUCTION............................................................................................................................. 6
2.1. Features................................................................................................................................... 6
2.2. Package Contents .............................................................................................................. 6
3. CABLE CONNECTION................................................................................................................... 7
3.1. Before Connecting ............................................................................................................. 7
3.2. Connecting the Cables..................................................................................................... 7
4. INSTALLING THE DRIVER SOFTWARE ............................................................................. 8
5. ADJUSTMENT .................................................................................................................................. 9
5.1. How to Use OSD Menu..................................................................................................... 9
5.2. OSD MENU Adjustments and Settings ................................................................. 10
5.3. Screen Adjustment........................................................................................................... 10
6. TROUBLESHOOTING.................................................................................................................... 12
7. CLEANING ......................................................................................................................................... 13
8. SPECIFICATION............................................................................................................................. 14
8.1. Specification......................................................................................................................... 14
8.2. D-Sub 15pin Connector................................................................................................. 14
8.3 . Preset Timing ..................................................................................................................... 14
9. caveat emptor / Guarantee exclusion........................................................................... 15
10. Vendor:............................................................................................................................................. 15
2
1. SAFETY SYMBOLS & PRECAUTIONS
1.1. SAFETY SYMBOLS
This manual uses the safety symbols below. They denote critical information. Please read
them carefully.
WARNING
Failure to abide by the information in a WARNING may result in serious injury
and can be life threatening.
CAUTION
Failure to abide by the information in a CAUTION may result in moderate injury
and/or property or product damage.
Alert electrical hazard.
Indicates a prohibited action.
Indicates to ground for safety.
1.2. PRECAUTIONS
To ensure personal safety and proper maintenance, please read this section and the caution
statements on the unit
WARNING
If the unit begins to emit smoke, smells like something is burning, or makes
strange noises, disconnect all power connections immediately and contact your
dealer for advice.
Attempting to use a malfunctioning unit may result in fire, electric shock, or equipment
damage.
Do not open the cabinet or modify the unit.
Opening the cabinet or modifying the unit may result in fire, electric shock, or burn.
Refer all servicing to qualified service personnel.
Do not attempt to service this product yourself as opening or removing covers may result in
fire, electric shock, or equipment damage.
Keep small objects or liquids away from the unit.
Small objects accidentally falling through the ventilation slots into the cabinet
or spillage into the cabinet may result in fire, electric shock, or equipment
damage. If an object or liquid falls/spills into the cabinet, unplug the unit
immediately. Have the unit checked by a qualified service engineer before
using it again.
3
Set the unit in an appropriate location.
Not doing so may result in fire, electric shock, or equipment damage.
-
Do not place outdoors.
-
Do not place in the transportation system (ship, aircraft, trains,
automobiles, etc.
-
Do not place in a dusty or humid environment.
-
Do not place in a location where the steam comes directly on the screen.
-
Do not place near heat generating devices or a humidifier.
-
Do not place in an inflammable gas environment.
To avoid danger of suffocation, keep the plastic packing bags away from babies
and children.
Use the enclosed power cord and connect to the standard power outlet of your
country.
Be sure to remain within the rated voltage of the power cord. Not doing so may result in fire
or electric shock.
To disconnect the power cord, grasp the plug firmly and pull.
Tugging on the cord may damage and result in fire or electric shock.
The equipment must be connected to a grounded main outlet.
Not doing so may result in fire or electric shock.
Use the correct voltage.
- The unit is designed for use with a specific voltage only. Connection to another voltage
than specified in this User’s Manual may cause fire, electric shock, or equipment damage.
- Do not overload your power circuit, as this may result in fire or electric shock.
Handle the power cord with care.
- The unit is designed for use with a specific voltage only. Connection to
another voltage than specified in this User’s Manual may cause fire,
electric shock, or equipment damage.
- Do not overload your power circuit, as this may result in fire or electric shock.
Never touch the plug and power cord if it begins to thunder.
Touching them may result in electric shock.
Do not touch a damaged LCD panel directly with bare hands.
The liquid crystal that may leak from the panel is poisonous if it enters the eyes or
mouth. If any part of the skin or body comes in direct contact with the panel, please wash
thoroughly. If some physical symptoms result, please consult your doctor.
Follow local regulation or laws for safe disposal.
4
CAUTION
Handle with care when carrying the unit.
Disconnect the power cord and signal cables and remove the optional unit. Moving the unit
with the cord or the option attached is dangerous. It may result in injury.
When handling the unit, grip the bottom of the unit firmly with both
hands ensuring the panel faces outward before lifting.
Dropping the unit may result in injury or equipment damage.
Do not block the ventilation slots on the cabinet.
- Do not place any objects on the ventilation slots.
- Do not install the unit in a closed space.
- Do not use the unit laid down or upside down.
- Blocking the ventilation slots prevents proper airflow and may result in fire, electric shock,
or equipment damage.
Do not touch the plug with wet hands.
Doing so may result in electric shock.
Use an easily accessible power outlet.
This will ensure that you can disconnect the power quickly in case of a problem.
Periodically clean the area around the plug.
Dust, water, or oil on the plug may result in fire.
Unplug the unit before cleaning it.
Cleaning the unit while it is plugged into a power outlet may result in electric shock.
If you plan to leave the unit unused for an extended period, disconnect the power
cord from the wall socket after turning off the power switch for the safety and the
power conservation.
LCD PANEL
When the monitor is cold and brought into a room or the room temperature goes up quickly,
dew condensation may occur inside and outside the monitor. In that case, do not turn the
monitor on and wait until dew condensation disappears, otherwise it may cause some
damages to it.
In order to suppress the luminosity change by long-term use and to maintain the stable
luminosity, please use the monitor with the lower brightness.
The screen may have defective pixels. These pixels may appear as slightly light or dark area
on the screen. This is due to the characteristics of the panel itself, and not the product.
The backlight of the LCD panel has a fixed life span. When the screen becomes dark or
begins to flicker, please contact your dealer.
Do not press on the panel or edge of the frame strongly, as this may result in damage to the
screen. There will be prints left on the screen if the pressed image is dark or black. If
pressure is repeatedly applied to the screen, it may deteriorate or damage your LCD panel.
Leave the screen white to decrease the prints.
Do not scratch or press on the panel with any sharp objects, such as a pencil or pen as this
may result in damage to the panel. Do not attempt to brush with tissues as this may scratch
the LCD panel.
When the screen image is changed after displaying the same image for extended periods of
time, an afterimage may appear. Use the screen saver or timer to avoid displaying the same
image for extended periods of time.
5
2. INTRODUCTION
Thank you very much for choosing this monitor.
2.1. Features
- VGA analog input
- Resolutions up to WXGA 1360x 768
- Power management system conforms to VESA DPMS standard.
- Supports DDC1/2B for Plug & Play compatibility.
- Advanced On Screen Display (OSD) control for picture quality adjustment
2.2. Package Contents
Please contact your local dealer for assistance if any of the listed items are missing or
damaged.
- LCD Monitor
- D-sub Signal Cable
- USB Cable
- CD drive
- User Manual
- Power cable
Note: Please retain the packing materials for future transference.
6
3. CABLE CONNECTION
3.1. Before Connecting
Before connecting your monitor to the computer, change the display screen settings
(Resolution and frequency) in accordance with the charts below.
Note:
- The lower display modes like 640x 480, automatically enlarge to the maximum display
mode (1360 x 768), and some lines of the characters may become fuzzy.
- When your computer and display support VESA DDC, the suitable resolution and the
refresh rate are set by just plugging your display into the computer without any manual
settings.
The monitor supports the following resolutions.
Resolution
Refresh rate
Dot Frequency
Remark
640 x 480
60Hz
800 x 600
60Hz
85MHz
VESA
1024 x 768
60Hz
(Max.)
VESA
1360 x 768
60Hz
VGA
VESA
3.2. Connecting the Cables
Note: Be sure that the power switches of both the computer and the monitor are OFF.
AC IN
D-sub
USB
Power cable connection:
Connect the power cord to the AC outlet, and connect the power to the monitor
VGA cable connection:
Plug 15-pin VGA signal cable to the VGA connector in the rear of the PC system, and plug the
other end to the monitor. Secure cable connectors with screws.
USB cable connection
Connect end of the touchscreen USB cable to the rear side of the computer and the other
end to the monitor
7
4. INSTALLING THE DRIVER SOFTWARE
Drivers are located on the enclosed CD-ROM for the following operating systems:
• Windows XP
• Windows 2000
• Windows Me
• Windows 98
• Windows 95
• Windows NT 4.0
The touchmonitor is Plug-and-Play compliant. Information on the video capabilities of
touchmonitor is sent to video display adapter when Windows starts. If Windows detects
touchmonitor, follow the instructions on the screen to install a generic Plug-and-Play
monitor. Refer to the appropriate section for driver installation instructions.
Installing the USB Touch Driver for Windows XP, Windows 2000, Me, 95/98 and
NT 4.0
1. Insert the CD-ROM in computer’s CD-ROM drive.
If Windows 98, Windows Me or Windows 2000 Windows XP starts the Add New Hardware
Wizard.
2. Choose Next. Select “Search for the best driver for your device (Recommended)” and
choose Next.
3. When a list of search locations is displayed, place a checkmark on “Specify a location” and
use Browse to select the suitable directory on the CD-ROM.
4. Choose Next. Once the USB touchscreen driver has been detected, choose Next again.
5. You will see several files being copied. Insert your Windows 98 CD if prompted. Choose
Finish.
If Windows 98, Windows Me or Windows 2000 does not start the Add New Hardware Wizard.
NOTE: For Windows 2000 you must have administrator access rights to install the driver.
1. Put the CD into CD_ROM.
2. Choose the icon of TOUCHSCREEN driver.
3. Choose operation system for USB, eg. Window xp_X86.
4. Select SETUP.exe ,then run to install.
5. Select NEXT according to the prompt till installation finished.
8
5. ADJUSTMENT
This touchmonitor will not likely require adjustment. Variations in video output and
application may require adjustments to the touchmonitor to optimize the quality of the
display.
For best performance, the touchmonitor should be operating in native resolution 1360 x 768.
Use the Display control panel in Windows to choose 1360 x 768 resolution. Operating in
other resolutions will degrade video performance.
All control adjustments are automatically memorized.
5.1 How to Use OSD Menu
6
1
2
(1) Auto Button
3
4
5
(2) Control Button (Increasing)
(3) Control Button (Reduce)
Power Indicator
(4) Menu/Enter Button
(5) Power On//Off Button
(6) Power Indicator
Green
Operation
Orange
Closed
Off
Power Off
1. Entering the OSD Menu
Press the MENU Button once to display the OSD Menu.
2. Making Adjustments and Settings
a. Select the desired sub menu icon using the Control buttons and press the MENU button.
The sub menu appears.
b. Use the Control buttons to select the desired setting icon and press the MENU button. The
setting menu appears.
c. Use the Control buttons to make all required adjustments and press the MENU button to
save the settings.
3. Exiting the OSD MENU
- To return to the main menu, select the <Return> icon and press the MENU button.
- To exit the OSD menu, select <Exit> icon .
9
5.2 OSD MENU Adjustments and Settings
The following table shows all adjustment and setting menus.
Main Menu
Sub Menu
Reference
Auto Adjust
Scan 5.3 Screen Adjustment
H.position
Image Setting
V.position
Clock
Phase
LockFun
ON/OFF
Selection for lockfunction or not
Gamma 1
Gamma 2
Gamma 3
Gamma
Choose suitable mode according to
Gamma 4
different application
Gamma 5
Gamma 6
Gamma 7
Color temp
9300
Choose suitable color temp according
6500
to different application
User
Zoom
Full
Choose suitable ZOOM according to
5:4
different application
4:3
User
Backlight,Contrast,Gamma,Sharpness
Default
,Dbrightness,Colortemp
Exit
Note
Close the OSD menu
:if you want key locked,please let “lockFun” on.Then press AUTO key delay 10s.the
screen display “Key locked”.
if you want key unlocked,please let “lockfun” off.when the key is locked(the screen display
“Key locked”),you should press AUTO key delay 10s.the screen display “KEY unlocked”.
5.3
Screen Adjustment
Screen adjustments for the monitor should be used in suppressing screen flickering and also
for adjusting the screen to its proper position. There is only one correct position for each
display mode. It is also recommended to use the OSD Menu function when first installing the
display or whenever changing the system.
Note: Allow the monitor to stabilize for at least 20 minutes before making image
adjustments.
Adjustment Procedure
1. Adjust by <Auto Adjust> menu in the OSD Menu.
To automatically adjust the clock, phase, screen position and resolution.
Note:
The Auto sizing function is intended for use on the computer running Windows. It may not
work properly when the computer is running on MS-DOS (Not windows) or the background
color for the "wall paper" or "desktop" pattern is set to black.
If the appropriate screen cannot be made by using the Auto adjustment button, adjust the
screen through the following procedures.
10
2. Adjust by using <Image Setting> menu in the OSD Menu.
(1) Vertical bars appear on the screen
→ Use the <Clock> adjustment.
Select the <Clock> and eliminate the vertical bars by using the UP and Down of the Control
buttons.
Do not continuously press the Control buttons, as the adjustment value will change quickly
and make it difficult to locate the most suitable adjustment point. If the horizontal flickering,
blur or bars appear, proceed to <Phase> adjustment as follows.
(2) Horizontal bars appear on the screen.
→ Use the <Phase> adjustment.
Select the <Phase> and eliminate the horizontal flickering, blurring or bars by using the
Right and Left buttons.
Note: Horizontal bars may not completely disappear from the screen depending on the
computer.
(3) The screen position is incorrect.
→ Use the <Position> adjustment.
The <Position> adjustment moves the image to the correct position. Select <Position> and
adjust the position by using the Up and Down buttons.
If vertical bars of distortion appear after finishing the <Position> adjustment, return to
<Clock> adjustment and repeat the previously explained adjustment procedure. (Clock →
Phase → Position)
11
6. TROUBLESHOOTING
If a problem persists even after applying the suggested remedies, contact a dealer.
Problems
Points to check with Possible Solutions
1. No picture
Check that the power cord is correctly connected. If the
Indicator status: Off
problem persists, turn off the monitor power for a few
minutes, then turn it back on and try again.
- when the signal is not inputted correctly, even if the monitor
functions properly.
- When the image is displayed correctly after a short time,
there is no problem with the monitor. (Some PCs do not
output the signal soon after powering on.)
Check that the signal cable is properly connected to the PC or
graphics board.
Indicator status: Green
Check the "Brightness" setting.
2. Display position is
Adjust the image position using the <Position>. If the
incorrect.
problem persists, use the graphics board's utility software to
change the display position if available.
3. Vertical bars of
Decrease the horizontal bars using the <Clock>.
distortion appear.
4. Horizontal bars of
Decrease the horizontal bars using the <Phase>.
distortion appear.
5. The screen is too bright
or too dark.
Adjust the <Brightness> (The backlight of the monitor has a
fixed life span. When the screen becomes dark or begins to
flicker, please contact your dealer.)
6.
Afterimages appear.
- Do you use the screen saver or timer when displaying the
same image for extended periods of time?
- Afterimages are particular to monitors. Avoid displaying the
same image for extended periods of time.
7. The screen has
defective pixels
This is due to the characteristics of the panel itself, and not
the product.
(e.g. slightly light
or dark).
8. Touch doesn’t work.
Make sure the touch cable is securely attached at both ends.
12
7. CLEANING
Periodic cleaning is recommended to keep the monitor looking new and to prolong its
operation lifetime.
Note: Never use thinner, benzene, alcohol (ethanol, methanol, or isopropyl alcohol),
abrasive cleaners, or other strong solvents, as these may cause damage to the cabinet or
LCD panel.
Cabinet
To remove stains, wipe the cabinet with a soft, lightly moistened cloth using a mild
detergent. Do not spray wax or cleaner directly into the cabinet. (For details, refer to the
manual of the PC.)
LCD Panel
The LCD surface can be cleaned with a soft cloth, such as cotton or lens paper.
If necessary, stubborn stains can be removed by moistening part of a cloth with water to
enhance its cleaning power.
13
8. SPECIFICATION
8.1
Specification
Display characteristics
Size:
26″ active display
Supported Color :
16,7M colors
Native resolution:
1360 x768
Pixel pitch:
0.4215 x 0.4215mm
Viewing angle:
178° V/H @ contrast ratio > 10
Brightness:
315cd/
㎡ min (with Touchscreen)
Contrast ratio:
3000:1
Response time:
6.5 ms Typ.
External connections
Analog Video Input:
15 pin D-sub
Touchscreen Interface:
USB
Physical specifications
Dimensions:
653(W)x400(D)x55(H) mm
Weight:
15 Kg
Standard mounting
VESA compatible(100 mm spacing)
Power supply:
AC100~240V 2A
Power consumption:
180W max.
Power saving:
EPA, VESA compliant
Operating temperature:
Storage temperature:
Relative humidity:
0° to 40°C
-20° to 65°C
5% to 90%, non condensing
Light Transmission:
90% Typ.
MTBF:
> 50,000 hours (excluding backlight)
8.2 D-Sub 15pin Connector
Pin
Signal
Pin
Signal
Pin
Signal
1
Red video
6
Red ground
11
Ground Shorted
2
Green video
7
Green ground
12
Data (SDA)
3
Blue video
8
Blue ground
13
H. Sync
4
Ground
9
5V
14
V. Sync
5
GND
10
Ground Shorted
15
Clock (SCL)
8.3 Preset Timing
Timing
Dot Clock
Signal Polarity
MHz
H
V
Frequency
FH (kHz)
FV (Hz)
VGA
640 x 480
25.2
-
-
31.5
60.0
VESA
800 x 600
40.0
+
+
37.9
60.3
VESA
1024 x 768
65.0
-
-
48.4
60.0
14
VESA
1360 x 768
85.0
+
+
47.7
60.0
9. caveat emptor / Guarantee exclusion
Claims for defects do not exist in the following cases:
- natural wear and tear, and any damage, errors, reduced output or changes in the condition
or function of our products that are due to external factors (e.g. blows, knocks, vibrations,
water, fire), or due to improper storage, handling, assembly or any other improper use, or
due to extreme climatic conditions, or to particular reception or operating conditions at the
location where the item is used;
- defects due to constructional errors or material defects, insofar as the customer has
prescribed the construction or the material;
- burn-in on the LCD panel caused by permanent display and spots forming on the LCD
panel
10.
Vendor:
Europe:
Headquarter (North America):
Canvys
A Division of Richardson Electronics GmbH
Raiffeisenstraße 5
D-78166 Donaueschingen
Canvys
A Division of Richardson Electronics GmbH
40W267 Keslinger Road
PO Box 393
LaFox IL 60147-0393 USA
Internet: www.canvys.com
Tel.: +49 (0) 771 83 00 – 0
Fax.: +49 (0) 771 83 00 – 80
VAT-No.: DE128240232
WEE-Reg.-Nr.: DE64678500
15