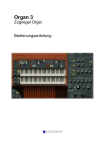
Download linplug relectro user manual - LinPlug Virtual Instruments
Transcript
linplug relectro user manual
Welcome
Thank you for purchasing a LinPlug relectro license or trying the demo.
The LinPlug relectro is a specialised effects plugin designed for creatively
modifying drum loops and samples and converting them into unique and
unusual electronic-sounding drums.
The LinPlug relectro's key features are a unique audio engine, a wide
range of possible effects, and an ability to morph between dry and wet
sounds. It comes with a large number of presets, however its vast creative
potential requires you to “play” it more like a conventional musical
instrument. Its easy-to-use interface and numerous processing and
modulation options invite you to create highly original beats.
This manual describes all aspects of the LinPlug relectro effects plugin and
is designed so that your use of this software is as efficient and as
pleasurable as possible. Appendix D also contains a quick reference, in
case you don't want to bother with the details.
We feel that the LinPlug relectro is exceptional because of its unique audio
processing features, and especially because it can turn even the most
boring beats into something different and exciting. We are confident that
you will get a lot of pleasure using the LinPlug relectro and that it will
become an inspirational part of your beat-making.
The LinPlug team, September 2011
Copyright: LinPlug V.I. GmbH, Germany, 2011, All rights reserved.
relectro is made by (alphabetic order) : Branislav, Pavol and Peter
Many thanks to the helping hands of (alphabetic order) : Chris, Christian,
Ed, Frank, Jim, Len, Marco, Matthias, Mirko, Nils and Sean
All technical specifications of the products specified in this manual may be subject to change
without notice. The documents may not be changed, especially copyright notices may not be
removed or changed. relectro is a trademark of LinPlug Virtual Instruments GmbH. LinPlug is
a trademark of LinPlug Virtual Instruments GmbH. VST is a registered trademark of Steinberg
Media Technologies GmbH. All other trademarks are the property of their respective owners.
LinPlug relectro user manual
Page 2
Table of Contents
INSTALLATION.............................................................................................4
FEATURES................................................................................................... 5
OVERVIEW.................................................................................................. 6
FOUR SECTIONS........................................................................................ 8
SIGNAL FLOW............................................................................................. 9
INPUT SECTION........................................................................................ 10
MAIN SECTION.......................................................................................... 12
MODULATION SECTION........................................................................... 17
OUTPUT SECTION.................................................................................... 20
PRESET CONTROLS................................................................................ 24
ECS (MIDI LEARN).................................................................................... 25
SETTINGS.................................................................................................. 26
APPENDIX A: PER WAVE PROCESSING ................................................27
APPENDIX B: MODULATION SOURCES................................................. 30
APPENDIX C: DO'S AND DONT'S.............................................................31
APPENDIX D: QUICK REFERENCE......................................................... 32
LinPlug relectro user manual
Page 3
Installation
Installation on Mac
After downloading the LinPlug relectro for Mac you will find a file named
"relectro Installer nnn.dmg" located in your download folder. “nnn” is the
actual version number, for example “100”. Most Mac will mount the disk
image automatically. If not, please double-click this file to open the image.
Then double-click the installer program which will guide you through the
installation process. The plugin file "relectro" and the factory presets will be
placed in the directory for virtual instruments on your Mac.
The next time you start your host software the LinPlug relectro will be listed
in the AU and VST effects plugin list.
Installation on PC
After downloading the LinPlug relectro for PC you will find a file named
"relectro Installer nnn.exe" located in your download folder. “nnn” is the
actual version number, for example “100”.
Start this program and the installer will guide you through the installation
process. Make sure you choose the correct plug-in directory so that your
host software can find the relectro. Refer to your host software's manual if
you are unsure about where this plug-in directory is located.
The plugin file "relectro.dll" and the factory presets will be placed in the
chosen directory. The next time you start your host software the LinPlug
relectro will be listed in the VST effects plugin list.
Common to Mac and PC
The first time the LinPlug relectro is started a Serial Number edit box will be
visible on the Setup page. It reads "Enter Serial here" in red letters.
Copy/Paste the serial number you have received into this edit box. If the
serial number has not been entered or it has been entered incorrectly, the
LinPlug relectro will remain in demo mode.
If you have any questions regarding the installation of LinPlug relectro
please contact our support team at:
http://www.linplug.com/support/support.htm.
LinPlug relectro user manual
Page 4
Features
The LinPlug relectro has a range of exciting features:
§
§
§
§
§
§
§
§
§
§
§
A unique audio processing algorithm, specially designed for processing
drum sounds and loops
The effect's sound can be continuously morphed between dry and wet
output in real-time using any (MIDI or host) controller
The input section provides the ability to change the volume and
frequency content of the input signal
A delay can be applied to thicken the input signal
The main processing section contains:
• A compressor / expander-like effect
• A cut-filter with infinite edge steepness
• A comprehensive pitch modulation section that enables control of
relative pitch, pitch-fixing of the input, and inversion of the pitch
following of the input signal
• variable wave repeat
• variable waveform replacement
• A two-band EQ-like section
The main modulation section contains:
• Two LFOs
• Two modulation step sequencers
• A Modulation Matrix with pitch-tracking and volume-tracking
Output section with additional HP and LP Filters and Chorus
Two control wheels for dry/wet blending and dry/wet morphing
Effects presets are stored directly on disk
MIDI program change supported
MIDI Learn, settings can be saved and restored
LinPlug relectro user manual
Page 5
Overview
The LinPlug relectro is a unique effects plugin.
The initial idea of relectro was to build a synthesizer with the ability to
modify its oscillators' signals on a per-wave basis. However, it turned out
that the concept of modifying audio on a per-wave basis was much better
suited to an effects unit which can use any kind of audio as its input signal.
But what does per-wave processing mean?
Per-wave processing means that each complete wave cycle of the audio
input is treated individually. The stream is divided into the first wave, the
second wave, the next, and the next and so on. This opens up processing
options which are not available with a conventional audio signal. We at
LinPlug carefully evaluated all these processing options and fine-tuned
them so that they were useable in a musical context; the result is the
different modules found in the relectro's main processing section.
To fully understand how the relectro functions it helps to have an idea of
how it is structured internally. The audio first comes into the relectro’s input
section, where its volume and frequency content can be adjusted. The input
can also be processed with a delay. However, the delay processing is not
like a typical delay. Instead, when the delay is placed in front of the
relectro's main processing section it creates an unique effect that is very
different to simply adding delay to the relectro's output.
However, it's the relectro's main processing section that really highlights its
uniqueness. It modifies the signal to an extent far beyond conventional
effects processors. We found that the best way to describe the effect is that
it changes the input “from a boring standard drum loop to a wicked
electronic beat”; it “electrifies” the sound, creating a distinctive “hard”
electro sound.
After the main processing section, the relectro's signal goes into the output
section, which contains a dual filter setup: High-Pass followed by LowPass. These are classical filters, because its always good to filter a bit, you
know... There is also a Chorus which is nice to add some width to certain
effects. The best part however in this section is the Wet controls, labeled
“Wet” for the standard Dry / Wet blending you know from effects units. The
control left of that, labeled Amt is a “processing Amount” control, allowing
you to truly morph into the effect (so not just blend, but gradually apply the
sound change). Try that to clearly hear the huge difference.
LinPlug relectro user manual
Page 6
All this is stepped up with the LinPlug typical Modulation Matrix featuring a
number of modulation sources and destinations. The modulation sources of
course include the volume and pitch of the input signal. The LinPlug
relectro also contains two LFOs and two Step Modulation Sources, good for
some wicked modulations.
More detailed information can be found in the following chapters. Appendix
D also contains a quick reference, in case you don't want to bother with the
details.
Operation / Controls
The LinPlug relectro dials and sliders are operated in a linear manner, so
just move your mouse up/down to modify a control.
Holding down the ALT key while clicking on a control changes the selected
control's value a minimum step upwards (when clicking in the upper half of
the control) or a minimum step downwards (when clicking in the lower half
of the control).
Holding down the CTRL key (Windows) or COMMAND key (Mac) while
clicking on a control sets the control to its default value (e.g. for Volume
controls it sets the control's value to 0 dB).
Holding down the SHIFT key while changing a control's value enables finer
control values to be set.
Double clicking once in a Modulation Matrix slot sets the value of the slot to
0.00. Double clicking in the same slot a second time resets the slot to its
previous value.
All Controls can be controlled using external MIDI messages. To do this you
need to use the LinPlug relectro's ECS which is described in detail later in
this manual.
LinPlug relectro user manual
Page 7
Four Sections
For the sake of this manual we will look at the relectro as being made of 4
sections:
All aspects of the respective sections are described in detail in the following
chapters.
LinPlug relectro user manual
Page 8
Signal Flow
The signal flow in relectro is pretty simple
The audio being sent to relectro first got split into two parts, like in almost
every effects unit, one part remains as the Dry signal which can be mixed
with the Wet signal in the output section, I'm sure you heard something like
this before.
The part of the signal which is going to become Wet part is the sent into
relectro's Input Filter. This filter actually works like a splitter, as you can see
in the above diagram, a part is sent to the Leak control and the other part
gets into the Input Delay.
From now on its pretty linear, the Input Delay (more on why there is a delay
in the input section later on) sends the signal further to the main
processing , from where it gets to the Output Filter, the Output Chorus to
the Wet control for being mixed with the original signal.
As you see the modulation section is not involved in the audio signal flow,
however, as you might have guessed, all the modulation origins here and
the control signals flow from the modulation section into all the different
parts of relectro.
LinPlug relectro user manual
Page 9
Input Section
The relectro has a dedicated input section, as preprocessing audio before it
gets into the relectro’s main processing is vital for achieving satisfying
results.
First you have a FILTER slider which is good for
reducing some of the higher frequencies of the input
audio material. As relectro rather adds harmonics and
distortion, too much high harmonics in the input audio
can be problematic or lead to undesired results. So
with the FILTER basically a low-pass filter is applied to
reduce harmonics in the input audio.
The LEAK control next to it lets you pass the removed
harmonics directly to the output, so they are not lost but
added to the processed audio of relectro. However, it
much depends on the audio material if no, some or full
leaking is sounding best.
STEREO lets you adjust the Stereo Width of the audio
being processed by relectro’s main processing. Turned
fully clockwise it keeps the stereo widths as it is in the
audio being fed into relectro while turned fully counter
clockwise the signal is mixed down to mono.
Note: If the output of relectro sounds too wild,
sometimes reducing stereo width will do the job. Also,
when applying the Delay and/or the Chorus effect it
might be appropriate to reduce stereo width
beforehand.
With GAIN you can simply adjust the input audio material so that its a bit
below 0 dB but not higher, the peak meter below the GAIN control shall
help you (its −12, −6, −3 and 0 dB), so let the loudest parts of the audio just
light the green parts of the peak meter.
LinPlug relectro user manual
Page 10
Below that is a stereo delay unit. Well, this is no
brainless addition to relectro, just filling some space.
The reason that there is a built in delay is this: As
relectro operates on a per-wave-cycle basis, it makes
much of a difference how these wave cycles look. And
if you overlap some audio with repetitions of previous
audio, you get very interesting sonic results (which are
sometimes hard to predict). In any case a delay before
relectro is much of a difference to a delay after
relectro, so we included it to emphasize this important
sound sculpturing trick. Once again: complicated to
describe, just try it.
The delay itself comes with anything you would expect
from stereo delay: separate time settings for L=left and
R=right delay (set them to the same value if you want
a mono delay).
A STEREO width control (set it to the middle for
mono), depending if you set it fully left or right you get
the respective delay line first.
Then a WET control for the effects amount and a
FEED control for feeding the delayed signal back to
the delays input.
Note: As for any of relectro’s effects settings, start
decent with a low WET setting to not overdo it.
LinPlug relectro user manual
Page 11
Main Section
So how should one think of the various main processing options in
relectro ? First of all they behave similar than their name-giving
counterparts, but with different audible results and usually not in the way
one would expect. Lets look at this sound sculpturing tools one by one:
The Compressor / Expander is doing exactly this compressing or
expanding of the dynamics, however, on a per-wave-cycle basis. It has no
threshold, like you might know it from a usual compressor, the relectro just
compresses audio at every level. The same applies for expansion, but you
know that by now, so lets stick with compression for this description, it
always applies for expansion as well.
It also has no attack or release parameters, simply because it treats every
wave cycle on its own, and as every wave-cycle has a certain audio level
there is no need of attack or release.
What remains is the compression ratio which can be adjusted with the
slider from no compression all the way up to 60 dB compression. This is an
tremendous rate, however, the logarithmic response of the slider allows you
to adjust it nicely.
Note: As each wave-cycle is processes individually, all kinds of sonic
artefacts will arise, particularly with high compression (this however is
almost no issue when expanding the dynamics).
Next is the Cut-Filter, which is similarly to a combined high-pass and lowpass filter. This results in a kind of band-pass filter with a adjustable width
(range of frequencies which pass). When you move the high-pass higher as
the lowpass is, it turns from band-pass into band-reject, so that only wave
cycles outside of the selected frequency range will pass through.
LinPlug relectro user manual
Page 12
The filters operate with infinite slope, this means, that every wave-cycle
which represents a frequency outside the selected filter range is drastically
cut away. Its not lowered in volume or anything, it just vanishes completely.
To find out what happens with the resulting gaps (after all when you
completely remove certain cycles you have gaps in the audio stream), see
next chapter.
There is a comprehensive section in relectro that deals with pitch and
frequencies. Top-left it starts with a mode switch. The description of the
modes is much longer than the practical relevance of it, anyway, its working
like this:
In GAP mode every gap that arises (in example from the cut filter just
described, but also due to raising pitch) simply remains a gap. This is
good fro some raspy sound (well, it can create many flavours of
sound, but this half way describes it in one word).
In FILL mode, whenever a gap arises, its filled with the just played
wave-cycle. So a certain cycle may be repeated once or multiple time,
if followed by a gap.
In BLEND mode finally, the position and size of the gap is considered
and its filled with a blend of the previous and the next wave-cycle so
that you get a more continuous transition (or blending) of the
waveforms.
In practice Gap sounds clearly different from Fill and Blend while the latter
two are quite similar. Appendix A shows some graphics to illustrate the
three operation modes.
LinPlug relectro user manual
Page 13
Note: When pitching down, GAP mode is not recommended as it requires
many voices, resulting in possible difference between realtime and bounce
due to the way the voice limit in relectro works.
Next comes the PITCH parameter, which allows some semitone accurate
pitching of the audio material within an +- 12.00 semitones range. One has
to keep in mind that this is no pitch shifter like you find it in a DAW or
dedicated pitch shifter plugin, its just a on a per-wave-cycle basis faster or
slower playback of every single wave-cycle. This per-wave-cycle operation
is good for not changing the length of the audio material while pitch shifting,
however, it delivers no accurate high quality pitch shifting but an effect
sound. But thats the intention after all, relectro should give you some new
effects at hand, not something that already exists.
Next comes the FIX slider, which does adjust a unique effect: Having it all
way down it does just nothing, having it all way up does completely fix
every single wave-cycle to the very same length (that means: a fixed pitch).
We could have made this a switch, but this way you have more flexibility in
creating unusual sounds by setting up a partial fixing (thus effectively
applying a different scale, but forget about theory, just try it).
Next to the FIX slider is the NOTE slider which defined to which note the
frequency of the audio material should be fixed. So while with FIX you
determine how much the frequency should be fixed, with note you
determine the actual frequency.
Note: The difference between PITCH and FIX/NOTE is that with PITCH you
change the frequency of the audio material relative to its original frequency,
while with FIX/NOTE you set it to a predetermined pitch, no matter what
pitch the audio material is at.
The final three slider in the pitch section still belong to the FIX parameter
and are for pitch tracking effects. Lets assume you have turned FIX all the
way up, so each wave-cycle has the same length and thus frequency. With
track you can make the frequency to which the audio gets fixed move along
the frequency of the audio material. Wait, isn’t that contrary to what we
aimed for with FIX ? Somewhat it looks so, but its not, because with the
SPEED parameter you set up how quickly it follows the audio materials
original frequency. So, in other words, TRACK and SPEED behave like a
portamento/glide section of a synthesizer (TRACK would be kind of glide
amount and SPEED is glide speed).
Note: Its best to try these three controls: load relectro with the default
preset Z_Default, set FIX to its maximum value, feed in some audio, maybe
a not too complicated drum loop and play with TRACK an SPEED controls
for a few minutes.
LinPlug relectro user manual
Page 14
Next is the Wave section which has two main functions, to repeat waves
and to replace them.
First the REPEAT control: Cycles from the Audio stream can be repeated;
however, repeating all cycles would of course only result in a terrible noise.
Thus the relectro repeats the first cycle it detects as long as it detects no
cycle with higher volume. If either the amount of repeats (determined by the
REPEAT slider) or a louder cycle is detected, relectro will play back the
next cycle, again repeating it for a while.
The REPEAT slider has an enormous range, while on the bottom its
gradually starting to repeat a cycle at all, at top it repeats it for almost a
second (which is a long time for a single cycle to repeat).
So when you have kick drum sound, relectro will let pass the first transients
until the kick reached full volume and the repeat the loudest wave-cycle of
the kick for the time the kick is sounding. This gives some pretty thick (and
often sick) sounds.
The WAVE-REPLACE however does a quite simple but sonically interesting
job, every wave-cycle can gradually be replaced with the chosen waveform.
You can select one of many waveforms from the waveform name (which
turns into a menu once you click it) or by browsing with the arrow files
through the available waveforms. There is no rule of thumb, you need to try
which waveform does a well replacement for certain audio material. You
can try to use bright waveforms with rather dark audio material and dark
waveforms with bright audio but often the opposite might work as good.
LinPlug relectro user manual
Page 15
The main processing section finally contains a EQ section, but its really
only EQ-alike. Like with most EQ’s you have frequency and gain controls,
to set up a operation frequency and the gain volume change. The relectro
EQ is a simple Low/High shelves EQ. Unlike the EQ you have in your daw
or as a separate plugin, this EQ has infinite slope. And as its like all main
parts of relectro working on a per-wave-cycle basis its results are different.
While usually an EQ does affect all harmonics, the relectro EQ does treat
the complete wave cycle, disregarding its harmonic spectrum.
What does that mean ? Lets look at an example: Assume some audio at
440 Hz, but with lots of harmonics, lets say a saw wave. With a
conventional high-shelf EQ at 2 kHz, you would be able to reduce all
harmonics at 2 kHz and above. The relectro EQ however, set at 2 kHz wont
touch the audio at all, because it looks at the full wave-cycle, which has a
440 Hz frequency and is thus below its operation frequency.
This makes much of a difference, audibly. The relectro EQ in some way is
less effective as it ignores harmonics, but more effective as it has infinite
slope and it adds some distortion as its emphasizes or reduces individual
single wave-cycles in the audio stream.1
1 The distortion when volume changing single wave cycles comes from sudden
change in harmonic spectrum as well as added harmonics at the transition from
one cycle to the next. No need to know these technical details though.
LinPlug relectro user manual
Page 16
Modulation Section
The modulation section is the complete lower part of the middle of relectro,
all below the just described audio processing part. You find 4 modulation
sources here, 2 STEP MODULATIONS and below 2 LFOs and the MATRIX
on the right. So thats look at these one by one:
STEP MODULATION is a set of two modulators, each is capable of
producing from 2 up to 16 modulation values in the range −48 to +48. So its
kind of variable length, adjustable waveform LFO. Or its just up to 16 steps
being used for modulation, whichever view you prefer.
On the right you can adjust both the length of the modulation pattern (2 to
16 individual values / steps) as well as the tempo, which is synced with the
host. Click on the tempo to adjust it and check the note about alignment in
the LFO section below.
Each step has a value in the range −48 to +48, which translates into min…
max in most cases, e.g. When modulating the WAVE REPLACE (using the
MATRIX). When modulating the PITCH NOTE however, it exactly translates
into semitones, so −48 to +48 semitones.
Below that there are two constantly running LFO’s. An LFO is an oscillator
that generates low frequency signals that are used to modulate certain
parameters of the signal processing. Each of the LFO's uses one of the
waveforms shown (sine, triangle, saw, pulse, random or sample/hold) and
an individual tempo setting (click on it to open a menu with all available
values).
The LFO’s are always synced to both host tempo and song position.
Note about alignment: With a tempo slower then a full note ( e.g. 4/1 ) as
well as with broken values which not align exactly with one bar (e.g.
7/16th ) the modulation might not align properly with the audio material that
LinPlug relectro user manual
Page 17
you feed into relectro. In this case, shift your audio by one or more bars to
align it the way you want it.
The MATRIX is where you can make use of the LFOs or STEP
MODULATION as well as other modulation sources, be it from the relectro
engine or from MIDI controller to create user-defined modulation routings.
On the left you find the Modulation Sources, in the mid the Modulation
Depth and on the right the Modulation target.
The Modulation sources are either from the relectro audio engine (Pitchfollow and Volume-follow), the MIDI which is received from the host
software (your daw software like Logic or Cubase) and relectro’s
modulators (STEP MODULATION and LFO). These are described in detail
in appendix B. Finally there is also the Constant modulation source which
comes handy sometimes to try which maximum effect a certain modulation
might reach (Constant is always the maximum possible positive
modulation value; the same as in example the LFO has when its wave is at
its maximum) .
To remove a modulation source or destination select the "- - - - -" entry in
the menu, this modulation is then inactive.
The Modulation Depth determines how much a certain Target is modulated
by the Source; a value of 0.0000 means that actually no modulation takes
places. To change the modulation depth click on the amount display and
move the mouse (while keeping the mouse button pressed) upwards or
downwards (increasing or decreasing the value) until the desired amount
has been reached. The further you move the mouse, the less sensitive it
gets, allowing more drastic changes. To temporary disable a modulation,
double click the Depth value (it will become 0.0000). To restore the original
Depth, double click it again and it will jump back to its original value.
LinPlug relectro user manual
Page 18
Note: A negative modulation depth is mainly used to inverse the modulation
source’s waveform. So you can in example use the falling sawtooth of the
LFO with a negative Depth to achieve the effect of a raising sawtooth.
The Modulation Destination determines what is modulated or changed. If
you pick in example the Pitch Note it means that the value of Pitch Note
from the main section is changed according to the value of the Modulation
Source and as much as set up in Modulation Depth. The Destinations
include almost all parameters from the main audio processing as well as
some from the input and output section. They are simply named after the
respective parameters in the input, main processing and output section.
Additionally you find Mod Matrix Depth 1..3 in there, allowing a modulation
being modulated itself; in example you could use a LFO in Matrix slot 1 to
modulate the Pitch and set up the Modulation Wheel to modulate slot 1
(thus effectively controlling the LFO to Pitch modulation with the Modulation
Wheel).
Note: Using a MIDI controller is often advantageous to using Parameter
Automation (something your host software most likely supports to record
parameter changes). The reasons are as follows:
When you automate a parameter, you cannot easily change its value later
on, because automation overwrites the changes you make on the relectro
user interface. However, when using in example the MIDI Modulation
Wheel, assigned via the Matrix, you can easily adjust the modulated
parameters value later on.
Second, you not only can change the parameter value easily, you can also
easily adjust the intensity of the modulation, which might come handy even
more often.
Finally relectro can handle such modulation which is assigned via the
Matrix more efficiently as a constant change of a parameter; however, this
is nothing you need to care about anyway.
LinPlug relectro user manual
Page 19
Output Section
relectro has quite a comprehensive output section, including a combined
high-pass and low-pass filter with resonance, a chorus effect and dials for
wet and effects amount (more about the difference of these two soon) and
of course a volume dial.
Like the input section, the output section works on a conventional way on
the audio stream that went previous through input and main processing
section. We chose both filter and chorus as they are particularly useful to
fine-tune the audio created by the main processing.
The filter offers you for each part a
CUT=cutoff and RES=resonance control
like you know them from most subtractive
synthesizers. The filter type is fixed to a 12
dB high-pass and 12 dB low-pass type
respectively.
With the CUT=cutoff you adjust the
operation frequency, which means the highpass is only letting pass frequencies higher
than its operation frequency and the lowpass is only letting pass frequencies lower
than its operation frequency.
With RES=resonance you can adjust the
additional emphasis around the operation
frequency.
LinPlug relectro user manual
Page 20
The CHORUS effect can be used to
"thicken" a single sound creating the
impression that it contains multiple
voices. The Chorus works by mixing
delayed signals with the original
signal. It offers TIME and SPEED
settings which together make up the
characteristic chorus sound. Longer
times produce a "chorusing" effect
while shorter times create a "flanging"
effect. The SPEED dial sets the rate
at which the delay time is modulated.
WET adjusts the amount of chorus
which is added to the sound, while
FEED is allowing you to feedback the
processed audio into the chorus input,
this is usually used when creating
flanging sounds with shorter delay
times.
VOLUME is the final volume
adjustment parameter, so that you
can raise or lower the relectro’s output
to be neither too loud nor too silent. Again, like in the input, the peak meter
helps here, offering lights for −12, −6, −3 and 0 dB. Always keep the red
light off to avoid potential clipping or distortion later in the signal chain.
LinPlug relectro user manual
Page 21
So now you have a WET and an AMT
dial on the relectro, what's that
please ? These two offer two ways to
adjust the overall effects intensity of
the relectro. With almost every effects
unit you have a WET control, which
adjusts the amount of processed
audio given to the output. The same
applies in relectro. However, with the
AMT=amount dial you can morph into
the relectro’s processed sound. For
each parameter in relectro there is
one value which means “keep the
input unprocessed”, in example for the
PITCH thats the middle setting (+- 0
semitones) or WAVE-REPLACE its
the full left setting (no replacement).
So when the AMT dial is fully down all
Parameters are in these neutral
position (not visually on the user
interface,
but
internally
for
processing). And as you gradually
move the AMT dial up, all parameters
approach internally the values shown
on the user interface, thus gradually
getting from a neutral, unprocessed
sound to the processed, affected sound.
Note: When you only want to use the WET dial for conventional control,
keep the AMT dial at maximum. When you only want the morphing, keep
the WET dial at maximum. However, for maximum pleasure adjust them as
you like ;-)
LinPlug relectro user manual
Page 22
If you are curious what parameters are actually affected by the AMT wheel,
here is a graphic illustrating just this:
You don’t have to learn this or print and pin it on your wall, its just if you are
curious how things work under the hood.
Above the AMT dial is a CAMERA symbol. Thats the snapshot function. At
times you may find a cool and useful sound while moving the AMT wheel.
Maybe you want to save as a new preset, or just go on from this particular
setting.
Clicking on the Snapshot icon, then relectro recalculates all parameters, so
that they produce just this sound, but at the AMT wheel fully up. So what
you will see is all parameters moving a bit towards their neutral position and
the AMT wheel going fully up. The sound remains just as you heard it
before.
LinPlug relectro user manual
Page 23
Preset Controls
The Preset Browser consists of two displays. The left one shows the
Current Bank and the right one shows the Current Preset. Whenever a
Preset is loaded using the file controls right of these displays, the Preset
name is updated with the name of the loaded Preset and the Bank name
(that's the name of the directory that contains the Preset).
By default the Preset Browser points to the factory presets installed with the
LinPlug relectro.
Presets can be changed in three different ways. You can load a new Preset
with the file controls, which work by clicking the < (Previous) or > (Next)
arrow buttons located right of the Preset name.
You can select the desired Preset directly from the right display, which turns
into a menu when you click on it.
You can also change a Preset by sending a program change command
from your host to the synth (could be either a built in feature of the host or a
MIDI program change from your MIDI controller).
The Current Location can be changed by loading a Preset from a different
directory or by selecting the desired location from the left display, which
also turns into a menu when you click on it.
The File Controls located to the right of the arrow buttons are used for all
File-related operations. The Load button opens a dialog that lets you select
a file for loading. The Save button allows you to save the current Preset
settings. Its recommended to save your presets in the “User presets” folder
of relectro.
Note: When you load a Preset using the Master section's file controls, the
previous Preset is erased so if you want to keep changes in a Preset, make
sure you save it before loading another one.
LinPlug relectro user manual
Page 24
ECS (MIDI Learn)
ECS means Easy Controller Setup, also called “MIDI Learn”. This section
makes it simple to control the LinPlug relectro from an external MIDI
controller (either hardware or software). All you have to select Learn from
the ECS menu, select a LinPlug relectro parameter with the mouse and
finally send some MIDI messages from you MIDI source. That's all there is
to do!
From now on you can change the parameter with that controller. You can
define up to 128 parameter-controllercombinations. This does not depend
on the type of controller you have nor
the particular MIDI Control Change
messages it sends.
ECS settings are save automatically,
but can be saved and restored
manually using the Load and Save
functions from the menu. A single
controller assignment can be cleared
using the Clear menu entry and move
controls that you wish to be cleared
(de-assigned from MIDI CC's).
The Clear All function clears all
controller assignments at once.
Don't forget to switch Off the ECS
after you have finished making or
clearing assignments!
LinPlug relectro user manual
Page 25
Settings
The Settings on the "Rear Panel" of the LinPlug relectro are accessed by
clicking on the setup button in the main section of the LinPlug relectro's
front panel.
First you will find the actual version of relectro you are running and the
SERIAL NUMBER field (reading “Enter Serial here” or “Valid” after a correct
serial number has been entered).
Startup finally is used to define a preset that is loaded upon startup of
relectro (when you insert a new instance of relectro in your host).
To switch back to the Front Panel click the Edit button on the right or the
relectro logo.
LinPlug relectro user manual
Page 26
Appendix A: Per Wave Processing
Some examples of the Per-Wave processing of relectro.
Assumed input signal (not very realistic, but good to show the actual
processing):
The example input consists of a full level pulse wave, followed by a -6dB
(half level) triangular wave, a -6dB pulse wave and finally a full level
triangular wave.
Compression and expansion works on any wave which is below 0 dB:
Compression raises the signal level of the two mid wave cycles (see
above), while Expansion does further reduce them:
LinPlug relectro user manual
Page 27
This also is the basic principle for the EQ, if a wave cycle is below a certain
frequency the Low-EQ's Gain setting determines how much its changed in
Level. If a wave cycle is higher in frequency than the High-EQ's Gain does
affect such high frequency wave cycle.
But relectro's Per-Wave processing does also include pitch changes: Each
wave cycle can be reduced or increased in pitch, using one of three
operation modes:
This is an example of raised pitch in Gap mode, as in raised pitch every
wave cycle is shorter, there are simply gaps between the cycles. Another
mode allows to fill these gaps:
In Fill mode, when one cycle is completed, but the next is “not yet there” (its
time has not yet come), the wave-cycle is simply repeated.
In this example, after the full level pulse wave completed, its played back
again, filling the gap. This means that the triangular cycle starts a bit later
(which is not perceived as any kind of delay btw). When the triangular wave
is finished, its already time to play the next pulse wave, so the triangular
wave has not to be repeated. The same applies for the pulse wave. Just
the final triangular wave will be repeated, as it was not yet time for the next
wave (whatever that may be, we don't have it in our example).
LinPlug relectro user manual
Page 28
There is a third Pitch Processing Mode: Blended
In Blended Mode a cycle is not simply repeated when its not yet time to
start the next wave cycle. Instead relectro computes what the signal would
most likely be at this point, when assuming a gradual harmonic change. So
in our example, after the pulse wave comes a mixture of both pulse and
triangular shape as well as an averaged level. If pulse and triangle would
have had a different pitch, that would have also been interpolated. In this
way it goes the whole way, always averaging the input signal so that we
have a more gradual change in the sound. In practice however, the
perceived changed between Gap mode and Fill or Blended mode is clear,
while the difference between Fill and Blended mode is most often only
subtle.
LinPlug relectro user manual
Page 29
Appendix B: Modulation Sources
Pitch-follow
whenever the relectro is feed with some audio, it slices
it into many individual wave-cycles. Each wave-cycle
has a certain length, depending on its pitch. So relectro
traces the pitch of the audio material. This pitch is
available as modulation source, the higher the pitch of
the audio, the higher is the modulation value.
Volume-follow
just like the pitch, relectro also always knows the
volume of the audio material being sent to it, this
volume information is available as modulation source,
the higher the volume of the audio, the higher is the
modulation value.
MIDI Note Number If you host allows to send notes to effect plugins (as
opposed to instrument plugins), relectro can make use
of this MIDI Note Number as modulation value; if sent to
the Modulation Target “Pitch Note” with a Modulation
Depth of 1.0000 you get an exact change of the audio
materials pitch according to the MIDI notes being sent
to relectro.
Pitch Wheel
The MIDI Pitch Wheel, this is a unipolar modulation
source, ranging from neutral to maximum (no negative
values).
Modulation Wheel The MIDI Modulation Wheel, this is a normal, bipolar
modulation source. Its Continuous Controller (CC) 1.
Breath Controller
Midi CC 2 (unipolar)
Foot Controller
MIDI CC 4 (unipolar).
Expression Contr. MIDI CC 11 (unipolar).
LFO 1, LFO 2
relectro’s internal LFO’s 1 and 2 (bipolar)
Step Mod 1 and 2 relectros internal Step Modulation (bipolar, however,
when using only the range 0..48 for the steps it behaves
unipolar).
Constant
a constant, positive modulation value (unipolar)
LinPlug relectro user manual
Page 30
Appendix C: Do's and Dont's
To achieve best results, its important to not over-do it when using relectro:
DON’T
- use all main effect options at once
- use any of them to an extend that it gets nasty, at least not until you want
it get nasty
- use relectro as a mastering plugin
–
use it on heavily processed audio
–
DO
- use relectro on single or few drum or percussion tracks
- use it with dry or almost dry audio
- use only few of the many processing options,
- set them decently
- reduce the input-filter to avoid particular nasty high frequency glitches
- use rather expansion then compression as relectro rather thickens
anyway
- use rather dull waveforms for the wave replacer to not create even more
harmonics
- use the output filter to pronounce the frequency range you like to be
prominent
- use modulation decently
- make yourself familiar with its characteristic, its like a new instrument
Particularly the last DO is important, relectro is not just another fx, one
needs to learn to play it like an instrument. I know thats not popular,
however, if you want a new, unique and personal sound, there’s no way
around. Its not too difficult though, and usually fun.
LinPlug relectro user manual
Page 31
Appendix D: Quick Reference
LinPlug relectro user manual
Page 32


