1
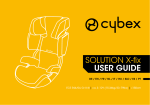
SOLUTION X-FIX
USER GUIDE
UK / DE / IT / FR / NL / PL / HU / CZ / SK
ECE R44/04, Gr. 2–3 | 15-36 kg (ca. 3–12Y)
UK – SHORT MANUAL / DE – KURZANLEITUNG / IT – SOMMARIO / FR – LE SOMMAIRE / NL – BEKNOPTE HANDLEIDING /
PL – INSTRUKCJA SKRÓCONA / HU – RÖVID ISMERTETÉS / CZ – KRÁTKÉ INSTRUKCE / SK – KRÁTKE INŠTRUKCIE
1
1
2
3
4
5
6
7
8
9
10
11
12
13
14
15
DEAR CUSTOMER!
Thank you for purchasing The cyBeX soluTion X-fiX. We assure you ThaT in The process of developing
The cyBeX soluTion X-fiX We focused on safeTy, comforT and user friendliness. The producT
is manufacTured under special qualiTy surveillance and complies WiTh The sTricTesT safeTy
requiremenTs.
SEHR GEEHRTE KUNDIN, SEHR GEEHRTER KUNDE!
vielen dank, dass sie sich Bei der Wahl eines kindersiTzes für den cyBeX soluTion X-fiX enTschieden
haBen. Bei der enTWicklung des cyBeX kindersiTzes soluTion X-fiX haBen sicherheiT, komforT
und BedienfreundlichkeiT im vordergrund gesTanden. das produkT Wird unTer Besonderer
qualiTäTsüBerWachung hergesTellT und erfüllT sTrengsTe sicherheiTsanforderungen.
GENTILE CLIENTE!
ci congraTuliamo con lei per avere acquisTaTo il seggiolino cyBeX soluTion X-fiX. le assicuriamo
che nel progeTTare cyBeX soluTion X-fiX i nosTri principali oBieTTivi sono sTaTi la sicurezza, il
comforT e la maneggevolezza. il prodoTTo è sTaTo elaBoraTo soTTo uno sTreTTo conTrollo
qualiTaTivo e risponde ai più severi sTandard di sicurezza.
4
DE
INHALT
IT
ARGOMENTI
Warnung! Um den optimalen Schutz für Ihr Kind zu gewährleisten, muss
der CYBEX Solution X-ix unbedingt so verwendet werden, wie es in dieser
Anleitung beschrieben wird.
Attenzione! Per garantire un’adeguata sicurezza del Vostro bambino è
molto importante che l’uso e l’installazione di CYBEX Solution X-ix siano
effettuati seguendo scrupolosamente questo manuale d’istruzioni.
hinweis! Bewahren sie die anleitung immer griffbereit auf (z.B. unter dem
elastischen Bezug an der rückseite der rückenlehne).
nota Bene! consigliamo di conservare il manuale istruzioni sotto la
copertura elastica sul retro dello schienale in modo da averlo sempre a
portata di mano per una veloce consultazione.
DE: Hinweis! Durch länderspeziische Anforderungen können
produktmerkmale abweichen.
iT: nota Bene! in base alle normative locali alcune caratteristiche del
prodotto potrebbero differire.
kurzanleiTung......................................................................................1
Warnung / hinWeis .............................................................................2
zulassung – eignung .........................................................................5
ersTmonTage ........................................................................................8
anpassen an die körpergrösse ......................................................8
einsTellung der kopfsTüTze ...............................................................8
der richTige plaTz im fahrzeug ......................................................10
BefesTigen des kindersiTzes miT den X-fiX rasTarmen ................12
ausBau des soluTion X-fiX ...............................................................14
den siTz ins fahrzeug sTellen ..........................................................14
anschnallen des kindes..................................................................16
isT ihr kind richTig gesicherT? .......................................................18
neigungsversTellBare kopfsTüTze ................................................18
pflege ...................................................................................................20
enTfernen des Bezugs .......................................................................20
enTfernen des siTzBezugs von der siTzlehne ...............................20
reinigung ............................................................................................22
verhalTen nach einem unfall........................................................22
produkTleBensdauer .......................................................................22
enTsorgung .......................................................................................24
garanTie ..............................................................................................24
sommario .............................................................................................1
aTTenzione / avverTenza ....................................................................2
omologazione - qualificazione ...................................................5
prima insTallazione ............................................................................8
regolazione in Base alla corporaTura del BamBino .............8
regolazione dell‘appoggiaTesTa ..................................................8
posizionamenTo correTTo del seggiolino all‘inTerno
dell‘auToveicolo ..............................................................................10
insTallazione del seggiolino auTo con i conneTTori ...........12
rimozione del soluTion X-fiX ..........................................................14
fissaggio del BamBino ....................................................................14
allacciare la cinTura di sicurezza del BamBino ....................16
il BamBino è fissaTo correTTamenTe?...........................................18
reclinazione dell‘appoggiaTesTa ................................................18
manuTenzione del prodoTTo .........................................................20
rimozione del rivesTimenTo ............................................................20
rimozione del rivesTimenTo schienale ........................................20
pulizia ...................................................................................................22
cosa fare a seguiTo di un incidenTe ............................................22
durevolezza del prodoTTo ............................................................22
smalTimenTo........................................................................................24
garanzia .............................................................................................24
6
b
FIRST INSTALLATION
The child seat consists of a booster seat (d) and a backrest (a) with height
adjustable shoulder and headrest. Only the combination of both parts
provides best protection and comfort to your child.
a
c
a
d
d
Warning! The parts of the CYBEX Solution X-fix must not be used alone or
in
combination with boosters, backrests or headrests from other
manufacturers or of a different product series. In such cases, the
certification expires immediately.
Connect the backrest (a) to the booster (d) by hooking the guide lug (b)
on the axis (c) of the booster (d).
Note! Please keep the instruction manual close by for future reference
(e.g. by storing it under the elastic cover at the rear side of the backrest.)
Warning! Please make sure that the plastic parts of the child seat never
get jammed (e.g. in the car door or by adjusting the back seat).
ADJUSTMENT REGARDING THE CHILD‘S HEIGHT
A headrest can only provide the best protection and comfort for your
child if optimally adjusted. Only then it can guarantee the optimal
position of the diagonal belt (f). you can adjust the height of the solution
X-ix headrest (e) in 11 positions. The shoulder rest is attached to the
headrest and does not have to be adjusted separately. You can check
the optimal adjustment of the headrest by trying to it exactly two ingers
between the headrest and the shoulders of the child.
e
f
ADJUSTMENT OF THE HEADREST
e
h
7
• Place your child in the child seat.
• pull the adjustment handle (h) in order to unlock the shoulder and headrest.
• Bring the shoulder and headrest (e) in the desired position.
• As soon as you let go of the adjustment handle (h), the shoulder and
headrest (e) locks automatically.
ERSTMONTAGE
der kindersitz besteht aus einem sitzkissen (d) und einer rückenlehne (a)
mit höhenverstellbarer schulter- und kopfstütze. nur die kombination der
beiden Teile bietet ihrem kind den bestmöglichen schutz und komfort.
PRIMA INSTALLAZIONE
il seggiolino di sicurezza per auto è composto da una seduta (d) e di uno
schienale (a) con appoggiatesta e protezioni per le spalle ad altezza
regolabile integrati. solo l’insieme di entrambe le componenti fornirà al
vostro bambino la corretta protezione e comfort.
Warnung! Die Bestandteile des CYBEX Solution X-fix dürfen weder einzeln,
noch in Verbindung mit Sitzkissen, Rückenlehnen oder Kopfstützen
anderer Hersteller oder einer anderen Baureihe verwendet werden. Die
Zulassung würde in einem solchen Fall sofort erlöschen.
Attenzione! Le parti del seggiolino CYBEX Solution X-fix non devono
assolutamente essere usate separatamente o in combinazione con
prodotti
di altro modello o produttore. In tal caso la licenza sarà automaticamente
annullata.
die rückenlehne (a) wird mit der führungsnase (b), auf der achse (c) des
sitzkissens (d) eingehakt.
lo schienale (a) è agganciato nell’asse (c) della seduta (d) con il binario
di ancoraggio (b).
Hinweis! Bitte bewahren sie die gebrauchsanleitung in reichweite (z.B.
unter dem elastischen Bezug auf der rückseite der rückenlehne) auf.
Nota! raccomandiamo di conservare il manuale in un posto sicuro.
dovrebbe essere sempre a portata di mano per riferimenti futuri.
consigliamo di riporlo sotto la copertura elastica, sul retro dello schienale.
Attenzione! Fare sempre molta attenzione a non danneggiare il sedile
durante l’uso quotidiano, inserendo le cinture o nel chiudere le porte del
veicolo.
REGOLAZIONE IN BASE ALLA CORPORATURA DEL BAMBINO
soltanto una protezione per le spalle ed un appoggiatesta (e) regolati
correttamente in base all’altezza possono fornire l’adeguata protezione
e comfort al vostro bambino e contemporaneamente garantire la
posizione
ottimale della cintura diagonale (f). l’altezza (e) può essere regolata in 11
posizioni. Le protezioni per le spalle sono issate all’appoggiatesta e non
richiedono una regolazione distinta. l’altezza dev’essere regolata in
modo da poter inserire 2 dita tra la base dell’appoggiatesta e la spalla el
bambino.
Warnung! Achten Sie immer darauf, dass die Einzelteile des Kindersitzes
niemals gestaucht oder eingeklemmt werden (z.B. durch die Fahrzeugtür
oder durch Verstellen der Rückbank).
ANPASSEN AN DIE KÖRPERGRÖSSE
nur eine in optimaler höhe eingestellte schulter- und kopfstütze (e)
bietet größtmöglichen schutz und komfort für ihr kind und gewährleistet
außerdem den optimalen verlauf des diagonalgurtes (f). die
höhenverstellung (e) kann in insgesamt 11 positionen erfolgen. die
schulterstütze ist mit der kopfstütze fest verbunden und muss nicht separat
eingestellt werden. die anpassung hat so zu erfolgen, dass zwischen
der unteren kante der kopfstütze und der schulter des kindes noch zwei
fingerbreit platz ist.
EINSTELLUNG DER KOPFSTÜTZE
REGOLAZIONE DELL‘APPOGGIATESTA
• setzen sie ihr kind in den kindersitz.
• ziehen sie den verstellgriff (h) nach oben, um die schulter- und kopfstütze zu
entriegeln.
• nun können sie die schulter- und kopfstütze (e) in die gewüschte position
bringen.
• sobald sie den verstellgriff (h) loslassen, rastet die schulter- und kopfstütze
(e) automatisch ein.
• sistemare il bambino nel seggiolino
• sollevare verso l’alto la maniglia di regolazione (h) per sbloccare il
meccanismo.
• portare protezioni per le spalle e appoggiatesta (e) nella posizione
desiderata.
• lasciando andare la maniglia di regolazione (h) le protezioni per le spalle e
l’appoggiatesta (e) si issano automaticamente in posizione.
8
THE BEST POSITION IN THE CAR
Without using the connectors the CYBEX Solution X-ix can be installed on
all vehicle seats equipped with a three-point automatic retractor belt. We
generally recommend, however, using the child seat in the back of the
vehicle. In the front, your child is usually exposed to higher risks in case of
an accident.
Warning! You must not use the Solution X-fix with a two-point belt or a lap
belt. When securing your child with a two-point belt, the child may sustain
lethal injuries in an accident.
When installing the CYBEX Solution X-ix with its ISOFIX-CONNECT
system the child seat falls into the „semi-universal“ admission
category, i.e. it may only be used in certain types of vehicles.
Please refer to the list of approved cars to check your vehicle‘s
compatibility. This list is updated regularly, and the latest version can be
obtained from CYBEX, your retailer or accessed online at www.cybexonline.com. In exceptions, the child seat may be used on the passenger
seat. please note the following for such cases:
• In cars equipped with airbags you should push the passenger seat as far
back as possible. please make sure that the upper point of the vehicle seat
belt stays behind the belt guide of the child seat.
• you must follow the recommendations of the vehicle manufacturer.
f
Warning! The seat belt (f) must run diagonally from the back and must
never lead to the front to the upper belt point of the front seat of in your
vehicle. Should you be unable to adjust this for example by pushing the
seat to the front or by using the seat on a different seat in the car, then the
child seat is not suitable for this vehicle.
Luggage or other objects in the vehicle which may cause injuries in an
accident must always be secured properly. Loose parts may turn into
deadly projectiles during an impact.
Warning! For vehicles with passenger seats that are positioned sideways,
the use of this child seat is not allowed. For seats that are positioned
against the direction of travel, e.g. in a van or a minibus, the use of the
child seat is allowed, assuming the seat is approved to carry an adult.
Please ensure that the headrest is not taken off when mounting the child
seat on a passenger seat which is positioned against the direction of
travel! The child seat must have the seat belt fastened even when not in
use. This is necessary to avoid the driver or passenger getting injured by a
loose child seat when making an emergency stop or in case of a crash.
Note! Please never leave your child unattended in the car.
9
DER RICHTIGE PLATZ IM FAHRZEUG
Der CYBEX Solution X-ix ist, ohne das ISOFIX Connect-System, auf allen
plätzen mit dreipunkt - automatikgurt verwendbar. Wir empfehlen aber
generell, den sitz hinten im fahrzeug zu installieren. auf dem Beifahrersitz
ist ihr kind bei einem unfall in den meisten fällen höheren gefahren
ausgesetzt.
Warnung! Der Sitz ist nicht für die Verwendung mit einem 2-Punkt- oder
Beckengurt geeignet. Wird der Sitz mit einem 2-Punkt-Gurt gesichert, kann es bei
einem Unfall zu schweren oder gar tödlichen Verletzungen des Kindes kommen.
Für die Befestigung mit X-ix-Rastarmen besteht eine semiuniversale Genehmigung. Aus diesem Grund darf der Solution X-ix
mit isofiX-connecT nur in bestimmten fahrzeugen eingesetzt
werden. die zugelassenen fahrzeuge entnehmen sie bitte der
beigelegten Kfz-Typenliste. Die Typenliste wird laufend erweitert. Die
aktuelle version erhalten sie direkt bei cyBeX, im fachhandel oder auf
www.cybex-online.com. In Ausnahmefällen kann der Sitz jedoch auch
vorne am Beifahrersitz verwendet werden. Beachten sie dabei die
folgenden punkte:
• Bei fahrzeugen mit airbag sollten sie den Beifahrersitz so weit wie möglich
nach hinten schieben. Beachten sie jedoch, dass der obere anlenkpunkt
des fahrzeuggurtes hinter der gurtführung des kindersitzes bleibt.
• die empfehlungen des fahrzeugherstellers sind unbedingt zu befolgen.
Warnung! Der Diagonalgurt (f) muss schräg nach hinten verlaufen und
darf nie nach vorn zum oberen Gurtpunkt in Ihrem Fahrzeug führen. Sollte
dies nicht einzustellen sein, z.B. durch Vorschieben des Autositzes oder
Verwendung auf einem anderen Sitzplatz, so ist der Kindersitz für dieses
Fahrzeug nicht geeignet.
gepäckstücke oder andere gegenstände im fahrzeug, welche bei einem
unfall verletzungen verursachen können, müssen immer gut befestigt
werden. sie können zu tödlichen geschossen im fahrzeug werden.
Warnung! Auf Fahrzeugplätzen, die quer zur Fahrtrichtung
angeordnet sind, ist die Verwendung des Sitzes nicht zulässig. Auf
rückwärtsgerichteten Fahrzeugsitzen, wie z.B. in einem Van oder Minibus,
ist die Verwendung zulässig, sofern der Fahrzeugsitz für die Beförderung
eines Erwachsenen zugelassen ist. Zu Beachten ist, dass die Kopfstütze
bei rückwärtsgerichtetem Einbau nicht entfernt werden darf! Der
Kindersitz muss auch dann, wenn er nicht benutzt wird, immer mit dem
Fahrzeuggurt befestigt sein. Bereits bei einer Notbremsung oder einem
geringen Aufprall kann ein unbefestigter Sitz andere Mitfahrer und Sie
selbst verletzen.
Hinweis! Bitte lassen sie ihr kind nie unbeaufsichtigt im fahrzeug zurück.
POSIZIONAMENTO CORRETTO DEL SEGGIOLINO ALL‘INTERNO
DELL‘AUTOVEICOLO
Il seggiolino CYBEX Solution X-ix può essere utilizzato su qualsiasi sedile di
autoveicolo dotato di sistema di cinture di sicurezza a tre punti di
ancoraggio. raccomandiamo normalmente di utilizzare il seggiolino
nella parte posteriore dell’autoveicolo. sul sedile anteriore il bambino è
esposto a maggiori rischi in caso di incidente.
Attenzione! Il seggiolino non può essere utilizzato con cinture di sicurezza a due
punti di ancoraggio o soltanto con quella per le gambe, perché in tal caso il
bambino sarebbe esposto a lesioni letali in caso di incidente
l’autovettura dev’essere compatibile per l’ancoraggio
addizionale con i connettori X-ix. Pertanto, questo seggiolino
potrà essere utilizzato soltanto su autovetture che rientrano ne la
categoria di installazione “semi universale”, incluse nell’elenco
di autovetture approvate qui allegato. l’elenco viene aggiornato
regolarmente e può essere scaricato dal nostro sito www.cybex-online.
com In casi eccezionali il seggiolino potrà essere issato sul sedile del
passeggero. in tal caso, preghiamo di notare quanto segue:
• nei veicoli dotati di airbag è necessario arretrare il sedile del passeggero al
massimo. assicuratevi che il punto di attacco superiore delle cinture si trovi
sempre dietro alla guida superiore del seggiolino.
• e’ indispensabile seguire le raccomandazioni del costruttore del veicolo.
Attenzione! La cintura di sicurezza (f) deve scorrere diagonalmente da
dietro ed il punto più alto deve trovarsi sempre dietro al seggiolino. Se,
per esempio, nell’arretrare al massimo il sedile anteriore o sistemandolo
in altra posizione nell’auto, il punto più alto della cintura non si trovasse
dietro al seggiolino, quest’ultimo non potrà essere utilizzato in tale
veicolo.
Bagagli o altri oggetti presenti nell’abitacolo dovranno sempre essere ben
issati e disposti in modo da non costituire pericolo in caso di incidente.
Attenzione! Seggiolino NON utulizzabile su sedili orientati lateralmente.
Per sedili orientati contro il senso di marcia, per es. van o minibis, l‘uso è
possibile soltanto se tali sedili sono omologati per il trasporto di un adulto.
Nei sedili orientati contro il senso di marcia NON togliere l‘appoggiatesta
quando viene montato il seggiolino. Allacciare sempre il seggiolino
con la cintura di sicurezza anche quando non in uso. In caso di frenata
improvvisa o di incidente, il seggiolino non fissato può costituire un grave
pericolo per il conducente o altri passeggeri.
Avvertenza! non lasciare mai il bambino incustodito nell’autovettura.
10
INSTALLATION OF THE CAR SEAT WITH CONNECTORS
The saftey of your child will be increased using the ISOFIXCONNECT system linking the child seat tightly with the vehicle.
your child will still be buckled up using the car‘s 3-point-belt.
• Connect the two enclosed X-ix installation aids (their longer parts pointing
upwards) with the two isofiX anchorage points (i).
y
x
Note! The car‘s isofiX anchorage points (i) are two metal rings per seat,
located between the backrest and the seat cushion of your vehicle seat.
If in doubt please refer to your vehicle owner’s manual.
• For adjustment move the X-ix lever (v), located on the bottom of the seat.
• Pull the connectors (w) as far out as they will go.
• Rotate the X-ix connectors by 180° until they point into the direction of the
installation aids.
Note! Make sure that the green safety indication (x) of the connectors
is not visible. If necessary, release them by pushing and simultaneously
pulling back the red release button (y). Repeat this procedure with the
other connector.
• Push both of the X-ix connectors (w) into the installation aids until you hear
them clicking into the isofiX anchorage points (i).
• Make sure that the child seat is connected safely by trying to pull it out.
• The green safety indication (x) must be clearly visible on both sides of the red
release buttons (y).
• With the X-ix button located on the bottom of the child seat you can now
adjust the position of the seat.
y
x
Note! For additional information please refer to the section “Placing the
Seat in the Car”.
• You can now buckle up the child. Please refer to “Buckling Up the Child”.
11
BEFESTIGEN DES SITZES MIT DEN X-FIX RASTARMEN
Mit dem ISOFIX-CONNECT System können Sie den Kindersitz fest
mit dem fahrzeug verbinden und so die sicherheit ihres kindes
erhöhen. ihr kind wird weiterhin mit dem 3-punkt-gurt ihres autos
angeschnallt.
INSTALLAZIONE DEL SEGGIOLINO AUTO CON I CONNETTORI
la sicurezza del vostro bambino sarà superiore grazie ai connettori
X-ix, che consentono un issaggio ottmale del seggiolino al
veicolo. Il bambino sarà issato al seggiolino utilizzando sempre la
cintura di sicurezza a 3 punti.
• Hängen Sie die beigelegten X-ix Einführungshilfen (u) mit der längeren
lasche nach oben in den beiden isofiX-Befestigungspunkten (i) ein.
• Collegare i due supporti per l’installazione X-ix (con la parte più lunga rivolta
verso l’alto) ai punti di ancoraggio isofiX (i).
Hinweis! die isofiX-Befestigungspunkte (i) sind zwei metalllaschen pro
Sitzplatz und beinden sich zwischen Rückenlehne und Sitz des Fahrzeugs.
im zweifelsfall nehmen sie die Bedienungsanleitung ihres fahrzeugs zu
hilfe.
Nota Bene! i punti di ancoraggio isofiX (i) sono i due ganci metallici per
ciascun sedile della vettura, posti tra la seduta e lo schienale. in caso di
dubbi, fare riferimento al manuale dell’autovettura.
• Betätigen Sie die X-ix Einstelltaste (v) an der Unterseite des Kindersitzes.
• Ziehen Sie die X-ix Rastarme (w) bis zum Anschlag heraus.
• Drehen Sie die X-ix Rastarme um 180°, damit sie in Richtung der
einführungshilfen zeigen.
• Per le regolazioni basta spostare il pulsante X-ix, alla base del seggiolino.
• Tirare i connettori (w) al massimo.
• Ruotare i connettori X-ix di 180° in modo che siano correttamente
orientati rispetto ai supporti per l’installazione.
Hinweis! achten sie darauf, dass die beiden grünen sicherheitsindikatoren
(x), an den ISOFIX Rastarmen (w), nicht sichtbar sind. Entriegeln
sie gegebenenfalls die isofiX rastarme (w), indem sie die rote
Entriegelungstaste (y) drücken und zurückziehen. Wiederholen Sie den
vorgang gegebenenfalls auch beim zweiten rastarm.
Nota Bene! Veriicare che gli indicatori di sicurezza di colore verde (x)
sui connettori siano ben visibili. se necessario, rilasciarli premendo e
contemporaneamente tirando all‘indietro i pulsanti di rilascio di colore
rosso (y). Ripetere da ambo i lati.
• Schieben Sie die beiden X-ix Rastarme (w) in die Einführungshilfen bis sie mit
einem hörbaren „KLICK“ an den ISOFIX-Befestigungspunkten (i) einrasten.
• vergewissern sie sich, dass der sitz gut hält, indem sie versuchen, ihn
herauszuziehen.
• Der grüne Sicherheitsindikator (x) muss an den beiden roten
Entriegelungstasten (y) gut sichtbar sein.
• Mit der X-ix Einstelltaste (v) an der Unterseite des Kindersitzes können Sie nun
die position des sitzes einstellen.
• Spingere entrambi i connettori X-ix (w) nei supporti per l’installazione ino a
quando non si sentirà lo scatto di connessione nei punti di ancoraggio
isofiX (i).
• Veriicare che il seggiolino sia issato saldamente, provando a tirarlo
verso di voi.
• Gli indicatori di sicurezza di colore verde (x) devono risultare ben visibili su
ambo i lati dei pulsanti di rilascio di colore rosso (y).
• Ora è possibile regolare la posizione del seggiolino utilizzando il pulsante X-ix
posto alla sua base.
Hinweis! Beachten Sie dazu den Abschnitt „Den Sitz ins Fahrzeug stellen”.
Nota Bene! per ulteriori dettagli fare riferimento alla sezione
“Posizionamento del seggiolino nell’auto”.
• Jetzt können Sie Ihr Kind anschnallen, siehe „Anschnallen des Kindes“.
• ora è possibile accomodare e allacciare il bambino. preghiamo di fare
riferimento alla sezione “Come allacciare il bambino”.
12
UNINSTALLING THE SOLUTION X-FIX
perform all installation steps in reverse order.
a
• Release the ISOFIX connectors (w) by simultaneously pulling and slinging
back the red release buttons (y).
• pull the seat out of the installation aids (u).
• Rotate the X-ix connectors by 180°.
• Pull the X-ix lever located at the bottom of the child car seat and push the
X-ix connectors into the child seat until completely hidden.
1
2
Note! following these steps the vehicle‘s seat pad will be protected and
the Isoix connectors will be prevented from being stained or damaged.
damages and stains could obstruct a smooth operation.
SECURING THE CHILD
place the child seat on the respective seat in the car.
• Please make sure that the backrest (a) of the child safety seat rests lat
against the backrest of the car seat so that the child seat is under no
circumstances in a sleeping position.
• When using the isofiX-anchorages in the car, make sure that the
backrest of the Solution X-ix is perfectly aligned and in full contact
with the rear vehicle seat. The position can be adjusted with the
adjustment lever (v) located on the bottom of the child car seat.
• should the headrest of the vehicle seat interfere, please pull it out
completely and turn it around or take it off entirely. The backrest (a)
optimally adjusts to almost any inclination of the vehicle seat.
Warning! The backrest of the Solution X-fix should rest flat against the
upright part of the car seat. Pushing the booster rearwards the seat should
be tightly pressed against the seat. For the best possible protection of your
child, the seat must be in a normal upright position!
Note! it is possible that some car seats that are made of soft material (e.g.
velours, leather, etc.) may show signs of usage and/or discolouration.
In order to avoid this, you could, for example, place a cover or towel
underneath it. In this context, we would also like to refer to you to our
cleaning instructions, which must absolutely be followed before the irst
use of the seat.
13
AUSBAU DES SOLUTION X-FIX
führen sie die einbauschritte in umgekehrter reihenfolge durch.
RIMOZIONE DEL SOLUTION X-FIX
eseguire tutte le operazioni per l’installazione nell’ordine inverso.
• entriegeln sie die isofiX rastarme (w) beidseitig, indem sie die roten
Entriegelungstasten (y) drücken und gleichzeitig zurückziehen.
• ziehen sie den sitz aus den einführungshilfen (u).
• Drehen Sie die X-ix Rastarme um 180°.
• Betätigen Sie die X-ix Einstelltaste (v) an der Unterseite des Kindersitzes und
schieben Sie die X-ix Rastarme bis zum Anschlag hinein.
• rilasciare i connettori isofiX (w) premendo e contemporaneamente tirando
all‘indietro i pulsanti di rilascio (y) di colore rosso.
• estrarre il seggiolino dai supporti per l’installazione (u).
• Ruotare i connettori X-ix (w) di 180°.
• Spostare il pulsante X-ix posto alla base del seggiolino e spingere i connettori
X-ix al massimo.
Hinweis! durch das einklappen der rastarme schonen sie nicht nur
den Fahrzeugsitz sondern schützen auch die Isoix Rastarme vor
verunreinigungen und Beschädigungen.
Nota Bene! questo procedimento aiuta a proteggere il rivestimento del
sedile da danni e tacche che potrebbero compromettere il regolare
funzionamento.
DEN SITZ INS FAHRZEUG STELLEN
stellen sie den kindersitz auf den entsprechenden fahrzeugsitz im auto.
FISSAGGIO DEL BAMBINO
collocare il seggiolino di sicurezza sul sedile dell’auto.
• achten sie unbedingt darauf, dass die rückenlehne (a) des kindersitzes
lächig an der Rückenlehne des Autositzes anliegt, so dass sich der
Kindersitz auf keinen Fall in einer Liegeposition beinden kann.
• Prestare la massima attenzione afinché lo schienale del seggiolino (a) sia
correttamente appoggiato al sedile dell’auto e non inclinato.
• nell’utilizzare il sistema di ancoraggio isofiX della vettura, assicuratevi che lo
schienale del seggiolino Solution X-ix sia perfettamente allineato ed in totale
contatto con il sedile posteriore. la distanza potrà essere regolata con
la leva di regolazione (v) che si trova alla base del seggiolino.
• nel caso di auto con rivestimento dei sedili in materiali
particolarmente delicati (per esempio velluto, pelle, ecc), l’uso del
seggiolino di sicurezza potrebbe danneggiarli. consigliamo di utilizzare un
telo o un asciugamano sotto al seggiolino per proteggere il sedile.
• se l’appoggiatesta del sedile interferisce con il posizionamento del
seggiolino di sicurezza sarà bene rialzarlo completamente o rimuoverlo. lo
schienale (a) del seggiolino si adatta perfettamente a qualsiasi inclinazione
del sedile dell’autoveicolo.
• Bei Benutzung der isofiX Befestigungspunkte im fahrzeug, achten
Sie darauf, dass die Rückenlehne des Solution X-ix volllächig an
Rückenlehne des Fahrzeugs auliegt. Sie können diesen Abstand mit
der einstelltaste (v) an der unterseite des kindersitzes einstellen.
• sollte die kopfstütze des fahrzeugsitzes störend sein, ziehen sie diese ganz
heraus, drehen sie sie um oder nehmen sie sie ganz ab. die rückenlehne (a)
passt sich optimal stufenlos fast jeder neigung des fahrzeugsitzes an.
Warnung! Die Rückenlehne des Solution X-fix muss an der Lehne des
Fahrzeuges flächig aufliegen. Um den größtmöglichen Schutz für das Kind
zu gewährleisten, muss sich der Sitz einer normalen aufrechten Position
befinden!
Attenzione! Lo schienale del seggiolino Solution X-fix dovrà essere
perfettamente apppoggiato allo schienale dell‘auto. La base dovrà
essere spinta all‘indietro contro il sedile. Per la massima sicurezza del
bambino il sedile deve trovarsi nella normale posizione eretta!
Hinweis! An einigen Autositzen aus empindlichem Material (z.B.
velours, leder, etc.) können durch die Benutzung von kindersitzen
mögliche gebrauchsspuren und/oder abfärbungen auftreten. um
das zu vermeiden, können sie z.B. eine decke oder ein handtuch
unterlegen. ferner weisen wir in diesem zusammenhang auf unsere
reinigungshinweise hin, die vor der ersten verwendung des sitzes
unbedingt beachtet werden sollten.
Nota Bene!nel caso di sedili in materiali particolarmente delicati (per
esempio velluto, pelle, ecc.) per evitare danneggiamenti consigliamo
di di stendere un telo protettivo sotto il seggiolino. con l‘occasione
ricordiamo di fare riferimento anche alle istruzioni per il lavaggio, che
devono essere seguite scrupolosamente prima dell‘utilizzo.
14
l
Warning! Never twist the belt!
l
m
Put the belt guide (m) into the belt buckle (l). If you hear a clicking sound
it is securely locked.
put the lap belt (n) in the bottom belt guides (k) of the child seat. now pull
the lap belt (n) tight by pulling the diagonal belt (f) until there is no slack.
The tighter the belt the better it can protect from injuries. The diagonal
belt and lap belt should both be inserted in the bottom belt guide at the
side of the belt buckle.
f
n
FASTENING THE SEATBELT OF YOUR CHILD
Put your child in the child seat. Pull out the three-point belt and lead it in
front of your child to the belt buckle (l).
Warning! The belt buckle of the car seat (l) must under no circumstances
reach into the bottom belt guide (k). If the belt strap is too long, the child
seat is not suitable for this vehicle.
k
d
n
k
The lap belt (n) should be placed in the bottom belt guides (k) on both
sides of the seat (d).
Note! Teach your child from the beginning to always pay attention to a
tight belt and that it should pull the belt tight by itself if necessary.
g
e
f
f
15
Warning! The lap belt must, on both sides, run as low across the groin
of your child as possible in order to take optimal effect in case of an
accident.
now lead the diagonal belt (f) through the upper red belt guide (g) in the
shoulder rest (e) until it is inside the belt guide.
please make sure that the diagonal belt (f) runs between the outer edge
of the shoulder and your child‘s neck. If necessary, adjust the running
of the belt by adjusting the height of the headrest. The height of the
headrest can still be adjusted in the car.
ANSCHNALLEN DES KINDES
setzen sie ihr kind in den kindersitz. ziehen sie den dreipunktgurt weit
heraus und führen sie diesen vor ihrem kind entlang zum gurtschloss (l).
Warnung! Gurt auf keinen Fall verdrehen.
stecken sie die gurtzunge (m) ins gurtschloss (l). dieses muss hörbar
einrasten.
den Beckengurt (n) in die unteren gurtführungen (k) des kindersitzes
einlegen. ziehen sie nun den Beckengurt (n) straff, indem sie kräftig am
diagonalgurt (f) ziehen. Je enger der gurt anliegt, desto besser kann
er vor verletzungen schützen. auf der seite des gurtschlosses müssen
schultergurt und Beckengurt zusammen in die untere gurtführung
eingelegt sein.
Warnung! Das Fahrzeuggurtschloss (l) darf keinesfalls in die untere
Gurtführung (k) hineinreichen. Ist die Gurtpeitsche zu lang, ist der Sitz nicht
für dieses Fahrzeug geeignet.
der Beckengurt (n) sollte auf beiden seiten des sitzkissens (d) in den
unteren gurtführungen (k) liegen.
Hinweis! Bringen sie ihrem kind von anfang an bei, immer auf eine straffe
gurtführung zu achten und bei Bedarf, den gurt selbst festzuziehen.
Warnung! Der Beckengurt muss auf beiden Seiten so tief wie möglich über
der Leistenbeuge Ihres Kindes verlaufen, um im Falle eines Unfalls optimal
wirken zu können.
nun führen sie den diagonalgurt (f) durch die obere rote gurtführung
(g) in der schulterstütze (e), bis er sich innerhalb der gurtführung
beindet. Achten Sie bitte darauf, dass der Diagonalgurt (f) zwischen
schulteraußen- kante und hals ihres kindes verläuft. falls erforderlich,
passen sie durch verstellen der kopfstützenhöhe den gurtverlauf an. die
höhe der kopfstütze kann auch noch im auto eingestellt werden.
ALLACCIARE LA CINTURA DI SICUREZZA DEL BAMBINO
collocare il bambino nel seggiolino di sicurezza. Tirare la cintura di
sicurezza a tre punti e farla passare davanti al bambino, ino al punto di
ancoraggio.
Attenzione! Non attorcigliare MAI la cintura!
sistemare la guida della cintura (m) nel dispositivo di chiusura (l).
L’aggancio corretto sarà segnalato dal “CLICK”. Sistemare la cintura
per le gambe (n) nelle guide inferiori (k) del seggiolino. quindi regolare
la lunghezza del tratto di cintura per le gambe (n) tirando la parte
diagonale della cintura (f) in modo da eliminare qualsiasi lasco. un
issaggio ottimale della cintura garantisce una maggiore protezione. La
cintura di sicurezza diagonale e quella per le gambe dovrebbero essere
inserite nella guida inferiore della cintura a lato del dispositivo di chiusura.
Attenzione! Il dispositivo di aggancio della cintura di sicurezza dell’auto
(l) non deve in alcun caso arrivare all’altezza delle fessure in cui scorrono
le cinture del seggiolino (k). Se il dispositivo di aggancio delle cinture è
troppo lungo, il seggiolino non è adatto a questo tipo di autoveicolo.
la cintura per le gambe (n) deve essere inserita nelle apposite guide (k)
disposte su ambo i lati della seduta (d).
Avvertenza! Insegnate in da subito al Vostro bambino di prestare
attenzione alla regolazione della cintura, che dovrà essere sempre ben
tesa. insegnategli a stringerla da solo se necessario.
Attenzione! La cintura di sicurezza per le gambe deve scorrere all’interno
delle guide da ambo i lati per garantire la massima protezione in caso di
incidente.
a questo punto inserire la cintura di sicurezza diagonale (f) nella fessura di
sicurezza del seggiolino all’altezza delle spalle (e).
Prestare la massima attenzione afinché la cintura diagonale (f) passi
tra il collo del bambino ed il lato esterno della spalla. se necessario,
sistemarne la posizione regolandol’altezza dell’appoggiatesta. l’altezza
dell’appoggiatesta può essere regolata anche quando il seggiolino è
issato all’interno dell’auto.
16
IS YOUR CHILD PROPERLY SECURED?
In order to ensure the maximum safety for your child, please check prior to
the ride whether …
g
n
k
k
f+n
r
t
• the lap belt (n) runs in the bottom belt guides (k) on both sides of the seat.
• the diagonal belt (f) also runs in the bottom belt guide (k) of the seat on the
side of the belt buckle.
• the diagonal belt (f) runs through the belt guide (g) of the shoulder rest,
marked red.
• the seat belt (f) runs diagonally to the back.
• the entire belt is snugly fastened and not twisted.
• the seat pad is locked in place on both sides with the X-ix
connectors and the isofiX anchorage points.
• the backrest (a) of the of the child seat rests lat against the vehicle
seat, making sure the child seat always stays in an upright position.
Note! The green safety indication (x) must be clearly visible on both sides
of the red release buttons (y).
RECLINING HEADREST
The CYBEX Solution X-ix has a reclining headrest (r) preventing your child‘s
head from falling forward when asleep. furthermore, this adjustable
headrest contributes to the comfort of your child during the car ride.
Note! Please ensure that the child‘s head always remains in contact
with the reclining headrest since otherwise the headrest cannot fulill its
optimal side-crash protective function.
By slightly lifting the headrest, the inclination of the headrest (r) can be
adjusted in three different positions.
Warning! The locking device (t) must never be blocked by any objects!
In case of an accident, the free movement of the inclination must be
guaranteed since otherwise your child might be injured.
17
IST IHR KIND RICHTIG GESICHERT?
um die bestmögliche sicherheit ihres kindes zu gewährleisten, prüfen sie
bitte vor Beginn der fahrt, ob …
IL BAMBINO È FISSATO CORRETTAMENTE?
per garantire la massima sicurezza e la massima protezione del bambino,
prima di avviare il veicolo è necessario veriicare i seguenti punti …
• der Beckengurt (n) auf beiden seiten des sitzkissens in den unteren
gurtführungen (k) verläuft.
• der diagonalgurt (f) auf der gurtschlossseite auch in der unteren
gurtführung (k) des sitzkissens verläuft.
• der diagonalgurt (f) durch die rot markierte gurtführung (g) der
schulterstütze verläuft.
• der diagonalgurt (f) schräg nach hinten verläuft.
• der gesamte gurt straff ist und nicht verdreht anliegt.
• die Rückenlehne (a) des Kindersitzes lächig an der Rückenlehne
des autositzes anliegt, so dass sich der kindersitz auf keinen fall in einer
Liegeposition beinden kann.
• la cintura di sicurezza per le gambe (n) deve passare attraverso le guide di
sicurezza (k) su ambo i lati del seggiolino.
• la cintura di sicurezza diagonale (f) deve essere inserita anche nella guida di
sicurezza inferiore (k) del seggiolino a lato del dispositivo di aggancio della
cintura di sicurezza.
• la cintura di sicurezza diagonale (f) deve passare attraverso la guida di
sicurezza (g) delle spalle contrassegnata in rosso
• la cintura di sicurezza (f) scorre in diagonale all’indietro.
• tutta la cintura dev’essere ben tesa e non attorcigliata.
• la base seduta dev‘essere ben issata su ambo i lati con i connettori
X-ix ed i punti di ancoraggio ISOFIX.
• lo schienale (a) del seggiolino dev‘essere completamente a
contatto con il sedile posteriore della vettura. questo per
garantire che il seggiolino resti sempre in posizione verticale.
Hinweis! Der grüne Sicherheitsindikator (x) muss an den beiden roten
Entriegelungstasten (y) gut sichtbar sein.
NEIGUNGSVERSTELLBARE KOPFSTÜTZE
Der CYBEX Solution X-ix hat eine neigungsverstellbare Kopfstütze (r), die
hilft, dass der kopf ihres kindes beim einschlafen nicht so leicht nach
vorne fällt. außerdem trägt diese verstellbare kopfstütze zum komfort für
ihr kind bei autofahrten bei.
Hinweis! achten sie bitte darauf, dass der kopf des kindes immer in
kontakt mit der neigungsverstellbaren kopfstütze bleibt, da die kopfstütze
nur so ihre optimierte seitenaufprall-schutzfunktion erfüllen kann.
durch leichtes anheben der kopfstütze kann die neigung der kopfstütze
(r) in drei verschiedene positionen verstellt werden.
Warnung! Auf keinen Fall darf die Einrastvorrichtung (t) mit Gegenständen
blockiert werden. Im Falle eines Unfalls muss die Leichtgängigkeit der
Neigungsverstellung gewährleistet sein, da es sonst eventuell zu
Verletzungen Ihres Kindes kommen kann.
Avvertenza! Gli indicatori di sicurezza di colore verde (x) devono risultare
ben visibili su ambo i lati dei pulsanti di rilascio di colore rosso (y).
RECLINAZIONE DELL’APPOGGIATESTA
Il seggiolino CYBEX Solution X-ix è dotato di un appoggiatesta reclinabile
(r) che impedisce alla testa del bambino di protendersi in avanti durante
il sonno. inoltre, fornisce al bambino un maggiore comfort durante il
viaggio.
Avvertenza! Veriicare che la testa del bambino si trovi sempre a contatto
con l‘appoggiatesta reclinabile onde evitare che l’ottima funzione di
questo dispositivo di sicurezza in caso di impatto laterale sia vaniicata.
sollevando leggermente l’appoggiatesta (r) è possibile regolarne
l’inclinazione in tre diverse posizioni.
Attenzione! Il sistema di bloccaggio (t) non deve mai essere contrastato
da ostacoli. E’ indispensabile verificare che il meccanismo di reclinazione
sia libero da impedimenti per prevenire ferite al bambino in caso di
incidente.
18
e
e
h
a
PRODUCT CARE
In order to guarantee the best possible protection of your child seat, it is
necessary that you take note of the following:
• All important parts of the child seat should be examined for any damages on
a regular basis. The mechanical parts must function lawlessly.
• It is essential that the child safety car seat does not get jammed between
hard objects e.g. like the door of the car, seat rail etc. causing possible
damage to the seat.
• The child seat must be examined by the manufacturer after a fall or similar
situations.
REMOVING THE SEAT COVER
The seat cover consists of three parts which are ixed to the seat either
by velcros, press buttons or button holes. Once you have released all
ixations, the cover parts can be removed.
in order to put the covers back on the seat, proceed in the reversed order
as removing them.
Warning! The child seat must never be used without the cover.
REMOVING THE SEAT COVER FROM THE BACKREST
1. Pull the headrest (e) into top position, by using the release handle (h).
2. To release the headrest (e), simultaneously pull the handle (h) and the
lower rim of the upper rib of the backrest (a). now the headrest (e) can be
completely detached.
3. now the cover can be removed.
4. For reassembly pull the adjustment handle (h) and insert the headrest (e)
into the backrest (a).
19
PFLEGE
um die größtmögliche schutzwirkung ihres kindersitzes zu gewährleisten,
ist es unbedingt notwendig, dass sie folgendes beachten:
MANUTENZIONE DEL PRODOTTO
per garantire i massimi standard di sicurezza del seggiolino è necessario
prendere nota dei seguenti accorgimenti:
• alle wichtigen Teile des kindersitzes sollten regelmäßig auf Beschädigungen
kontrolliert werden. die mechanischen Bauteile müssen einwandfrei
funktionieren.
• es ist unbedingt darauf zu achten, dass der kindersitz nicht zwischen harten
Teilen wie fahrzeugtür, sitzschiene usw. eingeklemmt wird und dadurch
beschädigt werden kann.
• der kindersitz muss z.B. nach einem sturz unbedingt vom hersteller überprüft
werden.
• Tutte le parti importanti del seggiolino di sicurezza per auto devono
essere sottoposte ad un regolare controllo per veriicare eventuali danni. Le
parti meccaniche devono funzionare correttamente.
• e’ essenziale che il seggiolino non venga danneggiato a causa di un
eventuale schiacciamento tra il sedile dell’auto e la porta o da altri
ostacoli solidi. il seggiolino dovrà essere inviato al produttore per un
controllo in caso di caduta o altri eventi similari.
ENTFERNEN DES BEZUGES
der Bezug besteht aus drei Teilen, die entweder mit klettband,
Druckknöpfen oder Knoplöchern am Kinderautositz befestigt sind.
sobald sie alle Befestigungen lösen, können die einzelteile abgenommen
werden.
um den Bezug wieder zu befestigen, verfahren sie in umgekehrter reihenfolge.
Warnung! Der Kindersitz darf keinesfalls ohne Bezug verwendet werden.
ENTFERNEN DES SITZBEZUGS VON DER SITZLEHNE
1. ziehen sie durch Betätigen des verstellgriffs (h) die kopfstütze (e) soweit wie
möglich heraus.
2. Betätigen sie den verstellgriff (h) und ziehen sie gleichzeitig an der unteren
kante der obersten rippe der sitzlehne (a), um die kopfstütze (e) zu lösen.
ziehen sie diese nun komplett heraus.
3. Jetzt können sie den sitzbezug nach oben hin entfernen.
4. um die rückenlehne wieder zusammenzubauen, stecken sie mit betätigtem verstellgriff (h) die kopfstütze (e) in die rückenstütze (a).
RIMOZIONE DEL RIVESTIMENTO
il rivestimento è costituito da tre parti unite al seggiolino tramite strisce di
velcro, bottoni a pressione o bottoni ad asola. una volta sganciati tutti i
punti di issaggio, le parti del rivestimento possono essere rimosse.
per reinserire il rivestimento, eseguire nuovamente le operazioni nell’ordine
inverso.
Attenzione! IIl seggiolino di sicurezza non deve mai essere utilizzato senza
l’apposito rivestimento.
RIMOZIONE DEL RIVESTIMENTO DELLO SCHIENALE
1. sollevare il poggiatesta (e) fino al punto di massima estensione attivando la
maniglia di sblocco (h).
2. per sganciare il poggiatesta (e) tirare contemporaneamente la maniglia (h)
ed il lembo inferiore della copertura dello schienale (a). a questo punto il
poggiatesta (e) può essere staccato.
3. e il rivestimento tolto.
4. per il rimontaggio tirare la maniglia di regolazione (h) ed inserire il poggiatesta (e) nello schienale (a).
20
CLEANING
It is important to use only an original CYBEX Solution X-ix seat cover since
the cover is also an essential part of the function. You may obtain spare
covers at your retailer.
Note! Please wash the cover before you use it the irst time. Seat covers
are machine washable at max. 30°C on delicate cycle. If you wash it at
higher temperature, the cover fabric may lose colour. Please wash the
cover separately and never dry it mechanically! Do not dry the cover in
direct sunlight! you can clean the plastic parts with a mild detergent and
warm water.
Warning! Please do not use chemical detergents or bleaching agents
under any circumstances!
WHAT TO DO AFTER AN ACCIDENT
If you had an accident, the seat might have sustained damages which
are not visible. In this case, the child seat must absolutely be examined
by the manufacturer and replaced if necessary.
DURABILITY OF THE PRODUCT
The CYBEX Solution X-ix was designed to easily fulill its purpose for
the expected durability (adding up to 9 years). However, since high
luctuations of temperature might occur and since there might be
unforeseeable exposures to the child seat, it is important to note the
following:
• If the car is exposed to direct sunlight for a longer period of time, the child
seat must be taken out of the car or covered with a cloth.
• Examine all plastic and metal parts of the seat for any damages or changes
about their form or colour on a yearly basis. If you notice any changes,
you need to dispose of the child seat or it must be examined by the
manufacturer and replaced if necessary.
• changes to the fabric, in particular the fading of colour, are normal after
yearlong use in a car and do not constitute a fault.
21
REINIGUNG
Es ist darauf zu achten, dass nur ein Original CYBEX Solution X-ix Sitzbezug
verwendet wird, da auch der Bezug ein wesentlicher Bestandteil der
funktion ist. ersatzbezüge erhalten sie im fachhandel.
PULIZIA
il rivestimento è una parte importante per il funzionamento del seggiolino
ed è indispensabile utilizzare soltanto rivestimenti originali cyBeX solution
X-ix. Rivestimenti di ricambio originali sono disponibili presso i rivenditori
autorizzati.
Hinweis! Bitte den Bezug vor der ersten verwendung waschen. der
Bezug darf bei 30°C im Schonwaschgang gewaschen werden. Sollten
Sie mit mehr als 30°C waschen, kann es zu Ausfärbungen kommen. Bitte
den Bezug gesondert von anderer Wäsche waschen und keinesfalls
maschinell trocknen! den Bezug keinesfalls in der prallen sonne trocknen!
die kunststoffteile können mit einem milden reinigungsmittel und warmen
Wasser gewaschen werden.
NB: e‘ consigliato il lavaggio prima del primo utilizzo. rivestimenti lavabili
in lavatrice, ciclo delicato max 30°. L‘uso di temperature più elevate
può scolorire i tessuti. lavare separatamente e non asciugare mai a
macchina. non asciugare alla luce diretta del sole. le parti in plastica
possono essere pulite con detergente neutro e acqua tiepida.
Warnung! Bitte auf keinen Fall chemische Reinigungs- oder Bleichmittel
verwenden!
Attenzione! Non usare mai prodotti chimici o sbiancanti per la pulizia!
VERHALTEN NACH EINEM UNFALL
Sollten Sie einen Unfall gehabt haben, können am Kindersitz
Beschädigungen auftreten, welche nicht unbedingt offensichtlich
erkennbar sind. In diesem Fall muss der Kindersitz unbedingt vom
Hersteller geprüft und gegebenenfalls ausgetauscht werden.
PRODUKTLEBENSDAUER
Der CYBEX Solution X-ix ist so ausgelegt, dass er für die gesamte
maximale Verwendungszeit von ca. 9 Jahren – seine Eigenschaften
erfüllt. da jedoch in fahrzeugen sehr große Temperaturschwankungen
und unvorhersehbare Belastungen auftreten können, ist es notwendig,
folgende punkte zu beachten.
COSA FARE A SEGUITO DI UN INCIDENTE
In caso di incidente il seggiolino potrebbe subire danni non
immediatamente visibili. In tal caso il seggiolino dovrà assolutamente
essere inviato al produttore per un controllo e, se necessario, sostituito.
• Wenn das fahrzeug längere zeit der prallen sonne ausgesetzt ist, muss der
kindersitz aus dem fahrzeug entfernt oder mit einem hellen Tuch abgedeckt
werden.
• prüfen sie regelmäßig alle kunststoff- und metallteile des sitzes auf
Beschädigung oder veränderung von form oder farbe. stellen sie eine
veränderung fest, ist der kindersitz ungedingt zu entsorgen oder er muss vom
hersteller geprüft und gegebenenfalls ausgetauscht werden.
• veränderungen des stoffes insbesondere das ausbleichen sind nach
jahrelanger verwendung in einem fahrzeug normal und stellen keine
Beeinträchtigung dar.
DUREVOLEZZA DEL PRODOTTO
Il seggiolino CYBEX Solution X-ix è progettato per l’intera durata del
periodo di utilizzo raccomandato, dai 3 ai 12 anni di età del bambino,
ovvero per la durata di 9 anni. Tuttavia, poiché il seggiolino può
essere sottoposto a notevoli variazioni di temperatura o a circostanze
imprevedibili all’interno del veicolo è in ogni caso importante prendere
nota di quanto segue:
• nel caso l’automobile venga lasciata al sole per un lungo periodo di tempo
consigliamo di estrarre il seggiolino o di ripararlo con un telo di copertura.
• controllare tutte le parti plastiche e metalliche del seggiolino almeno una
volta l‘anno e veriicare che non presentino modiiche di forma o di colore.
In caso di modiiche evidenti raccomandiamo di non utilizzare il seggiolino,
di farlo eventualmente esaminare dal produttore e, se necessario, sostituirlo.
• Modiiche al tessuto di rivestimento, in particolare lo sbiadimento, è
considerato normale con l’utilizzo negli anni e non costituisce un difetto.
22
DISPOSAL
At the end of the durability of the child seat, you must dispose it properly.
Waste disposal regulations may vary regionally. In order to guarantee a
proper disposal of the child safety seat, please contact your communal waste
management or administration of your city. In all cases, please note the waste
disposal regulations of your country.
WARRANTY
The following warranty applies solely in the country where this product was
initially sold by a retailer to a customer. The warranty covers all manufacturing
and material defects, existing and appearing, at the date of purchase or
appearing within a term of three (3) years from the date of purchase from the
retailer who initially sold the product to a consumer (manufacturer’s warranty).
in the event that a manufacturing or material defect should appear, we will
– at our own discretion – either repair the product free of charge or replace it
with a new product. To obtain such warranty it is required to take or ship the
product to the retailer, who initially sold this product to a customer and to
submit an original proof of purchase (sales receipt or invoice) that contains
the date of purchase, the name of the retailer and the type designation of this
product. This warranty shall not apply in the event that this product is taken or
shipped to the manufacturer or any other person other than the retailer who
initially sold this product to a consumer. Please check the product with respect
to completeness and manufacturing or material defects immediately at the
date of purchase or, in the event that the product was purchased in distance
selling, immediately after receipt. In case of a defect stop using the product
and take or ship it immediately to the retailer who initially sold it. In a warranty
case the product has to be returned in a clean and complete condition.
Prior to contacting the retailer, please read this instruction manual carefully.
This warranty does not cover any damages caused by misuse, environmental
inluence (water, ire, road accidents etc.) or normal wear and tear. It does
solely apply in the event that the use of the product was always in compliance
with the operating instructions, if any and all modiications and services were
performed by authorized persons and if original components and accessories
were used. This warranty does not exclude, limit or otherwise affect any
statutory consumer rights, including claims in tort and claims with respect
to a breach of contract, which the buyer may have against the seller or the
manufacturer of the product.
23
ENTSORGUNG
SMALTIMENTO
am ende der produktlebensdauer des kindersitzes ist eine sachgemäße
entsorgung vorzunehmen. die abfallentsorgung kann kommunal
unterschiedlich sein. um eine vorschriftsmäßige entsorgung des kindersitzes
zu gewährleisten, setzen sie sich mit ihrer kommunalen abfallentsorgung bzw.
verwaltung ihres Wohnortes in verbindung. Beachten sie auf jeden fall die
entsorgungsbestimmungen ihres landes.
Alla ine dell’utilizzo del seggiolino di sicurezza è necessario provvedere al suo
smaltimento nel modo appropriato. le norme per lo smaltimento variano da
nazione a nazione. Preghiamo di contattare l’uficio di competenza della
vostra città di residenza per delucidazioni in merito. in ogni caso, seguire
sempre le normative dello stato di residenza.
GARANTIEBEDINGUNGEN
GARANZIA
die nachfolgenden garantiebestimmungen gelten nur in dem land, in
dem dieses produkt erstmalig über den einzelhandel an einen verbraucher
verkauft wurde. die garantie deckt sämtliche herstellungs- und materialfehler
ab, die im zeitpunkt des kaufs bestanden haben oder die innerhalb von
drei (3) Jahren nach dem erstverkauf dieses produkts über den einzelhandel
an einen verbraucher in erscheinung getreten sind (herstellergarantie). Tritt
während der garantiezeit ein herstellungs- und materialfehler auf, wird das
produkt kostenlos repariert oder – nach unserem freien ermessen– gegen ein
neues ausgetauscht. um leistungen im rahmen dieser garantie in anspruch
nehmen zu können, muss das produkt an den einzelhändler zurückgegeben
werden, der es erstmalig verkauft hat und ein nachweis über den kauf
(kaufbeleg oder rechnung) im original vorgelegt werden, welcher das
kaufdatum, den namen des händlers sowie die produktbezeichnung
aufzeigt. der anspruch aus diesem garantieversprechen besteht nicht,
wenn das produkt an den hersteller oder irgendeine andere person als den
einzelhändler, der es erstmalig verkauft hat, zum zweck der inanspruchnahme
der garantieleistung geschickt wird. die garantie gilt nur, wenn das
produkt nach dem kauf umgehend auf vollständigkeit, herstellungs- und
materialfehler überprüft wurde. Wurde das produkt im versandhandel
gekauft, ist es umgehend nach erhalt auf vollständigkeit, herstellungs- und
materialfehler zu überprüfen. falls schäden vorhanden sind, darf das produkt
nicht mehr benutzt werden und muss umgehend an den händler, der es
erstmalig verkauft hat, zurück gegeben werden. im garantiefall muss das
produkt in einem vollständigen und sauberen zustand zurückgegeben
werden. Bitte lesen sie vor einer kontaktaufnahme mit dem händler sorgfältig
die gebrauchsanleitung. die garantie deckt keine schäden ab, die durch
Fehlgebrauch, äußere Einlüsse (Wasser, Feuer, Verkehrsunfälle o.ä.) oder
normalen verschleiß entstanden sind. die garantie wird nur gewährt, wenn
das produkt in übereinstimmung mit der gebrauchsanweisung behandelt
und benutzt wurde, reparaturen oder veränderungen ausschließlich durch
personen vorgenommen wurden, die hierzu befugt waren und stets nur
original Bau- und zubehörteile verwendet wurden. durch diese garantie
la seguente garanzia vale unicamente nella nazione in cui il prodotto
è stato originariamente venduto da un rivenditore al consumatore. la
garanzia copre eventuali difetti di fabbricazione e di materiali riscontrati
all‘acquisto o entro un periodo di tre (3) anni dalla data di acquisto presso il
rivenditore (garanzia del produttore). nel caso venga riscontrato o appaia
un difetto di fabbricazione o di materiali nel corso di validità della garanzia
provvederemo - a nostra discrezione - a riparare il prodotto senza costi o a
sostituirlo. per avere diritto alla garanzia è necessario riportare o spedire il
prodotto al rivenditore presso il quale è stato acquistato ed è indispensabile
fornire la prova d‘acquisto (scontrino iscale, fattura, ecc.) in originale. La
prova d‘acquisto dovrà contenere indicati la data di acquisto, il nome del
rivenditore e le caratteristiche del prodotto (tipo/modello). nessun intervento
in garanzia se il prodotto verrà inviato al produttore o a qualsiasi altra persona
diversa dal rivenditore presso il quale si è effettuato l‘acquisto. la garanzia
è valida soltanto se il prodotto è stato sottoposto ad un accurato controllo
di completezza, funzionalità all‘acquisto e eventuali manchevolezze di
produzione o di materiali sono state prontamente segnalate. per acquisti a
distanza, raccomandiamo di effettuare un controllo completo al ricevimento
del prodotto. in caso si riscontri qualsiasi danneggiamento invitiamo a non
utilizzare il prodotto e a restituirlo immediatamente al rivenditore da cui è
stato acquistato. i diritti di garanzia sono validi soltanto se il prodotto è reso
pulito e completo di ogni parte. prima di contattare il rivenditore vi preghiamo
di leggere con attenzione le istruzioni contenute nel manuale. la garanzia
non copre danni provocati da utilizzo improprio o eventi fortuiti e cause
ambientali (acqua, fuoco, incidenti stradali, ecc) o dal normale deperimento
d‘uso. la garanzia è valida soltanto per prodotti usati in conformità a quanto
stabilito nel manuale istruzioni, se eventuali modiiche o riparazioni sono
state effettuate da personale autorizzato e se sono state utilizzate solo parti
ed accessori originali. questa garanzia non esclude, limita o comunque
pregiudica eventuali diritti legali dei consumatori, comprese istanze in caso di
torto e in caso di una violazione del contratto, che l‘acquirente può avere nei
confronti del rivenditore o del produttore.
24
werden weder die auf grundlage der jeweils anwendbaren gesetze
bestehenden verbraucherrechte noch rechte gegen den verkäufer wegen
der vertragswidrigkeit des produkts ausgeschlossen, begrenzt oder in anderer
Weise eingeschränkt.
CYBEX GmbH
Riedinger Str. 18, 95448 Bayreuth, Germany
Tel.: +49 921 78 511-0
Fax.: +49 921 78 511- 999
CYBEX GmbH
Riedinger Str. 18, 95448 Bayreuth, Germany
Tel.: +49 921 78 511-0
Fax.: +49 921 78 511- 999
26