1
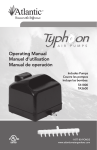
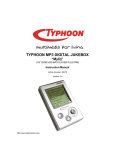
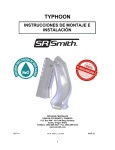
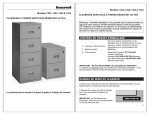
TYPHOON DESIGN WIRELESS
KEYBOARD & OPTICAL MOUSE SET
Article Number: #40240
Design Wireless Keyboard Optical Mouse Set.
User's Guide
GB
Notice: Notice:
Federal Communications Commission (FCC) requirements, Part 15
This equipment has been tested and found to comply with the limits for a class B digital device, pursuant to part
15 of the FCC Rules. These limits are designed to provide reasonable protection against harmful interference in
a residential installation.
This equipment generates, uses and can radiate radio frequency energy and, if not installed and used in
accordance with the instructions, may cause harmful interference to radio communications. However, there is no
guarantee that interference will not occur in a particular installation. If this equipment does cause harmful
interference to radio or television reception, which can be determined by turning the equipment off and on, the
user is encouraged to try to correct the interference by one or more of the following measures:
--Reorient or relocate the receiving antenna.
--Increase the separation between the equipment and receiver.
--Connect the equipment into an outlet on a circuit different from that to which the receiver is connected.
--Consult the dealer or an experienced radio/TV technician for help.
CAUTION: Any changes of modifications not expressly approved by the grantee of this device could void the
users authority to operate the equipment.
Congratulations on purchasing the Typhoon Design Wireless Keyboard and the Wireless Optical Mouse.
Please carefully read the User’s Guide to learn about the installation and the powerful functions of your
new Design Wireless Keyboard with the Wireless Optical Mouse.
1. Content of Package
a) Design Wireless Keyboard
b) Wireless Optical Mouse
c) Receiver (with PS/2 connectors)
d) Three AA Batteries for Keyboard
e) Two AAA Batteries for Wireless Optical Mouse
f) Driver CD-ROM
g) User’s Guide
Optional Parts for Wireless Optical Mouse
USB to DC Cable
2. Hardware Installation
2-1. Install the Receiver with the PS/2 Connectors
a) Please turn off your PC.
b) Plug the PS/2 connectors of the keyboard and the mouse on the receiver
into the PC.
Version 2.0
All specifications and information are subject to changes without further notices.
1
TYPHOON DESIGN WIRELESS
KEYBOARD & OPTICAL MOUSE SET
Article Number: #40240
2-2. Select the Channels for the Keyboard and the Mouse
a) Select Channel “1” or “2” for the Keyboard and the use the next available number for the Mouse. Do
not select the same channel as the Keyboard.
b) Put the batteries into the battery compartments of both Keyboard and Mouse.
Some keyboard or mouse may have only one channel depending on the model version.
2-3. Link the Design Wireless Keyboard and the Wireless
Optical Mouse with the Receiver (Synchronization)
a) The locations of the channel link button and
the LED indicator may differ with different
model versions.
b) Please turn on your PC. The LED indicator on
the receiver will light.
Keyboard
Link Butt on
Bat tery Case
1
2
CH
c)
Press the ID Link Button on the receiver and the LED indicator will blink. The receiver is ready to
automatically link (synchronize) with the keyboard and the mouse.
d) Next press the ID Link Button at the back of the keyboard under the flipper leg. The LED light on the
receiver will blink quickly when you have successfully completed the keyboard linkage.
e) Then press the ID Link Button at the back of the mouse beside the label.
f) The LED indicator on the receiver will light steadily while you have completed the linkage
(synchronization process).
Version 2.0
All specifications and information are subject to changes without further notices.
2
TYPHOON DESIGN WIRELESS
KEYBOARD & OPTICAL MOUSE SET
Article Number: #40240
g) The LED indicator of the receiver will blink when the keyboard or the mouse are in use.
h) If you need to re-link (synchronization) the mouse, and the keyboard or after changing the batteries,
please repeat the above synchronization instructions.
i) If the selected channel is interfered by other wireless-mouse or keyboard users nearby, please change
the Link ID by re-linkage (synchronization) or select the other channel immediately.
j) There are 256 changeable IDs for each channel so please re-synchronize to move to the next ID to
prevent interferences.
3. Driver Installation
a. The driver supports Windows® 98SE / 2000 / ME, and XP.
b. Place the driver CD-ROM into the CD drive and the auto-run installation will start. If
you have disabled “auto-run” feature on your CD drive, you can manually install by
double-clicking on the file “Setup.exe” to start the installation process.
c. The driver CD-ROM contains the drivers of both keyboard and the mouse. Please select to install the
keyboard driver or the mouse driver at the pop-up window. When asked to restart, select “later” and
move on to install the mouse driver next. Only after installing both drivers, then restart the PC.
d. The software applet icons of the keyboard and the mouse will appear the Window’s taskbar after
successful installation.
e. You can double-click on the icons and follow the listed instructions to set the special functions.
f.
20 Smart Hot Keys are located under Three Zones--Multimedia, Internet and Computer.
Multimedia Zone
Provides you the total media control
- Media Player
- Volume Up
- Volume Down
- Mute
- Fast Forward
- Fast Backward
- Play/Pause
- Stop
Version 2.0
All specifications and information are subject to changes without further notices.
3
TYPHOON DESIGN WIRELESS
KEYBOARD & OPTICAL MOUSE SET
Internet Zone
Freely surfing Internet through the
8 easy hot keys
- E-mail
- Web Home
- My Favorites
- Web Search
- Web Refresh
- Web Stop
- Web Page Forward
- Web Page Backward
Article Number: #40240
Multimedia Zone
Internet Zone
Computer Zone
Computer Zone
Use your computer in the smarter way
- PC Sleep
- Calculator
- My Computer
- Wake Up
4. Optional Charging Modes for the Wireless Optical Mouse
Notice:
- Ni-MH rechargeable batteries are recommended.
- There are two charge methods for the rechargeable version.
- Please skip this section if your mouse is not the rechargeable version.
(Some mouse may provide only one charging mode.)
- Recommendation: Please do not use the mouse during charge periods.
4-1. Charge from PC
Connect the mouse to the USB port of the PC with the USB to DC cable.
4-2. Charge from Adaptor
Version 2.0
All specifications and information are subject to changes without further notices.
4
TYPHOON DESIGN WIRELESS
KEYBOARD & OPTICAL MOUSE SET
Connect the mouse with the AC to DC adaptor.
Article Number: #40240
5. Battery Notice
a) Before First use, please charge the batteries for at least 6 to 8 hours.
b) The LED indicator on the scroll wheel of the mouse will light when the mouse battery is low in power.
Please change or recharge the batteries immediately.
c) If the keyboard is low in battery power, the LED indicator on the keyboard will light when typing any
key and a low-battery icon will also appear under the Window’s taskbar.
d) Press any keys of the keyboard or button of the mouse to wake up when they are in the sleeping mode
(hibernation).
- end -
Version 2.0
All specifications and information are subject to changes without further notices.
5