1
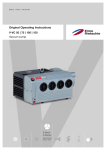
Edition: 2.2.2012 · BA 187-EN Original Operating Instructions V-VTE V V-VTE 3 | 6 | 8 | 10 V-Serie V-Series Drehschieber Rotary Vane Table of contents Table of contents 1 Foreword . . . . . . . . . . . . . . . . . . . . . . . . . . . . . . . . . . . . . . . . . . . . . . . . . . . . . . . . . . . . . . . . . . . 4 1.1 1.2 1.3 1.4 1.5 1.6 1.7 1.8 Principles . . . . . . . . . . . . . . . . . . . . . . . . . . . . . . . . . . . . . . . . . . . . . . . . . . . . . . . . . . . . . . . . . . . Target group . . . . . . . . . . . . . . . . . . . . . . . . . . . . . . . . . . . . . . . . . . . . . . . . . . . . . . . . . . . . . . . . . Supplier documentation and accompanying documents . . . . . . . . . . . . . . . . . . . . . . . . . . . . . . Abbreviations . . . . . . . . . . . . . . . . . . . . . . . . . . . . . . . . . . . . . . . . . . . . . . . . . . . . . . . . . . . . . . . . Directives, standards, laws . . . . . . . . . . . . . . . . . . . . . . . . . . . . . . . . . . . . . . . . . . . . . . . . . . . . . Symbols and meaning . . . . . . . . . . . . . . . . . . . . . . . . . . . . . . . . . . . . . . . . . . . . . . . . . . . . . . . . . Technical terms and meaning . . . . . . . . . . . . . . . . . . . . . . . . . . . . . . . . . . . . . . . . . . . . . . . . . . . Copyright . . . . . . . . . . . . . . . . . . . . . . . . . . . . . . . . . . . . . . . . . . . . . . . . . . . . . . . . . . . . . . . . . . . 4 4 4 4 4 5 5 5 2 Safety . . . . . . . . . . . . . . . . . . . . . . . . . . . . . . . . . . . . . . . . . . . . . . . . . . . . . . . . . . . . . . . . . . . . . 6 2.1 2.2 2.3 2.4 2.5 2.6 2.7 2.8 2.9 Warning instruction markings . . . . . . . . . . . . . . . . . . . . . . . . . . . . . . . . . . . . . . . . . . . . . . . . . . . General . . . . . . . . . . . . . . . . . . . . . . . . . . . . . . . . . . . . . . . . . . . . . . . . . . . . . . . . . . . . . . . . . . . . . Designated use . . . . . . . . . . . . . . . . . . . . . . . . . . . . . . . . . . . . . . . . . . . . . . . . . . . . . . . . . . . . . . Unacceptable operating modes. . . . . . . . . . . . . . . . . . . . . . . . . . . . . . . . . . . . . . . . . . . . . . . . . . Personal qualifications and training . . . . . . . . . . . . . . . . . . . . . . . . . . . . . . . . . . . . . . . . . . . . . . . Safety-conscious work . . . . . . . . . . . . . . . . . . . . . . . . . . . . . . . . . . . . . . . . . . . . . . . . . . . . . . . . Safety notes for the operator . . . . . . . . . . . . . . . . . . . . . . . . . . . . . . . . . . . . . . . . . . . . . . . . . . . . Safety instructions for installing, commissioning and maintenance . . . . . . . . . . . . . . . . . . . . . . Guarantee conditions . . . . . . . . . . . . . . . . . . . . . . . . . . . . . . . . . . . . . . . . . . . . . . . . . . . . . . . . . . 6 6 7 7 8 8 8 9 9 3 Transport, storage and disposal . . . . . . . . . . . . . . . . . . . . . . . . . . . . . . . . . . . . . . . . . . . . . . . . 10 3.1 3.3 Transportation . . . . . . . . . . . . . . . . . . . . . . . . . . . . . . . . . . . . . . . . . . . . . . . . . . . . . . . . . . . . . . . 3.1.1 Unpack and check the delivery condition . . . . . . . . . . . . . . . . . . . . . . . . . . . . . . . . . . 3.1.2 Lifting and transporting. . . . . . . . . . . . . . . . . . . . . . . . . . . . . . . . . . . . . . . . . . . . . . . . . Storage. . . . . . . . . . . . . . . . . . . . . . . . . . . . . . . . . . . . . . . . . . . . . . . . . . . . . . . . . . . . . . . . . . . . . 3.2.1 Ambient conditions for storage . . . . . . . . . . . . . . . . . . . . . . . . . . . . . . . . . . . . . . . . . . Disposal . . . . . . . . . . . . . . . . . . . . . . . . . . . . . . . . . . . . . . . . . . . . . . . . . . . . . . . . . . . . . . . . . . . . 10 10 10 11 11 11 4 Set up and operation . . . . . . . . . . . . . . . . . . . . . . . . . . . . . . . . . . . . . . . . . . . . . . . . . . . . . . . . . 12 4.1 4.2 4.3 Setup . . . . . . . . . . . . . . . . . . . . . . . . . . . . . . . . . . . . . . . . . . . . . . . . . . . . . . . . . . . . . . . . . . . . . . 4.1.1 Data plate . . . . . . . . . . . . . . . . . . . . . . . . . . . . . . . . . . . . . . . . . . . . . . . . . . . . . . . . . . . Description . . . . . . . . . . . . . . . . . . . . . . . . . . . . . . . . . . . . . . . . . . . . . . . . . . . . . . . . . . . . . . . . . Areas of application . . . . . . . . . . . . . . . . . . . . . . . . . . . . . . . . . . . . . . . . . . . . . . . . . . . . . . . . . . . 12 13 13 13 5 Installation . . . . . . . . . . . . . . . . . . . . . . . . . . . . . . . . . . . . . . . . . . . . . . . . . . . . . . . . . . . . . . . . . 14 5.1 5.2 5.3 5.4 5.5 Preparing for installation . . . . . . . . . . . . . . . . . . . . . . . . . . . . . . . . . . . . . . . . . . . . . . . . . . . . . . . Installation . . . . . . . . . . . . . . . . . . . . . . . . . . . . . . . . . . . . . . . . . . . . . . . . . . . . . . . . . . . . . . . . . . Connecting pipes . . . . . . . . . . . . . . . . . . . . . . . . . . . . . . . . . . . . . . . . . . . . . . . . . . . . . . . . . . . . . Control and relief valve (optional extra) . . . . . . . . . . . . . . . . . . . . . . . . . . . . . . . . . . . . . . . . . . . . Connecting the motor . . . . . . . . . . . . . . . . . . . . . . . . . . . . . . . . . . . . . . . . . . . . . . . . . . . . . . . . . 14 14 15 15 16 6 Commissioning and decommissioning . . . . . . . . . . . . . . . . . . . . . . . . . . . . . . . . . . . . . . . . . . 17 6.1 Commissioning . . . . . . . . . . . . . . . . . . . . . . . . . . . . . . . . . . . . . . . . . . . . . . . . . . . . . . . . . . . . . . 6.1.1 Checking the rotation direction. . . . . . . . . . . . . . . . . . . . . . . . . . . . . . . . . . . . . . . . . . . Decommissioning/ storing . . . . . . . . . . . . . . . . . . . . . . . . . . . . . . . . . . . . . . . . . . . . . . . . . . . . . . Re-commissioning . . . . . . . . . . . . . . . . . . . . . . . . . . . . . . . . . . . . . . . . . . . . . . . . . . . . . . . . . . . . 17 18 18 18 3.2 6.2 6.3 2 | www.gd-elmorietschle.com © Gardner Denver Schopfheim GmbH, Gardner Denver Deutschland GmbH Table of contents 7 Maintenance and repair . . . . . . . . . . . . . . . . . . . . . . . . . . . . . . . . . . . . . . . . . . . . . . . . . . . . . . . 19 7.1 7.2 7.3 7.4 Ensuring operational safety . . . . . . . . . . . . . . . . . . . . . . . . . . . . . . . . . . . . . . . . . . . . . . . . . . . . . Maintenance work . . . . . . . . . . . . . . . . . . . . . . . . . . . . . . . . . . . . . . . . . . . . . . . . . . . . . . . . . . . . 7.2.1 Air filtering . . . . . . . . . . . . . . . . . . . . . . . . . . . . . . . . . . . . . . . . . . . . . . . . . . . . . . . . . . . 7.2.2 Replacing blades . . . . . . . . . . . . . . . . . . . . . . . . . . . . . . . . . . . . . . . . . . . . . . . . . . . . . Repair/ Service . . . . . . . . . . . . . . . . . . . . . . . . . . . . . . . . . . . . . . . . . . . . . . . . . . . . . . . . . . . . . . . Spare parts. . . . . . . . . . . . . . . . . . . . . . . . . . . . . . . . . . . . . . . . . . . . . . . . . . . . . . . . . . . . . . . . . . 19 19 20 21 22 23 8 Malfunctions: Causes and elimination . . . . . . . . . . . . . . . . . . . . . . . . . . . . . . . . . . . . . . . . . . . 24 9 Technical Data . . . . . . . . . . . . . . . . . . . . . . . . . . . . . . . . . . . . . . . . . . . . . . . . . . . . . . . . . . . . . . 25 | 3 www.gd-elmorietschle.com © Gardner Denver Schopfheim GmbH, Gardner Denver Deutschland GmbH Foreword 1 Foreword 1.1 Principles These operating instructions: 1.2 • are a part of the following dry running rotary vane vacuum pumps V-VTE 3, V-VTE 6, V-VTE 8 and V-VTE 10. • describe how to use them safely and properly in all life phases. • must be available where the equipment is used. Target group The target group for these instructions is technically trained specialists. 1.3 Supplier documentation and accompanying documents Document Contents No. Operating Instructions BA 187-EN Declaration of Conformit C 0093-EN Declaration of harmlessness 7.7025.003.17 Spare parts’ list Spare parts’ document E 187 Data sheet Technical data and graphs D 187 Info sheet Storage guidelines for machines I 150 Manufacturer’s declaration EU Directive 2011/65/EU (RoHS II) — Supplier documentation 1.4 Abbreviations Fig. Figure V-VTE Vacuum pump 3 1.5 m /h Pumping capacity mbar (abs.) Final vacuum, operating vacuum Directives, standards, laws See Conformity Declaration 4 | www.gd-elmorietschle.com © Gardner Denver Schopfheim GmbH, Gardner Denver Deutschland GmbH Foreword 1.6 Symbols and meaning Symbol Explanation Condition, pre-requisite #### a), b),... Instructions, action Instructions in several steps Results [-> 14] Cross reference with page number Information, note Safety symbol Warns of potential risk of injury Obey all the safety instructions with this symbol in order to avoid injury and death. 1.7 Technical terms and meaning Term Explanation Machine Pump and motor combination ready to be connected Motor Pump drive motor Vacuum pump Machine to create a vacuum Rotary vane Machine’s design or active principle Pumping capacity Vacuum pump volume flow related to the condition in the suction connection Final pressure (abs.) The maximum vacuum that a pump reaches when the suction opening is closed. Given as absolute pressure. Permanent vacuum The vacuum or the suction range at which the pump operates permanently. The permanent vacuum or intake pressure is ≥ than the final vacuum and < than the atmospheric pressure.. Noise emission 1.8 The noise emitted at a specific loading given as a figure, sound pressure level dB(A) as per EN ISO 3744. Copyright Passing on or copying this document, using and providing information on its contents are prohibited unless expressly permitted. www.gd-elmorietschle.com © Gardner Denver Schopfheim GmbH, Gardner Denver Deutschland GmbH | 5 Safety 2 Safety The manufacturer is not responsible for damage if you do not follow all of this documentation. 2.1 Warning instruction markings Warning Danger level Consequences if not obeyed DANGER immediately imminent danger Death, severe bodily injury WARNING possible imminent danger Death, severe bodily injury CAUTION possible hazardous situation Slight bodily injury possible hazardous situation Material damage NOTICE 2.2 General These operating instructions contain basic instructions for installation, commissioning, maintenance and inspection work which must be obeyed to ensure the safe operation of the machine and prevent physical and material damage. The safety instructions in all sections must be taken into consideration. The operating instructions must be read by the responsible technical personnel/ operator before installing and commissioning and must be fully understood. The contents of the operating instructions must always be available on site for the technical personnel / operator. Instructions fixed directly onto the machine must be obeyed and must always remain legible. This applies for example to: • Symbols for connections • Data and motor data plate • Instruction and warning plates The operator is responsible for observing local regulations. 6 | www.gd-elmorietschle.com © Gardner Denver Schopfheim GmbH, Gardner Denver Deutschland GmbH Safety 2.3 Designated use The machine must only be operated in such areas as are described in the operating instructions: 2.4 • only operate the machine in a technically perfect condition • do not operate the machine when it is only partially assembled • the machine must only be operated at an ambient temperature and suction temperature of between 5 and 40°C. Please contact us for temperatures outside this range. • the machine may convey, compress or extract the following media: • convey air with a relative humidity of 30 90% • all non-explosive, non-inflammable, non-aggressive and non-poisonous dry gases and gas air mixtures • extracting, conveying and compressing explosive, inflammable, aggressive or poisonous media, e.g. dust as per ATEX zone 20-22, solvents as well as gaseous oxygen and other oxidants, extremely damp air, water vapour, traces of oil, oil vapour and grease • using the machine in non-commercial plants if the necessary precautions and protective measures have not been taken in the plant • installing in environments that are at risk of explosions • using the machine in areas with ionising radiation • back pressures on the outlet side of more than +0,1bars • modifications to the machine and accessories Unacceptable operating modes www.gd-elmorietschle.com © Gardner Denver Schopfheim GmbH, Gardner Denver Deutschland GmbH | 7 Safety 2.5 Personal qualifications and training • Ensure that people entrusted with working on the machine have read and understood these operating instructions before starting work, particularly the safety instructions for installation, commissioning, maintenance and inspection work. • Manage the responsibilities, competence and monitoring of staff • all work must only be carried out be technical specialists: • Installation, commissioning, maintenance and inspection work • Working with electricity • 2.6 personnel being trained to work on the machine must be supervised by technical specialists only Safety-conscious work The following safety regulations apply in addition to the safety instructions and intended use listed in these instructions: 2.7 8 • Accident prevention regulations, safety and operating regulations • the standards and laws in force • hot parts of the machine must not be accessible during operation or must be fitted with a guard • People must not be endangered by the free extraction or discharge of pumped media • Risks arising from electrical energy must be eliminated. • The machine must not be in touch with inflammable substances. Danger of fire by hot surfaces, discharge of pumped media or cooling air Safety notes for the operator | www.gd-elmorietschle.com © Gardner Denver Schopfheim GmbH, Gardner Denver Deutschland GmbH Safety 2.8 2.9 Safety instructions for installing, commissioning and maintenance • The operator will ensure that any installation, commissioning and maintenance work is carried out by authorised, qualified specialists who have gained sufficient information by an in-depth study of the operating instructions. • Only work on the machine when it is idle and cannot be switched on again • Ensure that you follow the procedure for decommissioning the machine described in the operating instructions. • Fit or start up safety and protective devices again immediately after finishing work. • Conversion work or modifications to the machine are only permissible with the manufacturer’s consent. • Only use original parts or parts approved by the manufacturer. The use of other parts may invalidate liability for any consequences arising. • Keep unauthorised people away from the machine Guarantee conditions The manufacturer’s guarantee or warranty will no longer apply in the following cases: • Improper use • Not complying with these instructions • Operation by insufficiently qualified staff • Using spare parts that have not been approved by Gardner Denver Schopfheim GmbH • Unauthorised modifications to the machine or the accessories supplied by Gardner Denver Schopfheim GmbH www.gd-elmorietschle.com © Gardner Denver Schopfheim GmbH, Gardner Denver Deutschland GmbH | 9 Transport, storage and disposal 3 Transport, storage and disposal 3.1 Transportation 3.1.1 Unpack and check the delivery condition a) Unpack the machine on receipt and check for transport damage. b) Notify the manufacturer of transport damage immediately. c) Dispose of the packaging in accordance with the local regulations in force. 3.1.2 Lifting and transporting WARNING Hurt or limbs crushed as a result of the items being transported falling or tipping over. When transporting ensure: a) that the machine is secured against tipping and falling. b) Put the goods to be conveyed on a horizontal base. 10 | www.gd-elmorietschle.com © Gardner Denver Schopfheim GmbH, Gardner Denver Deutschland GmbH Transport, storage and disposal 3.2 Storage NOTICE Material damage caused by improper storage. Ensure that the storage area meets the following conditions: a) dust free b) vibration free 3.2.1 Ambient conditions for storage Ambient conditions Value Relative humidity 0% to 80% Storage temperature -10°C to +60°C The machine must be stored in a dry environment with normal air humidity. It should not be stored for more than 6 months. see Info “Machine storage guidelines”, Page 4 3.3 Disposal WARNING Danger from inflammable, corrosive or poisonous substances. Machines that come into contact with hazardous substances must be decontaminated before disposal. a) b) c) d) e) When disposing ensure the following: Collect oils and grease separately and dispose of in accordance with the local regulations in force. Do not mix solvents, limescale removers and paint residues Remove components and dispose of them in accordance with the local regulations in force. Dispose of the machine in accordance with the national and local regulations in force. Parts subject to wear and tear (marked as such in the spare parts list) are special waste and must be disposed of in accordance with the national and local waste laws. www.gd-elmorietschle.com © Gardner Denver Schopfheim GmbH, Gardner Denver Deutschland GmbH | 11 Set up and operation 4 Set up and operation 4.1 Setup N A F B E F b Fig. 1 A C B P1 Q O Vacuum pump V-VTE A Vacuum connection N Data plate B Exhaust air outlet O Rotation direction arrow C Vacuum regulating valve (optional extra) P1 Motor data plate E Cooling air inlet Q hot surfaces > 70°C F Cooling air outlet b Housing cover 12 | www.gd-elmorietschle.com © Gardner Denver Schopfheim GmbH, Gardner Denver Deutschland GmbH Set up and operation 4.1.1 Data plate 1 2 *DUGQHU'HQYHU6FKRSIKHLP*PE+ 5RJJHQEDFKVWUDVVH '6FKRSIKHLP 9DFXXPSXPS 97( )ORZ PñK 1 Type/ Size 2 Item no. 3 Ultimate vacuum (abs.) 4 Serial number 5 Suction capacity 9DF PEDUDEV 6HULDO1R 7URFNHQOlXIHUQLFKW|OHQ 2LOOHVVSXPSGRQRWRLO1HSDVKXLOHU 5 Fig. 2 4.2 4 3 Data plate (example) Description The V-VTE model range are complete with a pipe connection on the inlet and an exhaust silencer on the outlet. All the air handled is filtered by a built-in micro-fine filter. The motor fan cools the motor and pump housing. Both the motor and pump have a common shaft. 4.3 Areas of application These dry running rotary vane vacuum pumps V-VTE 3 to V-VTE 10 are suitable for evacuating closed systems and for a permanent vacuum in the intake pressure range 150 - 1000 mbars (abs.). The pumping capacity with unrestricted suction is 3.5, 6, 8 and 10 m3/h at 50 Hz. Data sheet D 187 shows the dependency of the pumping capacity on the intake pressure. These dry running machines are suitable for conveying air with a relative humidity of 30 - 90%. If the unit is switched on more frequently (at regular intervals of about 10 times an hour) or at higher ambient temperatures and intake temperatures, the excess temperature limit of the motor winding and the bearings may be exceeded. Please contact the manufacturer should the unit be used under such conditions. If it is installed in the open air the unit must be protected from environmental influences, (e.g. by a protective roof). www.gd-elmorietschle.com © Gardner Denver Schopfheim GmbH, Gardner Denver Deutschland GmbH | 13 Installation 5 Installation 5.1 Preparing for installation Check the following points: • • Machine freely accessible from all sides Do not close ventilation grids and holes • Sufficient room for installing and removing pipes and for maintenance work, particularly for installing and dismantling the machine • No external vibration effect • Do not suck any hot exhaust air from other machines into the cooling system. There must be a minimum space of 20 cm in front of the housing cover (Fig. 1/b) for servicing. The cooling air entries (Fig. 1/E) and the cooling air exits (Fig. 1/F) must have a minimum distance of 8 cm from any obstruction. The discharged cooling air must not be recirculated. 5.2 Installation NOTICE The machine may only be operated when it is set up horizontally. Other installation on request. Material damage resulting from the machine tipping over and falling. When installed at more than 1000 m above sea level a reduction in power is noticeable. In this case we would ask you to contact us. Ensure that the foundation complies with the following conditions: • Level and straight • The bearing surface must be able to bear the weight of the machine It must be possible to install the machine on a firm foundation without anchoring. When installing on a substructure we recommend fixing with flexible buffers. 14 | www.gd-elmorietschle.com © Gardner Denver Schopfheim GmbH, Gardner Denver Deutschland GmbH Installation 5.3 Connecting pipes a) Vacuum connection at (Fig. 1/A). The air handled can be exhausted into the atmosphere through the exhaust port (Fig. 1/B) or by utilising a pipe connection and pipeline. NOTICE The pumping capacity of the vacuum pump is reduced if the suction pipe is too narrow and/or too long. 5.4 Control and relief valve (optional extra) The vacuum can be set by turning the control knob (Fig. 1/C) as shown on the symbol fitted to the button. www.gd-elmorietschle.com © Gardner Denver Schopfheim GmbH, Gardner Denver Deutschland GmbH | 15 Installation 5.5 Connecting the motor DANGER Danger of death if the electrical installation has not been done professionally. The electrical installation must only be done by a qualified electrician observing EN 60204. The operating company has to provide the main switch. a) The electrical motor data can be found on the data plate (Fig. 1/N) or the motor data plate (Fig. 1/P1). The motors comply with DIN EN 60034 and are in protection class IP 54 and insulation class F. The appropriate connection diagram is located in the motor‘s terminal box (not for the plug connection version). The motor data must be compared with the data of the existing mains network (current type, voltage, network frequency, permitted current value). b) Connect the motor via the plug connection or a motor protection switch (for safety reasons a motor protection switch is required and cable fitting must be provided to provide strain relief for the connection cable). We recommend using motor protection switches with delayed switch off, depending on possible excess current. Temporary excess current may occur when the machine is started cold. NOTICE Power supply The conditions at the installation location must match the information on the motor data plate. Without derating the following is permissible: • ± 5% voltage deviation • ± 2% Frequency deviation 16 | www.gd-elmorietschle.com © Gardner Denver Schopfheim GmbH, Gardner Denver Deutschland GmbH Commissioning and decommissioning 6 Commissioning and decommissioning 6.1 Commissioning WARNING Improper use May lead to severe or fatal injuries. Therefore be sure to obey the safety instructions. CAUTION Hot surfaces When the machine is at operating temperature the surface temperatures on the components (Fig. 1/ Q) may go above 70°C. You must avoid touching the hot surfaces (marked with warning plates). CAUTION Noise emission The highest noise pressure levels measured as per EN ISO 3744 are given in Section 9. When spending a long time in the vicinity of the running machine use ear protectors to avoid permanent damage to your hearing. NOTICE Wait until the machine stops The machine must only be switched on again after it stops. www.gd-elmorietschle.com © Gardner Denver Schopfheim GmbH, Gardner Denver Deutschland GmbH | 17 Commissioning and decommissioning 6.1.1 Checking the rotation direction The drive shaft direction of rotation is shown by the rotation direction arrow (Fig. 1/O). a) Start the motor briefly (max. two seconds) to check the direction of rotation. When looking at the motor fan, it must rotate clockwise. The suction pipe must not be connected when starting up like this. NOTICE Incorrect direction of rotation Running the machine in reverse for a long time may cause damage to the blades which may lead to the blades breaking. Use a phase sequence indicator to check the direction of rotation (anti-clockwise rotating field). 6.2 Decommissioning/ storing Stop the machine a) Switch the machine off. b) If available close the cut off device in the suction and pressure pipe. c) Disconnect the machine from the electricity source. d) Depressurise the machine: Open the pipes slowly. The pressure reduces slowly. e) Remove the pipes and hoses. f) Seal the connections for suction and discharge nozzles with adhesive foil. see also Section 3.2.1, Page 11 6.3 Re-commissioning a) Check the condition of the machine (cleanliness, cabling etc.). For installation see Section 5 Page 14 For commissioning see Section 6.1 Page 17 18 | www.gd-elmorietschle.com © Gardner Denver Schopfheim GmbH, Gardner Denver Deutschland GmbH Maintenance and repair 7 Maintenance and repair DANGER Danger of death from touching live parts. Before maintenance work disconnect the machine by pressing the main switch or unplugging it and ensure that it cannot be turned on again. WARNING Hot surfaces During maintenance work there is the danger of getting burnt on hot components (Fig. 1/Q). Wait for the machine to cool down. 7.1 Ensuring operational safety Regular maintenance work must be carried out in order to ensure operational safety. Maintenance intervals also depend on the operational demands on the machine. With any work observe the safety instructions described in Section 2.8 “Safety notes for installation, commissioning and maintenance”. The whole unit should always be kept in a clean condition. 7.2 Maintenance work Interval Maintenance to be carried out Section monthly Check the pipes and screws for leaks and to ensure they are seated properly and if necessary seal again or tighten up. — monthly Check the terminal box and cable inlet holes for leaks and if necessary re-seal. — monthly Clean the ventilation slots on the machine and the motor cooling ribs. — — The machine‘s bearings are permanently lubricated and do not require re-lubricating. — monthly / yearly Clean or replace filter cartridges 7.2.1 4,000 h - 1,000 h Check blades 7.2.2 Replace blades www.gd-elmorietschle.com © Gardner Denver Schopfheim GmbH, Gardner Denver Deutschland GmbH | 19 Maintenance and repair 7.2.1 Air filtering c d e Y Z X O1 g Fig. 3 m f n Air filtering and changing blades O1 Direction of rotation X Minimum height Y Slanting side of the blade Z Drilled holes in the housing b Housing cover c Rotor d Housing e Blade f Filter cartridge g Filter room m Gasket n Gasket s Screws b s NOTICE Insufficient maintenance on the air filter The power of the machine lessens and damage may occur to the machine. The filter cartridge (Fig. 3/f) air must be cleaned by blowing from the inside to the outside once a month or more often depending on the level of contamination, or if necessary replaced. In spite of cleaning the filters their separation efficiency will continue to deteriorate. Therefore the filters should be replaced every year (or under extreme condition more often). Changing filters: Screw off housing cover (b). Remove filter cartridge (Fig. 3/f) with gaskets (Fig. 3/ m, 3/n) from filter room (Fig. 3/g). Clean or replace filter cartridge and check gaskets. Reassemble in reverse order. Pay attention: a) Don’t interchange gaskets (Fig. 3/m, 3/n) b) Ensure that the surfaces of housing (Fig. 3/d) and rotor (Fig. 3/c) are clean c) Tighten the screws (Fig. 3/s) to 5,5 + 0,5 Nm 20 | www.gd-elmorietschle.com © Gardner Denver Schopfheim GmbH, Gardner Denver Deutschland GmbH Maintenance and repair WARNING 1 Danger of injury when dealing with compressed air. When blowing through with compressed air, solid particles may be carried along or powder dust swirling around may cause injury to the eyes. Therefore, when cleaning with compressed air always wear goggles and a dust mask. 2 Fig. 4 Purging filter cartridge 1 Filter cartridge 2 Compressed air 7.2.2 Replacing blades Checking blades: The models V-VTE have 4 blades which have a low but permanent wear factor. First check after 4,000 operating hours, thereafter every 1,000 operating hours. Unscrew the housing cover (Fig. 3/b) from the housing. Remove the blades (Fig. 7/e) to be checked. All blades must have a minimum height (Fig. 3/X): Type X (minimum height) V-VTE 3, 6 10 mm V-VTE 8, 10 12 mm The blades must only be changed as a set. Changing blades: If you detect during the blade check that the minimum height has been reached or it has fallen below the minimum height, the blade set must be changed. Blow out the housing and the rotor slot. Insert the blades into the rotor slot. When doing this you must ensure that the blades with the sloping side (Fig. 3/ Y) point outwards and the direction of rotation of these sloping sides (Fig. 3/O1) matches that of the drilled holes for the housing (Fig. 3/Z). Replace the housing cover (Fig. 3/b) and slightly tighten the screws. Start the pump briefly and check for free and smooth running blades. Tighten the screws (Fig. 3/s) to 5,5 + 0,5 Nm. www.gd-elmorietschle.com © Gardner Denver Schopfheim GmbH, Gardner Denver Deutschland GmbH | 21 Maintenance and repair 7.3 Repair/ Service a) For on site repair work the motor must be disconnected from the mains by a qualified electrician so that it cannot be started up again accidentally. For repairs use the manufacturer, its branch offices or authorised dealers. Please contact the manufacturer for the address of the service centre responsible for you (see Manufacturer‘s address). NOTICE For each machine that is sent to an Elmo Rietschle Service centre for inspection, maintenance or repair, a fully completed, signed declaration of harmlessness must be enclosed. The declaration of harmlessness is part of the supplier‘s documentation. b) After a repair or re-commissioning, the actions listed under „Installation“ and „Commissioning“ must be carried out as for initial commissioning. Fig. 4 Clearance certificate 7.7025.003.17 22 | www.gd-elmorietschle.com © Gardner Denver Schopfheim GmbH, Gardner Denver Deutschland GmbH Maintenance and repair 7.4 Spare parts Order spare parts in accordance with the: • Spare parts list: E 187 ➝ V-VTE 3 - V-VTE 10 • Download the PDF file: http://www.gd-elmorietschle.com ➝ Downloads ➝ Product Documents ➝ V-Series ➝ Spare Parts • Parts subject to wear and gaskets are indicated separately on the list. • Web site: http://www.service-er.de • Select the type, size and design. NOTICE Fig. 5 Spare parts list (example) Only use original spare parts or parts approved by the manufacturer. The use of other parts may lead to malfunctions and invalidate liability or the guarantee for any consequences arising. Fig. 6 Web site http://www.service-er.de www.gd-elmorietschle.com © Gardner Denver Schopfheim GmbH, Gardner Denver Deutschland GmbH | 23 Malfunctions: Causes and elimination 8 Malfunctions: Causes and elimination Fault Cause Troubleshooting Important Machine is switched off by the motor protection switch Mains voltage/ Frequency does not correspond with the motor data Check by qualified electrician Section 5.5 Connection to motor terminal board is not correct Motor protection switch is not set correctly Pumping capacity is insufficient Final pressure (max. vacuum) is not reached Machine gets too hot The machine makes an abnormal noise Motor protection switch is triggered too quickly Use a motor protection switch with an overload-dependent delayed switch off that takes into consideration the short term excess current at start up (version with short circuit and overload trigger as per VDE 0660 Part 2 orIEC 947-4) The intake filter is dirty Clean or replace the intake filter Section 7.2.1 Section 7.4 The suction pipe is too long or too narrow Check the hose or the pipe Section 5.3 Machine or system leaking Check the pipework and screw connections for leaks and to ensure that they are firmly seated. Section 7.2 Blades are damaged Replace blades Section 7.2.2 Section 7.4 Machine or system leaking Check the pipework and screw connections for leaks and to ensure that they are firmly seated. Section 7.2 Blades are worn or damaged Replace blades Section 7.2.2 Section 7.4 Ambient or intake temperature is too high Ensure it is being used properly Section 2.3 Cooling air supply is obstructed Check environmental conditions Section 5.1 Clean ventilation slots Section 7.2 The compressor housing is worn (chatter marks) Repair by manufacturer or authorised workshop Elmo Rietschle Service The vacuum regulating valve (if fitted) is vibrating Replace the valve Section 7.4 Blades are damaged Replace blades Section 7.2.2 Section 7.4 Please contact Elmo Rietschle Service for other malfunctions or those that cannot be eliminated. 24 | www.gd-elmorietschle.com © Gardner Denver Schopfheim GmbH, Gardner Denver Deutschland GmbH Technical Data 9 Technical Data V-VTE 3 6 8 10 50 Hz 60 63 65 62 60 Hz 61 64 66 68 kg 6.5 7.5 8.0 10.3 Length mm 209 224 249 264 Width mm 156 156 156 156 Height mm 151 156 156 156 Sound pressure level (max.) EN ISO 3744 Tolerance± 3 dB(A) Weight (max.) dB(A) You will find more technical data on the data sheet D 187 • Download the PDF file E 187 ➝ V-VTE 3 - V-VTE 10 • Download the PDF: http://www.gd-elmorietschle.com ➝ Downloads ➝ Product Documents ➝ V-Series ➝ Data Sheets NOTICE Subject to technical changes. Fig. 7 Data sheet (example) www.gd-elmorietschle.com © Gardner Denver Schopfheim GmbH, Gardner Denver Deutschland GmbH | 25 www.gd-elmorietschle.com [email protected] Gardner Denver Schopfheim GmbH Roggenbachstraße 58 79650 Schopfheim · Deutschland Tel. +49 7622 392-0 Fax +49 7622 392-300 Elmo Rietschle is a brand of Gardner Denver‘s Industrial Products Division and part of Blower Operations. EC - declaration of conformity 2006/42/EC Hereby the manufacturer confirms: Gardner Denver Schopfheim GmbH Postfach 1260 D-79642 Schopfheim that the machine: of the: vacuum pump Series: V-VTE Type: V-VTE 3, V-VTE 6, V-VTE 8, V-VTE 10 Is conform to the regulations of the guideline indicated above. The following harmonized and national standards and specifications are applied: EN 1012-2:1996+A1:2009 Compressors and vacuum pumps — Safety requirements — Part 2: Vacuum pumps These declarations of conformity are invalid when the machine has been modified without prior approval by us and the approval has been documented in writing. Name and address of the EC person in charge for documentation Gardner Denver Schopfheim GmbH Postfach 1260 D-79642 Schopfheim Gardner Denver Schopfheim GmbH Schopfheim, 1.3.2015 Dr. Friedrich Justen, Director Engineering C_0093_EN Safety declaration form for vacuum pumps and components 7.7025.003.17 Page 1 of 1 Gardner Denver Schopfheim GmbH Roggenbachstr. 58, 79650 Schopfheim Phone: +49/(0)7622/392-0 Fax: +49/(0)7622/392-300 Repairs and/or maintenance of vacuum pumps and components will only be carried out if a declaration has been filled in correctly and completely. If not, the repair work cannot be started and delays will result. This declaration must only be filled in and signed by authorised qualified staff. 1. Type of vacuum pumps/ components 2. Reason for the submission Type description: Machine number Order number: Delivery date: 3. Condition of vacuum pumps/ components YES NO 4. Contamination of the vacuum pumps/ components when in use Toxic YES NO Corrosive YES NO Was the pump/ component emptied? Microbiological*) YES NO (Product/Consumables) YES NO Explosive*) YES NO Has the pump/ component been cleaned and decontaminaRadioactive*) YES NO other YES NO YES Was this being operated? Which lubrication was used? Cleaning agent: Cleaning method: *) Microbiological, explosive or radioactively contaminated vacuum pumps/ components will only be accepted with proof that they have been cleaned properly. Type of toxic substance or process-related, dangerous reaction products with which the vacuum pumps/ components came into contact: Trade name, manufacturer's product name 1 2 3 4 Chemical name Hazard class Action to be taken if toxic substances are released First aid in the event of accidents Personal protection measures: YES Hazardous decomposition products when subjected to thermal load NO Which? 5. Legally binding declaration We swear that the information in this declaration is accurate and complete and that I, the undersigned, am in a position to judge this. We are aware that we are liable to the contractor for damage caused by incomplete and inaccurate information. We undertake to release the contractor from any damage claims from third parties arising from incomplete or incorrect information. We are aware that, regardless of this declaration, we are directly liable to third parties including in particular the contractor's staff entrusted with handling or repairing the product. Company: Street: Post code/ Town: Phone: Fax: Name (in capitals) Date: Position: Company stamp: Legally binding signature: TOS no. / Index: 7.7025.003.17 / 03 Office responsible: GS File management: ..\7702500317.xl Gardner Denver Schopfheim GmbH Postfach 1260 D-79642 Schopfheim