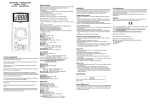
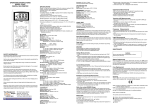
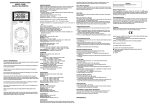
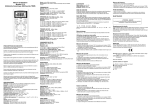
Transcript
OPERATING INSTRUCTIONS
MODEL 2703C
DIGITAL MULTIMETER
SPECIFICATIONS
Display: 3½ digit liquid crystal display (LCD) with a maximum reading of 1999.
Polarity: Automatic, positive implied, negative polarity indication.
Overrange: (OL) or (-OL) is displayed.
Zero: Automatic.
Low battery indication: The " " is displayed when the battery voltage drops
below the operating level.
Measurement rate: 2.5 times per second, nominal.
Auto power off: Approx. 25 minutes.
Operating environment: 0℃ to 50℃ at < 70% relative humidity.
Storage temperature: -20℃ to 60℃, 0 to 80% relative humidity.
2703C
V
V
Voltage Measurements
Temperature Coefficient: 0.1 x (specified accuracy) per ℃. (℃ to 18℃, 28℃ to
1.Connect the red test lead to ”VΩ” jack and the black test lead to the ”COM”
jack.
2.Set the Function/Range switch to the desired voltage type (AC or DC) and
range. If magnitude of voltage is not known, set switch to the highest range
and reduce until a satisfactory reading is obtained.
3.Connect the test leads to the device or circuit being measured.
4. For dc, a (-) sign is displayed for negative polarity; positive polarity is implied.
50℃).
Altitude: 6561.7 feet (2000m).
Power: Single standard 9-volt battery, NEDA 1604, JIS 006P, IEC 6F22.
Battery life: 200 hours typical with carbon-zinc.
Dimensions: 165mm (H) x 78mm (W) x 42.5mm (D).
Weight: Approx. 10.0 oz.(285g) including holster.
Accessories: One set test leads, one spare fuse, 9V battery (installed), and
Operating Instructions.
Ranges: 2V, 20V, 200V, 1000V
Resolution: 1mV
Accuracy: ± ( 1.2% rdg + 1 dgt)
Input impedance: 10MΩ
Overload protection: 1000VDC or 750VAC rms
AC VOLTS
BATT 1.5V
mA
COM
V
10A
(50Hz - 500Hz)
Ranges: 200V, 750V
Resolution: 0.1V
Accuracy: ± ( 2.0% rdg + 5 dgts) on 200V range
± ( 2.0% rdg + 10 dgts) on 750V range
Input impedance: 10MΩ
Overload protection: 1000VDC or 750VAC rms
DC CURRENT
SAFETY INFORMATION
The following safety information must be observed to ensure maximum personal
safety during the operation at this meter:
Use the meter only as specified in this manual or the protection provided by the
meter might be impaired.
Test the meter on a known voltage before using it to determine if hazardous
voltage is present.
Do not use the meter if the meter or test leads look damaged, or if you suspect
that the meter is not operating properly.
Never ground yourself when taking electrical measurements. Do not touch
exposed metal pipes, outlets, fixtures, etc., which might be at ground potential.
Keep your body isolated from ground by using dry clothing, rubber shoes, rubber
mats, or any approved insulating material.
Turn off power to the circuit under test before cutting, unsoldering, or breaking
the circuit. Small amounts of current can be dangerous.
Use caution when working above 60V dc or 30V ac rms. Such voltages pose a
shock hazard.
When using the probes, keep your fingers behind the finger guards on the
probes.
Measuring voltage which exceeds the limits of the multimeter may damage the
meter and expose the operator to a shock hazard. Always recognize the meter
voltage limits as stated on the front of the meter.
Before taking any measurements, read the Safety Information Section. Always
examine the instrument for damage, contamination (excessive dirt, grease, etc.)
and defects. Examine the test leads for cracked or frayed insulation. If any
abnormal conditions exist do not attempt to make any measurements.
Accuracy: Stated accuracy at 23℃ ±5℃, < 75% relative humidity.
DC VOLTS
A
OPERATION
Ranges: 2mA, 20mA, 200mA, 10A
Resolution: 1uA
Accuracy: ± (1.5% rdg + 1 dgts) on 2mA to 200mA ranges
± (3.0% rdg + 3 dgts) on 10A range
Input protection: 0.5A/500V fast blow ceramic fuse on mA input
10A/600V fast blow ceramic fuse on 10A input
10A Input: 10A for 60 seconds maximum followed
by a 10 minute cooling period
RESISTANCE
Ranges: 200Ω, 2k, 20k, 200k, 20MΩ
Resolution: 0.1Ω
Accuracy:
± (1.5% rdg + 4 dgts) on 2kΩ to 200kΩ ranges
± (3.0% rdg + 5 dgts) on 20MΩ range
Open circuit volts: 0.3Vdc typical, (3.0Vdc on 200Ω range)
Overload protection: 500VDC or AC rms
CONTINUITY
Audible indication: Less than 100Ω
Response time: 100ms
Overload protection: 500VDC or AC rms
DIODE TEST
Test current: Approx. 1.0mA
Accuracy: ±(3.0% rdg + 3dgts)
Open circuit volts: 3.0Vdc typical
Overload protection: 500VDC or AC rms
Fuse Replacement
If no current measurements are possible. Check for a blown overload protection
fuse. For access to fuses, remove the three screws from the back of the meter
and lift off the front case. Replace F1 only with the original type 0.5A/500V, fast
acting ceramic fuse, 6.35x32mm.
Replace F2 only with the original type 10A/600V, fast acting ceramic fuse,
6.35x25.4mm.
Cleaning
Wipe the case with a damp cloth and mild detergent. Do not use abrasives or
solvents. Dirt or moisture in the terminals can affect readings.
Current Measurements
1.Connect the red test lead to the (uA, mA or 10A) jack and the black test lead to
the "COM" jack.
2.Set the Function/Range switch to the DC or AC ranges.
3.Remove power from the circuit under test and open the normal circuit path
where the measurement is to be taken. Connect the meter in series with the
circuit.
4.Apply power and read the value from the display.
Safety: Conforms to IEC61010-1 (EN61010-1), CATII 1000V, CATIII 600V, Class
II, Pollution degree 2 Indoor use.
CATII: Is for measurements performed on circuits directly connected to the
low-voltage installation.
CAT III: Is for measurements performed in the building installation.
EMC: Conforms to EN61326.
Resistance and Continuity Measurements
1.Set the Function/Range switch to the desired resistance range or continuity
position.
2.Remove power from the equipment under test.
3.Connect the red test lead to the “ V Ω ” jack and the black test lead to
the ” C O M ” jack.
4.Touch the probes to the test points. In ohms, the value indicated in the display
is the measured value of resistance. In continuity test, the beeper sounds
continuously, if the resistance is less than 100Ω .
Diode Tests
1.Connect the red test lead to the “ V Ω ” jack and the black test lead to
the ” C O M ” jack.
2.Set the Function/Range switch to the “
“ position.
3.Turn off power to the circuit under test. External voltage across the
components causes invalid readings.
4.Touch probes to the diode. A forward-voltage drop is about 0.6V (typical for a
silicon diode).
5.Reverse probes. If the diode is good, “OL” is displayed. If the diode is shorted,
“000” or another number is displayed.
6. If the diode is open, “OL” is displayed in both directions.
Battery Test
1. Connect the red test lead to the (mA/BATT 1.5V) jack and the black test lead to
the "COM" jack.
2. Set the Function/Range switch to the desired 1.5V battery test range.
3. Connect the test leads to the 1.5Vdc battery under test. Normally, a good
1.5Vdc battery will read above 1.25Vdc. Consult the battery manufacturer for
complete battery specifications to determine actual battery life remaining and
condition of battery.
MAINTENANCE
WARNING
Remove test leads before changing battery or fuse or
performing any servicing.
BATTERY TEST
Battery Replacement
Ranges: 1.5V, 9V
Resolution: 1mV, 10mV
Accuracy: ±(3.5% rdg + 2 dgts)
Loaded current: 150mA typical for 1.5V range, 5mA
typical for 9V range
Overload protection: 500V DC or AC rms on 9V range,
0.5A/500V fast blow ceramic fuse on 1.5V range.
Power is supplied by a 9 volt battery. (NEDA 1604, IEC 6F22). The " " appears
on the LCD display when replacement is needed. To replace the battery, remove
the three screws from the back of the meter and lift off the front case. Remove
the battery from case bottom.
The symbols used on this instrument are:
Caution, refer to accompanying documents
Equipment protected throughout by Double insulation (Class II)
Alternating current
Direct current
Ground