1
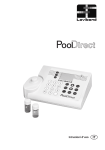
Operating Instructions for
Type DPN-2335-40-V.24 Printer
The printer is suitable for operation with the following Lovibond® photometers :
•
•
•
•
PoolDirect
MultiDirect
PCSpectro II
SpectroDirect
Important
The printer has already been configured in our plant for use with the above photometers.
Please do not make any changes to the programming !
Equipment provided (please quote order ref. 198075)
•
•
•
•
•
•
Battery-powered Type DPN-2335-40-V.24 printer
Roll chart (already installed)
Colour printing ribbon (already installed)
Battery charger
Serial cable (25 m; 9 m)
Interference suppression filter
Recommended spares
•
•
Roll charts (order ref. 198062)
Colour printing ribbon (order ref. 198067)
General appearance
Cover
Slot for roll chart
Function keys and
LED displays
Page 1 / 4
Function keys and LED displays
Red LED : shows
printer is on / off
On / Off switch for
chart feed
Green LED : shows
chart feed is on / off
Chart feed operates only
when green LED is lit
Changing the roll chart
Open the cover and place the new roll in
its location. Press the "SEL" key (the
green LED will go out) and the "FEED"
key to feed the chart under the colour
printing ribbon and through the slot in
the cover
Changing the colour printing ribbon
Push here to eject
the cassette
Turn the wheel in the
direction shown in
order to tension the
ribbon
Page 2 / 4
Charging the unit
1)
Set the On/Off switch on the right-hand side of the printer housing to "Off". The red
LED (P) and green LED (SEL) will both go out.
2)
Connect the charger to the printer and switch on the charger at the mains.
3)
A full charge takes approximately 12 hours.
4)
The batteries in the printer will not be damaged if the charging period is extended.
5)
If the batteries in the printer are fully discharged (flat) they must be charged at least
30 minutes before the printer is set to work.
Rear view
On / Off switch
25-pin data connector
9V power supply
from the charger
Page 3 / 4
Setting to work
1)
Complete the charging operation and disconnect the charger from the printer.
2)
Connect the printer and photometer with the serial cable. The printer has a 25-pin
connector and the photometer has a 9-pin connector.
3)
Switch on the photometer.
Important :
4)
the photometer baud rate must be set to 9600. This is carried out as
follows :
-
Press
[Mode] [2] [9]
-
[]
"Press Enter"
-
[2] [] Select baud rate
-
Use the arrow keys to select "9600"
-
[]
-
[ESC] Quit the menu
Press "Enter"
Switch on the printer (the On/Off switch is on the right-hand side of the housing)
Important :
the red and green LEDs must both be lit for data transmission (see
also "Function keys and LED displays"].
5]
Use the photometer to take measurements.
6]
Press the "print" button on the photometer as soon as the result appears in the
display (see photometer instruction manual].
7)
Data transfer takes place immediately from the photometer to the printer.
8]
The measurement results stored in the photometer can be printed at a later date by
reference to various criteria (see "Mode Menu Settings" in the photometer manual].
Interference suppression filter
An interference suppression filter is provided as part of the package, in case EMC is a
requirement. This should be fitted to the serial cable as shown below :
Interference suppression filter
serial cable
Page 4 / 4