1
Operating Instructions
These must be read
before starting use!
ProCharger
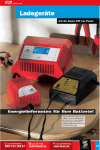
The ProCharger is one of the most modern and intelligent battery
charger/diagnostic and test devices for motorcycle, scooter
and quad/ATV starter batteries. It has a slide-switch for switching
between 6 V and 12 V, and is suitable for all conventional lead/
acid batteries as well as for all maintenance-free gel and AGM
batteries - i.e. for all the battery types in the Louis range. It is also
suitable for charging all maintenance-free gel, EXIDE and
AGM batteries. The ProCharger operates with state-of-the-art
characteristic-controlled charging technology to provide optimum
charging and care for your battery. The intelligent software
continuously monitors all its functions and automatically controls
the charging process according to battery status. The battery
can be left connected for months. Overcharging cannot happen.
The cable sets are equipped with compact connectors, and
can be connected to the battery using either clip connectors or
ring terminals.
Operating voltage: 220 - 240 V ~, charging current up to max.1A
Usable temperature range: -15°C to + 40°C
Charger dimensions (W x H (max.) x D): 10 x 6.5 x 15 cm
2
Special features:
• microprocessor-controlled, intelligent charging technology
• multi-stage charging characteristic (I/U1-U2)
• electronically protected against reverse polarity and short-circuit
• lead-battery activator (automatic battery care
mode/desulphating)
• trickle charging
• charging and discharging function (ideal for winter storage)
• battery test function/fault detection
• manual switching between 6 V and 12 V
• max. charging current 1 A (fully automatic adjustment)
• altogether 16 LED indicators in 4 colours for status
• 5 LEDs for five-stage capacity indication in % and
graphical symbols
• 2 LEDs to indicate the charging voltage (6 V and 12 V)
• 4 LEDs for condition indication: heavily discharged, faulty,
reverse polarity and fully charged
• 4 LEDs to indicate the basic functions 1 LED for 230 V
mains connection
• extra-long cables: charging cable 2.20 m and power cord 1.70 m
• including wall mounting kit (integrated into base of the unit)
• battery can remain permanently connected
3
Comprises
Index
Intended use
6
Functional description of the lead battery activator
7
Warning and safety instructions:
Comprises: ProCharger, cable set with clip connectors for quick
attachment, cable set with cable ring-terminals (eyes) for
permanent connection to the battery, along with comprehensive
operating instructions in German and English.
4
9
Risks
12
Safety
17
Malfunction-instructions
21
Connecting and first use
22
Brief explanation/quick start
24
Charging
25
Fault display
32
Technical data and list of components supplied
33
Guarantee
34
Note on environmental protection
35
Packaging
36
Cleaning
37
If you have questions about the product …
38
5
Intended use
Intended use
Using the charger as intended comprises charging and maintaining
the charge of conventional, standard lead/acid batteries as well
as of all maintenance-free, gel and AGM batteries for which the
voltage and charging current quoted in the specifications are
appropriate. No primary batteries (sink-carbon, alkaline etc.) or any
type of battery other than lead-acid batteries may be connected
and charged. Any other usage is deemed to be not as intended. The
user/operator is alone responsible for any resulting damage.
Make very sure that you follow the instructions of the battery
manufacturer.
Using the charger in any way other than as described above
can damage the product and give rise to other risks such as a short
circuit, fire, electric shock etc.
6
Functional description of the lead battery activator
Functional description of the lead battery activator
It is the nature of lead batteries that, if properly treated, they are
capable of lasting for between eight 8 and 10 years. In practice,
however, the average useful life is well below what is possible, and
it is seasonal use in particular that often leads to early failure of lead
batteries. Many owners of motorbikes, vintage cars, boats,
battery-operated lawnmowers and caravans are familiar with the
problem of finding that the battery often fails the first time it is
used in the spring. The culprit behind the early failure of many
lead batteries is a chemical process known as sulphation. The lead
sulphate contained in a battery has a tendency to develop clumps
of crystals. This tendency is particularly strong when discharge
is slow or during self-discharge. This reduces the plate surface area
within the battery (crystalline sulphate covers the lead plates),
and the capacity falls. The more the plates are covered, the less
energy can be stored and subsequently released. Deposits of
sulphate are the main reason for the failure of lead batteries. The
lead battery activator integrated into the ProCharger works
against the deposition of sulphate on the lead plates through
periodic, intense pulses of up to 80 A.
7
Functional description of the lead battery activator
How does desulphation work?
The crystalline sulphate deposits (sulphation) particularly tend to
form in lead batteries that are not used for a relatively long time.
This can be opposed by simulating normal operation. Charging
and discharging are performed cyclically. Methods in which the
batteries are subject to large, brief, pulses of discharging and recharging current produce even better results. Chargers that generate
charging pulses risk applying too much voltage to the vehicle's
electrical system. Some chargers apply an increased voltage (up to
20 V) when desulphating the battery. Because of this high voltage,
this method requires the battery to be disconnected from the
vehicle (there is a risk that the high voltage will damage the
vehicle's electronic systems). For this reason, the designers of the
ProCharger selected a method that uses discharge pulses.
Warning and safety instructions
Warning and safety instructions:
It is essential that the instructions in this introduction are considered before you use the device. The regulatory authorities
require that we give you important information for your safety,
and explain to you how you can avoid damaging the device or
other equipment. The manufacturer is not liable for any
damage arising from negligent or wilful failure to observe the
instructions in this manual!
In order to avoid malfunction, damage or health hazards,
the following safety instructions should also be followed:
• Please read these operating instructions through carefully,
as they contain a lot of important information about operation
and use. Only use the charger in accordance with these instructions. Dispose of any packaging material that you don't
need, or store it in a place where it is not accessible to
children. There is a risk of suffocation!
• If the charger or the connecting cables are damaged, it must
no longer be used. You should have it repaired at a qualified
workshop.
8
9
Warning and safety instructions
• Explosive gases that are hazardous to health can be generated
when lead/acid batteries are charged. You should therefore only
charge batteries in well-ventilated rooms. Avoid open flames and
sparks. Do not charge any types of accumulators or batteries that
are not listed in these instructions.
• Make sure that the charger's ventilation slots are not covered.
• The device must only be connected through an earthed socket
for 230 V AC/50 Hz (10/16 A).
• Do not charge any lead/acid accumulators that are damaged
or faulty. Never attempt to recharge dry batteries or those that
are not rechargeable.
• Do not use the charger in the open.
• Make sure that you don't come into contact with the battery acid.
Battery acid can cause severe skin burns! If you do come into
contact with the battery acid, you should immediately flush it
with lots of clean water, and consult a doctor if necessary.
• If the device is used for a long time at maximum charging current,
it will become hot. You should therefore check the charging process at regular intervals. If anything is not right (excessive heating
of the battery, the charger, heavy gassing from the battery)
then pull out the mains plug and disconnect the battery from the
charger immediately. Whenever you are not using the charger,
or when you want to clean it, pull out the mains plug and disconnect the device from the battery. Never pull the cable itself to
do this, but always take hold of the plug.
• Do not open or dismantle the charger, and do not attempt to
repair it.
• The device is not suitable for children.
• Do not wear any conductive jewellery such as chains, armbands
or rings while you are using the charger.
10
11
Risks
Risks associated with the use of the charger
The charger has been designed in accordance with the latest
engineering standards and with the recognized rules for technical
safety. Nevertheless, if wrongly used, there is a risk to:
• the life and limb of the operator or third parties
• the charger itself
• other property as a result of subsequent damage
Anybody who is involved with the initial operation, use, servicing
or maintenance of the charger must closely follow these operating
instructions. Malfunctions that affect safety are to be avoided and,
if necessary, rectified promptly.
Do not open the device. Unauthorized opening of the housing and
unsuitably performed repairs or modifications to the electronics,
housing, cables etc. can present hazards to the user of the device
and will invalidate the guarantee. Never connect or disconnect any
cables during a storm, and do not use the device during a storm.
During operation, and at least once a week, the charger must
be checked for proper operation while the power cord and the
12
charging cable must be checked for externally visible damage.
Note 1.1
Position the charger, the battery and the mains and charging
cables in such a way that nobody can tread on or stumble over
them.
Do not operate the device during frost or when there is a risk of
frost in order to prevent the formation of water condensation.
In order to avoid the risk of fire and the risk of an electrical shock,
the device must not be exposed to rain or moisture. No liquid
of any kind must be allowed to enter the device. For reasons of
both safety and of official approval (CE), unauthorised modification and/or changes to the device or the connecting cable are
not permitted.
Consult a qualified workshop if you have any doubts about the
usage, safety or connection of the device. Every time you use it,
check that the product and its connecting cables are not damaged.
Never start using the device if the protective insulation on the
mains or charging cables is damaged (crushed, torn, sheared off
etc.). If you find that there is any damage, do not start to use the
13
Risks
charger, but take it to a suitable workshop. Even if the device
appears not to have any function at all, it must be disconnected
immediately and sent back to the manufacturer for repair.
live cables or wires with which the device is connected must always
be examined before and after use to check for insulation faults,
breakages and crushed or bent locations.
Do not use the charger in rooms (or under unsuitable environmental conditions) where combustible gases, vapours or dusts are –
or may be – present. Never cover the ventilation slots or housing.
Do not put the device close to sources of hot air such as heaters.
Do not expose the device to direct sunlight, heavy dust,
mechanical vibrations or impacts.
Note 1.2
If a fault is found in the cable (if it is damaged), the device must
be taken out of operation without delay. Only operate the device
outside the vehicle. When connecting the battery charging clips,
make sure that the connection is secure and tight.
Important! Do not continue charging if the battery is faulty.
Do not use the device close to or on materials that are combustible
or easily ignited. Place it on a suitable, non-combustible underlay
such as a large, thick porcelain tile or a stone slab. Do not allow the
charging cable or the power cord to lie close to inflammable
materials. Do not use the charger on a boat or other water craft.
Before charging it, the battery must be taken out of the boat or
water craft, and it must be charged in a suitable place.
Neither the charging cable nor the power cord may be modified
by, for instance, lengthening or shortening. Similarly, they must not
be kinked, squashed or passed over sharp edges. Any electrically
14
Indications of a faulty battery:
• a smell of gas in the room
• you can feel that the cells are at different temperatures when
you touch the battery
• mechanical or thermal deformation of the battery housing
or charger
• different levels of liquid in the cells, or escaping liquid
To provide electrical power, the charger must be connected
through the power cord to a proper mains socket (230 V~/50 Hz)
15
Risks
belonging to the public power supply network.
Operating under unsuitable environmental conditions must always
be avoided. Unsuitable environmental conditions are: ambient
temperatures lower than -15°C or above 40°C, the presence of combustible gases, solvents, vapours, dust, easily inflammable materials,
heavy vibrations, strong magnetic fields such as are found close
to electrical machines and loudspeakers, air humidity greater than
80 % or wet conditions.
The device must only be operated in rooms with a closed construction and that are well ventilated. Avoid exposing it to direct
sunshine.
Do not put any containers such as vases, plants or similar items
on or next to the charger or the battery. Liquids could enter the
housing, and thereby impair the electrical safety. In addition,
there would be a high danger of a fire or of a potentially deadly
electric shock! If that happens, disconnect the product immediately
from the mains voltage. (First switch off the mains socket, then
remove the plug from the socket.) When that has been done,
disconnect the charger from the battery. Do not use the charger
16
Safety
again; take it to an authorized service centre, to a dealer, or return
it to the manufacturer for checking.
Safety
The product is not a toy. It is not suitable for children. Take particular care if there are children around. Children can sometimes try
to stick objects into the device through the openings in the
housing. This will destroy the device, and also creates a risk of death
from electric shock! The product must only be set up, operated
or stored in a place where it is not accessible to children. Children
might modify the settings, or short-circuit the lead battery, and
this can result in an explosion. Mortal danger!
Do not leave the packaging material lying around carelessly. It can
become a dangerous toy for children.
The product is only suitable for charging 6 V or 12 V standard
lead/acid batteries and all maintenance-free gel and AGM batteries.
Other types of battery or accumulator must not be charged!
Risk of explosion!
17
Safety
Never leave the product to operate unsupervised, and this means
that the charger and the charging process should be checked at
regular intervals. In spite of the comprehensive, versatile protective
circuits, incorrect function or problems when charging a battery
cannot be ruled out.
Only operate the product in a moderate climate, never in a tropical
climate. Observe the suitable environmental conditions described in
the "Specifications" chapter (see page 33).
Choose a location for the device that is strong, large and smooth
enough. Otherwise, there would be a risk of injury from the weight
of the product should it fall down. It is also possible that the device
would be destroyed. Do not use the device if it has been subjected
to a heavy impact or if it has been allowed to fall down. In such
a case, the device must be checked and, if necessary, repaired at a
qualified workshop.
Although the charger does feature a large number of safety
functions, the possibility of excessive heating of the battery or of
the device can never be totally ruled out.
18
Make sure that it is adequately ventilated when operating. Never
cover the charger or the battery to which it is connected. Always
leave enough space (at least 10 cm) between the charger and the
surroundings/wall, so that air circulation is not blocked.
Never connect the device to the mains voltage straight after you
have brought it in from a cold room into a warm one. The water
condensation that forms can sometimes lead to malfunction or to
damage, and there is also a risk of a potentially fatal electric
shock. Allow the charger (and the batteries) to warm up to room
temperature first of all before you connect the charger to
the mains voltage and switch it on. This can take a few hours!
Servicing, adjustment and repair work must only be done by a
qualified technician/service centre.
There are no components inside the device requiring adjustment
of servicing by the user.
In commercial establishments, the accident prevention regulations
laid down for electrical equipment by the appropriate trade associations must be observed.
19
Safety
In schools, educational facilities, hobby and DIY workshops,
operation of the product must be responsibly supervised by trained
personnel.
If you are not certain about the proper way to connect or operate
the device, or if you have any other questions that are not
covered in the operating instructions, please contact our technical
inquiry department (see page 38) or a qualified workshop.
Do not place the charger on top of valuable furniture; this also
applies to storage when not in use. It is possible for chemical
reactions with the rubber feet to cause discolouration, and pressure marks can also develop. Use a suitable underlay.
If the charging cable has been designed for a separate charging
adapter, only the original adapter offered by your dealer must
be used.
Never leave the charger to operate unsupervised. When the
charger is not in use, disconnect it from the mains power and
from the battery.
20
Malfunction – instructions
Never insert pointed objects (such as sewing or knitting needles,
ballpoint pens, paper clips etc.) into the ventilation slots or
other openings in the device; there is a risk of a potentially fatal
electric shock and of destroying the device. Never place any
objects or containers with liquid (such as vases, glasses, bottles) on
or next to the charger or to the connected battery. Liquid that
gets into the device can destroy both the charger and any battery
that is connected, in addition to which there is a risk of a
potentially fatal electric shock!
Malfunction – instructions
If the device does not function, check the following points:
1. Is the socket working properly and providing electrical power?
2. Is the lead battery that is connected faulty or heavily discharged?
3. Has the charger been connected to the lead battery with the
correct polarity?
In order to avoid damage to the battery, it is essential to make sure
that it is never discharged too deeply.
21
Connecting and first use
Connecting and first use
If the battery is charged while fitted in the vehicle, you must make
sure that all the vehicle's electrically powered equipment, such as
the ignition, radio, light, mobile phone, mobile phone charger and
so on, are switched off. In some cases, it will be necessary to remove
the lead battery or to disconnect it. It is essential that the warning
instructions from the manufacturer of the battery and vehicle are
observed. To charge the battery, first connect the red terminal (+)
to the positive terminal of the battery, then the black terminal (-)
to the negative terminal of the battery or to the vehicle bodywork.
Important! Connect the battery charger to the mains power
(a socket that also meets the relevant specifications). Always disconnect the device from the mains before any connection to
the battery is made or broken. The battery must be kept in a wellventilated place while it is being charged. The battery's topping
up or ventilation openings (cell plugs, if they exist, and if they can
be opened) must be opened while the battery is being charged.
We recommend that if your battery is not maintenance-free, it is
removed from the vehicle for charging.
22
Hazards – instructions: Risk from wrong polarity, short circuits and
contact with battery acid – it is essential that the safety warnings
from the manufacturer of the lead batteries are observed.
Important! Battery acid is highly corrosive. Treat any acid spills on
your skin of clothing with soapy water immediately, and rinse with
plenty of water. If acid splashes get into your eyes, flush immediately with a lot of water and seea doctor quickly.
After charging: When charging is complete, the battery charger
should be disconnected from the mains. Always do this by pulling
the plug, not the cable! The charging terminals are then taken
off the battery. The acid level should be checked on lead batteries
that are not main-tenance-free. If the fluid level is too low, it
must be topped up with distilled water. Hazard and safety warnings, and instructions from the manufacturer of the battery, must
be observed.
Charging a battery with the negative connected to the vehicle
body: The red charging terminal is first connected to the positive
terminal of the battery, and the black terminal (negative) to the
chassis of the vehicle (a conductive metal surface). Make sure that
this terminal is not attached close to the battery or to the fuel line.
23
Brief explanation/quick start
Brief explanation/quick start Using the device (first read all the
safety and hazard constructions).
Set the battery voltage: Depending on what kind of battery you
want to charge, set the slide switch to 6 V (corresponding to 3 cells)
or to 12 V on a 12 V battery (corresponding to 6 cells). Batteries with
a capacity of between 3 and 100 Ah can be charged.
Connecting to the battery: Connect the red terminal of the charger
to the positive terminal (+) of the battery and the black terminal to
the negative terminal (-) of the battery or to the vehicle bodywork.
Connecting to the mains: Now connect the battery charger to the
230 V mains power (a socket that also meets the relevant specifications). The battery charger should be disconnected from the
mains when charging is complete. Only then should the connections
to the bodywork and then to the battery be removed. The battery's
topping up or ventilation openings (cell plugs) must be opened
while the battery is being charged (if they do exist, and if they can
be opened).
We recommend that if your battery is not maintenance-free,
it is removed from the vehicle for charging.
24
Charging
Charging
The device will start the charging process automatically. If the
ProCharger detects a heavily discharged battery (< 10.5 V / 5.25 V)
this is indicated by an LED. Charging of the battery continues.
When the charging voltage rises above 10.5 V, this is indicated by a
capacity display in %. When a battery that has already been
permanently damaged, and in which only a small proportion of
its total capacity remains active, is charged, the "75 %" or "100 %"
LEDs will light up very quickly. This only means that the active, intact part has been charged to 75 % or 100 %, not the whole battery.
The LEDs for the % display can flash as the charge level changes
(between 50 %, 75 % and 100 %). It is possible to use the battery as
soon as the display changes to 100 %, as it is already nearly fully
charged. Depending on the capacity of the battery (its size) and on
its condition (age, degree of sulphation etc.) it can still take
several hours after the 100 % LED has lit before residual charging
is completed and the device changes over, first of all to test
mode, and then into trickle mode. If the "75 %" indicator stays lit
for a long period of time, or if the display does not reach the
100 % mark, this indicates that the charging current is still greater
than 100 mA.
25
Charging
This can have the following reasons:
1. Due to its age, a permanent leakage current of around 100 mA
or more is flowing within the connected battery.
2. The battery is being charged in (and connected to) the vehicle.
Devices in the vehicle may be continuously drawing some current,
and this current, together with the battery's residual charging
current, adds up to more than 100 mA.
If all the test criteria are satisfied after charging and the battery
is found to be "Healthy", the charger switches the "Done"
("Fertig") LED on and enters trickle mode. At the same time, the
"Charging" ("Laden") LED goes out, and the program switches
to "Trickle" ("Erhaltungssladen"), which is again indicated by an
LED. This means that the battery is charged and ready to operate,
and it can be disconnected from the charger. Then remove the
mains cable from the socket. Always do this by pulling the plug,
not the cable!
The acid level should be checked on lead batteries that are not
maintenance-free. If the fluid level is too low, it must be topped up
with distilled water. Follow the battery manufacturer's instructions.
26
Full description of the charging process
After the battery type has been set by the slide switch, and a 6 V
or 12 V lead battery (conventional, standard lead/acid batteries,
as well as all maintenance-free gel and AGM batteries) has been
connected, the "Reverse polarity" ("Verpolt") LED will light up
if the battery has been wrongly connected. If the voltage of a
properly connected battery is above 14.3 V (for a 12 V battery),
or above 7.15 V for a 6 V battery, the"Faulty" ("Defekt") LED will
flash, as will the "6 V" and "12 V"LEDs. If the voltage is in the
range between 0.5 and 7.15 V (6 V battery) or 0.5 and 14.3 V (on a
12 V battery) the device enters charging mode.
If the ProCharger detects a heavily discharged battery (< 10.5 V/
5.25 V) this is indicated by an LED. Charging of the battery
continues. When the charging voltage rises above 10.5 V, this is
indicated by a capacity display in %. Note: if the "Heavily discharged" ("Tiefentladen") LED lights up, this can have two causes:
a 6 V battery may have been connected, but the slide switch (for
setting the battery voltage) was accidentally set to 12 V. If, even
though "Heavily discharged" ("Tiefentladen") is indicated, the
voltage setting (done with the slide switch) matches the connected
battery, then it really is a case of a heavily discharged 12 V battery.
27
Charging
The battery is first charged at a constant current (I-phase) until the
end-of-charge voltage (14.3 V/7.15 V) is reached. The voltage is
then held constant (V1-phase) and the charging current adapts to
the level of charge in the battery. The fuller the battery, the lower
the charging current. If the charging current falls below about
100 mA, the charging process is halted and the charger switches
automatically into test mode. The test draws a defined load current
from the battery. If the voltage of the loaded battery falls back
to its rated value, this indicates a high internal resistance or a high
level of sulphation. In that case, the device attempts to bring the
battery back to life. In this process, the battery is subjected to short
charge and discharge cycles for an hour [the "Care/desulphation"
("Pflege/Entsulfatierung") LED lights up]. During charging, the
charging current is set to a maximum of 330 mA, and the battery
voltage to a maximum of 14.3 V. The discharges used here consist
of a discharge pulse of about 80 A (maximum) that lasts for
about 100 µs. This mode deliberately avoids the use of "high voltage" charging procedures (between 20 and 30 V), as is done by
the chargers from some other manufacturers, since this method
requires the user to remove or disconnect the battery, and this is
not always desirable. If the user ignores this rule the highly
sensitive electronic devices in modern vehicles can be damaged.
28
When this reactivation process is complete, a new charging
procedure starts. After this, a test is carried out yet again. If the
battery does not pass this test the charger considers it "Faulty".
The device switches itself off, and the "Faulty" ("Defekt") LED is lit.
If, however, all the test criteria are satisfied and the battery is
found to be "Healthy", the charger switches the "Done" ("Fertig")
LED on and enters trickle mode. At the same time, the "Charge"
LED goes out, and the program switches to "Trickle" ("Erhalten")
(V2 phase), which is again indicated by an LED. This means that
the battery is charged and ready to operate, and it can be disconnected from the charger. If, however, the battery remains connected
to the charger, the program will perform "trickle charging" for a
period of 60 minutes. The charging current is now adjusted so that
the battery voltage is automatically maintained at 13.8 V/6.9 V.
After these 60 minutes, the device automatically switches into maintenance mode. At this stage the "Trickle" LED ("Erhalten") goes
out, and the "Maintenance/desulphation" ("Pflege/Entsulfatierung")
and "Done" ("Fertig") LEDs are lit (lead battery activator on).
If the device detects that the battery voltage has fallen below 12 V
(or under 6 V) in maintenance mode it will start the programmed
sequence from the beginning again. In order to minimize or to
disperse deposits of sulphate on the lead plates, the battery in this
29
Charging
mode is subjected every 30 seconds to a discharge pulse of about
80 A (maximum) and lasting about 100 µs. The lead battery activator
that is integrated in the ProCharger prevents the development of
crystalline deposits of sulphate on the lead plates. These crystalline
deposits of sulphate particularly tend to form in lead batteries
that are stored for a long time, stored over the winter, only used
rarely, or are only discharged with low currents. This periodic
discharge pulse can significantly lengthen the useful life of lead
batteries. The lead sulphate has a tendency to form clumps of
crystals. This tendency is particularly strong when discharge is slow
or during self-discharge. This reduces the plate surface within
the battery (crystalline sulphate covers the lead plates), and the
capacity falls. The more plate area that is covered, the less energy
the lead battery can deliver. Deposits of sulphate are the main
reason for the failure of lead batteries. In order to work against
these sulphate deposits, when it is in continuous use the device
cycles between trickle mode and maintenance mode, spending
an hour in each.
30
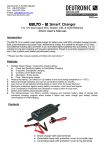
Full functional description of the charging process
Charging technology
The device has three different charging phases:
• I-phase, where the charging current is approx.1 A
(motorcycle)/approx. 4 A (car)
• U1-phase (main charging phase) with a constant voltage of 14.3 V
• U2-phase (trickle charging) with a constant voltage of 13.8 V
Program flow of the ProCharger
31
Fault display
Fault display
When running, the device can indicate four different fault
conditions:
1. The "12 V", "6 V" and "Fault" ("Defekt") LEDs flash:
The voltage set (with the slide switch) does not match the
measured battery voltage
2. The "Fault" ("Defekt") LED is lit: The battery is found to
be defective.
3. The "0 %" and "Fault" ("Defekt") LEDs flash:
The device cannot bring the battery voltage under control.
The measured battery voltage is above 15 V.
4. The "25 %" and "Fault" ("Defekt") LEDs flash:
The device cannot bring the charging current under control;
the measured battery current is greater than 1.5 A.
Technical data and list of components supplied
Specifications
Operating voltage: 220-240 V ~, charging current up to max. 1 A
Usable temperature range: -15°C to +40°C
Charger dimensions (W x H (max.) x D): 10 x 6.5 x 15 cm
Components supplied
ProCharger, cable set with clip connectors for quick attachment,
cable set with cable ring-terminals (eyes) for permanent connection
to the battery, along with comprehensive operating instructions in
German and English.
Faults no. 3 and 4 can be the result of a fault in the device.
32
33
Guarantee
Guarantee
The dealer/manufacturer from whom the device was obtained
guarantees the material and manufacture of the device for a period
of two years from the date of receipt. In the event of a fault, the
purchaser is initially only entitled to supplementary performance.
Supplementary performance comprises either rectification of
the fault or the supply of a substitute product. Devices or parts that
have been exchanged become the property of the dealer. The
purchaser must inform the dealer without delay of any faults that
may be found. The right to claim against the guarantee must be
supported by the provision of a proper proof of purchase (receipt,
invoice etc.). Damage arising out of unsuitable handling, operation,
storage, or from acts of nature or other external influences, are
not covered by the guarantee. We accept no liability for any damage resulting from modifications made by the user, and the user
will hold us indemnified against any claims made by third parties
arising from such modifications. Unless otherwise stipulated, the
current edition of our General Terms of Business apply.
34
Note on environmental protection
Note on environmental protection
At the end of its service life, this product must not be
disposed of in the ordinary domestic waste, but must
be taken to a collection point for recycling electrical
and electronic devices. The symbol on the product, the
usage instructions or the packaging will indicate this.
The valuable materials can be reused in accordance with their
identification. Through the reuse of the device, material recycling
or other ways of recycling used devices, you make an important
contribution to protecting our environment.
35
Packaging
Packaging
When disposing of the packaging, observe the applicable statutes
for environmental protection and for garbage disposal. The outer
packaging can be disposed of with the ordinary domestic waste. If
you want to dispose of the system components themselves, please
observe the relevant statutes on the disposal of electronic scrap.
36
Cleaning
Cleaning
Use a soft cloth and a little mild cleaning agent to clean the
housing. Harsh solvents such as thinner or petrol must not be used,
nor must scouring agent, as these will attack the surface. Dispose
of the cleaning wipes and excess cleaning agent in an environmentally sound manner. For reasons of safety, the mains plug must
always be withdrawn and the charging cable disconnected from
the battery before cleaning. Prevent any cleaning agent from getting inside the device!
37
If you have questions about the product....
Essentials equipment ...
If you have any questions about the product or these instructions, for prompt assistance please contact our Technical Centre by
fax on: +49 (0)40-73419358 or by e-mail: [email protected].
We will be pleased to provide prompt assistance. This is the best
way to ensure that the product is used correctly.
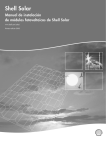
ProCharger wall bracket
· with well-designed receptacle for
the mains and charging cables
Lets you keep your ProCharger in
reach and ready to use while saving
space. Including fittings.
Order no. 10003627
ProCharger charging plug
For vehicle sockets (large and small)
or cigarette lighters. Also suitable for
BMW charging sockets.
Order no. 10003741
(no illustration)
ProCharger replacement eyelet
lead with connecting plug
Order no. 10003835
(no illustration)
ProCharger charging
cable extension
Length: 2.50 metre
Order no. 10003744
Detlev Louis Motorradvertriebs GmbH · 21027 Hamburg · Deutschland
www.louis.de · E-Mail: [email protected]
(no illustration)
Example of use with ProChrager wall bracket
38
Advertisement
Exclusively
at Louis!
Standards of quality:
✓ Original equipment manufacturer’s
quality for more than 30 years –
proven a million times
✓ Improved manufacturing method
✓ Enormously long service life
✓ Very high cold starting performance
✓ Suitable for ABS
✓ A-grade lead plates
✓ Includes high-performance terminal
grease
✓ Producer certified to ISO 9001
✓ Including comprehensive instructions
for use and servicing
®
BATTERIEN
Qualität seit 1980