1
Operating Instructions
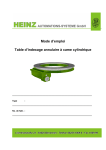
Globoidal cam gear
Type
:
Serial No. :
CONTENTS
1.
General
1.1
1.2
1.3
1.4
1.5
Validity
Safety instructions
Shipment
Transport Regulations
Weights of gear types
2.
Instructions for application of the gears
2.1
2.2
2.3
Installation position
Mounting of the gear
Gear operation
3.
Start up
3.1
3.2
3.3
3.4
Gear function
Oil level
Interruption operation
Important instructions
4.
Maintenance Instructions
4.1
4.2
4.3
4.4
General remark
Drive
Motor brake
Gear
5.
Inspection instructions
5.1
5.2
Inspection cycle
24-Hour-Service
6.
Spare part installation
6.1
6.2
6.2.1
6.2.2
6.2.3
6.2.4
6.3
6.4
6.5
Remark
Globoidal mechanism
Replacing cam followers (globoidal cam stays built in)
Replacing turret (globoidal cam stays built in)
Replacing globoidal cam (turret stays built in)
Replacing mechanism completely
Tapered roller bearings
Spare part drawing
Spare and wearing parts
7.
Final remark
BWV_H(T)SG_E
2 / 16
1.
General
1.1
Validity
These operating instructions are valid for globoidal cam gears. They are to be read and applied
by all persons in the user’s premises who are made responsible for the installation, operation,
maintenance or repair of these gears.
For the sake of simplicity, the globoidal cam gears will be referred to as “the gears” within the
following instructions.
Every gear is manufactured to the state-of-the-art and according to recognized safety
regulations.
Applications other than specified or exceeding the limiting parameters, e.g. higher speeds
and/or loads or other installation positions, are considered to be contrary to agreement. The
manufacturer shall not be held responsible for any damage resulting from this. In such
cases, the risk is carried solely by the operating company.
The agreement regarding application also covers reading the operating instructions and
compliance with the inspection and maintenance stipulations. Maintenance work may only be
carried out by qualified personnel who are acquainted with the principles of the gear function.
1.2
Safety instructions
The gear corresponds to the recognized safety regulations. When employed as part of a
machine or plant, danger of injury or death for the user or a third person can result, e.g. due to
removal of the lever, gear wheel with chain or similar parts. In such cases, suitable local
protective measures should be taken by the user.
1.3
Shipment
Every gear is subjected to go through an inspection process and is properly packed. In spite of
this, we request that the gear is unpacked immediately on arrival at the installation location and
checked for transport damage.
Any complaints should be reported immediately to the transport company.
1.4
Transport regulations
Eyebolts may be screwed into the fixing holes provided. Lifting ropes or chains may only be
applied on these eyebolts. The weight of the gear should be taken from table 1.5.
BWV_H(T)SG_E
3 / 16
1.5
Weight of the gears
Basic series
Weight without Weight with standard
motor
motor
[kg]
[kg]
Gear type
Housing
H(T)SG 63
Aluminium
12
24
H(T)SG 80
Grey cast
28
40
H(T)SG 110
Grey cast
57
80
H(T)SG 140
Grey cast
116
146
H(T)SG 180
Grey cast
200
245
H(T)SG 200
Grey cast
345
405
H(T)SG 254
Grey cast
400
470
Modified series
BWV_H(T)SG_E
Weight without
motor
[kg]
Weight with standard
motor
[kg]
Gear type
Housing
HSG 54
Grey cast
8,5
-
HSG 80 E
Aluminium
28
40
HSG 80 M
Grey cast
27
39
H(T)SG 82
Grey cast
27,5
39,5
HSG 100
Grey cast
55,5
78,5
H(T)SG 108
Grey cast
52
75
H(T)SG 108 M
Grey cast
52
75
HSG 125
Grey cast
95
125
H(T)SG 133
Grey cast
98
128
HTSG 140 M
Grey cast
95
125
HTSG 152
Grey cast
135
170
H(T)SG 171
Grey cast
190
230
HTSG 178
Grey cast
190
230
H(T)SG 220
Grey cast
350
390
HSG 250
Grey cast
665
720
4 / 16
2.
Instructions for application of the gears
2.1
Installation position
Due to its universal construction, the gear can be integrated into a machine or a plant in nearly
every position required.
When placing the order, the customer can preset the installation position, the mounting position
and possibly the oil holes.
The predetermined installation position is decisive for the lubrication of the gear components
and may therefore not be subsequently altered at the plant location.
Illustration 1: Gear installation positions
2.2 Mounting the gear
Due to the principle of the functioning of the gear, the output shaft as well as the input shaft are
subjected to variable torques. The following must therefore be observed:
•
•
•
2.3
The gear must be mounted on a rigid machined surface.
The fixing bolts must be secured and, if possible, the position of the gear should be
additionally fixed by means of dowel pins.
The connection between the gear and the driven load must be direct, free of play and
torsionally rigid. This also applies to the drive side of the gear.
Gear operation
The following should be observed with regards to gear operation:
• Elasticity and play in the driven masses can result in vibration and must therefore be
avoided.
• A possibly installed overload protection should be mounted on the output shaft.
BWV_H(T)SG_E
5 / 16
3. Start up
3.1 Gear function
HEINZ gears form a compact, robust unit which, through the use of accurately calculated
globoidal cams, enable the transformation of a constant input speed into an optimum, precise
and impact-free (intermittent) output movement.
The cam rollers fitted in the turret are guided precisely in the globoidal curve by the hardened
and ground cam path.
This cam path is formed with a variable slope and is divided into a dwell angle and index angle
area. When the cam is rotated, the precise jolt and impact-free movement of the output shaft is
produced by the cam path and the cam follower. As the cam course is constructed standard
symmetrically, it is possible to choose rotation to the left or to the right.
The dwell angle area has a zero slope. Through this, the cam followers result in a precise, selflocking positioning of the output shaft without an additional locking mechanism.
When a brake motor is employed, the positioning of the output shaft is independent on the
braking accuracy of the motor as the accurate positioning is dictated by the position of cam
followers in the dwell angle area. The whole dwell angle area is available for braking (see 3.3).
3.2
Oil level
The oil level should be checked before start up. It is sufficient it the oil can be observed through
the oil level indicating glass (see also 4.3 gear)
Basic series
modified series
Gear unit type
Oil qty.
[L]
Gear unit type
Oil qty.
[L]
Gear unit type
Oil qty.
[L]
H(T)SG 63
0,40
HSG 54
0,20
HTSG 140 M
3,50
H(T)SG 8O
0,75
HSG 80 E
0,75
HTSG 152
2,30
H(T)SG 110
1,80
HSG 80 M
0,60
H(T)SG 160
6,80
H(T)SG 140
3,30
H(T)SG 82
0,75
H(T)SG 171
5,5
H(T)SG 180
7,50
HSG 100
1,50
H(T)SG 178
7,10
H(T)SG 200
10,5
H(T)SG 108
1,60
H(T)SG 220
10,5
H(T)SG 254
18,0
H(T)SG 108 M
1,50
HSG 250
22,0
HSG 125
3,80
H(T)SG 133
4,00
BWV_H(T)SG_E
6 / 16
3.3
Interruption Operation
If the dwell angle area of the globoidal cam is insufficient for the interval of interruption required
for production, the interval can be prolonged by using a brake motor. The procedure is initiated
by an end position switch which is operated by one of the cams connected to the input shaft.
During the start up as well as during operation it has to be observed that after the braking has
occurred, the shaft key groove of the input shaft has to be positioned parallel to face 6 of the
housing and that it points towards the output shaft ( in case of double shift also a torsion of
180° is possible, cam followers should be in the middle of the dwell).
If the gear is fitted with an additional indicator, it should be observed that after braking has
occurred, the indicator is always positioned in the middle of the marking plate.
3.4
Important Instructions
With two speed drives, normal operation occurs always at the higher speed (high speed). The
lower speed (low speed) may only be used for setting up the unit or moving into the dwell angle
area after an emergency stop. During automatic operation, the gear may not be switched into
the low speed position while the unit is in the movement phase. With control systems which
only allow switching of the high speed through the low speed, this may only occur during the
dwell angle, this means during the standstill period of the output shaft or rather within the
marking plate.
Any damage which is caused by failure in complying with these instructions will result in the
rejection of any guarantee claim by the manufacturer.
4.
Maintenance Instructions
4.1. General Remark
In case of queries i.e. spare part orders, please state the type and serial number of the gear in
question.
4.2
Drive
The maintenance instructions for the gear brake motor or other drive units should be taken from
the instructions supplied by the corresponding manufacturer.
4.3
Motor brake
Due to wear of motor brake, the interruption in the dwell angle area as described in 3.3. should
be checked from time to time. The brake should be re-adjusted or renewed if necessary.
BWV_H(T)SG_E
7 / 16
4.4
Gear unit
4.4.1. Oil Lubrication
In Standard the gear unit is delivered with the synthetic lubricating oil “Klübersynth GHE 6 – 460”
It is lubricated for life, i.e. no oil changes are necessary at all. The oil level should be checked at regular intervals.
Sufficient oil is present if when the gear unit is stationary the oil can be seen in the sightglass
The lubrication of the cam rollers and the came is thus guaranteed
For rotating speed < 150 rpm
For rotating speed > 150 rpm
Klübersynth GHE 6 - 460
Klübersynth GHE 6 - 100
Mobil Glygoyle HE 460 (ISO V6 460)
Mobil Glygoyle 22 (ISO V6 150)
Shell Omala S4 WE 460
Shell Omala S4 WE 150
WARNING
WARNING
Warning: Never mix different oil sorts!
Only top up with the lubricant described above!
─────────────────────────────────────────────────────────────────────────
If used for the food industry, the gear unit is delivered with NSF H1 registered, conform to FDA 21 CFR § 178.3570 oil
"Klübersynth UH1 6 - 460"
It is lubricated for life, i.e. no oil changes are necessary at all. The oil level should be checked at regular intervals.
Sufficient oil is present if when the gear unit is stationary the oil can be seen in the sightglass
The lubrication of the cam rollers and the came is thus guaranteed
For rotating speed < 150 rpm
For rotating speed > 150 rpm
Klübersynth UH1 6 – 460
Klübersynth UH1 6 – 150
WARNING
WARNING
Warning: Never mix different oil sorts!
Only top up with the lubricant described above!
─────────────────────────────────────────────────────────────────────────
4.4.2. Grease Lubrication
It is lubricated for life, i.e. no grease are necessary at all. The grease level should be checked at regular intervals.
Normal Grease Lubrication
NSF H1 registered, conform to FDA 21 CFR § 178.3570
Castrol Olit 00
Cassida RLS 00
Microlube GB 00
Klübersynth UH1 14-1600
WARNING
WARNING
Warning: Never mix different oil sorts!
Only top up with the lubricant described above!
─────────────────────────────────────────────────────────────────────────
BWV_H(T)SG_E
8 / 16
5.
Inspection instructions
5.1
Inspection Cycle
It is recommended to control the oil level approximately every 8000 operation hours in order to
avoid any damage of the gear by leakage of oil.
5.2
24-Hour Service
Immediate availability of important components is guaranteed through stocking of a stand-by
set (globoidal cam, output and cam followers) by the unit operator.
BWV_H(T)SG_E
9 / 16
6.
Spare parts installation
6.1
Remark
Please read the following complete text carefully before the disassembly.
All construction elements have to be cleaned and to be checked if they are in perfect condition
before being installed. The list of spare parts may be helpful for the disassembly and the
installation of the individual parts.
6.2
Globoidal mechanism
The mechanism is a unit consisting of globoidal cam, cam followers and turret.
Due to a possible wear of the cam followers or the globoidal cam, it may be necessary to
replace the following parts:
•
•
•
•
Cam followers
Turret
Globoidal cam
Complete mechanism
6.2.1 Replacing cam followers (globoidal cam stays built in)
•
•
•
•
•
•
•
•
•
•
•
•
Drain oil
Move input shaft into dwell angle area
Unscrew end cap of output shaft
Lift output shaft out of globoidal housing
Unscrew stud bolts off turret (are glued in) and remove cam followers
Check shaft bore of cam followers in the turret if they are damaged and possibly
widened
In case of defective bores: see 6.2.2
In case of perfect condition of bores, push in new cam followers into turret
In case of cam followers without key way, bore with core hole drill a centralisation in
every cam followers shaft. The depth of centralisation depends on the centralisation
point of the stud bolts according to DIN914 (German Industrial Standard)
Secure cam followers with stud bolts (glue thread in)
Check globoidal cam and replace by a new one if necessary (see chapter 6.2.3)
Put output shaft with turret back into housing (observe the position of the shaft key
groove of the output shaft)
BWV_H(T)SG_E
10 / 16
•
•
•
Apply appropriate permanently elastic sealing material upon cleaned sealing surface and
install end cap
Move input shaft and check regular movement of mechanism
Fill in oil
6.2.2 Replacing turret ( globoidal cam stays built in)
• In the case of a defective cam followers shaft bore remove (smaller) tapered roller
bearing
• Remove stud bolts off turret and disassemble turret off output shaft
• Screw tight new turret with installed cam followers again and put in new studs
• Heat tapered roller bearing slightly (max. 80°C) and push over output shaft
• Put output shaft with turret back into housing (observe position of shaft key groove of
output shaft)
• Proceed with assembly as describe in chapter 6.2.1
6.2.3 Replacing globoidal cam (turret stays built in)
•
•
•
•
•
•
•
•
•
•
•
•
•
•
•
•
•
•
Drain oil
Move input shaft into dwell angle area
Screw off housing cover
Release safety catch of securing steel sheets and unscrew lock nut
Unscrew both eccentric covers
Push inner ring of tapered roller bearing (maximum 3 mm less than width of lock nut) off
input shaft by using lock nuts
Pull off tapered roller bearing by using an extractor
Remove lock nut and securing steel sheets
Drive input shaft out of globoidal cam without using too much power on the cam followers
Take old globoidal cam out of housing
Put new globoidal cam with dwell angle area between two cam followers
(Observe position of shaft key groove of output shaft)
Drive input shaft into cam without using too much power on the cam followers
Screw new securing steel sheets and new lock nuts on input shaft
Heat tapered roller bearing (max. 80°C) and push over input shaft (replace defective
bearings by new ones)
Screw off eccentric cover. While doing so, make sure no preloading is produced between
cam follower and cam, possibly move cam by using the lock nut or turn eccentric cover
Check preloading of tapered roller bearing in dwell angle area, possibly by adjusting the
eccentric cover
Adjust mechanism without backlash by turning eccentric cover and/or by moving the cam
BWV_H(T)SG_E
11 / 16
The height tolerance of the input shaft pivot may not exceed maximum 0,02 mm on the total
length of the pivot.
An even contact reflection of the cam follower and globoidal cam is absolutely required
- check with inking past! –
•
•
•
•
•
•
•
•
Screw lock nuts tightly and secure
Screw eccentric cover tightly
Turn input shaft with hand and check its even running, possibly repeat adjustment
Cover all openings
Put pins into eccentric cover (possibly earmark pin holes on same pc-diameter with same
depth of bores, remove chips)
Screw off eccentric cover, seal, bring into line above pin bore, tighten slightly, push pins
and screw tightly
Install new oil seals – seal housing cover and screw tightly
Fill in oil
6.2.4 Replacing mechanism completely
Please refer to chapter 6.2.1 to 6.2.3 for the instructions for disassembling and installation of
the turret.
6.3
Tapered roller bearing
When installing new tapered roller bearings, it has to be observed that the bearings are
adjusted free of play. If the backlash is to high or too low, this can be corrected by adjusting the
housing cover or eccentric cover. Afterwards check the correct running of the mechanism by
turning the input shaft, readjust if necessary.
BWV_H(T)SG_E
12 / 16
6.4
Spare part drawing (HSG / HTSG)
HSG
BWV_H(T)SG_E
13 / 16
HTSG
BWV_H(T)SG_E
14 / 16
6.5
Spare and wearing parts
1.
1.1
1.2
1.3
Mechanism
Globoidal cam
Turret
Cam followers
2.
2.1
2.2
2.3
Bearing set
Tapered roller bearing
Tapered roller bearing
Tapered roller bearing
output 1
output 2
output
3.
3.1
3.2
Sealing set
Oil seal
Oil seal
output
input
3.3
3.4
4.
5.
O-Ring
O-Ring
Input shaft
Output shaft
7.
Final remark
output
input
All repair work requires a certain amount of experience and should therefore be carried out by
HEINZ fitters.
Address of HEINZ:
HEINZ AUTOMATIONS-SYSTEME GmbH
Lilienthalstr. 21
D-64625 Bensheim
Tel.: 0049 (0)6251 / 1069-0
Fax: 0049 (0)6251 / 1069-99
http://: www.heinz-automation.de
E-Mail: [email protected]
BWV_H(T)SG_E
HEINZ GmbH
Kochhorstweg 33
D-04910 Elsterwerda
15 / 16
Lilienthalstrasse 21 - D-64625 Bensheim
Telefon +49(0)6251/1069-0 - Fax +49(0)6251/1069-99
BWV_H(T)SG_E
16 / 16