1
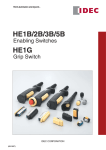
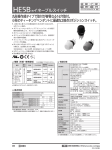
Type HE5B ENABLING SWITCH Operating Instructions
Use the ENABLING SWITCH according to the following instructions after confirming that the product is what
you have ordered.
Safety Precautions
!
・Read this instruction sheet to make sure of correct operation before starting installation, wiring, operation, maintenance,
and inspection. Also, keep this instruction sheet at the end user.
・Turn off the power to the enabling switch before starting installation, wiring, maintenance, and inspection of the enabling
switch.
Failure to turn power off may cause electrical shocks or fire hazard.
・Use wires of proper size to meet voltage and current requirements. Using improper wires may cause fire hazard due to
abnormal heat generation.
(1) Application
The enabling switch permits machine operation only while the enabling switch is manually operated for robot teaching or
other purposes in hazardous areas. Make sure that the control system is designed to activate the machine only when
the enabling switch is at position 2 (3mm operating stroke).
(2) Type No. Development
HE5B − M
2
P
*
3-position switch Rubber boot
Rubber boot material/ color
2: 2 contacts
Blank: Without rubber boot
Blank: Without rubber boot
P: With a rubber boot attached
Y: Silicon rubber/ Yellow
B: Silicon rubber/ Black
N1: NBR/PVC polyblend/ Gray
(3) Dimensions (mm)
Locking ring
Locking ring
Anti-rotation ring
Rubber boot
Solder/ tab terminal: 2.8(w)x 0.5
HE5B−M2P*
(With a rubber boot attached)
Mounting panel thickness:
0.5 to 4 mm
(4) Mounting
・Mounting Hole Layout (mm)
Anti-rotation ring
Locking ring
・Recommended tightening torque of locking ring:
0.29 to 0.49 N・m
Tighten the locking ring using the ring wrench
(Type: MT-001).
Anti-rotation ring
Solder/ tab terminal: 2.8(w)x 0.5
HE5B−M2
(Without rubber boot )
Note: Do not press the rubber boot with excessive pressure
to an inappropriate direction, otherwise the waterproof
function is impaired.
Note: With an enabling switch with rubber boot mounted on a
hermetically-sealed control box, a large change in
internal air pressure may cause the rubber boot to
expand and shrink, affecting the performance of the
enabling switch. Check periodically to make sure that
the enabling switch operates correctly.
Note: If the mounting panel is deformed when mounting an
enabling switch with rubber boot, the normal waterproof
characteristic is not assured. Keep a sufficient strength
of the mounting panel.
Note: When tightening the locking ring, secure the flange part
to prevent the enabling switch from rotating.
(5) Wiring
・ Applicable Wire Size: 0.5 mm2 (maximum) x 1 pc.
・ Terminal Soldering: Solder at a temperature of 260℃
within 3 seconds.
(Use non-corrosive liquid rosin as soldering flux.)
(6) Specifications and Ratings
IEC60947-5-1, EN60947-5-1 (DEMKO approval), JIS C8201-5-1
UL508 (UL recognition), CSA C22.2 No.14 (c-UL recognition)
ISO12100/EN292, IEC60204-1/EN60204-1
Applicable Standards for use ISO11161/prEN11161, ISO10218/EN775, ANSI B11.19, ANSI/RIA R15.06
-25 to +60℃ (no freezing)(rubber boot material: without rubber boot/ silicon rubber)
Operating temperature
-10 to +60℃ (no freezing) (rubber boot material: NBR/PVC polyblend)
2(inside the panel/ terminal side), 3(outside the panel/ operator side)
Pollution Degree
Thermal Current<Ith>
3A
30V
125V
Resistive load (AC12)
−
0.5A
Contact Ratings
AC
(Reference Values)
Inductive load (AC15)
−
0.3A
<Ue, Ie>
Resistive load (DC12)
1A
−
DC
Inductive load (DC13)
0.7A
−
Impulse Withstand Voltage<Uimp> 1.5 kV
Conditional Short-circuit Current
50A 125V
Short-circuit Protective Device
125V 10A
Fuse (IEC60127-1)
IP65: HE5B-M2P*
Degree of Protection
IP40: HE5B-M2 (Provision for protection is required to prevent button malfunction.)
(7) Configuration of Contacts and Number of Poles
Terminal Configuration (BOTTOM VIEW)
3-position Switch ( Note)
2 poles
…Terminal No.: between NO1 and C1, between NO2 and C2
Note: Use the NO and C terminals (OFF→ON→OFF).
(Do not use the NC terminals.)
(8) Operating Characteristics(reference values: without rubber boot)
Note: The operating force of
the enabling switch with
rubber boot depends on
Approx. 12N
the ambient temperature.
Applicable
Standards
Reference
Operating Force
(When the button
is pressed)
:ON (Close)
:OFF (Open)
Approx. 3N
Operating Travel (㎜)
Push →
Release ←
0
2.3±0.3
3.0±0.3 3.6±0.5
5.0±0.5
NO1−C1
NO2−C2
NO1−C1
NO2−C2
(9) Actuator Strength: 250N (minimum)
- when press the entire surface of the button (10) Accessory
・ Replacement rubber boot: HE9Z-D5*
①
*Rubber boot Material/ color:
Y (Silicon rubber/ Yellow)
B (Silicon rubber/ Black)
N1 (NBR/PVC polyblend/ Gray)
Installing the Rubber Boot
① Wrap the rubber boot
around the flange.
(Keep foreign objects
from entering the
rubber boot to
prevent malfunction.)
②Viewing from the
terminal side, check
that the rubber boot
is installed correctly
on the
area.
Precautions for Operation
・ Perform a sufficient risk assessment against the high
operating force at transition to the OFF position
when the button is pressed to the bottom.
②
・ Do not tie the enabling switch around the button with
a tape or string, or distort the rubber boot to keep
the switch in position 2.
Otherwise the original function of the enabling switch
is lost, posing a great risk of danger.
・ Perform a sufficient risk assessment against the
shape and structure where the enabling switch is
mounted, in order to prevent unintended actuation. For example, protrusion from a teaching pendant may cause the
enabling switch to be actuated by the weight of the teaching pendant.
・ When mounting the HE5B, make sure of sufficient strength of the mounting panel against the anticipated operating
physical force.(High operating physical force is expected especially at transition to the OFF position when the button
is pressed to the bottom.)
・ In order to ensure safety of the control system, connect each pair of the contacts of the 3-position switch to a
discrepancy detection circuit such as a safety relay module.(ISO13849-1/EN954-1)
B-814(0)(2003.11.)