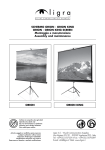
1
4.1
Všeobecná upozornìní
Bìhem odvíjení a navíjení není dovoleno, aby se zdržovaly osoby
v dosahu projekèní plochy !
Projekèní plochu smí obsluhovat pouze dospìlé osoby !
Dìti si nesmí hrát v blízkosti projekèního plátna !
Z dùvodu hrozícího nebezpeèí úrazu je zásadnì zakázáno
pøipevòovat jakékoliv pøedmìty na projekèní plochu !
4.2
Montage-/ Bedienungsanleitung
Mounting/ Operating instructions
Montážní návod/ Návod k obsluze
Popis chyb
Chyba
Pøíèina
Odstranìní závad
Pøi pøipojení na sí•
není napìtí
Pøipojte vedení na El. sí•.
Zkontrolujte instalaci
pøipojení
Tepelná ochrana
vypnula motor
Poèkejte cca 30 min. než
se tepelná ochrana
motoru odblokuje
Pohon není funkèní
kg
Wichtig
Attention
Varování
Gefährlich für Kinder !
Nur von Erwachsenen
zu bedienen !
unter der Bildwand nicht zulässig !
Wegen erhöhter Unfallgefahr ist es grundsätzlich
untersagt, Gegenstände an
der Bildwand anzubringen !
Hazardous to children !
Operation by adults
only !
Do not stand near screen
when extending or
retracting !
Do not attach any objects
on the screen (danger of
injury) !
Nebezpeèné pro dìti !
Obsluha jen dospìlou
osobou !
Nestùjte blízko projekèní
plochy pøi jejím odvíjení
nebo navíjení !
Výrobce zakazuje pøipevòovat na plochu jakékoliv
pøedmìty - nebezpeèí úrazu
Während des Aus- oder
Einfahrens der Bildwandfläche
ist der Aufenthalt von Personen
Technische Änderungen vorbehalten
Subject to alterations without notice
Právo na zmìnu vyhrazeno
J-AA-448
12
D
Inhaltsverzeichnis
1.
Allgemeine Sicherheitshinweise
1
2.
2.1
2.2
Beschreibung
Produktbeschreibung
Technische Daten
2
2
2
3.
3.1
3.2
3.3
3.4
3.5
3.6
3.7
Montage
Befestigung
Teileliste
Montage Wandhalter
Montage Deckenhalter
Montage Bildwand
Anschluß
Fernsteuerung
2
2
2
3
3
4
4
4
4.
4.1
4.2
Bedienungsanleitung
Allgemeine Informationen
Problemdiagnostik
5
5
5
2.1
Produktbeschreibung
3.5
Montáž projekèní plochy
1)
Zavìste projekèní plochu na instalované držáky.
2)
Anwendungsbereich: MultiFormat screen ist eine für
Video - und Datenprojektionen konzipierte professionelle
Lichtbildwand. Durch die Abblendungstechnik sind bis zu
sechs Formate einstellbar. Die Lichtbildwand ist vor allem für
Heimkinos optimiert, aber auch für repräsentative Räume bei
Schulungen, Konferenzen und Seminaren ...
Hohe Laufruhe und Bediensicherheit sind durch zwei
wartungsfreie, robuste 230 V - Elektromotore gegeben.
Weitere Produktmerkmale:
Našroubujte a dotáhnìte pojistné šrouby.
- Stahlgehäuse (RAL 9005)
3.6
- einfache Handhabung und Installation auf
Grund der Befestigungswinkel mit variabler
seitlicher Positionierung
Elektrické zapojení
Upozornìní: Elektrické zapojení musí provádìt pouze kvalifikovaní
pracovníci !
Technische Daten
Projektionbreite
Bildwandbreite
Gehäuselänge
192 cm
200 cm
223.5 cm
232 cm
240 cm
263.5 cm
262 cm
270 cm
293.5 cm
292 cm
300 cm
323.5 cm
Gehäusequerschnitt:
16 x 13 cm
Leistung
Spannung
Frequenz
90 W
230 V
50 Hz
PE N
L
Pøívodní kabel
230V/50Hz
Hinweis: Der Elektromotor ist für Kurzzeitbetrieb bis zu max 4 Minuten
ausgelegt. Falls diese Zeit überschritten wird, schaltet der Thermoschutz
den Motor selbstständig ab. Nach einer Abkühlzeit von ca.30 min ist
der Antrieb wieder betriebsbereit.
3.1
Hnìdý
2.2
Zelenožlutý
- gleichmäßige Reflektion ohne störende
Lichtpunkte oder Schattierungen
Modrý
- Bildwandoberfläche: Mattweiß
nach DIN 19045 Typ D
3.7
Dálkové ovládání
Befestigung
Displej
Die Schrauben und Dübel müssen 600N Ausreißkraft je
Befestigungswinkel standhalten.
Smìrové tlaèítko "VLEVO - VPRAVO"
Die Auswahl der Schrauben und Dübel muß entsprechend
dem Untergrund (Mauerwerk, Beton, Holz, Metall) und den
Ausreißkräften getroffen werden.
C
Tlaèítko "STOP"
Die Auswahl muss den Anforderungen bei der Montage
sowohl an der Wand als auch an der Decke entsprechen.
Tlaèítko "C"
Tlaèítko "AKTIVACE"
3.2
Teileliste
Obsluha projekèní plochy:
1 (1x)
2 (2x)
3 (2x)
4 (1x)
5 (2x)
1) Pro aktivaci displeje stisknìte libovolné tlaèítko
2) Smìrovým tlaèítkem "VLEVO-VPRAVO" vyberte požadovaný
formát projekèní plochy
3) Stisknìte tlaèítko "AKTIVACE"
4) Projekèní plocha vyroluje do požadovaného formátu
5) Pro zarolování projekèní plochy nastavte fomát "Home"
Tlaèítko "STOP" zastaví plochu v libovolné pozici
Pro zrušení chybového hlášení na displeji stisknìte tlaèítko "C"
2
11
3.3
3.3
Montáž stìnového uchycení
1)
Montage Wandhalter
1)
a
Umístìte upevòovací držáky
v požadované výšce na
stìnì a oznaète otvory pro
hmoždinky (viz. obr.)
Vyvrtejte otvory a vložte
hmoždinky.
a
Šíøe plochy
Rozmìr "a"
200 cm
165 - 185 cm
240 cm
205 - 225 cm
270 cm
235 - 255 cm
300 cm
265 - 285 cm
Befestigungswinkel in gewünschter
Höhe an die Wand halten und Bohrlöcher
markieren (siehe Tabelle).
Löcher (für die Befestigungswinkel) den
Markierungen entsprechend bohren und
Dübel einsetzen.
2)
Abstand "a"
200 cm
165 - 185 cm
240 cm
205 - 225 cm
270 cm
235 - 255 cm
300 cm
265 - 285 cm
2)
Befestigungswinkel an die Wand halten
und mit Schrauben befestigen.
Lage der Befestigungswinkel
mit Hilfe einer Wasserwaage regulieren.
Schrauben anziehen.
Pøiložte upevòovací držáky na stìnu a
pøipevnìte je lehce šrouby.
Srovnejte držáky do vodorovné polohy.
Dotáhnìte šrouby.
ŠPATNÌ
3.4
Bildwandbreite
FALSCH
SPRÁVNÌ
3.4
Montáž stropního uchycení
a
Umístìte upevòovací držáky
v požadovaném místì na
stropì a oznaète otvory pro
hmoždinky (viz. obr.)
Vyvrtejte otvory a vložte
hmoždinky.
RICHTIG
Montage Deckenhalter
a
Šíøe plochy
Rozmìr "a"
200 cm
165 - 185 cm
240 cm
205 - 225 cm
270 cm
235 - 255 cm
300 cm
265 - 285 cm
Befestigungswinkel an die Decke halten
und Bohrlöcher markieren
(siehe Tabelle).
Löcher (für die Befestigungswinkel) den
Markierungen entsprechend bohren und
Dübel einsetzen.
2)
Bildwandbreite
Abstand "a"
200 cm
165 - 185 cm
240 cm
205 - 225 cm
270 cm
235 - 255 cm
300 cm
265 - 285 cm
2)
Befestigungswinkel an die Decke halten
und mit Schrauben befestigen.
Achten Sie auf parallelen Sitz der Träger.
Schrauben anziehen.
Pøiložte upevòovací držáky na strop a
pøipevnìte je lehce šrouby.
Srovnejte držáky rovnobìžnì proti sobì.
Dotáhnìte šrouby.
10
3
3.5
CZ
Montage Bildwand
1)
Lichtbildwand an die Befestigungswinkel hängen.
2)
Obsah
1.
Všeobecná bezpeènostn? upozornìní
1
2.
2.1
2.2
Popis
Popis výrobku
Technická data
2
2
2
3.
3.1
3.2
3.3
3.4
3.5
3.6
3.7
Montážní postup
Upevnìní pro montáž
Seznam dílù
Montáž stìnového uchycení
Montáž stropního uchycení
Montáž projekèní plochy
Elektrické zapojení
Dálkové ovládání
2
2
2
3
3
4
4
4
4.
4.1
4.2
Návod k obsluze
Všeobecná upozornìní
Popis chyb
5
5
5
2.1
Popis výrobku
Možnosti použití: MultiFormat screen je profesionální
plocha urèená pro video, data, dia a zpìtné projektory.
Díky koncepci zastínìní a 4 nastavitelným formátùm je
urèená pøedevším pro domácí kina. Lze použít i pro
reprezentativní prostory, školení, konference, semináøe atd.
Tichý chod a spolehlivost zaruèují bezúdržbové 230 V
trubkové motory s digitálnì nastavenými koncovými polohami
Madenschraube einschrauben und festziehen.
3.6
Další parametry
- ocelový tubus, lakovaný barvou RAL 9005
- snadná montáž díky úhelníkovým držákùm s
možností boèního posunu
Anschluß
- povrch projekèní plochy : matnì bílá
odpovídající DIN 19045 Typ D
Hinweis: Elektronische Anschlüsse sind nur von Fachpersonal durchzuführen !
2.2
braun
blau
grün/gelb
- rovnomìrná odrazivost bez rušivých
pøesvìtlených míst a odleskù
Technická data
Šíøe obrazu Šíøe plochy Délka tubusu
PE N
200 cm
223.5 cm
232 cm
240 cm
263.5 cm
262 cm
270 cm
293.5 cm
292 cm
300 cm
323.5 cm
16 x 13 cm
Pøíkon
Napìtí
Frekvence
90 W
230 V
50 Hz
Upozornìní: Motory pro projekèní plochy jsou urèeny pouze pro
krátkodobý provoz: délka provozní doby èiní asi 4 minuty. Po této dobì
tepelná pojistka vypne automaticky motor. Po urèité dobì ochlazení
(cca 30 min) je pohon opìt pøipraven k provozu.
L
Netzzuleitung
230V/50Hz
3.7
192 cm
Prùøez tubusu:
3.1
Fernsteuerung
Upevnìní pro montáž
Šrouby a hmoždinky musí odolat tahu 600 N na každý
upevòovací držák.
Bildschirm
Drucktaster „links – rechts“
Výbìr šroubù a hmoždinek musí odpovídat kvalitì materiálu
nosných prvkù ( zdivo, beton, døevo, kov ) tak, aby
vyhovovaly pøedchozímu požadavku, jak pøi montáži na zeï,
tak i pøi montáži na strop.
C
Drucktaster „Stop“
Øiïte se údaji výrobcù spojovacího materiálu.
Drucktaster "C"
3.2
Drucktaster „Aktion“
Seznam dílù
Bedienung
1) Beliebigen Drucktaster zur Aktivierung drücken
2) Mit dem Drucktaster „links – rechts“ gefordertes Format der Bildwandfläche
auswählen
3) Drucktaster „Aktion“ drücken
4) Bildwandfläche rollt bis zum gefordertem Format ab
5) Stellen Sie das Format „Home“ ein, drücken Sie den Drucktaster “Aktion”
und die Bildwandfläche rollt auf
Drucktaster „STOP“ drücken zum Stoppen in beliebiger Position.
Drucktaster „C“ drücken - resetet die letzte Anzeige
1 (1x)
4
2 (2x)
3 (2x)
4 (1x)
5 (2x)
9
3.6
Wiring
4.1
Caution: Wiring must be carried out by trained persons only !
Allgemeine Informationen
Während des Aus- und Einfahrens der Bildwandfläche ist der Aufenthalt
von Personen im Wirkungsbereich der Lichtbildwand nicht zulässig !
Wegen erhöhter Unfallgefahr ist es grundsätzlich untersagt
Gegenstände an der Lichtbildwand anzubringen !
brown
blue
green/yellow
Die Lichtbildwand ist nur von Erwachsenen zu bedienen !
Kinder nicht an der Lichtbildwand spielen lassen !
4.2
Problemdiagnostik
Problem
PE N
L
Abhilfe
Netzanschluß ist nicht am
Stromnetz angeschlossen
Netzanschluß am
Stromnetz anschließen
Thermoschutz des Motors
hat abgeschaltet
ca. 30 min. warten, bis
Thermoschutz den Motor
freigibt
Der Antrieb führt keine
Fahrbefehle aus
Power source
230V/50Hz
3.7
Ursache
Fernsteuerung
GB
List of contents
Display
Side button "LEFT - RIGHT"
General safety rules
1
2.
2.1
2.2
Description
Product description
Technical data
2
2
2
3.
3.1
3.2
3.3
3.4
3.5
3.6
3.7
Mounting
Assembly fastening
List of parts
Wall bracket assembly
Ceiling bracket assembly
Projection screen assembly
Wiring
Remote control
2
2
2
3
3
4
4
4
4.
4.1
4.2
Operation
General notice
Error description
5
5
5
2.1
Product Description
C
"STOP" button
1.
"C" button
"ACTIVATE" button
Projection screens operation:
1) Press some button for display activate
2) Select requested format of projection screen with side
button "LEFT - RIGHT"
3) Press "ACTIVATE" button
4) Projection screen unroll to choosed format
5) Select function "Home" for roll-in projection screen
"STOP" button stops projection screen in random position
Press button "C" for erase displayed error notice
Field of application: MultiFormat screen is a professional
screen designed and intended for video and data projection.
Product with covering is suitable especially for home
cinema. Its possible for conferences, seminars, trainings too.
4.1
The robust and maintenance-free 230 V electric motors with
included digital end positions guarantees reliability and silent
operating.
General notice
Keep away from the space below the screen while lowering or
retracting.
Further product features:
The screen is to be operated by adults only.
Children are not allowed to pay at the screen.
- steel casing (RAL 9005)
Do not attach any objects to the screen. Danger of injury.
- easy operating and installation through fixing
angles with possible side shift
- reflective surface : matt-white according to
DIN 19045 Type D
4.2
- even reflection without any disturbing light dots
or shadings
Error description
Problem
Possible reasons
Solutions
No connections
to the mains
Connect the power
supply to the mains
2.2
The motor
does not work
The thermal protection has
switched off the motor
Wait about 30 minutes until
the thermal protection
releases the motor
Technical Data
Screen width
Casing length
200 cm
223.5 cm
240 cm
263.5 cm
270 cm
293.5 cm
300 cm
323.5 cm
Cross section of the
housing
16 x 13 cm
Motor:
90 W
230 V
50 Hz
Power output
Voltage
Frequency
Note:
The electronic motor is designed for short-term operation up to a
maximum of 4 minutes. If this time is exceeded, the thermal protection
will switch off the motor automatically. The motor can be used again
after it cooled down, i.e. after approx. 30 minutes.
8
5
3.1
3.4
Assembly fastening
Ceiling bracket assembly
The screws and dowels (wall plugs) should resist the tension
of 600N in the angle of fastening.
The selection of the screws and dowels should therefore
correspond to the material of the respective supporting
elements (brickwork, concrete, wood, metal) in
such a manner that they will meet the aforementioned
requirement.
3.2
List of parts
2 (2x)
1 (1x)
3.3
a
Hold the fixing squares in requested
height on the ceiling and mark up
the holes for plugs (see table). Drill the
holes in accordance with marks (for
fixing squares) and insert plugs.
3 (2x)
4 (1x)
5 (2x)
Screen width
Dimension "a"
200 cm
165 - 185 cm
240 cm
205 - 225 cm
270 cm
235 - 255 cm
300 cm
265 - 285 cm
2)
Wall bracket assembly
1)
Hold fixing squares on the ceiling and
mount with screws.
Align brackets to parallel itself
Tight screws.
a
3.5
Projection screen assembly
1)
Hold the fixing squares in requested
height on the wall and mark up
the holes for plugs (see table). Drill the
holes in accordance with marks (for
fixing squares) and insert plugs.
Screen width
Dimension "a"
200 cm
165 - 185 cm
240 cm
205 - 225 cm
270 cm
235 - 255 cm
300 cm
265 - 285 cm
2)
Hook the projection screen to installed brackets.
2)
Hold fixing squares on the wall and mount
with screws. The fixing square position
regulate by water-level.
Tight screws.
Install safety screws and tight its.
WRONG
RIGHT
6
7