1
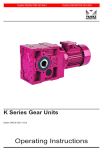
K Series Gear Units Edition OIKCE 0203 / 1014 Operating Instructions Operating Instructions K Series Contents Contents............................................................................................................................. 02 1 -How To Use This Manual.............................................................................................. 04 2 -Unit Designation............................................................................................................ 05 2.1- Detailed unit designation ........................................................................................ 05 2.2- Nameplate, unit designation.................................................................................... 06 3.Standard type Gearbox Part List.................................................................................. 07 3.1- Size: K00...K20 Type: 00......................................................................................... 07 3.2- Size: K00...K20 Type: 01L....................................................................................... 08 3.3- Size: K00...K20 Type: 01R...................................................................................... 09 3.4- Size: K00...K20 Type: 02L....................................................................................... 10 3.5- Size: K00...K20 Type: 02R...................................................................................... 11 3.6- Size: K00...K20 Type: 03L....................................................................................... 12 3.7- Size: K00...K20 Type: 03R...................................................................................... 13 3.8- Size: K00...K20 Type: 04......................................................................................... 14 3.9- Size: K00...K20 Type: 05......................................................................................... 15 3.10- Size: K00...K20 Type: 08....................................................................................... 16 3.11- Size: K27...K87 Type: 00....................................................................................... 17 3.12- Size: K27...K87 Type: 01....................................................................................... 18 3.13- Size: K27...K87 Type: 02....................................................................................... 19 3.14- Size: K27...K87 Type: 03....................................................................................... 20 3.15- Size: K27...K87 Type: 04....................................................................................... 21 3.16- Size: K27...K87 Type: 05....................................................................................... 22 3.17- Size: K27...K87 Type: 08....................................................................................... 23 3.18- Size: K27...K87 Type: 0S...................................................................................... 24 3.19- Size: K27...K87 Type: 0E...................................................................................... 25 4- Safety ............................................................................................................................ 26 4.1- Intended Use........................................................................................................... 26 4.2- Improper Use.......................................................................................................... 26 4.3- Safety Instructions................................................................................................... 27 4.3.1- General Safety Instructions............................................................................ 27 4.3.1.1- Working on the gear reducer............................................................... 27 4.3.1.2- Operation........................................................................................... 27 4.4- Tightening Torques.................................................................................................. 28 4.5- Case of Fire............................................................................................................. 28 5 -Things to Check Before the Gear Unit or Geared Motor is Installed........................ 29 5.1- Transportation......................................................................................................... 29 5.2- Storage.................................................................................................................... 30 6- Installing The Gear Unit................................................................................................ 30 6.1- Before you start....................................................................................................... 30 6.2- Check the shaft dimensions to fit ........................................................................... 31 6.3- Check the ambient temperature.............................................................................. 31 02 Operating Instructions K Series Contents 6.4- Check the voltage supply...............................................................................................31 6.5- Check the mounting position.........................................................................................34 6.6- Use of breather plug......................................................................................................34 6.7- Check the oil level..........................................................................................................34 6.8- Check shaft ends and mounting faces...........................................................................34 6.9- Cover abrasive ambient.................................................................................................34 6.10- Check accessibility to filling, breather and drain plugs���������������������������������������������������35 7- Mechanical Installation ��������������������������������������������������������������������������������������������������������35 7.1- Installing customer shaft with shoulder���������������������������������������������������������������������������36 7.2- Installing customer shaft without shoulder����������������������������������������������������������������������37 7.3- Disassembling customer shaft with shoulder�����������������������������������������������������������������38 7.4- Disassembling customer shaft without shoulder������������������������������������������������������������39 7.5- Shaft tightening torques��������������������������������������������������������������������������������������������������40 7.6- Recommended shaft dimensions for KT...00 types���������������������������������������������������������41 7.7- Assembling customer shaft with shrink disk��������������������������������������������������������������������42 7.8- Disassembling customer shaft with shrink disk���������������������������������������������������������������44 7.9- Assembling gear unit with torque arm�����������������������������������������������������������������������������45 7.10- Fixing bold position.........................................................................................................47 7.11- K.00.. - K.20.. Torgue arm assembly details...................................................................48 7.12- Fitting output shaft elements...........................................................................................49 7.12- Correct position of output shaft elements����������������������������������������������������������������������49 7.13- Fitting couplings������������������������������������������������������������������������������������������������������������50 8- Maintenance and Inspections ���������������������������������������������������������������������������������������������51 9- Lubrication ����������������������������������������������������������������������������������������������������������������������������53 9-1 Oil Types��������������������������������������������������������������������������������������������������������������������������53 9.2- Changing the oil.......................................................................................................... ����54 9.3- Oil Quantities. (lt) and oil plugs ��������������������������������������������������������������������������������������54 9.4- Mounting Positions����������������������������������������������������������������������������������������������������������58 10- Troubleshooting Guide..�����������������������������������������������������������������������������������������������������59 11- Disposal�������������������������������������������������������������������������������������������������������������������������������62 11.1- Disposal of Oil������������������������������������������������������������������������������������������������������������...62 11.2- Disposal of Sealings.......................................................................................................62 11.3- Disposal of Metal............................................................................................................62 12- Appendix...............................................................................................................................63 Warranty Conditions.................................................................................................................64 Warranty Declarations...............................................................................................................65 Service Contact Points..............................................................................................................66 03 Operating Instructions K Series General Informations 1 -How To Use This Manual Take attention to the following safety and warning signs for proper understanding and quick reference. Electric Hazard; Can cause severe or fatal injuries. Mechanical Hazard; Can cause severe or fatal injuries. Likely to be Hazardous; Can cause minor or fatal injuries Damage Risk; Can damage the drive or environment Important Information EC Machinery Directive: Within terms of the EC machinery directive 2006/42/EC, the gear reducer is not considered an autonomous machine, but as a component to install in machines. Operation is prohibited within the area of validity of the 2006/42/EC directive, until it has been determined that the machine, in which this product is installed, corresponds to the regulations within this directive. The operating instructions contain important information to ensure; - Trouble-free operation - Fulfilment of any rights to claim under guarantee The operating instruction must be kept close to the gearbox and must be available in case it is needed. This operating instruction is written for K Series gear units and is applicable only for K Series. If any different type of gearbox is used please ask SEVA for the operating instructions of that type. This instruction can be used only for standard type geared units of SEVA. For special application and modified gear units ask SEVA for validity. This manual does not cover 94/9/EC compatible gearboxes. For 94/9/EC contact SEVA. 04 Operating Instructions K Series Unit Designation 2 -Unit Designation 2.1- Detailed unit designation Detailed K Series gear units designation for ordering (This Designation is different from the short nameplate designation) K R 3 7 3 . 02 R - M2 T1 - 90S/4 - L05 L-220V With Fan P-24V With Fan S-220 V Without Fan Z-24 V Without Fan Brake 00- 5 Nm 01- 10 Nm 02- 25 Nm 04- 40 Nm 05- 50 Nm 10- 100 Nm 20- 200 Nm 30- 300 Nm 40- 400 Nm 50- 500 Nm Motor Size For KV types 90 S / 4 Pole Number For KN Types A06 : 63 B5 A10 : 100 B5 A20 : 200 B5 B06 : 63 B14 B10 : 100 B14 A22 : 225 B5 A07 : 71 B5 A11 : 112 B5 Frame Lenght A08 : 80 B5 A13 : 132 B5 A31 : 315 B5 Motor size B08 : 80 B14 B13 : 132 B14 A09 : 90 B5 A25 : 250 B5 A16 : 160 B5 B09 : 90 B14 A18 : 180 B5 Torque Arm Position Mounting Position Output Shaft - Flange Position Output Specification 00 :Hollow output shaft 01 :Solid output shaft 02 :Solid output shaft and with Flange 03 :Flanged and hollow output shaft 04 :With double output shaft 05 :Double flanged and double output shaft 08 :Double flanged and hollow output shaft 0S :Shrink disk output 0E :Extruder output Stage 2 Stages 3 Stages 4 Stages 5 Stages 6 Stages Revision Number 0,7 Housing Size 0...8 Input Type R : With Motor N :IEC B5 / B14 Flanged without Motor V :IEC B5 / B14 Flanged with Motor T :Without Motor Gearbox Type K Serie 05 Operating Instructions K Series Type Designation 2.2- Nameplate, unit designation Nameplate unit designation is a short abbreviation from the detailed designation A sample name plate for K Series www.seva-tec.de Type Power Speed Ratio Serial No M.Pos : : : : : : KR373.00R 2,2 kW 20 rpm 12,33 11/027165 M1 Oil Qty:2,9 lt OIL FILLED (MINERAL OIL VG320) Abreviations: Serial N. : Serial Number M.Pos. : Mounting Position Type Designation; KR373.00 Type R Shaft Arrangement Viewed from input side L - Right Input, Left Output R - Left Input, Right Output 06 Operating Instructions K Series Part Designations 3. Standard Type Gearbox Parts Lists 3.1- Size: K00...K20... Type: 00 4 5 11 9 8 7 6 10 5 12 4 2 13 14 3 2 15 16 2 17 18 16 19 1 20 24 2 2 21 22 23 25 26 27 23 22 21 Standard types basic part diagram. Parts may differ for special applications. Standard Part List 1- Pinion 9- Bolt 17- Gear 25- Output Shaft 2- Plug 10- Cover Plate 18- Spacer 26- Gear 3- Housing 11- Key 19- Spacer 27- Spacer 4- Circlip 12- Pinion Shaft 20- Circlip 5- Bearing 13- Shim Ring 21- Oil Seal 6- Gear 14- Circlip 22- Circlip 7- Pinion Shaft 15- Shim Ring 23- Bearing 8- Key 24- Key 16- Bearing 07 Operating Instructions K Series Part Designations 3.2- Size: K00...K20... Type: 01L 4 5 11 9 8 7 6 10 5 12 4 2 13 14 3 2 15 16 2 17 18 16 19 1 20 24 2 2 26 21 22 23 25 27 28 23 22 21 Standard types basic part diagram. Parts may differ for special applications. Standard Part List 08 1- Pinion 9- Bolt 17- Gear 25- Output Shaft 2- Plug 10- Cover Plate 18- Spacer 26- Key 3- Housing 11- Key 19- Spacer 27- Gear 4- Circlip 12- Pinion Shaft 20- Circlip 28- Spacer 5- Bearing 13- Shim Ring 21- Oil Seal 6- Gear 14- Circlip 22- Circlip 7- Pinion Shaft 15- Shim Ring 23- Bearing 8- Key 24- Key 16- Bearing Operating Instructions K Series Part Designations 3.3- Size: K00...K20... Type: 01R 26 4 11 9 25 23 5 8 7 10 27 6 5 12 4 2 13 14 3 24 2 15 16 21 22 2 23 17 22 18 16 21 19 1 20 2 2 Standard types basic part diagram. Parts may differ for special applications. Standard Part List 1- Pinion 9- Bolt 17- Gear 25- Key 2- Plug 10- Cover Plate 18- Spacer 26- Key 3- Housing 11- Key 19- Spacer 27- Gear 4- Circlip 12- Pinion Shaft 20- Circlip 5- Bearing 13- Shim Ring 21- Oil Seal 6- Gear 14- Circlip 22- Circlip 7- Pinion Shaft 15- Shim Ring 23- Bearing 8- Key 24- Output Shaft 16- Bearing 09 Operating Instructions K Series Part Designations 3.4- Size: K00...K20... Type: 02L 4 5 11 9 8 7 6 10 5 12 4 2 13 3 2 14 15 16 2 17 18 16 19 1 20 2 24 2 26 21 22 23 25 27 28 23 22 21 29 30 Standard types basic part diagram. Parts may differ for special applications. Standard Part List 10 1- Pinion 9- Bolt 17- Gear 25- Output Shaft 2- Plug 10- Cover Plate 18- Spacer 26- Key 3- Housing 11- Key 19- Spacer 27- Gear 4- Circlip 12- Pinion Shaft 20- Circlip 28- Spacer 5- Bearing 13- Shim Ring 21- Oil Seal 29- Flange 6- Gear 14- Circlip 22- Circlip 30- Bolt 7- Pinion Shaft 15- Shim Ring 23- Bearing 8- Key 24- Key 16- Bearing Operating Instructions K Series Part Designations 3.5- Size: K00...K20... Type: 02R 29 28 26 4 11 9 23 5 8 7 27 6 10 5 12 4 2 13 14 3 24 2 15 16 21 22 25 2 23 17 22 18 16 21 19 1 20 2 2 Standard types basic part diagram. Parts may differ for special applications. Standard Part List 1- Pinion 9- Bolt 17- Gear 25- Key 2- Plug 10- Cover Plate 18- Spacer 26- Key 3- Housing 11- Key 19- Spacer 27- Gear 4- Circlip 12- Pinion Shaft 20- Circlip 28- Flange 5- Bearing 13- Shim Ring 21- Oil Seal 29- Bolt 6- Gear 14- Circlip 22- Circlip 7- Pinion Shaft 15- Shim Ring 23- Bearing 8- Key 24- Output Shaft 16- Bearing 11 Operating Instructions K Series Part Designations 3.6- Size: K00...K20... Type: 03L 4 5 11 9 8 7 6 10 5 12 4 2 13 14 3 2 15 16 2 17 18 16 19 1 20 24 2 2 21 22 23 25 26 27 23 22 21 28 29 Standard types basic part diagram. Parts may differ for special applications. Standard Part List 12 1- Pinion 9- Bolt 17- Gear 25- Output Shaft 2- Plug 10- Cover Plate 18- Spacer 26- Gear 3- Housing 11- Key 19- Spacer 27- Spacer 4- Circlip 12- Pinion Shaft 20- Circlip 28- Flange 5- Bearing 13- Shim Ring 21- Oil Seal 29- Bolt 6- Gear 14- Circlip 22- Circlip 7- Pinion Shaft 15- Shim Ring 23- Bearing 8- Key 24- Key 16- Bearing Operating Instructions K Series Part Designations 3.7- Size: K00...K20... Type: 03R 4 5 11 9 8 7 29 6 10 5 12 28 4 2 13 14 3 2 15 16 2 17 18 16 19 1 20 24 2 2 21 22 23 25 26 27 23 22 21 Standard types basic part diagram. Parts may differ for special applications. Standard Part List 1- Pinion 9- Bolt 17- Gear 25- Output Shaft 2- Plug 10- Cover Plate 18- Spacer 26- Gear 3- Housing 11- Key 19- Spacer 27- Spacer 4- Circlip 12- Pinion Shaft 20- Circlip 28- Flange 5- Bearing 13- Shim Ring 21- Oil Seal 29- Bolt 6- Gear 14- Circlip 22- Circlip 7- Pinion Shaft 15- Shim Ring 23- Bearing 8- Key 24- Key 16- Bearing 13 Operating Instructions K Series Part Designations 3.8- Size: K00...K20... Type: 04 4 5 11 9 8 7 6 10 5 12 4 2 13 14 3 2 15 16 2 17 18 16 19 1 20 24 2 2 26 21 24 22 23 25 27 28 23 22 21 Standard types basic part diagram. Parts may differ for special applications. Standard Part List 14 1- Pinion 9- Bolt 17- Gear 25- Output Shaft 2- Plug 10- Cover Plate 18- Spacer 26- Key 3- Housing 11- Key 19- Spacer 27- Gear 4- Circlip 12- Pinion Shaft 20- Circlip 28- Spacer 5- Bearing 13- Shim Ring 21- Oil Seal 6- Gear 14- Circlip 22- Circlip 7- Pinion Shaft 15- Shim Ring 23- Bearing 8- Key 24- Key 16- Bearing Operating Instructions K Series Part Designations 3.9- Size: K00...K20... Type: 05 4 5 11 9 8 7 30 6 10 5 12 29 4 2 13 14 3 2 15 16 2 17 18 16 19 1 20 24 2 2 26 21 24 22 23 25 27 28 23 22 21 29 30 Standard types basic part diagram. Parts may differ for special applications. Standard Part List 1- Pinion 9- Bolt 17- Gear 25- Output Shaft 2- Plug 10- Cover Plate 18- Spacer 26- Key 3- Housing 11- Key 19- Spacer 27- Gear 4- Circlip 12- Pinion Shaft 20- Circlip 28- Spacer 5- Bearing 13- Shim Ring 21- Oil Seal 29- Flange 6- Gear 14- Circlip 22- Circlip 30- Bolt 7- Pinion Shaft 15- Shim Ring 23- Bearing 8- Key 24- Key 16- Bearing 15 Operating Instructions K Series Part Designations 3.10- Size: K00...K20... Type: 08 4 5 11 9 8 7 29 6 10 5 12 28 4 2 13 14 3 2 15 16 2 17 18 16 19 1 20 24 2 2 21 22 23 25 26 27 23 22 21 28 29 Standard types basic part diagram. Parts may differ for special applications. Standard Part List 16 1- Pinion 9- Bolt 17- Gear 25- Output Shaft 2- Plug 10- Cover Plate 18- Spacer 26- Gear 3- Housing 11- Key 19- Spacer 27- Spacer 4- Circlip 12- Pinion Shaft 20- Circlip 28- Flange 5- Bearing 13- Shim Ring 21- Oil Seal 29- Bolt 6- Gear 14- Circlip 22- Circlip 7- Pinion Shaft 15- Shim Ring 23- Bearing 8- Key 24- Key 16- Bearing Operating Instructions K Series Part Designations 3.11- Size: K27...K87... Type: 00 14 13 12 11 10 9 8 7 6 5 4 2 3 2 17 16 15 2 1 18 19 2 20 21 22 17 18 17 16 15 29 26 25 25 25 25 24 30 2 2 28 27 23 24 25 25 26 Standard types basic part diagram. Parts may differ for special applications. Standard Part List 1- Pinion 9- Bearing 17- Shim Ring 25- Shim Ring 2- Plug 10- Shim Ring 18- Bearing 26- Bearing 3- Housing 11- Key 19- Gear 27- Pinion Shaft 4- Circlip 12- Pinion Shaft 20- Shim Ring 28- Key 5- Shim Ring 13- Cover Plate 21- Key 29- Gear 6- Gear 14- Bolt 22- Output Shaft 30- Shim Ring 7- Bearing 15- Oil Seal 23- Closing Cap 8- Spacer 16- Circlip 24- Circlip 17 Operating Instructions K Series Part Designations 3.12- Size: K27...K87... Type: 01 14 13 12 11 10 9 8 7 6 5 4 3 2 2 2 15 16 19 21 18 17 1 2 20 22 23 17 18 17 16 30 15 27 26 26 26 26 25 24 2 29 28 24 25 26 26 27 Standard types basic part diagram. Parts may differ for special applications. Standard Part List 18 1- Pinion 9- Spacer 17- Shim Ring 25- Circlip 2- Plug 10- Bearing 18- Bearing 26- Shim Ring 3- Housing 11- Shim Ring 19- Gear 27- Bearing 4- Circlip 12- Pinion Shaft 20- Output Shaft 28- Pinion Shaft 5- Shim Ring 13- Cover Plate 21- Key 29- Key 6- Gear 14- Bolt 22- Key 30- Gear 7- Key 15- Oil Seal 23- Shim Ring 8- Bearing 16- Circlip 24- Closing Cap 2 Operating Instructions K Series Part Designations 3.13- Size: K27...K87... Type: 02 14 13 12 11 10 9 8 7 6 2 5 4 2 3 2 17 18 16 15 2 1 19 21 2 20 22 18 15 16 23 17 24 32 25 29 28 28 28 28 33 34 2 2 31 30 26 27 28 28 29 Standard types basic part diagram. Parts may differ for special applications. Standard Part List 1- Pinion 9- Bearing 17- Shim Ring 25- Bolt 33- Circlip 2- Plug 10- Shim Ring 18- Bearing 26- Closing Cap 34- Shim Ring 3- Housing 11- Key 19- Gear 27- Circlip 4- Circlip 12- Pinion Shaft 20- Output Shaft 28- Shim Ring 5- Shim Ring 13- Cover Plate 21- Key 29- Bearing 6- Gear 14- Bolt 22- Key 30- Pinion Shaft 7- Bearing 15- Oil Seal 23- Shim Ring 31- Key 8- Spacer 16- Circlip 24- Flange 32- Gear 19 Operating Instructions K Series Part Designations 3.14- Size: K27...K87... Type: 03 14 13 12 11 10 9 8 7 6 5 2 4 2 3 17 16 15 2 1 18 19 2 20 21 22 17 18 17 16 15 31 23 28 27 27 27 27 26 32 30 24 29 25 26 27 27 28 Standard types basic part diagram. Parts may differ for special applications. Standard Part List 20 1- Pinion 9- Bearing 17- Shim Ring 25- Closing Cap 2- Plug 10- Shim Ring 18- Bearing 26- Circlip 3- Housing 11- Key 19- Gear 27- Shim Ring 4- Circlip 12- Pinion Shaft 20- Shim Ring 28- Bearing 5- Shim Ring 13- Cover Plate 21- Key 29- Pinion Shaft 6- Gear 14- Bolt 22- Output Shaft 30- Key 7- Bearing 15- Oil Seal 23- Flange 31- Gear 8- Spacer 16- Circlip 24- Bolt 32- Shim Ring 2 2 Operating Instructions K Series Part Designations 3.15- Size: K27...K87... Type: 04 14 13 12 11 10 9 15 16 21 20 22 19 18 8 2 7 6 5 4 3 17 2 2 17 1 2 22 18 2 23 17 16 30 15 27 26 26 26 26 25 24 2 2 29 28 24 25 26 26 27 Standard types basic part diagram. Parts may differ for special applications. Standard Part List 1- Pinion 9- Spacer 17- Shim Ring 25- Circlip 2- Plug 10- Bearing 18- Bearing 26- Shim Ring 3- Housing 11- Shim Ring 19- Gear 27- Bearing 4- Circlip 12- Pinion Shaft 20- Output Shaft 28- Pinion Shaft 5- Shim Ring 13- Cover Plate 21- Key 29- Key 6- Gear 14- Bolt 22- Key 30- Gear 7- Key 15- Oil Seal 23- Shim Ring 8- Bearing 16- Circlip 24- Closing Cap 21 Operating Instructions K Series Part Designations 3.16- Size: K27...K87... Type: 05 14 13 25 12 11 24 10 9 8 7 6 2 5 4 2 3 2 18 16 17 15 2 1 19 22 18 15 16 21 20 2 22 23 17 24 32 29 28 28 28 28 33 34 2 2 31 25 30 26 27 28 28 29 Standard types basic part diagram. Parts may differ for special applications. Standard Part List 22 1- Pinion 9- Bearing 17- Shim Ring 25- Bolt 33- Circlip 2- Plug 10- Shim Ring 18- Bearing 26- Closing Cap 34- Shim Ring 3- Housing 11- Key 19- Gear 27- Circlip 4- Circlip 12- Pinion Shaft 20- Output Shaft 28- Shim Ring 5- Shim Ring 13- Cover Plate 21- Key 29- Bearing 6- Gear 14- Bolt 22- Key 30- Pinion Shaft 7- Bearing 15- Oil Seal 23- Shim Ring 31- Key 8- Spacer 16- Circlip 24- Flange 32- Gear Operating Instructions K Series Part Designations 3.17- Size: K27...K87... Type: 08 14 13 12 11 10 24 9 23 8 7 6 5 2 4 2 3 17 16 15 2 1 18 19 2 20 21 22 17 18 17 16 15 31 23 28 27 27 27 27 26 25 2 2 30 24 29 25 26 27 27 28 Standard types basic part diagram. Parts may differ for special applications. Standard Part List 1- Pinion 9- Bearing 17- Shim Ring 25- Closing Cap 2- Plug 10- Shim Ring 18- Bearing 26- Circlip 3- Housing 11- Key 19- Gear 27- Shim Ring 4- Circlip 12- Pinion Shaft 20- Shim Ring 28- Bearing 5- Shim Ring 13- Cover Plate 21- Key 29- Pinion Shaft 6- Gear 14- Bolt 22- Output Shaft 30- Key 7- Bearing 15- Oil Seal 23- Flange 31- Gear 8- Spacer 16- Circlip 24- Bolt 23 Operating Instructions K Series Part Designations 3.18- Size: K27...K87... Type: 0S 14 13 12 11 10 9 8 7 6 2 5 4 2 3 2 17 16 15 2 1 18 19 2 20 21 17 18 26 22 28 16 15 23 29 28 28 27 28 32 24 31 25 26 27 28 28 29 30 Standard types basic part diagram. Parts may differ for special applications. Standard Part List 24 1- Pinion 9- Bearing 17- Shim Ring 25- Bolt 2- Plug 10- Shim Ring 18- Bearing 26- Closing Cap 3- Housing 11- Key 19- Gear 27- Circlip 4- Circlip 12- Pinion Shaft 20- Key 28- Shim Ring 5- Shim Ring 13- Cover Plate 21- Output Shaft 29- Bearing 6- Gear 14- Bolt 22- Shim Ring 30- Pinion Shaft 7- Bearing 15- Oil Seal 23- Shrink Disk 31- Key 8- Spacer 16- Circlip 24- Cap 32- Gear 2 Operating Instructions K Series Part Designations 3.19- Size: K27...K87... Type: 0E 14 13 12 11 10 9 8 7 6 5 4 2 2 3 18 17 16 15 2 1 19 20 2 2 21 22 18 17 17 16 24 23 15 36 38 25 35 35 35 35 34 33 2 39 37 26 27 35 28 35 36 34 33 29 30 30 31 32 32 Standard types basic part diagram. Parts may differ for special applications. Standard Part List 1- Pinion 9- Bearing 17- Shim Ring 25- Flange 33- Closing Cap 2- Plug 10- Shim Ring 18- Bearing 26- Bolt 34- Circlip 3- Housing 11- Key 19- Gear 27- Ekstruder Housing 35- Shim Ring 4- Circlip 12- Pinion Shaft 20- Shim Ring 28- Bolt 36- Bearing 5- Shim Ring 13- Cover Plate 21- Key 29- Bearing 37- Pinion Shaft 6- Gear 14- Bolt 22- Hollow shaft 30- Key 38- Key 7- Bearing 15- Oil Seal 23- Circlip 31- Shaft 39- Gear 8- Spacer 16- Circlip 24- Shim Ring 32- Oil Seal 25 Operating Instructions K Series Safety 4- Safety 4.1- Intended Use The gear reducer is designed for use in industrial machines. Please refer to our catalogue or our web page for the maximum permitted torques and speeds. The most important maximum permitted values are indicated on the nameplate of the product. But the all data can be found on our product catalogues. Using the product out of the product catalogue/ nameplate’s permitted ranges will cancel the warranty/manufacturer declaration and SEVA will not take any responsibility. The gear units are intended for industrial machines and may only be used in accordance with the information provided in this manual the product catalogue and the nameplate of the gearbox. They comply with the applicable standards and regulations and meet the requirements of the directive 2006/42/EC. The gearbox must be started up, maintained and operated according this manual. The gearbox most be incorporated with 2006/42/EC confirming parts/machines. A motor connected to the gear unit is only allowed to be operated in the frequency entries so that the data provided on nameplate/catalogue of the gear unit is not exceeded and is accordance with the nameplate/catalogue. The speed range will be provided on the name plate if SEVA is informed that the gear unit will be used with frequency inverter. If not informed the nameplate will have a single fixed speed and only this speed is allowed. The electric motor and frequency inverter must be in accordance with 2006/42/EC If the gear units input is used with variable speed gear unit, this must be informed to SEVA before ordering and on the nameplate the allowed maximum and minimum speeds (speed range) will be provided. If not mentioned by ordering the gear units speed will be a fixed single input speed and only this speed is allowed. If the gear unit will be driven by belt / coupling / chain drive etc. the gear unit is only allowed to be used according the nameplate/catalogue entries. Different speed, higher motor power, higher radial/axial loads etc. than nameplate/catalogue is not allowed. The ambient temperature must be between +5 , +40 celsius and no abrasive media must attack the paint and seals. If different working conditions this must be informed to SEVA before ordering. The gearbox maintenance (oil change / check ) must be done according this manual 4.2-Improper Use Every usage which exceeds the limits stated above, the nameplate and catalogue of the product (especially highest torques and speeds) is not compliant with the regulations, and thus prohibited. The operation of the gear reducer is prohibited if; -It was not mounted/installed according to regulations and this manual -The gear reducer is very soiled -It is operated without lubricant -It is operated out of the permitted values provided on catalogues and/or nameplate 26 Operating Instructions K Series Safety 4.3- Safety Instructions 4.3.1- General Safety Instructions 4.3.1.1- Working on the gear reducer - Inappropriately executed work can lead to injury or damage. Make sure that the gear reducer is only installed, maintained and dismantled by trained technicians. - Foreign bodies spinning through the air can cause grave injury. Before putting the gear reducer into operation, check that there are no foreign bodies or tools near the gear reducer 4.3.1.2- Operation - Touching hot surfaces can lead to burns. Do not touch the gear reducer if their operation temperatures are too high, or use suitable safety equipment like gloves. -Rotating machinery can lead to injuries. There is danger of being trapped or pulled in! Keep a sufficient distance and make safeguarding to rotating machinery. See relevant norms EN349+A1, EN13857. 4.3.1.3- Maintenance -An unintentional start of the machine during maintenance work can lead to serious accidents. Make sure no one can start the machine while you are working on it. - Even a brief running of the machine during maintenance work can lead to accidents if the safety devices are not operating. Make sure that all safety devices are mounted and active. 4.3.1.4- Lubricant - Extended, intensive contact with oils can lead to skin irritations. Avoid extended contact with oil, and clean oil off skin thoroughly. - Hot oil can cause scalding. When changing oil, protect yourself against contacting hot oil. 4.3.1.5- Ambient Conditions - Standard gearboxes are allowed to work in ambient temperatures between +5 to +40 celsius unless differently specified on the nameplate. Using the gear unit out of this range can cause damage to the gear unit or environment. Over +40 celsius ambient conditions the gear unit surface temp could be so high causing burns when touched. 27 Operating Instructions K Series Safety -If the gear unit will be used in outdoor applications the gear unit must be prevented from rain snow and dust. Entering substances inside the gear unit from seals can damage the gear unit. Observe the safety instructions for outdoor use EN12100:2010. 4.4- Tightening Torques All screwed connections for which a tightening torque is specified, must on principle be tightened with a calibrated torque wrench and checked. Use the following torques for the threaded bores over the gear unit housing. For connecting elements refer to the mechanical installation part. Bolt Size Class Tightening Torque [Nm] M5 8.8 5.4 M6 8.8 9 M8 8.8 23 M10 8.8 43 M12 8.8 77 M16 8.8 190 M20 8.8 370 M24 8.8 640 4.5- Case of Fire The gear reducer itself is not combustible. However, it usually contains a synthetic or mineral gear oil. Please observe the following if the gear reducer is situated in a burning environment 4.5.1- Suitable extinguishing agents, Protective equipment Always keep suitable extinguishing, protective equipment like carbon dioxide, powder, foam, fog easily accessible around the gear unit. -High temperature produce irritating steam. Use a protective breathing apparatus. 4.5.2- Unsuitable extinguishing agents Do not spray with water! 28 Operating Instructions K Series Safety 5 -Things to Check Before the Gear Unit or Geared Motor is Installed If gear motors are used, please also refer to the manual of the motor manufacturer. Before you install the gearbox you have to be sure that the gearbox is arrived with the all necessary equipment and without damage. Thinks to take into consideration before you start to install the unit; - You have received the correct operation manual of the your product. - The gearbox and all its parts are transported without damage. - The gearbox is stored correctly according the instructions in this manual - You have the latest product catalogue or you have access to our web page 5.1- Transportation When the goods arrive, first check for any damage. If some damage observed, immediately contact the transport company and inform about the damage. Contact SEVA for the damage and do not start to install the unit until it is agreed that the damage has no affect of operation. Use the upper foot connection holes for lifting up the gear unit by using eyebolts. The eyebolts should be capable to carry the weight of gearboxes. Do not hang additional loads on the gear box by lifting. Use suitable hoisting equipment which is capable to hold the gear units weight. Refer to the catalogue for various types weights. If the gearbox is delivered with steel carrying construction use the construction holes for lifting the gear unit. See drawing bellow for hoisting point. Do not stay beneath / under the lifting/hoisting equipment which may cause serious injuries by falling down objects, accidental movements, unexpected accidents. Falling or hard placement can damage the gear unit. Only use hoisting and securing equipment which is permitted for the size / weight of your gear unit. Ensure that the load is slowly and carefully handled and placed. 29 Operating Instructions K Series Checking 5.2- Storage If the geared unit or geared motor will be stored up to 3 years refer to the following instructions; With Packing; -Use corrosion protection oil for the output shaft and connection surfaces like flange surface or foot assembling surface. Seal the unit in a plastic wrap and pack it in container. A moisture indicator should be placed around the container to observe the moisture. Relative atmospheric humidity should not exceed 50%. The container should be kept under roof which protects from snow and rain. Under this condition the gear unit can be stored up to 3 year with regular check. The ambient temperature should be between -5 to 60 Celsius degrees Without Packing; -Use protection oil for the output shaft and connection surfaces like flange surface or foot assembling surface. If no packing is used and the gearbox is stored without packing, the ambient temperature should be between 5 to 60 Celsius degrees. The gearbox must be kept under enclosed roof with constant temperature and constant humidity not exceeding 50%. The storage should be free of dust and dirt and ventilated with filter. If the gearbox is stored without packing it is recommended not to store more than 2 years and regular check during this time is recommended. If stored in open protect against insect damage. 6- Installing The Gear Unit 6.1- Before you start; - Observe the gear unit for damages of storage or transportation. If any damage please contact SEVA. - Be sure that you have all the equipment necessary for installing like; Spanners, torque wrench, shims and distance rings, fixing devices for input and output elements, lubricant, bolt adhesive etc. - This manual is not for 94/9/EC (ATEX) conforming gear units. For 94/9/EC conforming gear units refer to the ATEX range manual. ATEX conforming gear units have name plates indicating the zone and the temperature class and are different from standard type geared units. Therefore Standard units can not be installed on Potentially explosive atmospheres. 30 Operating Instructions K Series Checking 6.2- Check the shaft dimensions to fit Hollow Shaft Tolerance (H7) Output Shaft Tolerance Output Flange (DIN748) Shaft Centering Diameter Up to 50mm k6 Shoulder Over 50mm m6 Diameter Centering Shoulder Tolerance ( g6 ) Type Hollow Shaft Diameter K.00... Ø20 +0.02 0 Ø20 +0.02 0 Ø95 -0.01 -0.03 K.10... Ø30 +0.02 0 Ø30 +0.02 0 Ø110 -0.01 -0.03 K.20... Ø35 +0.03 0 Ø35 +0.02 0 Ø130 -0.01 -0.04 K.27... Ø35 +0.03 0 Ø35 +0.02 0 Ø130 -0.01 -0.04 K.37... Ø40 +0.03 0 Ø40 +0.02 0 Ø180 -0.01 -0.04 K.47... Ø50 +0.03 0 Ø50 +0.02 0 Ø230 -0.02 -0.05 K.57... Ø60 +0.03 0 Ø60 +0.03 +0.01 Ø250 -0.02 -0.05 K.67... Ø70 +0.03 0 Ø70 +0.03 +0.01 Ø300 -0.02 -0.05 K.77... Ø90 +0.04 0 Ø90 +0.04 +0.02 Ø350 -0.02 -0.05 K.87... Ø110 +0.04 0 Ø110 +0.04 +0.02 Ø450 -0.02 -0.06 6.3- Check the ambient temperature; The ambient temperature must be between +5 celsius to +40 celsius for standart type gear units. If different contact SEVA for special solutions. 6.4- Check the voltage supply; The standard geared motors are supplied with 230/400 V 50/60Hz. up to 3kW including 3kW and 400/690 V 50/60 Hz. over 3kW and is indicated on the motors name plate unless it is differently ordered. In case of only gear unit is supplied from SEVA please observe the name plate of the electric motor and the instructions of the supplier. Check the basic electric connection diagrams below. Use experienced electric technician. Using wrong connection or voltage can damage the electric motor or environment. 31 Operating Instructions K Series Checking The following wiring diagram is for standard 230/400 V 50Hz AC electric motors. For different voltages please contact SEVA. For gear units supplied without motor, refer to the motor manufacturers user manuel. The electric connection must be done by experienced electric technician. The gearbox, the motor and the brake must be grounded to prevent potential differences of earth and gearbox/motor. Nominal Powers at 400V, 50Hz Pole Number 230V ( D ) / 400 V ( Y ) 400V ( D ) 2 or 4 * 3 kW / 4 kW 6 * 2,2 kW / 3 kW 8 * 1,5 kW / 2,2 kW Starting Principle Direct Direct or Y/D Basic motor connection wiring diagram L1 L2 L3 L1 L2 L3 U U U U (230V) (230V) (400V) (400V) I1 U U (230V) (400V) I3 I2 U2 I1 I3 I2 V1 V1 3 Uph=U U1 L1 32 I = I ph V2 W2 W1 U 3 V2 Iph= I Uph= W2 U2 W1 U1 W2 U2 V2 W2 U2 V2 U1 V1 W1 U1 V1 W1 L2 L3 L1 L2 L3 Operating Instructions K Series Checking Standard type brakes basic wiring diagram The electric connection must be done by experienced electric technician. The gearbox and the motor must be grounded to prevent potential differences of earth and gearbox/motor. Delayed Running Brake ( 220V ) L1 L2 L3 N Sudden Brake (220 V) L1 L2 L3 N Brake Coil Brake Coil M M 3 3 Delayed Running Brake (24 V ) L1 L2 L3 N M 3 Brake Coil Sudden Brake (24 V) L1 L2 L3 N Brake Coil M 3 33 Operating Instructions B Series Checking 6.5- Check the mounting position; The mounting position must be in accordance with the mounting position mentioned on the name plate. If different please contact SEVA for possibilities of using in a different mounting position. Refer to the mounting positions and oil quantities on this manual and adjust the oil level accordingly with the recommended oil types given on this manual. Do not mix synthetic oils with mineral oils which can cause serious damage on the gear unit. 6.6- Use of breather plug; Breather plugs are not needed for K Series under normal ambient and working conditions (Up to 30 degree Celsius ambient temperature and up to 8 hours per day) . If heavy ambient conditions and long time working hours then breather plug are recommended by SEVA and delivered with the gearbox together. Replace the breather plug with the most top plug according to your mounting position. Some plug positions are not machined according mounting position. If no mounting position is mentioned by ordering the standard M1 position plugs are machined. 6.7- Check the oil level ; On the mounting position tables the oil level plug is shown. Please refer to those tables and be sure that the oil level is correct according the mounting position by screwing half way out the level plug and see if oil comes out from that plug. If oil comes out tighten the plug again. If no oil comes out take out the filling plug and add oil until oil comes out from the level plug and tighten both plugs after finish. Be sure you are using the correct oil mentioned on the oil tables on this manual. Do not mix synthetic oils with mineral which can cause serious damage on the gear unit. 6.8- Check shaft ends and mounting faces; Before you start to installing be sure that all the connection elements are free of oil and dust. The output shaft may be protected by anti-corrosion oil. Please remove this using available solvents on your market. By using this do not touch sealing lips or painting of the housing. 6.9- Cover abrasive ambient; If the gear unit will be placed on a abrasive ambient be sure that the output seals are covered so that no abrasive material, chemicals or water touches the seals. Any pressure coming from outside over the seals can cause that the out staying substances to enter the gearbox and cause serious damage to the gear unit. If pressure or abrasive material can not be prevented from coming over the sealing, contact SEVA for solutions. Abrasive material, chemicals, water, positive or negative pressure exceeding 0,2 bar can affect or damage the sealing lip or output shaft. Inside entering substances from the seals can cause serious damage to the gear unit. 34 Operating Instructions K Series Checking 6.10- Check accessibility to filling, breather and drain plugs; The filling, breather and drain plugs must be freely accessible for further checking and service. 7- Mechanical Installation The gear unit can only be installed using the supplied connection points like foot and flange assembling points. To install the gear unit without the supplied connection points can cause serious injuries by loosening or braking the gear unit. Even the gear unit is installed totally correctly according this manual, be sure that no one will be harmed by accidentally brake downs or loosening. The mounting plate must be rigid enough not allowing torsions, flat enough to prevent strains by tightening the bolts and stable enough not allowing vibrations. By using chain drives this becomes much more important because of the polygon effect on chain drives. According to your connection elements the maximal permitted radial and axial load of the gear unit must be in accordance with your application. Check the product catalogue for permitted radial loads and calculation. If the output or input shaft is overloaded by radial or axial loads it can cause serious damage to the gear unit. Secure the gear unit using 8.8 or higher quality bolts. Cover all the turning parts from human entering or touching. Turning parts can cause severe or fatal injuries. For different kind of basic installations refer to the following illustrations. 35 Operating Instructions K Series Mounting 7.1- Installing customer shaft with shoulder 7.1.1- Use anti-seize assembling paste available in your market. Use a brush to apply the paste. 36 7.1.2 -Fasten the bold as shown below. Operating Instructions K Series Mounting 7.2- Installing customer shaft without shoulder 7.2.1- Use anti-seize assembling paste available on your market. Use a brush to apply the paste. 7.2.2 -Fasten the bold as shown indicated 37 Operating Instructions K Series Mounting 7.3- Disassembling customer shaft with shoulder 7.3.1- Disassemble the bolt and take out the parts as shown 7.3.2- -Use the disassemble set from SEVA and fasten the bold as shown bellow to take out the output shaft. For disassemble sets look the following pages. 38 Operating Instructions K Series Mounting 7.4- Disassembling customer shaft without shoulder 7.4.1- Disassembly the bolt and take out the parts as shown 7.4.2- Use the disassembly set from SEVA and fasten the bold as shown bellow to take out the output shaft. For disassembly sets look the following pages. 39 Operating Instructions K Series Mounting 7.5 Shaft Tightening Torque values are as shown 40 Type Bolt Tightening Torques [Nm] K.00 M6 8 K.10 M10 20 K.20 M12 20 K.27 M12 20 K.37 M16 40 K.47 M16 40 K.57 M20 80 K.67 M20 80 K.77 M24 200 K.87 M24 200 Operating Instructions K Series Mounting 7.6- Recommended shaft dimensions for KT...00 types b (max) b1 b2 b3 c f t1 Ød1 m1 M e1 s Ød t k6 e 45° u g (DIN 332) h Type s u e1 t1 M d d1 m1 K.00.. 19.7 10 22 5.5 M10 20 19 K.10.. 29.7 10 33 7.5 M12 30 K.20.. 34.7 12 38 9.5 M16 K.27.. 34.7 12 38 9.5 K.37.. 39.7 12 43 K.47.. 49.7 12 K.57.. 59.7 K.67.. f b b1 b2 b3 c g h e t 24 86 45 25 16 0.5 M6 18 22.5 6 29 36 90 50 20 20 1 M10 24 33 8 35 34 43 102 60 20 22 1 M12 30 38 10 M16 35 34 43 114 65 27 22 1 M12 30 38 10 11.5 M20 40 39 50 138 75 35 28 2 M16 38 43 12 53.5 13.5 M20 50 49 60 165 87 41 37 3 M16 38 53.5 14 16 64 17.5 M24 60 59 75 188 101 44 43 3 M20 44 64 18 69.7 16 74.5 19.5 M24 70 69 85 248 115 78 55 4 M20 44 74.5 20 K.77.. 89.7 20 95 24.5 M30 90 89 110 287 140 83 64 4 M24 52 95 25 K.87.. 109.7 20 116 27.5 M30 110 109 130 347 165 98 84 4 M24 52 116 28 5 41 Operating Instructions K Series Mounting 7.7- Assembling customer shaft with shrink disk 7.7.1- Loosen the bolts of the shrink disk 7.7.2- Use a solvent available in your market to clean all the dirt an oil from the shaft and shrink disk hollow. The surfaces must be free from oil or any dirt. The solvent must be removed from the surfaces as well. 42 Operating Instructions K Series Mounting 7.7.3- Insert the shaft and tighten the bolts as shown. Be sure that there is a clearance between the shrink disk shoulder and the hollow shaft shoulder of the gearbox. Type Bolt Tightening Torque [Nm] K.00 M6 12 K.10 M8 30 K.20 M8 30 K.27 M8 30 K.37 M8 30 K.47 M8 30 K.57 M10 59 K.67 M10 59 K.77 M12 100 K.87 M14 160 43 Operating Instructions K Series Mounting 7.8- Disassembling customer shaft with shrink disk 7.8.1- Loosen the bolts of the shrink disk and take out the shaft. 44 Operating Instructions K Series Mounting 7.9 Assembling Gear Unit with Torque Arm 7.9.1- The following connecting possibilities are available. Use one position which is the most suitable. 45 Operating Instructions K Series Mounting 7.9.2- Assemble the parts as shown bellow 8 4 1 2 3 4 5 6 7 8 9 9 5 11 46 11 10 8 9 10 11 8 9 1- Gear Unit 4- Spacer Ring 7- Torque Arm 10- Rubber Buffer 2- Assembled Shaft 5- Machine Extension 8- Spacer Ring 11- Bolt 3- Bolt 6- Nut 9- Nut Operating Instructions K Series Mounting 7.10- For the fixing bold position refer to the following dimensions h Std b1 R d b h1 h2 Ød b b1 T1 h3 d R b b1 T2 Std Type b b1 d R h KR273.10 56 28 17 22,5 160 KR373.10 74 37 22 27,5 200 KR473.10 78 39 22 27,5 250 KR573.10 105 52,5 26 42,5 KR673.10 110 55 26 KR773.10 155 77,5 KR873.10 160 80 T1 h1 T2 h2 h3 119 73 141 150 105 170 182 155 210 300 220 180 251 42,5 350 245 200 260 32 50 450 335 260 360 32 55 550 400 263 410 47 Operating Instructions K Series Mounting 7.11 K.00.. - K.20.. TORGUE ARM ASSEMBLY DETAILS h d r 48 b e d r e Type b h K.00.. K.10.. K.20.. 47 16 10 32 100 49.5 16 10 36 150 54.5 25 20 45 200 L1 L2 R1 R2 Operating Instructions K Series Mounting 7.12- Fitting output shaft elements Use the following illustration to assemble output shaft units 1) Gear shaft end 2) Thrust bearing 3) Coupling hub 7.13- Correct position of output shaft elements Output Shaft unit (transmission elements) must placed as close as possible to the gear unit so that the radial load is as closest as possible to the gear unit. 1) Hub 49 Operating Instructions K Series Mounting 7.14- Fitting Couplings 7.14.1- By fitting couplings be sure that there is some clearance between the two elements 7.14.2- By fitting couplings be sure that there is no eccentricity between the two shafts. 7.14.3- By fitting couplings be sure that the two shafts are not angular miss-aligned. 50 Operating Instructions K Series Lubrication 8- Maintenance and Inspections Under normal ambient and working conditions the gear unit should be checked according the following intervals. (For definition of normal working conditions refer to the product catalogue: “Selecting Gearbox” section); Every 3.000 working hours or every 6 months Item to check / replace Every 4.000 working hours Every 10.000 working hours or every 3 years Every 25.000 working hours x Check for oil leakage x Check for oil level x Check oil leakage from seal x (Change if necessary) Check Rubber buffer x (Change if necessary) Check Bearings Noise x (See Below for details) Change Mineral Oil Change Synthetic-PAO Oil x (See Below for details) x Change Sealing x Change Bearing Grease x Change Bearings x Check for noise Changes Oil change interval [Hours] 45000 40000 35000 30000 Mineral Synthetic PAO Synthetic PG 25000 20000 15000 10000 5000 0 70 80 90 100 110 120 130 140 150 160 Oil bath temperature (Celcius) For normal ambient conditions 70 degrees Celsius oil bath temp. should be taken as reference * For K series Mineral oil is used unless it is differently ordered. For oil type and quantities refer to the following tables. 51 Operating Instructions K Series Lubrication Notes 52 Operating Instructions K Series Lubrication 9- Lubrication 9-1 Oil Types DIN Lubricant 51517-3 Ambient Temperature [ºC] Dip Forced Lubrication Lubrication ISO VG Beyond Petroleum Castrol Energol GR-XP 680 Energol GR-XP 460 Energol GR-XP 320 Energol GR-XP 220 Energol GR-XP-150 Energol GR-XP 100 Energsyn SG-XP 680 Energsyn SG-XP460 Alpha SP 680 Alpha SP 460 Alpha SP 320 Alpha SP 220 Alpha SP 150 Alpha SP 100 Aphasyn PG460 Energsyn SG-XP320 Energsyn 220 SG-XP 220 Energsyn 150 SG-XP 150 Aphasyn PG320 Aphasyn PG 220 Aphasyn PG 150 Klüber Lubrication Mobil Shell Klüberoil GEM 1-680 N Klüberoil GEM 1-460 N Klüberoil GEM 1-320 N Klüberoil GEM 1-220 N Klüberoil GEM1-150 N Klüberoil GEM 1-100 N Klübersynth GH 6 -680 Klübersynth GH 6-460 Mobilgear 600 XP 680 Mobilgear 600 XP 460 Mobilgear 600 XP 320 Mobilgear 600 XP 220 Mobilgear 600 XP 150 Omala 680 Omala F460 Omala F320 Omala F220 Omala 150 Omala 100 Tivela S 680 Tivela S 460 Klübersynth GH 6-320 Klübersynth GH 6-220 Klübersynth GH 6 -150 Klübersynth GH 6 -100 Mobil Glygoyle 320 0 ... +50 – 680 -5 ... +45 – 460 -10 ... +40 +15 ... +40 320 -15 ... +30 +10 ... +30 -20 ... +20 +5 ... +20 220 150 -25... +10 +3 ... +10 100 -10 ... +60 – 680 -20 ... +50 – 460 -25 ... +40 +5 ... +40 320 -30 ...+30 0 ...+30 -35 ... +20 -5 ... +20 -40 ... +10 -8 ... +10 100 – – -10 ... +60 – 680 – – Klübersynth Mobil SHC Gear 680 GEM4-680 N – -20 ... +50 – 460 Enersyn EP-XF 460 Alphasyn T 460 Klübersynth Mobil SHC Gear 460 GEM4-460 N Omala HD 460 -25 ... +40 +5 ... +40 320 Enersyn EP-XF 320 Alphasyn T 320 Klübersynth Mobil SHC Gear 320 GEM4-320 N Omala HD 320 -30 ... +30 0 ...+30 220 Enersyn EP-XF 220 Alphasyn T 220 Klübersynth Mobil SHC Gear 220 GEM4-220 N Omala HD 220 -35 ... +20 -5 ... +20 150 Enersyn EP-XF 150 Alphasyn T 150 Klübersynth Mobil SHC Gear 150 GEM4-150 N Omala HD 150 -40 ... +10 -8 ... +10 100 – – Klübersynth Mobil SHC 627 GEM4-100 N – Food CLP -15 ... +25 Grade Oil NSF H1 +5 ... +25 320 – Optileb GT 320 +5 ... +40 320 – Mineral Oil CLP CLP PG Synthetic Oil CLP HC Biodegradable Oil CLP E -25 ... +40 Mineral Grease [ -20 .... +120 Working Temperature ºC ] Synthetic Grease [ -30 .... +100 Working Temperature ºC ] – Klüberoil 4 UH1-320 N Tribol BioTop Klübersynth 1418-320 GEM 2-320 Mobilgear 600 XP 100 Mobil Glygoyle 680 Mobil Glygoyle 460 Mobil Glygoyle 22 Tivela S 320 Tivela S 220 Tivela S 150 Mobil Glygoyle 100 – Mobil Glygoyle 30 Mobil SHC Cibus 320 Cassida Fluid GL-320 – – Energrease LS 3 Spheerol AP3 Centoplex 2 EP Mobilux EP 3 Alvania RL3 Energrease SY 2202 – Petamo GHY 133 N Mobiltemp SHC100 Cassida RLS 2 53 Operating Instructions K Series Lubrication 9.2- Changing the oil Refer to the nameplate to find out the correct oil filled inside the gearbox. -Do not mix synthetic oils with mineral oils which will cause serious damage to the gear unit. The oil change must be done by using the filling, draining and level plugs according the mounting position illustrated in section 9.4. - Extended, intensive contact with oils can lead to skin irritations. Avoid extended contact with oil, and clean oil off skin thoroughly. - Hot oil can cause scalding. When changing oil, protect yourself against contacting hot oil. 9.3.1-K.00. - K.20. Two - Three Stage Helical-Bevel Geared Gearboxes Oil Level Plugs * * M1 M2 * * M3 M4 * * M6 M5 *: For K002 and K003 this plug doesn’t exist. Please refer to oil quantities. Oil Quantities (lt) M2 M3 M4 M5 M6 K.00. 0.3 0,6 0,5 0.8 0.65 0.65 K.10. 0.55 0.8 0.85 1.1 0.8 0.8 K.20. 1.0 1.35 1.5 1.7 1.4 1.4 : ■ : Drain plug ∆ 54 M1 : Oil Filling and Vent plug ▲ Symbols Type : Oil level Operating Instructions K Series Lubrication 9.3.2 Three Stage K Series Oil Level Plugs M1 M2 M3 M4 M6 M5 Oil Quantities (lt) Type M1 M2 M3 M4 M5 M6 K.273 1,3 2,0 2,0 2,1 1,5 1,3 K.373 2,1 3,3 3,2 3,7 2,4 2,8 K.473 5,0 6,5 6,0 7,0 4,8 5,5 K.573 6,5 9,5 9,5 10 7,5 8,0 K.673 15 19 19 22,5 18 17 K.773 21 31 29 34 25 21 K.873 37 50 50 60 45 39 ■ : Drain plug ∆ : : Oil Filling and Vent plug ▲ Symbols : Oil level 55 Operating Instructions K Series Lubrication 9.3.3 Four Stage K Series Oil Level Plugs A A B B M2 M1 A B AB M4 M3 A A B M5 B M6 Oil Quantities (lt) Type M1 A/B M2 A/B M3 A/B M4 A/B M5 A/B M6 A/B K.374 2,1 / 0,25 3,3 / 0,25 3,2/ 0,25 3,7/ 0,25 2,4 / 0,25 2,8 / 0,25 K.474 5,0 / 0,4 6,5/ 0,4 6,0 / 0,4 7,0 / 0,4 4,8 / 0,4 5,5 / 0,4 KR574 6,5 / 0,5 9,5 / 0,5 9,5 / 0,5 10,0 / 0,5 7,5 / 0,5 8,0 / 0,5 K.674 15,0 / 0,9 19,0 / 0,9 19,0/ 0,9 20,5 / 0,9 18,0 / 0,9 17,0 / 0,9 K.774 21,0 / 1,0 29,0 / 1,0 29,0 / 1,0 34,0 / 1,0 25,0 / 1,0 21,0 / 1,0 K.874 37,0 / 2,15 50,0/ 2,15 50,0 / 2,15 60,0 / 2,15 45,0 / 2,15 39,0 / 2,15 ■ : Drain plug ∆ 56 : : Oil Filling and Vent plug ▲ Symbols : Oil level Operating Instructions K Series Lubrication 9.3.4 Five-Six Stage K Series Oil Level Plugs A B A B M2 M1 A B B A M3 A M4 B A B M6 M5 Oil Quantities. (liter) Type M1 A/B M2 A/B M3 A/B M4 A/B M5 A/B M6 A/B K.275-276 1,3 / 0,4 2,0 / 0,6 2,0 / 0,5 2,1 / 0,6 1,5 / 0,5 1,3 / 0,4 KR375-376 2,10 / 0,65 3,3 / 0,9 3,2 / 0,7 3,7 / 0,9 2,4 / 0,7 2,8 / 0,7 K.475-476 5,0 / 1,2 6,5 / 2,0 6,0 / 2,0 7,0 / 2,0 4,8 / 1,4 5,5 / 1,4 K.575-576 6,5 / 1,9 9,5 / 3,3 9,5 / 3,0 10,0 / 3,3 7,5 / 2,6 8,0 / 2,6 K.675-676 15,0 / 2,0 19,0 / 3,3 19,0 / 3,1 20,5 / 3,4 18,0 / 2,8 17,0 / 2,6 K.775-776 21,0 / 2,0 31,0 / 3,4 29,0 / 3,1 34,0 / 3,4 25,0 / 2,8 21,0 / 2,6 K.875-876 37,0 / 2,0 50,0 / 3,4 50,0 / 3,1 60,0 / 3,4 45,0 / 2,8 39,0 / 2,6 ■ : Drain plug ∆ : : Oil Filling and Vent plug ▲ Symbols : Oil level 57 Operating Instructions K Series Lubrication 9.4- Mounting Positions M2 M1 M5 M6 M4 M3 Figured mounting positions of M1 to M6 are determined as reference of directional position of the gearbox. Mounting surfaces are not binding. 58 Operating Instructions K Series Troubleshooting Guide 10- Troubleshooting Guide All the operations bellow must be done by authorized and skilled mechanician / electrician. Inform SEVA before making any change to the gearbox. Only oil change is allowed to change without information. Do not make anything if you are not sure what you are doing and contact SEVA. Any change or operation done without the information of SEVA is in your own risk and responsibility and SEVA does not take any responsibility. ID Problem Observation Remedy 001 Gearbox Does Not Start Up You hear no noise and shaft is not turning. You are not using any driver or frequency inverter. Please Check the voltage supply and frequency of your electric connection. They must be in accordance with the nameplate of the motor. Observe motor manufacturers start up manual. Still does not work go to ID 100 Gearbox Does Not Start Up You hear no noise and shaft is not turning. You are using frequency inverter or driver. Please observe the frequency inverter/driver manual. Check the motor by supplying direct voltage to see if the problem is on your driver/frequency inverter. Still does not work go to ID 001. Gearbox Does Not Start Up You hear some noise but both motor shaft and gearbox shaft is not turning. You are not using any driver /frequency inverter or braked motor. Please Check the voltage supply and frequency of your electric connection. They must be in accordance with the nameplate of the motor. Observe motor manufacturers start up manual. Still same problem, the load may be too high for the chosen motor. Loosen the gearbox from the load/torque. If it works than the starting torque is insufficient and higher motor power is needed. For monophaze motors, check the starting up condansator and running condansator as well. If nothing helps go to ID 100 You hear some noise but both motor shaft and gearbox shaft is not turning. You are using driver or frequency inverter. Please observe the frequency inverters or drivers manual. To see if the problem is on your driver or frequency inverter take out the driver/frequency inverter and make direct voltage supply to the motor according the motors nameplate. Still does not work go to ID 100 002 003 004 005 Gearbox Does Not Start Up Gearbox Does Not Start Up You hear some noise but both motor shaft and gearbox shaft is not turning. You are using braked motor Please Check the voltage supply and frequency of your electric connection. They must be in accordance with the nameplate of the motor. Observe motor manufacturers start up manual. Be sure that the brake is working. Observe the brake manufacturers Manuel. If brake is supplied from SEVA observe this Manuel for correct brake wiring diagram. If still not work supply the brake with voltage according its nameplate directly. For example 198V DC. You will hear a clicking noise explaining that the brake is opening. If you hear no noise the brake or rectifier is defect. If you hear the clicking noise the brake is working. You should this clicking noise by your normal electric connection as well. By supplying direct supply to the brake you hear the clicking noise and at same time you supply the motor with direct voltage according to its name plate and still same problem, the load may be too high for the chosen motor. Go to ID 003. 59 Operating Instructions K Series Troubleshooting Guide ID Observation Remedy Gearbox Does Not Work in Low Speeds/ frequencies. You are using frequency inverter. For very low speeds the frequency inverters frequency is lowering down. For very low frequencies the inverter parameter and motor parameter must be optimise. Also for low speeds the efficiency of the gearbox may vary too much. Specially for worm-gearboxes. The recommended frequency range is 20-70 Hz for worm-gearboxes and 10-70 Hz for Helical Gear Boxes. Use Higher motor power and Frequency inverter or change ratio of gearbox to work inside the recommended range. Gearbox Does Not Start Mornings or After Long Time Stop. Ambient Temperature is below +5 Celsius The oil is not in accordance with your working conditions. Change to lower viscosity oils. Observe this Manuel for using the correct oil. Working in higher ambient temperatures is an other solution if possible. If still same problem you need higher motor power. You are using Worm Gear Box and ambient tenp is lower than +40 Celsius Measure the surface temp. using a temperature measuring device under full load. If the temp is under +80 Celsius this will make no harm to the gearbox and is normal. All ATEX conforming gearboxes and standard worm gearboxes are designed to work under max. +120 Celsius. If higher than +120 Celsius and using ATEX conforming gear box immediately stop the system and contact SEVA. Go to ID 100. If not ATEX confirming check the oil type and oil quantity/ level according your mounting position and check the nameplate mounting position. If nameplate mounting position does not fit the actual position go to ID 100. Gearbox is Heating Up too Much You are using Helical Gear Box. Ambient temp is lower than +40 Celsius Measure the surface temp. using a temperature measuring device under full load. If the temp is under +80 Celsius this will make no harm to the gearbox and is normal. All ATEX conforming gearboxes are designed to work under max. +120 Celsius. If higher than +120 Celsius and using ATEX conforming gear box immediately stop the system and contact SEVA. If not ATEX gearbox the gearbox is designed to work under max. +80 Celsius. If higher than +80 Celsius check the oil type and oil quantitiy/level according your mounting position and check the nameplate mounting position. If nameplate mounting position does not fit the actual position go to ID 100 Gearbox is Heating Up too Much Ambient Temp is over +40 Celsius Standard Gearboxes are designed to work under +40 Celsius. ambient temperature. If ambient temp is higher than +40 Celsius special solutions/gearboxes are required. Please contact SEVA 011 Gearbox is noisy Nois is regular continious 012 Gearbox is noisy Nois is random 006 007 008 009 010 60 Problem Gearbox is Heating Up too Much Check Your moving parts for noise. Disassemble the gearbox and run without load. If you still hear the noise motor bearings or gearbox bearings are defect. Change bearings. Go to ID 100 Check Your moving parts for noise. Disassemble the gearbox and run without load. If you hear still the noise the oil may has some particles inside. Change the oil and look for small particles. If metal particles are found the gearbox may have some damage. Go to ID 100 Operating Instructions K Series Troubleshooting Guide ID Problem Observation Remedy 013 Gearbox is noisy Regular nocking noise Check Your moving parts for noise. Disassemble the gearbox and run without load. If you still hear the noise one of the gears inside is defect. Go to ID 100 014 Gearbox is noisy Regular up and down noise Check the output-shaft connection elements for run out. Take out the output shaft element and run without load. If you still hear the noise one of the gears has run out problem. Go to ID 100 Gearbox is noisy Gearbox is with braked motor and noise is coming from the brake side randomly. Low randomly clicking noise may come from the brake disk which is normal. If noise level is disturbing the brake may be defect or brake clearance is not adjusted. Go to ID 100 016 Gearbox is noisy You are using frequency inverter and the noise level is changing according your speed. The frequency inverter parameters are not optimised for the frequency range or motor you are using. Observe the frequency inverters manual. If still same problem change the ratio of gearbox. Go to ID 100 017 Oil is Leaking Oil Leakage from Seal If ambient Temp is over +40 Celsius or none stop work over 16 hours please change the top plug with a breather plug. Observe this manual for using breather plug. If this is not your case the seal could be damaged. Go to ID 100 Oil is Leaking Oil Leakage from Plug If you are using breather plug be sure it is in the correct place. This is the most top plug position according your mounting position. The plug may be not tight enough. There are some particles under the plug rubber surface. Clean and tighten the plug. If still same problem go to ID 100 019 Oil is Leaking Oil Leakage from Housing Observe exactly where the oil is coming out. It could be seal or plug point where it comes out and leaks over the housing. If this is your case go to ID 018/019. If you are sure oil comes out from housing than housing has some micro split / crack. Go to ID 100 020 Oil is Leaking Oil Leakage from Cover The sealing liquid under cover is split/defect. Disassemble the cover and put new sealing liquid. Assemble the cover and tighten the bolts. If still same problem go to ID 100 021 Gearbox is moving regularly on its mounting point You are using Torque Arm 022 Gearbox is moving randomly on its mounting point You are using Torque Arm 023 Motor is heating up Motor is running over its nominal current 023 Motor is heating up Ambient is dusty 015 018 The movement of gear box is because of the run out of the shaft which you assemble the gearbox. This has no bad affect or harm to the gearbox and is normal unless you are using torque arm. The movement of gear box is because of the run out and clearance of the shaft which you assemble the gearbox. Check the clearance of the assembling shaft and the clearances on your machine. This has no bad affect or harm to the gearbox unless you are using torque arm. The motor power is not enough or some overload to the motor is possible. The motor may be defect. Go to ID 100 Check the motor Fan Hub and rips. They must be free of dust. If you are using forced external fan, check if it is working. If you are using frequency inverter in low speeds and you do not have forced external fan, you may need forced external fan. Go to ID 100 61 Operating Instructions K Series Troubleshooting Guide ID Problem Observation Remedy 024 Motor is running but Gearbox shaft does not turn Scratching noise comes out Some part (key, gear) may be defect inside gearbox. Go to ID 10 You are using chain drive or pinion gear The radial load or polygon effect of the chain may have caused the damage. Check also if the assembly bolts are loosened or the plate you assemble the gearbox is rigid enough. Check if you are using the correct diameter of chain drive and you are not exceeding max. Allowed radial load. Check the position of your output element and re-calculate your radial load and check if this fit to the maximum allowed radial load. Go to ID 100 You are using chain drive or pinion gear The radial load or polygon effect of the chain may have caused the damage. Check also if the assembly bolts are loosened or the plate you assemble the gearbox is rigid enough. Check if you are using the correct diameter of chain drive and you are not exceeding max. allowed radial load. Check the position of your output element and re-calculate your radial load and check if this fit to the maximum allowed radial load. Go to ID 100 025 Gearbox Housing is Defect 026 Output Shaft is Defect 027 Gearbox is stopping too late You are using braked motor Please check the wiring diagram of the brake. There are two different kind of brake wiring diagram. The standard gearbox delivered from our factory is set to delayed braking. For sudden braking check the wiring diagram. 028 Gearbox is starting too late You are using braked motor For fast opening of big brakes (over 100 Nm), you may need shock transformators which is supplied by SEVA. Go to ID 100 No self solution found Please contact SEVA Service point. See on the back side of this manual. Changing mechanical parts of gearbox can only be done by SEVA or with information of SEVA. Any change without informing SEVA will cancel the warranty, manufacturer declarations and SEVA will take no responsibility. 100 Service Required 11- Disposal If your product is no longer of use and you wish to dispose of it, refer to the instructions here. If you have any questions regarding ecological disposal methods, please consult our service points given on the backside of this Manuel. 11.1- Disposal of Oil Lubricants (oil and greases) are hazardous substances, which can contaminate soil and water. Collect drained lubricant into suitable receptacles and dispose of it according to the valid national guidelines. 11.2- Disposal of Sealings Remove the sealing rings from the gear reducer, and clean them of oil and grease residues. Dispose of the sealings as composite material (metal/plastic) 11.3- Disposal of Metal Divide up the remainder of the gear reducer into iron, aluminium, non-ferrous heavy metal if possible Dispose of it according to the valid national guidelines. 62