1
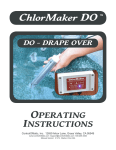
Mega-ChlorMaker
DO - DRAPE OVER
OPERATING
INSTRUCTIONS
ControlOMatic, Inc. 12659 Arbor Lane, Grass Valley, CA 95949
www.ControlOMatic.com [email protected] 530-205-4520
Manual Version: 4/1/14 Made in the USA
TM
INTRODUCTION
Mega-ChlorMaker DO is a semi-automated, salt water chlorine generation system specifically designed for Swim
Spas and Above Ground Pools up to 10,000 Gallons. Mega-ChlorMaker DO generates chlorine from a small
amount of ordinary salt (Sodium Chloride, NaCl) dissolved in the spa water. The amount of salt added is very small
in relation to the volume of the water in the spa. It’s about 90% less concentration than ocean water and below the
typical taste level of most humans. The small addition of salt also benefits users by providing a softening effect on
the water, leaving hair and skin feeling smoother and healthier than with traditional sanitizing products. Only 2.5
cups of salt per 100 gallons of water is all it takes for Mega-ChlorMaker DO to produce fresh, pure chlorine leaving
your water clean and clear day after day.
IMPORTANT SAFETY INSTRUCTIONS
READ & FOLLOW ALL INSTRUCTIONS
SAVE THESE INSTRUCTIONS
When installing and using this electrical equipment, basic safety precautions should always be followed,
including the following:
WARNING: To reduce the risk of injury, do not permit children to use this product unless they are closely supervised by at all times.
WARNING: Use Mega-ChlorMaker DO only according to these instructions. Any modification or misuse of this product will void the warranty.
WARNING: Install Mega-ChlorMaker DO in accordance with all national and local electrical, plumbing, safety, and other applicable codes.
WARNING: Connect Mega-ChlorMaker DO to a GFCI (ground fault circuit interrupt) or GFI (ground fault inter
rupt) protected VAC power source only.
WARNING: Protect the power supply and outlet from exposure to the elements including direct sun, rain, snow, condensation, etc.
WARNING: DO NOT use with extension cord. Injury may result.
WARNING:
DO NOT insert objects into, or tamper with Mega-ChlorMaker DO’s body in any way. Inserting metal objects into the body may cause damage and void the warranty.
WARNING:
DO NOT operate Mega-ChlorMaker DO if damaged in any way.
WARNING: DO NOT pull on the cord to disconnect the Power Supply from power source. Do not allow the cord to rest on sharp edges or corners or to be walked upon. Do not drop, throw, or otherwise rough handle Mega-ChlorMaker DO.
WARNING:
DO NOT handle the unit during chlorine production (visible bubbling). Slight discomfort may be felt in cuts, sores, or sensitive skin areas due to chlorine concentration and the electrolysis process. Stop chlorine production by either removing Mega-ChlorMaker DO from the water by lifting the cord (do not grasp the housing), or by unplugging the power supply from the power source.
WARNING: Unit must be disconnected from power source before performing any maintenance or
troubleshooting operations.
WARNING:
Disconnect, remove, and store or Mega-ChlorMaker DO indoors when spa has been winterized or drained.
CAUTION:
Leave spa cover open at least 30 seconds to allow trapped gases to escape prior to use.
CAUTION:
If unit is not working properly, or has been damaged in any way, contact technical support immediately at 1-530-205-4520.
CAUTION:
Measure water quality parameters and adjust if necessary prior to each spa use.
CAUTION:
Make sure all spa electrical components and power cords have been thoroughly inspected by a
licensed electrician prior to using Mega-ChlorMaker DO.
WATER PREPARATION & MAINTENANCE
To ensure proper operation, the spa must be drained, rinsed, refilled with fresh water, and balanced to the recommended levels indicated in this section before installing the product. Use the test strips to measure water chemistry and verify that the water has been balanced properly. Replacing the filter is recommended but not required
unless the spa was previously sanitized with a hydrogen peroxide system. The combination of hydrogen peroxide
and chlorine may cause gum-like build up, water discoloration, and skin irritation.
It is important to properly maintain your spa for the health and safety of its users. Spas are unique in both size
and usage patterns. Mega-ChlorMaker DO will significantly reduce the amount of spa maintenance required, but
chemical check-ups including chlorine levels and PH are recommended before each use. Proper water maintenance will prolong the life of Mega-ChlorMaker DO and the spa. The following table describes generally accepted
optimum water chemistry for portable spas.
PARAMETER
RECOMMENDED LEVEL
Free Chlorine
3.0 to 5.0 PPM
PH Balance
7.2 to 7.6
Total Alkalinity
80 to 120 PPM
Calcium Hardness
300 to 400 PPM
It is recommended that chlorine and PH levels are checked before each use, or at least once per week when not in
use. Alkalinity, Calcium Hardness, and Salt Concentration should be checked at least once per month. It is recommended that the spa is manually shocked after high usage (example: after a party with multiple users), or biweekly
if used frequently. Always remember to leave the spa circulating for several hours before retesting. Phosphates in
the spa water will increase the demand for chlorine and will reduce the life expectancy of the generator. Remove
Phosphates upon start up and each month there after. Phosphate Remover can be purchased at any local Pool &
Spa supply store.
WARNING: Consistent chlorine levels above 5.0 PPM or consistent salt concentration levels above 5,000
PPM may lead to corrosion of metal components in the spa.
WARNING: Consistently low Calcium Hardness levels below 150 PPM may lead to spa equipment damage
and failure. Make sure Calcium Hardness levels are within the recommended range above.
SALT REQUIREMENT
Mega-ChlorMaker DO can generate both Chlorine or Bromine. It all depends on which sanitizer the user prefers. Use Sodium Chloride Salt if you prefer Chlorine Generation and Sodium Bromide Salt if you prefer Bromine. Please Note: Each salt requires a different level of salinity for Mega-ChlorMaker DO to operate effectively.
WARNING: SALT ONLY NEEDS TO BE ADDED ONCE AND BROUGHT TO THE APPROPRIATE SALT LEVEL
(BLUE LIGHTS) PER SPA WATER CHANGE. DO NOT KEEP ADDING SALT (See Salt Level Indicator Section
Below).
CHLORINE SALT - SODIUM CHLORIDE (NaCl): Raise Salt Level to 1,500 to 2,000 PPM (Parts Per Million).
Approved salts include “pool salt” made for salt water chlorine generating systems, canning and pickling salt from
your local market, and some water softener salts that are 99% pure sodium chloride or better. These approved
salts are generally available at pool & spa supply stores, home improvement centers and On-Line stores in a
variety of sizes. Never use rock salt or salts that have more than 1% “anti-caking agents”, “yellow prussiate of
soda”, or “sodium ferrocyanide”. These compounds may cause surface staining. Please use chart below.
BROMINE SALT - SODIUM BROMIDE (NaBr): Raise Salt Level to 2,500 to 3,000 PPM (Parts Per Million).
There are several manufacturers of Sodium Bromide Salt to choose from. Please make sure the Sodium Bromide you purchase is 99% pure or better. Ask your local pool and spa dealer for assistance. Please use chart
below.
Chart is Based on 100 Gallons or 379 Liters of Spa Water
SALT TYPE
POUNDS
CUPS
99% Pure Sodium Chloride (NaCl) - Pool Salt, Water Softener &
Other Coarse Grain Salts
1.5
2.5
99% Pure Sodium Bromide (NaBr) Fine Grain Salt
2.5
4.0
The amount of salt to add and dissolve is dependent upon the size of the spa. Determine the volume of water in
gallons or liters by checking the spa owner’s manual or use any internet volume calculator.
99% Pure Sodium Chloride (NaCl) Coarse Grain Example For a 350 Gallon Spa: Divide 350 Gal by 100 Gallons
then multiply answer by 2.5 Cups. (350 / 100 = 3.5 x 2.5 = 8.75 Cups)
99% Pure Sodium Bromide (NaBr) Fine Grain Example For a 1,326 Liter Spa: Divide 1,326 Liters by 379 Liters
then multiply answer by 4.0 Cups. (1,326 / 379 = 3.5 x 4.0 = 14 Cups)
Simply pour the recommended amount of salt directly into the spa water to bring the concentration to the recommended level. Turn the spa jets on to help dissolve the salt. Warmer water will aid in dissolving the salt faster. If
the water is cold it may take several hours for the salt to fully dissolve.
WARNING: Do not turn Mega-ChlorMaker DO on until all the salt has fully dissolved.
SALT LEVEL INDICATOR
This Salt Water System will indicate if the salt level is within the recommended range listed above. It will indicate
proper salt levels by showing solid BLUE lights WHILE PRODUCING CHLORINE. When NOT producing chlorine
it will be in Standby Mode which is indicated by a quick GREEN flash every 10 seconds (see below).
Solid RED & GREEN lights: Salt Level Too High (Cell Shuts Off To Protect Cell & Spa) - Dilute Salt
Solid GREEN lights WHILE producing chlorine: Salt Level On The High Side
Solid BLUE lights WHILE producing chlorine: Salt Level Within Normal Range
Solid RED lights WHILE producing chlorine: Salt Level On The Low Side
STANDBY MODE: Quick GREEN flash every 10 seconds when NOT producing chlorine (Very Normal)
IMPORTANT: It is important to occasionally check that the lights are indicating proper salt level. Always
use Salt Test Strips to check the salt level and adjust the water according to the Test Strips. If Test Strips
Show Too High: remove some water from the spa and replace with fresh water. Re-test and adjust as necessary. If Test Strips Show Too Low: Add salt, re-test and adjust as necessary.
PRODUCT INSTALLATION
Mega-ChlorMaker DO is equipped with a 110/220 VAC Auto-Sensing Power Supply allowing Mega-ChlorMaker DO
to be installed on almost any spa. Please follow the installation instructions below.
1.
Prepare Spa For Installation: Shut down main power to spa and drain water completely. Open access
panel to the spa exposing the spas plumbing area.
2.
Find Power Supply Location & Route Power Supply Cable (DO NOT FASTEN POWER SUPPLY TO THE
CABLE OR TO POWER SOURCE AT THIS POINT): Find the power source location and rout the power supply cable from the control panel to the power source. The black cable clips can be used to secure the cable
in place. IMPORTANT: Make sure the power source is GFI Protected and is protected by a weather protective cover. Single Gang and Double Gang weather protective covers can be purchased at any local hardware
store. Please see weather protective cover example in the picture below.
3.
Find Skirting Location For Control Panel: Find a convenient location on the skirting just below the fiberglass lip of the spa. See Picture Below. Rout the Cell Cable from the control panel to the point where the cell
will drape into the spa. The black cable clips can be used to secure the cable in place.
PRODUCT INSTALLATION CONTINUED
4.
Remove Top Cover To Control Panel: IMPORTANT: First make sure power supply is unplugged from
power source. Then remove the top cover of the control panel by unfastening the 4 screws as shown in the
picture below allowing the top cover to freely separate from the bottom section of the control panel.
Unfasten Screws
Unfasten Screws
Watertight Cable Grips
5.
Fasten Bottom Section Of Control Panel To Skirting: Locate the two fastening holes as shown in the picture below. Use the supplied screws to securely fasten the bottom section of the control panel to the skirting.
Fastening Holes
6.
Fastening Holes
Fasten Top Cover of Control Panel: Make sure the black rubber gasket is secured in the grove on underside of the top cover. Replace the top cover of the control panel and securely tighten the 4 panel cover
screws. Tighten the watertight cable grips at the bottom of the control panel. WARNING: Do not remove
power cable or cell cable from the connectors inside the control panel. Should cables become disconnected, make sure they are reconnected with the correct polarity. Reversing will damage the
control panel.
PRODUCT INSTALLATION CONTINUED
7.
Place Generating Cell In Spa: The cell can now be placed in the spa’s main body of water. IMPORTANT:
The cell must be fully submerged in the water. The deeper the cell rests in the water provides better dispersion of chlorine throughout the water.
8.
Refill Spa, Balance Water & Add Salt: Refill the spa with water, balance the water, and pour/dissolve the
recommended amount of salt in the water (See “Salt Requirement” Section). Please make sure the salt is
fully dissolved before proceeding to the next step.
9.
Fasten Power Supply to Power Supply Cable: Attach the cord’s watertight connector to the black power
supply and make sure the watertight connector is turned clockwise and the nut is hand tight. VERY IMPORTANT: Do not reverse polarity of the cords connector to the power supply connector - doing so will
void the product warranty. See the diagram below and make sure the ridge and grove at the bottom of
each connector line up appropriately before securing the connection.
10. Fasten Power Supply to Power Source: Plug the black power supply into the 110VAC or 220VAC power
source. Mega-ChlorMaker DO will begin the chlorine generation process.
CHANGING POWER LEVELS
Mega-ChlorMaker DO is designed with 10 power level settings. Mega-ChlorMaker DO is set to power level 3
straight from the factory. Please follow the steps below to increase or decrease the power from the factory default
power level 3.
VIEW THE CURRENT POWER LEVEL SETTING
1. Simply press the DOWN arrow button once and count the white flashes. Each flash represents a power level.
For example: 3 white flashes = power level 3, 7 white flashes = power level 7, and so on.
CHANGE POWER LEVELS
1. Press both the UP arrow and the DOWN arrow at the same time. The White Light will turn on solid indicating
that it is in power change mode.
2. Then press UP arrow to increase power. The GREEN light will flash each time the UP arrow is pressed. Or
press the DOWN arrow to decrease power. The RED light will flash each time the DOWN arrow is pressed.
3. When finished do not press any buttons for 3 seconds. The White light will flash (count the flashes) confirming
the new power level setting.
STANDBY MODE
Mega-ChlorMaker DO operates in 3 hour cycles. Which means it will be
generating chlorine for a period of time in that 3 hour cycle depending on the
power level setting. When Mega-ChlorMaker DO is not generating chlorine
(off) it is in Standby Mode. Standby Mode is indicated by a quick GREEN
flash every 10 seconds. Mega-ChlorMaker DO will remain in Standby Mode
until it engages its next 3 hour cycle. To start chlorine production when in
Standby, simply press the Boost button and Mega-ChlorMaker will resume
chlorine production.
SELECTING THE RIGHT POWER LEVEL
Selecting the right power level requires some testing and adjustment. There are many factors that affect the
sanitizing needs of a spa such as: Frequency of spa use, number of people, if there is an Ozone Generator, spa
temperature, last drain and refill, etc. However, after the testing and adjustment period, Mega-ChlorMaker DO will
take care of your sanitation needs day after day. As a starting point, please program Mega-ChlorMaker DO and set
the power level to the general recommendations shown in the chart below.
Power
Level
Mega-ChlorMaker DO
1 to 3
Less than 2000
4
2000 to 3000
5
3000 to 4000
6
4000 to 5000
7 to 10
5000 and above
Spa (Gallons)
Test the Chlorine Level with test strips after 1 to 2 days. When testing, the best readings are always done about an
hour after restarting Mega-ChlorMaker DO by simply pressing the up or down arrow. If the chlorine level is LOW,
increase the power level by one level. If the chlorine level is HIGH decrease the power level by one level. Wait a
day or so after this initial adjustment, re-test and repeat as necessary until a consistent chlorine residual has been
achieved. If the chlorine level is VERY high or VERY low, adjust by 2 levels, as needed.
IMPORTANT NOTE: If the chlorine level is zero 24 hours after installation, the initial chlorine demand
on the spa may be above what Mega-ChlorMaker DO can produce to break away from zero. In this case,
manually add chlorine or shock (according to the company product label) to assist in the initial set-up.
If spa usage drops (vacation, winter, etc), it is important to re-set the power level down several levels. If usage
significantly increases, (return from vacation, etc) it is important to adjust the power level up accordingly. Always
retest and adjust the power level as needed.
BOOST MODE
Boost Mode is designed to replenish chlorine that was just used during the last spa use. Activating Boost Mode will
take Mega-ChlorMaker DO out of regular production mode or standby mode and re-start the production of chlorine
according to the following table. To activate Boost Mode simply press the Boost Mode Button. The Salt Light will
begin flashing indicating that Mega-ChlorMaker DO is engaged in Boost Mode.
Power
Level
1
2
3
4
5
6
7
8
9
10
Normal Time
(Minutes)
2
7.5
15
30
45
60
90
120
150
180
Boost Mode Time
(Minutes)
8
30
60
120
180
180
180
180
180
180
TROUBLE SHOOTING
It is always a good idea to revisit the user manual to make sure installation or maintenance steps were not overlooked before referring to the trouble shooting section.
Problem
Consistently Low
Chlorine
Possible Causes
Corrective Action
Power level too low
Increase the power level
Plates need cleaning
Soak the unit in Vinegar for 30 minutes
Low salt level
Adjust the salt level as necessary - use test strips
Large bather load
Additional chlorine or shock may be needed
Just doesn’t keep up
Remove organic material, such as leaves, etc.
Clean the filter
Remove Phosphates
Shock the water
Consistently High
Chlorine
Power level too high
Lower the power level
No Chlorine (Solid
RED & GREEN
Lights)
Salt level may be too high Dilute the spa water by draining some of the spa water and
and engaged the automat- refilling with fresh water.
ic shut down feature.
Plates Are Dirty
With White Or
Scale Build Up
Hard water, high calcium
and minerals in water.
Soak the cell in vinegar or diluted acid for 30 minutes. Reduce calcium level in water.
Mega-ChlorMaker
Go To
www.ControlOMatic.com
For More Product
Information
TM
LIMITED WARRANTY
Models: This warranty applies to Mega-ChlorMaker DO models referenced as “System”.
ControlOMatic, Inc. Warrants the system to be free of all defects in material and workmanship for one (1) year from
the original purchase date. The system includes the power supply unit, cable, electronics, and electrolytic generator for residential use only. The product must be installed properly and used in accordance with this manual and all
applicable local codes and regulations. This warranty is not transferable.
In no event shall ControlOMatic, Inc. be liable for consequential damages for breach of this warranty. Some states
do not allow the exclusion or limitation of incidental or consequential damages, so the above limitation or exclusion
may not apply. The warranty does not cover any loss or damage to the product due to improper installation, product
abuse, misuse, negligence, or improper maintenance of the system, pool or spa. The warranty does not cover any
loss or damage to the spa, spa components, users, or anything outside the system due to system failure. Purchaser assume all responsibility for using the system.
This warranty does not apply to any costs, repairs, services, damages, claims or losses for all of the following: Service calls to install, re-install or correct the installation of the product, or to explain the usage of the system to the
buyer, repairs necessitated by use other than normal home use, damage resulting from misuse, unintended use,
unforeseen use, non pool or spa use, abuse, accidents, alterations, improper installation, or corrective work necessitated by repairs made by anyone other than an authorized service technician.
THE FOREGOING WARRANTIES ARE CONTINGENT ON THE PROPER USE OF THE SYSTEM IN ACCORDANCE WITH THESE INSTRUCTIONS AND SPECIFICATIONS AND SHALL NOT APPLY TO ANY SYSTEM
THAT HAS BEEN REPAIRED OR MODIFIED BY PERSONS OTHER THAN THE MANUFACTURER.
THE EXPRESS WARRANTIES SET FORTH IN THIS AGREEMENT ARE IN LIEU OF ALL OTHER WARRANTIES, EXPRESS OR IMPLIED. MANUFACTURER HEREBY SPECIFICALLY DISCLAIMS ANY OTHER REPRESENTATIONS OR WARRANTIES, EXPRESS OR IMPLIED, INCLUDING WITHOUT LIMITATION ANY WARRANTIES OF MERCHANTABILITY OR FITNESS FOR A PARTICULAR PURPOSE.
IN NO EVENT WILL MANUFACTURER’S LIABILITY FOR ANY CLAIM, WHETHER IN CONTRACT, TORT OR
UNDER ANY OTHER THEORY OF LIABILITY, EXCEED THE AMOUNT NECESSARY TO REPAIR OR REPLACE THE COVERED SYSTEM.
Damage to the system from improper water maintenance is not covered in this warranty.
Should any problem develop during the warranty period, go to: www.controlomatic.com to obtain the proper technical support phone number. You will need the serial number visible in the clear part of the system body. You may be
required to return the defective component, and if necessary, the component will either be repaired or replaced.
PRODUCT REGISTRATION
Please fill out the information below and send to ControlOMatic to properly register your product. Or register your product on line at www.ControlOMatic.com.
First Name:
Last Name:
Address:
City:
Phone:
State / Province:
Postal Code:
E-Mail:
Please copy this section and forward a copy to
ControlOMatic, Inc.
12659 Arbor Lane
Grass Valley, CA 95949
Or Register At www.ControlOMatic.com
Product Model:
Serial Number: