1
8130
ELECTRONIC ENTRY DEVICE
USER OPERATING INSTRUCTIONS
The following instructions cover the user operations of the
8130 Electronic Entry Device.
FEATURES
• Keypad Entry for Electronic Lock
• LCD Display Area for Time Delay/Open Window and
Penalty Display
• Jumper Switches to Change Time Delay Counting Direction
• Compatible with the following lock code:
8130
ComboGard (33E V2.13)
ComboGard Pro (39E V1.01)
AuditGard (66E LGA V1.20)
TimeGard (TL11 V1.30 and V2.22)
8130 ENTRY DEVICE RESPONSES
•
•
•
•
Valid Code Entry - Two beeps
Invalid Code Entry - Three beeps
Input Disabled (AuditGard or TimeGard) - Four beeps
Timelock Denied Access (TimeGard) - One long beep (2 seconds)
...
DEVICE SETUP
At first power up with a programmed lock (or after battery replacement), the entry device
must “learn” the settings of the lock to which it is attached.
Note: If the entry device has already been attached to the lock, powered up (first time or
with replacement battery), and cycled through a time delay/open window cycle, you do
not need to complete the device setup at this time.
1. Connect the cable from the 8130 Entry Device into the connector port marked ENT on
the programmed lock.
2. If the battery has not yet been installed, remove the battery cover and connect a new
9-Volt Alkaline battery to the battery connector. Use of a high quality, name brand
battery (Energizer® or Duracell®) is recommended.
Note: Once the battery is connected, the system will run a self check of the display
and buzzer.
3. Place the battery back in the battery compartment and put the cover back in place.
4. Initiate a time delay opening of the lock by entering a valid combination. The time delay
period will start and you must let the full delay and opening period complete for
the entry device to “learn” the lock settings. DO NOT interrupt the time delay/
open window cycle.
Note: Regardless of the current jumper switch settings, the time delay cycle will
count up the first time.
(P/N) 737.098 Rev A • 04/09
© copyright 2009
Kaba Mas LLC
Page 1 of 4
OPEN LOCK
1. Enter valid combination.
2. For Dual User access, enter the second valid combination.
3. Open the container within 4 seconds.
TIME DELAY DISPLAY
The time display will operate during a time delay period and opening window. The time
display format is mm:ss (minutes and seconds.) The default device operation is set to
count down for the time delay period and count up for the opening window. To change
the counting direction, see section on CHANGE COUNTING DIRECTION.
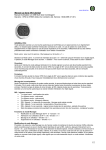
Figure 1
CHANGE COUNTING DIRECTION
Two jumper switches are available on the control card of
the entry device to control the counting direction of the LCD
display for time delay and open window.
No jumper = Count up
Jumper on = Count down
The device is shipped with a jumper on the switch for time
delay and no jumper on the switch for the opening window
as shown in the photo (Figure 1); therefore, the default status
of the device is that time delay counts down and the opening
Jumper On
window counts up.
- Delay
An additional jumper is included in the hardware pack with
switch =
the entry device. You can change the counting direction(s)
Count Down
by adding another jumper, by switching the position of the
original jumper, or by removing the original jumper.
No Jumper
- Open
switch =
Count Up
Note: To remove the back cover, use a medium-sized Phillips head screwdriver. If you
change the jumper settings, they will not be recognized until the next power up of the
entry device. Therefore, you must remove the battery if installed and drain the remaining
power by holding and pressing a key or by pressing multiple keys continuously.
OPEN LOCK WITH TIME DELAY
1. Enter valid combination. The time delay display will be activated. (See TIME
DELAY DISPLAY.)
2. Once the Time Delay has expired and the lock has entered the “open window”, enter
valid combination again.
3. For Dual User access, enter the second valid combination.
4. Open the container within 4 seconds.
TIME DELAY OVERRIDE
This feature enables a User to override Time Delay. The feature must be programmed
when the lock is set up. Refer to the Manager instructions for more detail.
If operating in Dual Combo Mode, the manager or a user combination must first be
entered, then the override combination.
(P/N) 737.098 Rev A • 04/09
© copyright 2009
Kaba Mas LLC
Page 2 of 4
INITIATE SILENT DURESS ALARM
This operation is intended to work in conjunction with an alarm box. The feature must be
programmed when the lock is set up.
For ComboGard, AuditGard or TimeGard:
The silent duress combination is created by taking your existing combination and
adding or subtracting 1 from the last digit of the combination. For example, if the PIN is
“526674”, entering “526673” or “526675” will activate the silent duress alarm. If the
combination is “526699”, entering “526698” or “526690” will activate the alarm.
For ComboGard Pro:
The silent duress combination is created by taking your existing combination and
adding 1 to the last digit of the combination. For example, if the PIN is “526674”,
entering “526675” will activate the silent duress alarm. If the combination is
“526699”, entering “526690” will activate the alarm.
Once the silent duress combination is entered, the silent duress alarm is activated and
normal lock operation continues.
CHANGE COMBINATION
Caution: Before changing a combination, open the container door to allow testing with
the new combination. If you make a mistake while performing this operation, wait 30
seconds and start over.
For ComboGard:
1. Enter all 0’s for the combination.
2. Enter current valid combination.
3. Enter new valid combination.
Note: New combination will not be accepted if it varies from the current combination
by only one digit (+/-). When selecting a combination, do not use a birthday or
other predictable information that could give correlation between the user and the
combination.
4. Enter new valid combination again for verification.
5. Record the new combination and store it in a secure place.
For ComboGard Pro, AuditGard, or TimeGard:
1. Enter current valid combination, holding down the last digit until two sets of double
beeps occur.
2. Press 0. Double beep
3. Enter new valid combination.
Note: New combination will not be accepted if it varies from the current combination
by only one digit (+/-). When selecting a combination, do not use a birthday or
other predictable information that could give correlation between the user and the
combination.
4. Enter new valid combination again for verification.
5. Record the new combination and store it in a secure place.
(P/N) 737.098 Rev A • 04/09
© copyright 2009
Kaba Mas LLC
Page 3 of 4
WRONG TRY PENALTY DISPLAY
A time penalty of 5 minutes will start after the 4th consecutive wrong combination
has been entered. During a wrong try penalty period, PEN is displayed in the LCD
display area.
Two more consecutive wrong combinations entered after the penalty has expired will start
another 5 minute penalty.
BATTERY LOW WARNING
The battery low warning occurs if the battery drops below 6 volts during solenoid
activation. Multiple beeps
....
BATTERY REPLACEMENT
1. Remove the battery compartment cover at the bottom of the entry device.
2. Remove the battery from the battery compartment & carefully disconnect the battery.
Caution: Hold the battery terminal connector while disconnecting the battery to avoid
ripping the battery wires out of the assembly.
3. Connect a new 9-Volt Alkaline battery to the battery connector. Use of a high quality,
name brand battery (Energizer® or Duracell®) is recommended.
Note: Once the battery is connected, the system will run a self check of the display
and buzzer. If the entry device beeps when the battery is reconnected, the power has
drained off completely and the entry device must go through a device setup. Initiate
a time delay/open window cyle once again to allow the entry device to “relearn” the
lock settings. Refer to the section on DEVICE SETUP.
4. Place the battery back in the battery compartment and put the cover back in place.
749 W. Short Street, Lexington, KY 40508 USA
Phone: (859) 253-4744 FAX: (859) 255-2655
Technical Support: (800) 950-4744
www.kaba-mas.com
(P/N) 737.098 Rev A • 04/09
© copyright 2009
Kaba Mas LLC
Page 4 of 4