Transcript
 —
StatGuardPlus Instructions
WARNING
Read all instructions prior to installation of
thermostat guard. Verify dimensions to
ensure productis suitable for your
application. Disconnect power to prevent
electrical shock or equipment damage.
SET COMBINATION
1. Set combination to opening
number prior to resetting (factory
defaultis 0-0-0)
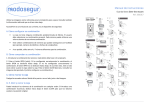
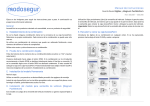
2. Push the pin hole in with a paper
clip (see picture) and hold in while
turning each of the dials to the
desired number and then
release. Your new number is set. Do
not forget the new combination! Only
you know that number and it can only
be changed by you!
3. To lock, turn clockwise to the
locked position. Rotate dials to hide
combination code.
4. To open, turn dials back to your
code and rotate counter clockwise.
INSTALLATION
1. Position the base plate over the
existing thermostat.
2. Mark the wall at the six screw
holes with a pencil.
3. Install the drywall anchors by first
drilling a small hole the size of each
anchor where the pencil marks are.
4. Re-align the base plate over the
anchors and insert the first four
screws on the right side of the base
plate.
5. Gently lift the left side of the base
plate from the wall and attach the
cover to the base plate by placing the
three hinges into the three slotted
holes.
6. Insert the final two screws into the
left side of the base plate and
close. Installation complete.
StatG Gudrdpée
Instrucciones StatGuardPlus
ADVERTENCIA
Lea todas los instrucciones antes de la
instalacion de la guardia del termostato.
Verifique las dimensiones para asegurar que
el producto sea conveniente a su aplicacion.
Desconecte el poder para prevenir el daño de
equipo o descargas eléctricas.
COLOQUE LA COMBINACIÓN
1. Coloque la combinación de
arpetura número inicial antes de
reajustar (falta de la fábrica es 0-0-0)
2. Empuje el agujero con un
suejtepapel (vea el cuadro) y
mantenelo y ala vez de vuelta cada
uno de los diales al número deseado y
suéltalo. Se establece su número
Nuevo. No olvida la nueva
combinación! Solo sab usted el
número y solo puede usted
cambiarlo!
3. Para cerrar, gire a la derecha ala
posición cerrada con llave. Rote los
diales para ensconder el codigo de la
combinación.
4. Para abrir, vuelva los diales a su
codigo y gire a la izquierda.
INSTALACIÓN
1. Coloque la placa base sobre el
termostato existente.
2. Marque la pared a los seis agujeros
de los tornillos con su lapiz.
3. Instale las anclas de pared
perforación de un pequeño agujero,
del tamaño de cada ancla estan las
marcas de lápiz.
4. Realinee la placa base sobre las
anclas y inserte los cuarto tornillos
primeros a la derecha de la placa
base.
5. Suavemente levanta el lado
izquierdo de la placa base y coloque
la cubierta a la placa base colocando
los tres goznes en los tres agujeros
ranurados.
6. Inserte los dos tornillos finales en
el lado izquierdo de la placa base y
cierre. Instalación completa!