Transcript
INSTALLATION INSTRUCTION FOR FIXTURE 8217-5H,8218-5H
WARNING! SHUT OFF THE POWER AT FUSE OR CIRCUIT BREAKER.
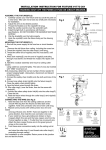
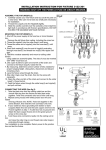
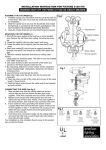
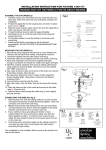
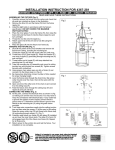
ASSEMBLY THE FIXTURE(FIG.2)
1. Carefully unpack your new fixture and lay out all the parts on a
clear area. Take care not to lose any small parts necessary for
installation.
2. Thread the tube (G) onto the nipple (H) tightly, then put the cap
(D) over the nipple (E) and secure with hex nut (C).Install the
fixture loop (A) on.
3. Install the top end of the side rod (F) onto the cap (D) and
secure with cap nut (B).
4. Install the frame (N), fabric shade (K) by protruding the bottom
end of the side rod (F) through the holes of the frame (N) and
fabric shade (K) and locking them in place with cap nut (I).
5. Thread the stem (M) into the coupling (L) and secure with hex
nut.
6. Insert the tube (O), check ring (P), plastic washer (Q), round
acryl panel (R) & steel washer (S) over the stem (M) in order,
and secure with finial (T) tightly.
7. Install the light bulb in accordance with fixture’s specifications.
DO NOT EXCEED THE MAXMUM WATTAGE RATING!
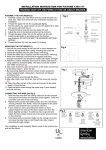
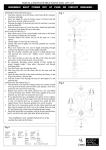
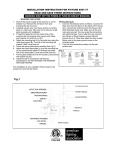
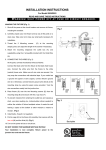
MOUNTING THE FIXTURE(FIG.1)
1, Shut off the power supply at the fuse box or circuit breaker box.
Remove the old fixture from ceiling. Including the cross bar.
2, Thread the nipple(I) into the collar loop(J) until snug.
3, Thread the other end of nipple(I) into the cross bar(F) until snug.
4, Place lock washer(E) over the end of nipple(I) protruding
through cross bar(F) and thread hex nut(D) onto nipple until tight.
5, Take this crossbar assembly and mount to ceiling outlet box(A)
using outlet box screw(H) tightly. The side of cross bar marked
with “GND” must face out.
6, Connect one end of chain(N) onto the fixture loop using the chain
link (M).
7, By measuring, determine correct number of links needed for
proper hanging height.
8, Lace the fixture wires through the chain.
9, Slip collar ring(L) over the chain, then do the same with
canopy(K).
10, Connect the other end link of the chain(N) to the collar
loop(J) using the chain link (M).
11, Feed the fixture wires through the collar loop(J) and nipple(I) and
pull until taut.
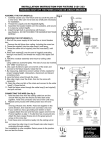
CONNECTING THE WIRE (See fig.3)
1. Take the black wire from the ceiling outlet box and the smooth
wire leg from the fixture and twist bare ends together. Twist wire
connector onto end of wire until snug.
2. Repeat same process with white junction box wire and ribbed
wire leg of fixture wire. NOTE :Twist wire together in the same
direction, then twist the wire connector onto wire.
3. If your outlet box has a grounding wire (Green or bare
copper).Attach this wire and the bare copper wire from the
fixture together as step 1. If outlet box has no ground wire.
Attach the bare copper fixture wire to the green ground screw
on the cross bar.
4. Tuck these wires connectors neatly into the ceiling out let box
and raise the collar ring (L) and thread onto collar loop(J)
protruding through canopy.
Your installation is now complete. Return power to the junction box
and test the fixture.
Fig.2
LOOP(A)
Fig.1
*the above drawing is for the installation only.
Fig.3