1
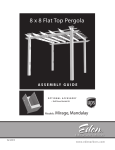
6 1/2 x 6 1/2 Wood Grain
Flat Top Pergola
A S S E M B LY G U I D E
Models:
Lakewood
OPTIONAL ACCESSORY
• Bolt Down Bracket Kit
Ver 1/AUG/2011
www.edenarbors.com
Ta b l e o f Co n t e n t s
The 6.5 x 6.5 Wood Grain Flat Top Pergola
PAGE
Introduction & Overview……………………………. . . . . . . . . . . . . . . . . . . . . . . . . . . . . . . . . . . . . . . . . . . . . . . .………. . . . . . 3
6.5 x 6.5 Flat Top Wood Grain Pergola Materials Overview……………………… . . . . . . . . . . . . . . . . …. . . . . . . . . . . 4
6.5 x 6.5 Flat Top Wood Grain Pergola Materials Breakdown……………. . . . . . . . . . . . . . . . . . . . . . . . . . . …. . . . . . . . . . 5
Pergola Additional Materials List………………………………. . . . . . . . . . . . . . . . . . . . . . . . . . . . . . . . . . . . . . . . . . . . . . . . . . 6
Wood Post Layout & Installation for In-Ground Application………………………………. . . . . . . . . . . . . . . . . . . . . 7
Wood Post Layout & Installation using Bolt Down Post Brackets for Concrete or Wood Surface…………… 8
Vinyl Column Installation Over Wood Posts………………………. . . . . . . . . . …………………. . …………. . … 9
Vinyl Beam Assembly . . . . . . . . . . . . . . . . …………. . . . . . . . . . . . . . . . . . . . . . . . . . . . . . . . . . . . . . . . . . . . . . . . . . . . . . . . . . . . . . . . . . . . . 10
Vinyl Beams & Rafters Placement . . . . . . . . . ………………. . . . . . . . . . . . . . . . . . . . . . . . . . . . . . . . . . . . . . . . . . . . . . . . . . . . . . . . . . 11
Fastening Decorative Caps . . . . . . . . . . . ………………………………. . . . . . . . . . . . . . . . . . . . . . . . . . . . . . . . . . . . . . . . . . . . . . 12
Shade Slat Assembly & Installation. . . . . . . . . . . . . . . . . . . . . . . . . . . . . . . . . . . . . . . . . . . . . . . . . . . . . . . . . . . . . . . . . . . . . . . . . . . . . . . . . 12
www.edenarbors.com
2
6.5 x 6.5 Wood Grain Flat Top Pergola
I n t r o d u c t i o n & O ve r v i e w
Getting Started
Restriction of Use
First off, allow us to say thank you for the investment you have made in one
of our fine pergola kits. This kit is designed to be assembled and installed
ideally by two people with basic carpentry knowledge and tools. Do not
attempt alone, especially during the installation stage. Should you decide to
moderately modify the dimensions of your pergola from the standard kit size,
a circular saw with a sharp fine-tooth blade is all that is needed to cut, shorten
or modify the vinyl components. When assembling components place on a
non-abrasive surface (ie: shipping box) to avoid scratching. We recommend
a 15’x15’ area for un-obstructed assembling. You should not need to use
excessive force when assembling any components.
This product is not designed to carry additional
weight loads such as swings, people or other
objects.
Please take the time to read this instruction
guide thoroughly prior to the construction
of your pergola. If you have any questions,
feel free to contact our technical dept by calling
1 800 282 9346, ext #20 (Mon to Fri 8:00 A.M
to 4:00 P.M. EST).
Planning & Preparing
Because this project is made to stand independent of your home, you can
either locate it near your house or let it stand alone in the garden. By keeping
it unattached from your home you will not have to deal with moving existing
gutters or matching eave heights. If you plan to build your pergola close to
the house, please keep the outer extremities of the pergola a minimum of 4
inches back from your eaves.
What looks like the toughest part of this project is actually the easiest, the
graceful, solid-looking columns. We’ve designed these columns to simply be
slipped over treated 4x4 wood posts that are either embedded in concrete or
directly mounted to a concrete or wood surface using our bolt down brackets.
See pages 7, 8 and 9 for more details.
It is critical before you start that you consider the current slope of elevation
where the pergola is planned - if there is any. Also utility or sprinkler line
location is important to identify prior to excavating holes if necessary.
You should also check to verify local building codes, ordinances, neighbourhood covenants, or height restrictions regarding this type of structure.
www.edenarbors.com
6.5 x 6.5 Wood Grain Flat Top Pergola
3
6.5 x 6.5 Wood Grain Flat Top Pergola Materials Overview
www.edenarbors.com
1
2
3
4
5
6
7
110.5 in
1.
2.
3.
4.
5.
6.
7.
Main Rafters (7)
Shade Slats Including Decorative End Caps (7)
Rafter & Beam Decorative End Caps (18)
Post Caps (4)
Posts (4)
Main Support Beams (2)
Rafter Brackets (10)
110.5 in
12.3 in
Top View
95.25 in
87.125 in
81.5 in
78 in
78 in
88 in
Front View
4
6.5 x 6.5 Wood Grain Flat Top Pergola
Side View
6.5 x 6.5 Wood Grain Flat Top Pergola Materials Breakdown
www.edenarbors.com
(Accessories Not included)
Check Boxes (Total of 3) for These Contents
In the event of missing or defective parts please call our customer service
dept. at 1 800 282 9346, ext #20 (Mon. to Fri. 8:00 AM to 4:00 PM EST).
1.
2.
3.
4.
5.
6.
7.
8.
Main Rafters (7) 1.5” x 5.5 “x 94”
Shade Slats (7) 1.5” x 1.5 “x 94”
Rafter & Beam Decorative End Caps (18)
Post Caps (4)
Rafter Brackets (10)
Shade slate Decorative End Caps (14)
Main Support Beams (2) 1.5” x 5.5” x 94”
Posts (4) 5” x 5” x 94“
8
1
2
3
4
5
6
7
Not to Scale
6.5 x 6.5 Flat Top Pergola
5
www.edenarbors.com
Pergola Additional Materials List
A
B
C
D
E
F
Hardware (in plastic bag)
NOTE: WE HAVE INCLUDED EXTRA SCREWS BEYOND
WHAT IS IDENTIFIED BELOW.
All Screws Included with this Kit are Self-Auguring.
A. Vinyl Weld Glue (2)
B. 3/4” Self-Auguring Screws (40) (for Rafter Brackets)
C. 3/4” Self-Auguring Screws (8) (to secure Posts to wood posts)
D. 4“ Self-Auguring Screws with Nylon Washer (49) (for Shade Slates)
E. 4” Self-Auguring Screws with Nylon Washer (32) (to secure Beams and
Rafters to Posts.)
G
I
F. Snap Caps (129) (for screw heads)
Extra Materials You will Need
(Purchase separately from www.edenarbors.com or retailer of our products)
If Mounting Pergola on Concrete or Wood Deck
G. 4x4x4 Pressure-Treated Wood Posts (4)
(purchase at local building center)
H. 4x4 Bolt Down Bracket Kit (purchase from www.edenarbors.com or a
retailer of our products)
If Mounting Pergola in Ground
I. 4x4x8 Pressure-Treated Wood Posts (4)
(purchase at local building center)
J. Concrete Ready Mix (4) (purchase at local building center)
Tools You Will Need
•
•
•
•
•
•
•
Level
Hammer
Tape Measure
String Line
Wood Stakes (4) (temporary support for string line)
Step Ladders (2)
Cordless Drill
Tools You May Need
• Circular Saw with Fine Tooth Blade
• Framing Level
• Framing Square
Purchase Separately
Purchase Separately
H
J
CONCRETE - Ready Mix
Purchase Separately at:
www.edenarbors.com
Purchase Separately
Not to Scale
6
6.5 x 6.5 Wood Grain Flat Top Pergola
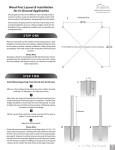
Wood Post Layout & Installation
for In-Ground Application
www.edenarbors.com
This pergola can also be installed on a pre-existing wood or
concrete surface using our bolt down bracket system with
a 4x4 wood post (sold separate). See page eight for more details.
1
Overhead View
78 1/4 in.
198.76 cm.
Post location and placement is the most critical step in the
overall installation process. Please double check for the
possibility of any underground utilities such as sprinkler, gas
or telephone lines.
STEP ONE
Measure and mark out the location of the pergola posts using
string line and temporary wood stakes. Diagonal distances must
be the same to ensure a square installation. Adjust string lines
accordingly. The inside corner of the string lines will be the post
location.
110.66 in. (281.08 cm.)
from corner of wood post to corner of wood post.
78 1/4 in.
198.76 cm.
Please Note:
Should you decide to moderately modify the dimensions of your
pergola from the standard kit size, a circular saw with a sharp
fine-tooth blade is all that you need to cut, shorten or modify the
vinyl components.
10”
STEP T WO
1
Install Wood Supporting Posts Directly into the Ground
1
36”
After you have determined where the posts will be located,
excavate 10” diameter x 36” deep post holes.
2
After holes are dug and cleaned, place the 4x4 wood post into
a hole ensuring it’s level and square to string lines. The final post
height should be about 48” out of the ground.
3
60”
Fill the vacant hole with pre-mixed concrete all the way to
within 3” of the top of the hole.
4
Repeat for all four posts.
2
3
6.5 x 6.5 Wood Grain Flat Top Pergola
3”
7
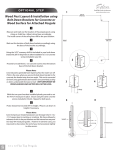
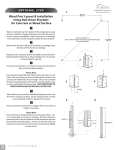
OPTIONAL STEP
www.edenarbors.com
1
79.5 in.
201.9 cm.
Wood Post Layout & Installation
Using Bolt Down Brackets
for Concrete or Wood Surface
1
Measure and mark out the location of the pergola posts using
string or chalk line. Diagonal distances must be the same to
ensure a square installation. Adjust string lines accordingly.
The inside corner of the string lines will be the post location.
112.4 in. (285.6 cm.)
From corner of bracket (steel sleeve, not bottom flange),
to corner of bracket.
2
Mark out the location of bolt down brackets as illustrated.
3
2
4
Marker
Using the 5/32” masonry drill bit included in your bolt down
bracket kit, drill 3” deep holes to allow installation of 2 1/2 concrete
screws included in your kit.
Proceed to install three 2 1/2 concrete screws into the bottom
base of the bolt down bracket.
Please Note:
Concrete patios generally have sloped surface for water run-off.
If this is the case, when you secure the bolt down bracket to the
concrete, the bracket may be at an angle. This can be corrected
for level using galvanized steel washers (not provided), acting
as shims underneath the base to level - VERY IMPORTANT OR
PERGOLA BEAMS AND RAFTERS WILL NOT BE LEVEL.
3
4
3“ (Deep)
5
With the four post brackets installed plumb, proceed to set
the 4x4 x4’ wood post in place. Secure using the same concrete
screws included in the kit. Repeat for all 4 posts.
6
Posts should be approximately 48” in height.
Level
48”
7
In order to create a snug fit between the wood posts and the
inner cavity of the vinyl posts, it will be necessary to ‘build out’
the 4x4 posts near the bottom and the top using 1/2” x 3 1/2” x 12”
shims on all four sides (not supplied).
5
6
7
1/2”x3 1/2”x12”
shims on all
four sides
near bottom
and the top
8
6.5 x 6.5 Wood Grain Flat Top Pergola
79.5 in.
201.9 cm.
STEP THREE
www.edenarbors.com
Vinyl Column Installation
Over Wood Posts
1
Using a step ladder, guide the vinyl column over the top of the
wood post down into position. Ensure that holes at top of
column are orientated correctly for future beam and
rafter placement as per illustration.
* Ensure that holes at top of column
are orientated correctly for
future beam and rafter placement.
Please Note:
If you installed your wood posts directly into the ground, please
proceed to position the vinyl column tight to the inside corner of
the wood posts as illustrated below. NO SHIMS REQUIRED.
Wood post inside
the vinyl post.
Vinyl Columns should be tight to the inside
corner of wood posts as illustrated.
NO SHIMS REQUIRED.
36“
Slope?
8“
1
2
3
2
Finally, adjust post heights accordingly to ensure future level
installation of beams and rafters as necessary. If slope is severe
causing a height difference between the posts, you may need
to trim down the bottom of two or more of your vinyl columns
as necessary.
3
Secure the vinyl columns to the wood posts using 2 - 3/4” screws
at 8” up from the bottom and 1 more approximately 36” high.
6.5 x 6.5 Wood Grain Flat Top Pergola
9
At this stage, the columns should be properly
installed as per the following illustration,
with the columns 78 in (198.1 cm) apart.
Also, notice that the holes at the top of each
post should be facing the same direction.
www.edenarbors.com
78 in.
198.1 cm.
78 in.
198.1 cm.
STEP FOUR
1
Vinyl Beam Assembly
1
Lay out two 94” beams (part 7) as shown. Align and fasten
mounting brackets to the pre-drilled holes on top of the beams
using the 3/4“ screws provided. cover the screw heads with
provided snap caps.
STEP FIVE
Vinyl Beam & Rafters Placement
2
Using a helper and two ladders, proceed to complete the
following steps
2
Slide the vinyl beam with rafter clips pre-installed through
both holes of the vinyl column (overshooting), and then back
through both holes of the opposite column. Repeat for
opposite beam.
Please note:
The top of the vinyl columns may need to be tensioned in opposite
directions to each other to allow the beams and rafters to be
installed on a slight angle. The vinyl columns naturally allow for
some measure of flex.
3
Stop when the end of the beam measures 3” from the
outside edge of the post. Fasten both ends of the beam to
the posts as illustrated using four 4“ screws per post.
Cover the screw heads with provided snap caps.
Repeat step 2 for the remaining posts and bracketed beam.
10 6.5 x 6.5 Wood Grain Flat Top Pergola
3”
3
4
4
Slide the two outer rafters through both holes of the vinyl column
(overshooting) and then back through both holes of the opposite
column. Stop when the end of the beam measures 3” from
the outside edge of the post.
5
Using 4” screws, lock the beams and rafters into position inside
the posts by driving in 2 screws on each face of the posts.
6
Place the remainder five rafters in the front and rear rafter brackets.
7
Complete a final adjustment of all beams and rafters. All spacing
should appear equal to the eye.
8
Using 3/4” self-auguring ,screws attach the pergola rafters to the
rafter brackets.
5
7
6
8
6.5 x 6.5 Wood Grain Flat Top Pergola
11
STEP SIX
Fastening Decorative Caps
1
Glue the post caps top and bottom using vinyl weld.
Glue the postcaps onto the posts.
2
Install decorative pergola end caps using vinyl weld.
2
1
2
STEP SEVEN
Shade Slat Assembly
1
To assemble the shade slats, glue the 1 1/2” square pergola end caps
onto the end of the filters.
Shade Slats Installation
Shade slats are designed to extend approximately 7 1/4” past
the last rafter. Measurement includes the pergola ends.
Your goal is to ensure that all the shade slats overhang
equally to the eye.
4
2
Install first and last shade slats 2“ away from the posts.
3
Install the rest of the shade slats at 10.5” spacing.
4
Install one 3” screw at each intersection of rafter and shade slat.
1
12 6.5 x 6.5 Wood Grain Flat Top Pergola
3
10.5”