Transcript
Operation
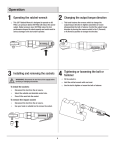
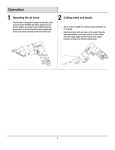
1 Operating the ratchet wrench
□□ This 3/8” Ratchet Wrench is designed to operate on
90 PSIG. Lower pressure (below 90 PSIG) will reduce
performance of the tool. Higher air pressure (over 90
PSIG) raises the performance of the tool beyond its rated
capacity and could cause serious damage to the tool and
the user.
2 Changing the direction of the tool
WARNING: Disconnect the tool from the air supply before
servicing or changing accessories.
□□ The direction of the tool is reversible.
□□ Control the rotation direction by turning the reverse button
above the ratchet head to R (Reverse) or F (Forward).
R
F
3 Installing and removing the sockets 4 Driving the nuts and bolts
WARNING: Disconnect the tool from the air supply before
servicing or changing accessories.
To install sockets:
□□ Remove the air supply from the ratchet wrench.
□□ Fit the 3/8” square drive socket onto the anvil, pushing on
the socket.
To remove sockets:
□□ Remove the air supply from the ratchet wrench.
□□ Holding the socket firmly, pull it off the anvil.
6
□□ Place the reverse button located above the head of the
ratchet wrench to the correct direction, F (Forward) or R
(Reverse). Fit the correct size socket to the anvil of the
ratchet wrench.
□□ Hold the ratchet wrench with one hand and place the
socket onto the nut/bolt to be tightened or removed. Press
the throttle lever and stop the operation once the nut/bolt
is removed or tightened.