1
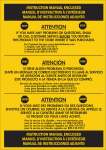
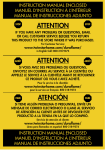
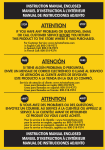
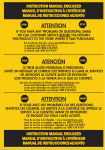
INSTRUCTION MANUAL ENCLOSED
MANUEL D’INSTRUCTION À L’INTÉRIEUR
MANUAL DE INSTRUCCIONES ADJUNTO
STOP
ATTENTION
STOP
IF YOU HAVE ANY PROBLEMS OR QUESTIONS, EMAIL
OR CALL CUSTOMER SERVICE BEFORE YOU RETURN
THIS PRODUCT TO THE STORE WHERE IT WAS PURCHASED.
For Customer Service:
www.twinstarhome.com/duraflame/
in English Call: 800-318-9373
ARRÊT
ATTENTION
ARRÊT
SI VOUS AVEZ DES PROBLÈMES OU QUESTIONS,
ENVOYEZ UN COURRIEL AU SERVICE À LA CLIENTÈLE OU
APPELEZ LE SERVICE À LA CLIENTÈLE AVANT DE RETOURNER
CE PRODUIT OÙ VOUS L’AVEZ ACHETÉ.
Pour le service à la clientèle:
www.twinstarhome.com/duraflame/
pour le service en français: 800-318-9374
PARE
ATENCIÓN
PARE
SI TIENE ALGÚN PROBLEMA O PREGUNTAS, ENVÍE UN
MENSAJE DE CORREO ELECTRÓNICO O LLAME AL SERVICIO
DE ATENCIÓN AL CLIENTE ANTES DE DEVOLVER ESTE
PRODUCTO A LA TIENDA EN LA QUE LO COMPRÓ.
Servicio de atención al cliente:
www.twinstarhome.com/duraflame/
Línea para llamadas en español: 800-318-9374
INSTRUCTION MANUAL ENCLOSED
MANUEL D’INSTRUCTION À L’INTÉRIEUR
MANUAL DE INSTRUCCIONES ADJUNTO
ELECTRIC STOVE WITH HEATER
VENT FREE DECORATIVE ELECTRIC STOVE
HOMEOWNERS OPERATING MANUAL
MODEL: DFS-500-0,DFS-500-2
CONSUMER SAFETY INFORMATION
PLEASE READ THIS MANUAL BEFORE INSTALLING
AND OPERATING THIS APPLIANCE
WARNING!!
IF THE INFORMATION IN THIS MANUAL IS NOT FOLLOWED
EXACTLY, AN ELECTRIC SHOCK OR FIRE MAY RESULT CAUSING
PROPERTY DAMAGE, PERSONAL INJURY OR LOSS OF LIFE.
DO NOT STORE OR USE GASOLINE OR OTHER FLAMMABLE VAPORS
AND LIQUIDS IN THE VICINITY OF THIS OR ANY OTHER APPLIANCE.
Thank you and congratulations on your purchase of a Twin-Star International, Inc.
stove. Please read the Installation & Operating Instructions before using this
appliance.
IMPORTANT: Read all instructions and warnings carefully before starting installation.
Failure to follow these instructions may result in a possible electric shock, fire hazard
and/or injury and will void the warranty.
Installation of Electric Fireplace, should take 15 minutes. The only tool required is a
Phillips head screwdriver, not supplied with this unit.
For Customer Service:
www.twinstarhome.com/duraflame/
In English Call: 800-318-9373
In Spanish Call: 800-318-9374
WARNING: THIS IS AN UNVENTED,
ELECTRIC APPLIANCE. DO NOT
ATTEMPT TO BURN WOOD OR
MANUFACTURED FIRELOGS IN OR
ON THIS APPLIANCE OR GRATE.
Distributed by
Twin-Star International, Inc. Under license.
duraflameTM and the duraflame flame
logo are trademarks of Duraflame, Inc.
Twin-Star International, Inc.
Delray Beach, FL 33445
Made in China • Printed in China
Made in China
Printed in China
© 2012, Twin-Star International, Inc.
E-1
E-1
IMPORTANT INSTRUCTIONS
When using electrical appliances, basic precautions should always be followed to reduce the risk of fire,
electrical shock, and injury to persons including the following:
1. Read all instructions before using this appliance.
2. This appliance is hot when in use. To avoid burns,
do not let bare skin touch hot surfaces. If provided,
use handles when moving this appliance. Keep
combustible materials, such as furniture, pillows,
bedding, papers, clothes and curtains at least 3 feet
(0.9 m) from the front of this appliance.
WARNING: In order to avoid overheating, do not
cover the heater. It cannot be used in a wardrobe.
3. CAUTION: Whenever the heater is left operating
and unattended, extreme caution is necessary if
children or invalids are nearby.
4. The appliance is not to be used by children or
persons with reduced physical, sensory or mental
capabilities, or lack of experience and knowledge,
unless they have been given supervision or
instruction.
5. Children being supervised not to play with the
appliance.
6. If possible, always unplug this appliance when
not in use.
7. Do not operate any heater with a damaged cord or
plug or after the appliance malfunctions, or if it has
been dropped or damaged in any manner.
8. If the supply cord is damaged, it must be replaced
by the manufacturer, its service agent or similarly
qualified persons in order to avoid a hazard.
9. Any repairs to this fireplace should be carried out
by a qualified service person.
10. Under no circumstance should this fireplace
be modified. Parts having to be removed for
servicing must be replaced prior to operating this
fireplace again.
11. Do not use outdoors.
12. This heater is not intended for use in bathrooms,
laundry areas and similar indoor locations. Never
locate this appliance where it may fall into a
bathtub or other water container.
13. Do not run cord under carpeting. Do not cover
cord with throw rugs, runners or the like. Arrange
cord away from traffic areas and where it will not
be tripped over.
14. To disconnect this appliance, turn controls to the
off position, then remove plug from outlet.
15. Connect to properly grounded outlets only.
16. This appliance, when installed, must be electrically
grounded in accordance with local codes or, in the
absence of local codes, with the current CSA C22.1
Canadian Electrical Code or for U.S.A. installations,
follow local codes and the National Electrical
Code, ANSI/NFPA NO.70.
17. There is a thermostat limiter inside the heater.
When the inner temperature over-heats or abnormal
heating occurs, the thermostat protective device
would cut off power supply to prevent damage
or risk of fire.
18. The heaters must not be located immediately
below a socket-outlet.
19. Do not insert or allow foreign objects to enter any
ventilation or exhaust opening as this may cause an
electric shock or fire, or damage the appliance.
20. To prevent a possible fire, do not block air intakes
or exhaust in any manner. Do not use on soft
surfaces, like a bed, where opening may become
blocked.
21. This appliance has hot and arcing or sparking parts
inside. Do not use it in areas where gasoline, paint
or flammable liquids are used or stored. This
fireplace should not be used as a drying rack for
clothing. Christmas stockings or decorations should
not be hung in the area of it.
22. Use this appliance only as described in the
manual. Any other use not recommended by the
manufacturer may cause fire, electric shock or
injury to persons.
23. Always plug heaters directly into a wall outlet/
receptacle. Never use with an extension cord or
relocatable power tap (outlet/ power strip).
24. See directions in Figure 1.
This heater is for use on 120 volts. The cord has a
plug as shown in figure 1. See Figure 1 for grounding
instruction. An adapter as shown at C is available for
connecting three-blade grounding type plugs to
two-slot receptacles. The green grounding plug
extending from the adapter must be connected to a
permanent ground such as a properly grounded
outlet box. The adapter should not be used if a
three-slot grounded receptacle is available.
E-2
Figure 1
COVER OF GROUNDED
OUTLET BOX
METAL SCREW
GROUNDING PIN
A B
C D
ADAPTER
GROUNDING
MEANS
GROUNDING PIN
SAVE THESE
INSTRUCTIONS
PRODUCT SPECIFICATIONS
VOLTAGE
AMPS
WATTS
120 VAC, 60 Hz
12.5 Amps
1500 Watts
PACKAGE CONTENTS
CAUTION
To avoid injury from unexpected starting or electrical shock, do not plug the power cord into a
source of power during unpacking and assembly. The cord must remain unplugged whenever
you are adjusting/assembling the fireplace.
If any part is missing or damaged, do not attempt to use or plug in the power cord until the
missing or damaged part is correctly replaced. To avoid electric shock, use only identical
replacement parts, when servicing use double-insulated tools.
Part
Description
AA
Stove Body
BB
CC
Quantity
1
Stove Legs
4
Screws for Legs
4
Fig. 2
E-3
Picture
PREPARATION
Before beginning installation of the product, make sure all parts are present. Compare parts with
package contents list and diagrams above. If any part is missing or damaged, do not attempt to
assemble, install, or operate the product. Contact customer service for replacement parts.
Estimated Assembly Time: 15 minutes
Tools Required for Assembly: Phillips head screwdriver (not included)
MOUNTING LEGS TO THE STOVE BODY
Insert the leg buckles into the holes located on the base of the stove. Fasten the legs using the screws (1
screw per leg) and tighten with a Phillips head screwdriver (Fig. 3)
Fig.3
STOVE LOCATION
When choosing a location for your new stove, follow the instructions listed in the <IMPORTANT
INSTRUCTIONS> section in page 2.
Cold climate installation recommendation: When installing this unit against a
non-insulated exterior wall or chase, it is mandatory that the outer walls be insulated to
conform to applicable insulation codes.
ELECTRICAL CONNECTION
A 15-Amp, 120-V, 60 Hz circuit with a properly grounded outlet is required. Preferably, the fireplace will
be on a dedicated circuit as other appliances on the same circuit may cause the circuit breaker to trip or
the fuse to blow when the heater is in operation. The unit comes standard with 6-ft. (1.83 m) three-wire
cord, exiting from the rear of the fireplace.Do not exceed the current rating of the current tap. Always plug
heaters directly into a wall outlet/ receptacle. Never use with an extension cord or relocatable power tap
(outlet/ power strip).
E-4
OPERATING INSTRUCTIONS
TO ACCESS CONTROL PANEL - Open the door to access the control panel.
- POWER
The Power switch supplies power to all of the functions of the fireplace and will illuminate the flame effect. This switch must be lit for any of the functions to work.
- HEAT
Your fireplace consists of a fan-forced wire element type heater. The HEATER switch turns the heater
ON and OFF. This switch must be lit for the heater function to work.
- TEMPERATURE
The Temperature control knob helps regulate the ambient temperature level. The further the knob is
rotated clockwise, the higher the set point temperature. Turning the knob counter-clockwise will lower
the set point temperature.
- BRIGHTNESS
The Flame Brightness control knob adjusts the flame brightness. Turning the knob to the left
(counter-clockwise ) dims the flame effect. Turning the knob to the right brightens the flame effect.
WARNING: Turn the power off when servicing this appliance. First turn the main power switch
to the “OFF” position. Then remove the electrical plug from the wall outlet.
Fig. 4
E-5
CARE AND MAINTENANCE
CLEARANCE TO COMBUSTIBLES
Keep electrical cords, drapery, furniture and other combustibles at least 3 ft (0.9 m) from the front of the
heater and away from the sides.
CLEANING TRIM
Clean the metal trim using a soft cloth, slightly dampened with a citrus oil-based product and buff with
a soft, clean cloth. DO NOT use brass polish or household cleaners as these products will damage the
metal trim. Purchase citrus oil-based products at a hardware store.
REPLACING THE LIGHT BULB
This electric stove uses one clear 120-V, 40-watt, E12 socket base light bulb (candelabra base, B bulb).
Access the 40-watt bulb through the rear access panel (see illustration below).
1. Turn the main power switch off, and then unplug the power cord from the wall outlet.
2. If fireplace has been operating, let the unit cool at least 2 hours.
3. Loosen the screws holding the stove back panel to the main body of stove (see Fig 5).
4. Pinch the spring clip to loosen the spindle, and gently turn and pull the rubber gromet out of the
spinner motor shaft. (see Fig.6).
5. Pull the spinner out of the bracket.(see Fig 6).
6. Remove light bulb and replace with one clear 120-V, 40 Watt E12 Socket base light bulb (Fig. 7).
7. Place rear access panel back into position and tighten screws (do not over-tighten).
Pinch this spring clip to
loosen. Gently turn and
pull the rubber grommet
from out of the motor
shaft.
1. Loosen Phillips
head screws
2. Remove back
panel to access
light bulb
Ember bed
light bulb
3. Replace the
light bulb
Fig. 6
Light bulb holding spring
Pull
Pull
Spinner
Fig. 5
Fig. 7
WARNING:Do not exceed 40 watts per bulb. Use of higher rated bulb may result
in a fire, causing property damage or personal injury.
E-6
MAINTENANCE OF MOTORS
• The motors used on the fan and the flame generator assembly are pre-lubricated for extended
bearing life and require no further lubrication. However, we recommend periodic cleaning/vacuuming
of the fan/heater
• Make sure the unit is turned OFF and unplugged whenever you are cleaning the heater or fireplace.
WARNING: Make sure the power is turned off before proceeding. Any electrical repairs
or rewiring of this unit should be carried out by a licensed electrician in accordance with
national and local codes.
If repairing or replacing any electrical component or wiring, the original wire routing,
color coding and securing locations must be followed.
WARNING: Electrical outlet wiring must comply with local building codes and other
applicable regulations to reduce the risk of fire, electrical shock and injury to persons.
WARNING: Do not use this fireplace if any part of it has been under water. Immediately
call a qualified service technician to inspect the fireplace and replace any part of the
electrical system.
WARNING: Disconnect power before attempting any maintenance or cleaning to reduce
the risk of fire, electrical shock or personal injury.
TROUBLESHOOTING
PROBLEM
1. No power, switches do not
light up.
2. Switches light up,
but no flame effect.
POSSIBLE CAUSE
1. Power cord was not plugged
into the outlet.
2. Broken or loose bulb.
3. Logs glow, flame effect
does not work.
3a. Spinner fell from bracket
3b. Spinner motor doesn’t work.
4. Flame effect operates, but
heater does not blow warm
air.
4a. Heater switch is in “OFF”
position.
4b. Thermostat is in low
position.
5. Heater doesn’t work, but
Power and Heater switches
are in the “ON” position and
thermostat is set on the
highest level.
5a. The thermal protector has
tripped.
E-7
CORRECTIVE ACTION
1. Check that unit is plugged into
a standard 120-v outlet.
2. Remove the back panel and
check for any broken or loose
light bulb.
3a. Remove the back panel.
Check to see if “spinner” is
correcrly mounted to the
motor.
3b. Check to see if spinning motor
is functioning. If not, call
customer service.
4a. Check that heater switch is in
“ON” position. Switch should
light up.
4b. Make certain that thermostat
is turned toward the highest
position.
5a.Turn all switches to the “OFF”
position and unplug the unit
from the wall outlet for 5
minutes. After 5 minutes, plug
the unit back into wall outlet
and operate as normal.
1-YEAR LIMITED WARRANTY
The manufacturer warrants that your new Electric Stove is free from manufacturing and material defects
for a period of one year from date of purchase, subject to the following conditions and limitations.
1. Install and operate this Electric Stove in accordance with the installation and operating instructions
furnished with the product at all times. Any unauthorized repair, alteration, willful abuse, accident, or
misuse of the product shall nullify this warranty.
2. This warranty is non-transferable, and is made to the original owner, provided that the purchase was
made through an authorized supplier of the product.
3. The warranty is limited to the repair or replacement of part(s) found to be defective in material or
workmanship, provided that such part(s) have been subjected to normal conditions of use and
service, after said defect is confirmed by the manufacturer’s inspection.
4. This warranty does not cover the light bulb(s) included with the Electric Stove.
5. The manufacturer may, at its discretion, fully discharge all obligations with respect to this warranty by
refunding the wholesale price of the defective part(s).
6. Any installation, labor, construction, transportation, or other related costs/expenses arising from
defective part(s), repair, replacement, or otherwise of same, will not be covered by this warranty,
nor shall the manufacturer assume responsibility for same.
7. The owner/user assumes all other risks, if any, including the risk of any direct, indirect or
consequential loss or damage arising out of the use, or inability to use the product, except
as provided by law.
8. All other warranties – expressed or implied –with respect to the product, its components and
accessories, or any obligations/liabilities on the part of the manufacturer are hereby expressly
excluded.
9. The manufacturer neither assumes, nor authorizes any third party to assume on its behalf, any other
liabilities with respect to the sale of the product.
10. The warranties as outlined within this document do not apply to non accessories used in conjunction
with the installation of this product.
This warranty is void if:
a. The fireplace is subjected to prolonged periods of dampness or condensation.
b. Any unauthorized alteration, willful abuse, accident, or misuse of the product.
c. You do not have the original receipt of purchase.
IF WARRANTY SERVICE IS NEEDED
Contact the manufacturer by calling customer service department at 1-800-318-9373,
9 a.m.-5 p.m., EST, Monday-Friday. Make sure you have your warranty, your sales receipt,
location of purchase and the model/serial number of your product.
E-8
ESTUFA ELÉCTRICA CON CALENTADOR
E S T UFA E L É C T R I C A D E C O RATIVA S I N E X T R A C T O R
MANUAL DE OPERACIÓN DEL PROPIETARIO
MODELO: DFS-500-0, DFS-500-2
INFORMACIÓN SOBRE SEGURIDAD PARA EL CONSUMIDOR
LEA ESTE MANUAL ANTES DE INSTALAR Y OPERAR ESTE APARATO
¡¡ADVERTENCIA!!
EN CASO DE NO SEGUIR LA INFORMACIÓN EN ESTE MANUAL
CON EXACTITUD, PODRÍAN PROVOCARSE DESCARGA ELÉCTRICA
O INCENDIO Y DAÑOS A LA PROPIEDAD, LESIONES PERSONALES O
LA PÉRDIDA DE LA VIDA.
NO GUARDE NI USE GASOLINA NI OTROS VAPORES Y LÍQUIDOS
INFLAMABLES CERCA DE ESTE APARATO, NI DE CUALQUIER OTRO.
Gracias y felicitaciones por su adquisición de una chimenea de Twin-Star International, Inc.
Lea las Instrucciones de Instalación y Operación antes de utilizar este aparato.
IMPORTANTE: Lea todas las instrucciones y advertencias con detenimiento antes de
comenzar la instalación. Si no se siguen las instrucciones, podría provocarse riesgo de
descarga eléctrica, incendio o lesiones y, además, la garantía perdería validez.
La instalación del Chimenea Eléctrica sólo tomará 15 minutos. La única herramienta
requerida es un destornillador Phillips que no se suministra con esta unidad.
Servicio de atención al cliente:
www.twinstarhome.com/duraflame/
Línea para llamadas en inglés: 800-318-9373
Línea para llamadas en español: 800-318-9374
ADVERTENCIA: ESTE ES UN
APARATO ELÉCTRICO SIN
VENTILACIÓN. NO INTENTE
QUEMAR LEÑOS FABRICADOS NI
MADERA DENTRO O SOBRE ESTE
APARATO O SU PARRILLA.
S-1
Impreso en China
Fabricado en China
© 2012, Twin-Star International, Inc.
INSTRUCCIONES IMPORTANTES
Al utilizar aparatos eléctricos, siempre deberán tomarse precauciones básicas para reducir el riesgo
de incendio, descarga eléctrica y lesiones a personas. Éstas incluyen:
1. Lea todas las instrucciones antes de usar este aparato.
2. Este aparato se calienta cuando está en uso. Para evitar
quemaduras, no permita que la piel sin protección entre
en contacto con superficies calientes. Si están incluidas,
utilice las manijas para mover este aparato. Mantenga
los materiales inflamables, como muebles, almohadas,
ropa de cama, papeles, prendas de vestir y cortinas, a
un mínimo de 1 metro (3 pies) de distancia de la parte
frontal de este aparato.
ADVERTENCIA: Para evitar un sobrecalentamiento,
no cubra el calentador. No puede utilizarse en
guardarropas.
3. PRECAUCIÓN: Siempre que se deje el calentador en
funcionamiento y sin atención, deberá tenerse extremo
cuidado si hay niños o personas inválidas cerca.
4. El aparato no debe ser utilizado por niños o personas
con capacidades mentales, sensoriales o físicas
disminuidas o con falta de experiencia o conocimiento,
a menos que sean supervisados o que hayan recibido
instrucciones.
5. Los niños deberán ser supervisados para que no
jueguen con el aparato.
6. Si es posible, siempre desenchufe este aparato cuando
no esté en uso.
7. No opere ningún calentador con un cable o enchufe
dañado o luego de que éste funcione incorrectamente,
o si se cae o se daña de cualquier manera.
8. Si el cable se daña, debe ser reemplazado por el
fabricante, su agente de mantenimiento u otras
personas con calificaciones similares a fin de prevenir
riesgos.
9. Todas las reparaciones a esta chimenea deberán ser
realizadas por una persona calificada de mantenimiento.
10. En ninguna circunstancia podrá modificarse esta
chimenea. Las piezas que se hayan retirado para
realizarles el mantenimiento deberán volver a colocarse
antes de operar esta chimenea nuevamente.
11. No utilice el aparato en exteriores.
12. Este calentador no está diseñado para su uso en baños,
áreas de lavado ni lugares interiores similares. Nunca c
oloque este aparato en un lugar desde el que podría
caer a una bañera o a otro recipiente con agua.
13. No pase el cable debajo de una alfombra. No cubra el
cable con alfombras pequeñas, tapetes o elementos
similares. Coloque el cable lejos de las áreas de paso
y donde no ocasione tropezones.
14. Para desconectar este aparato, coloque los controles
en la posición de apagado y luego retire el enchufe del
tomacorriente.
15. Sólo conecte el aparato a tomacorrientes con una
conexión a tierra adecuada.
16. Al instalar este aparato, éste deberá contar con una
conexión eléctrica a tierra de acuerdo con códigos
locales o, en ausencia de códigos locales, con el Código
Canadiense de Electricidad vigente, norma CSA C22.1 o,
para las instalaciones en EE. UU., de acuerdo con
códigos locales y el Código Nacional de Electricidad,
ANSI/NFPA Nº 70.
17. El calentador incluye un limitador de termostato. Si la
temperatura interior aumenta demasiado o se produce
un calentamiento anormal, el dispositivo protector del
termostato interrumpirá el suministro de energía para
evitar daños en la chimenea o un riesgo de incendio.
18. Los calentadores no deben colocarse inmediatamente
debajo de un tomacorriente.
S-2
19. No introduzca ni permita que objetos extraños
ingresen a ninguna abertura de ventilación o escape,
ya que esto podría causar una descarga eléctrica o
incendio o podría dañar el aparato.
20. A fin de evitar un posible incendio, no bloquee las
entradas ni las salidas de aire de ninguna manera.
No utilice el aparato sobre superficies blandas, como
una cama, donde la abertura podría bloquearse.
21. Este aparato tiene piezas calientes y piezas que
producen arcos eléctricos o chispas en el interior.
No lo utilice en áreas donde se usen o guarden
líquidos inflamables, gasolina o pintura. Esta
chimenea no debe utilizarse como un soporte para
secar ropa. No deben colgarse medias para los
regalos de Navidad ni elementos decorativos cerca
del aparato.
22. Utilice este aparato únicamente como se describe
en el manual. Cualquier otro uso no recomendado
por el fabricante podría causar incendio, descarga
eléctrica o lesiones a personas.
23.Siempre enchufe los calentadores directamente en un
receptáculo o tomacorriente de pared. Nunca los utilice
con un cable prolongador o un contacto múltiple con
tomas reubicables (tomacorriente/enchufe múltiple).
24. Vea la figura 1 para consultar las indicaciones a seguir.
Este calentador debe utilizarse con 120 voltios. El
cable incluye un enchufe tal como se muestra en la
figura 1. Vea la figura 1 para obtener instrucciones
sobre la conexión a tierra. Un adaptador (como se
muestra en C) se encuentra disponible para conectar
enchufes de conexión a tierra de tres clavijas a
receptáculos de dos ranuras. El enchufe verde de
conexión a tierra que se extiende desde el adaptador
debe conectarse a una toma de tierra permanente, tal
como una caja de distribución con una conexión a
tierra adecuada. El adaptador no deberá utilizarse si
se dispone de un receptáculo de tres ranuras
conectado a tierra.
Figura 1
TAPA DE LA CAJA DE DISTRIBUCIÓN CON
CONEXIÓN A TIERRA
TORNILLO METÁLICO
CLAVIJA DE CONEXIÓN A TIERRA
ADAPTADOR
A B
C D
MEDIO DE CONEXIÓN A TIERRA
CLAVIJA DE CONEXIÓN A TIERRA
GUARDE ESTAS
INSTRUCCIONES
ESPECIFICACIONES DEL PRODUCTO
VOLTAJE
AMPS
VATIOS
120 V CA, 60 Hz
12,5 amperios
1500 vatios
CONTENIDO DEL PAQUETE
PRECAUCIÓN
Para evitar lesiones debido a encendidos inesperados o por descargas eléctricas, no enchufe
el cable de alimentación en una fuente de energía durante el desembalaje y el ensamblaje.
El cable debe permanecer desenchufado siempre que se esté ajustando o ensamblando
la chimenea.
Si falta alguna pieza o alguna pieza está dañada, no intente usar o enchufar el cable
eléctrico hasta repararla o reemplazarla. Para evitar una descarga eléctrica, utilice sólo
piezas de repuesto idénticas cuando repare herramientas con doble aislamiento.
Pieza
Descripción
Cantidad
AA
Cuerpo de la
estufa
1
BB
Patas de la
estufa
4
CC
Tornillos para las
patas
4
Fig. 2
S-3
Imagen
PREPARACIÓN
Antes de comenzar la instalación del producto, asegúrese de contar con todas las piezas. Compare
las piezas con la lista de contenidos del paquete y los diagramas incluidos anteriormente. Si falta alguna pieza o si alguna pieza está dañada, no intente armar, instalar u operar el producto. Para obtener
repuestos, póngase en contacto con el servicio al cliente.
Tiempo estimado de armado: 15 minutos
Herramientas necesarias para el armado: Manual Phillips (no incluidas)
MONTAJE DE LAS PATAS AL CUERPO DE LA ESTUFA
Inserte las hebillas de las piernas en los orificios de la base de la estufa. Fije las patas con el tornillo (1
tornillo por la pierna) y apretar con un destornillador Phillips(figura 3)
Fig.3
UBICACIÓN DE LA ESTUFA
Al elegir un lugar para colocar la estufa nueva, siga las instrucciones que se enumeran en la sección
<INSTRUCCIONES IMPORTANTES>, en la página 2.
Recomendación para la instalación en climas fríos: Al instalar esta unidad contra un
compartimiento o una pared exterior sin aislamiento, es obligatorio aislar las paredes
externas conforme con los códigos correspondientes de aislamiento.
CONEXIÓN ELÉCTRICA
Se requiere un circuito de 60 Hz, 15 amp y 120 voltios con un tomacorriente conectado a tierra
correctamente. Preferentemente, la chimenea deberá estar en un circuito especial, ya que otros
aparatos en el mismo circuito podrían causar que se desconecte el interruptor de circuito o que se
queme el fusible cuando el calentador esté funcionando. La unidad viene de serie con un cable trifilar de
6 pies (1.83 m) que sale de la parte trasera de la chimenea. No debe excederse la corriente nominal
de la toma actual. Siempre enchufe los calentadores directamente en un receptáculo o tomacorriente
de pared.Nunca los utilice con un cable prolongador o un contacto múltiple con tomas reubicables
(tomacorriente/enchufe múltiple).
S-4
INSTRUCCIONES OPERATIVAS
ACCESO AL PANEL DE CONTROL: Abra la puerta a fin de obtener acceso al panel de control.
- ENERGÍA
El interruptor ENERGÍA suministra energía a todas las funciones de la chimenea y enciende el efecto de
llama. Este interruptor debe estar en la posición de encendido (ON) para que funcione cualquiera de las
funciones.
- CALENTADOR
La chimenea consiste en un calentador tipo elemento de alambre con ventilador. El interruptor
CALENTADOR enciende (ON) y apaga (OFF) el calentador. Para que funcione el calentador, este
interruptor deberá estar en la posición de encendido.
- TEMPERATURA
La perilla de control TEMPERATURA regula el nivel de temperatura del calentador. Cuanto más se gire
la perilla en el sentido de las agujas del reloj, mayor será la temperatura de punto de ajuste. Al girar la
perilla en sentido opuesto a las agujas del reloj, se disminuirá la temperatura de punto de ajuste. Use
esta función para regular el nivel de temperatura ambiente.
- BRILLO
La perilla de control Flame Brightness ajusta el brillo de la llama. Al girar la perilla hacia la izquierda (en
sentido opuesto a las agujas del reloj), se atenuará el efecto de llama. Al girar la perilla a la derecha, se
intensificará el efecto de llama.
ADVERTENCIA: Apague el aparato cuando efectúe tareas de mantenimiento. Primero, coloque el interruptor de alimentación principal en la posición apagado. A continuación, retire el enchufe eléctrico del
tomacorriente de pared.
Fig.4
S-5
CUIDADO Y MANTENIMIENTO
DISTANCIA DE SEPARACIÓN CON ELEMENTOS INFLAMABLES
Mantenga los cables eléctricos, cortinas, muebles y demás elementos inflamables a una distancia
de 0,91 m (3 pies) como mínimo de la parte frontal y de los lados del calentador.
REBORDES DE LIMPIEZA
Limpie el reborde de metal con un paño suave levemente humedecido con un producto cítrico a base
de aceite y pula con un paño limpio y suave. NO USE pulidor de latón ni limpiadores domésticos, ya que
pueden dañar los rebordes de metal. Compre los productos cítricos a base de aceite en una ferretería.
REEMPLAZO DE LAS BOMBILLA
Esta estufa eléctrica usa uno bombilla transparentes con base de portalámparas E12 de 120 voltios, 40
vatios (bombilla B con base de candelabro). Obtenga acceso a las bombilla de 40 vatios a través del
panel de acceso posterior (consulte la ilustración a continuación).
1. Apague el interruptor de alimentación principal; a continuación, desenchufe el cable de alimentación
del tomacorriente de pared.
2. Si la chimenea ha estado en funcionamiento, deje que la unidad se enfríe durante un mínimo de 2
horas.
3. Afloje los tornillos que sujetan el panel posterior al cuerpo principal de la estufa (vea la figura 5).
4. Ajuste la abrazadera de resorte para aflojar el husillo y jale de la arandela de goma para quitarla del
eje del motor del rotador (vea la figura 6).
5. Jale el rotador para quitarlo del soporte (vea la figura 6).
6. Retire las bombilla y reemplácelas por uno bombilla transparentes con base de portalámparas E12
de 120 voltios, 40 vatios (figura 7).
7. Coloque el panel de acceso posterior nuevamente en su posición y ajuste los tornillos (no los ajuste
en exceso).
Ajuste la abrazadera
de resorte para aflojarla y jale de la arandela
de goma para quitarla
del eje del motor.
1. Afloje los
tornillos Phillips
2. Retire el panel
posterior para
tener acceso
a las bombilla
3. Reemplace todas
las bombilla
Brasas
bombilla
Fig. 6
Resorte que sostiene la bombilla
Tire
Tire
Disco giratorio
Fig. 7
Fig. 5
ADVERTENCIA: no exceda 40 vatios por bombilla. El uso de bombilla de mayor
denominación puede provocar un incendio, causar daños a la propiedad o lesiones
personales.
S-6
MANTENIMIENTO DE LOS MOTORES
• Los motores que se usan en el ventilador y en el generador de llamas vienen lubricados previamente
para prolongar la vida útil de los rodamientos y no necesitan otra lubricación. Sin embargo, se
recomienda una limpieza o aspiración periódica del ventilador o calentador
• Asegúrese de que la unidad esté apagada y desenchufada siempre que limpie el calentador
o chimenea.
ADVERTENCIA: asegúrese de que la unidad esté apagada antes de proceder. Toda
reparación eléctrica o nuevo cableado de esta unidad sólo debe realizarlo un electricista
certificado de acuerdo con los códigos nacionales y locales.
Si se repara o reemplaza cualquier componente eléctrico o cableado, se deben seguir
las rutas originales de los cables, los códigos de color y las ubicaciones de fijación.
ADVERTENCIA: el cableado del tomacorriente debe cumplir con los códigos de
construcción locales y con otras normas que correspondan para reducir el riesgo
de incendio, descarga eléctrica y lesiones a personas.
ADVERTENCIA: no utilice esta chimenea si alguna de sus piezas estuvo sumergida
en agua. Llame de inmediato a un técnico en mantenimiento calificado a fin de que
inspeccione la chimenea y reemplace cualquier pieza del sistema eléctrico.
ADVERTENCIA: desconecte la alimentación antes de intentar realizar cualquier
mantenimiento o limpieza para reducir el riesgo de incendio, descarga eléctrica o
lesiones personales.
SOLUCIÓN DE PROBLEMAS
PROBLEMA
1. No hay alimentación, los
interruptores no encienden.
CAUSA POSIBLE
1. El cable eléctrico no
estaba enchufado en
el tomacorriente.
2. La bombilla está quemada o
2. Los interruptores se
suelta.
encienden, pero no hay efecto
de llama.
3a. El rotador se cayó del
3. Los leños se encienden;
soporte.
pero el efecto de llama no
funciona.
3b. El motor del rotador no
funciona
4. El efecto de llama funciona,
pero el calentador no emite
aire caliente.
5. El calentador no funciona,
pero los interruptores
ENERGÍA y CALENTADOR
están en la posición
encendido y el termostato
está en el nivel más alto.
ACCIÓN CORRECTIVA
1. Verifique que la unidad esté
enchufada a un tomacorriente
estándar de 120 V.
2. Retire el panel posterior y
compruebe si hay bombilla
quemadas o sueltas.
3a. Quite el panel posterior.
Compruebe que el “rotador” esté
correctamente montado en la
parte trasera de la unidad.
3b. Compruebe si el motor de
rotación funciona. En caso contrario, llame a servicio al cliente.
4a. Compruebe que el interruptor
4a. El interruptor
CALENTADOR se encuentra del calentador esté en la posición
encendido. El interruptor debería
en la posición apagado.
encenderse.
4b. Asegúrese de que el termosta4b. El termostato está en la
to esté dirigido hacia la posición
posición baja.
más alta.
5a. El protector térmico se
5a. Coloque todos los interrupactivó.
tores en la posición apagado y
desenchufe la unidad del tomacorriente de pared durante cinco
(5) minutos. Transcurridos los
cinco (5) minutos, enchufe nuevamente la unidad al tomacorriente
y use normalmente.
S-7
GARANTÍA LIMITADA DE 1 AÑO
El fabricante garantiza que su nueva estufa eléctrica no presentará defectos de fabricación ni materiales durante un período de un año a partir de la fecha de compra, siempre y cuando se cumplan las
siguientes condiciones y limitaciones.
1. Esta estufa eléctrica se debe instalar y operar en todo momento de acuerdo con las instrucciones
de instalación y operación proporcionadas con el producto. Cualquier reparación no autorizada,
alteración, abuso deliberado, accidente o uso inadecuado del producto anulará esta garantía.
2. Esta garantía no es transferible y sólo está disponible para el propietario original, siempre y cuando
la compra se haya realizado a través de un proveedor autorizado del producto.
3. Esta garantía se limita a la reparación o reemplazo de piezas que se consideren defectuosas en
material o mano de obra, siempre y cuando dicha pieza haya estado sometida a condiciones
normales de uso y servicio, después de que una inspección por parte del fabricante confirme
dicho defecto.
4. Esta garantía no cubre las bombilla incluidas con la estufa eléctrica.
5. El fabricante podrá, bajo su criterio, eximirse de toda obligación respecto de esta garantía
reembolsando el precio al por mayor de la pieza defectuosa.
6. Esta garantía no cubre·ningún costo de instalación, mano de obra, fabricación, transporte o de
otro tipo que surja de la pieza defectuosa, su reparación, reemplazo u otra situación, y el fabricante
no asume ninguna responsabilidad por las mismas.
7. El dueño/usuario asume todos los riegos, si los hay, incluidos los riesgos de daños o pérdidas
directos, indirectos o resultantes que surjan del uso del producto, o de la incapacidad para usarlo,
salvo que la ley estipule lo contrario.
8. Mediante el presente, se excluye expresamente cualquier otra garantía, expresa o implícita, respecto
del producto, sus componentes y accesorios, o cualquier otra obligación o responsabilidad de parte
del fabricante.
9. El fabricante no asume ni autoriza a ningún tercero a asumir en su nombre ninguna otra
responsabilidad respecto de la venta de este producto.
10. Las garantías descritas en este documento no se aplican a accesorios que no sean del fabricante
y que se usen junto con la instalación de este producto.
Esta garantía es nula si:
a. La chimenea está sometida a períodos prolongados de humedad o condensación.
b. Se produce cualquier alteración no autorizada, abuso deliberado, accidente o uso inadecuado
del producto.
c. Usted no tiene el recibo original de compra.
SI SE NECESITA SERVICIO DE GARANTÍA
Póngase en contacto con el fabricante llamando al departamento de Servicio al Cliente
al 1-800-318-9374, de lunes a viernes de 9 a.m. a 5 p.m., hora estándar del Este.
Asegúrese de tener su garantía, su recibo de venta, la identificación del lugar de
compra y el modelo o número de serie de su producto.
S-8
INSTRUCTION MANUAL ENCLOSED
MANUEL D’INSTRUCTION À L’INTÉRIEUR
MANUAL DE INSTRUCCIONES ADJUNTO
STOP
ATTENTION
STOP
IF YOU HAVE ANY PROBLEMS OR QUESTIONS, EMAIL
OR CALL CUSTOMER SERVICE BEFORE YOU RETURN
THIS PRODUCT TO THE STORE WHERE IT WAS PURCHASED.
For Customer Service:
www.twinstarhome.com/duraflame/
in English Call: 800-318-9373
ARRÊT
ATTENTION
ARRÊT
SI VOUS AVEZ DES PROBLÈMES OU QUESTIONS,
ENVOYEZ UN COURRIEL AU SERVICE À LA CLIENTÈLE OU
APPELEZ LE SERVICE À LA CLIENTÈLE AVANT DE RETOURNER
CE PRODUIT OÙ VOUS L’AVEZ ACHETÉ.
Pour le service à la clientèle:
www.twinstarhome.com/duraflame/
pour le service en français: 800-318-9374
PARE
ATENCIÓN
PARE
SI TIENE ALGÚN PROBLEMA O PREGUNTAS, ENVÍE UN
MENSAJE DE CORREO ELECTRÓNICO O LLAME AL SERVICIO
DE ATENCIÓN AL CLIENTE ANTES DE DEVOLVER ESTE
PRODUCTO A LA TIENDA EN LA QUE LO COMPRÓ.
Servicio de atención al cliente:
www.twinstarhome.com/duraflame/
Línea para llamadas en español: 800-318-9374
INSTRUCTION MANUAL ENCLOSED
MANUEL D’INSTRUCTION À L’INTÉRIEUR
MANUAL DE INSTRUCCIONES ADJUNTO