1
2013 THD.com
21in Outdoor Pumpkin Instruction Sheet (English)
Date: 5/10/13
Fig 3
15”
Fig 6
Fig 8
Model No. 7407129
9. Check for any loose, unlit or damaged bulbs. Although it
will still operate, the bulbs must be replaced promptly to
ensure the performance and life expectancy of the item.
OUTDOOR PUMPKIN SCULPTURE
LED replacement:
Before changing LEDs, make sure the light string is unplugged.
ASSEMBLY INSTRUCTIONS:
NOTE: No tools required (hammer optional).
NOTE: Retain carton for storage.
1. Carefully remove all parts from the carton. Your pumpkin should
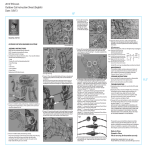
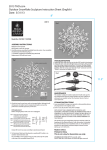
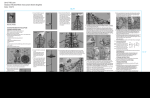
include the following (Fig 1):
1 Pumpkin (plug attached)
1 Stem
1 Base
2 Lawn stakes
Replacement LED bulbs & covers
Fig 1
Pumpkin
4. Secure the positioning of the ribs by sliding each rib
into the slots provided on the top of the pumpkin’s
base (Fig 4).
7. Connect the electrical system of the pumpkin to the stem
by aligning the flat ends of both connectors as shown
and connect them together. Slide the screw cover from
the “male” connector over the “female” connector and
tighten (Fig 7a and 7b).
Base
Fig 7a
2. Place the base on level ground and insert the pole into the base
(Fig 2).
COVER
COVER
BASE
COVER
BASE
LED
SOCKET
SOCKET
Actual LED cover may vary depending on product purchased.
10. To illuminate, fully insert the plug into a working GFCI
outlet or an outdoor rated extension cord.
MAINTENANCE
STORAGE INSTRUCTIONS
Fig 4
Lawn
stakes
COVER
This outdoor sculpture includes replacement bulbs and
caps for any replacements that you need to perform on
your sculpture. If extra parts are needed, contact the
Customer Service Team at 1-877-527-0313.
Stem
Replacement LED
bulbs and covers
Step 1: Grasp plug and remove from the
receptacle or other outlet device.
Do not unplug by pulling cord.
Step 2: Unscrew plastic cover from LED socket.
Step 3: Hold LED lamp by the plastic base and
pull LED/base straight out of the socket.
Step 4: Replace LED with only 3 volt, 20 mA
LED type lamp (provided with product).
Step 5: Place the plastic cover over the LED
lamp and screw it back onto the socket.
1. Leave assembled if storage room permits or disassemble,
placing all components in the original carton.
2. Store in cool, dry location away from sunlight.
5. Insert the pegs of the stem into the eyelets of the
pumpkin (round peg into round eyelet; flattened peg
into flattened eyelet) (Fig 5).
TROUBLESHOOTING
1. Unplug the light string and check to see that the GFCI outlet
is functioning.
2. Unplug the light string and check all light string connections.
This product uses low voltage coaxial connections. To
connect the light strings, align the flat ends of both
connectors as shown and connect them together. Slide the
screw cover from the “male” connector over the “female”
connector and tighten (Fig 7b).
Fig 5
Fig 7b
NOTE: DO NOT USE A DIMMER SWITCH OR INSTALL ANY
ADDITIONAL CHRISTMAS LIGHTING OR ORNAMENTATION
THAT IS POWERED BY A LIGHT BULB SOCKET. DOING THIS
MAY RESULT IN DAMAGE TO THIS PRODUCT OR CAUSE
PERSONAL INJURY. THIS ACTION WILL VOID THE LIMITED
WARRANTY OF THIS PRODUCT.
This product was pre-tested before shipment and date
coded. In keeping with the National Electric Code, this
product is intended for seasonal (90 days max.) installation
and use. For problems or questions on this product call
Home Depot customer service toll-free at 1-877-527-0313.
Made in China
Printed in China
This is not a toy, for decorative use only.
Fig 2
3. Spread out the ribs of the pumpkin (Fig 3).
6. Insert the horizontal support bar of the stem into the
eyelet provided (Fig 6).
8. Push or gently hammer lawn stakes into the ground,
securing the pumpkin’s base. Angle each stake at a 45°
angle toward the center (Fig 8).
DISTRIBUTED BY HOME DEPOT U.S.A., INC. 2455
PACES FERRY RD., N.W. Atlanta, GA 30339 All rights reserved.
11.5”
2013 THD.com
21in Outdoor Pumpkin Instruction Sheet (Spanish)
Date: 5/10/13
Fig 3
15”
Fig 6
Modelo N° 7407129
9. Verifique el artículo para detectar las bombillas que puedan estar
flojas, apagadas o dañinas. Aunque todavía funcionara, debe
reemplazar las bombillas rápidamente para asegurar el
rendimiento y la duración de vida útil del artículo.
ESCULTURA EXTERIOR CALABAZA
Reemplazo de las luces LED:
Antes de cambiar las luces LED, asegúrese de que el ensamble
esté desenchufado.
INSTRUCCIONES PARA ENSAMBLAJE:
NOTA: No se requieren herramientas.
NOTA: Conserve el embalaje para el almacenamiento.
1. Retire con cuidado todos los componentes de la caja. Su calabaza
debe incluir los siguientes componentes (Fig 1):
1 calabaza (con enchufe)
1 tallo
1 Base
2 Estacas para césped
Bombillas LED y recubrimientos de reemplazo
Fig 1
Calabaza
Fig 8
4. Fije la posición de las nervaduras por deslizar cada
nervadura en las ranuras provistas en la parte superior
de la base de la calabaza (Fig 4).
7. Conecte el sistema eléctrico de la calabaza al tallo
alineando los extremos planos de ambos conectores
como se muestra y conectándolos juntos. Deslice el
recubrimiento enroscado del conector “macho” por
encima del conector “hembra” y apriételo (Fig 7a y 7b).
Base
Fig 7a
Paso 1: Agarre el enchufe y quítelo del
receptáculo u otro tomacorriente.
No desenchufe el artículo halando el
cordón eléctrico.
RECUBRIMIENTO
Paso 2: Destornille el recubrimiento de
plástico del casquillo de la luz LED. BASE DE
RECUBRIMIENTO
Paso 3: Agarre la luz LED por la base de
plástico y hale la luz LED/base
LUZ LED
directamente fuera del casquillo.
CASQUILLO
Paso 4: Reemplace la luz LED solamente con
una bombilla de tipo LED de 3 voltios
y 20 mA (incluidas con el producto).
Paso 5: Coloque el recubrimiento de plástico
encima de la bombilla LED y vuelva a
enroscarlo sobre el casquillo.
RECUBRIMIENTO
BASE DE
RECUBRIMIENTO
CASQUILLO
El recubrimiento para la luz LED puede variar según el producto
comprado.
10. Para iluminar, introduzca completamente el enchufe en un
tomacorriente operativo de tipo GFCI (interruptor de circuito por
falla de conexión a tierra) o en una extensión clasificada para los
exteriores.
MANTENIMIENTO
Si es necesario, este escultura exterior contiene bombillas y
recubrimientos de reemplazo para el producto. Si se
requieren piezas adicionales, puede llamar al equipo de
servicio a la clientela al 1-877-527-0313.
Tallo
Fig 4
INSTRUCCIONES PARA ALMACENAMIENTO
Bombillas LED
y recubrimientos de reemplazo
Estacas
para césped
2. Coloque la base en terreno plano e inserte el poste en la base
(Fig 2).
1. Mantenga la estructura montada si hay espacio suficiente para
guardarla, o desmóntela. Coloque todos los componentes en el
embalaje original.
2. Guárdelo en un lugar fresco y seco, lejos de la luz del sol.
5. Inserte las varillas del tallo en los ojales de la calabaza
(varilla redonda en ojal redondo; varilla aplanada en ojal
aplanado) (Fig 5).
PROBLEMAS / SOLUCIONES
1. Desenchufe el artículo y verifique si el tomacorriente de tipo GFCI
(interruptor de circuito por falla de conexión a tierra) funciona.
2. Desenchufe el artículo y verifique todas las conexiones del
ensamble de luces. Este producto utiliza conexiones coaxiales de
bajo voltaje. Para conectar los ensambles de luces, alinee los
extremos planos de ambos conectores como se muestra y
conéctelos juntos. Deslice el recubrimiento enroscado del conector
“macho” por encima del conector “hembra” y apriételo (Fig 7b).
Fig 5
Fig 7b
NOTA: NO UTILICE UN INTERRUPTOR CON REGULADOR
DE INTENSIDAD NI INSTALE CUALQUIER ILUMINACIÓN O
ADORNO NAVIDEÑO ADICIONAL, EL CUAL ESTÁ
ALIMENTADO POR UN CASQUILLO DE BOMBILLA. AL
HACERLO, PUEDE DAÑAR ESTE PRODUCTO O PROVOCAR
LESIONES. ADEMÁS AL HACERLO, ANULARÁ LA
GARANTÍA LIMITADA DE ESTE PRODUCTO.
Este producto ha sido previamente probado antes del
envío y también se ha dado una codificación de fecha.
De acuerdo con el Código Eléctrico Nacional de Estados
Unidos (NEC), este producto está diseñado para una
instalación estacional (máx. 90 días) y uso. Si tiene
problemas o inquietudes con este producto, llame sin
costo al servicio de Home Depot al 1-877-527-0313.
Hecho en China
Impreso en China
No es un juguete – solamente para uso decorativo.
Fig 2
3. Separe las nervaduras de la calabaza (Fig 3).
6. Inserte la barra de soporte horizontal del tallo en el ojal
provisto (Fig 6).
8. Fije o clave suavemente con un martillo las estacas para
el césped en el suelo, reforzando la base de la calabaza.
Fije cada estaca a un ángulo central de 45 grados (Fig 8).
DISTRIBUIDO POR HOME DEPOT U.S.A., INC. 2455
PACES FERRY RD., N.W. ATLANTA, GA 30339
Todos los derechos reservados.
11.5”