1
2014 Home Depot MSL
Tree Instruction Sheet - 4-function (English)
Date: 3/13/14
7207008-62HO (7.5 ft Mt Everest Spruce)
7207015-62 (9 ft Mt Everest Spruce)
15”
CCT14
TROUBLESHOOTING
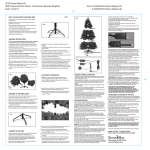
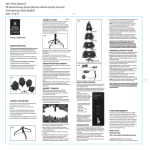
Fig 5
1. If the tree does not illuminate, press the 4-Function foot pedal. It
may be in the OFF position.
2. If the top of the tree or another individual lettered section does
not illuminate, remove each section and then reinsert as
instructed, to ensure the electrical connection occurs.
C
Model No. 7207008-62HO / 7207015-62
Fig 3
Connection 2
PRE-ASSEMBLY
Packaging Contents
Carefully unpack all tree components from the carton
(Fig 1). Your tree should include the following:
1 Folding metal tree stand with 3 eyebolts
1 4-function foot pedal with cord and plug; which is
already connected to the lower section “A” of the tree
(Fig 5).
1 Bag of replacement bulbs are included with these
instructions
Tree sections as noted below:
7.5’ tree – 3 sections
9’ tree – 4 sections
Fig 1
ASSEMBLY OF THE TREE STAND
1. Remove the tree stand from the plastic bag, loosen the eye
bolt and open the tree stand to form an “X”.
2. Align the holes for the insertion of the remaining (2) eyebolts.
3. Insert each eyebolt and begin threading in a clockwise
direction for a couple of rotations only; leaving enough room
for the tree’s pole from section “A” to be inserted into the
assembled stand (Fig 2).
4. Place the tree stand in its desired location; as once the tree is
fully assembled, it may be too difficult to move and relocate.
B
Connection 1
4. Carefully cut the nylon strapping bounding the branches
upright.
CAUTION: Be extremely careful not to cut any of the exposed
light set wires.
5. Now gently guide the branches downward into place.
6. The bottom section of your tree contains a cord with a
4-function foot pedal. Remove the twist tie from the cord and
plug into a working electrical outlet. Push the button to select
color change, white, multi or OFF (Fig 6).
NOTE: Your tree has been designed with EZ-Power™
technology; allowing for each of the tree’s remaining sections
to light up automatically, upon a firm insertion of each
lettered section (Fig 5).
7. Locate the next section of the tree which is identified by a
label on the outer branches marked “B” (Fig 5).
8. Remove the protective plastic cap from the end of the pole on
section “B”; insert that end onto the top of the pole of section
“A” (Fig 4).
Fig 4
1. Locate the bottom section of the tree which is identified by
a label on the outer branches marked “A” (Fig 5).
2. Remove the protective plastic cap from the end of the
pole, (that is pinched to a point), and place that end into
the tree stand. Be sure that the pointed end of the pole
extends to the bottom of the stand.
3. Now tighten the eyebolts evenly on the tree stand; being
careful not to over-tighten (Fig 3).
Foot Pedal
Fig 6
WARRANTY INFORMATION
If for any reason, after assembly, the tree does not light please call
our toll free number 1-877-527-0313.
The limited warranty of this tree applies only to the original
purchaser against manufacturer defects. A valid sales receipt must
be retained as proof of purchase. This product was pre-tested before
shipment and date coded.
The warranty of this pre-lit tree is void when the product is used for
commercial purposes.
Warranty on Lights:
For up to 5 years from the date of purchase, Home Depot will replace
free of charge any manufacturer defect found to the lighted portion
of your tree.
Warranty on Tree:
For up to 5 years from the date of purchase, Home Depot will replace
free of charge any manufacturer defect found to the tree.
Note: After your pre-lit tree is assembled, please check your tree for
any loose or damaged bulbs. Loose or damaged bulbs must be
replaced promptly in order to maintain the performance and life
expectancy of your pre-lit tree. If a bulb burns out, please replace it
at once (see replacement instructions). Failure to replace a burned
out bulb will result in a shorter life span for the remaining bulbs.
Failure to replace burned out bulbs, or misuse of this product will
void the warranty. This Christmas tree is a seasonal product. It is
intended for indoor use only and for temporary (90 days max)
installation and use only. Keep away from heat and moisture.
NOTE: ALTHOUGH THE LED LIGHT STRINGS ON THE TREE ARE
RATED FOR INDOOR OR OUTDOOR USE; THE COMBINATION
OF THE TREE WITH THE LED LIGHTS IS RECOMMENDED FOR
INDOOR USE ONLY.
MAINTENANCE
This Pre-lit tree includes extra bulbs for any replacements that you
may need to perform on your tree. If extra parts are needed, contact
the Customer Service Team at 1-877-527-0313.
Fig 2
ASSEMBLY OF THE TREE
A
NOTE: DO NOT USE A DIMMER SWITCH OR INSTALL ANY ADDITIONAL
CHRISTMAS LIGHTING OR ORNAMENTATION THAT IS POWERED BY A
LIGHT BULB SOCKET. DOING THIS MAY RESULT IN DAMAGE TO YOUR
CHRISTMAS TREE OR CAUSE PERSONAL INJURY. THIS ACTION WILL
RESULT IN A VOID OF THE LIMITED WARRANTY OF THIS PRODUCT.
CARE AND CLEANING
9. Once section “B” is fully inserted downward into section “A”;
both section “A” and section “B” will now be lit.
10. Again, carefully cut the nylon strapping bounding the
branches upright; being extremely careful not to cut any of
the exposed light set wires.
11. Now gently guide the branches of section “B” downward
into place.
12. Depending on the height of the tree you have purchased,
you will continue to build your tree upwards, section by
section, following the above steps until the tree is
completely assembled. Each section of the tree is labeled in
alphabetical order beginning from the bottom to the top.
1. Gently remove the plug from its electrical outlet, and carefully bind
the cord which contains the 4-function foot pedal and plug.
2. Beginning with the tree’s top section; lift each section straight up
from the section below, and continue working downward.
NOTE: You may have to slightly wiggle each section as you lift each
section upward.
3. To remove the bottom and final section; loosen the eyebolts by
turning in a counter-clockwise direction and lift section “A” from
the support collar of the tree stand.
4. Gently fold the branches of each section upward, towards the
center, and position in the storage container.
NOTE: With the exception of the tree’s “top” section; by holding
each section upside down; the branches will collapse downward,
due to the hinging, aiding in the packing of each section into the
storage container.
5. Fully unthread the eyebolts from the tree’s stand and fold
together; placing in the storage container.
6. It is recommended to always store the tree in a cool, dry location
protected from excessive exposure to heat or sunlight.
Made in China
Printed in China
This is not a toy, for decorative use only.
DISTRIBUTED BY HOME DEPOT U.S.A., INC. 2455
PACES FERRY RD., N.W. Atlanta, GA 30339 All rights reserved.
11.5”
2014 Home Depot MSL
Tree Instruction Sheet - 4-function (Spanish)
Date: 3/19/14
7207008-62HO (7.5 ft Mt Everest Spruce)
7207015-62 (9 ft Mt Everest Spruce)
15”
CCT14
PROBLEMAS / SOLUCIONES
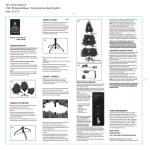
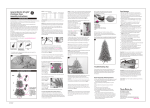
Fig 5
1. Si el árbol no se ilumina, presione el pedal de 4 funciones. Puede estar en
posición apagada (OFF).
2. Si la parte superior del árbol u otra sección individual marcada no se
ilumina, retire cada sección y vuelva a insertarla como se ha indicado, para
asegurarse de que se establezca una conexión eléctrica.
C
Modelo N° 7207008-62HO / 7207015-62
Fig 3
Conexión 2
PREENSAMBLAJE
Contenido del embalaje
Desembale cuidadosamente todos los componentes del
árbol de la caja (Fig 1). El árbol debe incluir lo siguiente:
1 Soporte metálico plegable para árbol con 3 pernos de
anilla
Interruptor de pie de 4 funciones con cable y enchufe, ya
conectado a la sección inferior “A” del árbol (Fig 5).
1 Bolsillo de bombillas de reemplazo incluido con estas
instrucciones.
Tres secciones como indicadas abajo:
Árbol de 2,3 m (7.5 pi) – 3 secciones
Árbol de 2,7 m (9 pi) – 4 secciones
Fig 1
ENSAMBLAJE DEL SOPORTE PARA EL ÁRBOL
1. Retire la base del árbol de la bolsa de plástico, afloje el perno
de argolla y abra la base del árbol para formar un “X”.
2. Alinee los agujeros para insertar los (2) pernos de argolla
restantes.
3. Inserte cada uno de los pernos de anilla y enhébrelos
solamente con algunas vueltas en el sentido del reloj. Deje
un espacio suficiente para insertar el eje del árbol dentro del
soporte (Fig 2).
4. Coloque el soporte para el árbol en el lugar deseado, ya que
después del ensamblaje completo del árbol, puede ser difícil
desplazarlo a un lugar diferente.
B
Conexión 1
4. Corte cuidadosamente la cinta de nilón que mantiene las
ramas juntas y derechas.
ATENCIÓN: Tenga mucho cuidado de no cortar ningún
cable de luz expuesto.
5. Ahora, dirija suavemente cada una de las ramas hacia
abajo en su lugar.
6. La sección inferior del árbol contiene un cable con un
interruptor de 4 funciones. Retire el fijador del cable e
introdúzcalo en un tomacorriente operativo. Pulse el
botón para seleccionar entre cambio de color, blanco,
multi o apagado (Fig 6).
NOTA: Su árbol ha sido diseñado con la tecnología del
conector de alimentación EZ-Power™; permitiendo que
cada sección del árbol que queda se ilumine
automáticamente, cuando se inserte cada sección
marcada con letra firmemente (Fig 5).
7. Localice la sección siguiente del árbol, identificada con
una etiqueta que se encuentra sobre las ramas exteriores
marcadas con la “B” (Fig 5).
8. Retire el capuchón protector de plástico del extremo del
eje de la sección “B”; coloque este extremo sobre la parte
superior del eje de la sección “A” (Fig 4).
Fig 4
ENSAMBLAJE DEL ÁRBOL
Pedal
Fig 6
MANTENIMIENTO
Este árbol pre-iluminado incluye bombillas de recambio para
cualquier sustitución que necesita hacer en el árbol. Si se
requieren piezas adicionales, puede llamar al equipo de
servicio a la clientela al 1-877-527-0313.
CUIDADO Y LIMPIEZA
Fig 2
1. Identifique la sección inferior del árbol que tiene una
etiqueta sobre las ramas exteriores y marcada con una “A”
(Fig 5).
2. Quite el capuchón protector de plástico del extremo del
eje, (en forma de punta) y coloque este extremo dentro del
soporte para el árbol. Asegúrese de que el extremo
puntiagudo del eje alcance la parte inferior del soporte.
3. Ahora apriete los pernos de argolla de manera uniforme
en la base del árbol; cuidado de no apretarlos de forma
excesiva (Fig 3).
A
9. Una vez que la sección “B” está insertada completamente
hacia abajo, dentro de la sección “A”, ambas secciones
“A” y “B” estarán ahora iluminadas.
10. Otra vez, corte cuidadosamente la cinta de nilón que
mantiene las ramas juntas y derechas; teniendo mucho
cuidado de no cortar ningún cable de luz expuesto.
11. Ahora, dirija suavemente cada una de las ramas de la
sección “B” hacia abajo en su lugar.
12. Según la altura del árbol que compró, continuará
armando su árbol hacia arriba (sección por sección) de la
misma manera. Siga los pasos de arriba, hasta que esté
completado. Cada una de las secciones del árbol tiene
una etiqueta en orden alfabético, desde la parte inferior
hacia la parte superior (Fig 5).
1. Retire suavemente el enchufe del tomacorriente, y ate con
cuidado el cable que contiene el interruptor de pie de 4
funciones y el enchufe.
2. Comenzando con la sección superior del árbol, levante cada una
de las secciones directamente hacia arriba y quitándolas de la
sección de abajo y continúe trabajando hacia abajo.
NOTA: Es posible que necesite mover cada sección ligeramente
mientras levantándola hacia arriba.
3. Para quitar la sección inferior y última, afloje Los pernos de anilla
girándolos hacia la izquierda y hale la sección “A” hacia arriba
del soporte para el árbol.
4. Pliegue suavemente las ramas de cada una de las secciones
hacia arriba y hacia el centro y colóquelas en la caja de
almacenamiento. NOTA: Con la excepción de la sección
superior del árbol, si sostiene cada sección boca abajo, las ramas
se plegarán hacia abajo debido a las bisagras. Esta característica
le ayudará a colocar cada sección en la caja de almacenamiento.
5. Desenrosque completamente los pernos de anilla en el soporte
para el árbol y pliéguelo; colocándolo en la caja de
almacenamiento.
6. Siempre recomendamos guardar el árbol en un lugar fresco,
seco y protegido contra una exposición excesiva del calor o de
la luz del sol.
NOTA: NO UTILICE UN INTERRUPTOR CON REGULADOR DE INTENSIDAD NI
INSTALE CUALQUIER ILUMINACIÓN O ADORNO NAVIDEÑO ADICIONAL, EL
CUAL ESTÁ ALIMENTADO POR UN CASQUILLO DE BOMBILLA. AL
HACERLO, PUEDE DAÑAR SU ÁRBOL DE NAVIDAD O PROVOCAR
LESIONES. ADEMÁS AL HACERLO, ANULARÁ LA GARANTÍA LIMITADA DE
ESTE PRODUCTO.
INFORMACIÓN SOBRE LA GARANTÍA
Si por cualquier razón el árbol no enciende después de ensamblado, favor
de llamar gratis al número 1-877-527-0313.
La garantía limitada de este árbol se aplica solamente al comprador
original, contra los defectos del fabricante. Un recibo válido de la compra
debe ser conservado como prueba. Este producto se probó antes de ser
enviado y se agregó el código de fecha.
La garantía de este árbol preiluminado es nula si el producto es usado
para fines comerciales.
Garantía par alas luces:
Después de la fecha de compra, por un máximo de 5 años, Home Depot
reemplazará libre de todo costo cualquier defecto de fabricación
encontrado en la parte de iluminación de su árbol.
Garantía para de árbol:
Después de la fecha de compra, por un máximo de 5 años, Home Depot
reemplazará libre de todo costo, cualquier defecto de fabricación
encontrado en el árbol.
Nota: Después de que su árbol esté ensamblado, revise por favor si tiene
bombills flojos o dañados. A fin de mantener el rendimiento y la vida útil
de su árbol preiluminado estos bombillos deben ser reemplazados
inmediatamente. Si un bombillos se quema, por favor reemplácelo
inmediatamente. (Ver las instrucciones de reemplazo). El dejar de
reemplazar un bombillo quemado resultará en una duración más corta de
los bombillos restantes. El dejar de reemplazar los bombillos quemados o
el uso inadecuado de este producto anulará la garantía. Este árbol de
Navidad es un producto de temporada. Se tiene la intención de que su
uso sea en interiors y para instalación temporal (máximo de 90 días)
únicamente. Manténgalo lejos del calor y la humedad.
NOTA: AUNQUE LOS ENSAMBLES DE LUCES LED DEL ÁRBOL
ESTÁN CLASIFICADOS PARA SER UTILIZADOS EN INTERIORES O
EXTERIORES; LA COMBINACIÓN DEL ÁRBOL Y LUCES LED SE
RECOMIENDA UTILIZAR SOLAMENTE EN INTERIORES.
Hecho en China
Impreso en China
No es un juguete – solamente para uso decorativo.
DISTRIBUIDO POR HOME DEPOT U.S.A., INC. 2455
PACES FERRY RD., N.W. ATLANTA, GA 30339 Todos los derechos reservados.
11.5”